Installation
↑ Back to top- Download the .zip file from your WooCommerce account.
- Go to: WordPress Admin > Plugins > Add New and Upload Plugin for the file you have downloaded.
- Install Now and then Activate Plugin.
Initial Setup
↑ Back to topAfter activating the Reserve Stock, extension settings can be configured in your WordPress Admin panel within WooCommerce > Settings > Reserve Stock.
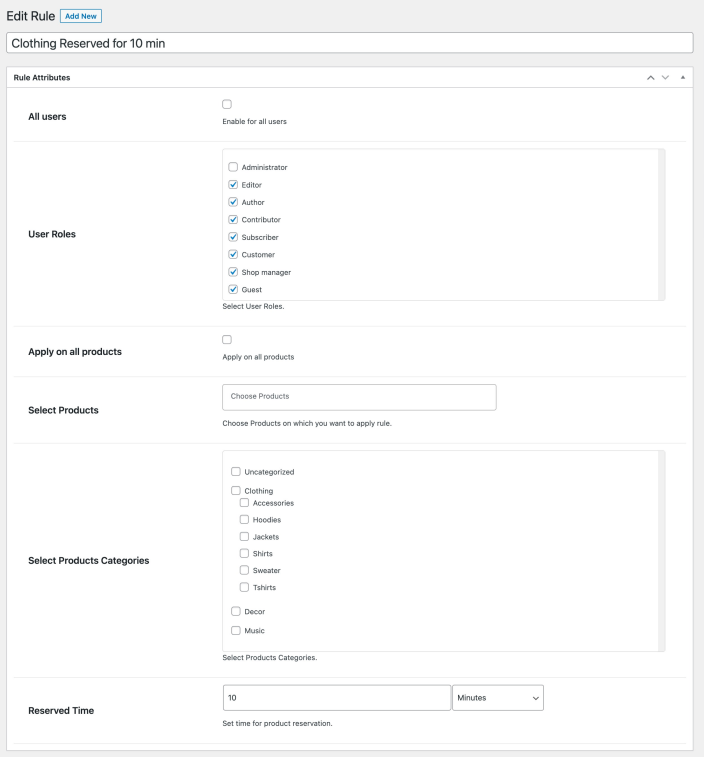
Reserve Stock Rules
↑ Back to top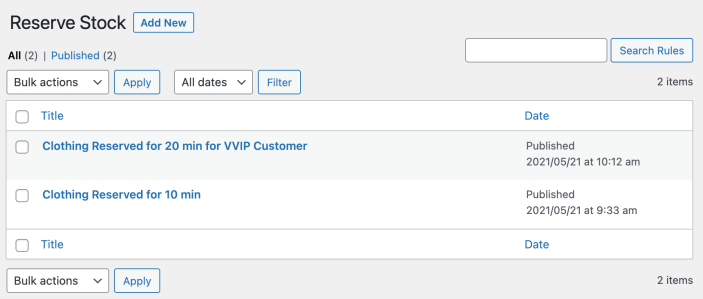 While creating new stock reserve rule you can customize using the following options,
- Enable stock reserve for all or specific user roles
- Specify products and categories
- Add time that defines how long customer can reserve product in their cart
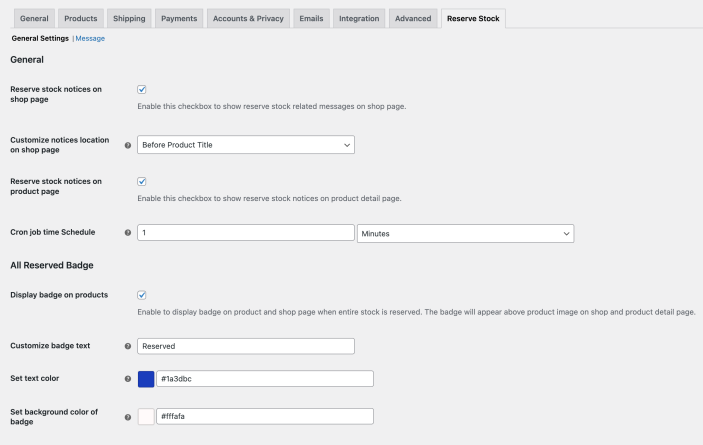
General Settings
↑ Back to top- Enable stock reserve notices on shop page
- Customize notices position
- Enable stock reserve notices on product page
- Customize cronjob time
- Enable All Reserved Badge (Displayed when entire stock is reserved)
- Customize badge text, text color and background color
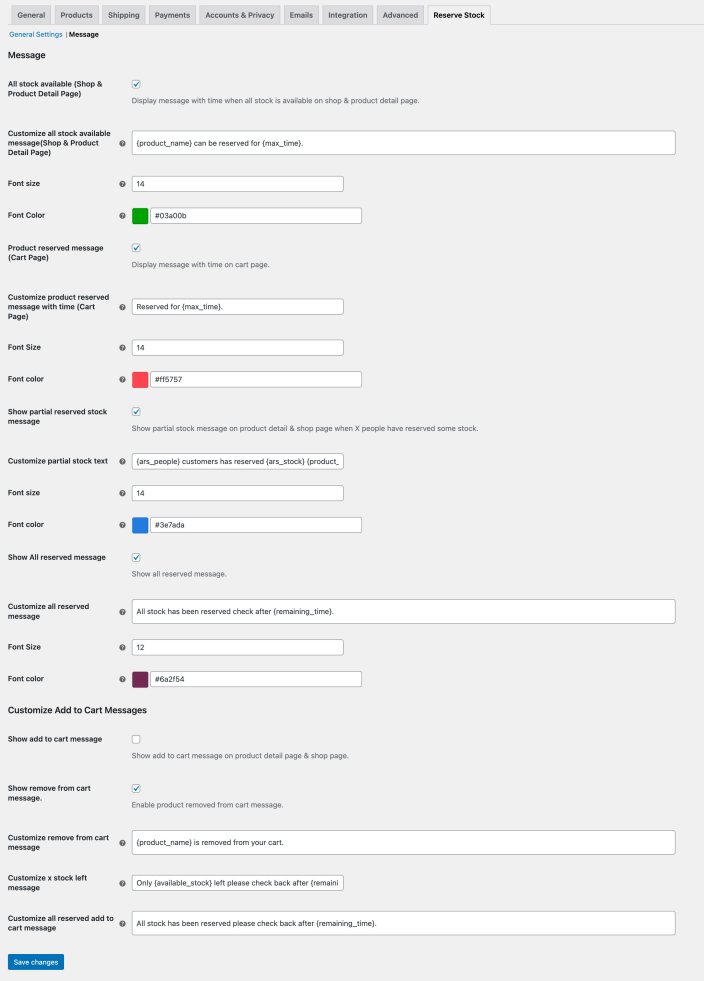
Customize Reserve Stock Messages
↑ Back to top- General stock reserve message
- Reserved timer displayed on cart page
- When some stock is reserved
- When entire stock is reserved
- Item is removed from cart when time expires
- Error messages on add to cart when stock is reserved