Thank you for choosing Skinny & WooCommerce for your online store.
Installation
↑ Back to topThe fastest way to install Skinny is through the WordPress admin dashboard.
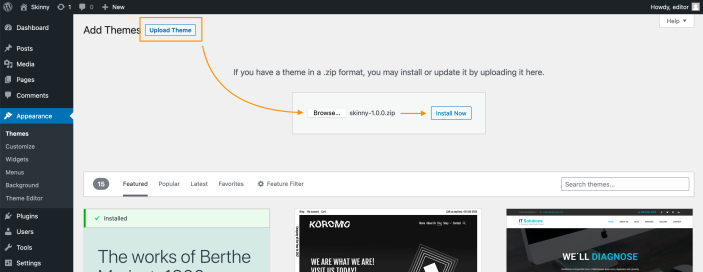
- Go to: Appearance > Themes > Add New / Upload Theme
- Upload the skinny.zip file you have downloaded from WooCommerce.com
- Activate as you would any other WordPress theme then proceed with the Setup and Configuration.
To install Skinny manually:
- Download the latest version of Skinny from WooCommerce.com
- Upload the extracted folder to the
/wp-content/themes/dir on your server via FTP. - Activate Skinny the Appearance > Themes screen in your dashboard.
More info at Using Themes.
Setup and Demo Import
↑ Back to topBefore proceeding with the install process, please make sure that the WooCommerce is installed.
Once you’ve activated Skinny and WooCommerce, your eCommerce site is ready to make use of Skinny features & customizations. You can now proceed to the Customization section below.
Demo Import
↑ Back to topIf you wish to import demo/dummy content for Skinny, follow the below steps.
Download Dummy Data:
- Download the dummy content files from this link – Skinny Dummy Content.
- Extract the files and keep them handy for the next import steps.
Import Content:
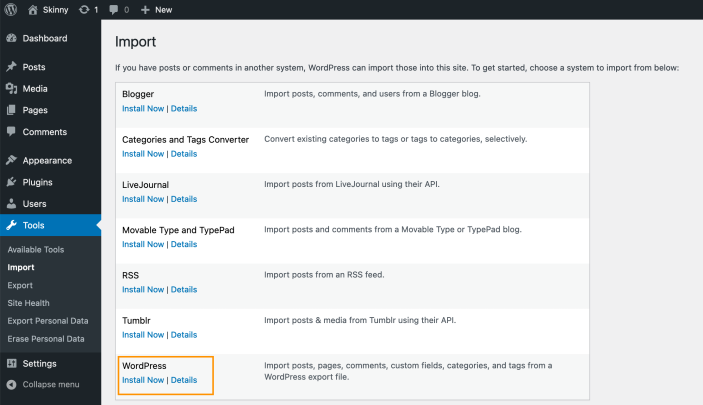
- From your WordPress admin dashboard, go to Tools > Import > WordPress.
- Click on Install Now button at the WordPress option available in the list.
- Once the installation is complete, it’ll show a new option to Run Importer, please click on it.
- From this WordPress Importer page, click on Browse and select the file ending with .xml from the above downloaded & extracted Dummy files.
- Now click on Upload File and Import, it’ll ask you two things, (a) To assign authors for the import data you can select from the options below or keep it as it is (b) To download and import attachments, this option imports the media used in the dummy content.
- Hit the Submit button now, once this completes you’ll be greeted with a successful import message.
Import Widgets:
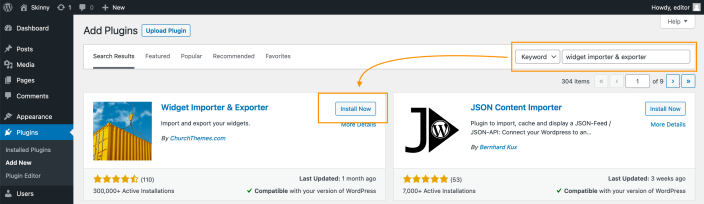
- Make sure you have Widget Importer & Exporter plugin installed & activated, if not please do so to continue with the below steps. (Learn more about managing plugins)
- From your WordPress admin dashboard, go to Tools > Widget Importer & Exporter, it will take you to its import & export page.
- Click on Browse, and select the file ending with .wie from the above downloaded & extracted dummy files.
- Hit the Import Widgets button, once this upload completes all the widgets will be imported into your site (Note: This can take up to 2min to import).
Set Homepage
↑ Back to topTo make your site look exactly like our demo, you can set a static homepage either by selecting the Home page from imported dummy pages or by selecting your own.
Follow these steps to set it:
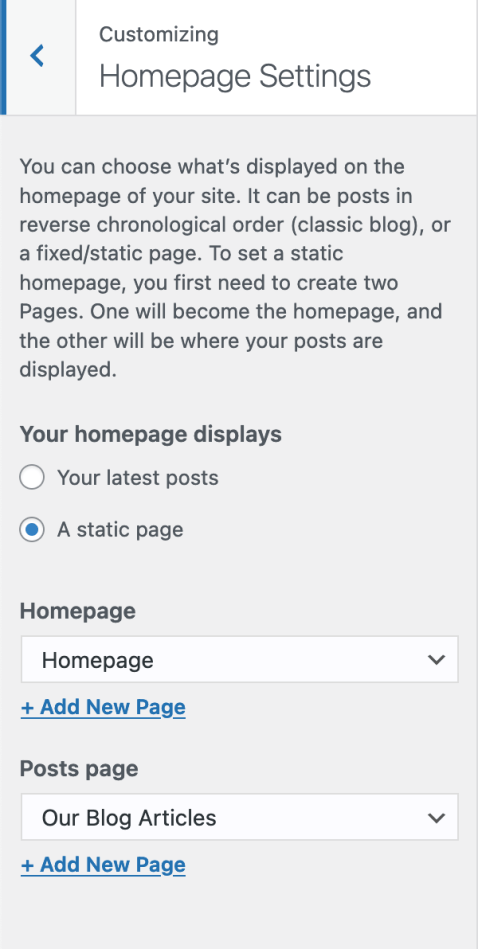
- From your wp-admin Dashboard, go to Appearance > Customize > Homepage Settings.
- Once you’re in the Homepage Settings panel, set homepage display as to A static page option.
- Post the second step you’ll need to select a page for homepage, select Homepage imported in the demo data above from the dropdown menu.
Note: This will also require you to set a blog/posts page, select Our Blog Articles page imported in the demo data or create a static page and select it. - Last step is to hit Save/Publish button visible at the top.
You can now proceed with the site customization and modifying the dummy content/pages as per your store needs.
Customization
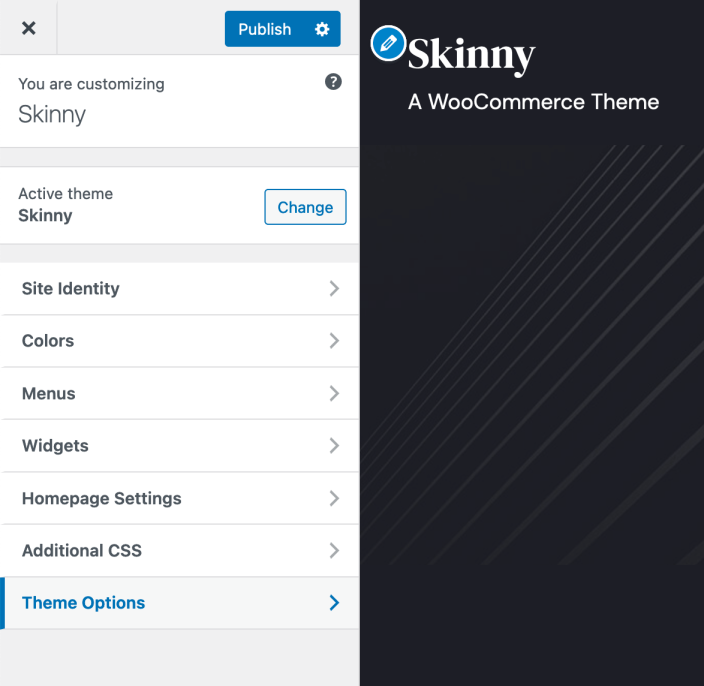
↑ Back to topYour customization settings are located under Appearance > Customize > Site Identity, Colors, and Theme Options respectively.
Site Identity
↑ Back to topYou can change your logo and favicon at Site Identity section.
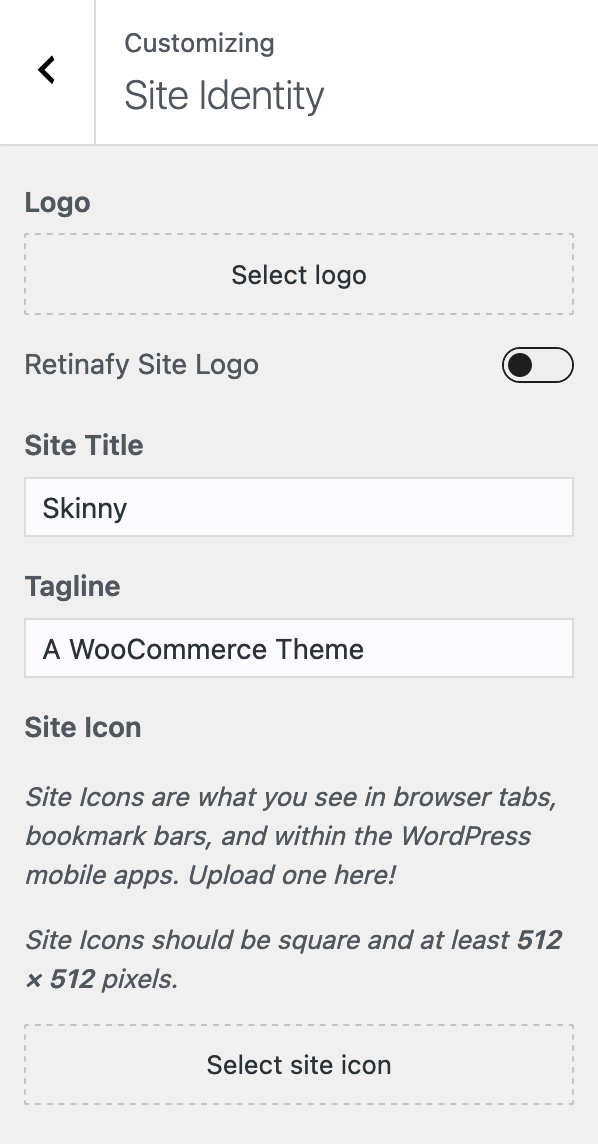
Additionally, you also have an option to enable Retinafy Site Logo, once enabled site logo will be shown at 50% width/height of its original size, making it look sharper and crispier. (We recommend uploading a 2x image for the logo if this option is enabled.)
Colors
↑ Back to topAt Colors section, you will be able to set your site Color Scheme (Dark/White).
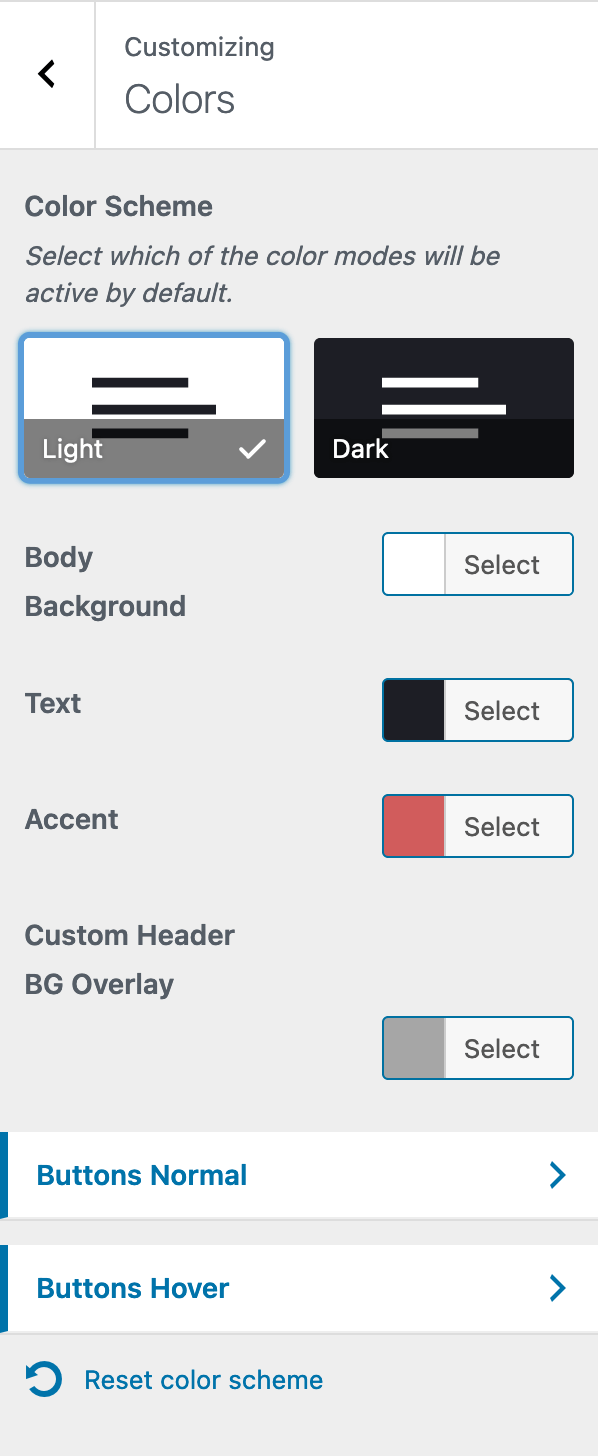
You can also change the color scheme palette by overriding the color options available in each scheme. This panel also includes color selection for theme buttons and their hover behavior.
Menus
↑ Back to topAt the Menus section, you can set up your menus. Skinny has 2 menu locations Primary and Footer.
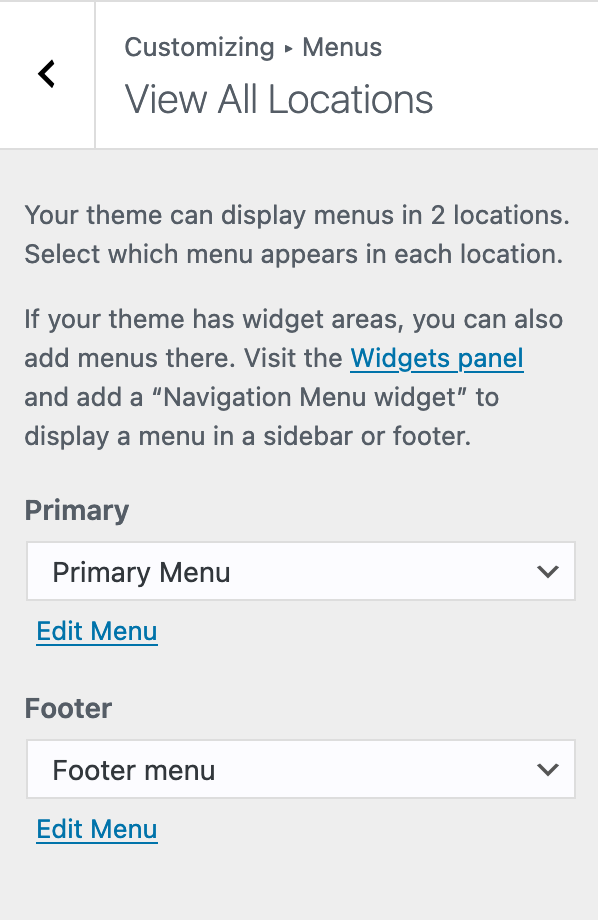
Setting up your menus is standard to all WordPress themes and is described in detail in the official WordPress documentation: https://codex.wordpress.org/WordPress_Menu_User_Guide
Theme Options
↑ Back to topUnder the Theme Options panel, you can find all the other theme-related controls and settings.
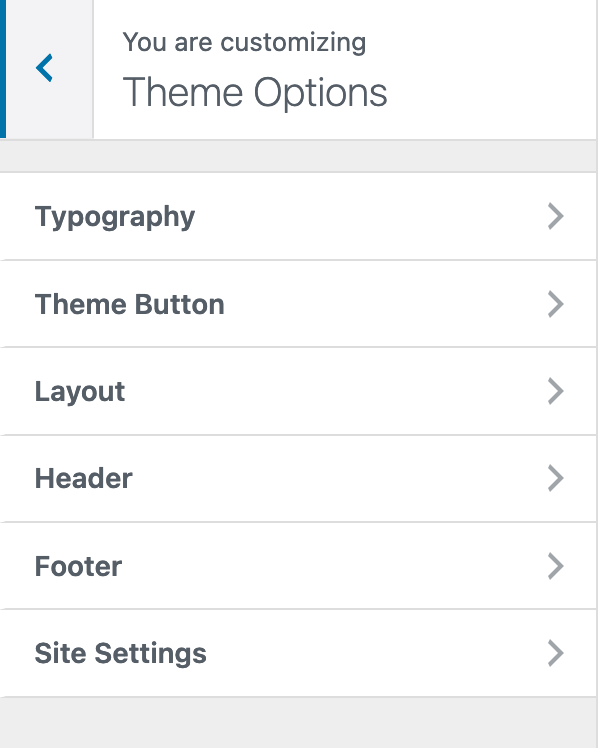
Skinny has a wide range of controls for all of the important aspects of your site namely Typography, Theme Buttons, Layout, Header, Footer & some extra Site Settings.
Typography
↑ Back to topAt the Theme Options > Typography section, you can set up the body & headings font from the vast library of Google fonts.
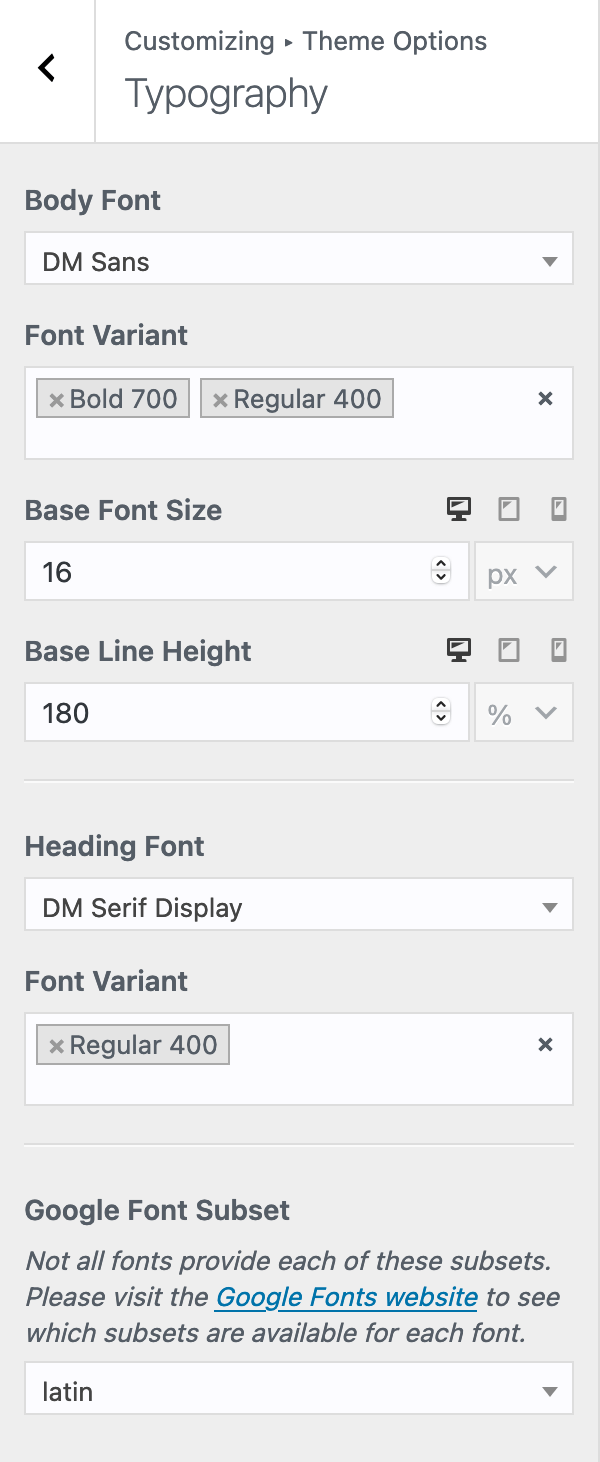
You can also control the site font sizes from the font scaling system provided under this panel, which controls both body & headings text used throughout the site.
Theme Button
↑ Back to top
At the Theme Options > Theme Button section, you can control the text & border-radius for the buttons used throughout the theme.
Layout
↑ Back to top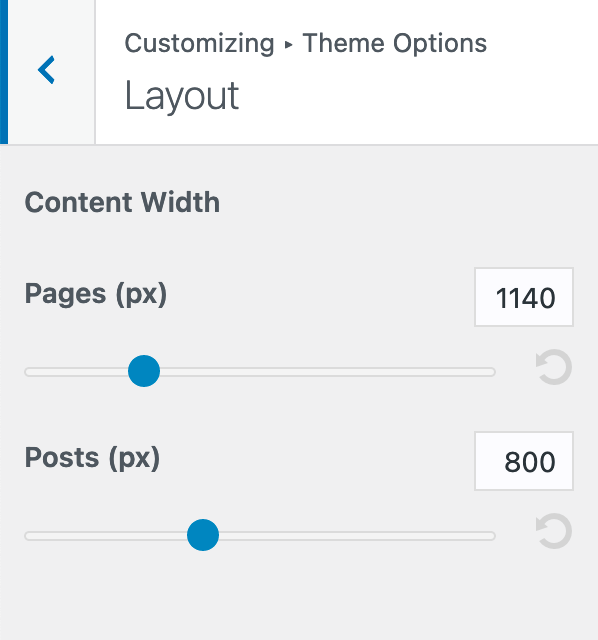
At the Theme Options > Layout section, you can control the content width for singular posts & pages.
Header
↑ Back to topAt the Theme Options > Header section, you can set the layout of the site header from 2 provided styles (Default and Centered).
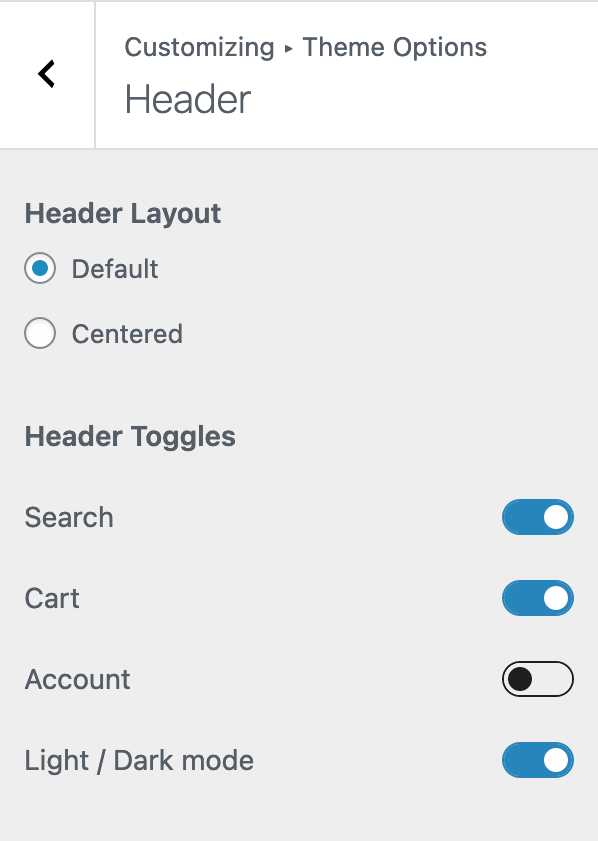
You can also toggle header magic links such as Search, Cart, Account, Light/Dark Mode.
Footer
↑ Back to topAt the Theme Options > Footer section, you can add a CTA block to the footer, you can find the steps to do so at here.
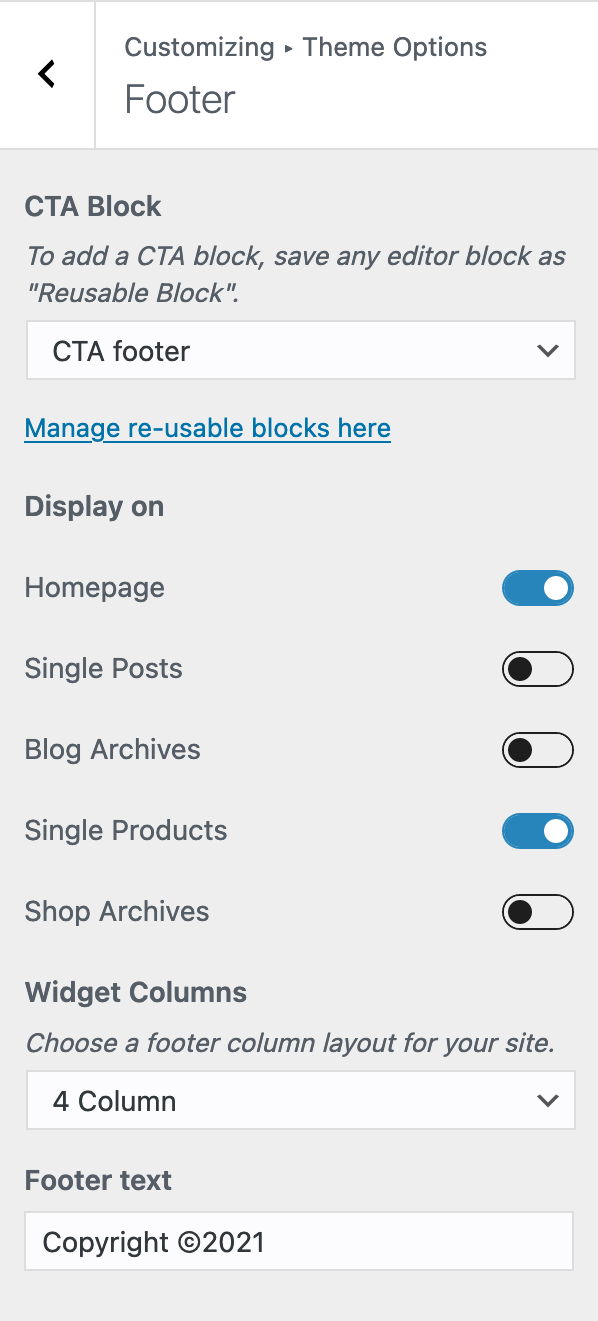
You can also toggle the CTA block display conditions according to your preference for e.g. at shop & homepage only. You also get the option to control footer widget columns and text at the very bottom.
Site Settings
↑ Back to top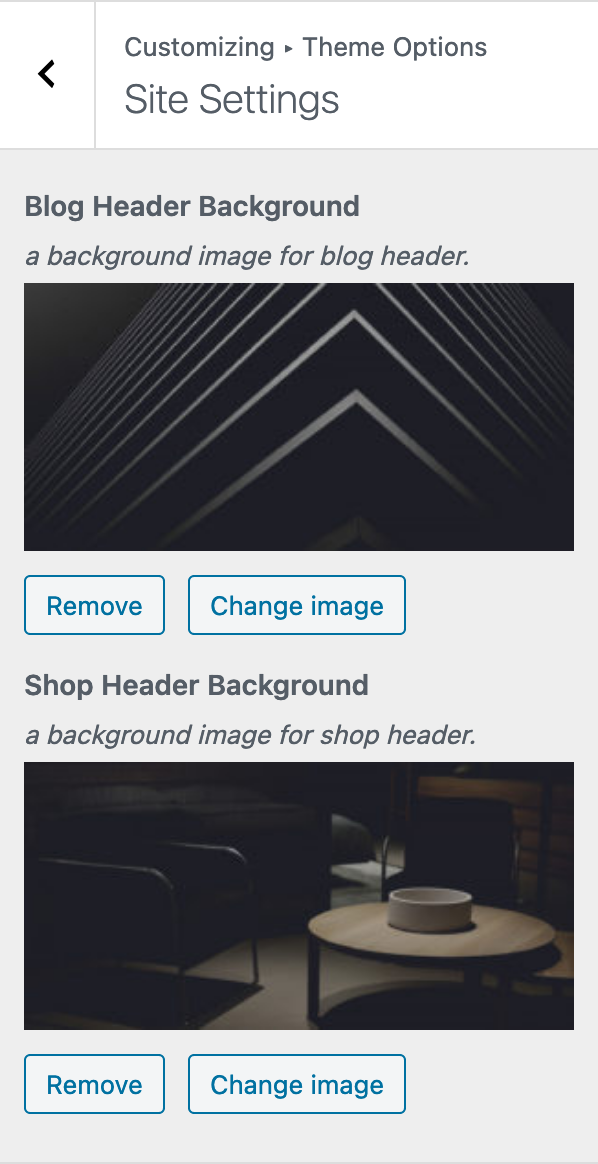
At the Theme Options > Site Settings section, you can set a background cover image for the blog and shop header.
Day and Night mode
↑ Back to topSkinny’s site color scheme feature comes enabled by default with two palettes namely Light and Dark, you can customize these palettes to your preferred colors and have them toggle via a front-end toggle available at the header.
Customize the light and dark color palettes
↑ Back to topTo customize the palettes for each of the color schemes, from your WordPress admin dashboard, go to Appearance > Customize and then Colors section. Here you’ll be able to select and preview changes to the respective color scheme.
Here’s a screenshot of the Color Scheme controls available at WordPress Customizer Colors section.
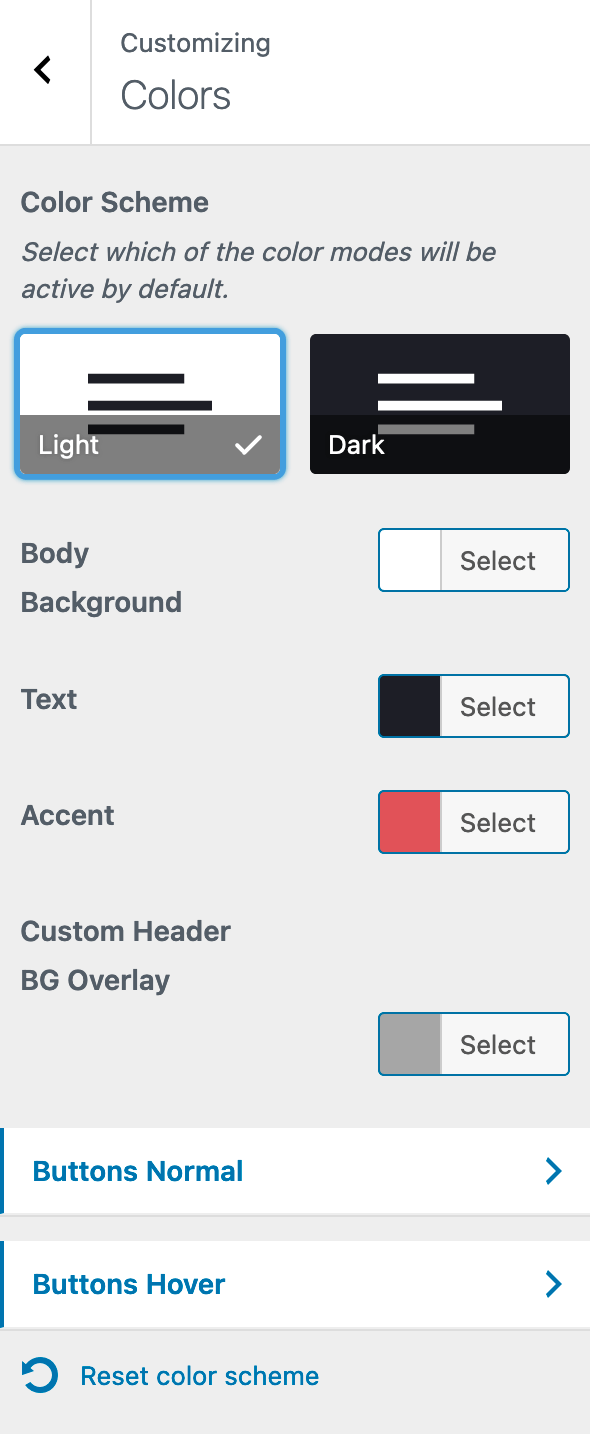
Test that it works well by switching palettes in several pages
↑ Back to topSwitching between these two color schemes will toggle their respective color controls and changes/previews should be a cakewalk following this. You can also try previewing other pages or theme buttons to adjust their color and hover behaviors.
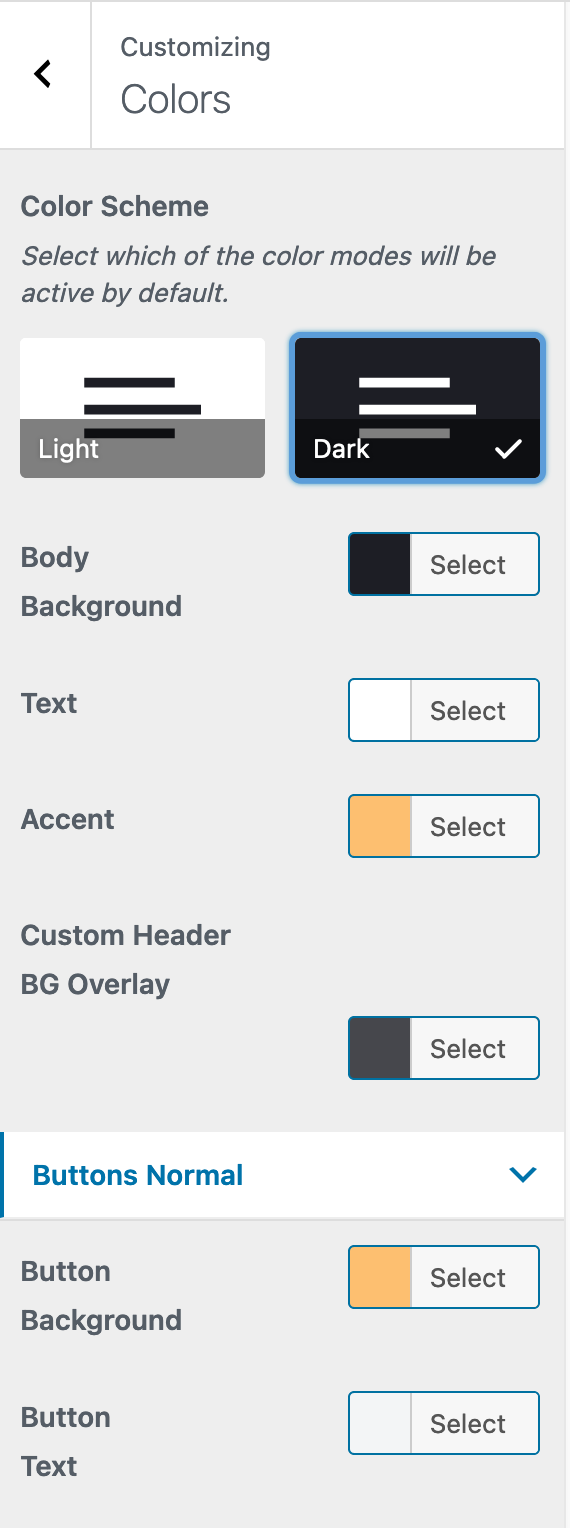
Here’s a screenshot displaying color defaults set for the Dark color scheme palette.
Toggle at the header panel
↑ Back to topYou can also enable the front-end toggle available at the header, to enable this from the WordPress Customizer go to Theme Options > Header section and enable the Light / Dark mode switch available at the very bottom.
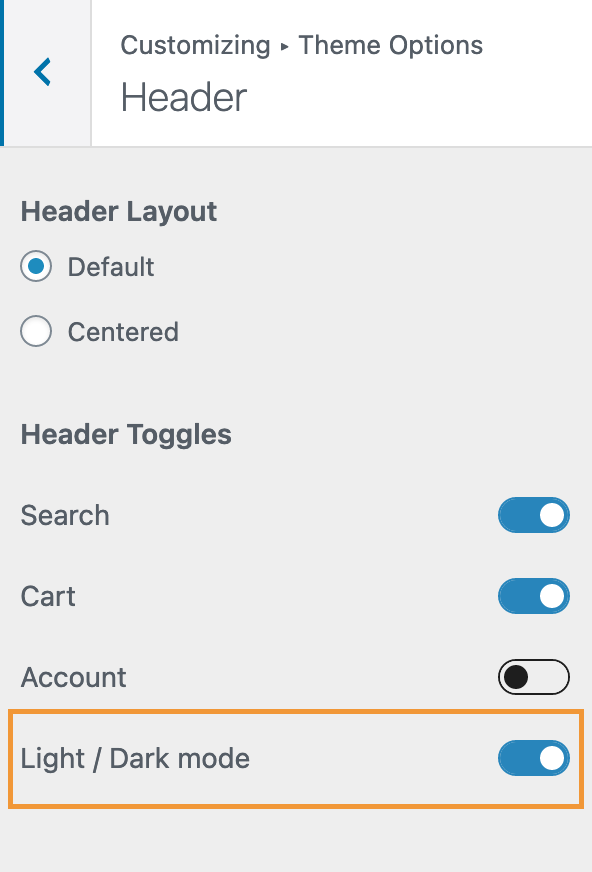
Once you toggle the Light / Dark mode switch from the above-shown Header section, a color scheme toggle icon will be displayed at the very top right of the site header.

Note: This frontend color scheme toggle comes disabled by default in the Customizer, for color control live previews in the Colors tab.
Reset color scheme
↑ Back to top
If you ever wish to reset the color schemes back to their defaults, you can always find the Reset color scheme button at the very bottom of the Colors tab.
Display CTA Block
↑ Back to topSkinny uses the re-usable blocks feature from Gutenberg aka Block editor to add a call-to-action block at the footer of the site. To know how you can create one for your own site and display it at the footer, follow the below steps.
Create a re-usable CTA block and customise it
↑ Back to top- From your WordPress admin dashboard, create a new post, or open the block editor page from any post/page.

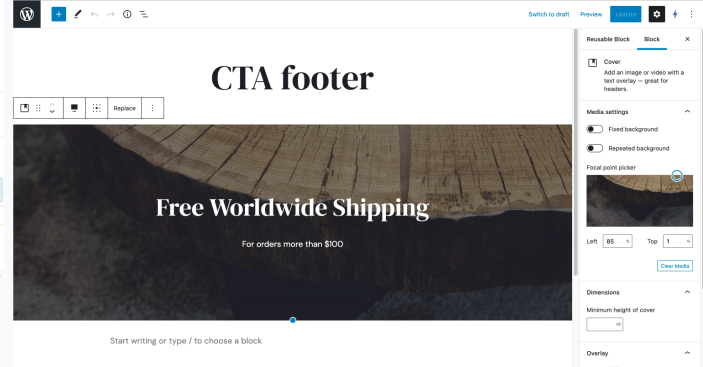
2. Once you’re in the editor create a desired block with your content. At our demo we have a cover block with one heading and paragraph blocks inside, here’s a screenshot for reference –
Save a block as a re-usable block
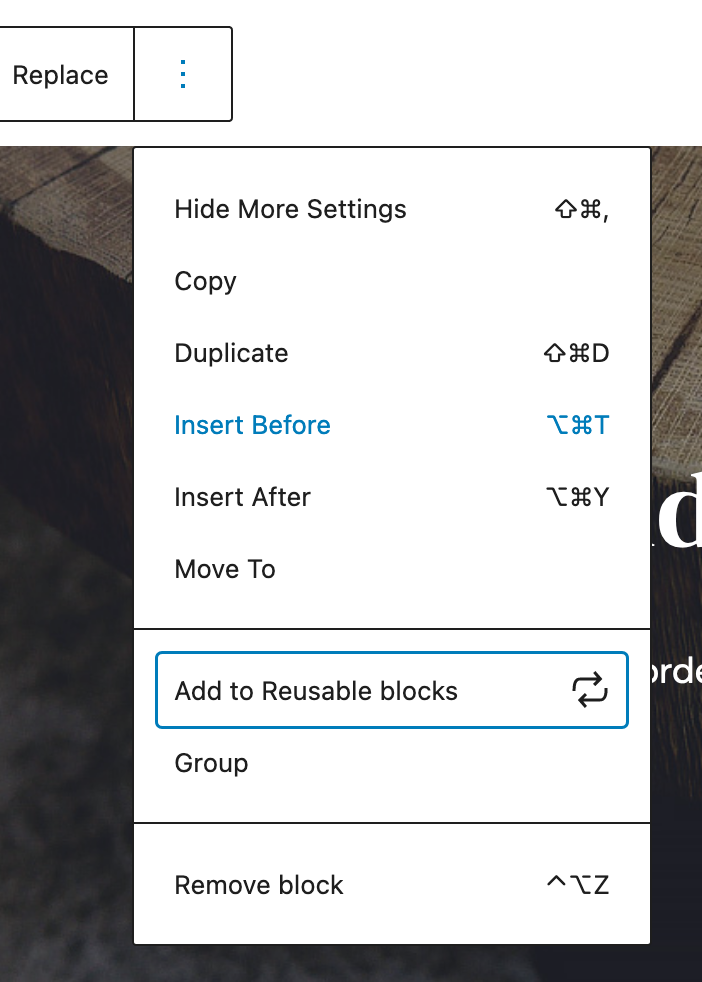
↑ Back to topFrom the block toolbar for that respective block, click on the 3 dots button at the very end which says “more options” and it should expand another list of options below. Now click on the “Add to Reusable blocks” option.
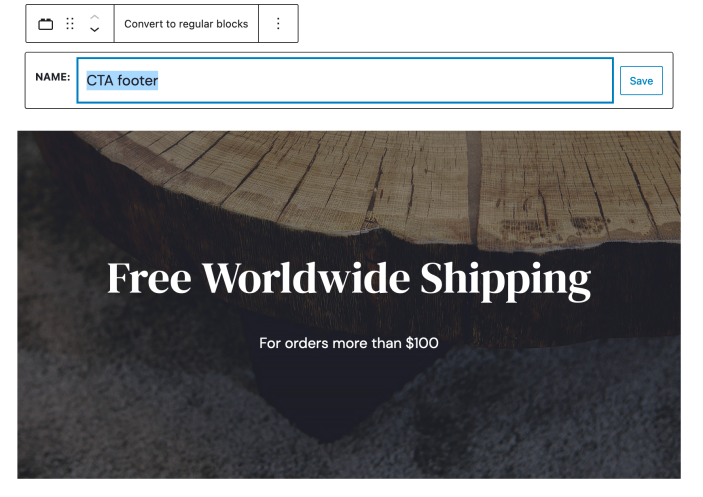
Once you do that it’ll ask you to give it a name, enter a name as you prefer, and make sure to hit save.
Note: You are not required to save the page/post you’re using to create a reusable block.
Set it to show at site footer
↑ Back to topTo make it visible at the site footer, you need to set the same reusable block which we just saved above, from your admin dashboard go to at Appearance > Customize and then Theme Options > Footer > CTA Block.
Take a look at the below screenshot for reference:
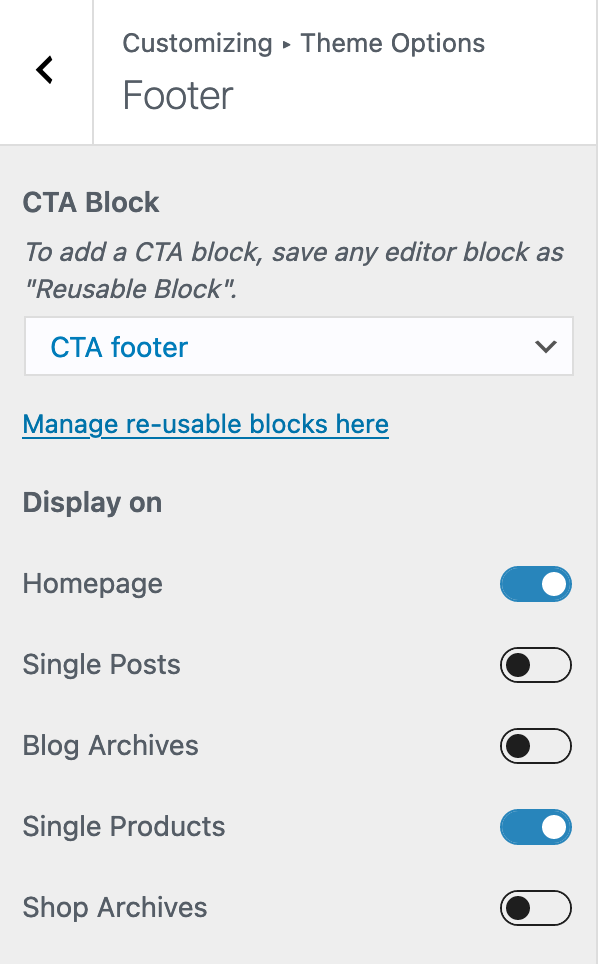
You can further use the “Display on” toggles to conditionally set the display of this block at the footer on your desired pages, in the above screenshot from the demo site we have it set to display only at Homepage & Single Products page.
Thank you for using one of the Premium Themes by Codestag