Version 2.0 of Social Login updated how login is authenticated with provider networks like Facebook and Twitter. We migrated from using Opauth to HybridAuth, which is a different code library for communicating with social networks.
We made this move because, while we routinely audit the plugin for security, HybridAuth has a more active development community, and thus will be more secure in the long run over the life of WooCommerce Social Login, and we want to be proactive in using newer codebases.
The plugin will continue to work without issue after upgrading. This change is backwards-compatible, but you need to make an update to your site to support this newer library.
This guide is only necessary if you used Social Login prior to version 2.0.
↑ Back to top
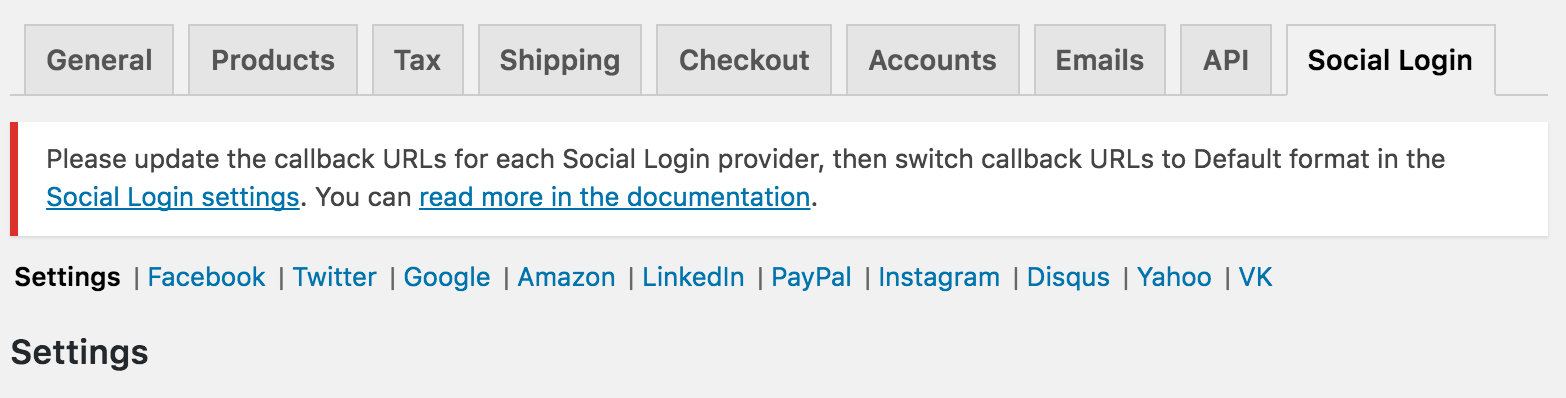
The tradeoff to using a new library is that users must update callback URLs for some of their social network applications, and the plugin will notify you of this upon upgrade. This should take about 15 minutes depending on the providers you use.
Update Notice
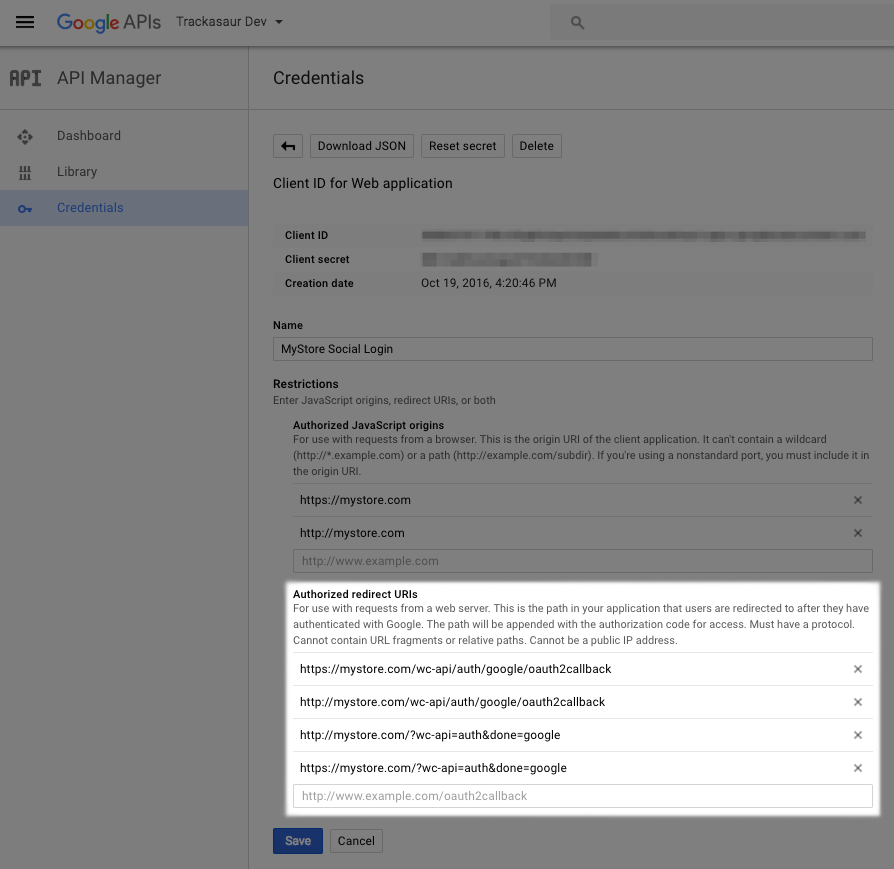
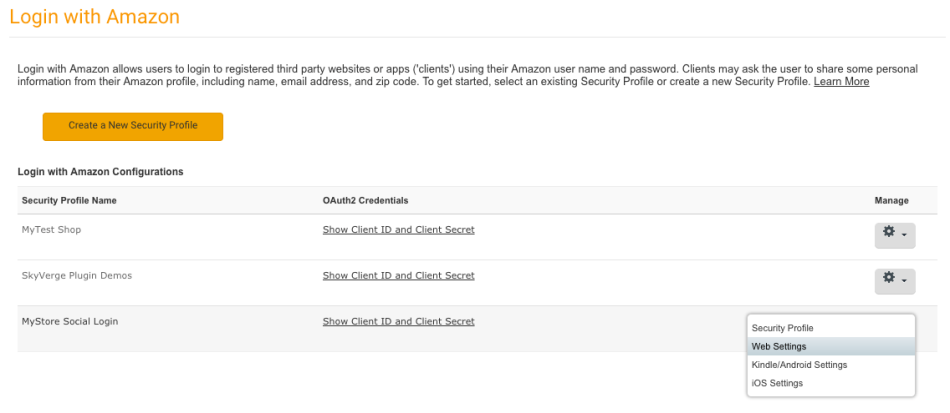
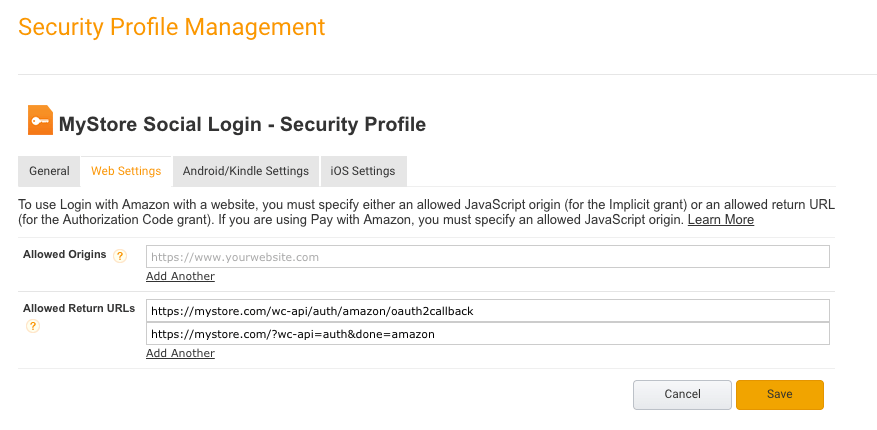
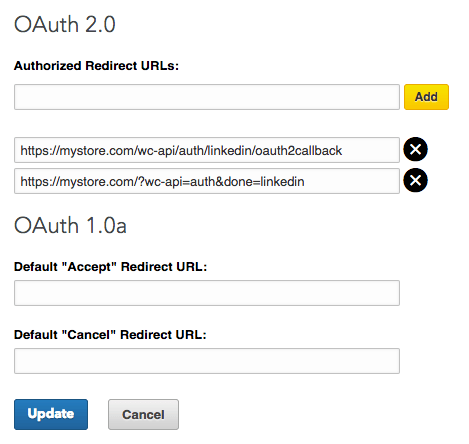
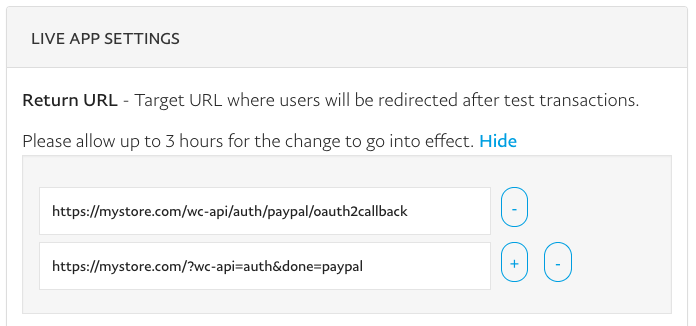
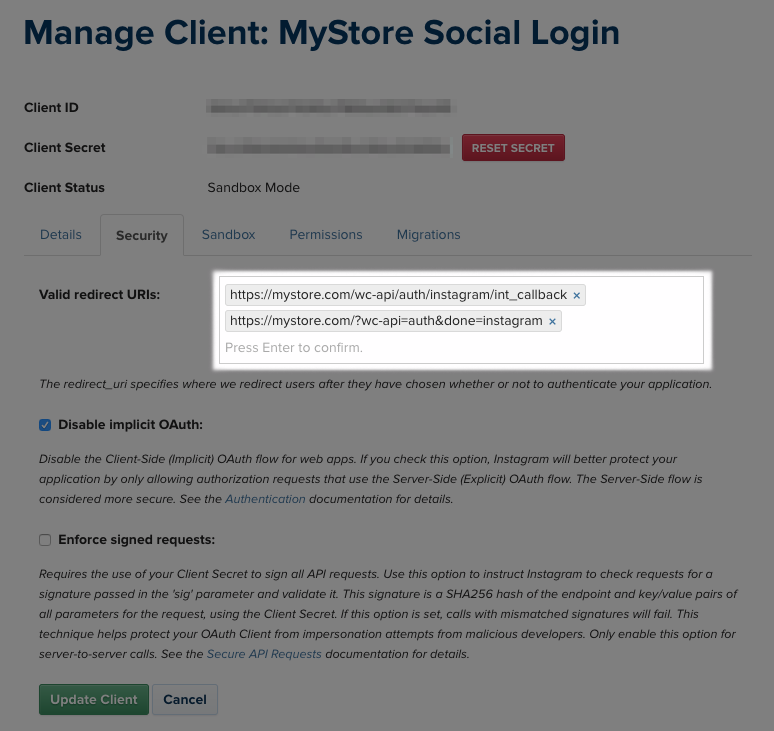
You’ll need to update the following providers, then make a switch to the new callback URLs in the plugin settings. As each provider here allows you to add additional callback URLs, we recommend adding these new callback URLs, then later switching the plugin over to using them. While most providers have changes that take effect immediately, some (PayPal is an example) will take a few hours to implement new URLs.
Changing app settings to add the new URLs, waiting a few hours, then changing the plugin settings is the best approach for no downtime or frontend implications.
Make sure you’re modifying the social network apps you previously created for your site in this process.
↑ Back to top
We recommend doing this a few hours after you’ve added your new PayPal URL, as these can take time to take effect. Once you’ve waited a bit for that URL update to process, you can adjust the plugin settings.
Go to WooCommerce > Settings > Social Login and adjust the “Callback URL format” setting. You should now use Default as the format instead of the legacy format. This will tell Social Login to use the new URLs you’ve just added to your providers.
Existing linked accounts will continue to work after this change; your customers will not be affected in any way once you’ve switched.Update Callback format
This was the last step! You’re now ready for all future updates to the plugin.
All done here? You can read up on creating new social login apps, or go back to the main documentation.
We and our partners process your personal data (such as browsing data, IP Addresses, cookie information, and other unique identifiers) based on your consent and/or our legitimate interest to optimize our website, marketing activities, and your user experience.