Wallet for WooCommerce helps your users to quickly complete a purchase by adding funds to the site and using them for future purchases.
Installation
↑ Back to top- Download the .zip file from your WooCommerce account.
- Go to: WordPress Admin > Plugins > Add New and Upload Plugin with the file you downloaded with Choose File.
- Install Now and Activate the extension.
More information at: Install and Activate Plugins/Extensions.
Setup and Configuration
↑ Back to topTo access the plugin settings navigate to Dashboard > Wallet > Settings.
General
↑ Back to topGeneral
↑ Back to top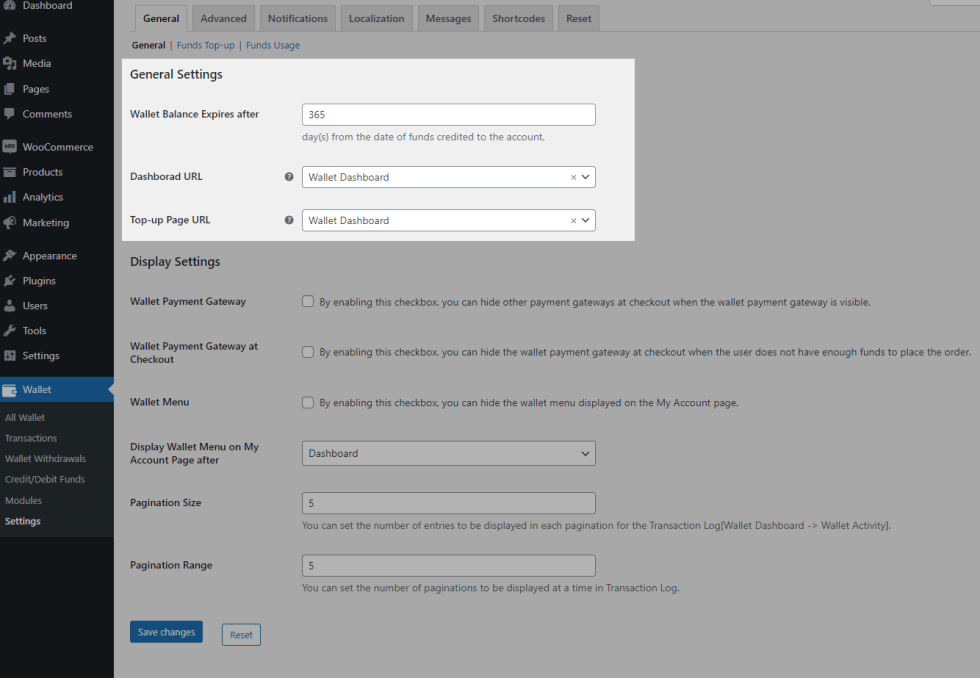
- By default, the wallet balance will have 365 days validity. If you wish to customize the validity of the expiry date, you can do so by customizing the “Wallet Balance expires after” option. If left empty, the wallet balance will have unlimited validity.
- When the plugin is installed and activated for the first time, a page for the wallet dashboard will be automatically created and will be assigned in the Dashboard URL option.
- When the plugin is installed and activated for the first time, a page for wallet top-up will be automatically created and will be assigned in the Top-up Page URL option.
Display Settings
↑ Back to top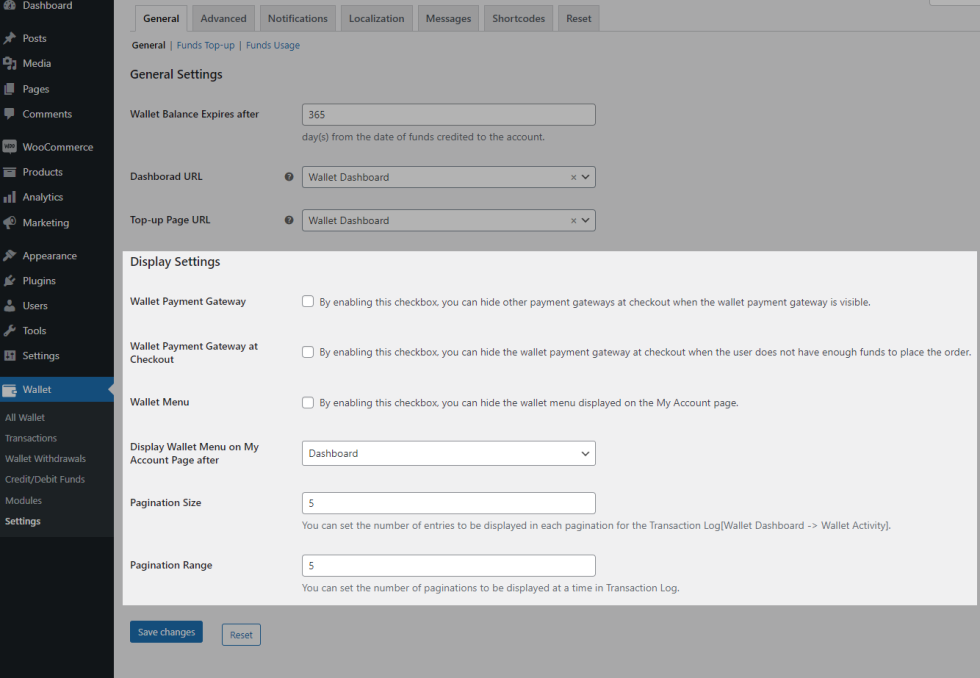
- By default, when the wallet payment gateway is visible on the checkout page, all other enabled payment gateways will be visible. If you wish to hide the other payment gateways when the wallet payment gateway is visible, you can do so by enabling the “Wallet Payment Gateway” checkbox.
- If you wish to hide the Wallet Payment Gateway at checkout when the user doesn’t have enough funds to place the order using this payment method, then enable “Wallet Payment Gateway at Checkout” checkbox.
- If you wish to hide the wallet menu in the user’s my account page, then enable the “Wallet Menu” checkbox.
- By default, the Wallet Menu will be displayed after the Dashboard menu position. If you wish to display the Wallet menu on a different position, you can do so by customizing the Display Wallet Menu on My Account Page after option.
- You can also customize the number of entries to be displayed per page in the user’s activity log in the Pagination Size option. Similarly, you can set the number of pagination to be displayed at a time using Pagination Range option.
Funds Top-up
↑ Back to top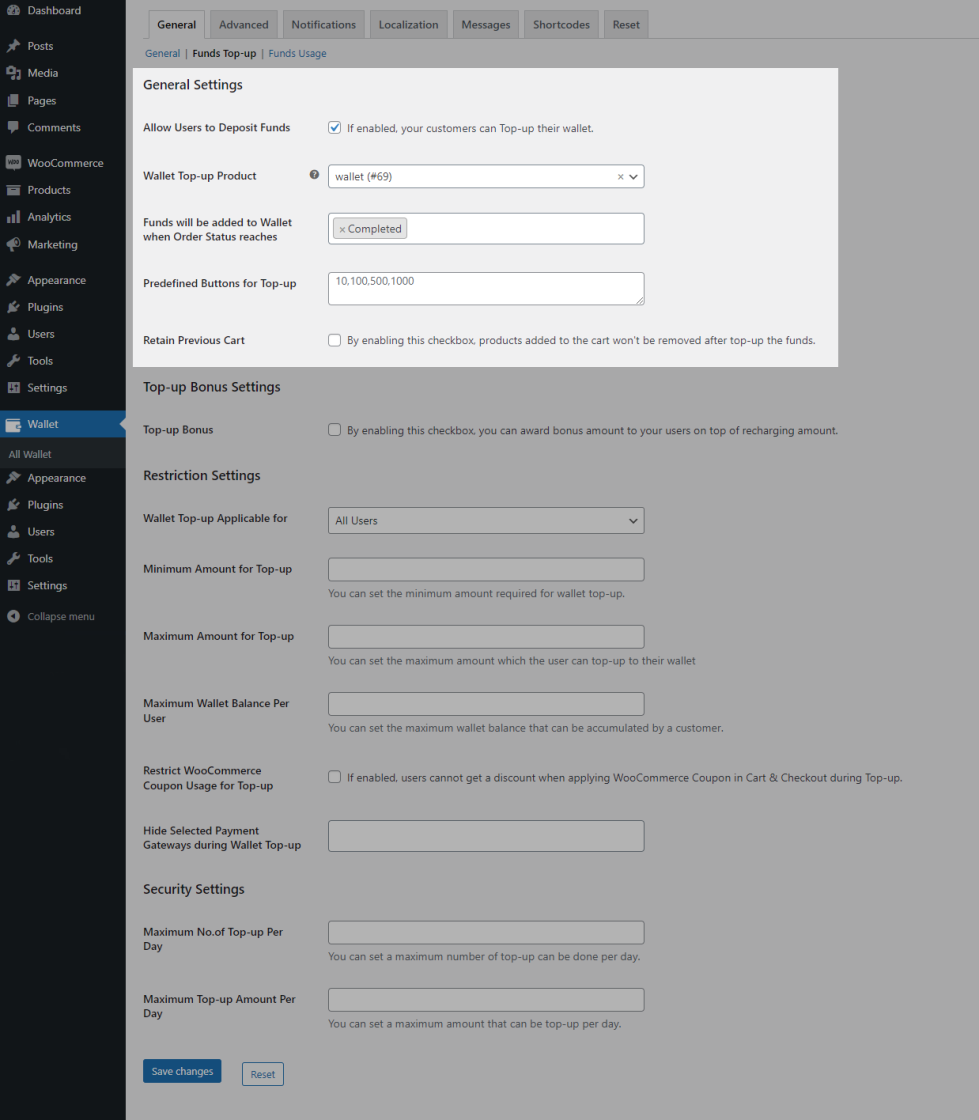
- If you want your users to add funds to their account, you can do so by enabling the “Allow Users to Deposit Funds” option.
- When the plugin is installed and activated for the first time, the plugin will automatically create a product needed for top-up and assign it in the Wallet Top-up Product option. If you wish to customize it, you can do so by creating a new product/selecting another product in the Wallet Top-up Product option.
- By default, wallet funds added through top-up will be added to the user’s account only when the top-up order reaches “Completed” status. If you wish to customize the status on which the funds get added to the user’s account, you can do so by customizing the “Funds will be added to Wallet when Order Status reaches” option.
- You can optionally set predefined Top-up amounts for your users to select in the “Predefined Buttons for Top-up” option.
- By default, when the user tries to add funds to the account while having products in the cart, the default behavior is that the existing cart will be cleared and top up product will be added to the cart. If you wish to add retain the existing cart and complete the purchase, you can do so by enabling the “Retain Previous Cart” option.
Top-Up Bonus Settings
↑ Back to top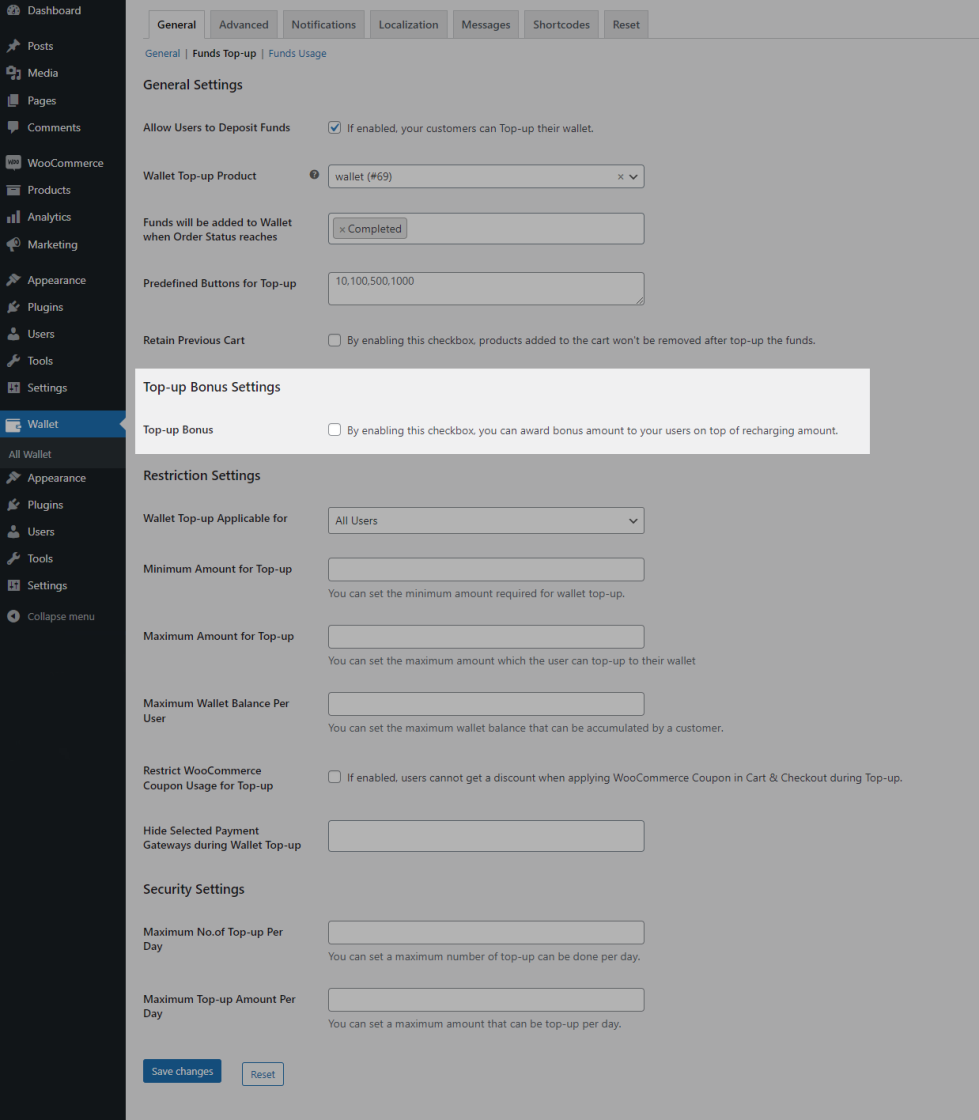
- If you wish to offer a Top-up Bonus to your users for adding funds to the account, you can do so by enabling the “Top-up” option.
- To create a new rule, click the Add New Rule button
- Fill in the following fields,
- Min Top-up Amount
- Max Top-up Amount
- Bonus Type
- Bonus Value
Restriction Settings
↑ Back to top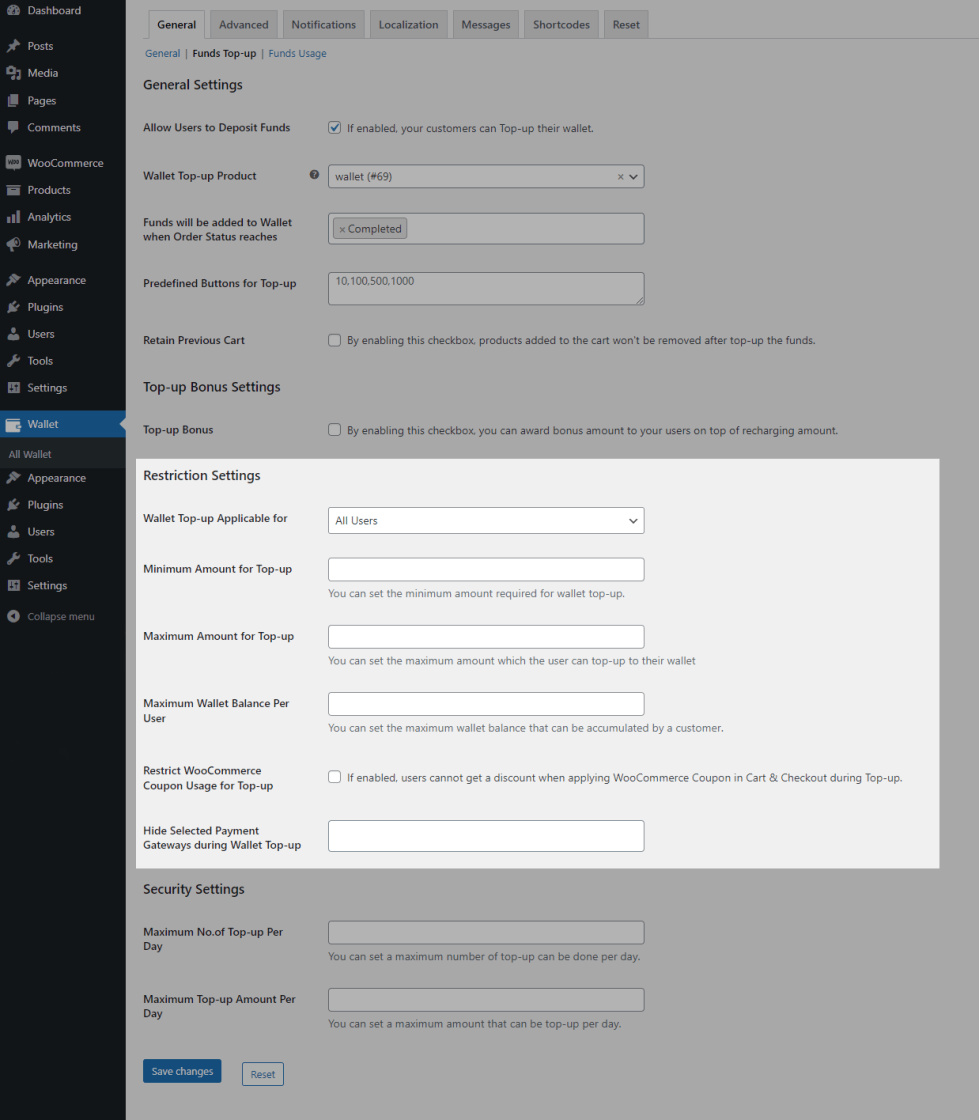
- By default, Wallet Top-up can be done by all users. If you wish to restrict it to specific user(s)/Userroles, you can do so by customizing the “Wallet Top-up Applicable for” option.
- You can optionally set the minimum amount for Top-up in the “Minimum Amount for Top-up” option.
- You can optionally set the maximum amount for Top-up in the “Maximum Amount for Top-up” option.
- You can also optionally set a maximum wallet balance that an user can hold without using it in the “Maximum Wallet Balance Per User” option.
- By default, users can use coupons on their Wallet Top-up orders. If you wish to prevent them from using coupons, you can do so by enabling the “Restrict WooCommerce Coupon Usage for Top-Up” option.
- You can also optionally hide certain payment gateways for wallet top-up in the “Hide Selected Payment Gateways during Wallet Top-up” option.
Security Settings
↑ Back to top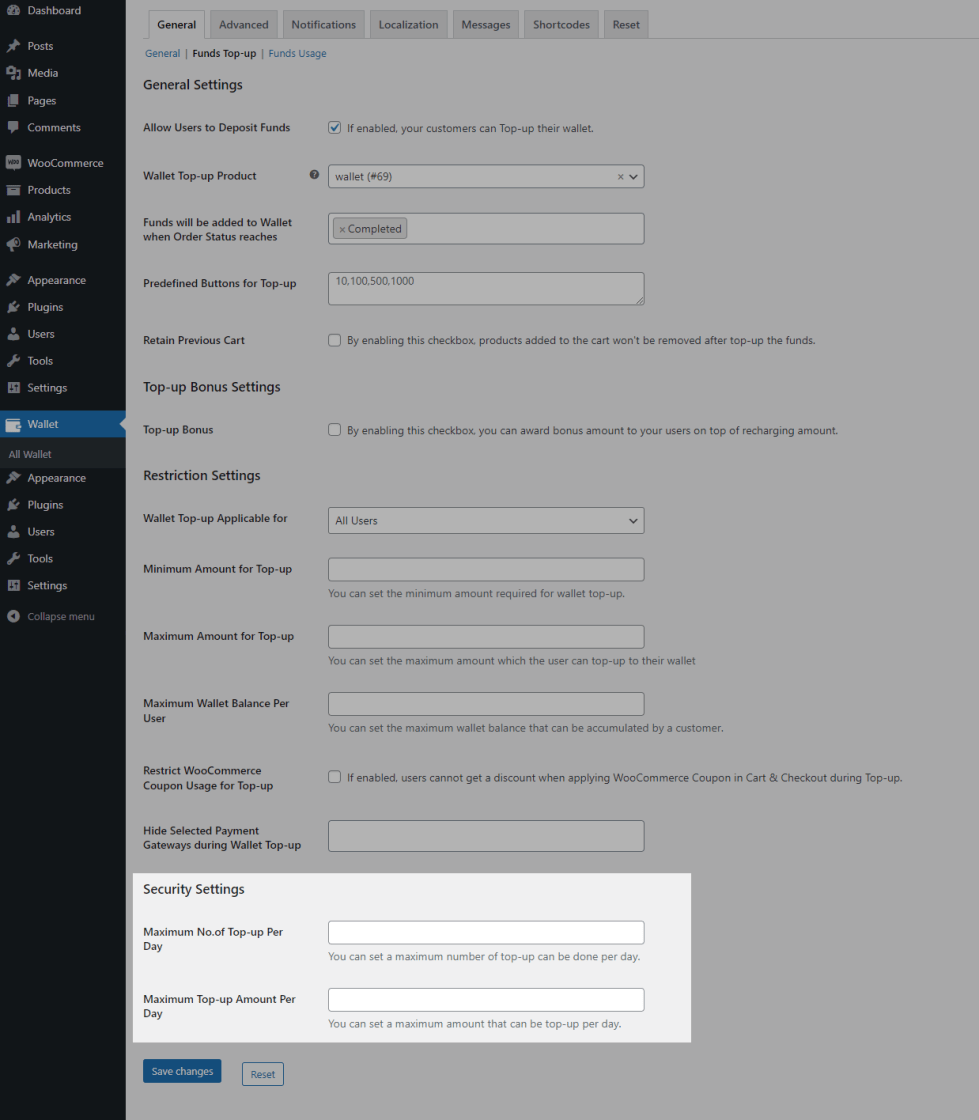
- You can also optionally set the maximum number of top-ups which can be made by a single user in a day in the “Maximum No.of Top-up Per Day” option.
- You can also optionally set the maximum top-up amount which can be done by a single user in a day in the “Maximum Top-up Amount Per Day” option.
Funds Usage
↑ Back to topGeneral Settings
↑ Back to top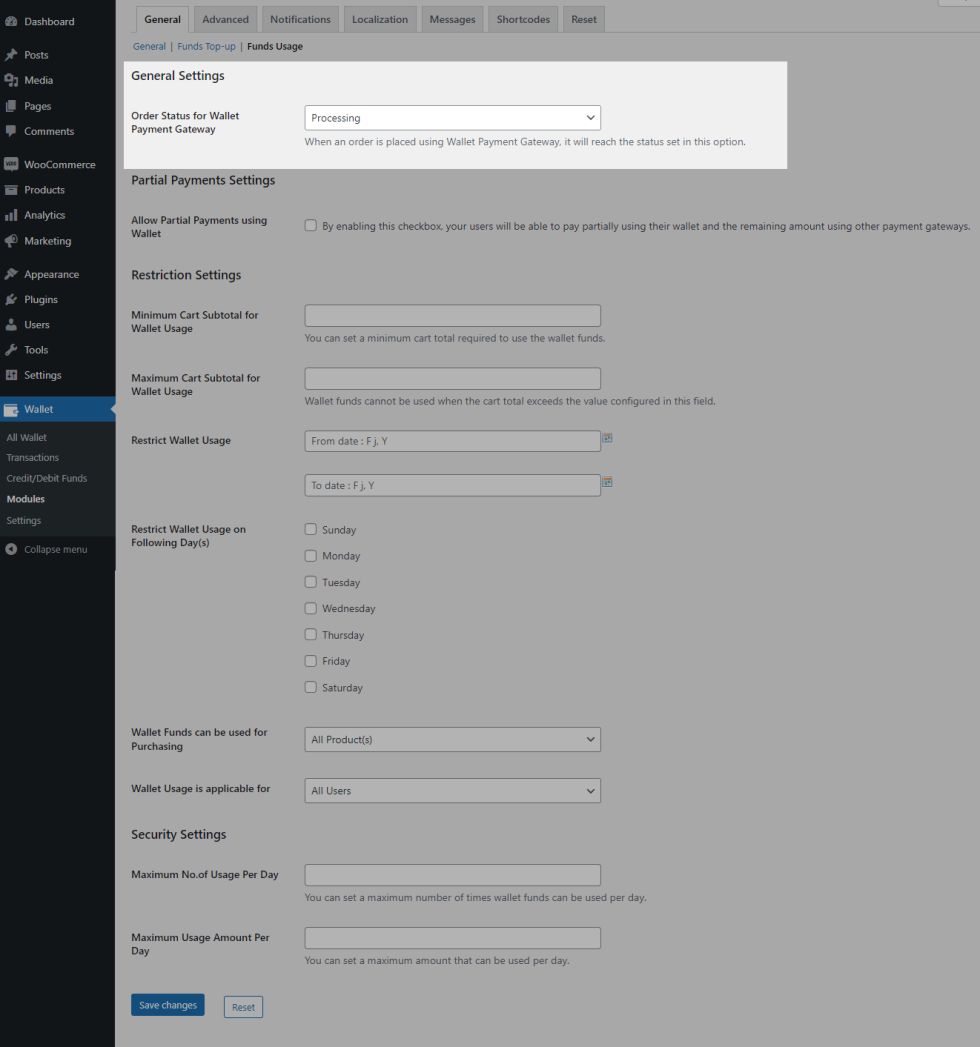
By default, when an order is placed using the wallet payment gateway, it will go to “Processing” status. If you wish to set it to a different status, you can do so by customizing the “Order Status for Wallet Payment Gateway” option.
Partial Payment Settings
↑ Back to top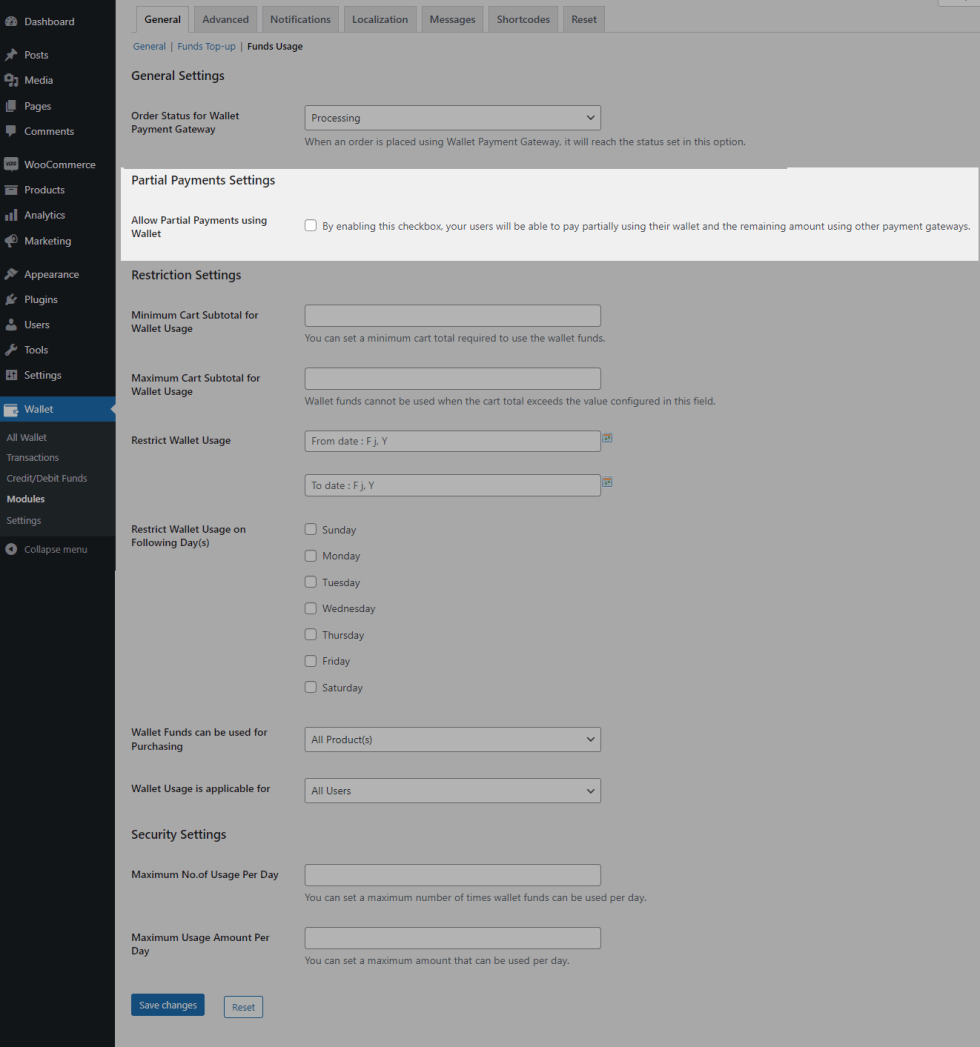
- If you wish your users to partially use their wallet balance in an order, then enable the “Allow Partial Payments using Wallet” option.
- If you choose to allow partial payments on your site, it can be allowed in two scenarios they are,
- Any Time: User can use their wallet balance anytime they prefer.
- When Wallet Balance is Less than Order Total: User can use their wallet balance only when their wallet balance is less than their order total.
- You can optionally set a limit on maximum wallet balance which can be used partially in an order in the “Maximum Funds Usage in Order” option.
- You can enable the pages on which the user can partially redeem their wallet balance in the “Display Wallet Funds Redeem field in” option.
Restriction Settings
↑ Back to top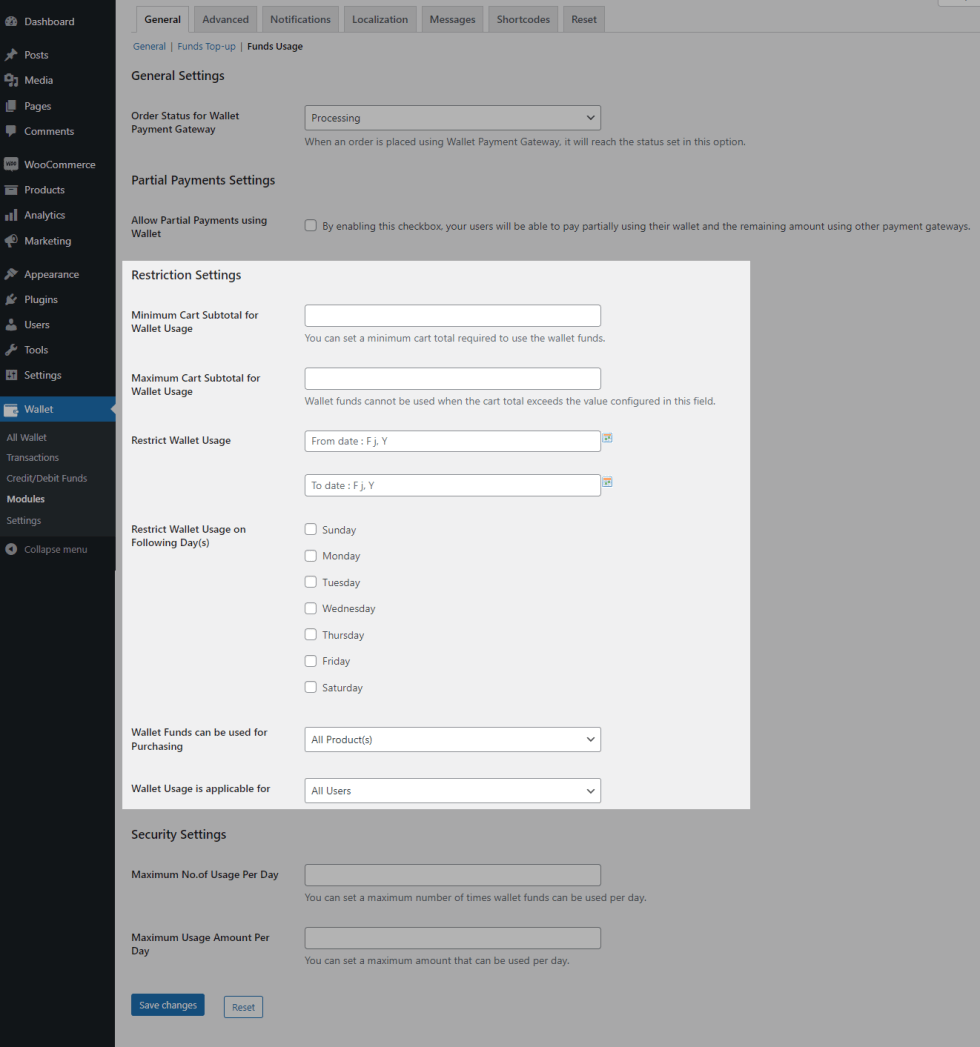
- You can optionally set the minimum cart total for wallet usage in the “Minimum Cart Total for Wallet Usage” option.
- You can optionally set the maximum cart total for wallet usage in the “Maximum Cart Total for Wallet Usage” option.
- You can also optionally restrict the wallet usage on specific days in the “Restrict Wallet Usage” option.
- You can also optionally restrict the wallet usage on specific days of the week in the “Restrict Wallet Usage on Following Day(s)” option.
- By default, wallet funds can be used for purchasing all the products on the site. If you want to restrict the purchase to specific products/categories, you can do so by customizing the “Wallet Funds can be used for Purchasing” option.
- By default, wallet funds can be used by all users on the site. If you want to restrict the purchase to specific users/userroles, you can do so by customizing the “Wallet Usage is applicable for” option.
Security Settings
↑ Back to top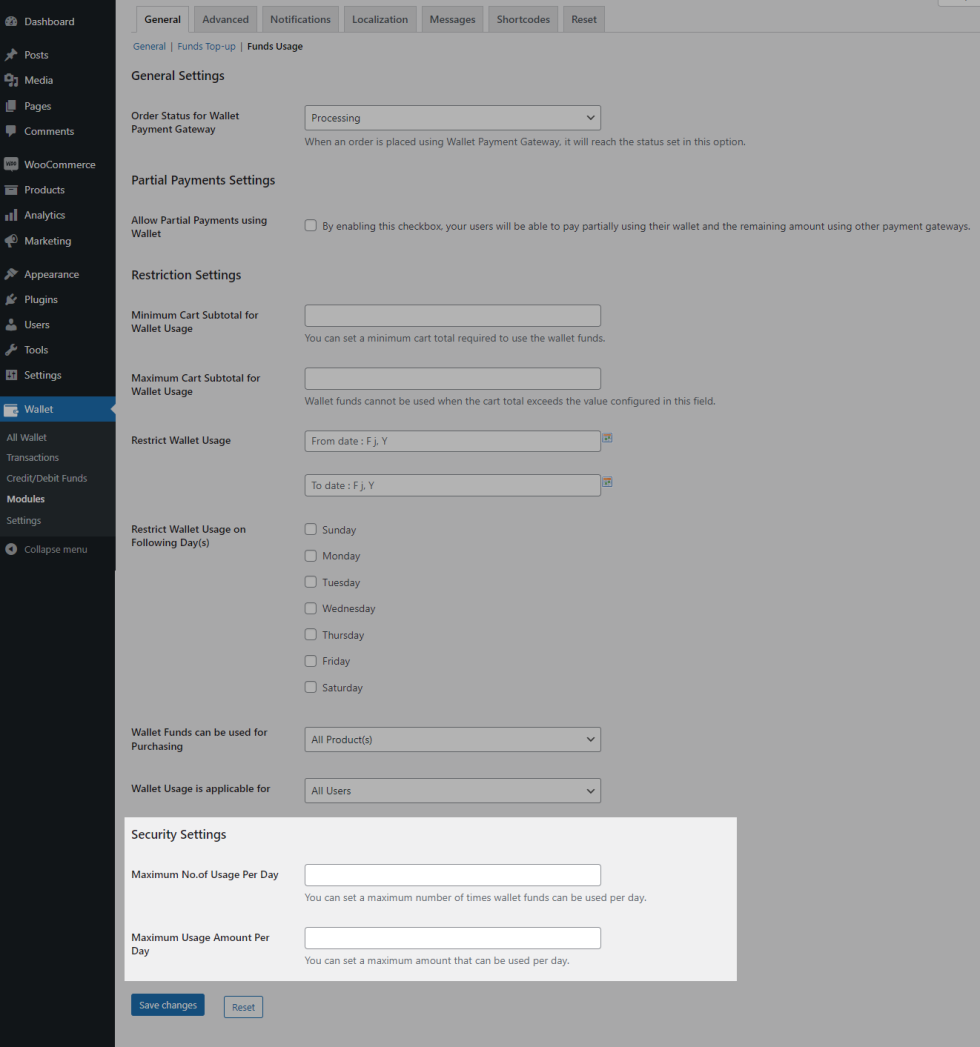
- You can also optionally set the maximum number of orders in which wallet funds can be used by a single user in a day in the “Maximum No.of Usage Per Day” option.
- You can also optionally set the maximum amount which can be used by a single user in a day in the “Maximum Usage Amount Per Day” option.
Advanced
↑ Back to topTroubleshoot
↑ Back to top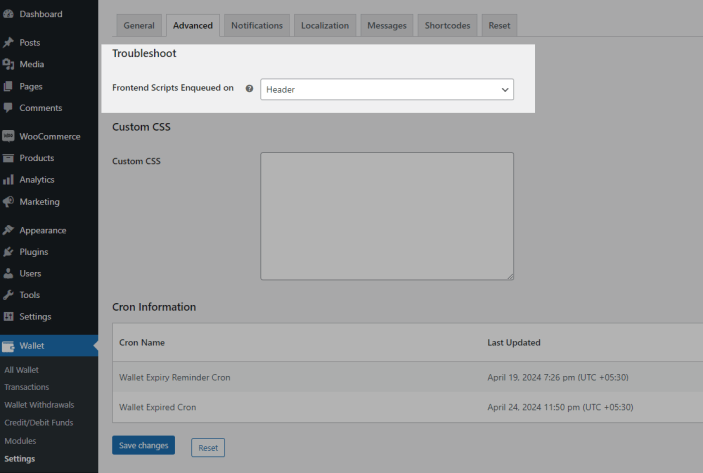
By default, all the plugin scripts will be loaded in the plugin header. If you face any conflict with any other plugin or themes and wish to load the plugin scripts on the footer, you can do so by customizing the “Frontend Scripts Enqueued on” option.
Custom CSS
↑ Back to top
You can customize the Wallet dashboards look and feel by using the Custom CSS option.
Notification
↑ Back to top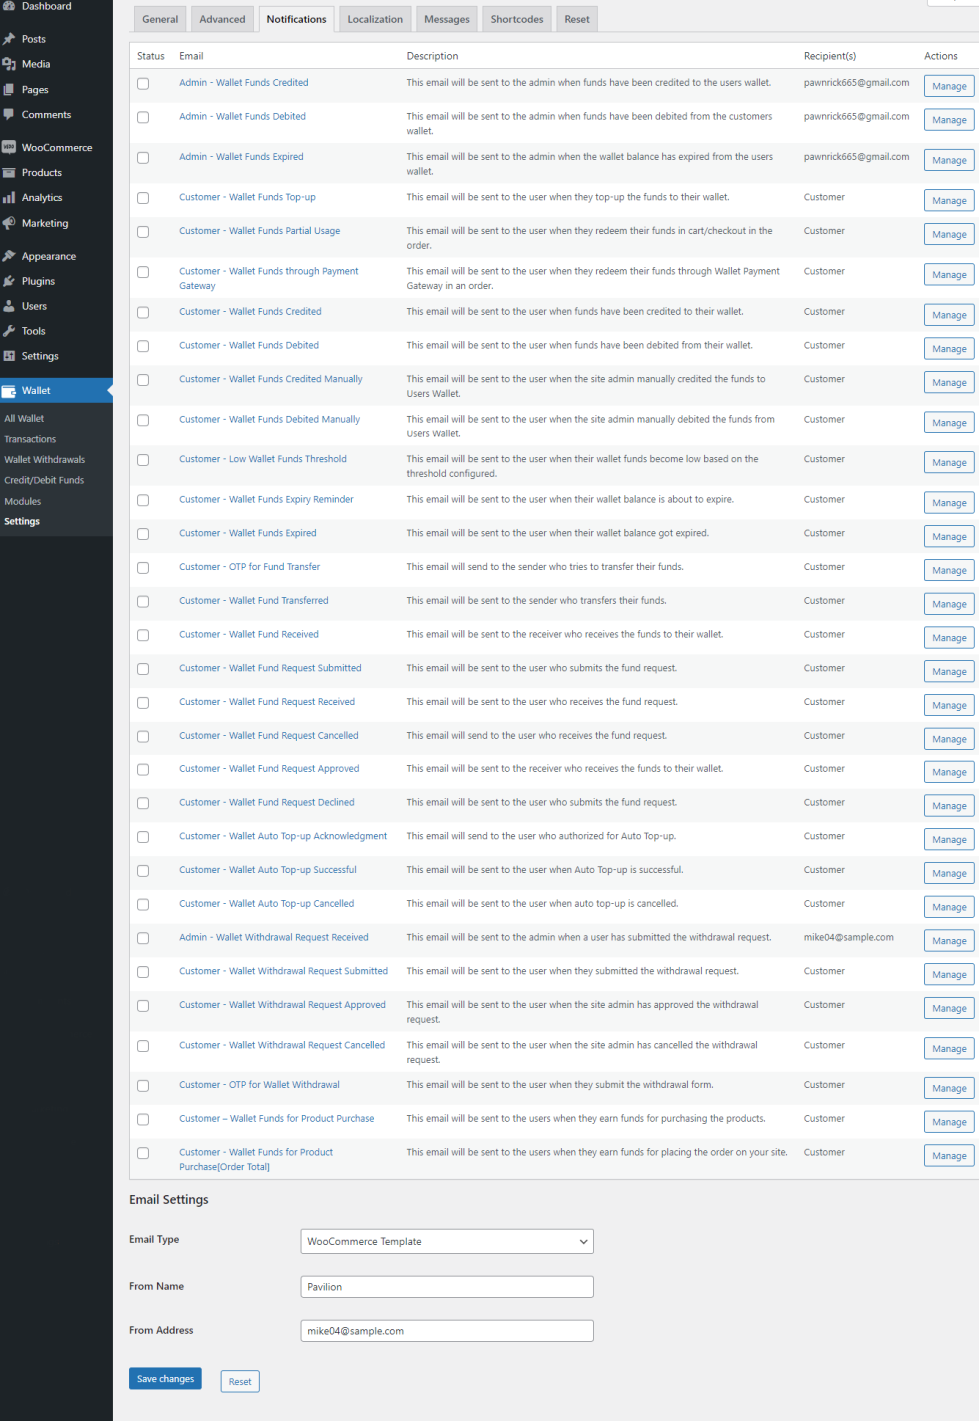
You can enable/disable the email notifications sent by the plugin in this section.
Localization
↑ Back to top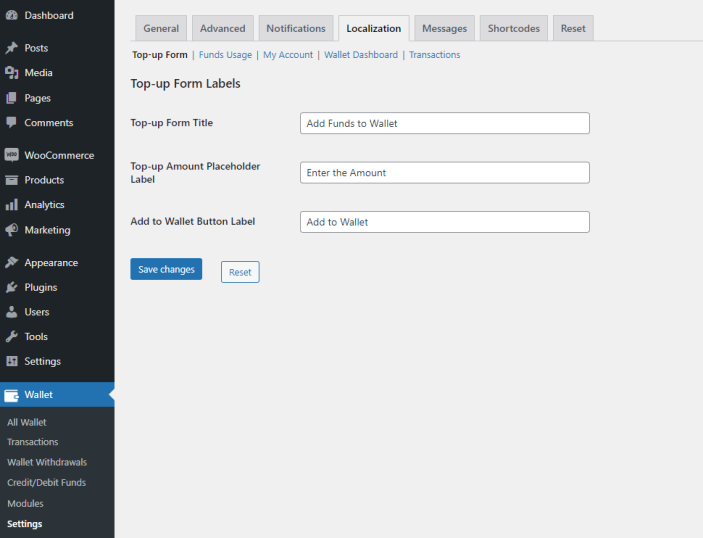
You can customize the labels displayed to your users in frontend in this section.
Messages
↑ Back to top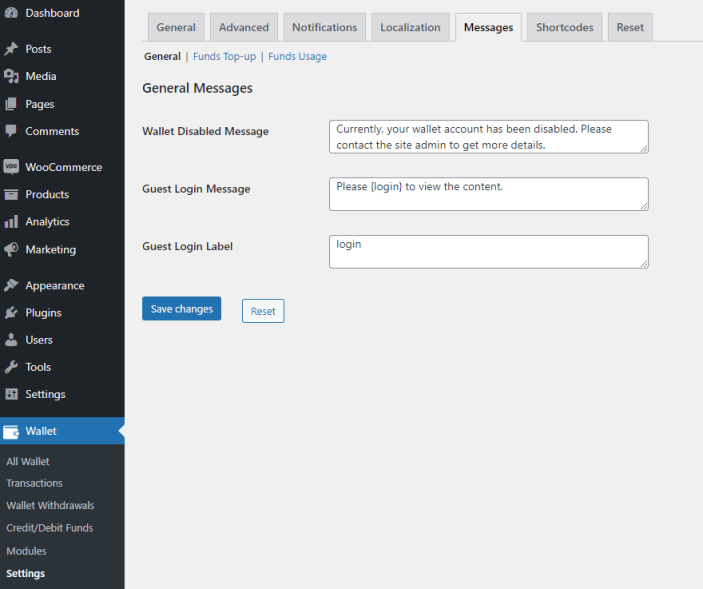
You can customize the messages displayed to your users in frontend in this section.
Shortcodes
↑ Back to top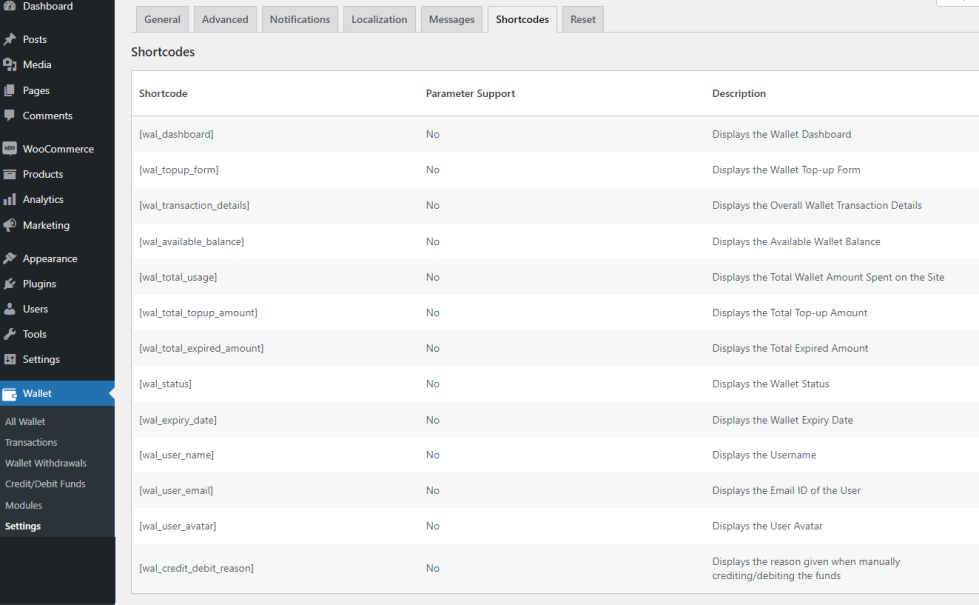
You can view the list of shortcodes that are supported by this plugin in this section.
Reset
↑ Back to top
You can reset your users wallet balance & transaction log using in this section. You can make use of the user/user roles filter based on your needs.
Modules Configuration
↑ Back to topFund Transfer and Request
↑ Back to topFund Transfer
- If you want your users to transfer funds to other users on the site, enable the Fund Transfer option.
- You can optionally set a minimum amount for fund transfer in the “Minimum Amount for Wallet Transfer” option.
- You can optionally set a maximum amount for fund transfer in the “Maximum Amount for Wallet Transfer” option.
- You can also optionally set the maximum number of transfers that can be made by a user in a day by setting a value in the “Maximum Number of Transactions Per Day” option.
- You can optionally set the maximum number of people for which funds can be transferred in a day in the “Maximum Number of Unique Transfers Per Day” option.
- You can also optionally charge a Transfer fee for fund transfer. To enable the transfer fee enable the “Wallet Transfer Fee” option.
- In the Transfer Fee Type option, you can set up, you can choose between fixed fee and percentage fee.
- In the Transfer Fee Value, you can set the fee value.
Fund Request

- If you want your users to request funds from other users on the site, enable the Fund Request option.
- You can optionally set a minimum amount for fund request in the “Minimum Amount for Wallet Request” option.
- You can optionally set a maximum amount for fund transfer in the “Maximum Amount for Wallet Request” option.
- You can also optionally set the maximum number of requests which can be made by a user in a day by setting a value in the “Maximum Number of Requests Per Day” option.
- You can optionally set the maximum number of people to whom funds can be requested in a day in the “Maximum Number of Unique Transfers Per Day” option.
Advanced
Display Settings
You can optionally set the number of entries to be displayed per page in the “Pagination Size” option.
Restriction Settings

By default, funds can be transferred/requested by all the users on the site. If you want to restrict the Funds Transfer/Request to specific users on the site, you can do so by customizing the “User Selection” option.
OTP Settings
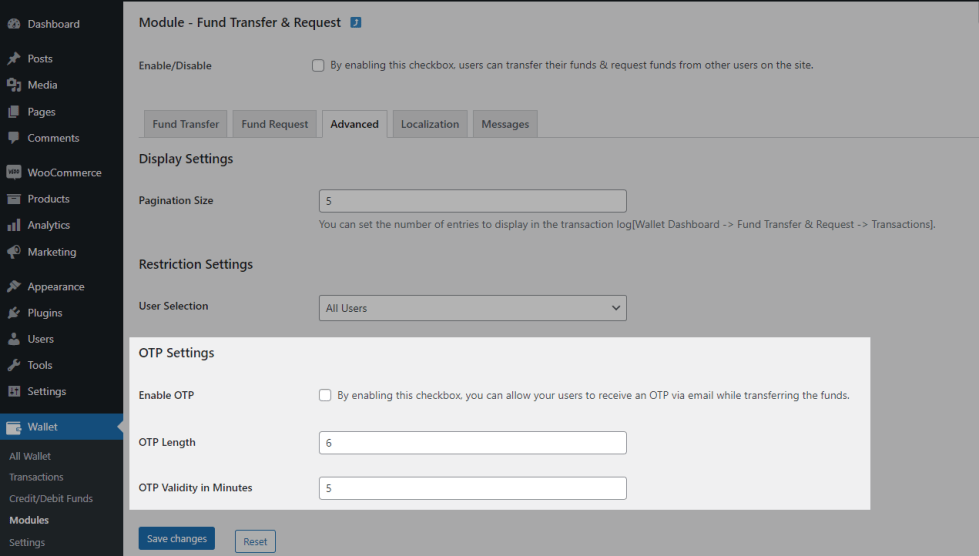
- If you wish to enable OTP based authentication, enable the “Enable OTP” option.
- You can customize the length of the OTP in the “OTP Length” option.
- You can also customize the OTP validity in the “OTP Validity in Minutes” option.
Localization
You can customize the Labels displayed to the user in the “Localization” section.
Messages
You can customize the messages displayed to the user in the “Messages” section.
Wallet Auto Top-up
↑ Back to topGeneral
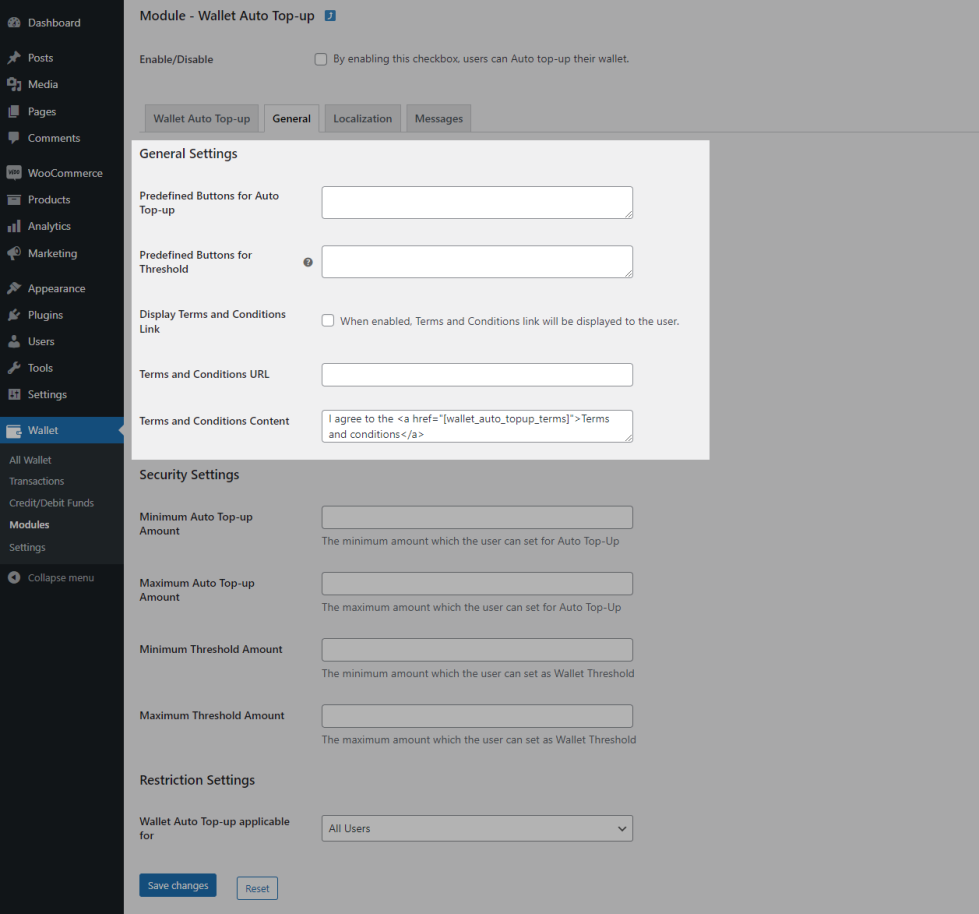
- The user will have to choose an amount from the list of available options. The site admin will have to set up the Predefined amounts in the Predefined Buttons for Auto Top-up option.
- The user will have to choose an amount from the list of available options. The site admin will have to set up the Predefined amounts in the Predefined Buttons for Threshold option.
- You can also optionally display a link to the terms and conditions in the “Display Terms and Conditions Link” option.
- You can set the URL in the “Terms and Conditions URL” option.
Security Settings
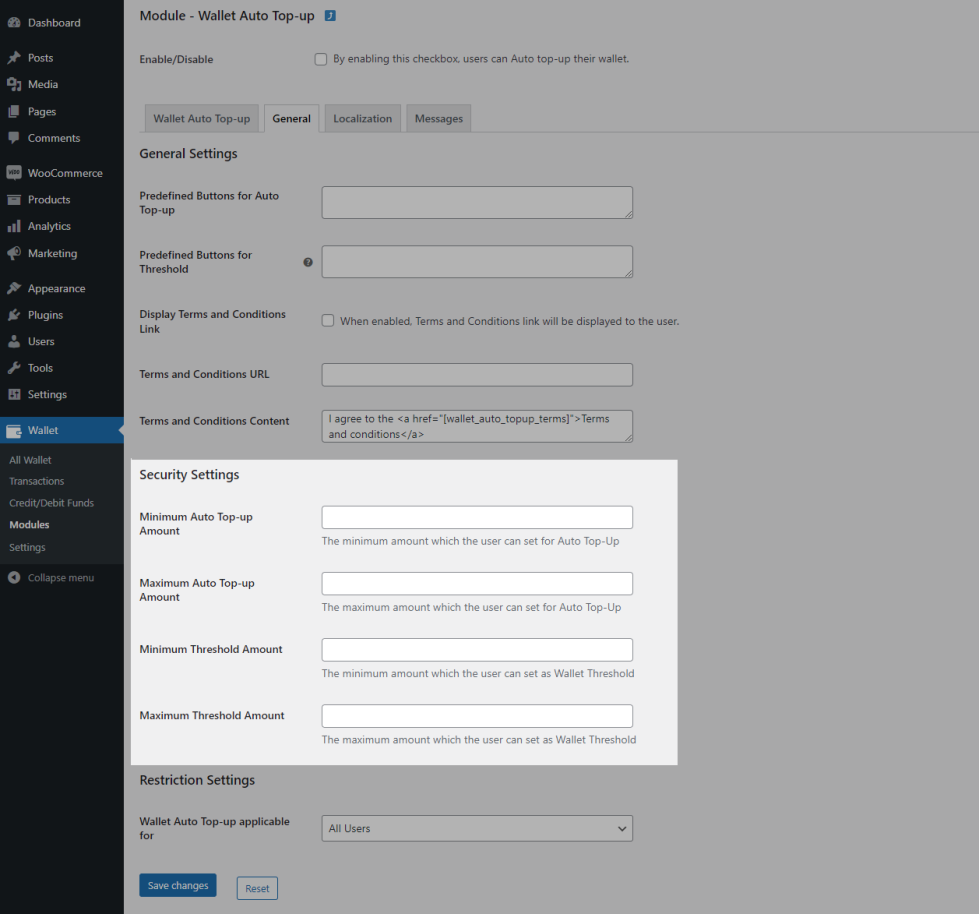
- You can also optionally set up the Minimum Amount for Wallet Top up in the Minimum Top-up Amount option.
- You can also optionally set up the Maximum Amount for Wallet Top up in the Maximum Top-up Amount option.
- You can also optionally set up the Minimum Amount for Wallet Top up in the Minimum Top-up Amount option.
Restriction Settings
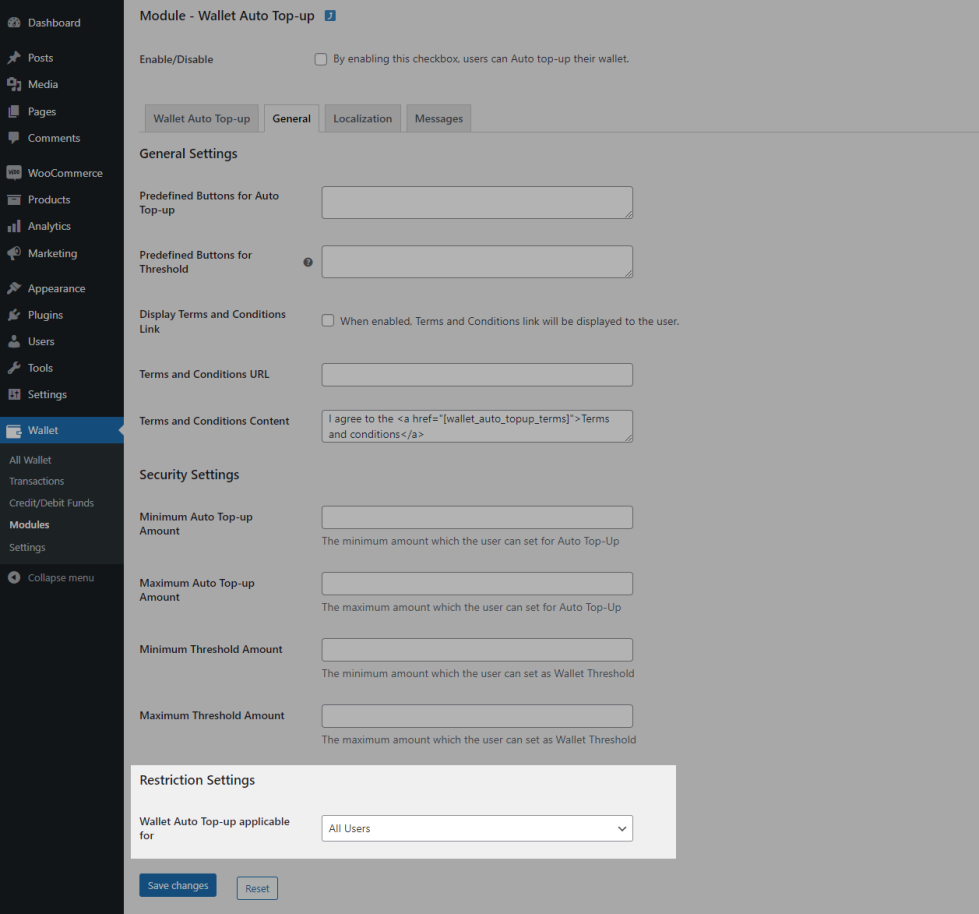
By default, Wallet Auto Top-up is applicable for all users. If you want to restrict this feature to specific Users/Userroles, you can do so by customizing the “Wallet Auto Top-up applicable for” option.
Localization

You can customize the messages displayed to the user in the Localization section.
Messages
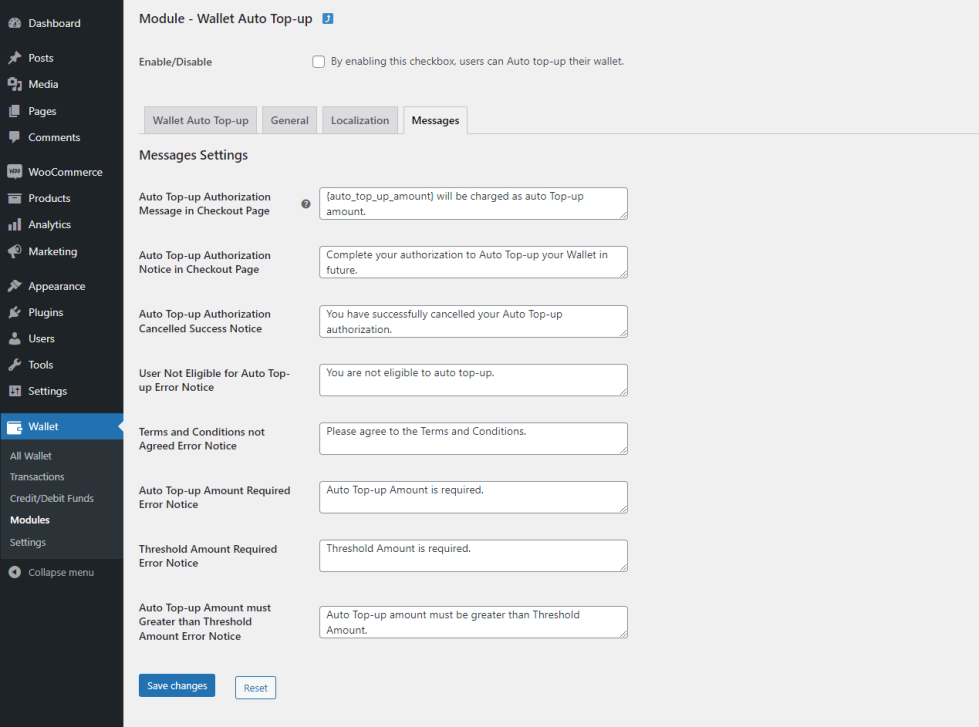
You can customize the messages displayed to the user in the Messages section.
Gift Voucher
↑ Back to topGift Voucher Generation
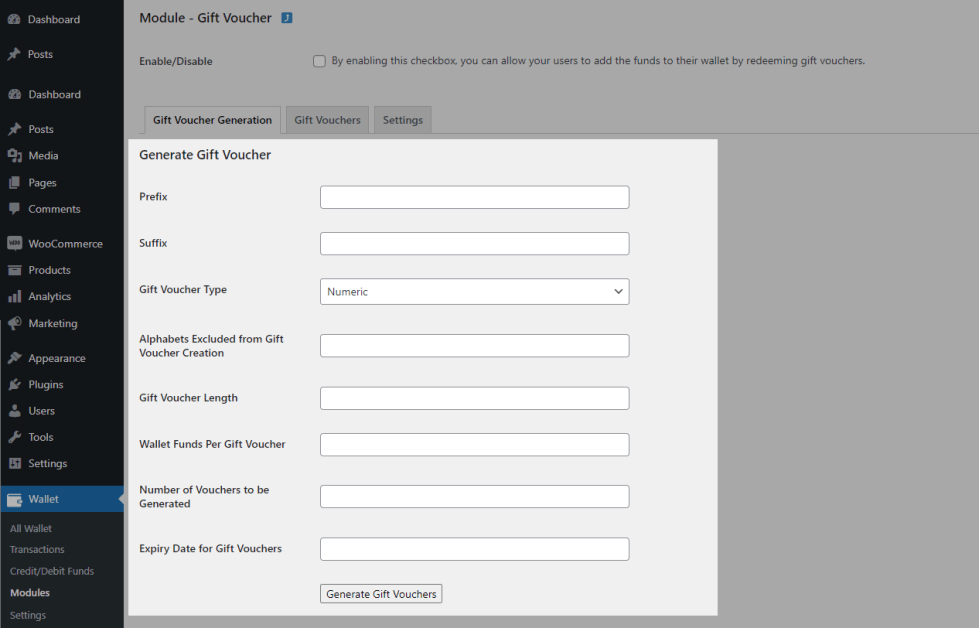
- You can optionally enter a prefix and suffix in the Prefix and Suffix section.
- In the Gift Voucher Type option, you can select whether your gift cards should be Numeric or Alphanumeric.
- In the Gift Voucher Length option, input the length of the gift cards you wish to generate.
- In the Wallet Funds Per Gift Voucher option, enter the wallet balance per gift voucher.
- In the Number of Vouchers to be Generated option, input the number of vouchers you wish to generate.
- In the Expiry Date for Gift Vouchers option, you can optionally set an expiry date.
- Upon filling the required fields, click the “Generate Gift Vouchers” button.
- Once the Gift Vouchers have been generated, the generated Gift Vouchers will be listed in the “Gift Vouchers” tab.
Settings
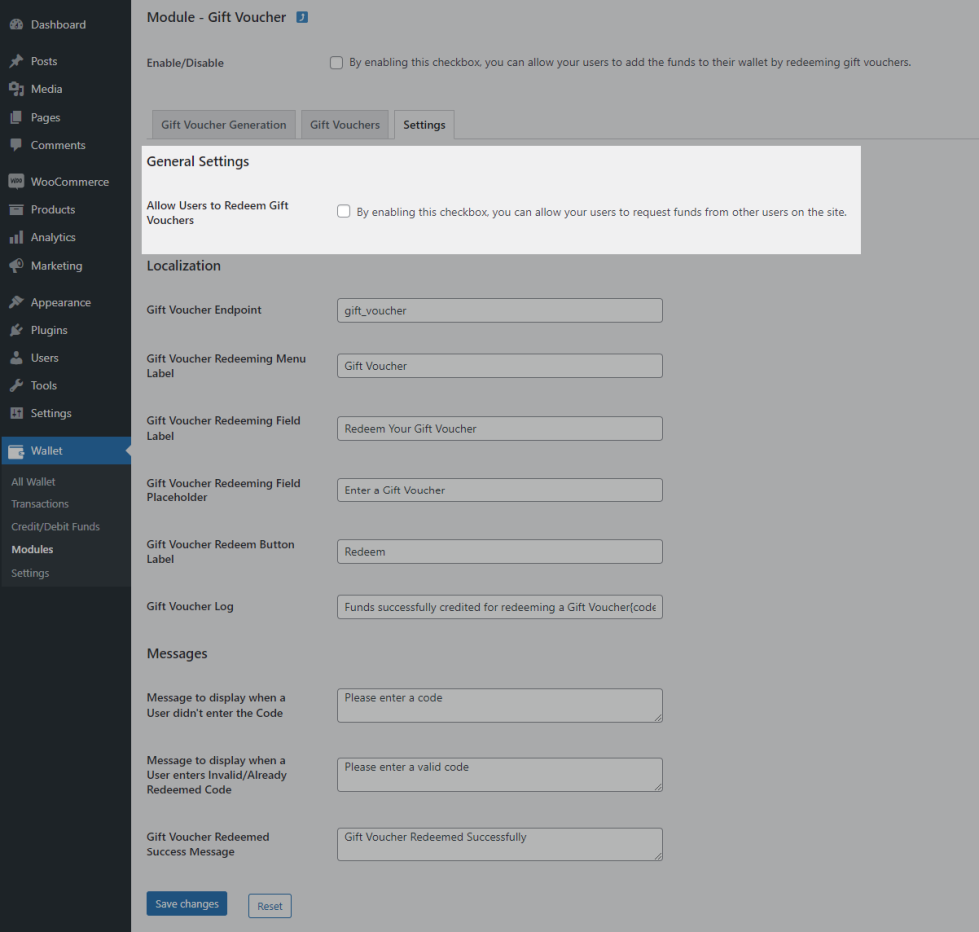
You can customize the labels and messages in the “Settings” section.
Gift Vouchers
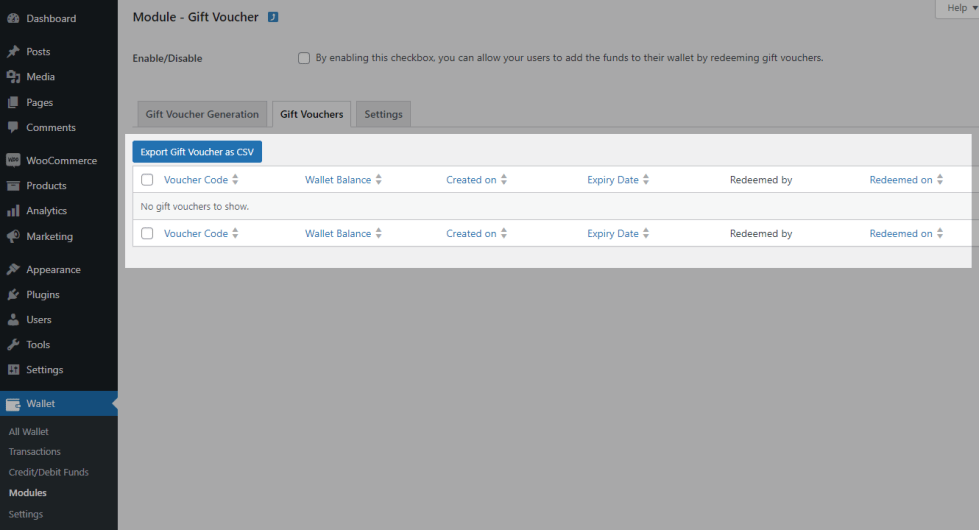
The generated gift vouchers will be listed in this table.
Wallet Actions
↑ Back to topAccount Signup Reward Points
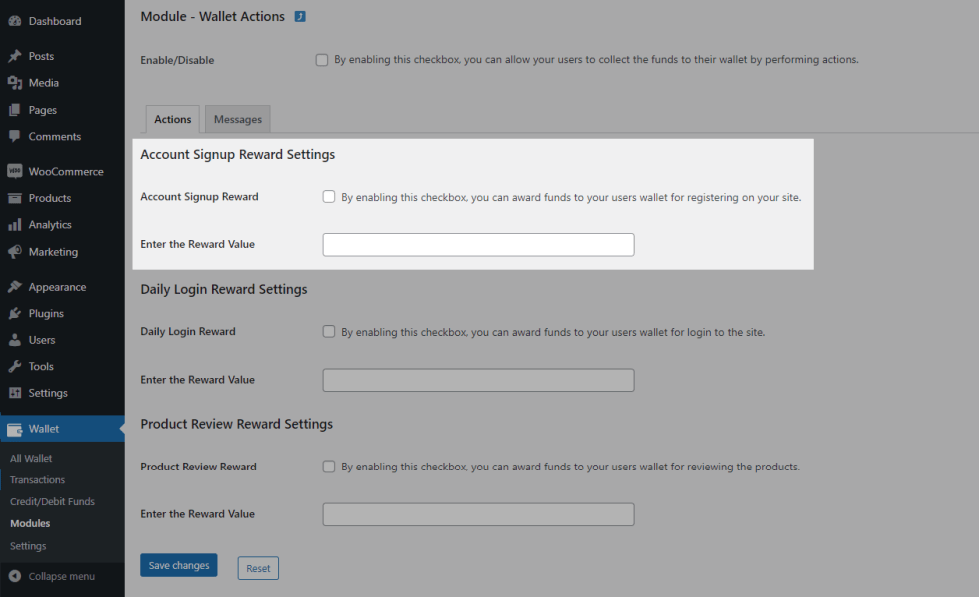
- You can reward your users with a Wallet balance for creating an account on the site.
- To offer the signup reward, enable the “Account Signup Reward Funds” option and set the reward amount in the “Enter the Funds Value” option.
Daily Login Reward Points
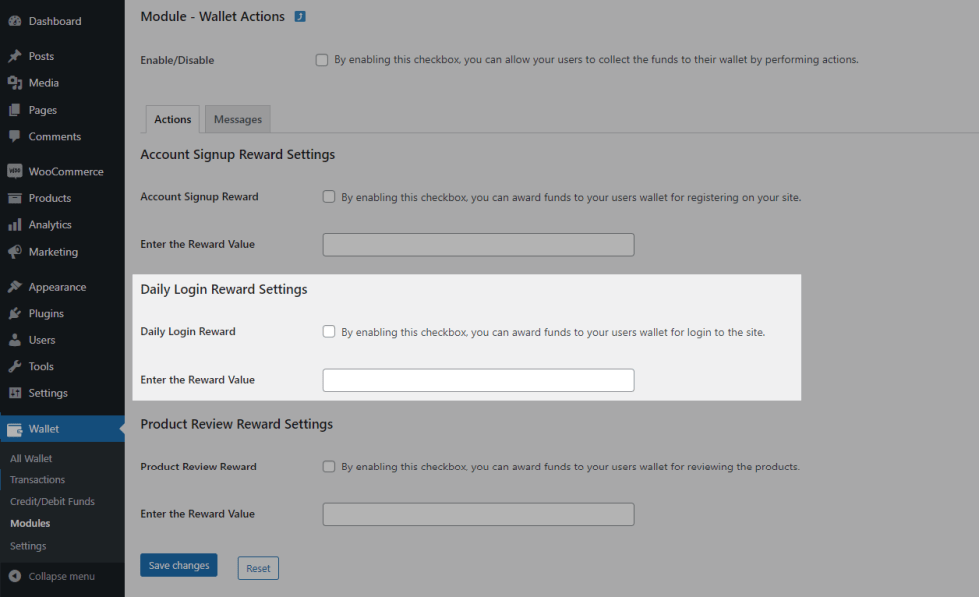
- You can reward your users with a Wallet balance for logging in daily on your site.
- To offer the daily login reward, enable the “Daily Login Reward” option and set the reward amount in the “Enter the Reward Value” option.
Product Review Reward Settings
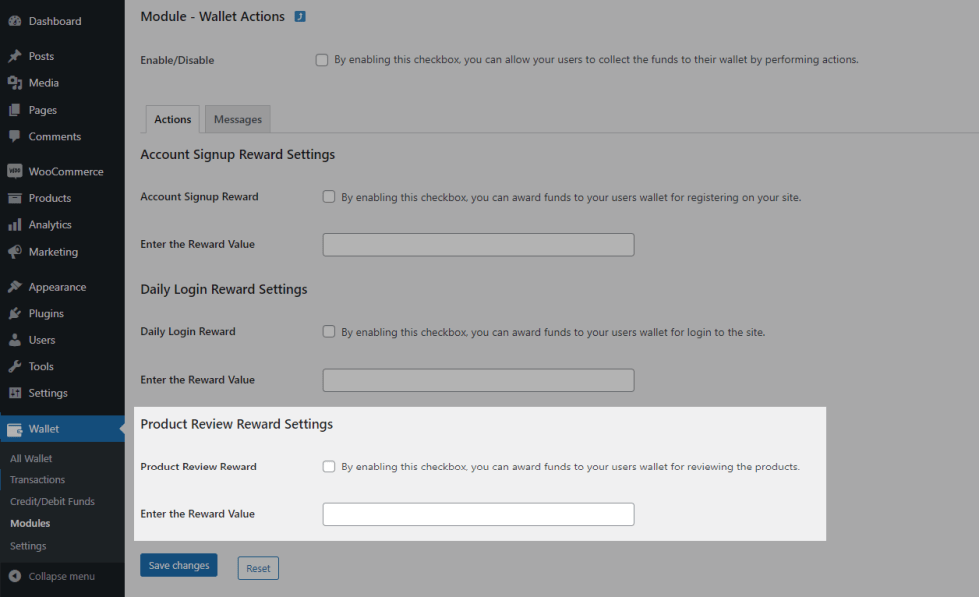
- You can reward your users with a Wallet balance when they give a review for products on your site.
- To offer the product review reward, enable the “Product Review Reward” option and set the reward amount in the “Enter the Reward Value” option.
Wallet Withdrawal
↑ Back to topIf you wish to allow your users to withdraw their available funds from the wallet, then turn on this module.
General
General Settings
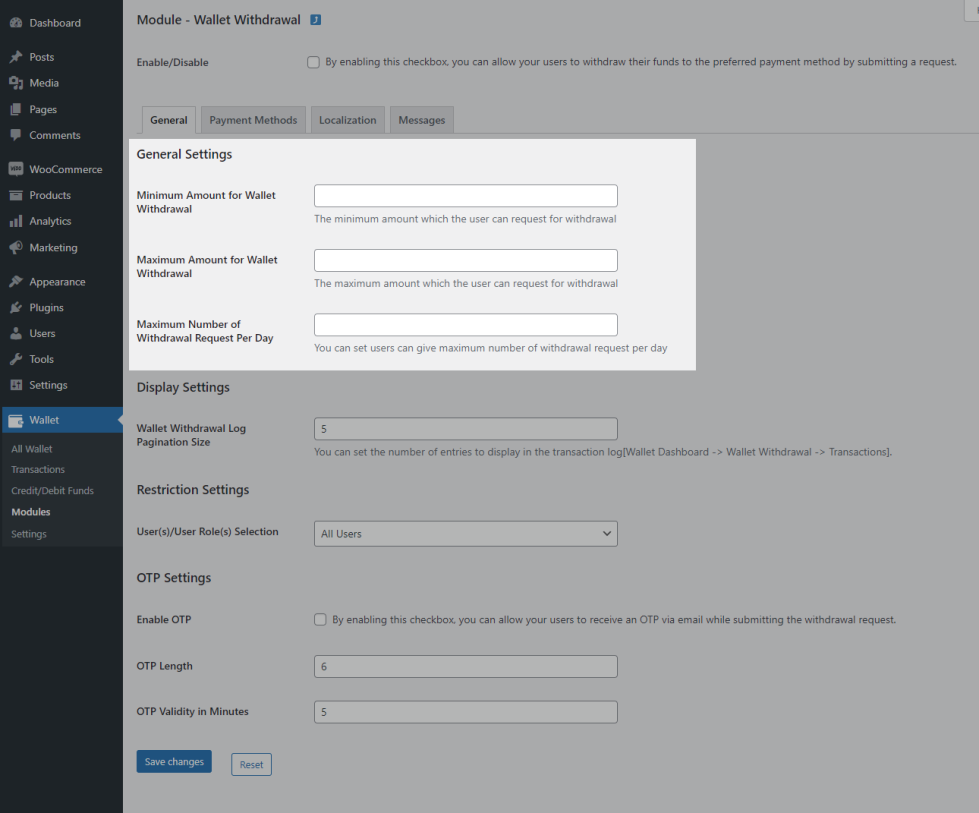
- If you wish that your users can submit a withdrawal request with some minimum amount, then you can set the value in Minimum Amount for Wallet Withdrawal field.
- If you wish that your users cannot give a withdrawal request with more than the specified amount, then you can set the value in Maximum Amount for Wallet Withdrawal field.
- You can set the number of withdrawal request that can be submitted by a user in a day by setting a value in the Maximum Number of Withdrawal Request Per Day field.
Display Settings
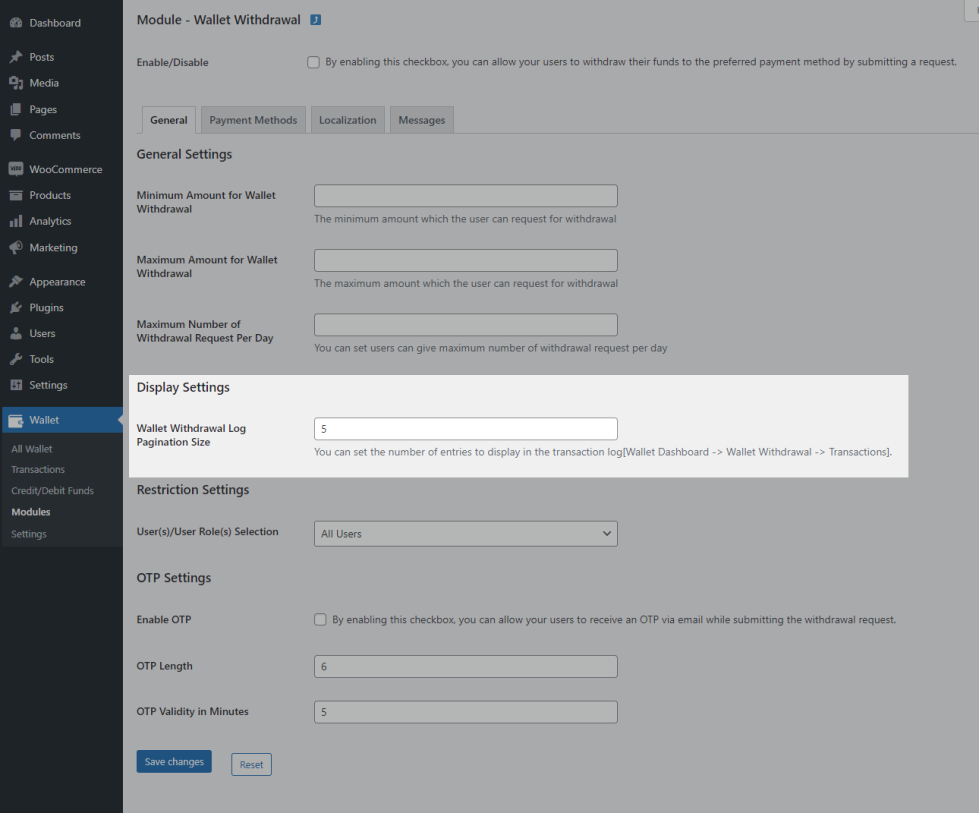
You can set the number of entries to be displayed in each pagination for the withdrawal transaction log in Wallet Withdrawal Log Pagination Size field.
Restriction Settings
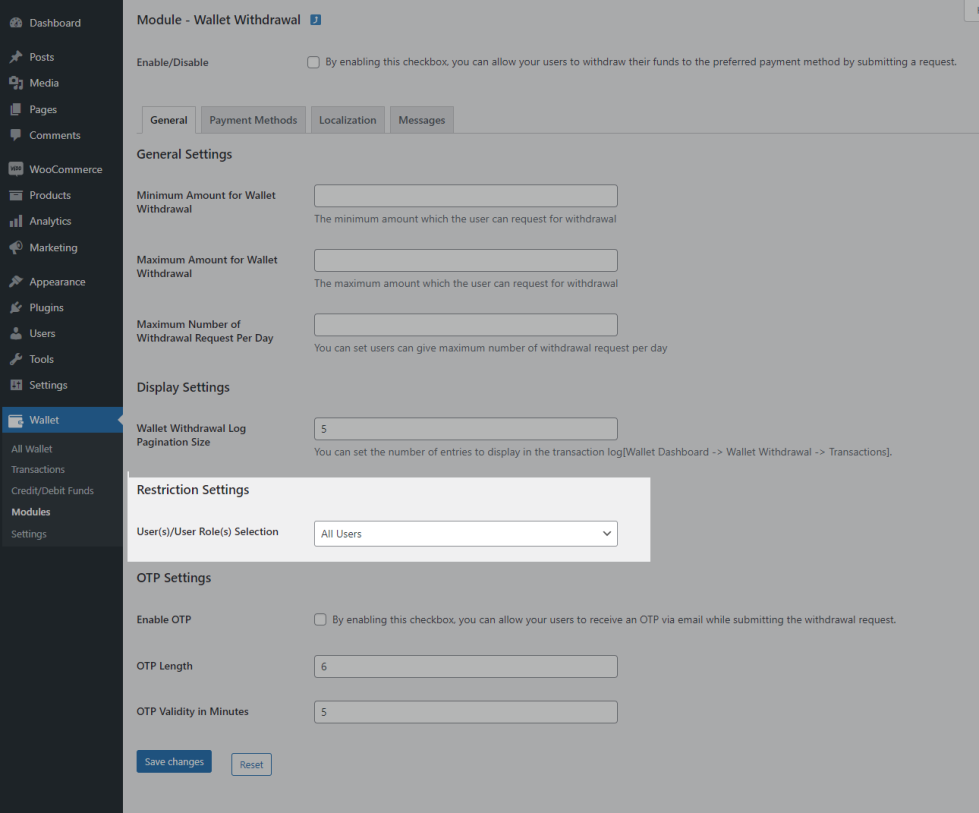
If you wish to restrict some of your users from submitting the withdrawal request, you can make use of the filters available in User(s)/User Role(s) Selection option.
OTP Settings
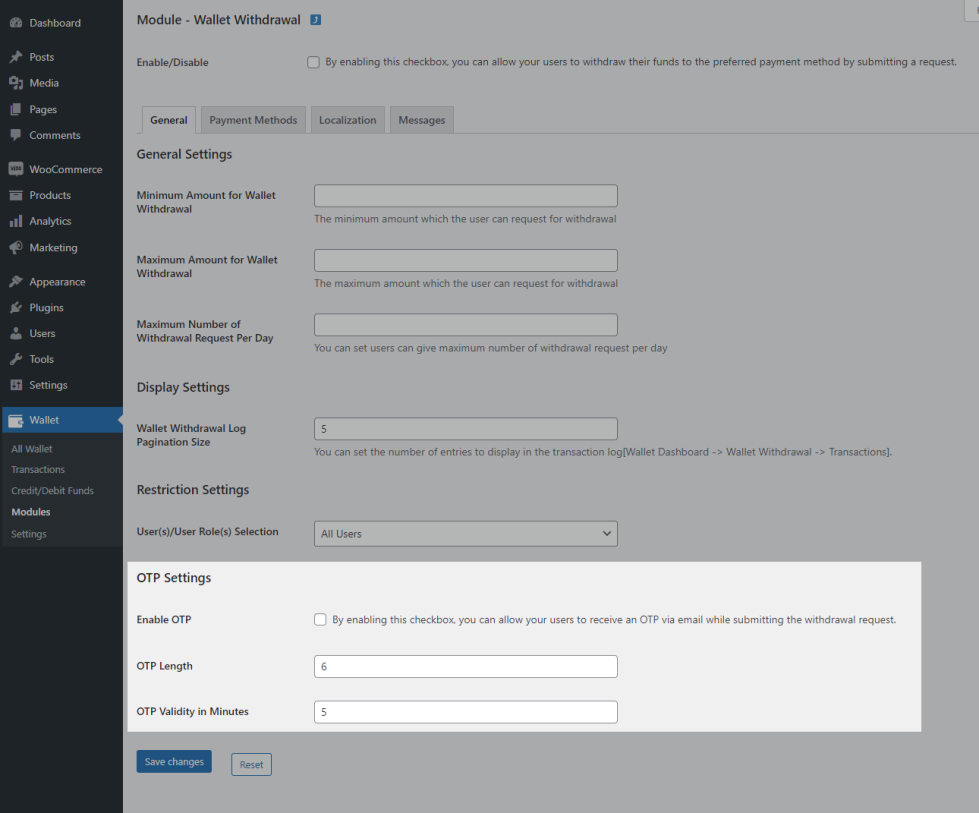
- If you wish to enable OTP based authentication, enable the “Enable OTP” option.
- You can customize the length of the OTP in the “OTP Length” option.
- You can also customize the OTP validity in the “OTP Validity in Minutes” option.
Payment Methods
Payment methods supported in the Wallet Withdrawal module are,
i) Bank Transfer
General Settings
- If you wish to allow your users to withdraw the amount to their bank account, then enable Bank Transfer checkbox.
- You can customize the name of this payment method in Title field.
Withdrawal Fee Settings
- You can also optionally charge a Withdrawal Fee from your users. To enable the withdrawal fee enable the “Charge Withdrawal Fee” option.
- In the Fee Type option, you can set up, you can choose between fixed fee and percentage fee.
- Enter the value in Set the Fee Value field.
Localization
You can customize the required payment field labels displaying in the Payment Form at frontend using Localization section.
Messages
You can customize the message displayed in Payment Form at frontend using Messages section.
ii) PayPal
General Settings
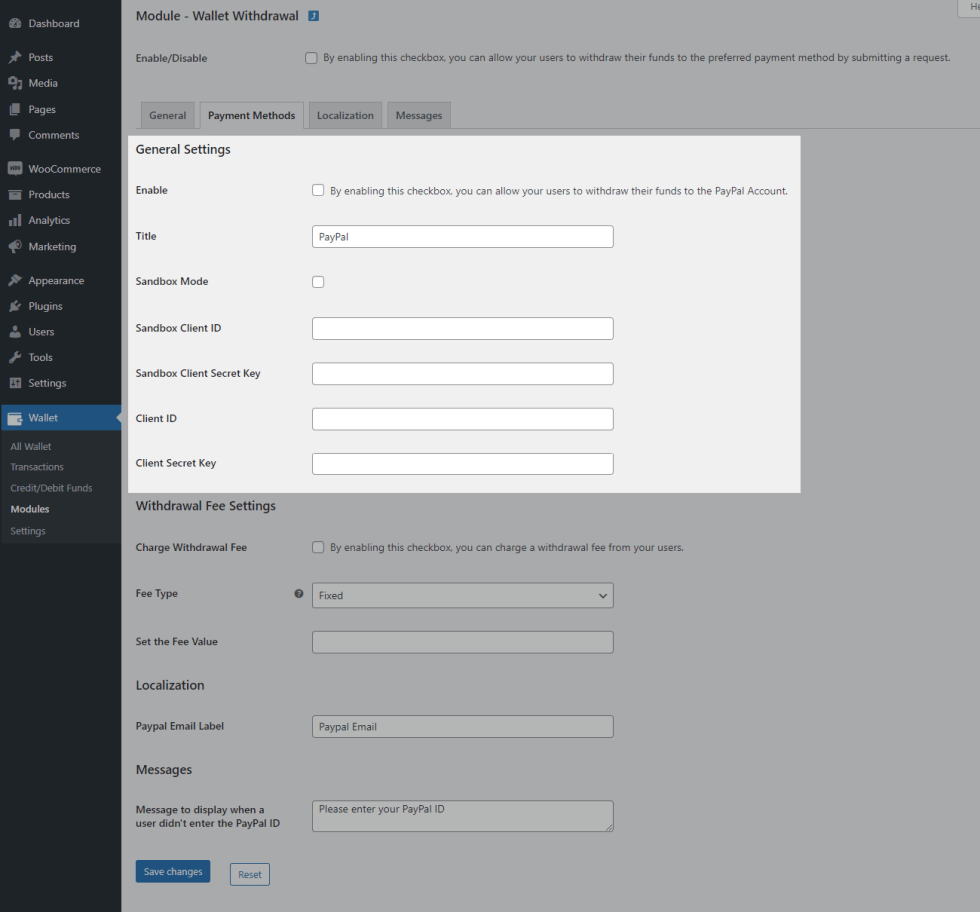
- If you wish to allow your users to withdraw their to amount to PayPal ID, then enable PayPal checkbox.
- You can customize the name of this payment method in Title field.
- Enable Sandbox Mode checkbox if you wish to check this scenario for testing purpose.
- If you enabled Sandbox Mode, then set the Sandbox Client ID & Client Secret Key in respective fields. If not enabled, then set the Live Credentials in respective fields.
Withdrawl Fee Settings
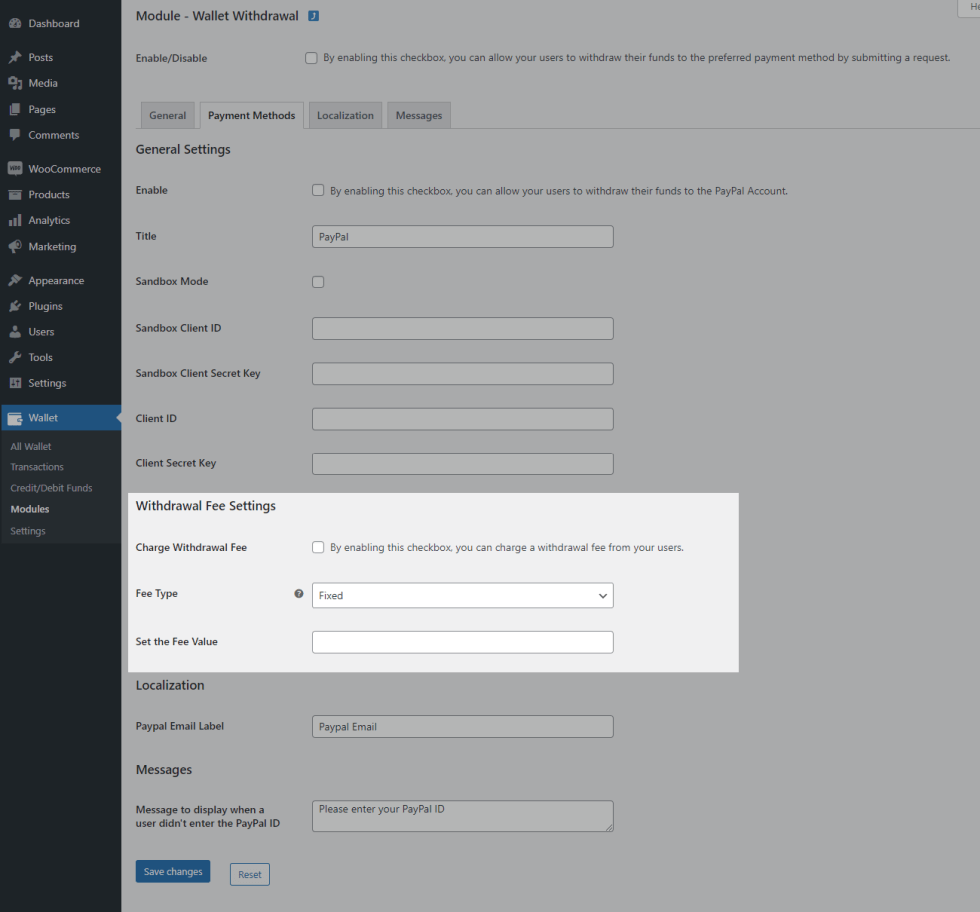
- You can also optionally charge a Withdrawal Fee from your users. To enable the withdrawal fee enable the “Charge Withdrawal Fee” option.
- In the Fee Type option, you can set up, you can choose between fixed fee and percentage fee.
- Enter the value in Set the Fee Value field.
Localization
You can customize the PayPal Email Label displayed in Payment Form using Localization section.
Messages
You can customize the message displayed in Payment Form at frontend using Messages section.
Localization
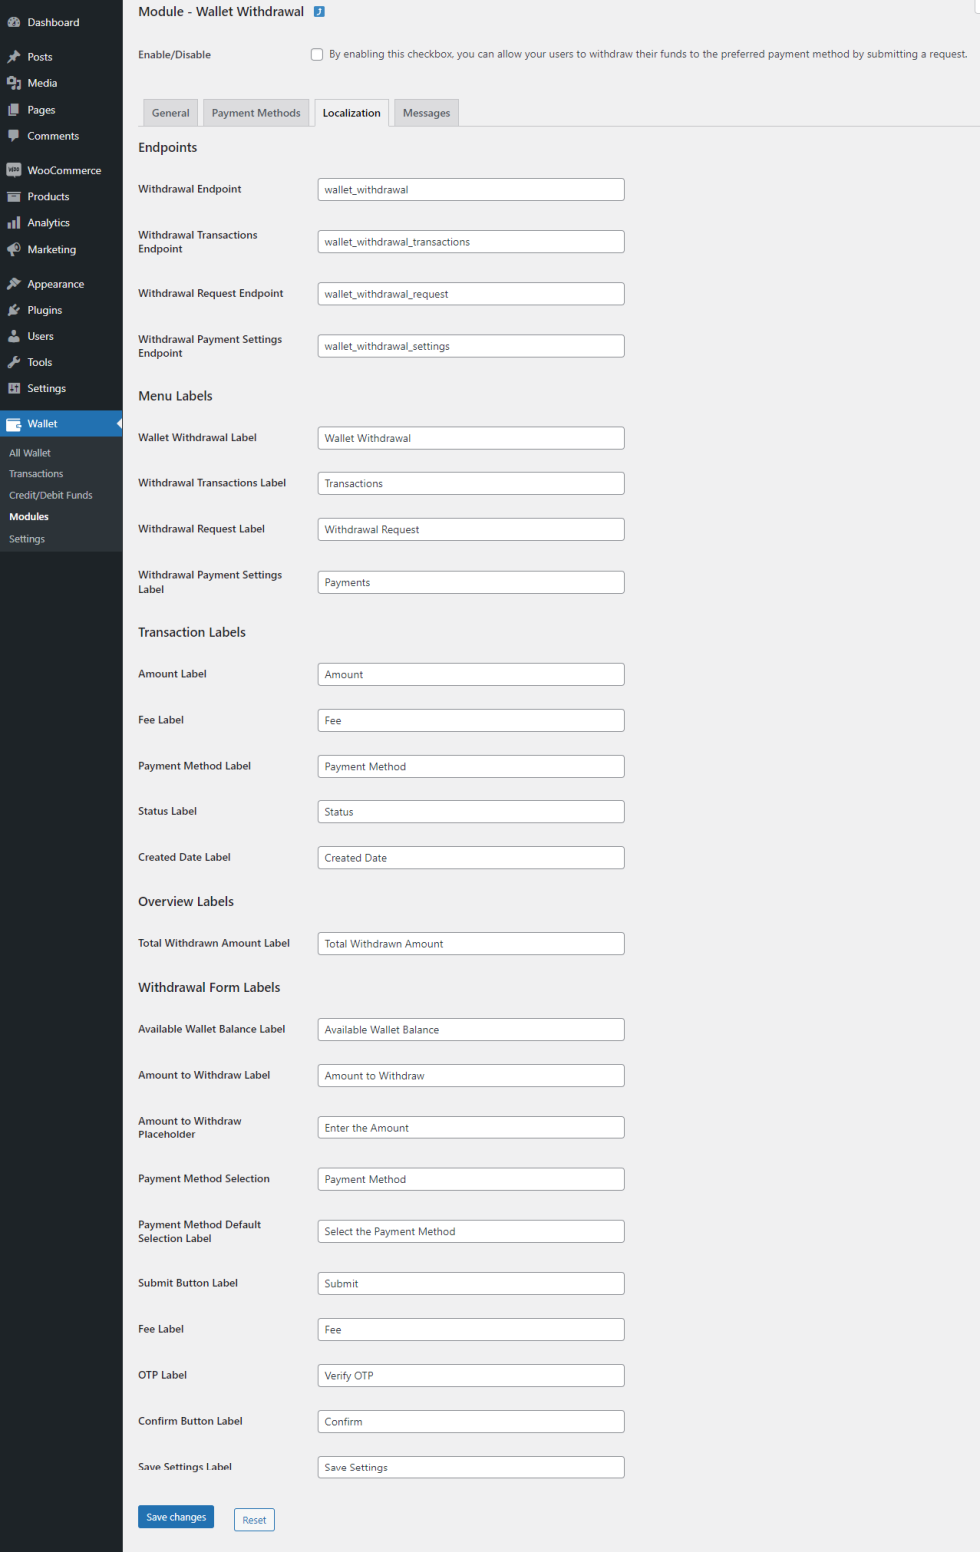
You can customize the Labels displayed to the user in Wallet Withdrawal menu at frontend using Localization” section.
Messages
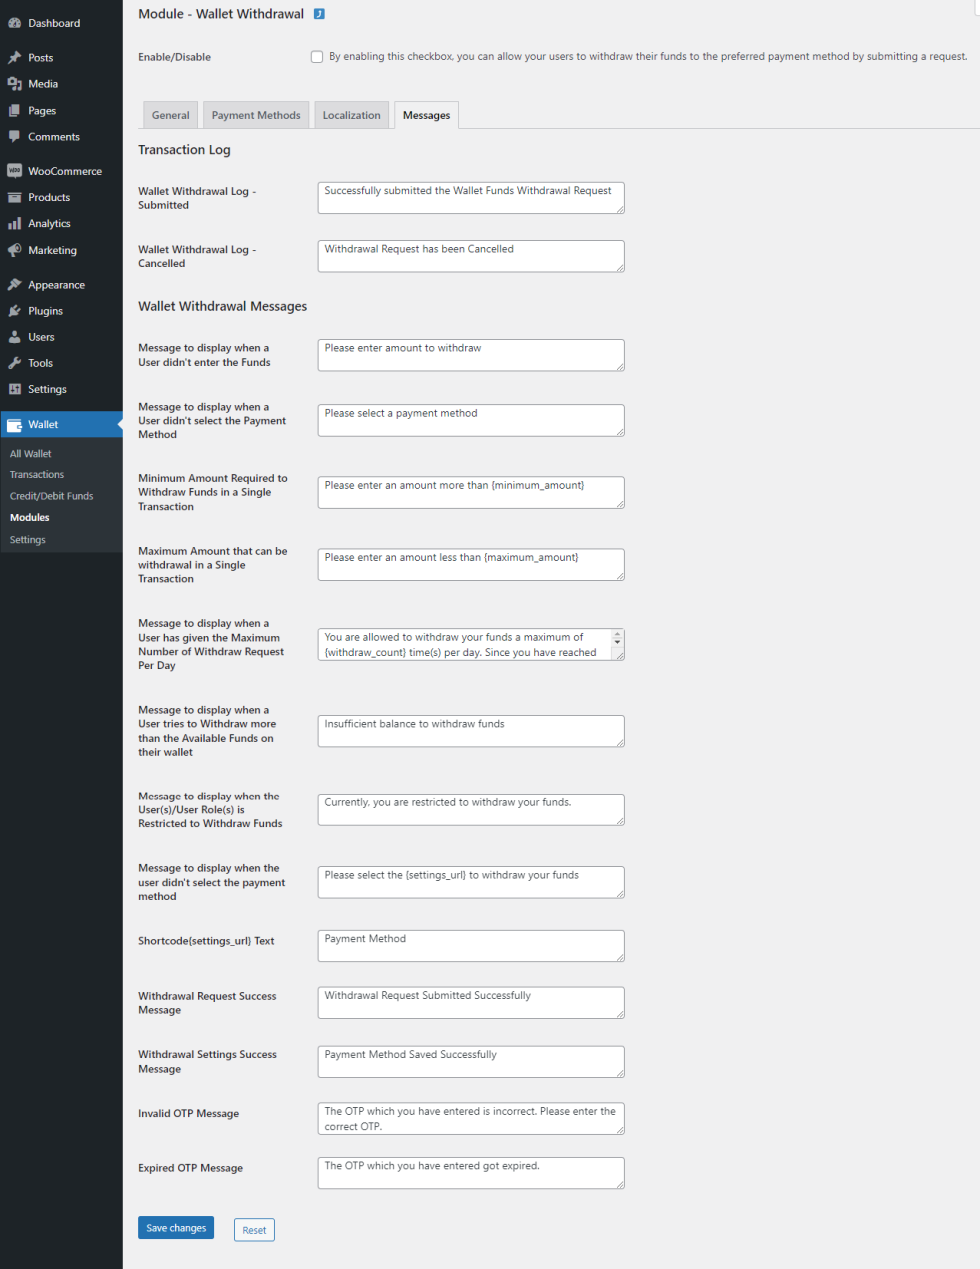
You can customize the messages displayed to the user in Wallet Withdrawal menu at frontend using “Messages” section.
Withdrawl Request
- As a admin you can see the submitted withdrawal request under Wallet -> Wallet Withdrawals.
- If a user chooses the payment method as Bank Transfer, then you have to manually pay the amount to users account by using the details given by them.
- If a user chooses the payment method as PayPal[supports Payout Integration], then the requested amount will be transferred to user’s PayPal ID immediately once you approved the request.
- In case if your rejects the submitted request, then the deducted funds will be added back to the users wallet.
Product Purchase
Product Purchase Settings

- If you wish to award the funds based on Products, then select Products/Product Category in Product Purchase Funds based on option.
- You can choose the Fund Type as Percentage for Product Price/Fixed Value & set the value in respective field.
- If you wish to award the funds based on entire order, then select Order Total in Product Purchase Funds based on option.
- You can choose the Fund Type as Percentage for Order Total/Fixed Value & set the value in respective field.
- You can allow product purchase funds to award only when the order total should reach some minimum amount, then set the value in Minimum Order Total field.
- You can allow product purchase funds to award only when the order total should not exceed certain amount, then set the value in Maximum Order Total field.
- If you wish to award the funds based on specific order range, then select Order Total Range in Product Purchase Funds based on option.
- You can create N number of rules by configuring the below details,
- Minimum Order Total
- Maximum Order Total
- Fund Type[Percentage of Order Total/Fixed Amount]
- Fund Value
- In case, if the order total matched with multiple rules, then option configured in Rule Priority will decide to award the funds.
Order Status Settings

Product Purchase Funds will be awarded to users once the order status reached to the status selected in Funds will be added to wallet when the order status reaches multi select field.
Localization

You can customize the event recorded in transaction log using this section.
Messages
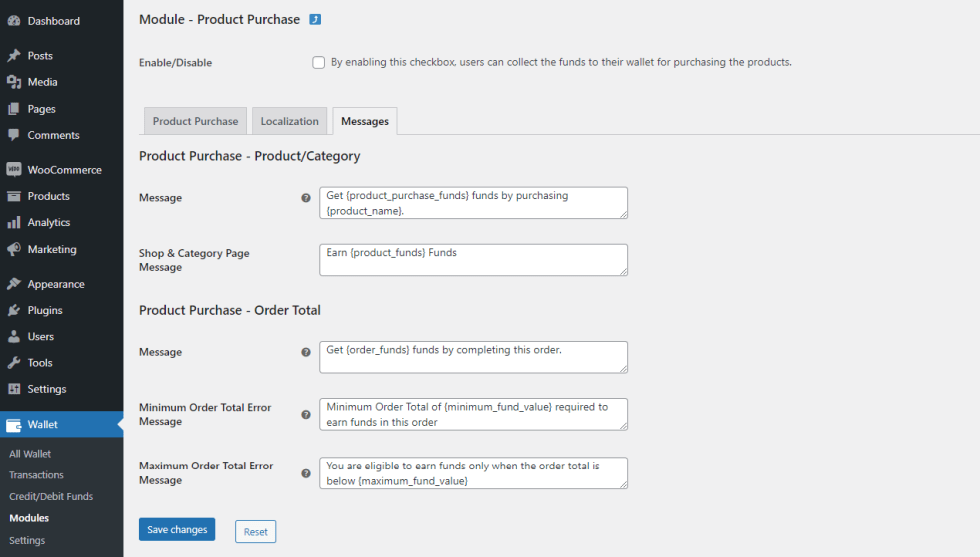
You can customize the messages displayed in shop page, product page, cart page & checkout page using this section.
Credit/Debit Funds
If you wish to manually update[Credit/Debit] the funds to your users, then make use of the options available in this menu[Wallet -> Credit/Debit Funds].
Usage
↑ Back to topWallet Funds Top-up
↑ Back to top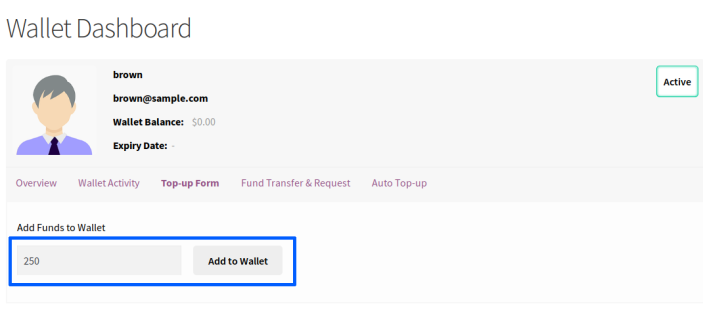
- To add funds to the user’s account, the user will have to access the Top-up form from the Wallet Dashboard.
- Within the section, your users can enter the amount they wish to add to their account and proceed to Top-up.
- Once the top-up button is clicked, a product will be added to the cart. Once the user completes the purchase and the payment is received, the funds will be added to the user’s account.
Wallet Funds – Partial Usage
↑ Back to top
- User adds few products to the cart and they wish to use some of their wallet balance in the current order.
- The option to partially redeem the wallet balance will be available on the cart and checkout page.
- The user can enter the amount they wish to redeem and redeem it. Once the wallet balance is partially redeemed, the user can use other payment methods on the site and place the order.
- Once the order is placed, the used Wallet balance will be debited from the user’s account.
Wallet Funds – Usage via Payment Gateway
↑ Back to top
- User adds few products to the cart and proceed to the checkout page to make the payment.
- On the checkout page, if the user has sufficient wallet balance, to place the order, the Wallet Payment Gateway will be visible to the user.
- If the user chooses to pay with Wallet balance, they will have to select the Wallet Payment Gateway and place the order.
- Once the order is placed, the used Wallet balance will be debited from the user’s account.
Wallet Fund Transfer & Request
↑ Back to topFund Transfer Module provides the following features,
- Users can transfer their wallet balance to other users on the site(Direct Fund Transfer)
- Users can request Wallet funds from other users on the site(Fund Request)
Direct Fund Transfer
- To Transfer funds to another user, the user will have to access the Fund Transfer Menu from the Wallet Dashboard. It can be found in Fund Transfer Details > Fund Transfer
- Once the request form is accessed, the user has to search and identify the user to whom the fund request has to be sent.
- The user will have to fill in the amount for transfer and submit the form.
- You can optionally enable OTP based Authentication for additional security.
- The OTP will be sent via email. When OTP Authentication is enabled, the user will have to fill in the OTP to complete the Fund Transfer.
Fund Request
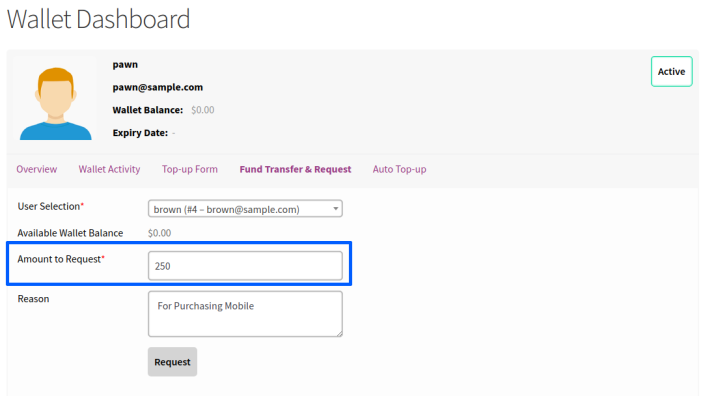
- Any user who wishes to request wallet funds should access the Fund Transfer Menu from the Wallet Dashboard. It can be found in Fund Transfer Details > Fund Transfer
- Once the request form is accessed, the user has to search and identify the user to whom the fund will have to be requested.
- The user will have to fill in the amount needed and submit the form.
- Once the request is submitted, the other user will be notified about a new request.
- The user can respond to the request directly from their dashboard.
- If the request is approved, the requested amount will be credited to the user’s wallet.
Wallet Auto Top-up
↑ Back to top- Wallet Auto Top-up Module allows your users to automatically top-up their wallet when their wallet balance falls below a specified threshold value.
- To set up Auto Top-up, the user will have to access the Auto Top-up menu from the Wallet Dashboard.
- Within the section, based on the configuration, the user will have to select the Amount for Auto Top-up and the Threshold Amount.
- After entering the amount, the user will have two options,
1. They can pay the Top-up amount and authorize future Auto Top-up
2. Authorize future Auto Top-up without making any payment - Once the Authorization is completed, funds will be added to the user’s account whenever the wallet balance falls below a specified threshold.
Gift Vouchers
↑ Back to top- Site admin will have to generate gift vouchers and share them with your users.
- Your users can redeem their gift vouchers by accessing the Gift Vouchers section in the Wallet dashboard.
- Within the Gift Voucher section, your users can redeem their gift voucher. Once the gift voucher is redeemed, the wallet balance associated with the Gift Voucher will be added to the user’s wallet balance.
Wallet Actions
↑ Back to top- Account Signup: The user will receive a funds to their wallet for creating an account on the site.
- Daily Login: The user will receive a funds to their wallet for logging into the site daily.
- Product Review: The user will receive a funds to their wallet for giving a review to the products.
Wallet Withdrawal
↑ Back to top- At first users should select the payment method to receive the withdraw funds from their Wallet Dashboard[Wallet Withdrawal -> Payments].
- After that, they can submit the withdrawal request[Wallet Withdrawal -> Withdrawal Request] which is a 2 step form. First they should enter the funds to withdraw & then need to confirm the details.
- Once the request is submitted successfully, the requested funds will be deducted from the users wallet.
- If a user chooses the payment method as Bank Transfer, then the site admin has to manually pay the amount to users account by using the details given by them.
- If a user chooses the payment method as PayPal[supports Payout Integration], then the requested amount will be transferred to user’s PayPal ID immediately after admin’s approval.
- If the admin reject the submitted request, then the deducted funds will be added back to the users wallet.
Product Purchase
↑ Back to top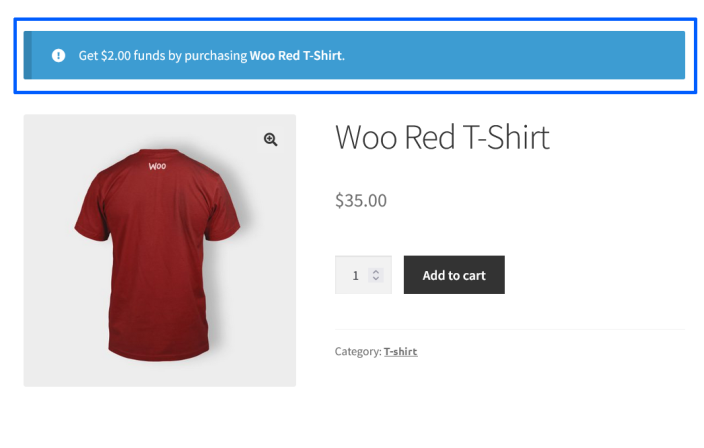
- Users can see the funds they will receive for purchasing the products in shop page, product page, cart page & checkout page.
- Once they placed the order, the funds will be added to the wallet when the order status reaches either processing/completed.
All Wallet
↑ Back to top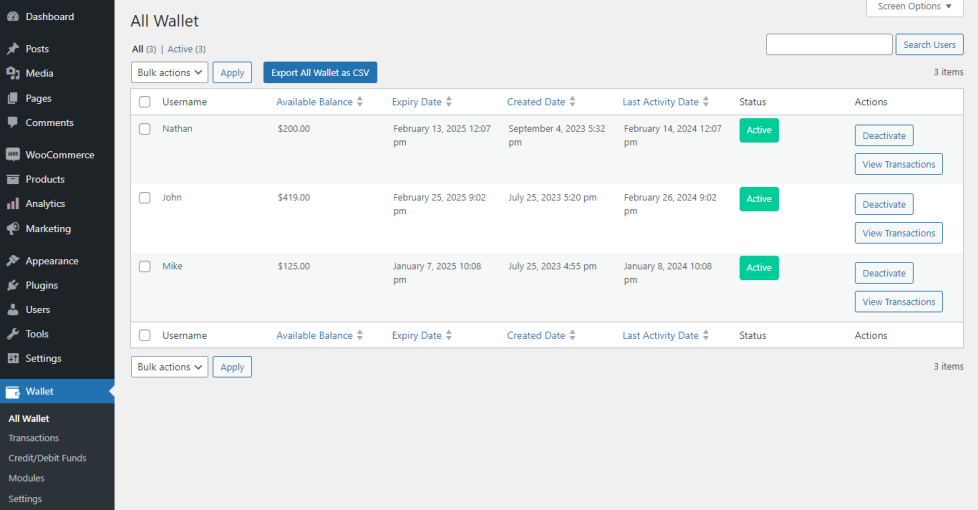
You can see the list of users maintaining their wallet in this menu[Wallet -> All Wallet].
Transactions
↑ Back to topYou can see the wallet activities of each action in this menu[Wallet -> Transaction].
Translation
↑ Back to topWallet for WooCommerce Plugin is translation ready meaning you can edit the po files by which you can translate the text to any language.
The steps to do the translation are as follows. For eg let us consider translation to French.
- Download and install Poedit
- Open the file wallet-for-woocommerce > languages > wallet-for-woocommerce.pot using Poedit.
- Create a new translation file by clicking Create new translation button.
- Choose the Source text and set its corresponding French text in Translation Text Area.
- Save the changes.
- Save the file name as wallet-for-woocommerce-fr_FR.po.
- If you are using WordPress Version 3.9.13 or below, then in wp-config.php define the WPLANG as French. Syntax is define(‘WPLANG’, ‘fr_FR’);
- If you are using WordPress Version 4.0 or above, then go to WordPress dashboard > Settings > General and select the Site Language as French.