WooCommerce Anti-Fraud automatically detects potential fraud every time an order is placed on your store. Each order is assigned an Order Risk Score along with tailored risk assessment advice. Additionally, the plugin integrates seamlessly with MaxMind’s AI-powered MinFraud services, providing an extra layer of robust security for your store.
Experiencing a Card Attack or Fake Orders (Including PayPal)? – September 2025 Update
↑ Back to topThe OPMC Anti-Fraud plugin has advanced technology to prevent card attacks at the checkout. Including prevalent issues relating to the Paypal payment gateway.
It takes just 10 minutes to set up. However, without the initial setup it will not be effective against card attacks.
We’ve made it as easy as possible to get quick protection for card attacks.
Short video explainers
↑ Back to topThere are two videos which outline the settings that need to be applied. These both cover the same material, but the first one is just a summary designed for experienced users, web developers, designers & IT professionals.
The first is a sub 1 minute video here:
You can get a more detailed run through here which is about 11 minutes. This is more useful if you are a store owner and explains the settings in more detail:
Card Attack Protection – Quick Setup Guide
↑ Back to topFollow these steps to protect your WooCommerce store from carding (card attack) attempts using the OPMC Anti-Fraud plugin.
Key things you need to know:
1. Enable OPMC reCaptcha
- Follow these steps to enable ReCaptcha in the Antifraud Plugin:
- Go to WP Admin → OPMC Anti-Fraud → reCaptcha tab.
- Tick Enable reCaptcha.
- Get your site key and secret key (like a username & password).
- Watch this 3-minute video for instructions: How to get keys.
- Enter your keys into the fields.
- Press Save at the bottom of the page.
- A checkbox will appear to verify the settings. Tick it.
⚠️ Important: Only use Google reCaptcha v2. v3 is not effective for blocking card attacks.

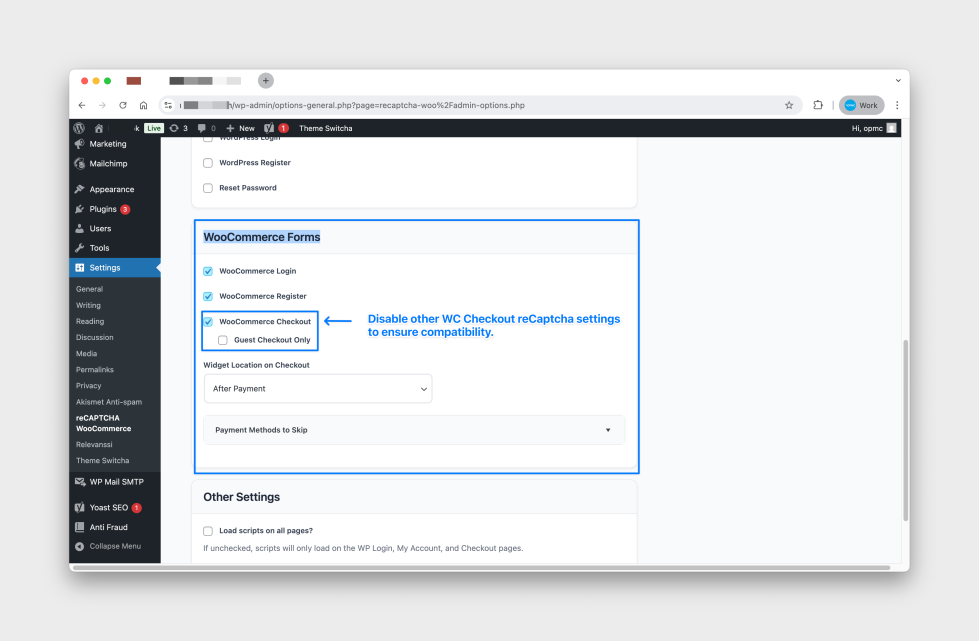
2. Remove Conflicts with Other reCaptcha Plugins
- Follow these steps to avoid reCaptcha plugin conflicts:
- Deactivate any other reCaptcha plugins.
- If you must keep them, configure them so they do not run on the cart or checkout pages.
✅ Only one reCaptcha should be active on checkout. Multiple reCaptchas = conflicts.
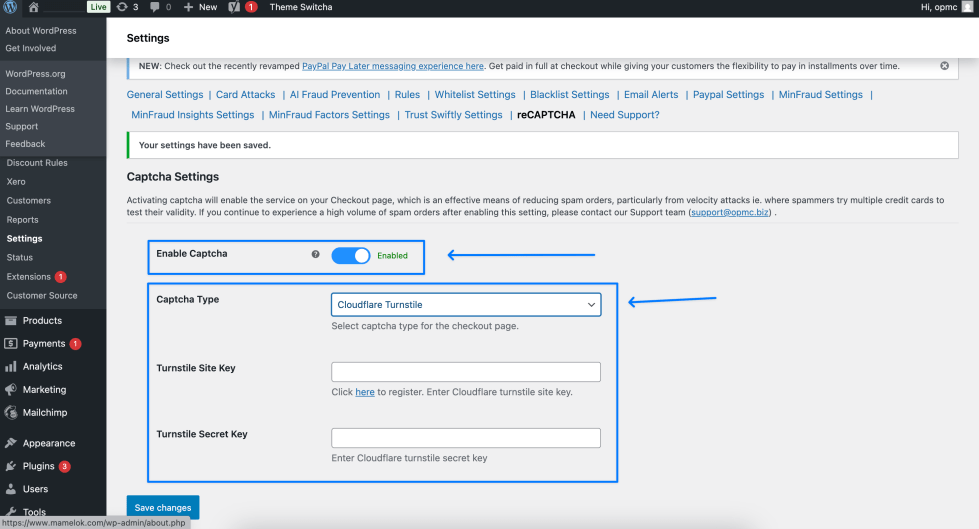
3. If Problems Continue → Use Cloudflare Turnstile
- Enabling Cloudflare Turnstile can be done from the Antifraud Settings Page:
- Go to the reCaptcha tab in OPMC Anti-Fraud.
- Select Cloudflare Turnstile instead.
- Follow Cloudflare’s setup guide on their website.
This avoids issues if other software on your site is already using Google reCaptcha.
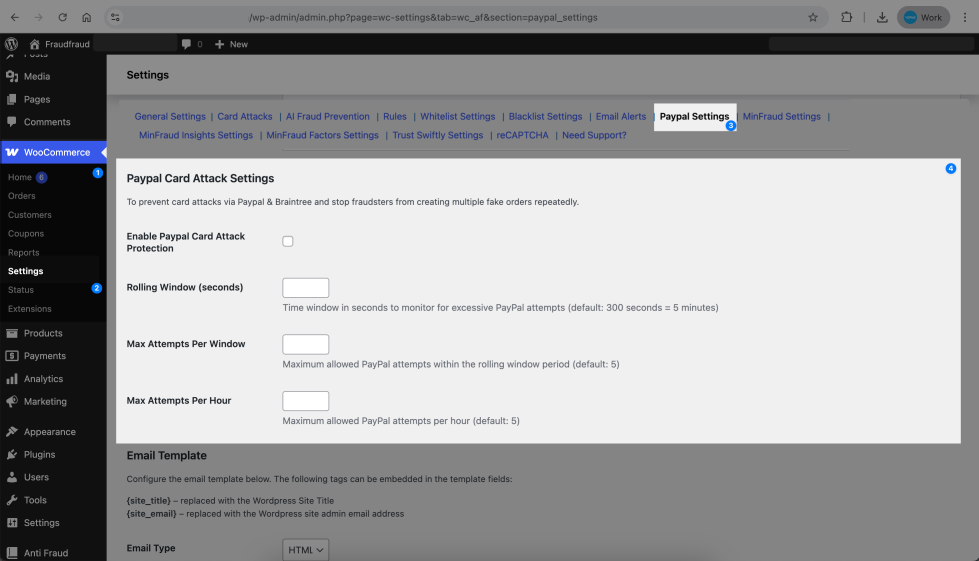
4. Enable PayPal Card Attack Protection
- If you use PayPal, you must do this:
- Go to WP Admin → OPMC Anti-Fraud → PayPal settings tab.
- Scroll to PayPal Card Attack Settings.
- Tick Enable PayPal Card Attack Protection.
- Press Save changes at the bottom.
⚠️ Important: If you skip this step, PayPal transactions will not be protected.Optional – Advanced Blocking (Use with Caution)
5. Optional – Advanced Blocking (Use with Caution)
- Only try these after enabling the settings above. Misuse can block real customers.
- Unknown origin orders – enable only if basic card attack settings don’t stop attacks.
- Scoring/weighting system – use carefully. Blocking at “50/100” may block many real orders.
- Location-based blocking – works best with a paid Bigdatacloud.com integration. Free version is much less accurate.
More Detail – How It Works & Key Considerations
Why OPMC reCaptcha?
- Our reCaptcha includes behind-the-scenes technology to block card attacks more effectively than standard reCaptcha plugins.
- It works even when PayPal is used.
Conflicts with Other reCaptchas
- Most failures happen when multiple reCaptcha plugins are active on checkout.
- Only one reCaptcha can load at checkout, so disable others or prevent them from running on cart/checkout pages.
Cloudflare Turnstile as a Backup
- If you cannot fully disable other reCaptcha plugins, switch to Cloudflare Turnstile.
- This avoids conflicts but still protects against card attacks.
PayPal Protection
- Separate setup is required for PayPal transactions.
- Without enabling the PayPal option, PayPal checkouts remain unprotected.
Advanced Settings – Use Carefully
- Blocking unknown origin orders can stop spam but may block legitimate orders if the plugin is already protecting against attacks.
- Weighting and scoring systems (e.g. blocking at 50/100) can block many real orders if misused.
Latest Anti-Fraud for WooCommerce Updates
-
v7.1 – Faster Checks, Smarter AI
Enhanced rule evaluation for faster fraud screening.
New customizable rules (e.g., country blocking, risky emails).
Improved logging for clearer fraud scoring.
ChatGPT integration for advanced AI-powered fraud analysis. -
v7.0 – Major Security Boost
Added SMS verification for suspicious orders.
Advanced IP whitelisting for trusted customers.
Refined scoring to reduce false positives.
Full WooCommerce 8.x compatibility.
Installation
↑ Back to topTo start using a product from WooCommerce.com, you can use the “Add to store” functionality on the order confirmation page or the My subscriptions section in your account.
- Navigate to My subscriptions.
- Find the Add to store button next to the product you’re planning to install.
- Follow the instructions on the screen, and the product will be automatically added to your store.
Alternative options and more information at:
Managing WooCommerce.com subscriptions.

Quickstart with the Plugin
↑ Back to top- The Antifraud settings page is under WooCommerce > Settings > Antifraud. In Antifraud settings, you can adjust rule weights and define actions based on various Risk Scores.
- By default, the plugin will automatically protect your store using the baseline options. Some of these preset options include canceling fraud orders, holding suspected orders, and email notifications for flagged orders.
Advanced Features
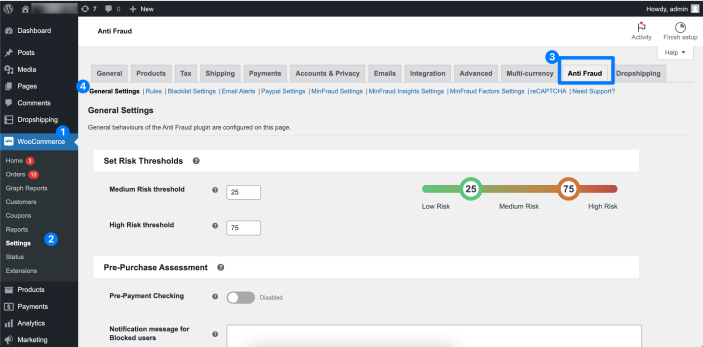
↑ Back to topIn Anti-Fraud Settings, you can enable rules, update rule weights, and set automated actions based on the Order Risk Scores including:
- Automation Actions: Trigger actions based on score including Cancelling Fraud, Placing Suspected Orders on hold, or notifying the administrator with an email notification.
- Velocity Attack Prevention: Tools to protect against rapid, fake orders, including reCAPTCHA, card testing protection, and order delay settings. Unlike other plugins, OPMC’s reCaptcha integration automatically revalidates each time the ‘Place Order‘ button is clicked.
- Advanced Blacklisting: Filtering based on Geolocation, IP, Email address, and Order Attempts.
- Advanced Whitelisting: By Payment Methods, User Roles, Email and IP Address.
- Address-based Rules: Based on Billing and Shipping, Phone Number, IP and VPN Check.
- Integration with Paypal: Verify PayPal before sending the order for fraud prevention.
- MaxMind Integration: Utilize MaxMind’s AI-powered fraud detection, with automatic recording of key MaxMind data points for comprehensive analysis.
- MinFraud Integration: Assess fraudulent activity by integrating minFraud® AI-based service by MaxMind.
- Trust Swiftly Integration: Enhanced identity verification.
- Customer Pre-Purchase Assessment: Score potential orders before payment is accepted.
- ReCaptcha V2 Compatibility: Works with Woo Checkout Blocks and Classic Woo Checkout.
- Multilingual Support: Support for over 32 Languages, including English, Mandarin, Spanish, and Arabic.
- Manual Order Check Button – Allows individual orders to be manually checked for fraud.
- Anti-Fraud Dashboard: High-Level overview of fraud-related information and order information.
Learn more about the Setup and Configuration in the Antifraud Plugin.
Automating Actions
↑ Back to top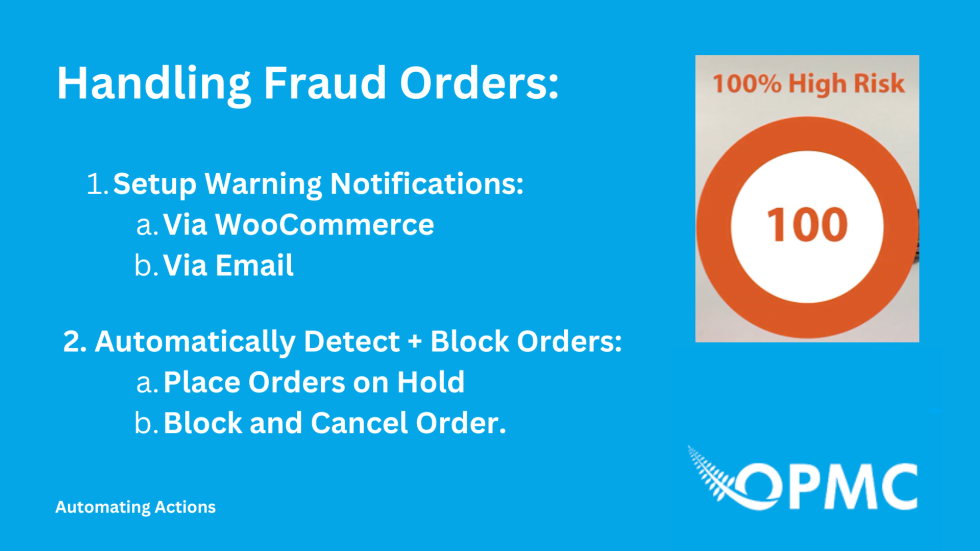
Trigger actions based on score including Cancelling Fraud, Placing Suspected Orders on hold, or notifying the administrator with an email notification.
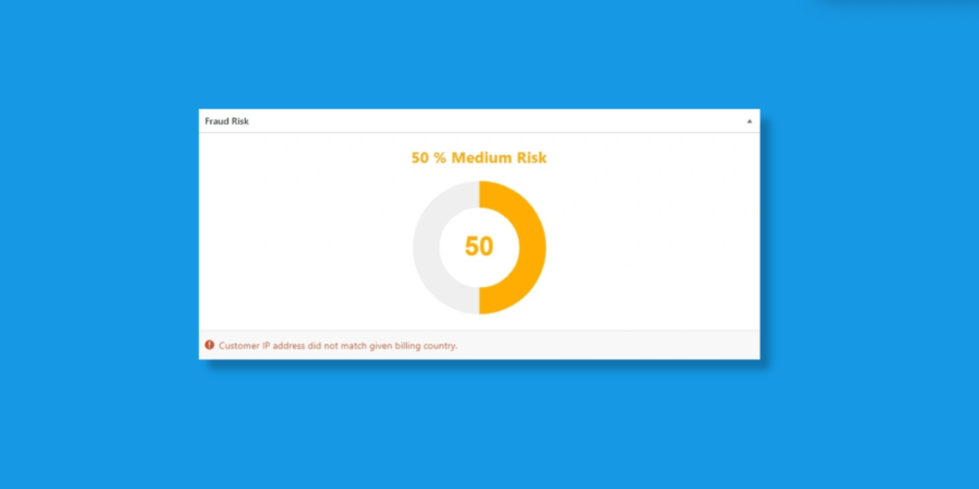
Configure and work with the Order Risk Score.
Getting started using the Antifraud plugin: Using Antifraud Order Risk Score
Set up actions based on the Order Risk Score.
Setting thresholds: Antifraud Threshold and Notification Settings Page
Velocity Attacks and Credit Card Testing
↑ Back to top
Velocity Attacks and other types of Credit Card fraud is on the rise. The Anti-Fraud plugin has features specifically designed to address the challenges of hundreds or thousands of false orders being put through your store.
Please see the section at the very top of this page which provides detailed instructions on how to handle fraudulent transactions.
Some of the Anti-Fraud Velocity Attacks and Credit Card Testing Features include:
- Dedicated Settings Tab for Velocity Attack Management / Credit Card Testing.
- Integration with Google ReCaptcha.
- Card Testing Protection via API.
- Compatibility with WooCommerce Classic Checkout / WooCommerce Checkout Blocks.
- Order Processing Delay Setting.
- Detection Across Orders and between Payment Attempts.
Find out more about preventing Velocity Attacks and other types of credit card fraud prevention and the features of the Antifraud Plugin: Velocity Attacks
Advanced Blacklisting
↑ Back to top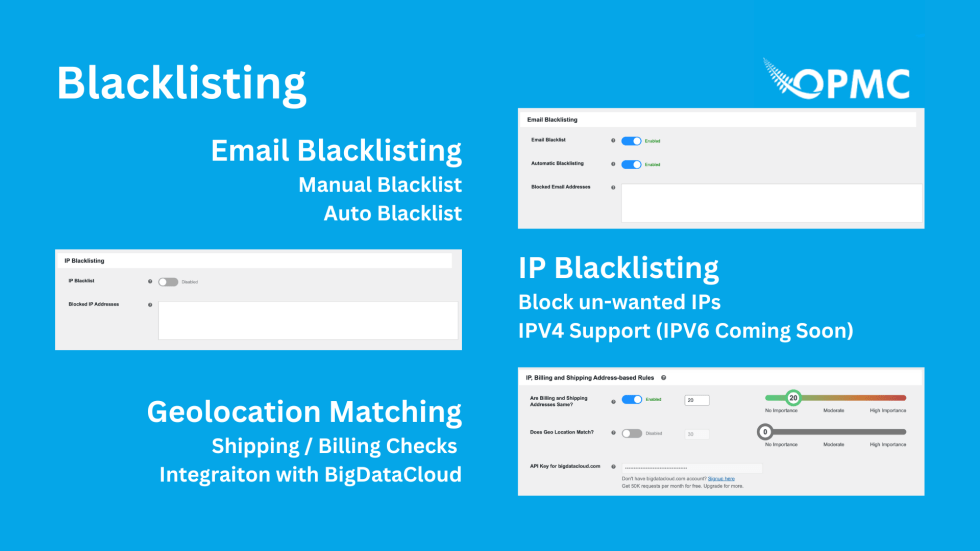
With the Antifraud Plugin you can filter and prevent fraudulent users based on Geolocation, IP, Email address, and Order Attempts.
Learn more about how the Antifraud Plugin uses advanced Blacklisting Features to prevent fraud orders before they are placed including:
- How does the Blacklisting Feature work?
- Can you Blacklist orders based on Email / IP?
- How to Automatically Blacklist fraudulent user details?
For more details and configuration instructions read: Blacklisting Settings.
Address Based Rules
↑ Back to topIdentify threats based on IP, Geolocation, Phone number, VPN/Proxy, Billing and Shipping addresses, and more.
The Antifraud Plugin adds additional layers of fraud detection to your WooCommerce Checkout process. Filter and prevent fraudulent orders based on a variety of order information, including:
- Physical and IP Address Comparison Rules
- Billing and Shipping Address Mismatch Rules
- Geolocation and Billing / Shipping Address Comparison Rules
- VPN / Proxy Detection
Expand fraud prevention with Advanced Integrations
↑ Back to top
The Anti-Fraud for WooCommerce Plugin allows you to integrate with advanced Third Party fraud detection and prevention services. Learn how to strengthen your store’s security posture by integrating with the leading service providers including:
- AI / ML Fraud Detection:
- MaxMind – Powerful machine learning technology developed to better identify fraudulent orders. Learn more about Integrating with MaxMind
- ChatGPT API Integration – AI based in house security expert who can review every single order for fraud factors.
- Advanced Order Detail Verification:
- Bigdatacloud.com – Validate customer addresses based on precise location intelligence
- Quickemailverification.com – Advanced email verification service
- Advanced Identity Verification:
- TrustSwiftly – Flexible & accurate identify verification using 15+ methods
- Leading Automated and Security Service Providers
- Google reCAPTCHA – Require additional verification to deter velocity attacks
- Paypal – Additional tools for merchants accepting Paypal payments
Integrate with ChatGPT
↑ Back to topOur powerful ChatGPT integration is designed to provide you with an internal fraud security expert who can provide detailed feedback about each transaction and the likelihood of fraud.
While an experienced store owner can be more wary of fraud red flags, ChatGPT can automate this process for you and give each order a risk score out of 100.
All orders are automatically rated, and details provided for the risk score given.
You need to enter your ChatGPT API credentials, which is a separate service from the standard ChatGPT. The links to set this up are provided within the plugin itself.
Using the ChatGPT API to check orders is additional cost that you are directly responsible for.
Integrate with MaxMind
↑ Back to topIntegrating with MaxMind and MinFraud: Integrating Antifraud with Maxmind
Integrate with Big Data Cloud
↑ Back to topHow to integrate the BigDataCloud with Anti-Fraud: Anti-Fraud BigDataCloud Integration
Integrate with Trust Swiftly
↑ Back to topHow to integrate the Trust Swiftly with Antifraud: Antifraud TrustSwiftly Integration
Integrate with Google reCAPTCHA
↑ Back to topHow to integrate the Google reCAPTCHA with Antifraud: Antifraud Google reCAPTCHA Integration
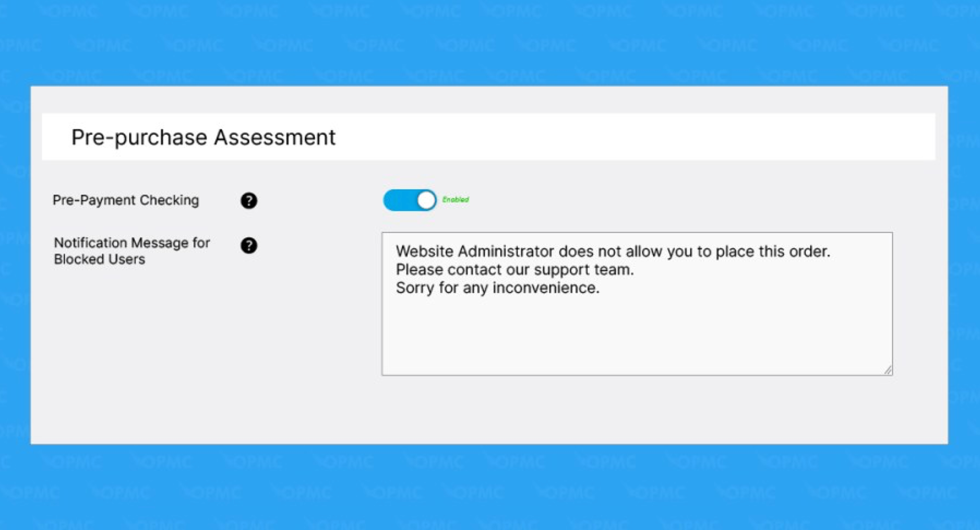
Configuring Your Store Order Status Process
↑ Back to topAssess customers for potential fraud before payment is processed. If the fraud score falls within a high-risk range, the order will be declined, and a customized message will be displayed on the checkout page, informing the buyer of the reason for the denial.
Learn how to configure the Anti-Fraud Plugin to effectively stop fraudsters at the right moment, minimizing their impact on your store, suppliers, and payment gateways.
Plugin scans and blocks fraudulent activities in real-time.
- Order information is checked by an automated Risk Scoring system and can be configured to run pre or post-payment.
- Risk Scoring assigns a risk to each order, the order can be assigned a new status based on the level of risk.
- Notification options alert the store owner when pre-configured thresholds are exceeded for specific orders.
Analytics Dashboard
↑ Back to topThe Antifraud Dashboard can be accessed from the following: WP Admin > Anti Fraud
The Antifraud Analytics Dashboard provides a clear high-level overview of orders and order risk scoring details based on the fraud rules within the Antifraud Plugin. These include but are not limited to:
- Discover recent fraudulent activities
- View Trends over a week
- What’s going on with the latest orders
- Emails blocked in 24 hours
- PayPal accounts under verification
- Complete, unified information on fraudulent activities in one place.