Optimise your inventory, predict customer demand, automate stock replenishment, and manage purchase orders with the Inventory Management for WooCommerce extension.
Shelf Planner’s Inventory Management for WooCommerce solves a merchant’s costliest problem: accurately predicting customer demand for hundreds of products every day.
This extension offers a plug-and-play forecasting engine that helps you optimise your inventory and improve your margins and sell-through, all while reducing waste. Beautiful.
Installation
↑ Back to topRequirements
↑ Back to top- WordPress 6.0 or later
- WooCommerce 7.0 or later
- PHP version: 7.4 or higher
To start using a product from WooCommerce.com, you can use the “Add to store” functionality on the order confirmation page or the My subscriptions section in your account.
Alternative opion:
- Upload the plugin ZIP via Plugins → Add New → Upload Plugin
- Activate the plugin

Getting Started
↑ Back to top1. Plugin Activation & License Creation
↑ Back to topAfter installation and activation of the extension on your store, you will have to create an account and connect Shelf Planner to your store. On the plugin pages in your store, you can either use the ‘Complete setup’ notification on top of the page, or the ‘Get Started’ link in the plugin description:
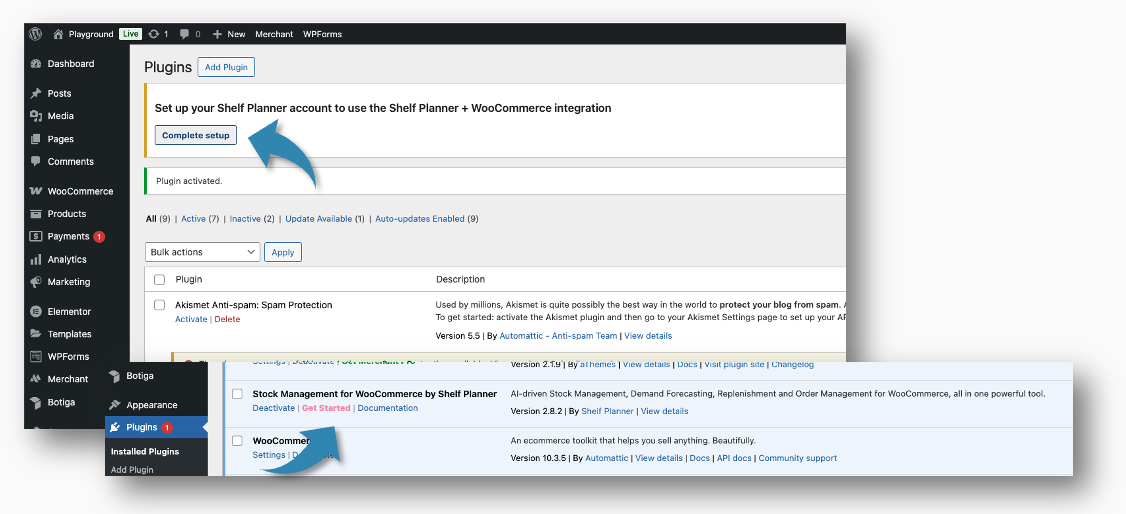
Both of these link will initiate the store setup guide, where you create your account and enter the basic parameters for your site.
2. Create Your Account
↑ Back to topAfter installation of the extension (plugin) to the customer’s site, a link to my.shelfplanner opens to the ‘Create Account’ page:
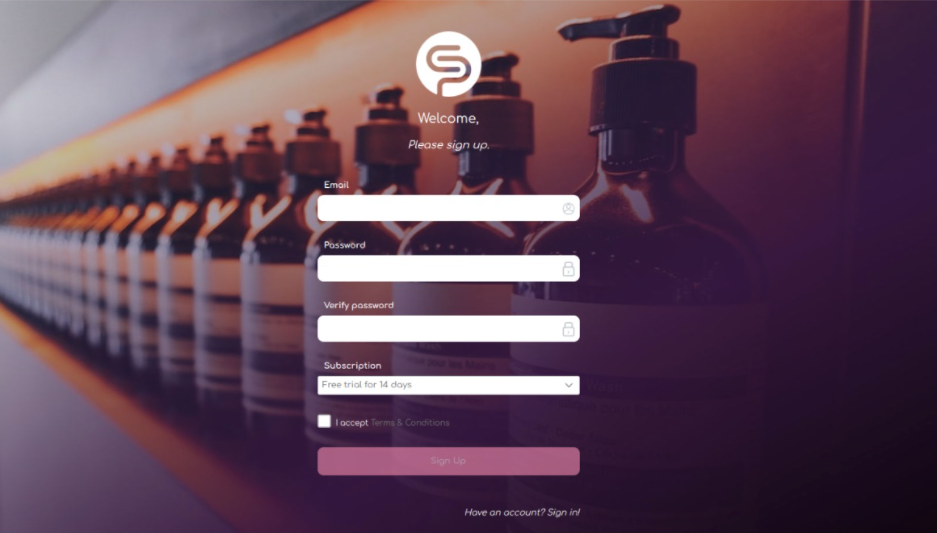
Enter your email, password and create your account.
You can choose between a two week free trial, or the annual subscription. If you chose the 2 week free trial, you will automatically be notified in the app when you trial period has ended.
Terms & Conditions
A link on the Create Account page leads to a new page (opens in new tab) with Shelf Planner’s Terms & Conditions.
Customers that have already created an account can use the link for existing customers.
3. Confirm Your Account
↑ Back to topAfter creating your account on my.shelfplanner you will receive a confirmation mail:
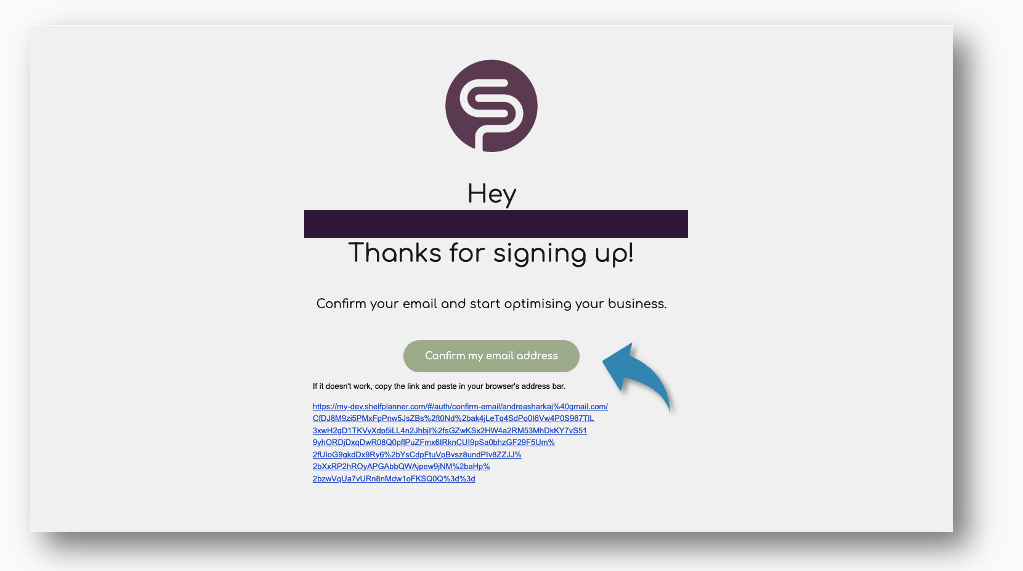
To confirm your email address, click the button in the email. If this doesn’t work, you can also copy the link at the bottom of the email to activate your account.
4. Set Up Your Store
↑ Back to topAfter confirming your email address, a start up wizard opens to set up your store. Shelf Planner is a plug and play solution and we promise there will never be any coding required.
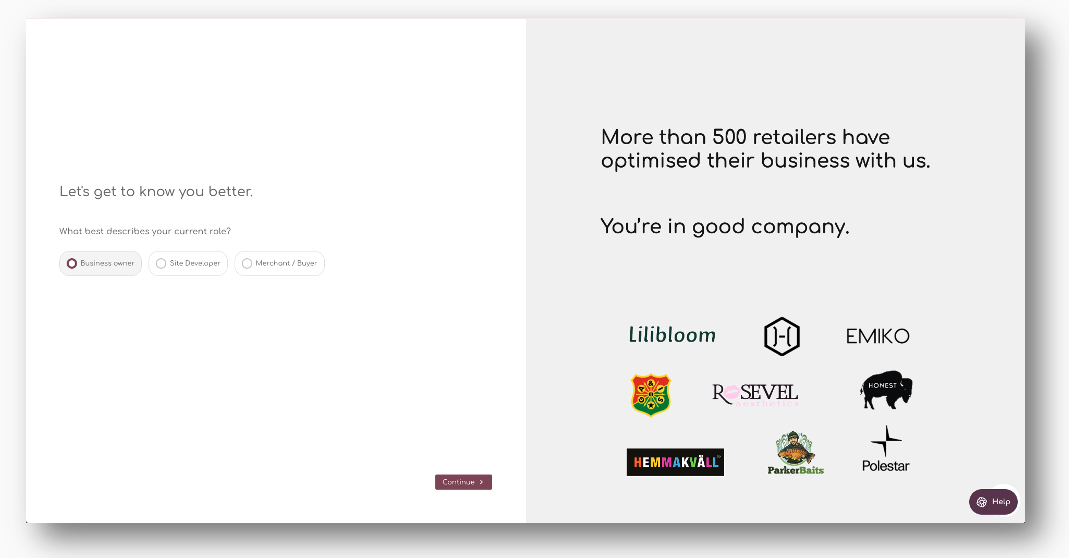
Roles & Ownership
In my.shelfplanner, users can have different roles and authorization profile – we differentiate between Business Owners, Site Developers, and Merchants or Buyers:
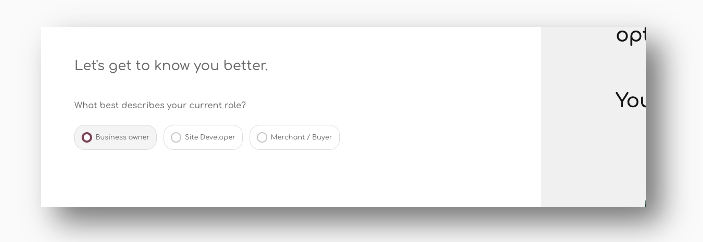
Business Owners
As a Business Owner, you have control of team members and payment details. Business Owners can invite other Team Members, can invite Site Developers and also have access to the payment sections in the app.
Site Developers
If you are a Site Developer, you can invite other team members and get the store set up, but you cannot change any of the parameters or product data in the app. You can also not create and complete any purchase orders.
Merchants / Buyers
Merchants have full access to all functionality in the tool, but do not have access to the Payment Section, nor can they add extensions or add-ons in the app.
Below, we’ve highlighted some user-specific authorisations and restrictions:
| Store Owner | Site Developer | Merchants / Buyers | |
| Invite Team Members | Yes | Yes | No |
| Payment Details | Yes | No | No |
| Install Add-Ons* | Yes | Yes | No |
| Set Up Store Parameters | Yes | No | Yes |
| Manage Products, Stock, Cost Prices, etc. | Yes | No | Yes |
| Create and Confirm PO’s, Update Stock Qty’s | Yes | No | Yes |
* Add Ons are extensions in the app, such as Bill of Materials, Multi Sites and Campaigns & Events.
Invite Team Members
The second step in the onboarding is to invite Team Members for your store. You can do this as part of the onboarding, but you can also choose to do this at a later stage. (For more information on how to do this, please have a look at the support pages Invite Your Team).
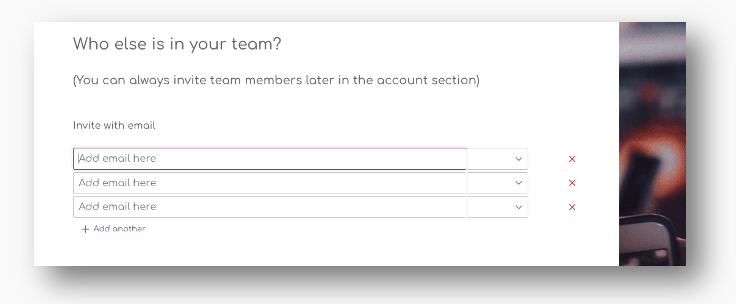
If you want to invite your team members at this stage, simply enter the mail address and select the role for the user. You can choose between Store Owner, or Team Member. Team Members have the same user rights as Merchants / Buyers.
Order Frequency
The next steps is the ‘Order Frequency’. This basically means how often you place orders for your store. The order frequency is very store and even industry specific.
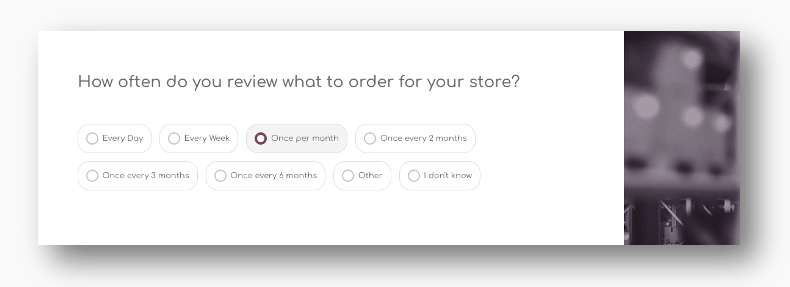
If you are just getting started and don’t know yet how often you will review your order recommendations, the system will automatically set a default based on your store’s industry and categories.
Finished Goods or Own Manufacturing
Shelf Planner allows you to create Bill of Materials (BOM). If you produce your own products, or assemble components for your products, we will activate the BOM and Material section by default.
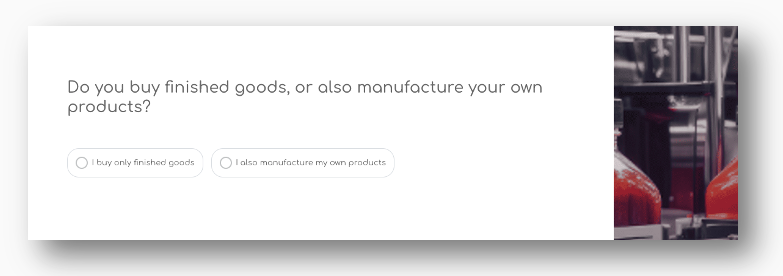
The Bill of Material section is in beta testing phase and for the time being, we will offer this feature to all users free of charge. If you don’t need it, simply choose ‘Finished Goods’ and the Bill of Material pages will be disabled.
Analysing History & Forecast Generation
The final step is to analyse your products, categories and history. This will allow us to generate the first sales forecast for your store, and also prepare the first order recommendations.
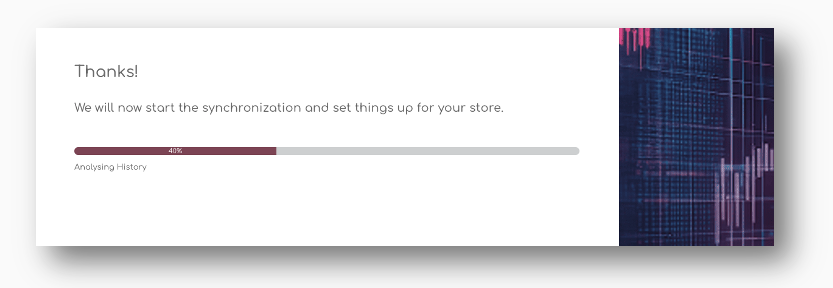
Depending on the size of your assortment and the order volume you have in the past year, this process can take anything from 2 minutes to 20 minutes.
Once the process is completed, your store is set up and you can start using the tool.
Failed Installation
It can happen the installation and set up cannot be completed. This can happen for example when product data is corrupted, or when the sync is interrupted.
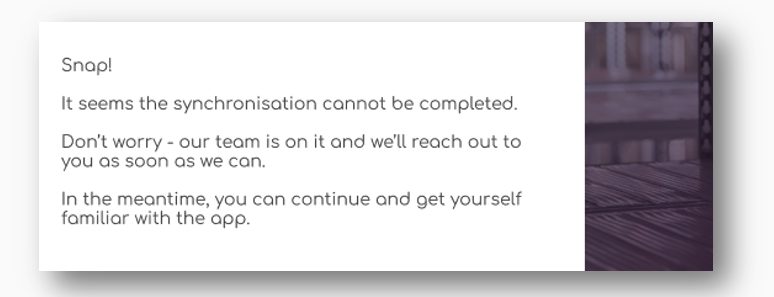
In that case, our support team will automatically receive a notification and reach out to you to support. You can still use the app to get familiar with the functionality, or for example set up suppliers.
5. Login (Existing User)
↑ Back to topExisting Users can login directly by going to my.shelfplanner.com. From there, you can enter directly into the app. Your store data is automatically synchronised with your WooCommerce store, so there is no need to connect to your store’s admin.

If you have forgotten your password, you can request a password request link by following the link ‘Forgot Password’:
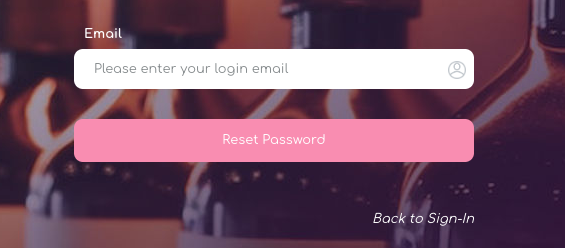
Simply enter your email and a reset link will be sent to your mail. After creating a new password, you will have access to the app again.
Getting Started Tour
↑ Back to topAfter installation and account creation, a Getting Started tour is shown in the lower left side of the page:
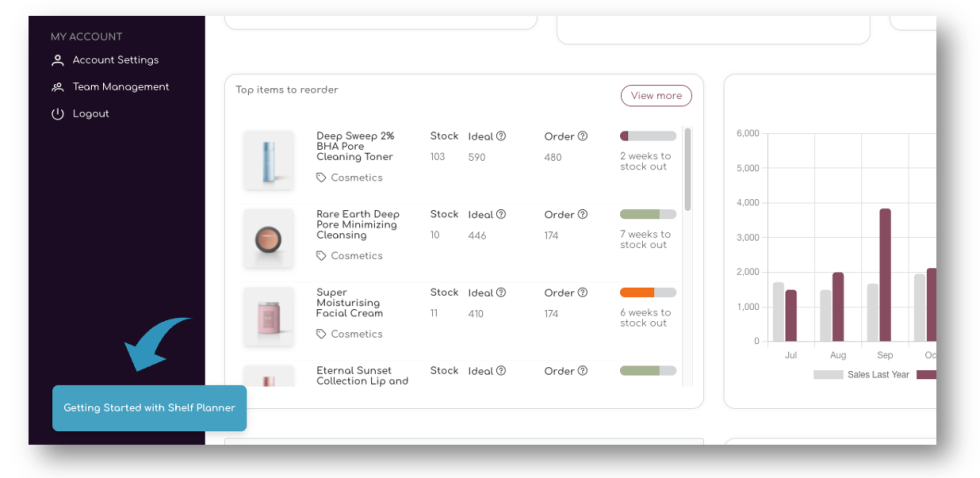
We recommend you to have a look at these steps, as they will both introduce you to some of the logic in the app, but also set your store up for initial forecasts and order proposals.
Embedded Support
↑ Back to topOn the lower right side of the screen, you will find the Support element.
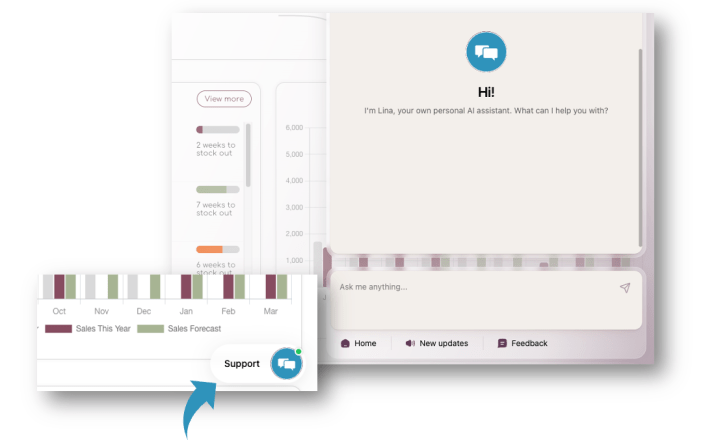
The Support element contains three pages;
Support – Home
↑ Back to topOn the home part of the support element you will find general information and links to some of the most read articles.
Support – News
↑ Back to topHere you will find news about upcoming developments and release notes. When we release a new feature, we typically will introduce these with guided tours, which can be found there.
Support – Feedback
↑ Back to topWe love feedback, positive or negative – anything that can help us to make our app better.
You can leave comments directly to the development team, using screenshots and short video clips.
1. Homepage & Reports
↑ Back to topThe main landing page in the app shows you your store’s performance at a glance and recommendations that might need your attention.

1. Sales Year To Date
↑ Back to topOn top of the dashboards, three graphs show the performance of your store.
The ‘Sales this year’ shows the current sales compared to last year in value.

Please note that we only use ‘Completed Orders‘ for this statistic. Orders that are processing or on hold are not included.
By hovering the graph, you can compare this year vs last year sales in value.
2. Sales Potential Next 6 Months
↑ Back to topThe second graph on top of the page shows the sales potential for your store in the next 6 months:
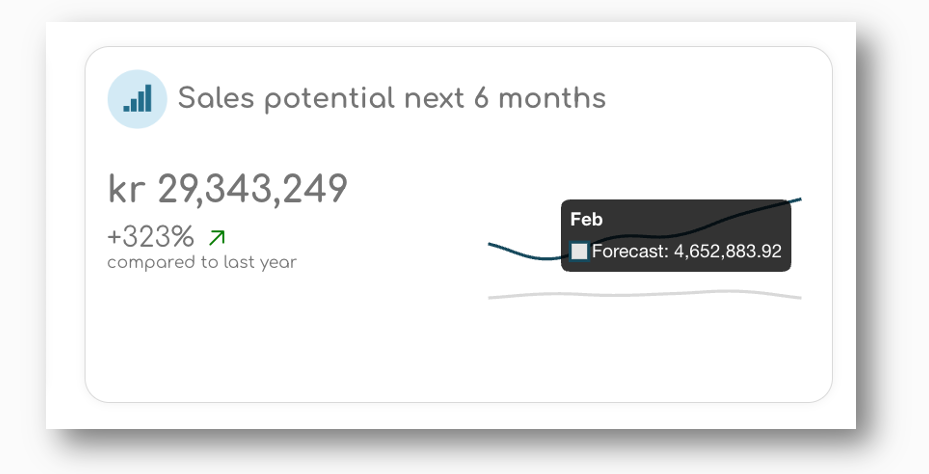
The Sales Potential is based on the sales forecast for all active items in your store, taking into account seasonality and availability. The assumption is that when you reorder in time, stock outs are reduced and you increase sales.
3. Stock Health
↑ Back to topThe third element shows a stock health analyses, using classic merchandising terms:
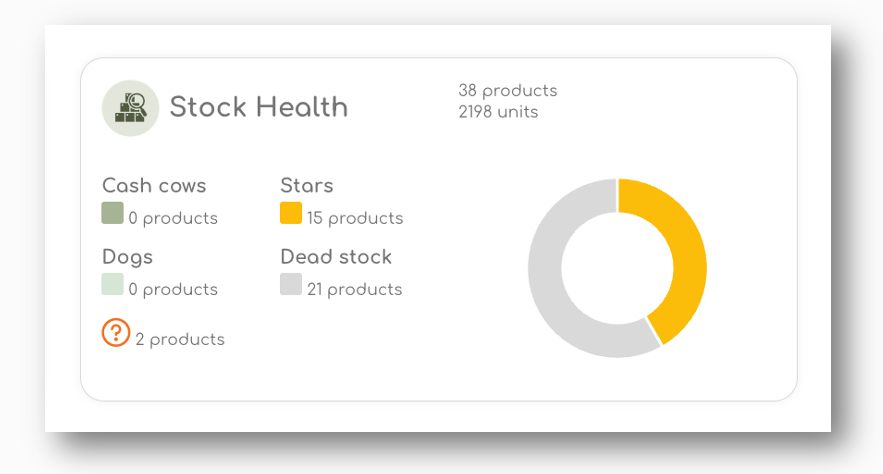
When hovering the 4 different terms, a hover appears explaining the terminology;
Cash Cows
Cash cows are products with a high market share but low market growth.
These products generate steady revenue with little need for investment. They have matured in the market and provide consistent cash flow.
Stars are high-performing products that have both high sales share and high growth potential.
Maintain adequate stock levels and continue to sell these items, as they are reliable sources of profit.
Stars
These products are popular, in-demand, and typically drive significant sales. They often require investment to maintain their growth and share of sales in your store.
Try to invest in promoting and stocking these items, as they have the potential to become your future cash cows.
Dogs
Dogs are products with low sales share and low growth.
These items are typically underperforming, with weak sales and limited future potential. They may be outdated or no longer relevant to your customers.
Consider discontinuing these products or reducing stock levels, as they tie up resources without generating significant returns.
Dead stock
Dead stock refers to products that are unsold or obsolete inventory that has been sitting in your storage for a long time.
These items have not sold for a considerable period and are unlikely to sell without significant markdowns or promotions.
Focus on clearing out dead stock through discounts, bundles, or liquidation sales to free up space and capital for more profitable items.
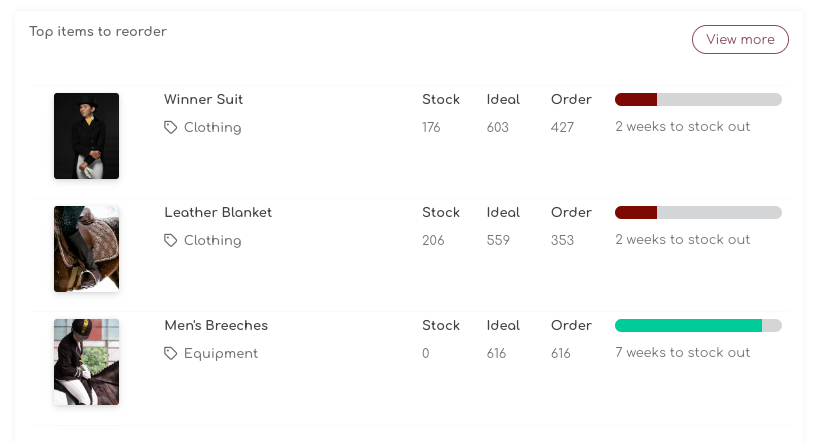
4. Top items to re-order
↑ Back to topThe first table shows the 10 items that might need immediate attention.
5. Sales Forecast
↑ Back to topThe graph on the right top of the dashboard shows your store’s Sales Forecast compared to last year.
Based on your sales forecast, stock outs and incoming and current stock, we project the sales forecast for the next 26 weeks.
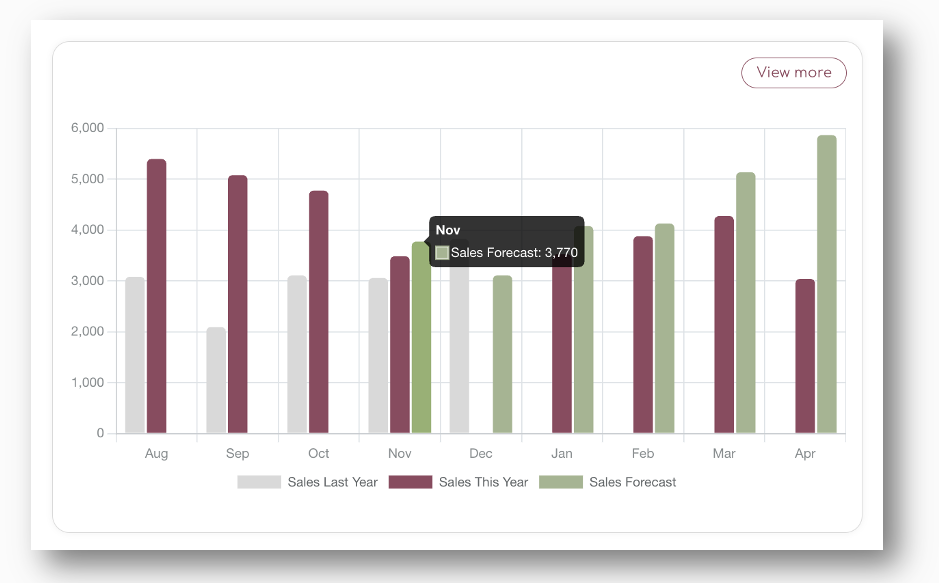
The ‘View More‘ button brings you to the Sales & Stock Projection page, where you can review the same projections on product level.
6. Purchase orders
↑ Back to topThis is where you find a summary of your placed orders. If orders pass there delivery date, you will receive a notification.

All detailed information (view all orders) can be found under the Order Proposals and the Order History pages.
7. Stock Summary
↑ Back to topThe Stock Summary report shows the main KPI’s of your store at a glance.
If you have set up your suppliers and updated product settings with cost and supplier information, you will find the key measures for your store here.
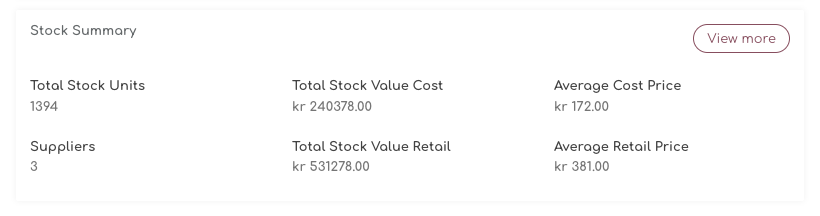
For individual product and category information, you can find the same KPI’s on the Stock Detail page:

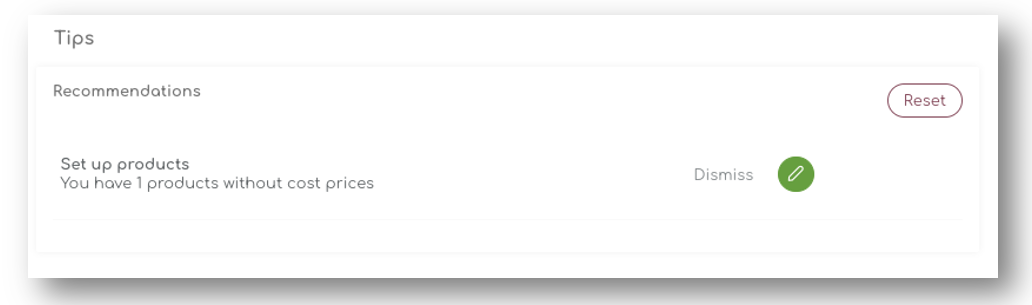
Tips & Recommendations
↑ Back to topOn the lower left corner of the screen, our Shelf Planner team will provide you with insightful tips and recommendations that will help you to improve your business.
These can be anything from user guides to recommendation the Shelf Planner engine provides. In the example below, the tips are generated when products are missing Cost Prices:
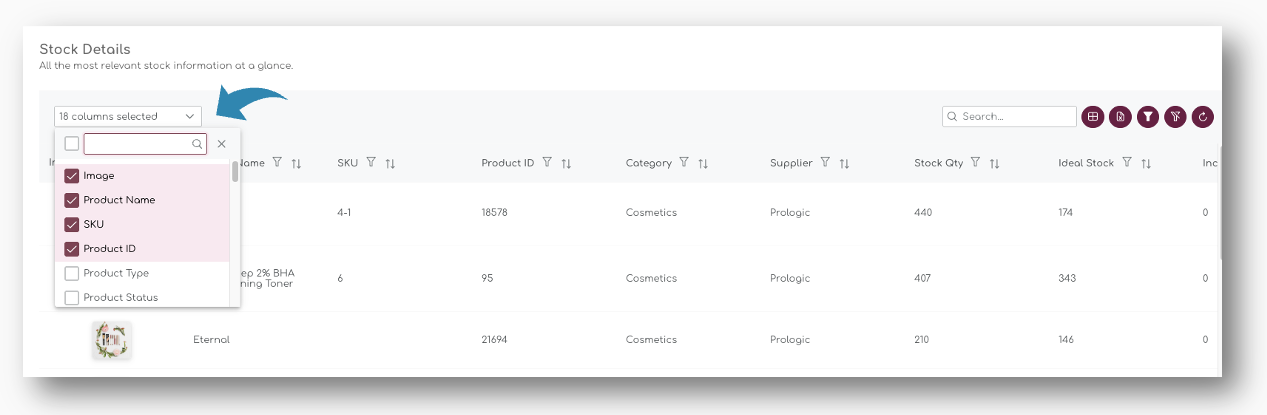
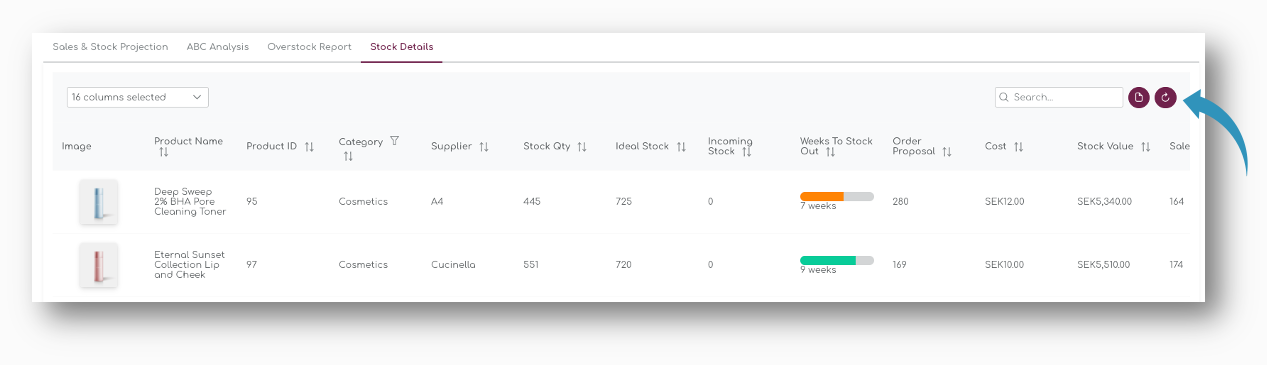
2. Stock Details
↑ Back to topTable Filters
↑ Back to topBy default, the The Stock Details page shows a number of columns, but you can add or remove any of the measures with the drop down on the top left of the page:
Save Custom Filters
When you have made your selection, you can save the selection for your account by clicking the ‘Filter’ icon top right of the table:
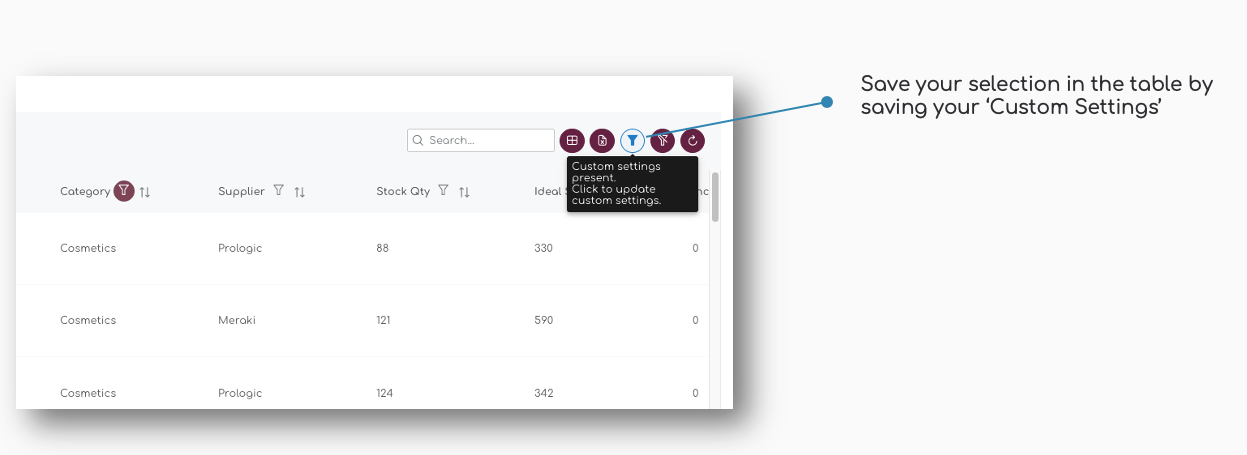
The ‘Custom Filter Settings‘ apply on all filters you apply in the table. The filters are user specific so all team members can create their own layouts. The custom filters are also saved until you release them, so even after logging out, the settings will be saved.
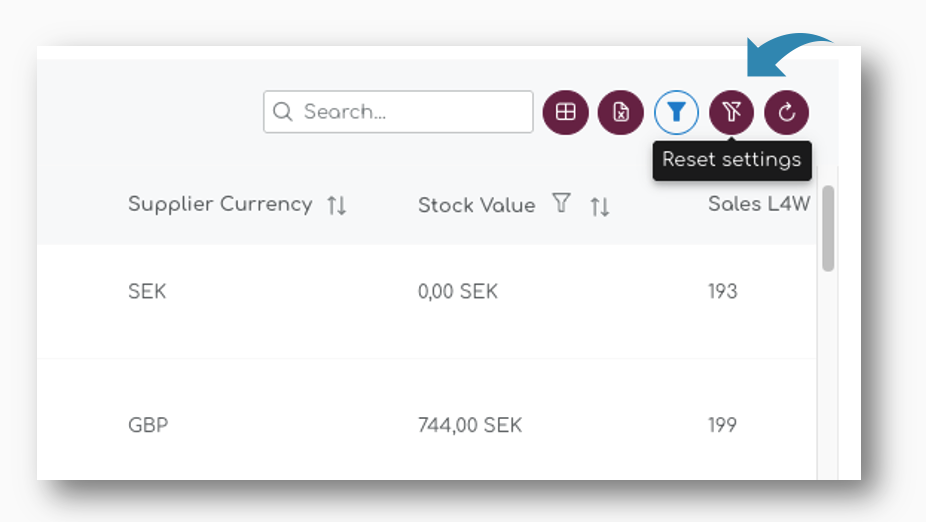
Reset Filter Settings
You can release the filters by clicking the ‘Reset Settings’ – this will reset the entire table back to default settings:
For more information on how to apply the different filters, please have a look at the dedicated page for this: Smart Filters – Customise Your Report Views
Product Meta Data
↑ Back to topThe Stock Details page contains all KPI’s and measures that are created or maintained in Shelf Planner. In this article, we’ll briefly describe how they are sourced, created and managed in the program.
Product Type
Product Type is used to identify if a product is sold in your store as a ‘Single Product‘, or as a ‘Variation‘.
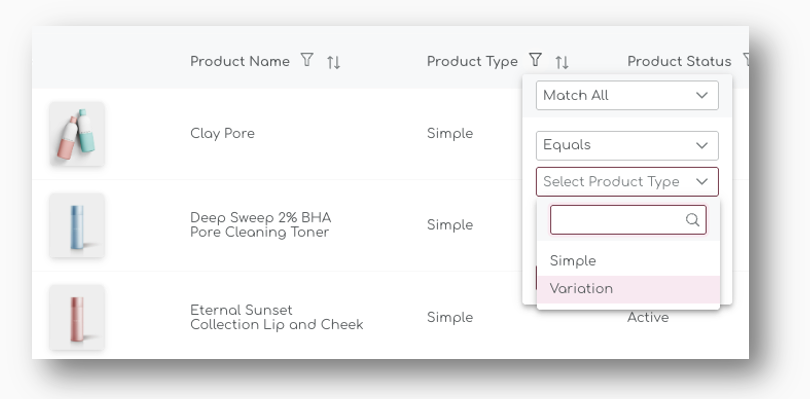
Simple Products and Variations follow the hierarchy of each platform and sometimes they have different naming conventions. In my.shelfplanner, we always make all calculations, forecasts and recommendation on the lowest level, the SKU level.
There is no limit to how many variations you can have.
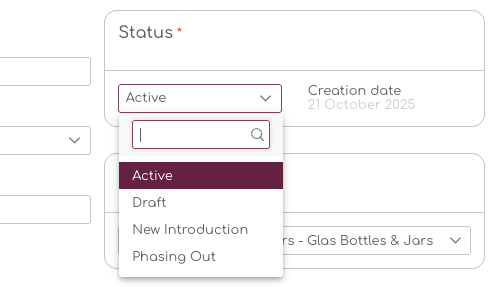
Product Status
Shelf Planner uses product statuses to refine the forecast and improve the order recommendations.
The Product Status is defined based on the product’s lifecycle.
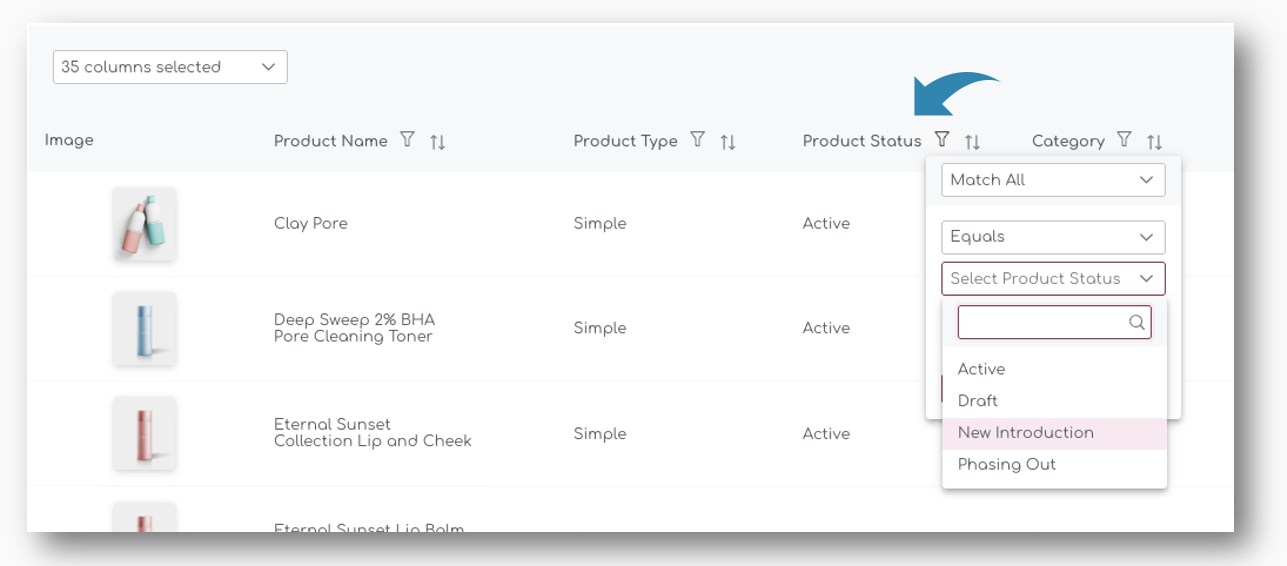
For example, New Introduction products require a different forecasting logic than products that have been active for a longer period.
Drafts are products you have created in your store, but not published yet. You can still place purchase orders for these items, or set the product parameters for replenishment.
| When you publish a new product in your catalogue in the store, this status will automatically change from ‘Draft’ to ‘Active’ in the app with the next overnight synchronisation. For more information on how to manually synchronise your products, please see the Synchronisation pages. |
Phasing Out is a status we don’t use at the moment – this feature is still in development.
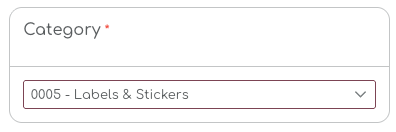
Category
Most platforms allow you to assign multiple categories to a single product. Shelf Planner uses the ‘Primary Category’ in all tables and filters. Categories are created and maintained in your store and Shelf Planner synchronises these every night, or on demand.
Supplier Information
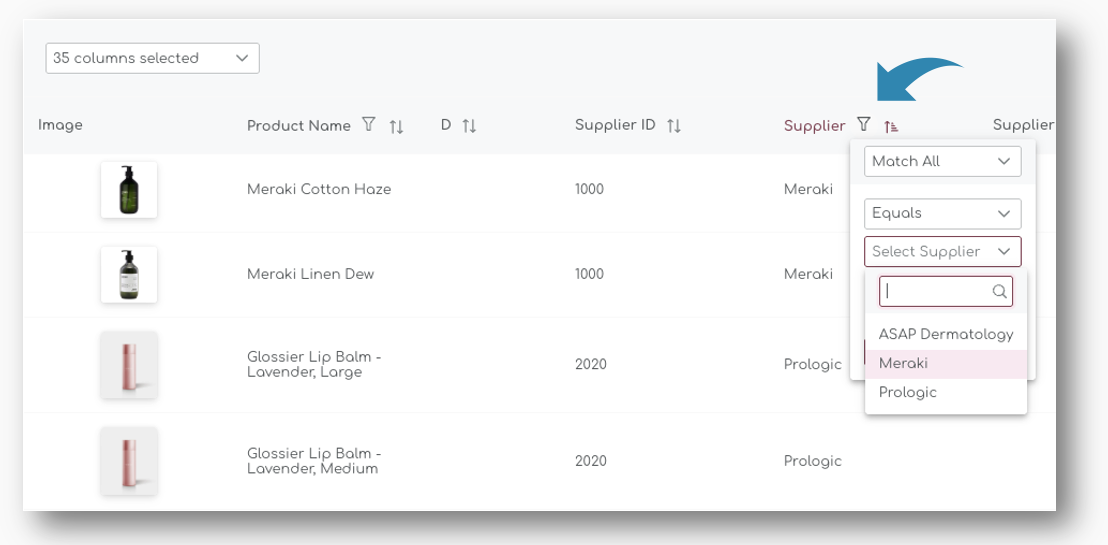
↑ Back to topThe second section on the table is the Supplier information for each product. In this section you will also find product specific supplier information that are used when purchasing items, for example a supplier’s Product References, or a supplier’s Product ID.

Supplier ID & Supplier Name
You will have to set up a supplier before you can assign a Supplier to a product. Supplier ID and Supplier Name are unique, free text fields.
Supplier Product ID & Supplier Product Reference
Supplier Product ID and Supplier Product References are free text fields where you can add additional supplier specific information, for example SKU references or Supplier product descriptions.
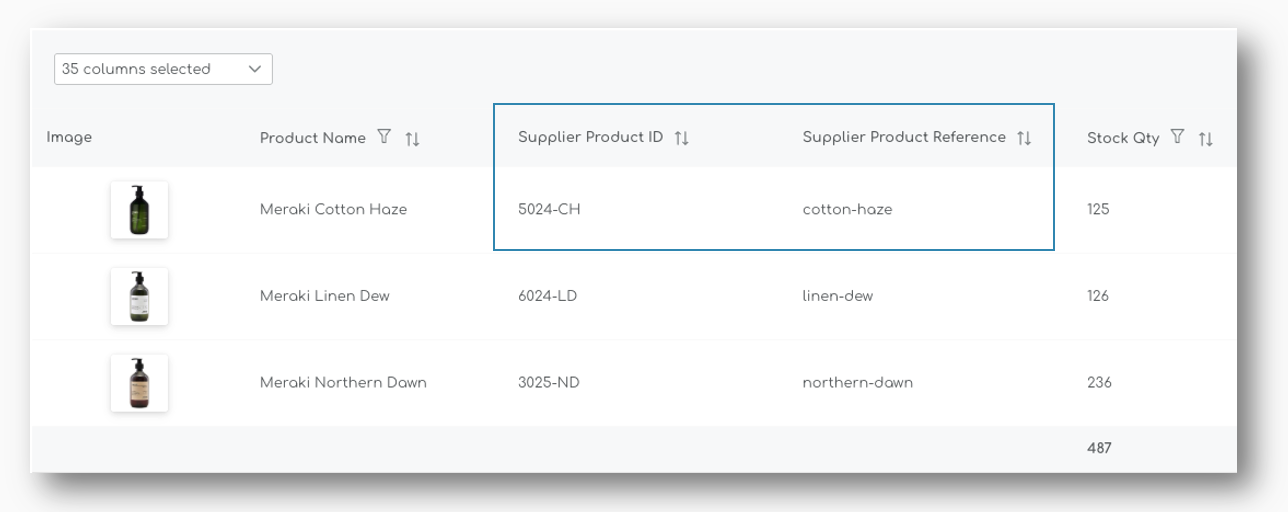
Both of these fields will also appear on Purchase Orders and the when PDF’s are generated.
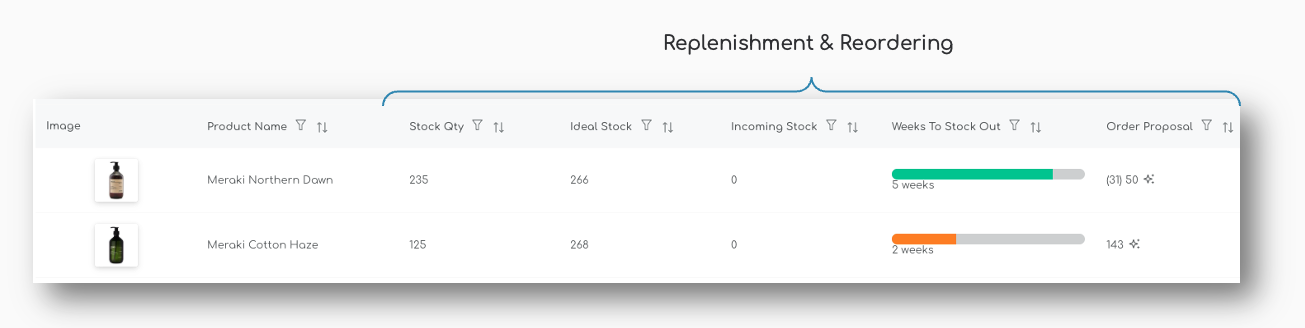
Replenishment & Reordering
↑ Back to topThe next section in the Stock Details table is built up with all measures, parameters and calculations related to Replenishment or Reordering of your items.
The values and calculations presented in the default view give you a first glance at what you have on stock, what is your Ideal Stock for the item, how much you have incoming and how much you need to order:
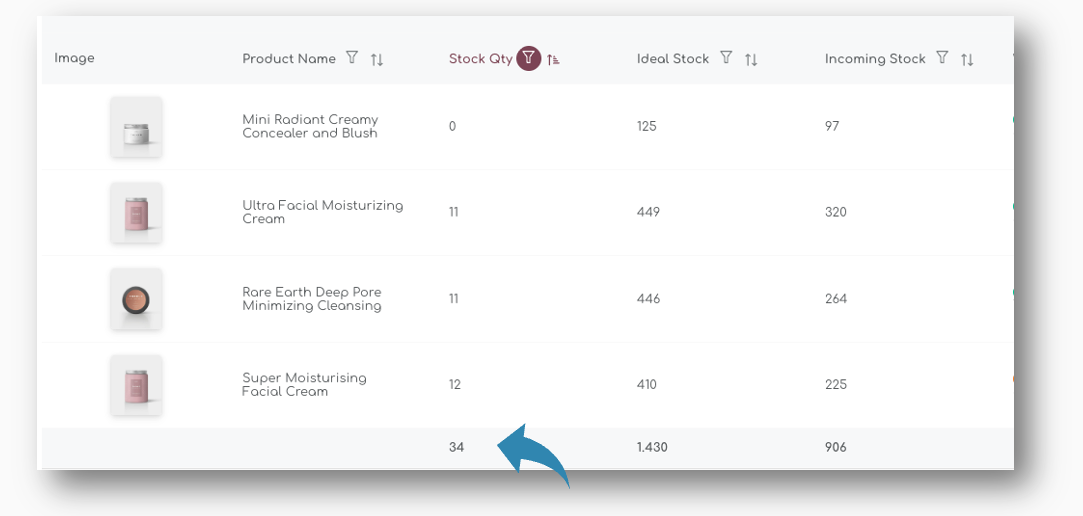
Stock Quantity
Your Stock Quantity is synced live from your store. We also use a two way sync to update stock quantities from the app back to your store, either through the product settings page (when you update a product manually), or when completing a Purchase Order.
Stock Quantity Totals, as well as Ideal Stock and Incoming Stock Totals are calculated at the bottom of the table. In the example below, we have filtered to show all items from 1 supplier with less than 25 units in stock – the totals for these 4 items are recalculated at the bottom of the table:
Ideal Stock
The Ideal Stock is one of the key metrics used in Shelf Planner. It represents the stock you should have at your disposal to meet your customer demand. It is sometimes also referred to as Model Stock.
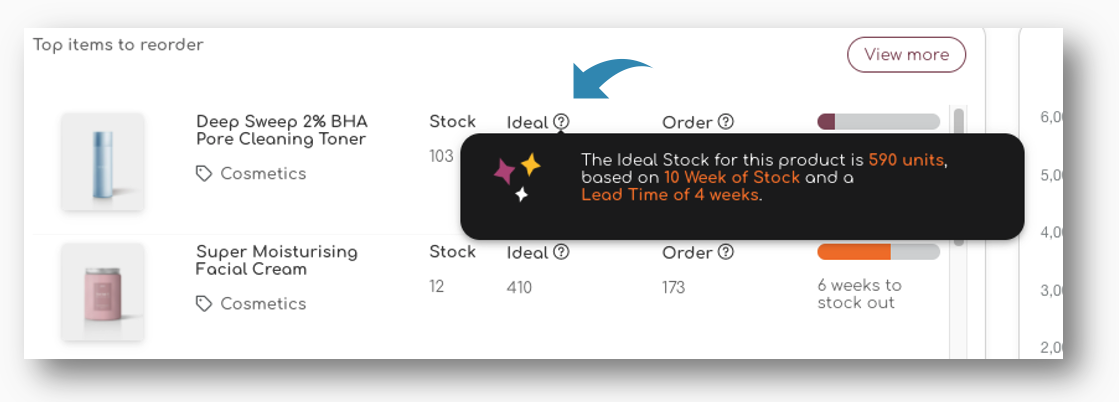
The Ideal Stock looks at your Sales Forecast and calculates the optimal stock level for each item, taking into account Supplier Lead Times, Minimum Order Quantities, and a product’s overall performance (for example ABC Analysis and trends for a product)
Incoming Stock
When you use the Purchase Order function in Shelf Planner, Incoming Stock is tracked for all orders that are placed. Based on the expected delivery date, we calculate the date and week when the stock is supposed to arrive, and include this in the order recommendations.
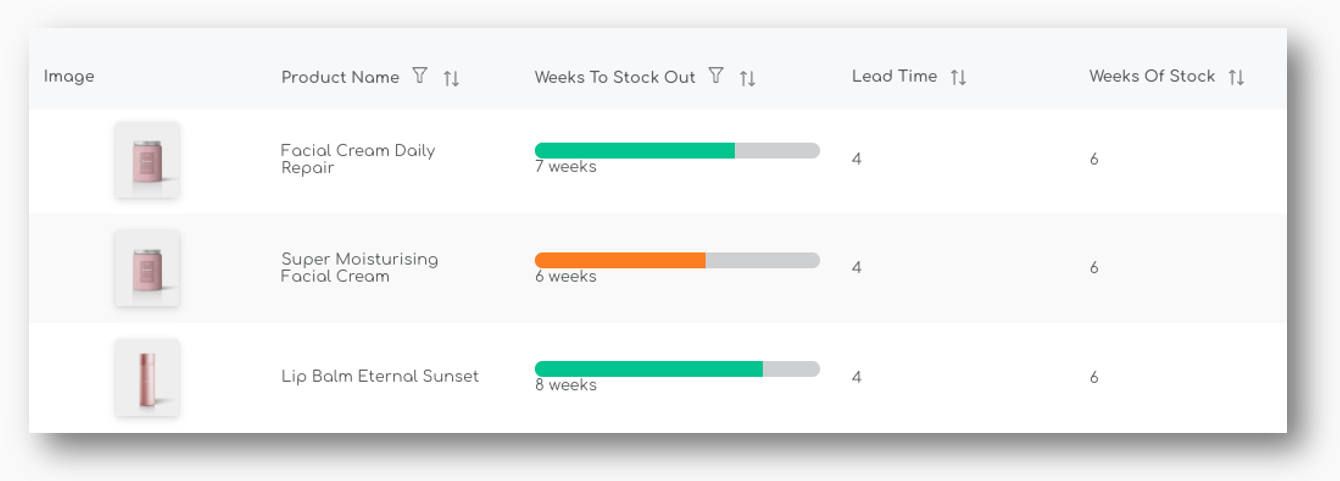
Weeks to Stock Out
The Weeks to Stock Out shows a colour coded bar
Order Proposals
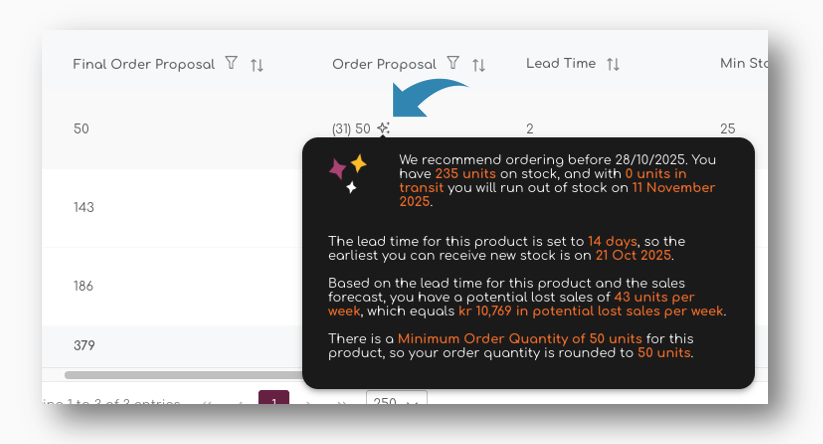
↑ Back to topThe Stock Details shows you all steps in how we get to a ‘Final Order Proposal’. By default, we only show the ‘Order Proposal’, and this measure is also use throughout the application when we present an order proposal.
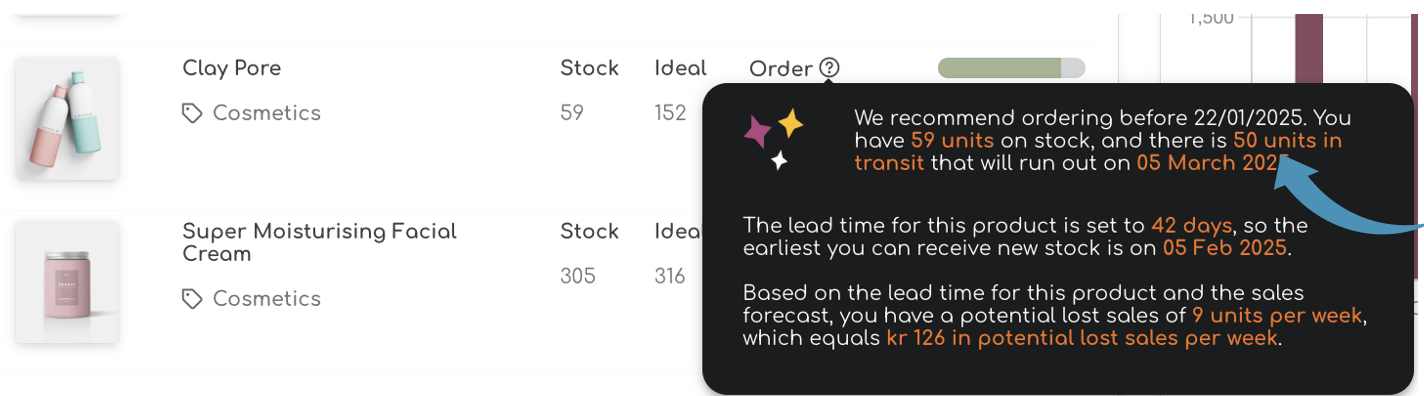
This final order proposal is calculated based on a number of parameters and you will see a summary when you hover on the star icon:
Original Order Proposal
The original order proposal is calculated based on your sales forecast, your current stock on hand, and any incoming stock. It also looks at the product’s lead time, the supplier lead time and your Weeks of Stock for this item.
Final Order Proposal
The Final Order Proposal uses the original order proposal, but then also takes into account the Pack Sizes and Minimum Order Quantities for a product:
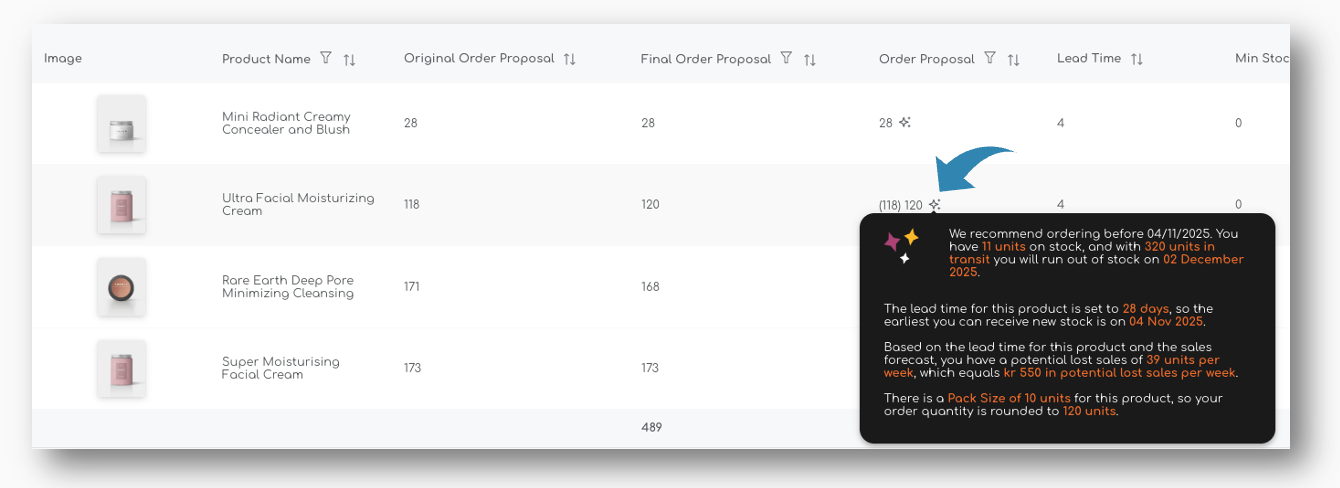
As shown in this example, the Original Order Proposal is 118 units, but because there is a Pack Size of 10 units for this item, the order proposal is rounded to 120 units to comply with the pack sizes.
Replenishment Settings (Weeks of Stock, Lead Time, Pack Sizes, MOQ’s)
All of the following parameters have an impact on the order proposals. Weeks of Stock and Lead Times are predominantly used to calculate the Ideal Stock for your items. Pack Sizes and MOQ’s are used to calculate to right order quantity.
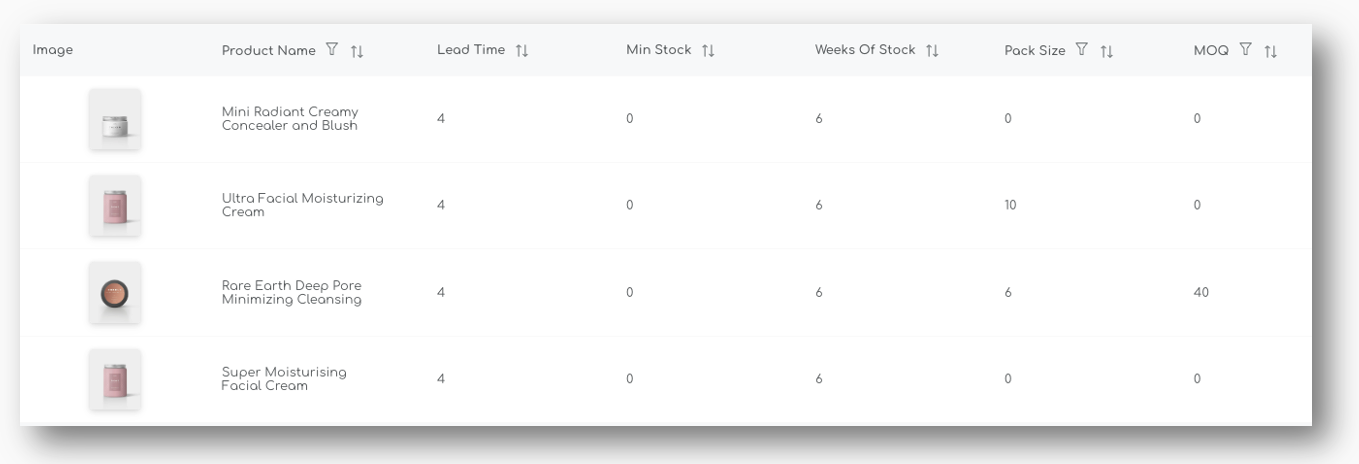
Shelf Planner also allows you to set Minimum Stock Quantities. You can apply Minimum Stock rules on any product and they work as a safety stock.
Let’s say you have items with very low sales, for example 1 unit every 2 months. In that case, the forecast will also be low, maybe even to low for the system to calculate an Ideal Stock. If you want to make sure you always have at least 2 units of stock in your warehouse, you can use the Minimum Stock for these types of items. The system will automatically take the max of the two parameters.
You can read more about when and how to use Minimum instead of Ideal Stock in the dedicated pages for Minimum Stock.
Cost Prices & Stock Value
↑ Back to topThe next section in the report contains all stock information related to cost prices, supplier currencies and stock value.
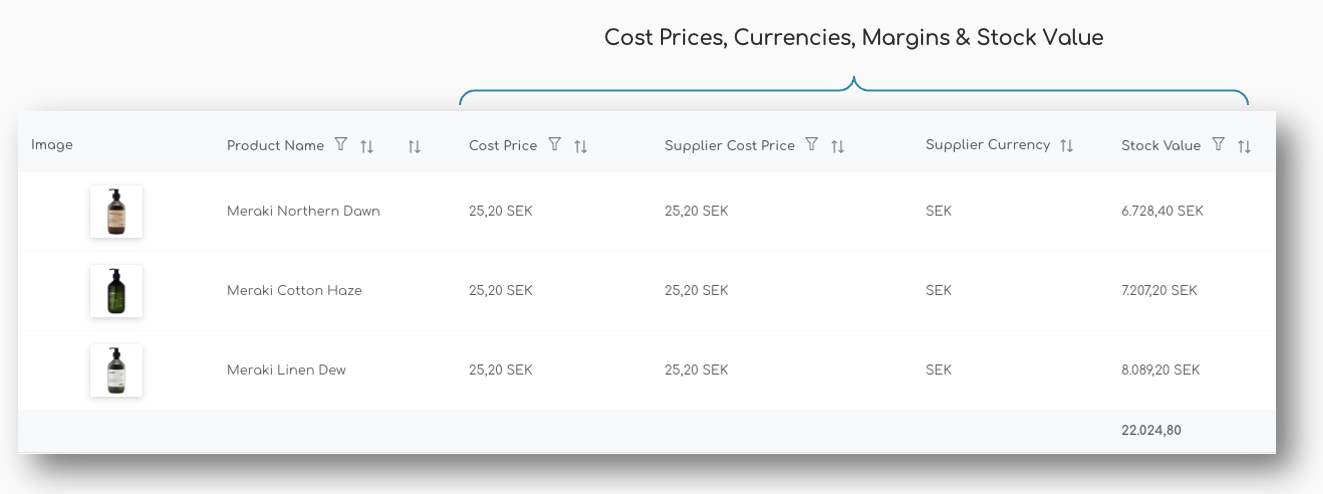
Cost Price & Supplier Cost Price
Cost Prices can be entered in store currency, or in the Supplier’s Currency. Every week, our exchange rates are updated based on Sweden’s Riksbank Exchange Rates.
For more information on how to use Cost Prices and Supplier Cost Prices in different currencies, please have a look at the article Supplier Currencies and Cost Prices in the Product Settings section.
Stock Value
The Stock Value for all your items is calculated in your store’s currency. At the bottom of the table, we sum the total for the selection you made. For example, here you can easily see your current stock value for a Supplier, Category or individual products or product groups.
3. Order Proposals
↑ Back to topOrder Proposals based on Ideal Stock
↑ Back to topShelf Planner generates Order Proposals for all your products, based on your customer demand, actual sales and external factors.
The main table on the Order Proposals page shows all products that can be reordered and have a Order Proposal generated for them.
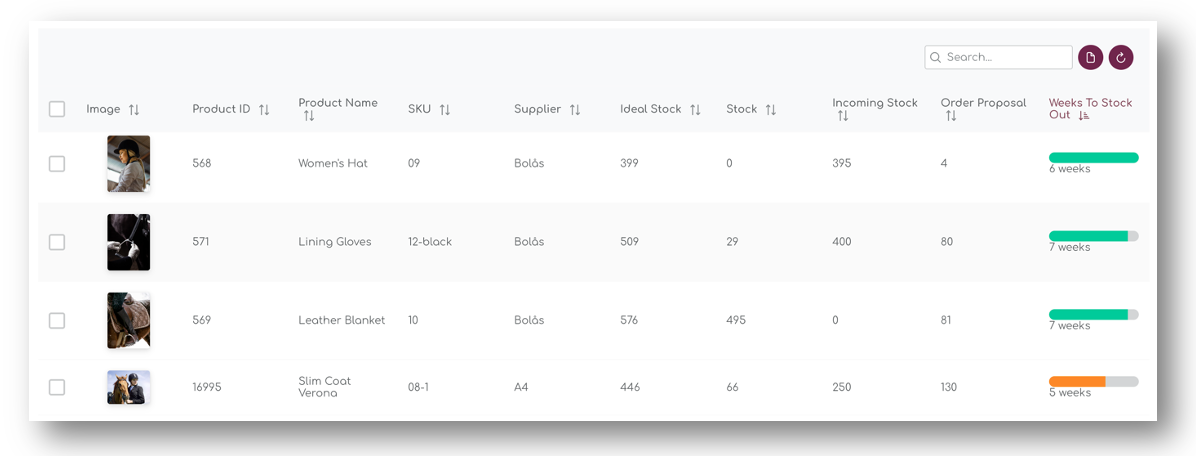
The table is automatically filtered on items that need to be replenished. The table is filtered descending from the Weeks to Stock Out column.

There are a number of parameters and measures that determine the final order proposal
Ideal Stock
↑ Back to topThe Ideal Stock is calculated by the Shelf Planner engine and is based on:
- your sales forecast
- incoming stock
- current stock
Every night, your sales forecast is updated. This ensures you always have the latest picture of each product’s performance and trends.
Current Stock
↑ Back to topThe current is the Stock you have in your store. The live two-way sync ensures you always have the same stock levels picture in my.shelfplanner and your store.
Inbound Stock
↑ Back to topThe Inbound refers to the stock that is incoming or in transit. When you place purchase orders, we will track the expected delivery date for all items.
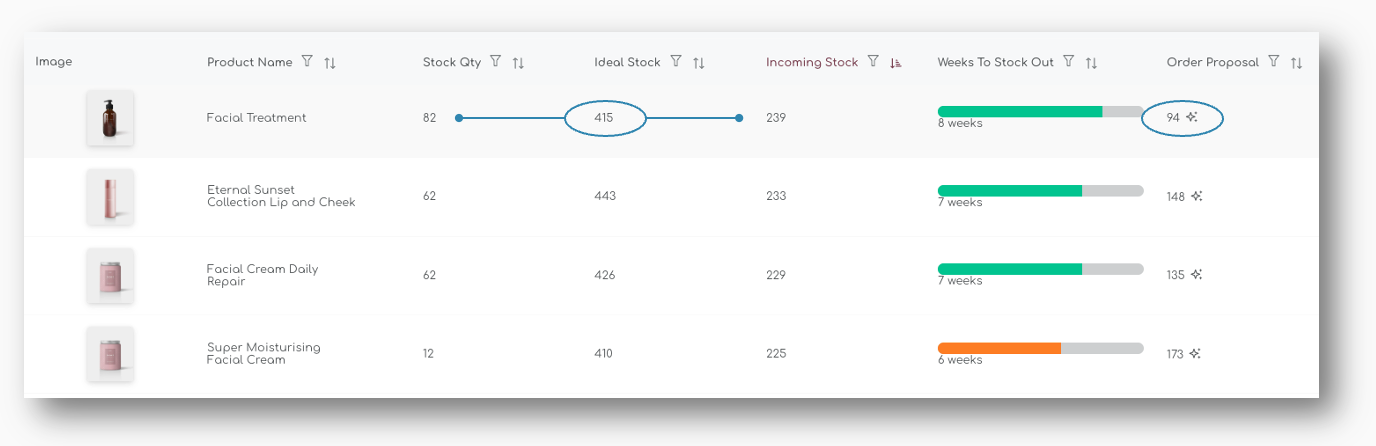
Order Proposal based on Ideal Stock
The Shelf Planner engine uses your sales forecast for the coming weeks to understand whether you are understocked, or overstocked.
You do not necessarily want to replenish all the items in your store. You can select a single item or place multiple orders for the same item over time.
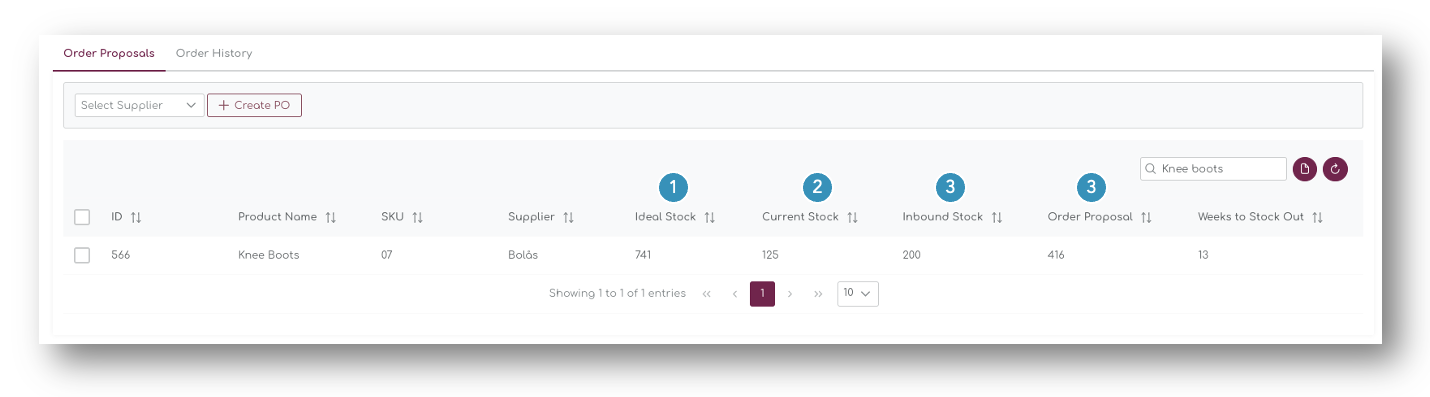
In the example below, the Order Proposal for the selected product is 416 units (4). This number is based on:
- Ideal Stock (1) for the product (based on product parameters and sales forecast)
- Current Stock (2) – your current inventory, synced with your store)
- Inbound Stock (3) – any incoming orders that you placed
Order Proposal based on Minimum Stock
↑ Back to topFor some of your products, it can be difficult to create an accurate forecast. Examples could be newly launched products, items with random sales, or items with extreme seasonality.
Our machine learning algorithms will pick up this behaviour and highlight these items in that case. For some of these products, it might be better to set a Minimum Stock threshold instead of using the Ideal Stock for the Order Recommendations.
Set Minimum Stock
↑ Back to topTo set a minimum stock, open the products settings:
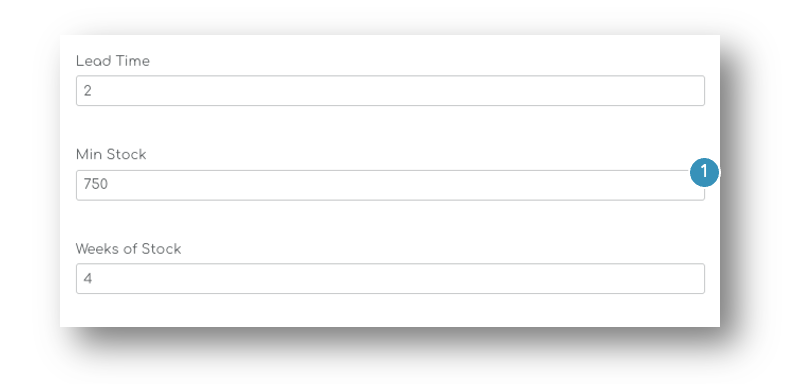
In this example, we set the Minimum Stock to 750 units. Instead of using the Weeks of Stock and the Lead Time to define the order proposals, the Min Stock is used to determine the Order Proposal:

As shown in the example above, the current stock (1) is 514 units. There is no incoming Stock (2). Becuase the minimum is set to 750 units, the Order Proposal is 750 – 514 = 236 units.
The Weeks of Stock (4) is in this example ignored.
When we set the Minimum Stock back to 100, the Order Proposal is recalculated:
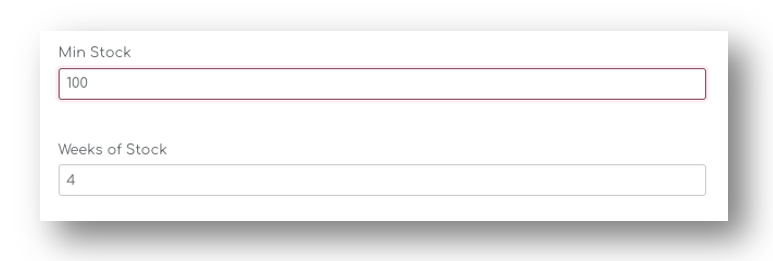
The Min Stock is now set to 100 and the Ideal Stock is using the Weeks of Stock and Lead Time (1). With a Lead Time of 2 and a Weeks of Stock setting of 6 weeks, the Ideal Stock uses 6 weeks of Sales to calculate the Ideal Stock, in this case 426 units:

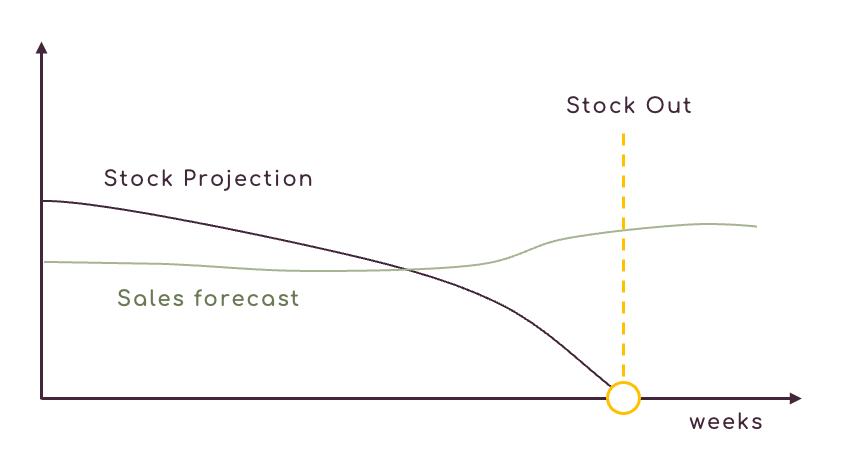
As you can see in the example below, the Forecast for the next 8 weeks is 593 units, hence the Weeks to Stock out is 7 weeks and technically, this item is ‘overstocked’:

Weeks To Stock Out
↑ Back to topThe Weeks to Stock out is calculated using the sales forecast for the product and the current stock level.
4. Materials, Categories, Kits & Assemblies
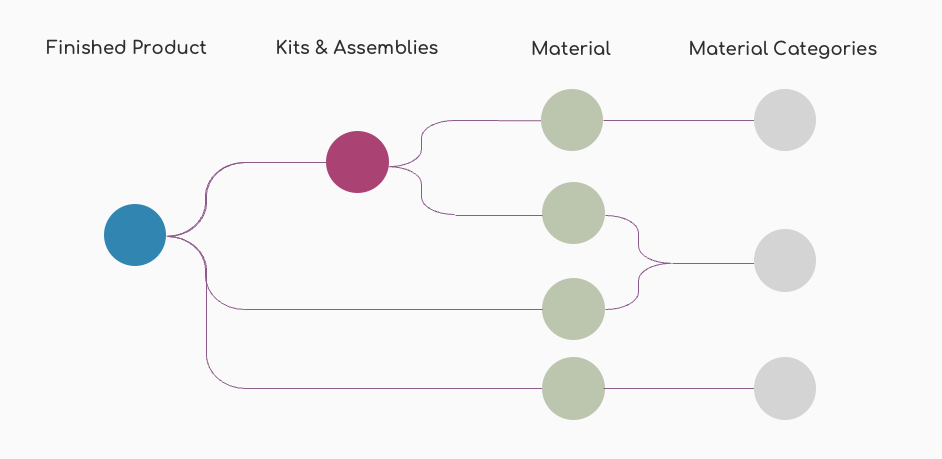
↑ Back to topMaterials are the so called ‘Leaf Levels’ in the Bill of Materials, the lowest level in the product hierarchy. Within the Shelfplanner app, all materials can be assigned to a Finished Good, a Kit or Assembly, and Material Categories.
The image below illustrates the relationship between Products (Finished Goods), Kits & Assemblies, Material and Material Categories:
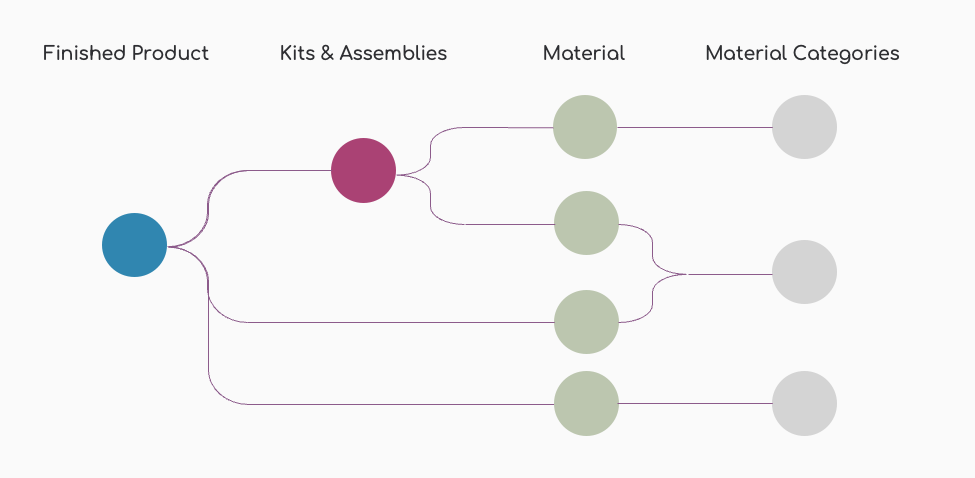
A Kit or Assembly can consist of multiple materials. You can create your own Kits & Assemblies and you can read more about this on the Kits & Assembly pages.
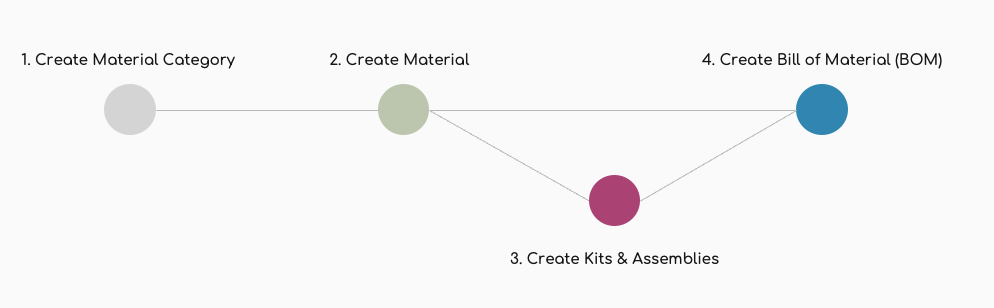
Before you can create Materials, you will have to set up a Material Category. The diagram below illustrates the order and relationship between the different elements. You can create a Bill of Material with only materials, but also with combinations of Materials and Kits or Assemblies.
If you want to create a Kit or Assembly, you will first need to create both Material Categories and Materials.
Creating a New Material Category
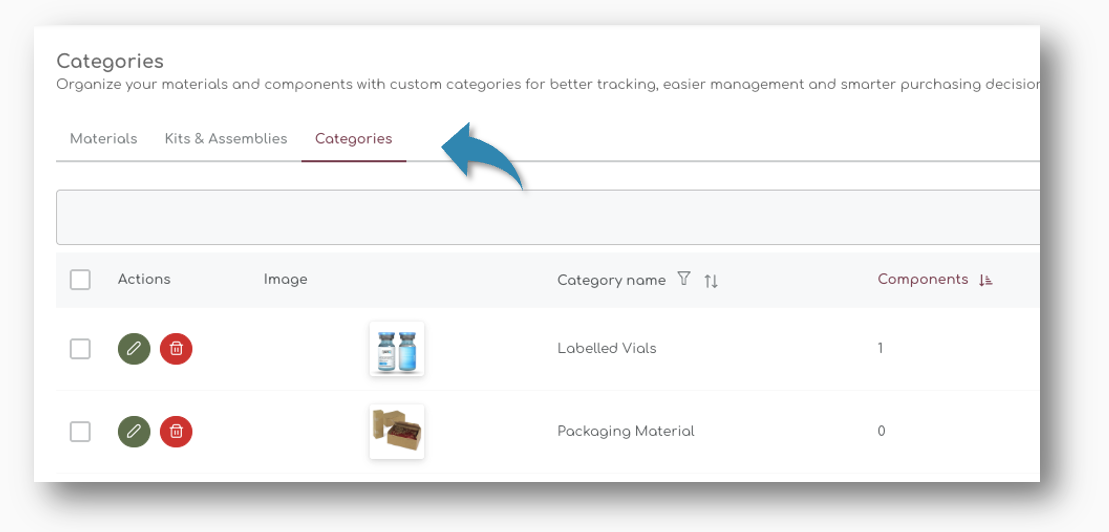
↑ Back to topStep 1: Navigate to the Categories Section
↑ Back to top- Open the Material pages in the Products section of the menu
- On the Materials page, click on the “Categories” tab to switch to the Categories view.
Step 2: Create a New Material Category
↑ Back to top1. In the Categories section, click on the “+ New” button. This button is usually located at the top right corner of the page.

This will open the category creation popup, where you can enter the details of the new category:
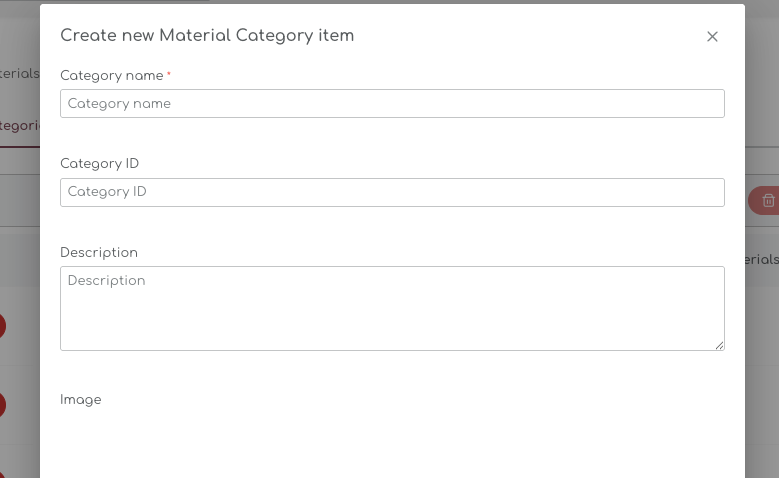
Step 3: Enter Category Information
↑ Back to topFill in the following details for the new category:
Category Name
Enter a descriptive name for the category. This name should clearly indicate the type of materials that will be grouped under this category.
- Example: “Packaging”

Category ID
Assign a unique identifier for the category. This could be a code or any other unique identifier.
- Example: “0001-Packaging”, but any free text is possible

Description
Provide a brief description of the category. This description should give an overview of the types of materials included in this category.
- Example: “This category includes all types of packaging materials such as boxes, bags, wraps, and containers used for storing and transporting products..”

The description is a free text and is only used for internal use and not shown anywhere.
Image
Upload an image that represents the category. This image will help in visually identifying the category.
- Tip: Use a clear and relevant image that represents the category well. Images will automatically get cropped to 50 x 50 px
- Only PNG and JPEG format is accepted.
Step 4: Save the Category
↑ Back to top- Once you have entered all the details, review the information to ensure accuracy.
- Click on the “Save” button to save the new category.
Creating New Materials
↑ Back to topOnce you have created Material Categories, you can start creating the Materials for your store. In the chapters below, we will guide you through the steps how to do set up materials, link categories and set up reorder points for the Materials in your store.
Step 1: Create a New Material
↑ Back to topIn the dashboard, navigate to the “Materials” page under the “Products” section:
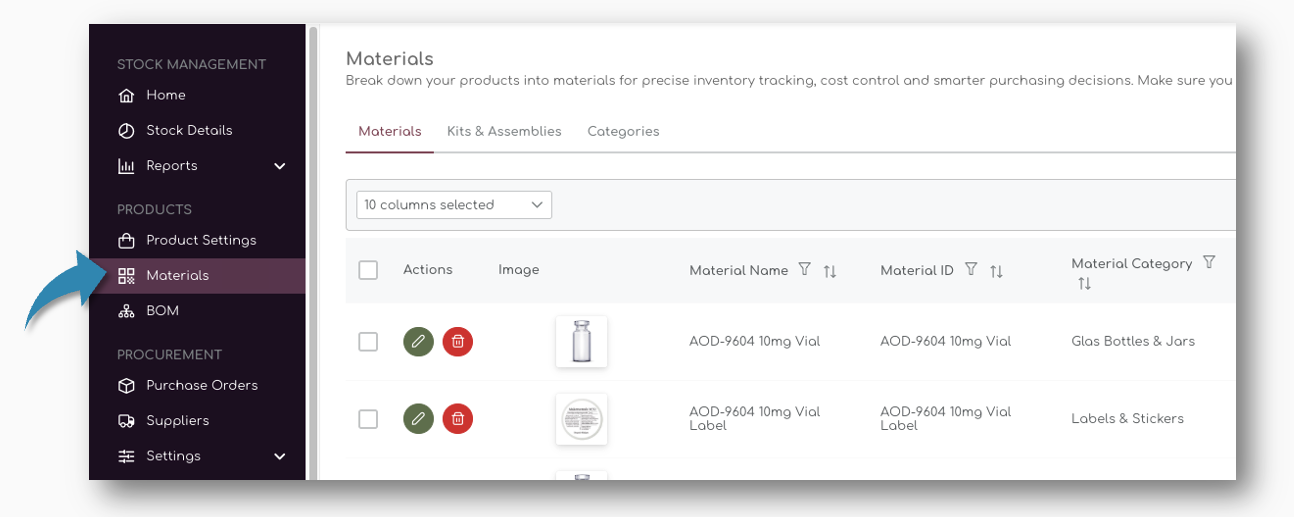
The table on the Material page shows all the individual materials for your products and by default the Material Name, Material ID, Category Supplier, Lead Time, Safety Stock, Cost Prices and Stock Quantities are presented.
You can add more columns to the table using the Drop Down on top of the Table:
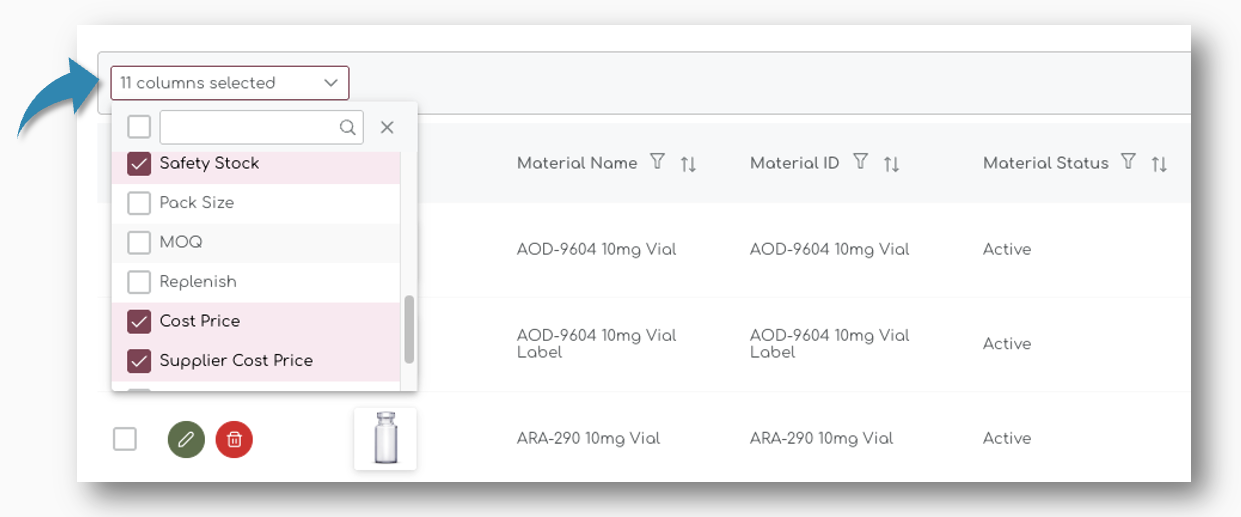
You can find a full list of all material measures at the bottom of this page.
Step 2: Enter General Material Information
↑ Back to topOn top of the table, you can click on the “New” button to create a new material. A pop up appears where you can you can enter the details of the new material.
The first section is the general material information. This is where you can add all generic information such as
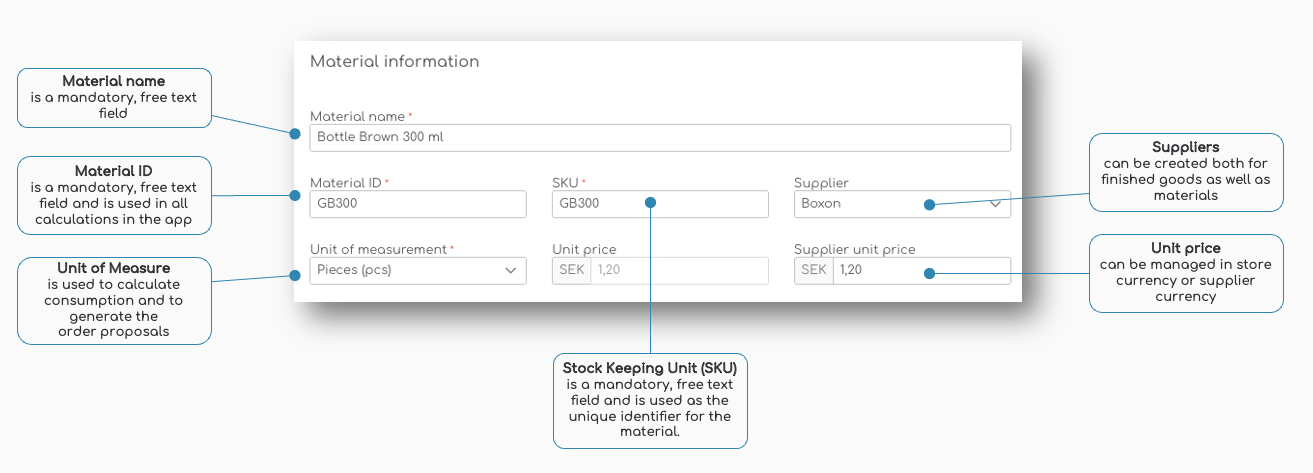
Material Name, Material ID & SKU
Similar to products in your store, we use the Material Name, Material ID and SKU information in the app. These are mandatory fields and have to be unique.
Material Name
Enter a descriptive name for the material. For example, “Letter Pack L150 x B100 x H27mm”.

Material Name is a free text field, so you can enter any value.
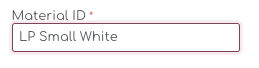
Material ID
Assign a unique identifier for the material. This could be a free text, like a code or a description, for example “LP Small White”
SKU
Enter the Stock Keeping Unit (SKU) for the material – this should be a unique code, for example “0004-LP-150”
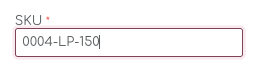
It’s a free field text, so you can enter any value that fits your business and data model for your store.
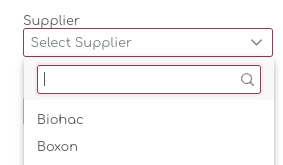
Supplier
Select the supplier from the dropdown list. Ensure that your suppliers are already set up in the system. You can select the Suppliers from the drop down menu once you have created the supplier.
Unit of Measure
Specify the unit of measure for the material, such as pieces (pcs), weight (e.g. grams), length (m, cm) or any of the other Units of Measure. By default, we offer all standard units of measure, divided into multiple classes;
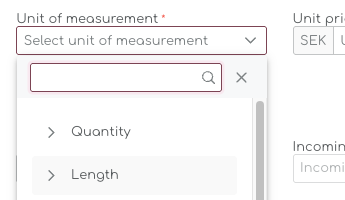
You can chose from the following Units of Measurement:
| Quantity | Pieces |
| Length | Meter (m) |
| Centimeter (cm) | |
| Inch (in) | |
| Foot (ft) | |
| Weight | Kilogram (kg) |
| Gram (g) | |
| Pound (lb) | |
| Ounce (oz) | |
| Volume | Liter (l) |
| Milliliter (ml) | |
| Cubic Meter (m3) | |
| Area | Square Meter (m2) |
| Square Foot (ft2) | |
| Time | Second (s) |
| Minute (m) | |
| Hour (h) | |
| Day (d) |
Unit Price
Enter the unit price of the material in your preferred currency. When you order from suppliers with different currencies than your store currency, you can enter the Supplier Currency. The Material Cost Price will automatically be updated to your store’s currency.

Supplier Unit Price
Enter the unit price provided by the supplier in their currency. You can set the Supplier Currency in the Supplier Settings.
Exchange rates are updated weekly.
Image
Upload an image of the material for easy identification. Picture files in the format JPEG and PNG are allowed for upload. After uploading, you can crop the image if needed. A thumbnail will be generated automatically.
Step 3: Enter Replenishment Settings
↑ Back to topThe second part of the material pages are the Replenishment Settings. Similar to Products, we use a number of parameters to calculate your Ideal Stock and Order Recommendations for all you materials, kits and assembled parts.
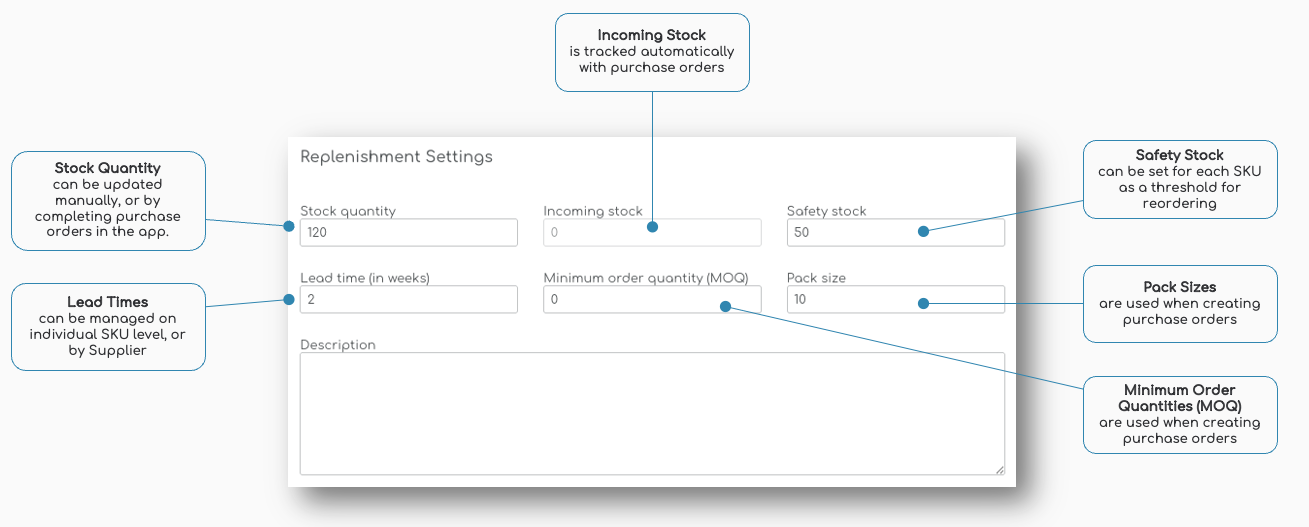
Stock Quantity
The Stock Quantity for materials is entered manually the first time you create a new material. Based on the consumption of the material, we calculate your Ideal Stock for future weeks.
Incoming Stock
When you create a Purchase Order for a material, we automatically track the status of the PO and classify the ordered quantities as ‘Incoming Stock.
We use the incoming stock for materials to calculate the order proposals, similar to how the order proposals for products is generated.
On the Material creation page, the Incoming Stock is not an editable field. It’s calculated based on PO’s placed.
Safety Stock
Set the safety stock level to ensure you have a buffer to prevent stockouts.
Lead Time (in weeks)
Enter the lead time in weeks, which is the time it takes for the material to be delivered after placing an order.
Minimum Order Quantity (MOQ)
Shelf Planner’s Purchase Order Management incorporates a product’s Minimum Order Quantities (MOQs) into its algorithms to optimize inventory planning and procurement.
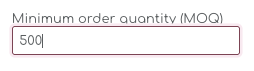
You can enter any value in the MOQ field, and the system will automatically round the Order Proposals for Materials to match the MOQ.
Pack Size
A pack size is the predetermined quantity in which a product is sold, manufactured, or shipped. Suppliers often enforce pack size requirements to streamline production and logistics.
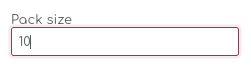
You can enter any value in the Pack Size field and the system will use this parameter to round your order proposals.
Step 4: Assign Material Category
↑ Back to topBefore you can create a new material, you have to assign a category to the material. When you have set up the categories for materials in your store, you can select the Category from the dropdown list:
Step 5: Save the Material
↑ Back to topOnce you have entered all the details, click on the “Save” button to save the new material.
You can also choose to “Save as draft” if you want to complete the setup later.

Creation Date
After creating a Material, or after saving the material as a Draft, we automatically set the creation date. When you save the item as a draft, the creation date will be updated when you publish the material.
Material Status
After you create and save a new Material, a status will automatically be assigned.
Draft
Draft product and materials are not used in any calculations or proposals.
Active Materials
Active Materials can be assigned to BOMs and Kits & Assemblies, and they will be included in all calculations, reports and recommendation.
| Phasing Out is used for Material Items that will be replaced or phased out of your assortment. New Introduction is used for newly introduced materials and it allows you to track stock age. New Introduction and Phasing Out statuses are features still in development. Only Draft and Active statuses are used in the recommendations. |
Creating Kits & Assemblies
A Kit or Assembly can consist of multiple materials. They can be used in pre-processing activities, for example to partially assemble and streamline production processes.
| Before creating a Kits or Assembled product, you will have to create a Material Category. You can do this on the tab Material Categories on the same page. |
Step 1: Create a New Kit or Assembly
↑ Back to topIn the dashboard, navigate to the “Kits & Assemblies” page under the “Products” section:
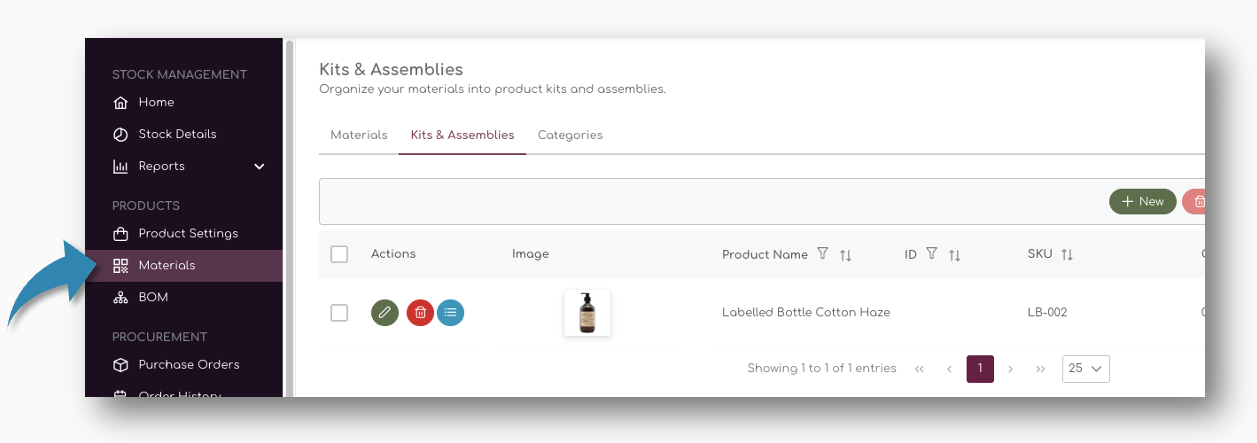
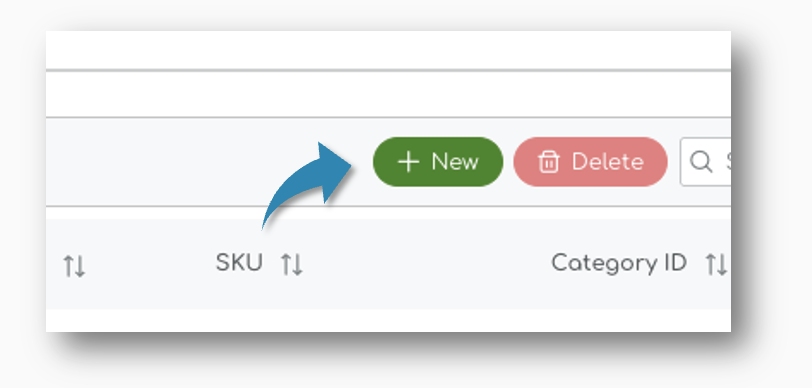
On top of the table, you can click on the “New” button to create a new material:
Step 2: Enter General Assembly Information
↑ Back to topA pop up appears where you can you can enter the details of the new Kit. The first section is the general material information. This is where you can add all generic information such as name, ID and SKU number. You can also add some general comments or descriptions.
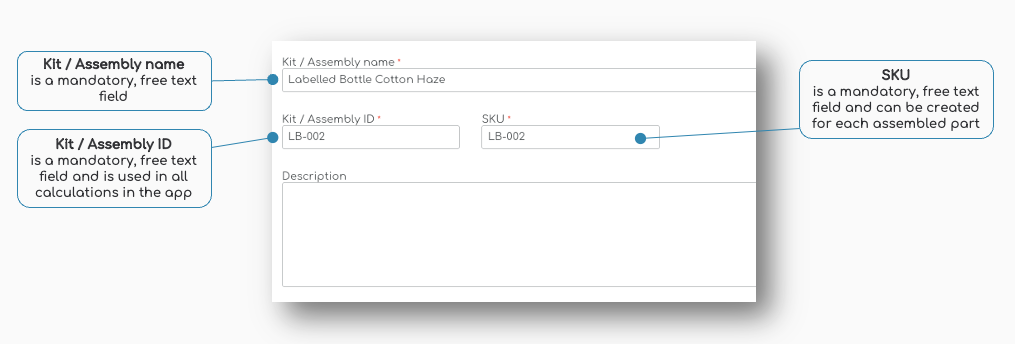
Kit Assembly Name
Similar to products in your store, we use the Material Name, Material ID and SKU information in the app. These are mandatory fields and have to be unique. Enter a descriptive name for the material. For example, “Labelled Bottle Cotton Haze”.

Kit / Assembly ID
Assign a unique identifier for the material. This could be a free text, like a code or a description, for example “LB-002”

SKU
Enter the Stock Keeping Unit (SKU) for the material – this should be a unique code, for example “LB-002”
It’s a free field text, so you can enter any value that fits your business and data model for your store.
Category
Select the supplier from the dropdown list. Ensure that your categories are already set up in the system. You can select the Categories from the drop down menu once you have created the supplier.
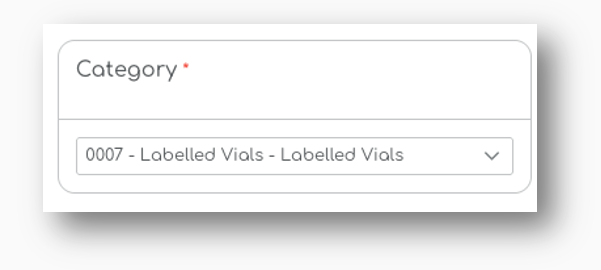
In this example, we have created a dedicated Category for assembled parts – Labelled Vials
Step 3: Assign Material to Kit / Assembly
↑ Back to topWhen you have entered the general information for the assmbled part, you can save the item. A new pop up will appear where you can select which items should be assembled in the kit or assembled part:
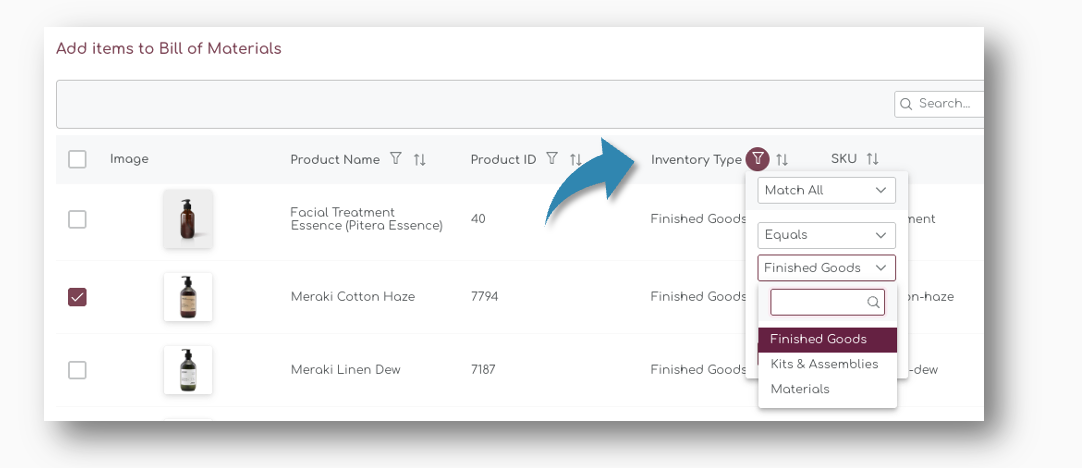
Add Finished Goods to Kits & Assemblies
Kits & Assemblies can be created by mixing both Materials, Finished Goods, or other assebled parts. When you create a new kit, you can easily filter on the ‘Inventory Type’ and select the type of product you want to add:
Add Materials to Kits & Assemblies
When you create a new assembled part using materials, you can select the materials from the available materials. When you add them to the Kit, a new BOM is created with all line items and their relevant information:
This creates a so called ‘multi-level’ Bill of Material’.
The Line Items in the BOM show the general information of the Kit, such as product/material name, supplier and unit of measure.
Add Line Items
You can add additional line items by simply typing in the field “Material Name” – all Materials or Components you have created for you store will appear when you start typing:
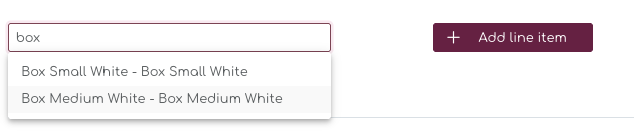
Only Materials will appear in this search. If you want to add a Finished Goods, or other Kits / Assemblies, you can use the “Select Multiple” instead:
5. How to Create a Bill of Material
↑ Back to topA Bill of Materials (BOM) is a comprehensive list of raw materials, components, and assemblies required to construct, manufacture, or repair a product or service.
A BOM provides a structured way to manage and track the various parts that make up a finished product, ensuring that you have all the necessary components in stock and ready for production.
The image below illustrates the relationship between a ‘Finished Good’, ‘Kits & Assemblies’ and ‘Material’:
Step by Step Guide for Creating a BOM
↑ Back to topPrerequisites
↑ Back to topBefore you start using the Bill of Materials feature, ensure that you have completed the following prerequisites:
Set Up Suppliers: Make sure that all your suppliers are set up in the Shelf Planner system.
This includes entering supplier details such as name, contact information, and any specific terms and conditions. It is important to enter the parameters important for purchasing, in particular lead times. Accurate lead times ensure that you can plan your production schedule effectively and avoid delays. Having your suppliers set up will allow you to easily associate components with their respective suppliers.
Create Materials: Ensure that all the materials and components you plan to use in your Bills of Materials are created and available in the system. This includes entering details such as material name, description, unit of measure, and any other relevant information. Having your materials set up will make it easier to add them to your BOMs and manage your inventory effectively.
Step 1: Create New Bill of Material
↑ Back to topThere are two ways to create a Bill of Material in the app – the first is from the Product Settings pages, and the second is from the BOM pages. We’ll start with the product pages in this guide.
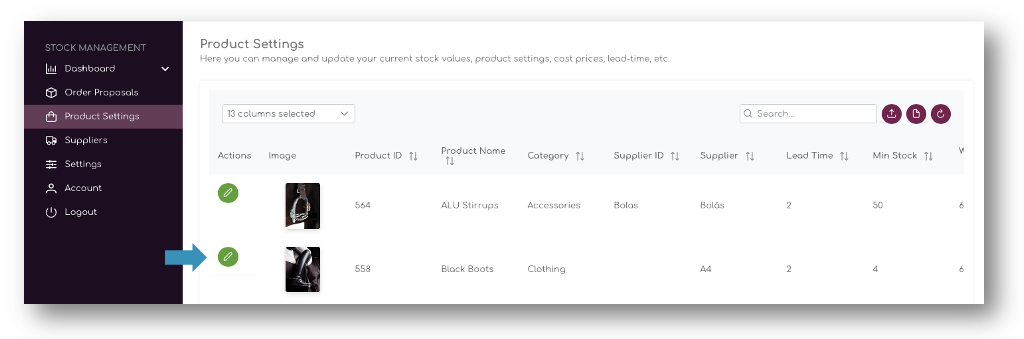
1. Navigate to Products section and open Product Settings pages:
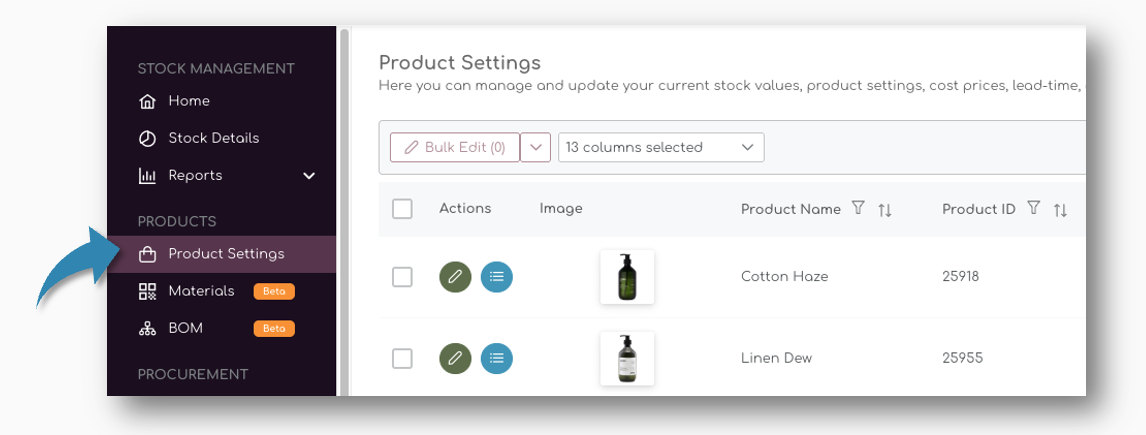
2. Select the product you want to create a BOM for and hit the teal button in the actions column to create a new Bill of Material for the item:
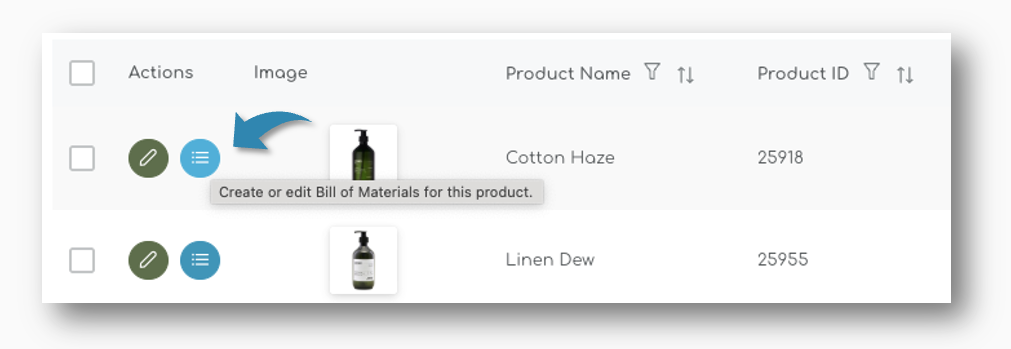
This will open a new screen where you can choose to either ‘Include’ the Finished Good into the BOM, or ‘Build from Scratch’
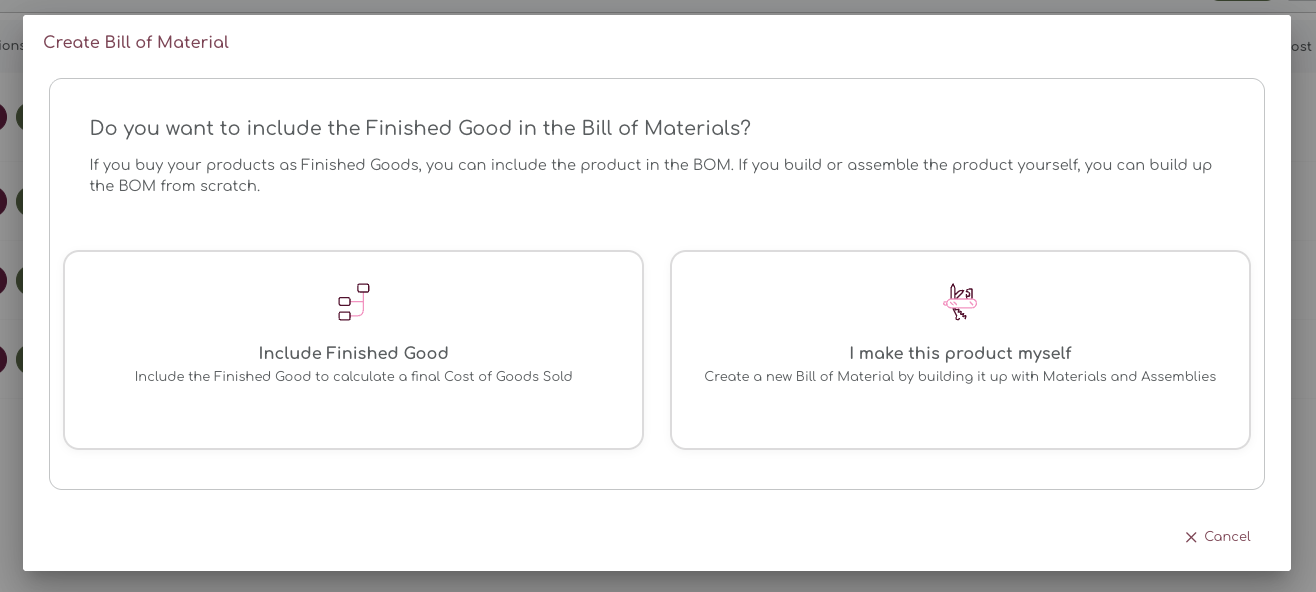
When you buy your products as finished goods, you can include them into the BOM and add other components, materials and assembled parts to create a complete bill.
In the following chapter, we will explain both methods.
Step 2: Build a BOM from Scratch
↑ Back to topWhen you select ‘I make this product myself’, you basically source all components and materials and assemble or manufacture the finished good yourself. Selecting this option opens a new screen where you can add all materials and parts you want to add to the BOM:
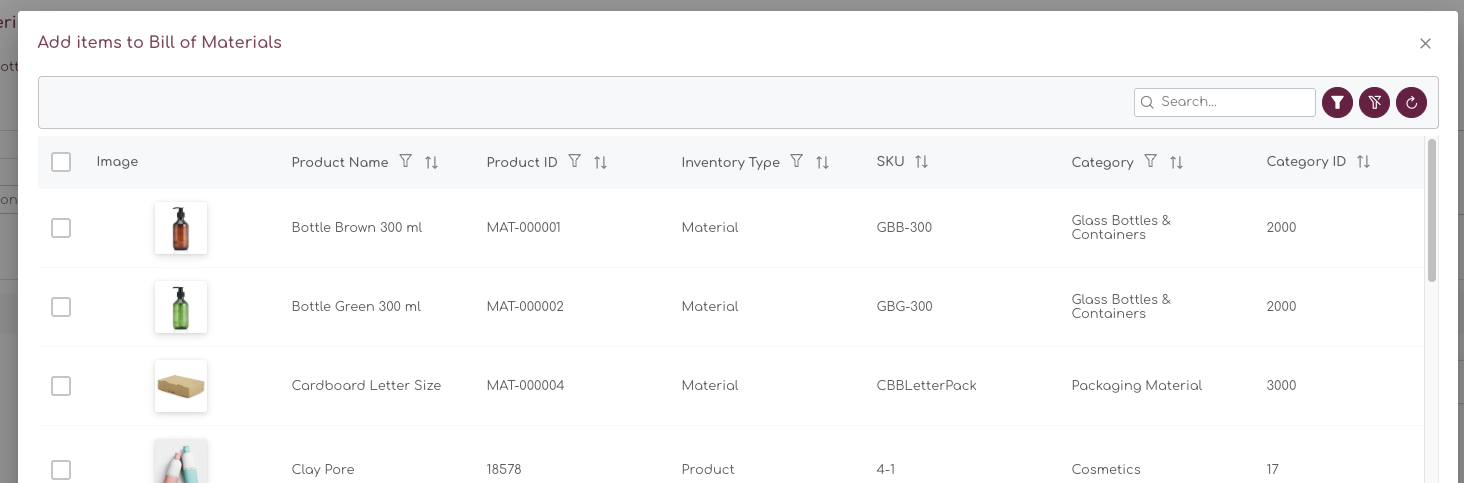
This screen offers all options, but you can easily filter by Supplier, Product ID or Inventory Type.
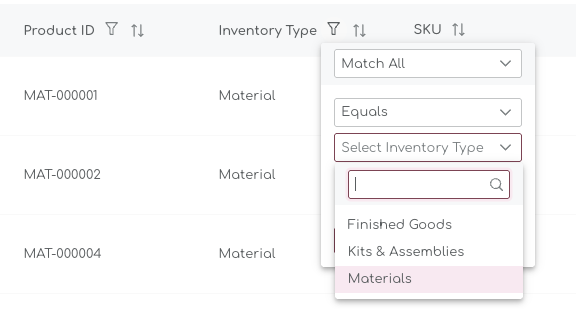
Inventory Type
Inventory Types differentiates between Finished Goods, Materials and Kits & Assemblies
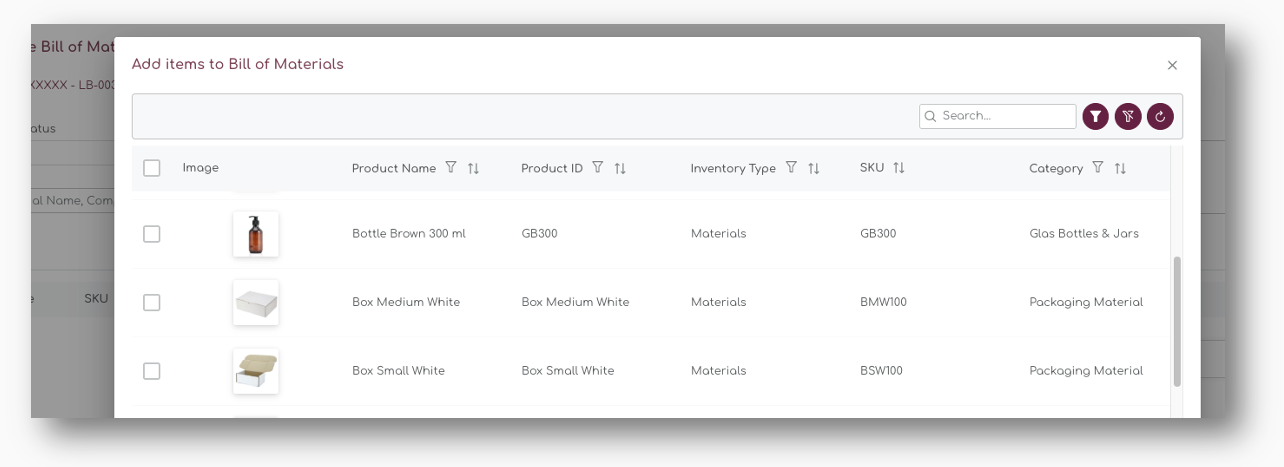
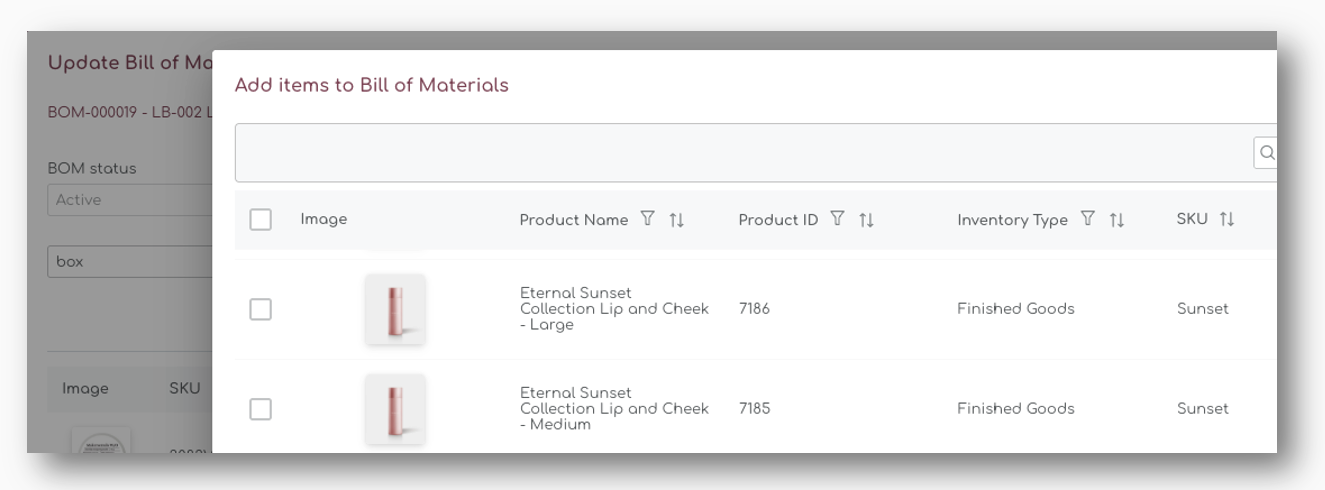
Step 3: Select Items to Include in BOM
↑ Back to topFrom the items shown, select the items you want to include in the BOM. Tick the boxes left of the images to include them:

You can use the filter or the search box on top of the table to find the items you’re looking for. If you can’t find an item, or have missed to create a material, you can always proceed from here and add it at a later stage.
When you have completed the selection, hit the ‘Add selected items’ at the bottom of the page:

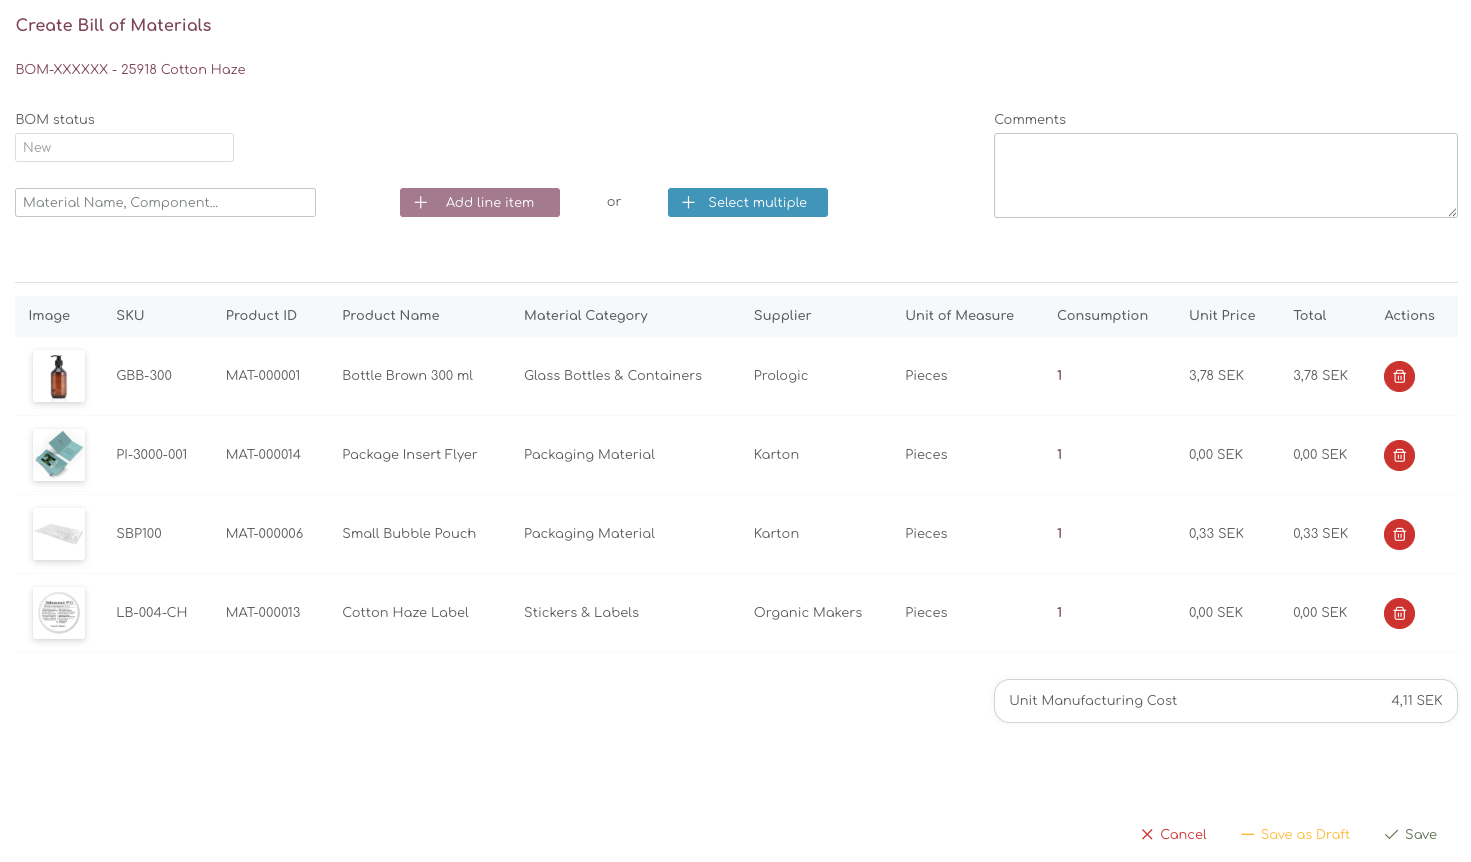
Step 4: Review Bill of Material
↑ Back to topThe next page shows the summary of the newly created BOM, with all line items and their informtion:
BOM Details
The Bill of Materials detail show the general information and included BOM ID, BOM Status. From here you can also add addtional products or materials:
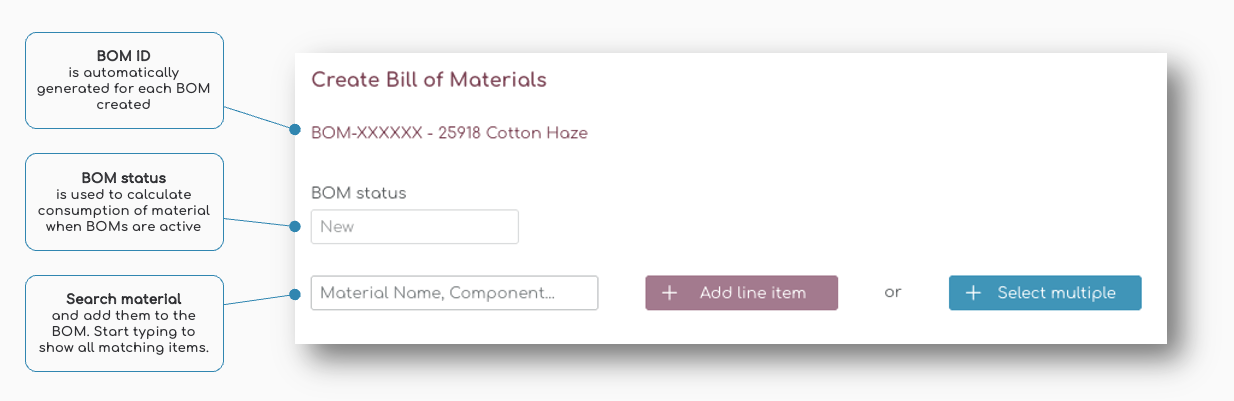
Add line Item
Simply start typing to find additional material, finished goods or components:

Alternatively, you can ‘Select Multiple’ and the pop up appears to add multiple items in one go. Select the product and ‘Add line item’:

Comments
The comments field is a free text field which can be used to leave comments to team member, or add general information to the BOM.
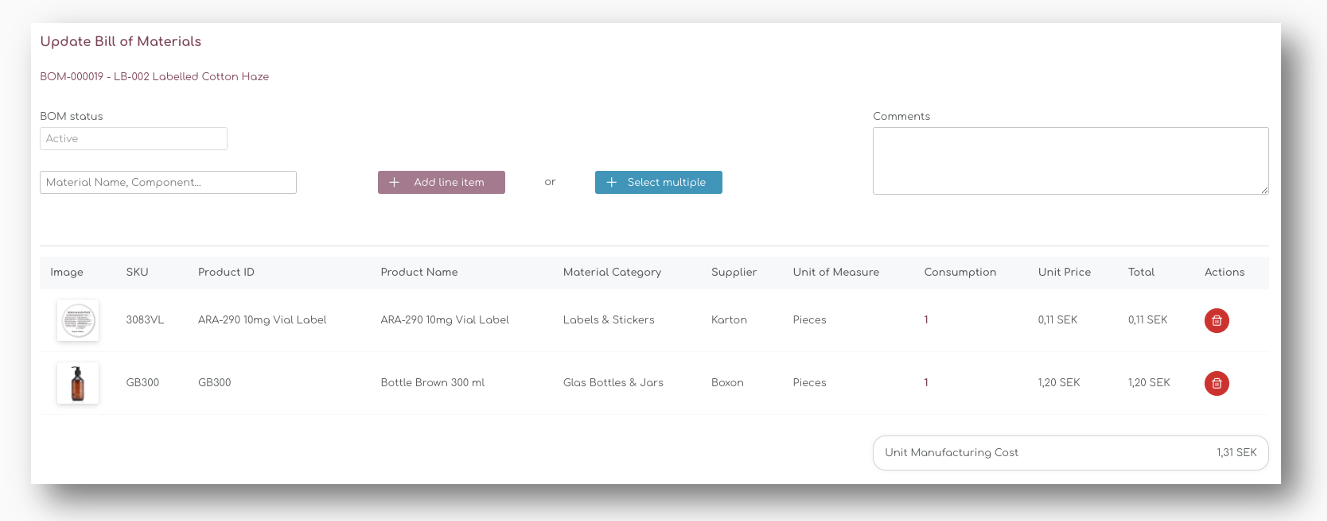
Step 5: Review Line Items and Consumption
↑ Back to topWhen you have added all the items to the product, you can review the consumption of each material.
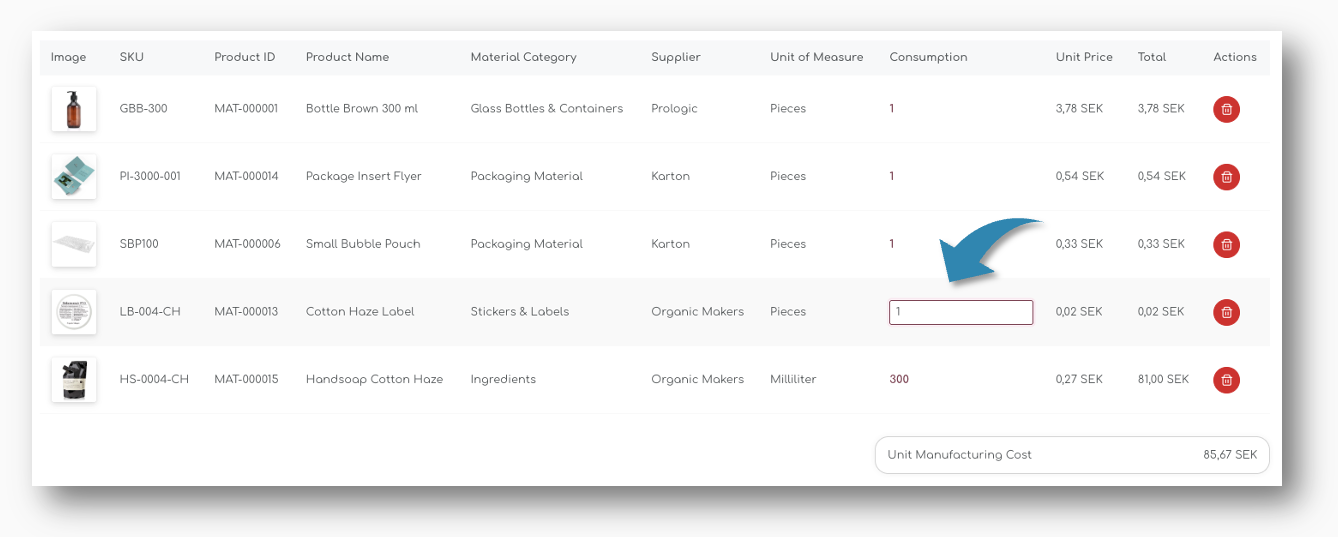
When you change the consumption, the total cost price for the line item is automatically updated. Also the total manufacturing cost is updated when you make changes to any of the items:

Step 6: Create and Save BOM
↑ Back to topSave the Bill of Material as a Draft, or as a final BOM at the bottom of the page:

When you save the BOM, a unique BOM ID will be generated and you will be redirected to the main BOM pages.
Step 7: Review Material Status
↑ Back to topWhen you have saved the Bill of Material, the system will automatically generate a forecast for all materials and components.
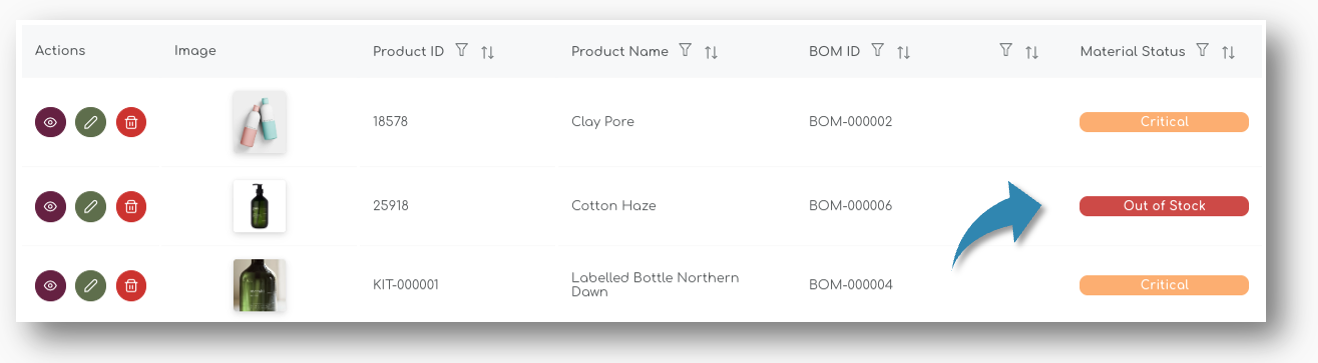
On the main pages of the BOM, you can see the Material Status – for the item we have created in this example, the Material Status is set as ‘Critical’:
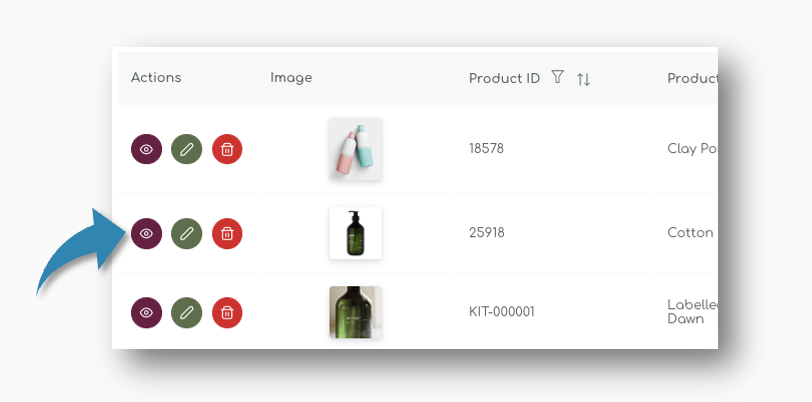
You can look at the BOM and the status of each individual material by clicking the ‘eye’ icon left of the table:
Material Status
For each of the line items, the Material Status is shown. Within each BOM, material statuses can vary, but the Material Status for the Finished Good is always based on the material with the lowest quantity available.
In this example, you technically cannot produce this item, as one of the materials is out of stock:
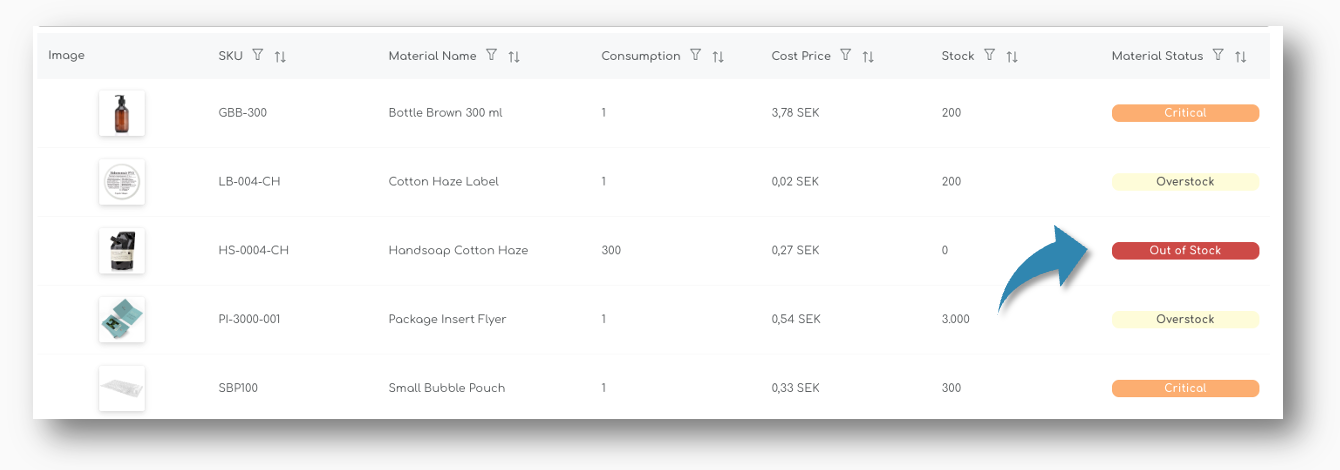
Two other Materials are classified as ‘Critical’, which means that there is not sufficient enough stock on hand to cover the future sales.
Stock Status Definitions
Your stock status is automatically updated based on how much stock you have compared to your Ideal Stock level (the optimal amount you want to keep in stock, based on your future sales forecast).
| Material Status | What it Means |
|---|---|
| Sufficient | You have enough stock to meet your Ideal Stock level. No action is needed. |
| Low Stock | Your stock is below the Ideal Stock level but still covers more than half of it. Consider placing an order soon. |
| Critical | Your stock is less than half of your Ideal Stock level. Order now to avoid stockouts and to avoid lost sales. |
| Out of Stock | You have no stock left. Immediate action is required to replenish your inventory. |
6. Create Purchase Orders
↑ Back to topOnce you have set up a supplier, you can create a Purchase Order for multiple products by selecting a supplier in the top of the table:
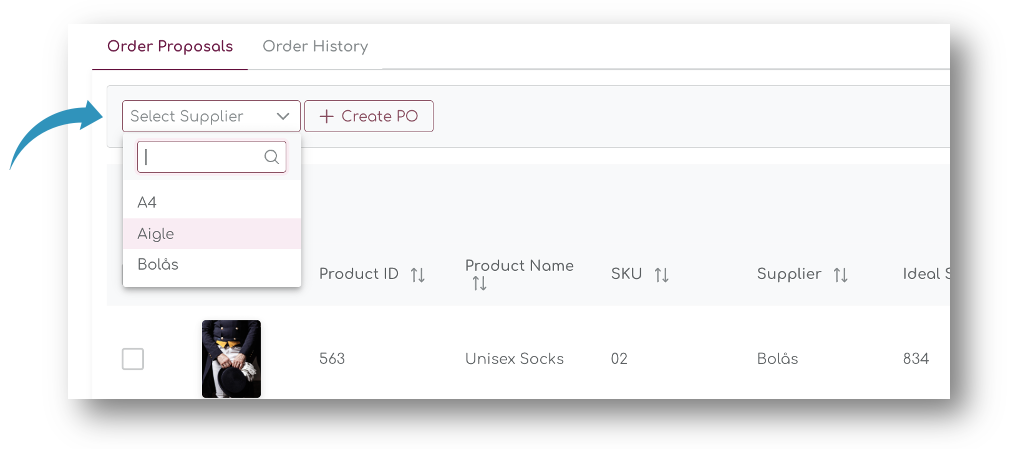
The table will show all items with order proposals:
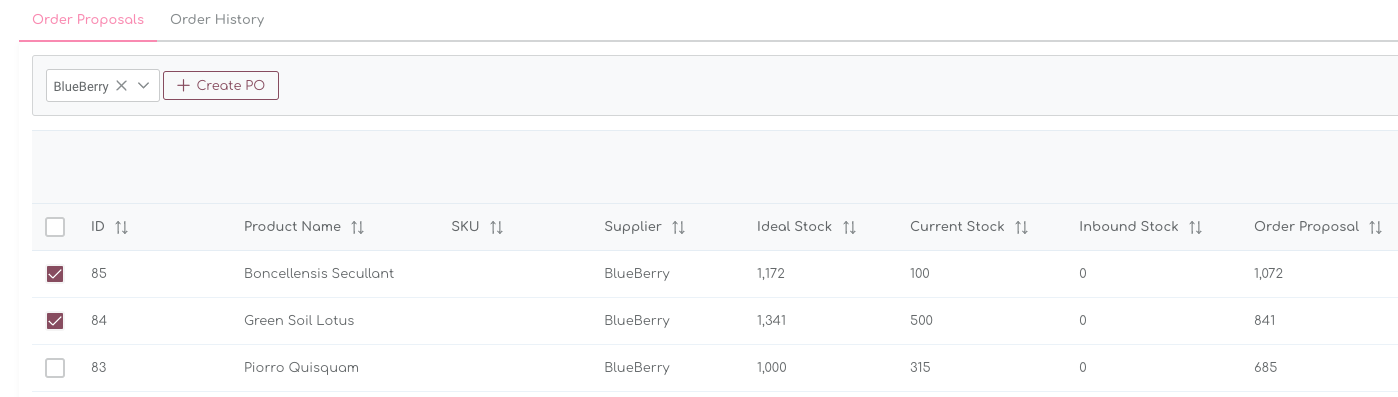
Tick the box for the items you want to order and press the ‘Create PO’ button on the top of the table. This will trigger a pop up where you can enter the order details:
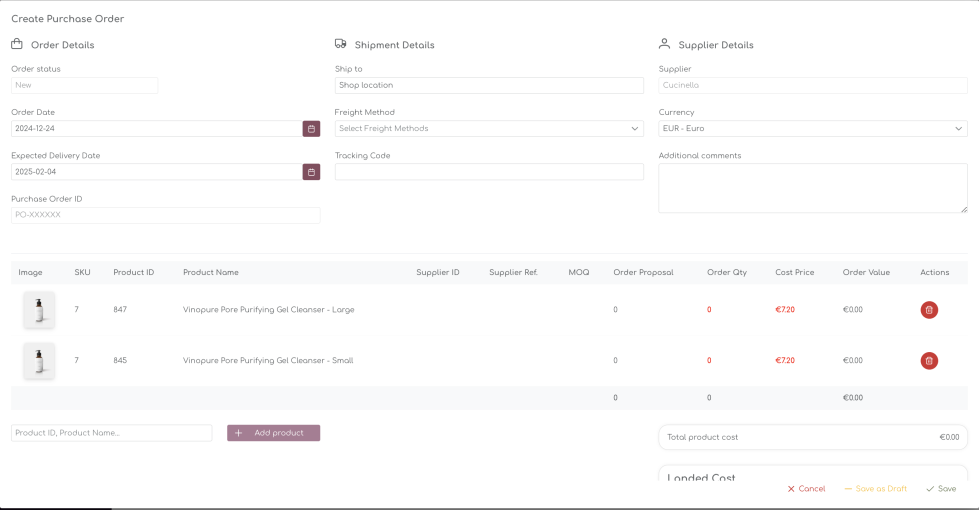
Order Details
↑ Back to topThe order details contain information of the order status, Order date and Expected Delivery Date:

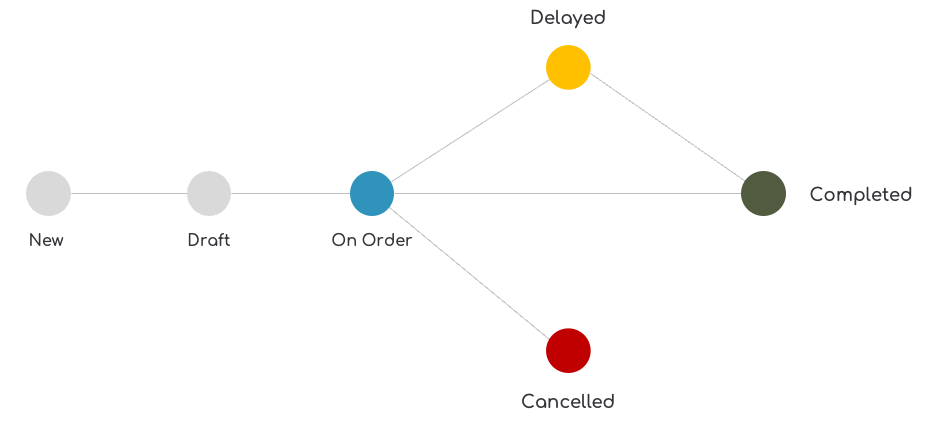
Order Status
↑ Back to topWhen you create a new purchase order, you can adjust the status based on following statuses:
- New
- Draft
- On Order
- Delayed
- Completed
- Cancelled
We will describe each of these statuses in the chapters below.
Order Date
↑ Back to topThe Order Date is automatically set to the date of creation, but you can change this to any date in the future. It will also appear on the generated PDF if you export the order, and will remain the reference point for the purchase order.

Expected Delivery Date
↑ Back to topThe Expected Delivery Date is automatically generated based on longest lead time for the products selected in the order.

Expected Delivery Dates can be updated at any time on placed orders. You can also change the status of the order to delayed – in that case you will be asked to change the ETD at the same time:

Let’s say the items in the example have the following lead times:
| SKU | Lead Time (in Weeks) |
|---|---|
| 501 | 2 weeks |
| 512 | 3 weeks |
| 551 | 2 weeks |
In this case, the product with the longest lead time will determine the Expected Delivery date – 3 weeks / 21 days from today’s date.
Purchase Order ID
The Purchase Order ID is automatically generated based on the PO settings.

Shipment Details
↑ Back to topThe Shipment Details are used to determine the allocation information for the purchase order and also contain information about the Freight Method you or your suppliers can use.
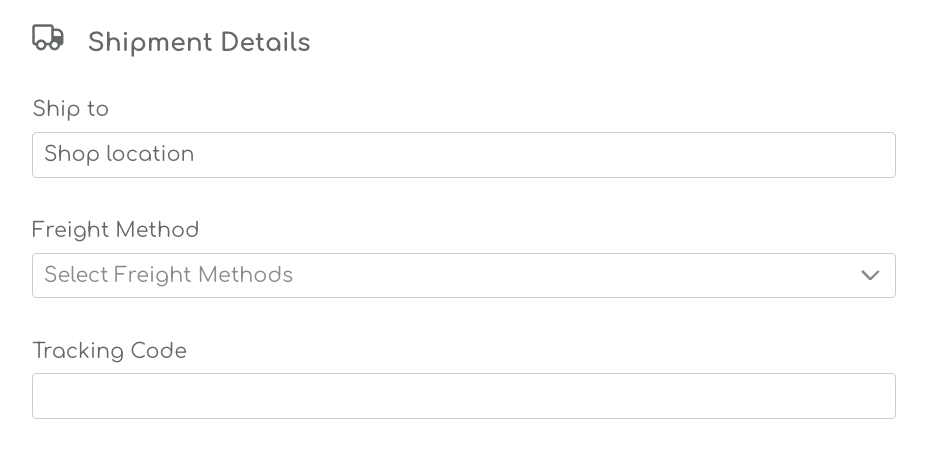
— The Ship To Location is a Boost feature that is under development. —
Freight Method
↑ Back to topYou can select a number of freight methods to calculate the landed cost for your orders. In the drop down, you can select multiple transportation modes:
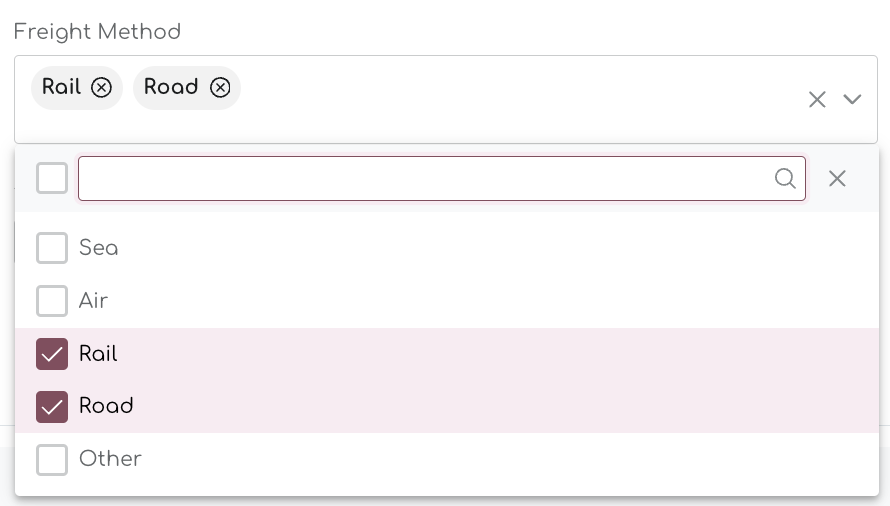
When you select the Freight Method, you can enter the cost for each line in the Landed Cost section:
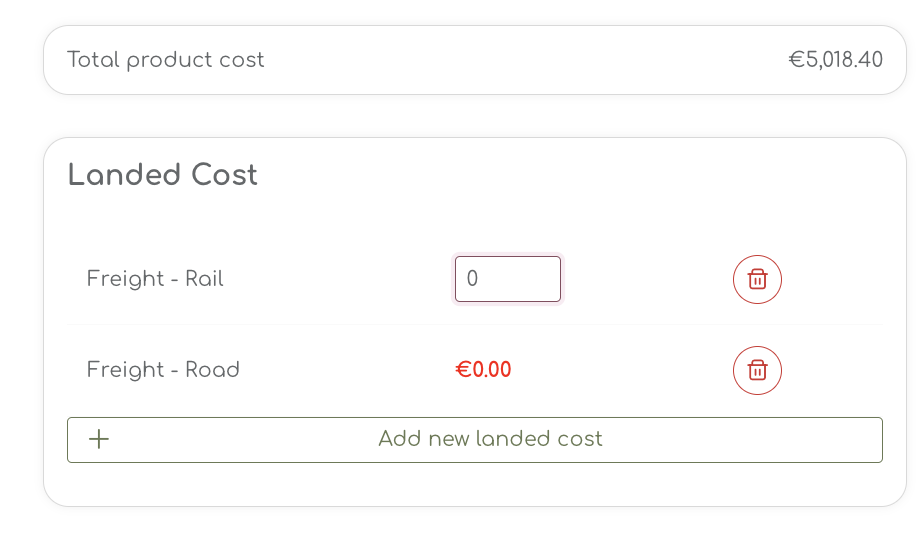
When you enter the freight cost, the Landed Cost is updated accordingly.
Order Lines
↑ Back to topWhen you generated the initial Purchase Order, the items you selected are shown in the table. As long as an order is set to status ‘new’, ‘draft’, ‘On Order’ or ‘Delayed’ you can amend the order and add or remove products from the order lines. Completed orders cannot be changed anymore.
To delete a product from the order, you can use the bin under the actions in the table.
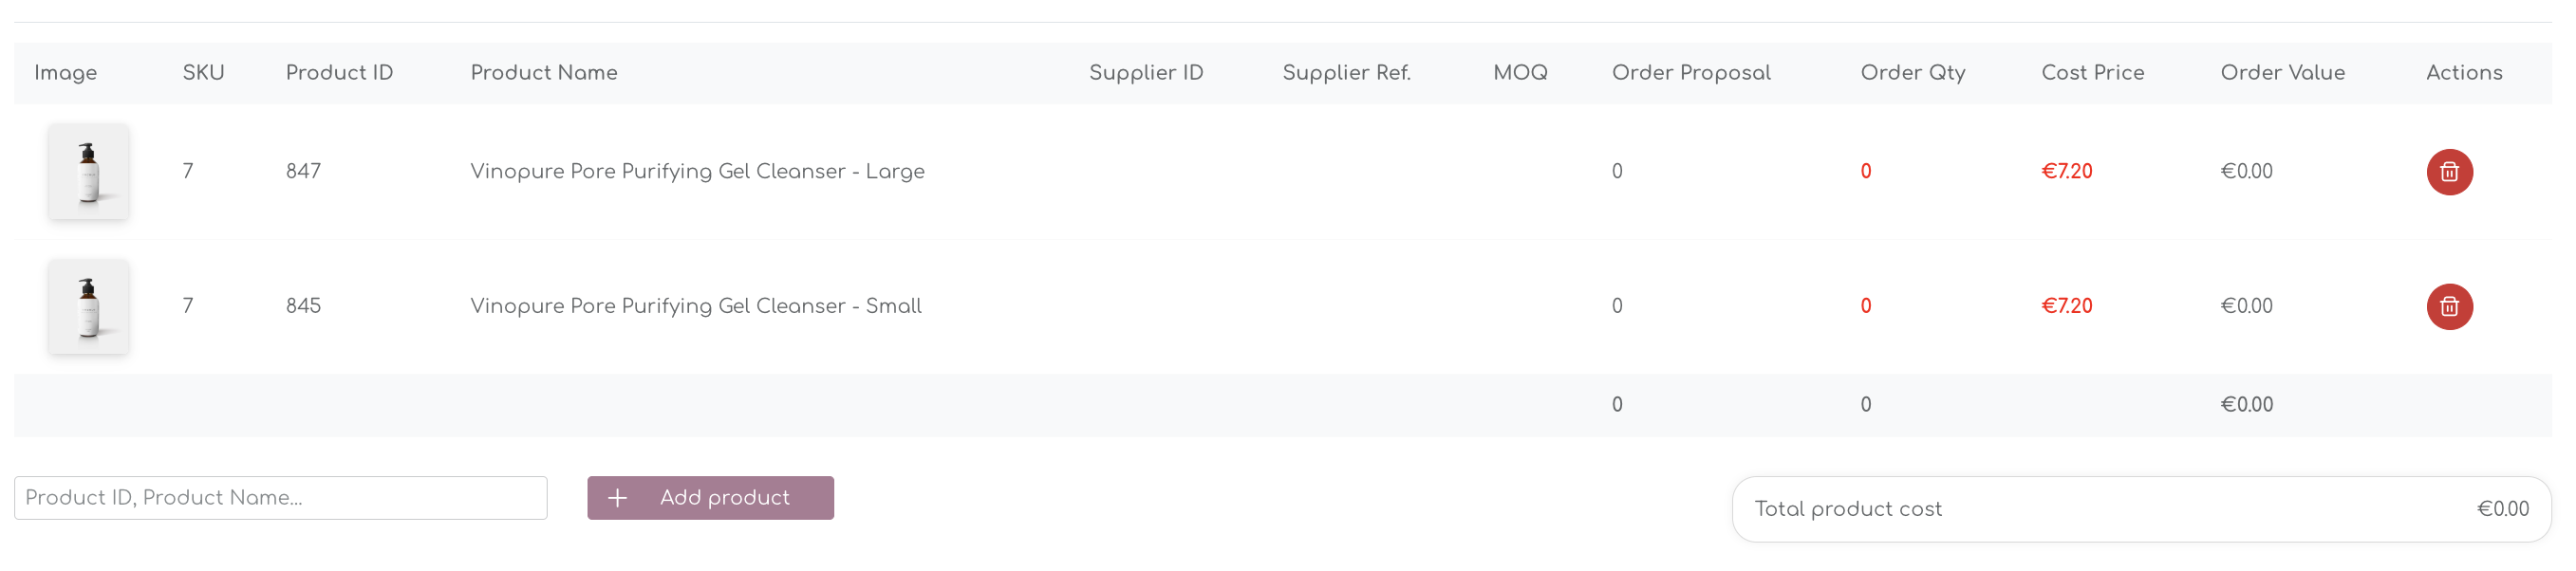
Add Products to the PO
↑ Back to topIf you want to add a product to the PO, you can simply search for the item in the ‘Add Product’ section:

The smart search allows you to simply put in any value to search for a product. The available products you can choose from is based on the Supplier that is assigned to the products.
The final order quantity is a user input and is the final order quantity for the product.
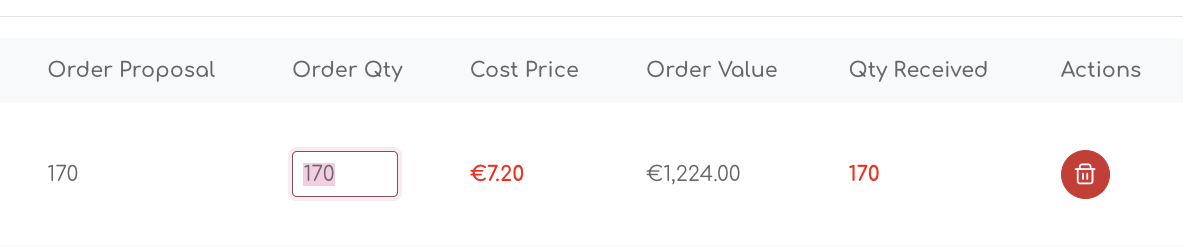
Order Quantity
↑ Back to topThe Order Quantity is highlighted ‘bold’ and ‘red’ to highlight the editability. The initial value is based on the autogenerated order proposals the Shelf Planner engine recommends you to order. In the example below, the engine recommends to order 170 units, but you can overwrite this if you chose to:
When you overwrite the Order Quantity, the Order Value is updated accordingly:

The Sum of the bottom of the tables shows the Original Order Proposal, the final Order Quantity and the Sum of the Order Value:
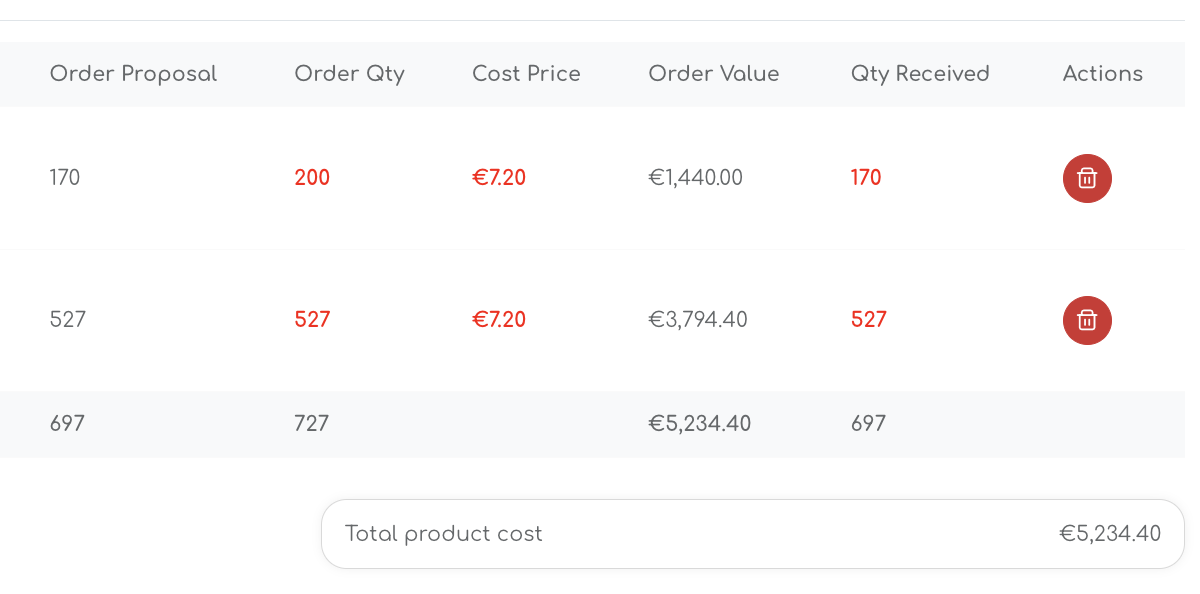
The Order Value is updated based on the changes you make in the Order Qty.
Cost Price
↑ Back to topThe Cost Price for the item should be pre-populated with the value that was last entered by the user. Cost prices are entered and managed in the Product Settings pages.
However, it can happen that prices increase or decrease. In that case, you can change the pre-filled cost price to the new price at the same time when you create the order.
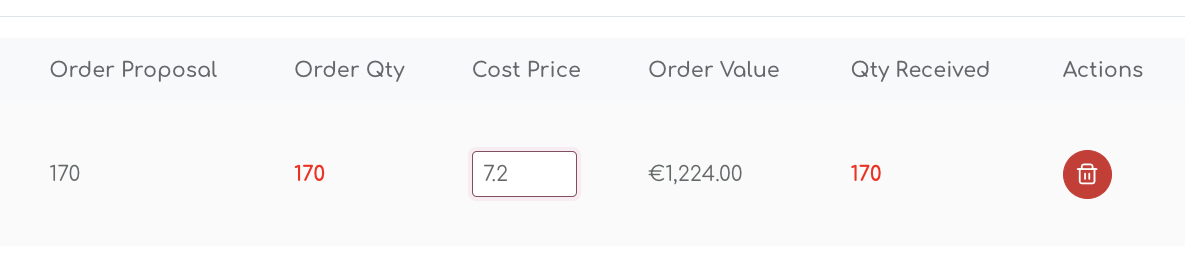
The new cost price will be used to calculate the Average Cost price in some of the stock report. (for more info see Cost of Goods and the chapter on average cost prices.
Order Status
↑ Back to topWhen you create a new purchase order, you can adjust the status based on following statuses:
- New
- Draft
- On Order
- Delayed
- Completed
- Cancelled
Draft Orders
↑ Back to topWhen you create a new order, you can make changes and save it as a draft. At the bottom of the page, select ‘save draft’ to create a Draft Order.

Order Recommendations for the items in the draft will be updated live based on sales in your store or changes to your stock levels.
When you save as a Draft, the order status will update in the Order history page:

Draft orders do not receive a Purchase Order ID (PO-XXXXXX) until the final order is created.
When you continue to work on the Draft order, the status shows draft in the Order Details:
When you save the order, you can continue to work on it and save again as draft, or ‘save’ as a new order. This will turn the draft to a final order and set the status to On Order. At this time, the order will also receive its final PO ID.
On Order
↑ Back to topOrders that have received the status ‘On Order’ ensure that incoming stock is taking into account for future order proposals.
When you place the order for an article, the order quantity is classified as ‘incoming stock’. This allows the algorithms to predict your future stock positions.
Landed Cost
↑ Back to topLanded cost in refers to the total cost of acquiring a product, including all expenses incurred to deliver it to the final destination. This figure goes beyond the purchase price and typically includes:
- Purchase Price: The cost of the product itself.
- Shipping and Freight Costs: Fees for transporting the goods from the supplier to the buyer’s location.
- Customs Duties and Taxes: Import/export duties, tariffs, and other government-imposed fees.
- Insurance: Coverage for the goods while in transit.
- Handling Fees: Costs associated with loading, unloading, and storing the goods during transit.
- Warehouse Fees: If the goods are temporarily stored, warehousing costs are factored in.
- Miscellaneous Fees: Any additional costs, such as port or terminal fees, inspection fees, or currency conversion costs.
When you select the Freight Method, you can specify the individual cost related to these.
For any other cost, for example insurance, Customs & Duties, you can use the free text field in the Landed Cost area:
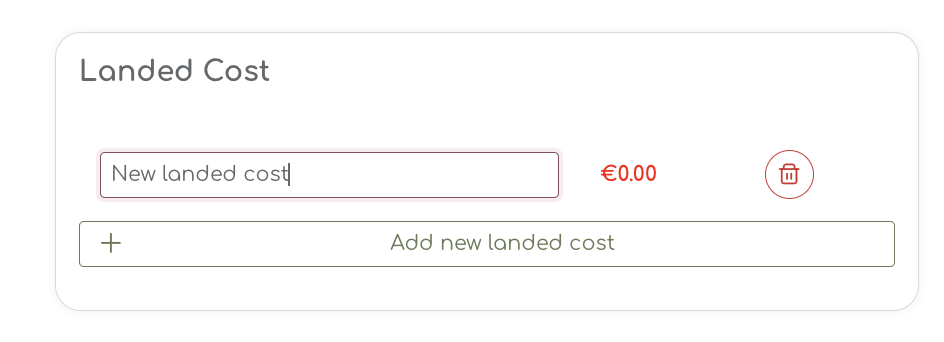
This is a free text field and you can enter the related costs to the purchase order. All the cost you enter will be included in the calculation of the Landed Cost by Product, related to this specific Purchase Order.
Order History
↑ Back to topOnce you have created a Purchase Order, you can track and manage the orders in the Order History tab. The order history tab shows all Purchase Order and their current statuses:
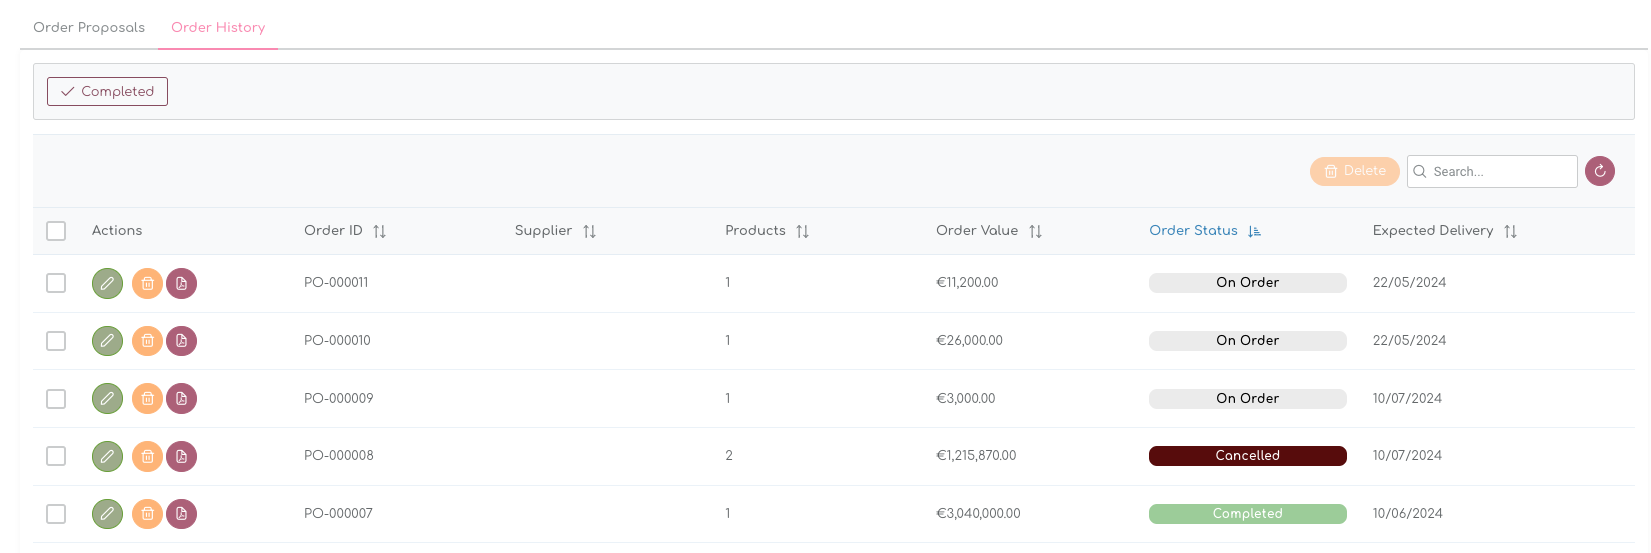
Purchase Order Status
↑ Back to topThere are 5 Order Statuses available, 4 of which can be selected by the user.
- On Order
- Completed
- Delayed
- Cancelled
- Deleted
On Order
Once a Purchase Order is created, it is automatically set to On Order. This means there is incoming stock, which is used in the calculation of the Order Proposal.
As described in the previous chapter (Create Purchase Order), the Expected Delivery Date is generated by looking at the longest lead-time of the products in the order.
Completed Orders
When an Order has been received, the user can complete the order by selecting the ‘Completed Status from the Drop Down list and save.
Setting the Order to ‘completed’ also updates the ‘Current Stock’ in WooCommerce and updates the order proposal accordingly.

For Completed and Cancelled Orders, the Expected Delivery date in the table is Light Grey (Col #D3D3D3 instead of the normal Dark Grey (Col # 131313) to indicate this order has been received or cancelled and is no longer incoming.
Delayed Orders
If a Purchase order is dealyed, you can change the status and update the ‘Expected Delivery Date’;
After saving the changes, the Purchase Order status changes to ‘Delayed’:

If there are any impacts on the availability, you will receive a notification of potential lost sales, or get a new order recommendation.
Cancelled Orders
When an order is cancelled, the inbound stock for this order is deleted and the Order Proposal is updated accordingly.
Deleted Orders
The fifth status is ‘Deleted’. When an Order Line is deleted, the entire order line is deleted from the table. Deleted Order Lines will need to be stored for a selected period of time.

Mass Edit function
↑ Back to topThere are two options to ‘mass edit’ Purchase Orders.
1. Complete Orders
If you select one or more orders with the tick box in the table, you can set them to completed with the ‘Completed’ button above the table:
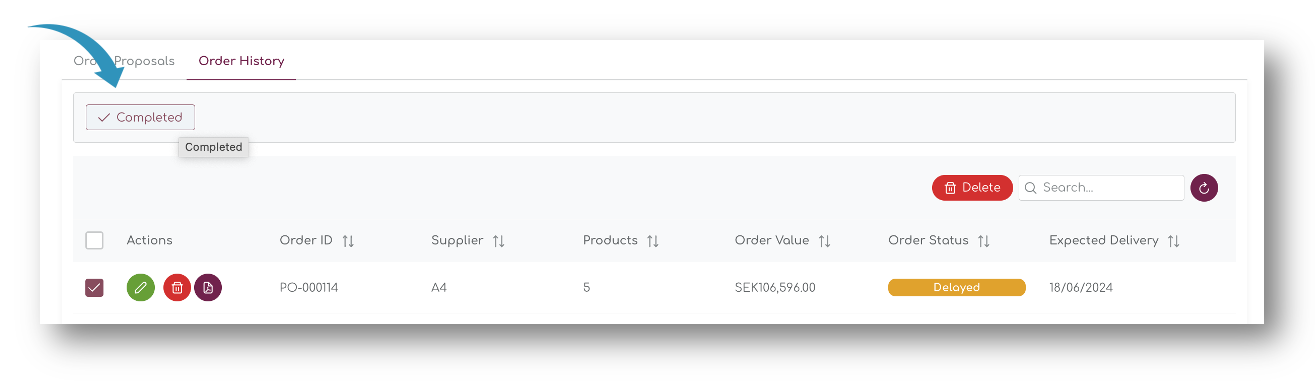
This action will set the order to completed, with 100% delivery (all items in the order have been delivered)
2. Delete Orders
The second option allows you to delete the orders:
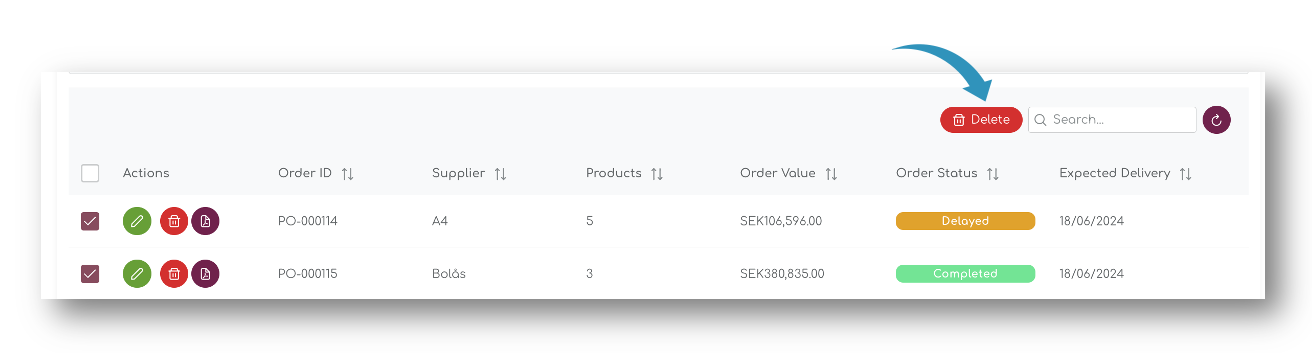
This action deletes the selected orders. If selected Purchase Orders are ‘On Order’, the incoming stock is deleted as well and the Order Proposals are recalculated automatically.
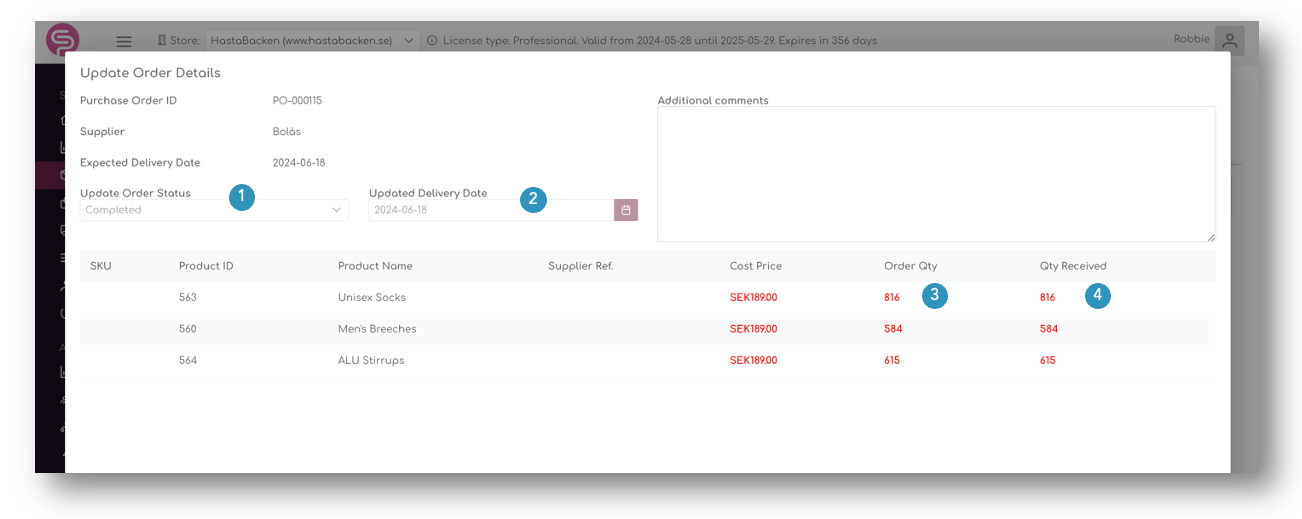
Edit Purchase Orders
↑ Back to topYou can edit purchase orders and update them by selecting the edit button:
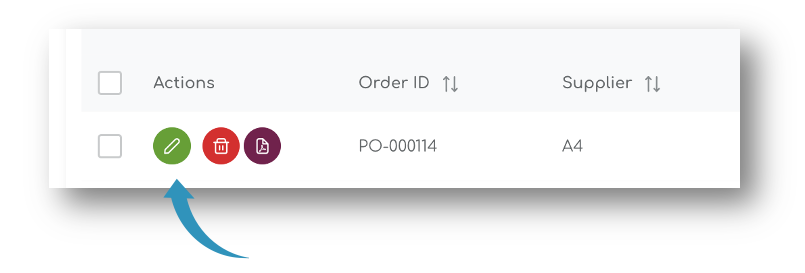
The pop up that appears allows you to make changes to the status of the order (1), the Expected Delivery Date (2), Order Quantity (3) and the Received Quantity (4)
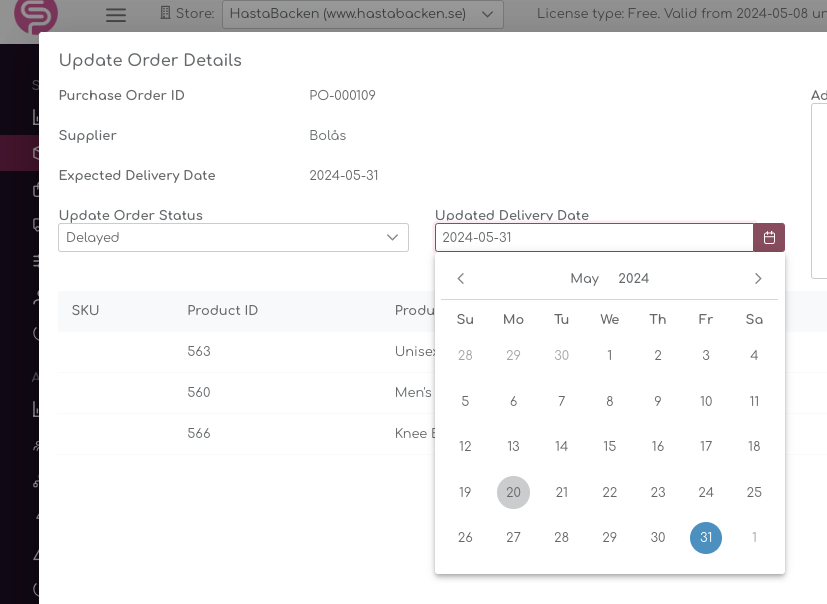
Update Order Status
After placing the Purchase Order, you can update the status as we discussed earlier in this article.
Updated Delivery Time
When you set an order status to ‘Delayed’ you can adjust the Expected Delivery time to the new date:
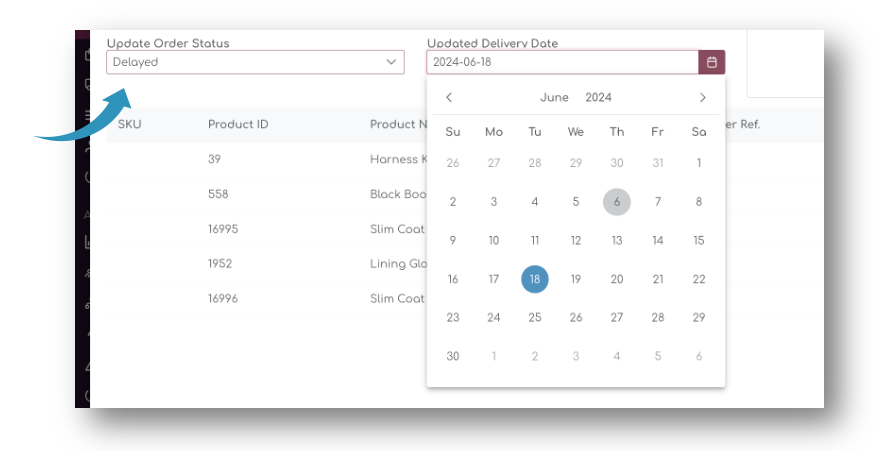
Changing the Delivery date will automatically recalculate your order proposals and stock requirements.
Update Order Quantity
You can update the order quantity on the order by order line. For example, if your suppliers informs you about short delivery or additional quantities, you can still amend the quantity and see the impact on your stock.
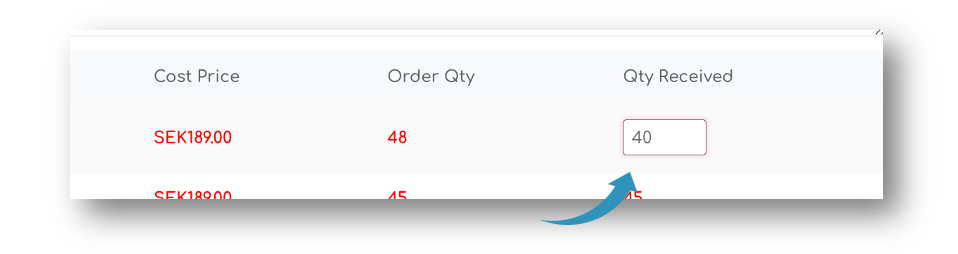
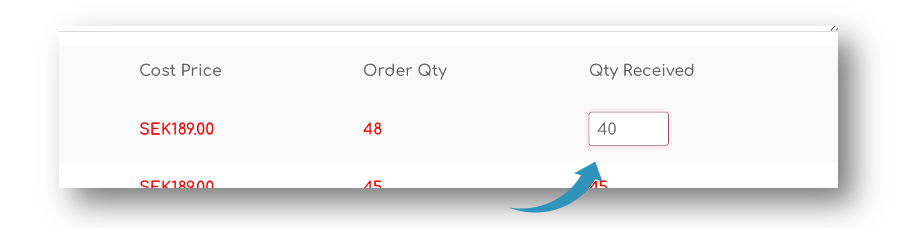
Quantity Received
After delivery, it can happen you’re missing units, for example due to short deliveries or damaged goods during transportation. You can adjust the delived quantities and the system will automatically recalculate the impact on your stock.
By default, the value for Qty Received is equal to the Order Qty, but you can override it by selecting the field:
Header
The header contains the company Logo, Supplier General information and the PO numbers and order dates.
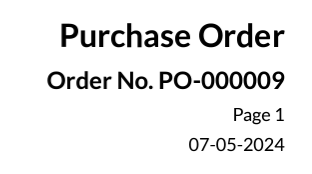
The values presented:
| Value | Description | Type | Source |
|---|---|---|---|
| Company Logo | The company (our customer) logo | png, jpeg, svg upload max 50×50 px | Uploaded on Settings pages |
| Order No. | The PO number that generated by the app | ID, PO number | Automatically generated when creating the PO |
| Order Date | Date when the PO is generated (e.g. 15.04.2024) | Date | Automatically generated when creating the PO |
Supplier Information
Supplier information is maintained on the Supplier page. The Supplier address will appear on the PO header:
The Supplier information contains all general information about the supplier, that is created in the Supplier pages:
| Value | Description | Type | Source |
|---|---|---|---|
| Supplier Name | The Supplier Name | Free text | Generated by user when creating new supplier on the Supplier pages. |
| Address | Supplier Address Information (Street Name) | Free text | Generated by user when creating new supplier on the Supplier pages. |
| City | Supplier Address Information (City) | Free text | Generated by user when creating new supplier on the Supplier pages. |
| Postal Code | Supplier Address Information (Postal code) | Free text | Generated by user when creating new supplier on the Supplier pages. |
| Country | Supplier Address Information (Country) | Free text | Generated by user when creating new supplier on the Supplier pages. |
Purchase Order Information
The order details contain the most relevant information with regards to the purchase order:

| Value | Description | Type | Source |
|---|---|---|---|
| Vendor No | The Supplier Number | Free text | Generated by user when creating new supplier on the Supplier pages. |
| Delivery Terms | Delivery Terms for the selected Supplier | Drop down selection | Selected by user when creating new supplier on the Supplier pages. |
| Payment Terms | Payment Terms for the selected Supplier | Drop down selection | Selected by user when creating new supplier on the Supplier pages. |
| Purchaser | Person placing the order (user defined) | Login credentials (First Name / Last Name) | utomatically generated by login credentials |
| Order Date | Date when the PO is created | Date | Automatically generated when creating the PO |
| Shipment Date | Date when the PO is expected for delivery | Date | Automatically generated when creating the PO |
| Currency | Currency Code (e.g. EUR, SEK) | International Currency Code | Assigned by user in the Supplier settings and used when creating the order |
Order Details
The Order Details contain the products on order, quantities and values of the order:
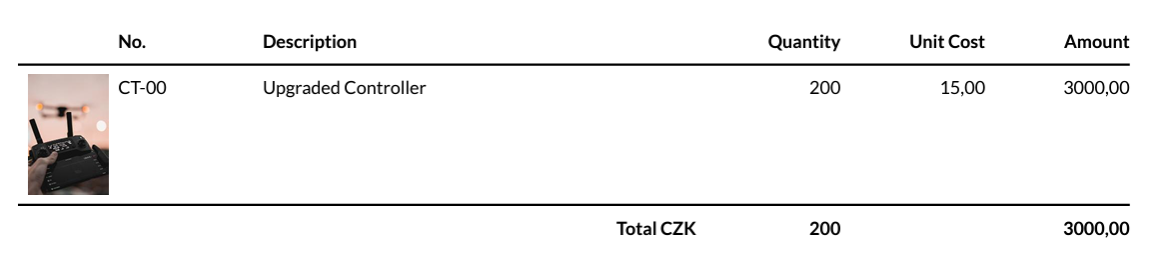
| Value | Description | Type | Source |
|---|---|---|---|
| Product Thumbnail | Product image in thumbnail format | Image | Part of platform meta data |
| Description | Product Name | Product name, part of platform information | Part of platform meta data |
| Product Variation | Payment Terms for the selected Supplier | Drop down selection | Part of platform meta data |
| Supplier Product ID | Person placing the order (user defined) | Free text | Created by user in Product management pages in SP |
| Quantity | Order quantity for the order | integer | Automatically generated when creating the PO |
| Unit Cost | Cost Price in Supplier Currency | Value, 2 decimals | Automatically generated when creating the PO |
| Amount | Date when the PO is created | Date | Automatically generated when creating the PO |
| Total Value | Total order value of the PO | Date | Automatically generated when creating the PO |
| Total Units | Date when the PO is created | Date | Automatically generated when creating the PO |
Delivery Details
Delivery details contain the information where the order has to be shipped to.
The Delivery information is the company address, unless a different Delivery address is entered in the Settings pages:

| Value | Description | Type | Source |
|---|---|---|---|
| Name | Company name, C/O or Name of adressy | Free text | Entered by user in the Settings pages |
| Delivery Address | Street Name | Free text | Entered by user in the Settings pages |
| Postal Code | Postal code | Free text | Entered by user in the Settings pages |
| City | City | Free text | Entered by user in the Settings pages |
Note to supplier
The note to supplier is a free text the user can add to each purchase order. It will appear on the PDF underneath the Delivery Address Details:
Footer
The footer of the PDF contains general information of the company.

Some of the information is not mandatory and if it is not filled in the PO settings, they will not appear in the footer, as shown in the example above for Web, Email and VAT Reg. No.
| Value | Description | Type | Source |
|---|---|---|---|
| User’s mail address | Email, based on user ID in SP | Generated by account login | |
| Phone | Phone number | Free text | Entered by user in the Settings pages in Company information |
| VAT Reg. no | VAT Registration number | Free text | Entered by user in the Settings pages in Company information |
7. Suppliers
↑ Back to topOn the supplier page, use the ‘New’ button on top of the table:

A pop up appears where you can enter the main Supplier details, such as name, lead times, location and currency:
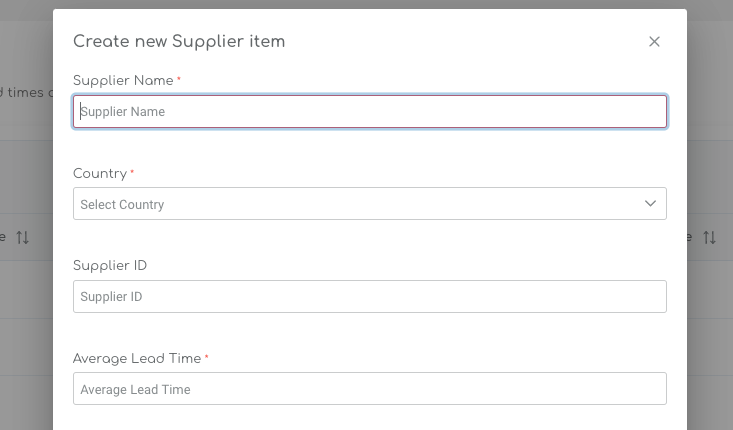
There are a number of mandatory fields required when creating a Supplier:
| Value | Description | Mandatory (Y/N) | Source |
|---|---|---|---|
| Supplier Name | Free text, Supplier Name | Yes | User defined, free text |
| Country | Drop Down, Country of Origin | Yes | User defined, Drop Down List |
| Address | Free text, Address | No | User defined, free text |
| Postal Code | Postal Code, free text | No | User defined, Drop Down List |
| Supplier ID | Free Text | No | User defined, free text |
| Average Lead Time in Weeks | The average number of weeks it take for the supplier to recieve goods from the supplier. | No | User defined, integer, weeks |
| Supplier Currency | Currency used for placing the Purchase Order | Yes | User defined, Drop Down |
| Payment Terms | Dropdown, selection of predefined payment terms | No | User defined, Drop Down |
Supplier Settings
↑ Back to topTwo critical settings are important when creating a new supplier:
- Average Lead Time in Weeks
- Supplier Currency
Supplier Lead Time
↑ Back to topSupplier lead times are used when calculating the Order Proposals. They are also used to pre-fill the Expected Delivery Date on the Purchase Orders.
Supplier Currency
↑ Back to topA drop down list of currencies, which will be used in calculation of Cost Prices.
Payment Terms
↑ Back to topThe payment terms are predefine by us on the back end and the user can choose between:
- None
- Payment in advance
- Net 7 days
- Net 14 days
- Net 30 days
- Net 45 days
- Net 60 days
8. Product Management
↑ Back to topThere are 3 ways to edit products in the program:
- Single Product Edit
- Bulk Edit
- Mass Upload with CSV files
Single Product Edit
↑ Back to topOn the Product Settings page, you can open the edit function with the pencil icon:
A popup appears for the item with the values you can change the following measures and values:
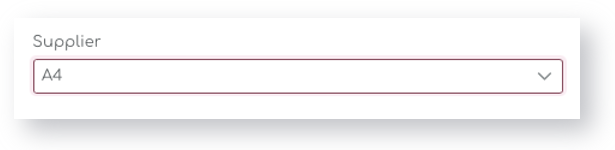
Suppliers
↑ Back to topThe Supplier field is a drop down list. You will have to set up a supplier before you can assign a product to a supplier.
Supplier Product ID
↑ Back to topSupplier Product ID and Supplier Product References are free text fields where you can add additional supplier specific information, for example SKU references or Supplier product descriptions.
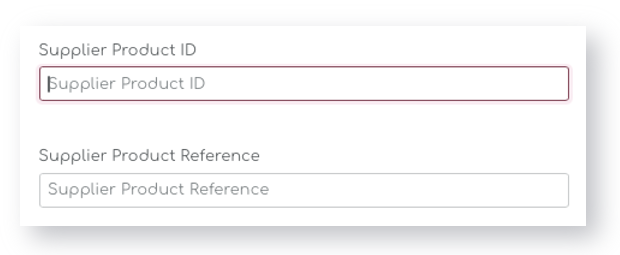
Both of these fields will also appear on Purchase Orders and the when PDF’s are generated.
Lead Time
↑ Back to topThe Lead Time is one of the KPI’s that has a significant impact on your order proposals.
The number represents the amount of weeks it take for a supplier to deliver the goods to your warehouse.
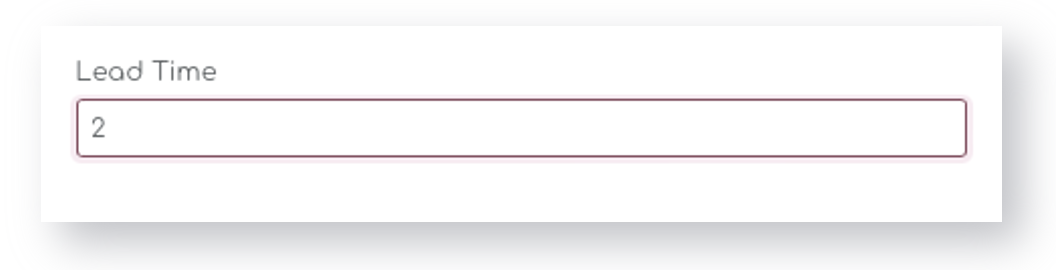
The Lead Time by Product overrides the Lead Time by Supplier and also the Default Lead Time for your store.
Minimum Stock
↑ Back to topThe minimum stock can be entered by product in the Product Settings.
The Minimum Stock in Shelf Planner is not to be confused with the low stock threshold that is used in WooCommerce. Instead, the Minimum Stock is used as a Safety Stock in the Order Proposal calculation. It works in tandem with the Ideal Stock. For more information, have a look at the dedicated article for Order Recommendations.

Minimum Stock is an optional field and you can enter any ‘whole’ value here.
Cost Price
↑ Back to topThe Cost Price is the purchase price for your products.

The currency for cost prices is linked to the supplier you have assigned to the product. If you don’t assign suppliers to your products, the default currency for the store is used.
Product Settings Table Filter
↑ Back to topThe product settings contains a number of measures and KPI’s. You can filter and add or remove columns from the tables with the Column Selector:
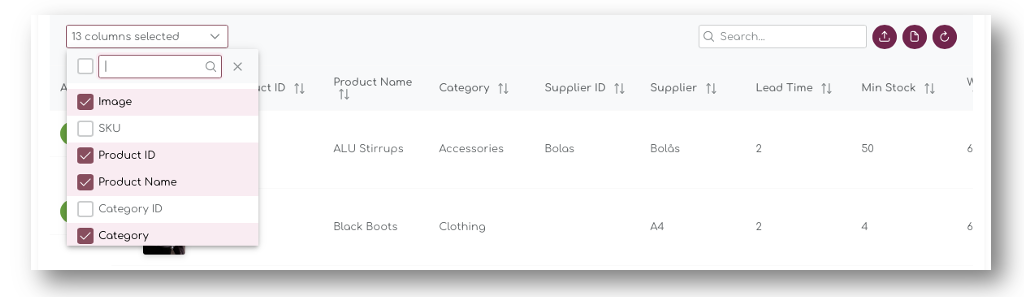
Product ID and and Product Name are static values and cannot be removed.
Bulk Edit Products
↑ Back to topSelect Products
↑ Back to topOn the Product Management pages, you can select multiple products and change the settings for these items in one go. Start by selecting the products in the table:
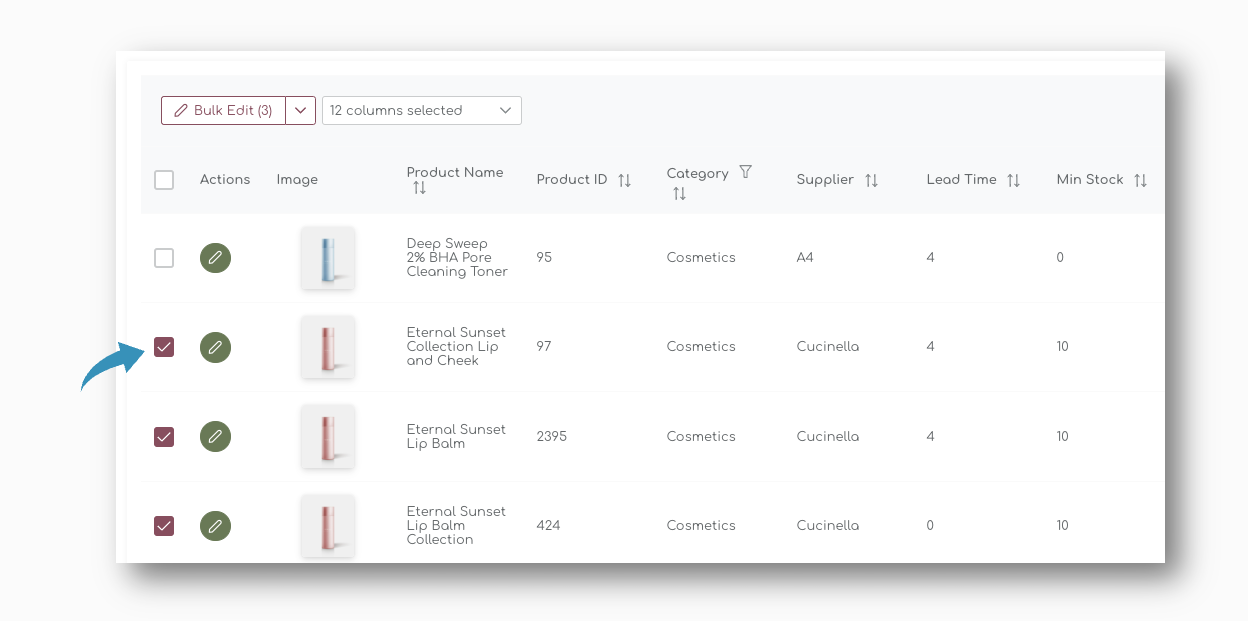
When you have selected the products you want to edit, the ‘Bulk Edit’ on top of the table allows you to chose the values you want to edit:
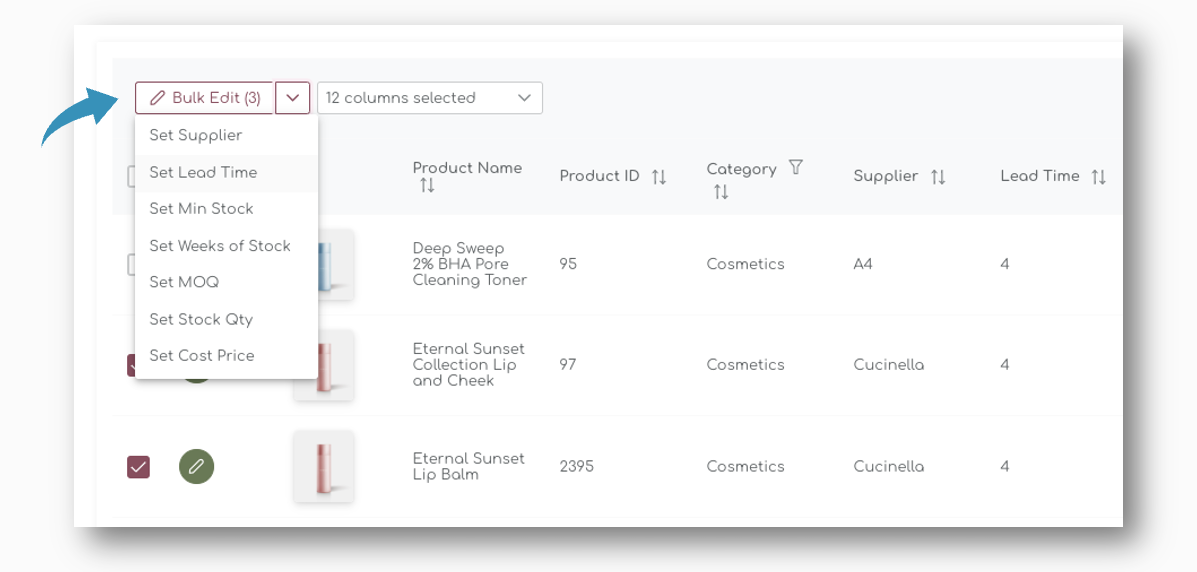
All the fields that are editable in the single product edit are also editable in the bulk edit. When you select one of the values you want to change, a pop appears where you can enter the value:
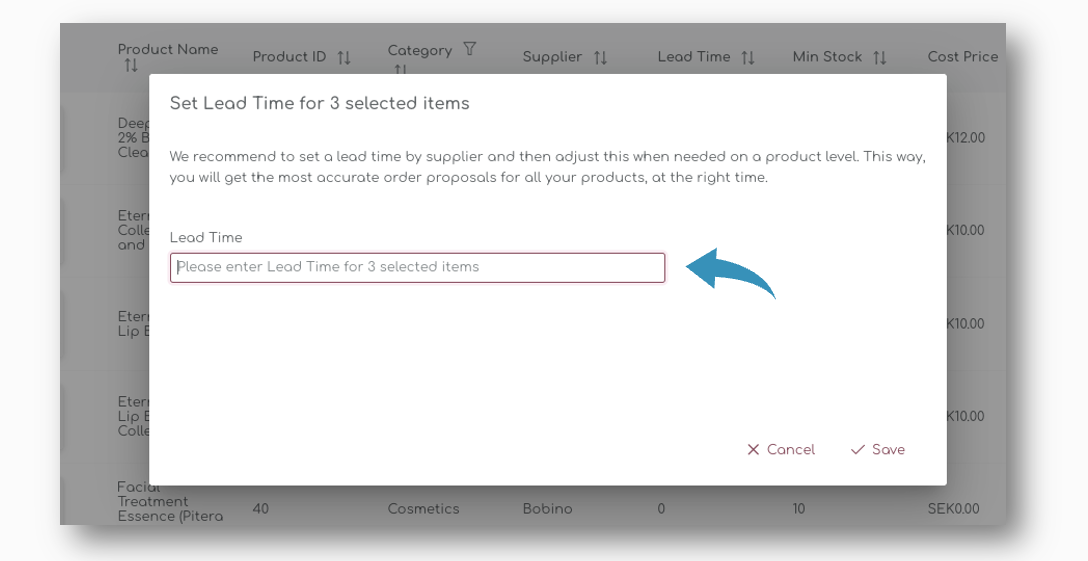
When you save the data, the new value is entered for all selected items.
| Please note that you can only override values with this way of editing, it is not possible to change existing values. |
Mass Upload CSV Files
↑ Back to top| If you’re changing Supplier information of your products, you will have to set up the supplier first in the Supplier pages. |
Download Sample File
On the Product Management pages, you can download a sample file.
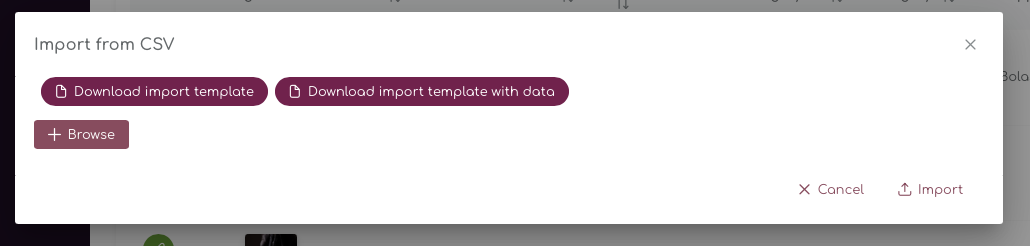
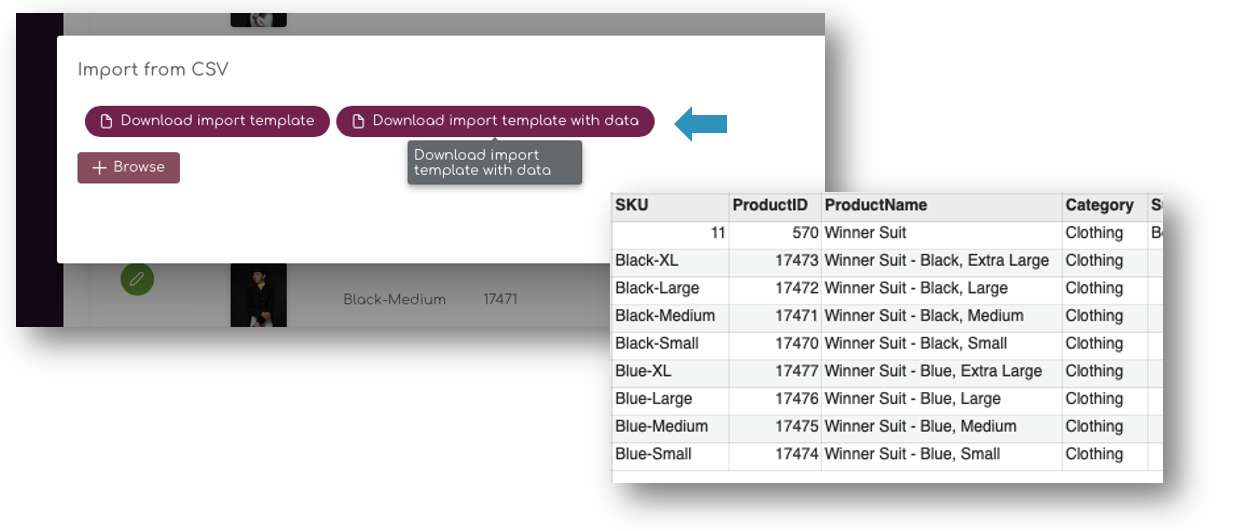
Download import template with data
The template with data will create a CSV copy of the entire assortment of your store. You can use this template when you set up your store for the first time.
All relevant product data from your platform is there and you can enrich it here in one go with additional parameters, for example Lead Times and Weeks of Stock.

Not all fields are mandatory and if you leave them blank, no changes to the data will be made.
Please note that if you want to assign a Supplier to a product, the Supplier has to be created already.
Download import template (emtpy)
If you have thousands of SKU’s, you might not want to download the entire product list. In that case, you can simply download the empty table. It contains all the relevant measures you can amend.
Make sure the Product ID is entered correclty, this will ensure the data is updated.

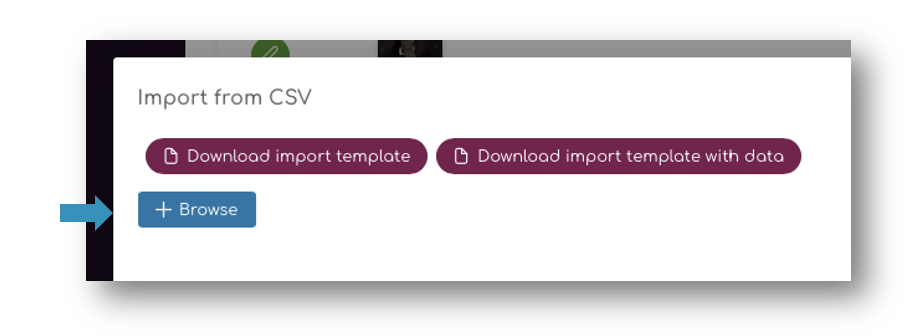
Upload CSV File
↑ Back to topOnce you have made the changes to the file, you can upload the saved file using the same upload button. Select ‘Browse’ and upload the file:
Confirm the import:
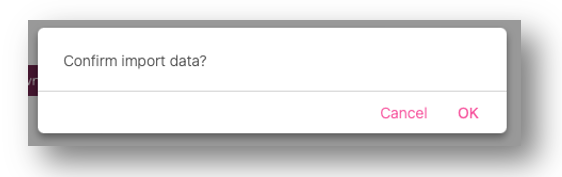
Once the import is completed, you will see a notification on the screen and you can refresh the page.
‘Selected’ Mass Upload
↑ Back to topYou can select single products, suppliers or categories and mass-edit a selection of your products.
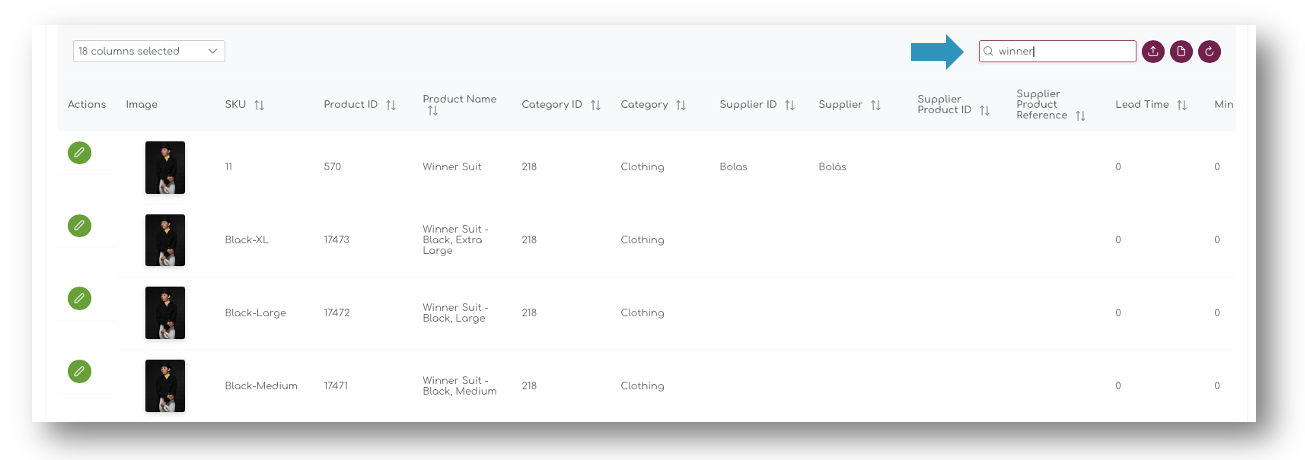
Simply select the items or selection you want to edit using the Search function:
When you download import table with data, only the selected fields in the table are downloaded:
Make the changes in the csv file and upload, only your selected files are uploaded and amended.
Video Guide Mass Upload
↑ Back to topWatch this short video on how to down- and upload product information easily.
https://www.youtube.com/embed/GJNDUr8aDJ8
9. Team Management
↑ Back to topYou can add up to 3 team members to your Shelf Planner account.
Invite a Team Member
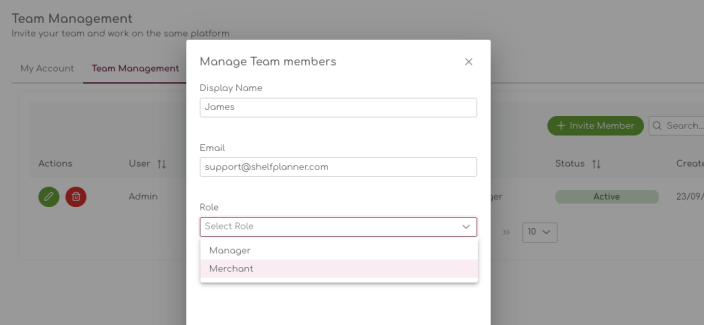
↑ Back to topTo invite a new team member, press the ‘Invite Member’ button on top of the table:

A pop up appears where you can enter the Team Member’s Display Name, email address and user role:

After saving the data, the new user will receive a mail to activate their account. The store owner will be able to see the status for the invitations in the table:

Invitation Mail
↑ Back to topWhen the Store Owner has created a new user, an invitation mail is sent at the same time to the new team member.
In the activation mail, the user can chose to accept or Refuse the invitation. By accepting the account is activated and the new team member will automatically be guided to the login pages of my.shelfplanner.

Accept Invitation
When the new user accepts the invitation, the account will be activated and a temporary password will be generated:

Temporary Password
After you have activated your account, a mail with User Name and Password is sent:

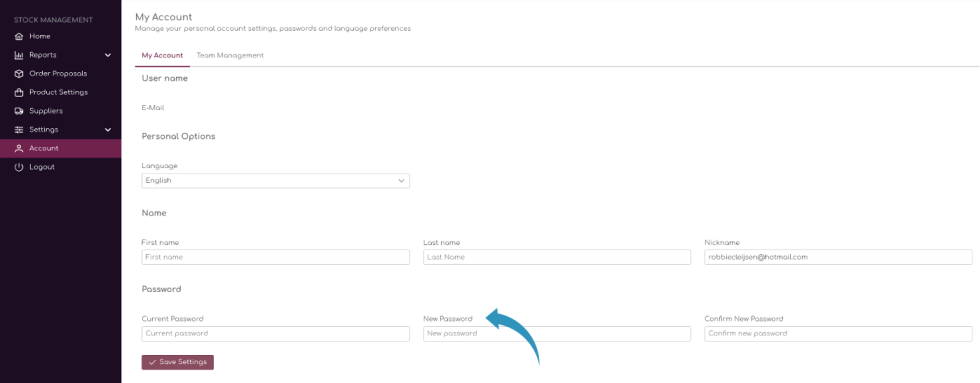
Password Settings
Make sure to update your password after your first login. Every user can do this under the ‘My Account’ section:
User Roles
↑ Back to topUnder the Team Management tab in the My Account section of the app, you can add and manage your team members.
We differentiate between 2 roles in the program:
- Store Manager
- Merchant
By default, you can have a total of 3 team members active. Only store owners or Admin users can invite and remove team members.
Store Manager
↑ Back to topTo set up a Store Manager, select the ‘Manager’ role when creating a new user:
The Store Manager role can invite team members, change store settings and has access to the billing section.
Merchant
↑ Back to topMerchants have access to all features in the app, including extensions and add-ons, but cannot invite new member, or edit user data for other team members.
Merchants also do not have access to the billing sections of the program.
User Permissions
↑ Back to top| Store Manager | Merchant | |
| Create New User | Yes | No |
| Delete Users | Yes | No |
| Manage All Users | Yes | No |
| App Features & Capabilities | All | All |
| Install Extensions & Add-ons | Yes | No |
| Biling & Licenses | Yes | No |
10. Two-Way Sync
↑ Back to topIn this article we describe the two-way synchronisation processes between Shelf Planner and your WooCommerce store.
Live Synchronisation
↑ Back to topProduct Meta Data
↑ Back to topThere is a live synchronisation between your store and the app for the following measures and values:
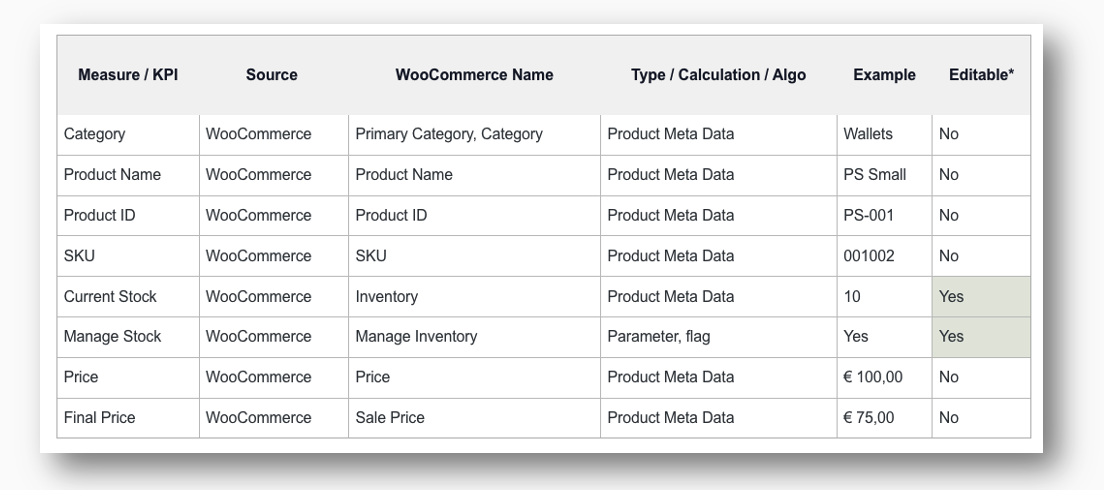
* Editable in my.shelfplanner app
Whenever any of these values are updated a synchronisation starts immediately to update the data.
Refresh Product Data
↑ Back to topIt can happen that there is a minor lag between your store’s server and the app. In that case, you can simply refresh the page or refresh the tables with the refresh buttons on top of the tables:
Two-Way Sync
↑ Back to topFrom the Shelf Planner app you can write back stock quantity and the Manage Stock settings information.
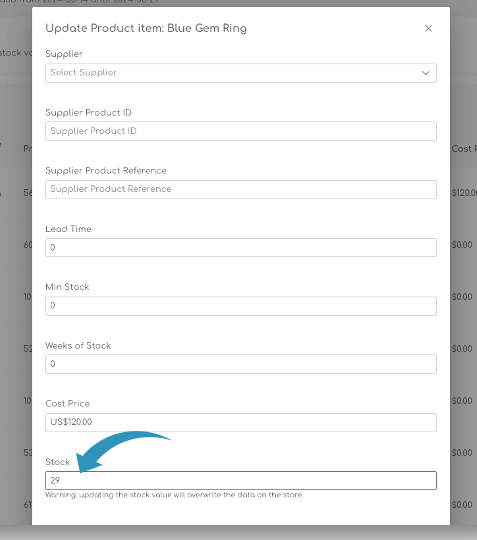
Stock Quantity
↑ Back to topIn the Update Product pages, changing the Stock quantity will automatically update the stock quantity in your store:
Stock is also updated when you confirm a purchase order:
The Quantity Received ads the stock units to the stock you have currently on hand in your store.
Manage Stock Flag
↑ Back to topIn WooCommerce, you can activate or deactivate stock management with the ‘Manage Inventory’ flag.
In our platform, we use this flag to decide if an order proposal needs to be calculated or not. The assumption here is that if you don’t want to ‘Manage Stock’, we also don’t calculate the order recommendations.
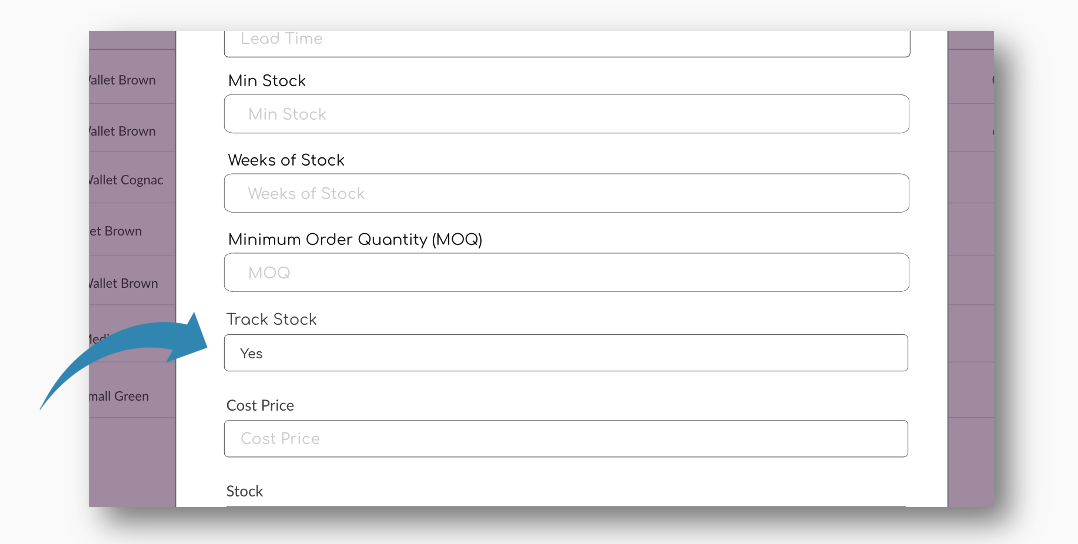
The Track Stock flags works in both directions. If it is active in your store, but you deactivated it in the app, it will overwrite the setting in your store.
This flag should be used with caution, as it will also reset the stock quantity to 0 on both sides.
How to disable the 2-way sync
↑ Back to topShelf Planner uses a so called 2-way sync between your store and the app for stock quantities. This is to make sure you always have the latest stock quantity when making purchase order decisions.
If you want to disable the two way sync, you can do this on the Replenishment Settings page in the Procurement section:
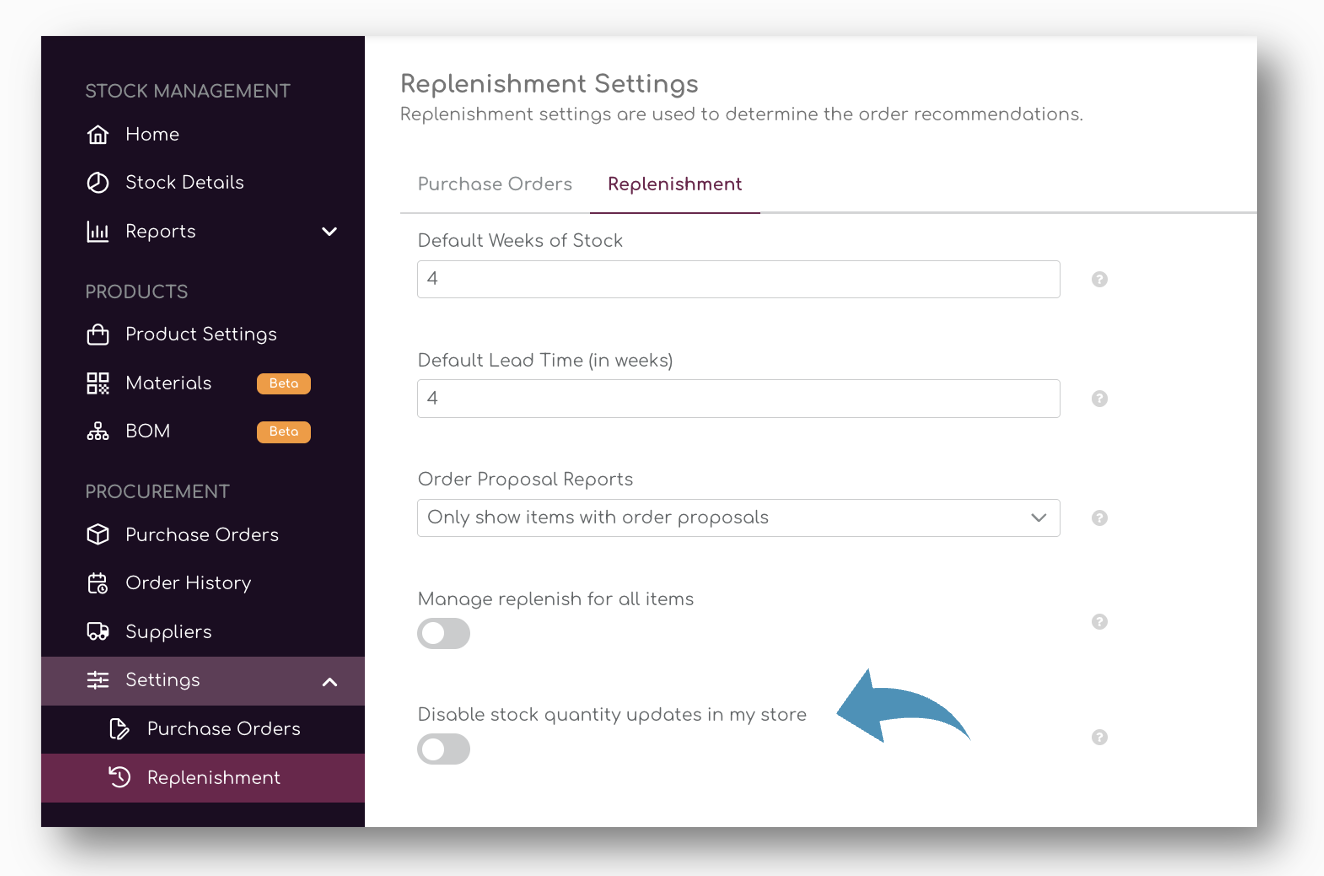
If you don’t wan to update store stock from Shelf Planner back to your store, you can tick the button to disable the synchronization:
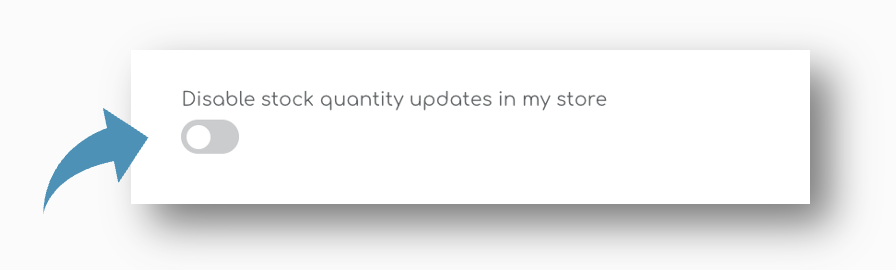
When the tick box is activated, Shelf Planner will no longer update changes to stock quantities in your store.
11. Troubleshooting
↑ Back to topShelf Planner Installation and Activation Issues
↑ Back to topShelfplanner is designed to integrate seamlessly with WooCommerce using API calls. However, some users may encounter issues during the installation or activation of our plugin, the Shelfplanner Connector. This guide outlines the basic requirements for WooCommerce APIs and provides steps to troubleshoot common problems.
WooCommerce Open API Requirements
↑ Back to topTo ensure a smooth connection between Shelfplanner and WooCommerce, your website must meet the following requirements:
WooCommerce REST API Enabled
↑ Back to topWooCommerce provides a REST API to allow external tools like Shelfplanner to interact with your store. Ensure that the REST API is enabled in your WooCommerce settings.
API Key or User Permissions
Generate API keys under WooCommerce > Settings > Advanced > REST API. Assign Read/Write permissions to these keys for the Shelfplanner Connector to function correctly.
Alternatively, ensure the user account connected to the API has Administrator privileges.
Permalinks Settings
The WooCommerce REST API requires “pretty” permalinks to function. Go to Settings > Permalinks and ensure that the structure is set to anything other than “Plain” (e.g., “Post Name”).
Secure Connection (SSL)
API calls are more secure when your website uses HTTPS. Verify that your website has an SSL certificate installed and is properly configured.
Firewall and Security Plugins
Some firewalls or security plugins may block API calls. Whitelist the following endpoints to allow Shelfplanner to communicate with WooCommerce:
https://yourwebsite.com/wp-json/wc/v3/*
PHP and WooCommerce Versions
Ensure that your server meets the minimum requirements for running WooCommerce:
PHP version 7.4 or higher.
WooCommerce version 4.0 or higher.
Steps to Troubleshoot Installation Issues
↑ Back to topIf you encounter problems installing or activating the Shelfplanner Connector, follow these steps:
1. Verify API Access
Navigate to WooCommerce > Status > API and check if the REST API is accessible.
Test the connection by visiting this URL in your browser: https://yourwebsite.com/wp-json/wc/v3/. If it displays data, the API is functional.
2. Check for Plugin Conflicts
Deactivate other WooCommerce plugins temporarily to identify potential conflicts. Reactivate them one by one to pinpoint the issue.
3. Review Security Settings
Check your firewall, hosting provider, or security plugin settings to ensure API requests from Shelfplanner are not being blocked.
4. Update Software
Make sure your WordPress, WooCommerce, and all related plugins are updated to their latest versions.
5. Inspect Server Logs
Look for errors in your server logs. Many hosting providers offer access to error logs via their control panels.
6. Enable Debugging
Enable debugging in WordPress by adding the following lines to your wp-config.php file:
Check the debug log file (/wp-content/debug.log) for error messages related to Shelfplanner.
When to Contact Support
↑ Back to topIf the above steps do not resolve your issue, reach out to Shelfplanner Support with the following information:
Website URL
- Provide the full URL of your WooCommerce store.
WooCommerce and WordPress Version
- Share the versions you are using, found under WooCommerce > Status.
Error Logs
- Attach any relevant error logs from your server or the WordPress debug log.
Steps to Reproduce
- Describe the issue and the steps you took before encountering it.
By ensuring your WooCommerce APIs meet the necessary requirements and following the troubleshooting steps outlined above, most issues can be resolved quickly. If problems persist, our support team is ready to assist you!
define('WP_DEBUG', true);
define('WP_DEBUG_LOG', true);
12. Frequently Asked Questions
↑ Back to top– How long before I start seeing my sales forecast and order proposals?
↑ Back to topImmediately, our dashboard provides real-time analytics.
However, depending on your store size, it might take a couple of minutes before you see data updated in the reports.
You can check the progress in the ‘Integrations’ tab, or update the data manually on the Home page by hitting the refresh button.
– Can I get more frequent updates on my sales forecast than a weekly sales forecast?
↑ Back to topYes, you can. The Sales Forecast is calculated with live data, but we update the sales forecast for your store only once per week, every Monday morning for your time zone.
However, if you want to update the forecast on demand, you can do this in the ‘Integrations’ and ‘Update Forecast Data’, or simply hit the ‘Refresh’ button on the Home page to update the sales forecast on Demand.
– How do you calculate my store’s sales forecast?
↑ Back to topOur forecasting engine analyses your store’s historical and daily sales, as well as external data sets that factor for local events, news trends, weather, holidays, and even school schedules. This is then translated into a daily sales forecast for all your products.
The order proposals are then calculated based on the sales forecast per product and variation, based on the stock parameters you have entered – weeks of stock and lead time.
– Is your extension compatible with WooCommerce’ High Performance Order Storage (HPOS)?
↑ Back to topYes, our extension automatically recognises what setup you use for your store and will adjust the synchronisation accordingly.
– Stock Quantity is not updated in my store, what should I do?
↑ Back to topIf your stock levels are not updating as expected, it may be due to your server not being configured to accept PUT requests. Shelf Planner uses PUT logic for updating stock data to ensure data accuracy and consistency.
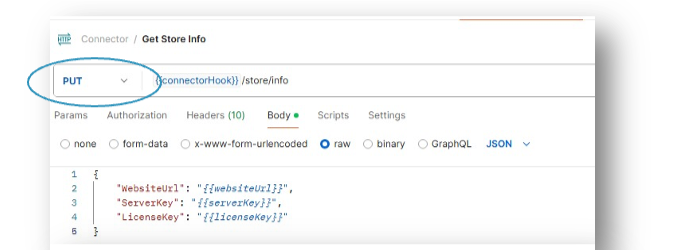
To allow Shelf Planner to update stock data on your server, you need to ensure that your server is configured to accept PUT requests. Here are the general steps to do this:
- Check Your Server Settings: Verify your server’s current settings to see if PUT requests are allowed. This can usually be done through your server’s configuration files or control panel.
- Update Configuration: If PUT requests are not allowed, update your server configuration to enable them. This might involve modifying configuration files or settings related to HTTP methods.
- Firewall and Security Settings: Ensure that any firewalls or security middleware are configured to allow PUT requests to pass through. You may need to add specific rules or exceptions for PUT requests.
- Test the Configuration: After making the necessary changes, test your server to ensure that it can accept PUT requests from Shelf Planner. You can do this by performing a test update and verifying that the stock data is correctly updated.
Support
↑ Back to topI couldn’t find my answer here. What do I do?
If you couldn’t find what you’re looking for in the documentation, you can open a ticket through the WooCommerce Support Portal with us, and our 24/7 support team will be happy to give you a hand!