Affiliate Suite includes features that help you run a comprehensive Affiliate System on your site.
Features
↑ Back to topAffiliate Registration
- Users can register as an Affiliate on the My Account page, Affiliate Signup Form, and the Checkout page.
- Admins can mark users as affiliates in bulk using Admin settings.
Affiliate fees
Sites can charge users a fee to register as affiliates.
Referral codes
Affiliates can refer new users to sites using referral codes instead of affiliate links.
Creatives
Affiliates can promote their Affiliate links using creatives.
Refer-a-Friend form
Affiliates can refer new users directly to your site using the Refer-a-Friend form.
Product-based affiliate links
Admins can generate an affiliate link for specific products on the Affiliate Dashboard.
Affiliate-level product commissions
Set custom commission rates for each affiliate.
Checkout affiliate
Users will be able to select affiliates on the checkout page.
Slug modification
Affiliates will be able to modify their identification.
Readable URL affiliate links
Admins can create affiliate URLs as readable affiliate links.
Affiliate signup bonuses
When affiliates register, they can receive a bonus commission.
Product commissions
Affiliates can see the commission rates for configured products from their dashboards.
Referral order details
Affiliates can see order details of buyers (Order ID, Order Amount, Order Date, Customer Name, Customer Email, etc.).
Commission payouts
Admins can pay affiliate commissions directly from the site using the following methods:
- PayPal Payouts
- Affiliate Suite’s built-in wallet system
Payout requests
Affiliates can send Payout requests to site admins.
Lifetime commission
Affiliates will receive commissions for a lifetime.
Leaderboard
Admins can list top-performing affiliates on a leaderboard.
Privacy Controls
Option for the site admin to optionally display the following details about the customer to the Affiliates,
- Order ID
- Order Amount
- Order Date
- Customer Name
- Customer Email
- Customer Phone
- Customer Billing Address
- Customer Shipping Address
- Coupon Used
- Affiliate Commission
Email notifications
Users receive email notifications for all important affiliate activities.
Installation
↑ Back to top- Download the .zip file from your WooCommerce account.
- Go to WordPress Admin > Plugins > Add New and Upload Plugin with the file you downloaded with Choose File.
- Install Now and Activate the extension.
More information at Install and Activate Plugins/Extensions.
Setup and Configuration
↑ Back to topTo set up the plugin, go to WooCommerce > Affiliate Suite > Settings
General
↑ Back to topWooCommerce Account Signup Commission
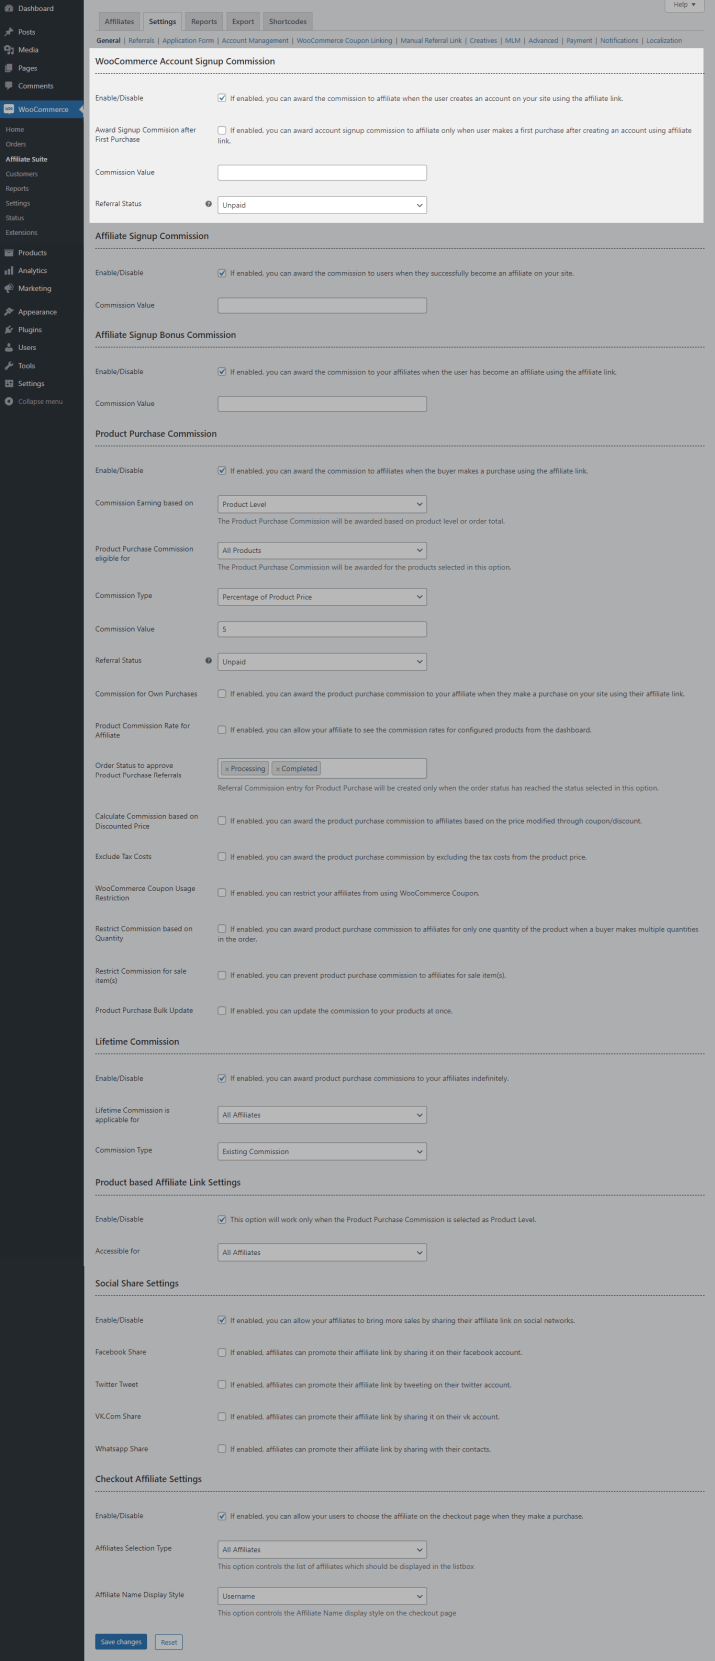
- If you want to offer a commission to your affiliates when a user creates an account on the site using the Affiliate Link, you can do so by enabling the option.
- You can optionally offer the Account Signup Commission after the user makes the first purchase & order status can be selected in Order Status to award Signup Commission after First Purchase option.
- In the Commission Value, set the commission amount to be awarded to the Affiliate.
- By default, the account signup commission will be awarded after the admin approves the affiliate activity. If you want to automatically approve the Account Signup Commission, change the Referral Status option to Unpaid.
Affiliate Signup Bonus Commission
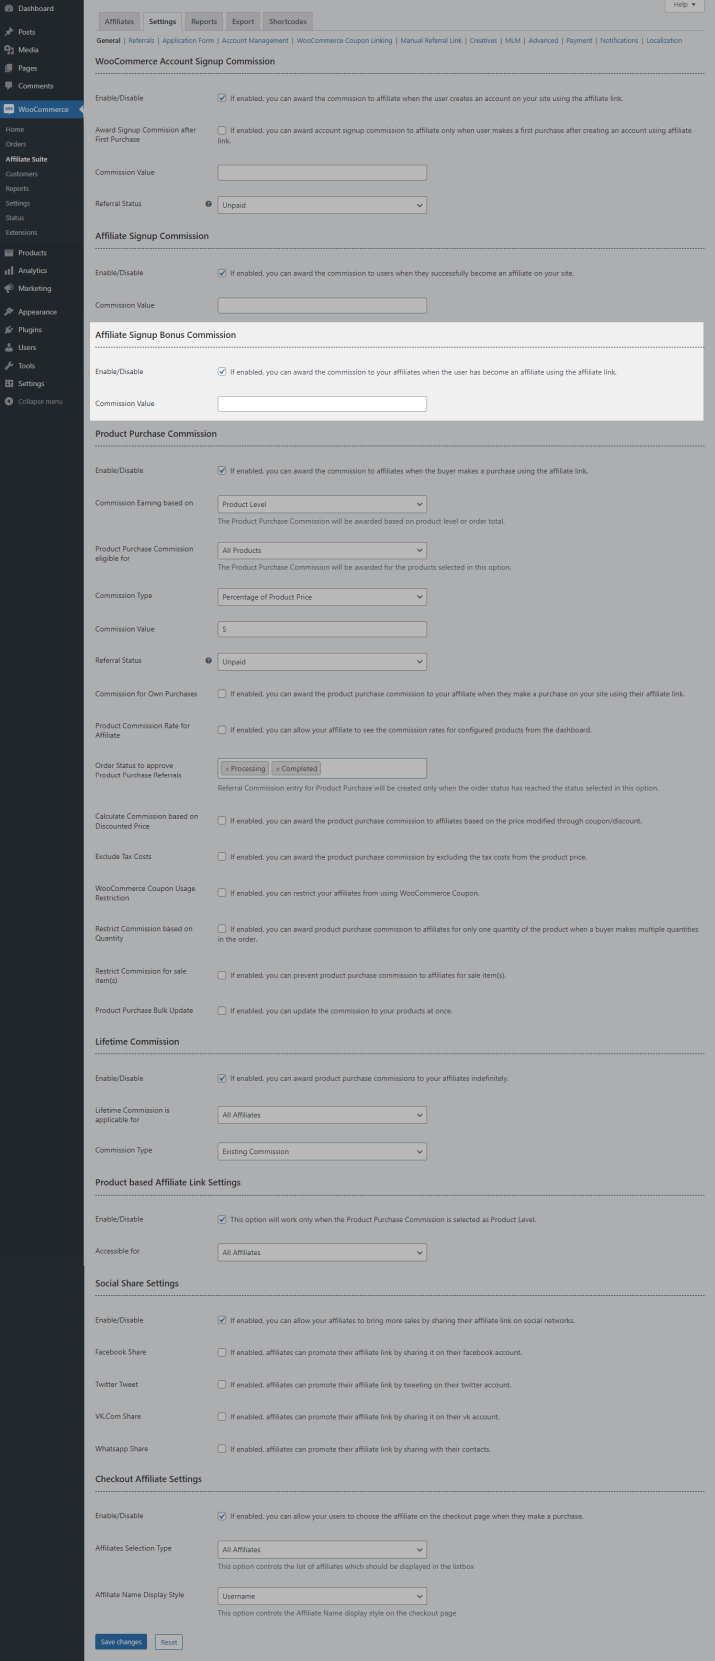
If you want to offer Commission to your Affiliate when the user has become an affiliate using the given affiliate link, you can do so by enabling the checkbox and setting up the commission value.
Affiliate Signup Commission

If you want to offer Commission to your Affiliate for creating an Affiliate Account, you can do so by enabling the option and setting up the commission value.
Product Purchase Commission
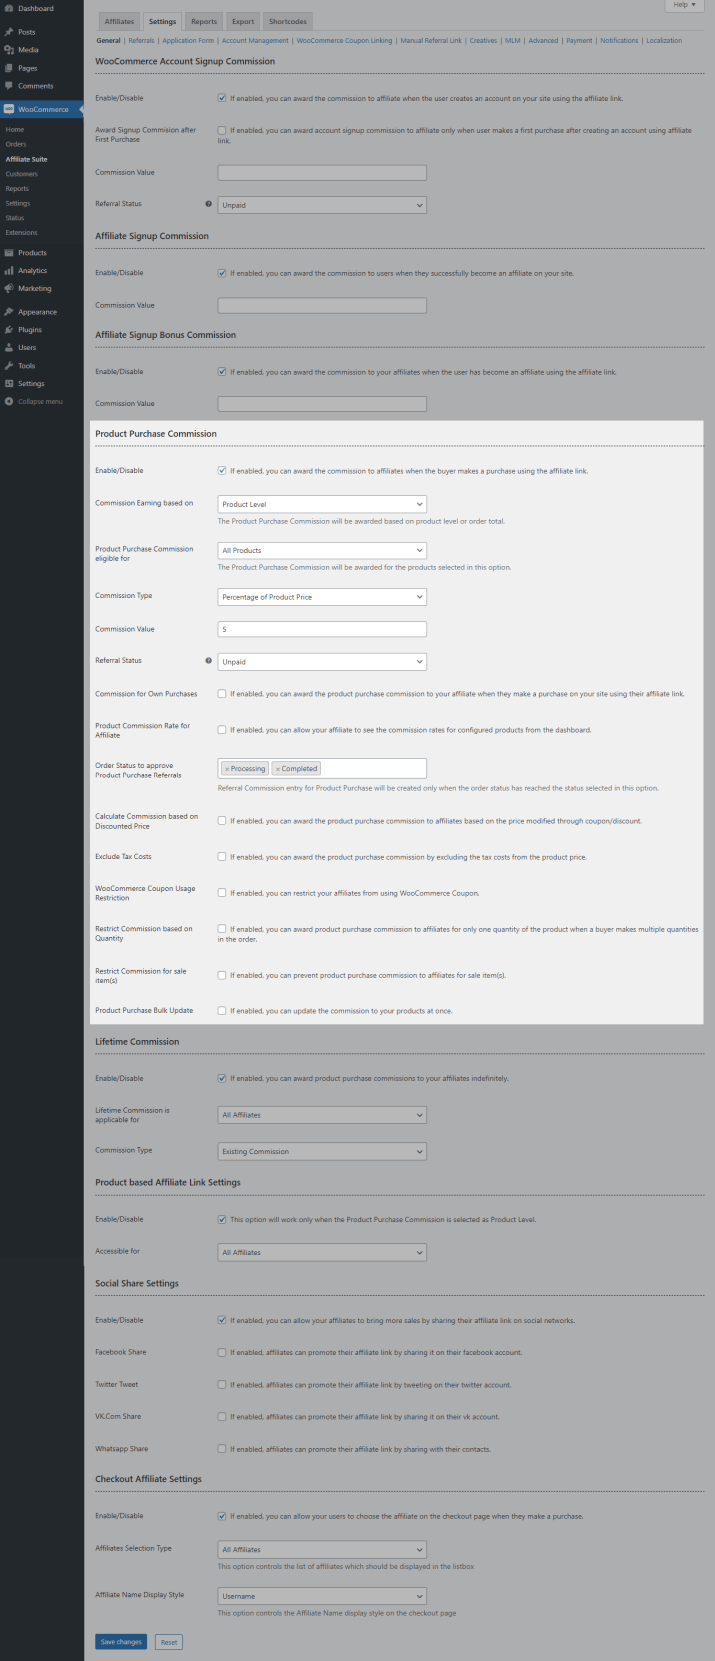
- If you want to offer a commission to your affiliates for purchasing products on the site using the Affiliate Link, you can do so by enabling the option.
- By default, a commission will be awarded based on the Product Level. If you wish to award based on Order Total/Order Total Range, then you can change it using Commission Earning Based on option.
- By default, the affiliate commission is eligible for all the products on the site. If you want to restrict Affiliate Commission for specific products on the site, you can customize the Product Purchase Commission eligible for option.
- By default, the percentage of the product’s price can be offered as the affiliate commission. You can optionally offer a fixed commission value to your users.
- By default, the product purchase commission will be awarded after the admin approves the affiliate activity. If you want to approve the Product Purchase Commission automatically, change the Referral Status option to Unpaid.
- By default, the affiliate will not receive a commission for their purchases. You can optionally enable this option to allow commission for your purchases.
- By default, the commission rate will not be displayed to the affiliate. You can optionally enable the Product Commission Rate for Affiliate option.
- By default, a product purchase commission will be awarded to the affiliate once the order reaches the status specified in the option. You can customize the “Order Status to approve Product Purchase Referrals” option to offer the commission on a different status.
- Product purchase commission will be calculated based on the Regular Price by default. You can optionally calculate the commission rate based on the discounted price by enabling the Calculate Commission based on Discounted Price option.
- The product purchase commission, including the tax costs, will be calculated by default. You can exclude the tax cost by enabling the Exclude Tax Costs option.
- By default, affiliates can use WooCommerce Coupon codes on their orders. You can optionally restrict coupon usage by enabling the WooCommerce Coupon Usage option.
- By default, there is no restriction on the quantity to earn an affiliate commission. You can optionally restrict the quantity to 1 from the “Restrict Commission based on Quantity” option.
- If you wish to restrict the product purchase commission for sale items, then enable this checkbox[Restrict Commission for Sale Item(s)].
- If you wish to set the product purchase commission to certain products/categories in a single action, then enable the Product Purchase Bulk Update checkbox & make use of the options present inside it.
Lifetime Commission
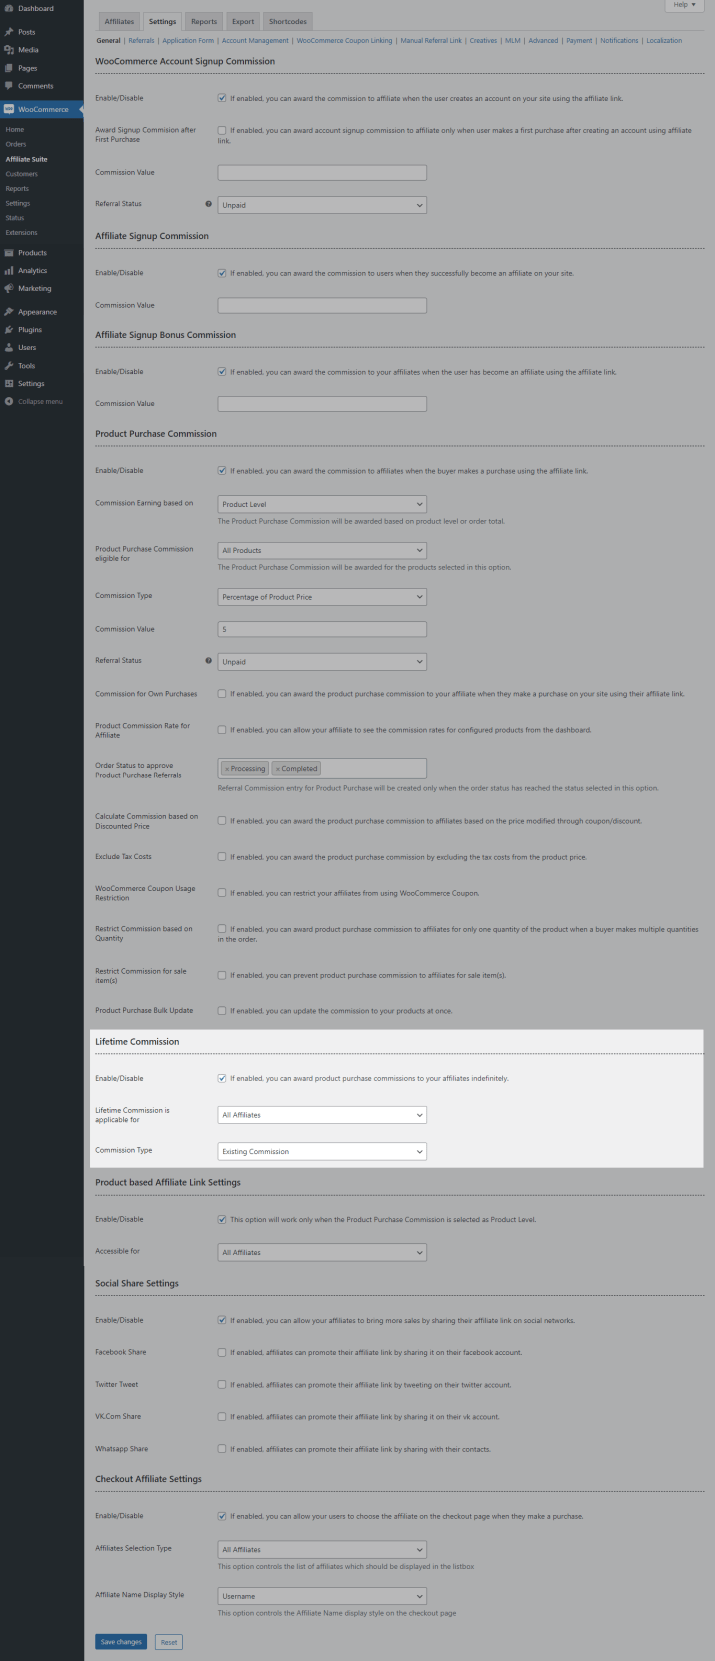
If you want to offer a Lifetime Commission to your Affiliates, you can do so by enabling the Lifetime Commission option.
Product-Based Affiliate Link Settings
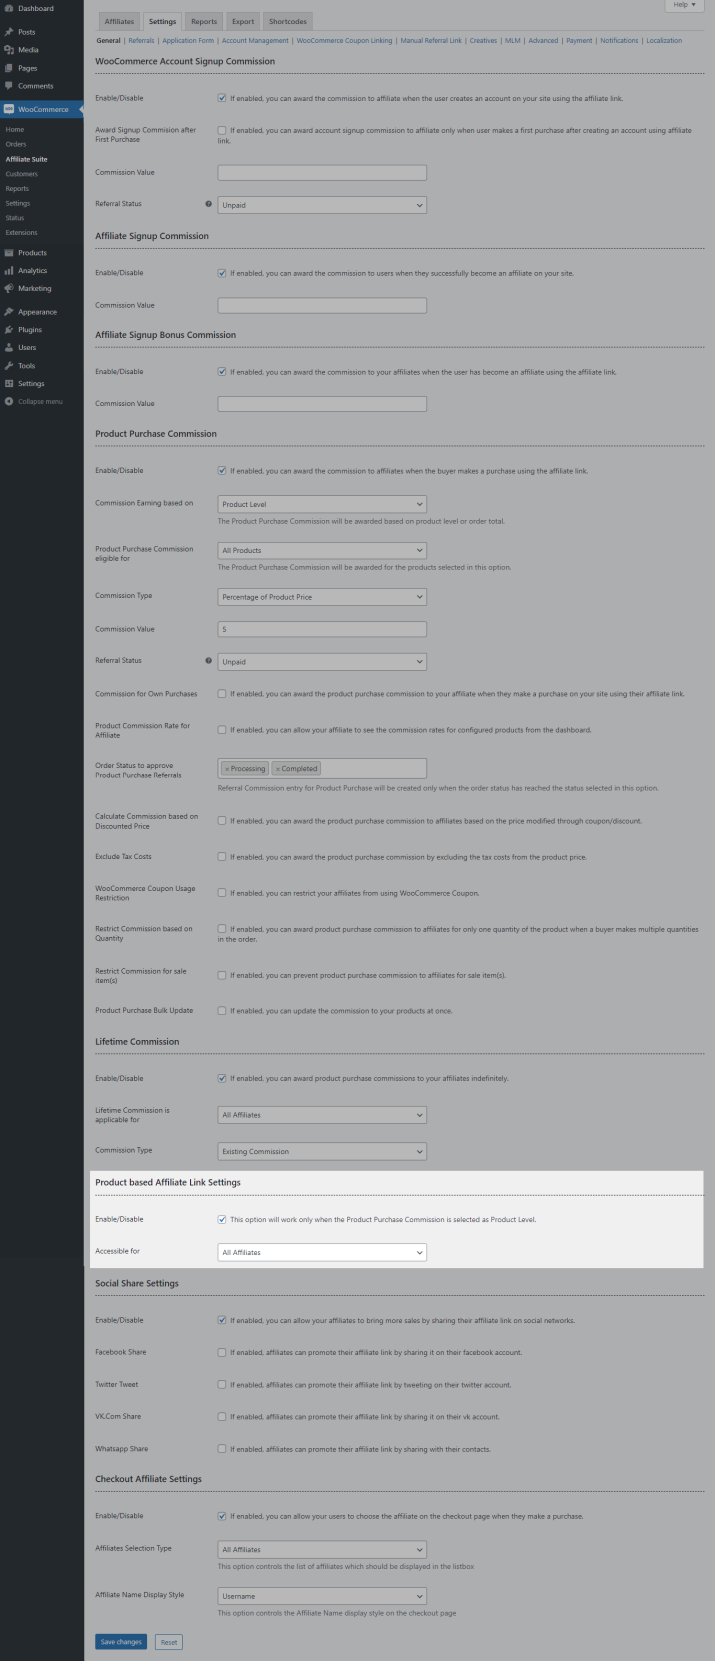
By Default, Affiliate links are valid throughout the site. You can enable the Product-based Affiliate Link settings option to restrict affiliate links to specific products.
Social Share Settings
If you wish to allow your affiliates to promote the affiliate links through their social media account from their affiliate dashboard, you can do so by enabling the Social Share Settings section.
Checkout Affiliate Settings

If you wish to allow your users to input the affiliate info on the checkout page, you can do so by enabling Settings.
Referral
↑ Back to topReferral Settings

- By default, the affiliate has to manually generate their affiliate link from the dashboard. If you wish to generate the affiliate link automatically, then select Static URL in Affiliate Link Type option.
- You can customize the label & URL in respective fields [Referral Link Label & URL].
- You can customize the Referral Identifier based on your needs.
- By default, referral links will be generated based on Affiliate ID. If you wish to allow your affiliates to generate their link based on username, then select Affiliate Username in Referral Format.
Referral Validity Settings

By default, cookie validity will be configured for 7 days. You can customize it in Referral Cookie Validity option.
Referral Restrictions
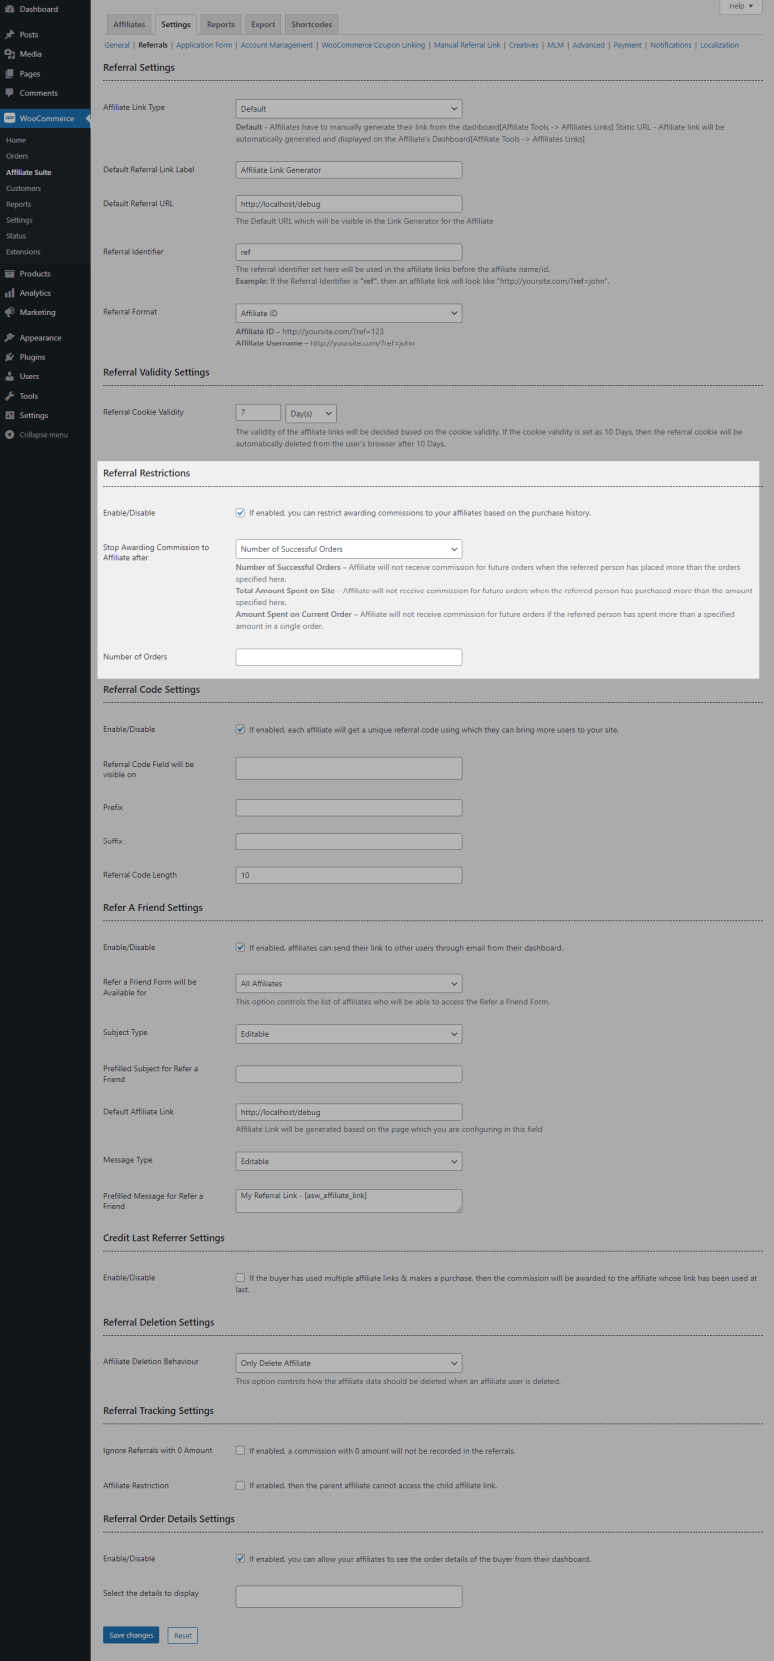
You can restrict the product purchase commission to your affiliates when the buyer matches with the following purchase history options,
- Number of Successful Orders
- Total Amount Spent on Site
- Amount Spent on Current Order
Referral Code Settings
- If you wish to generate a unique referral code for your affiliates, then enable the checkbox.
- By default, the referral code field will be displayed on Affiliate Registration Form, WooCommerce Registration Form & Checkout Page. If you wish to display only on the preferred places, then make use of this option[Referral Code Field will be visible on].
- You can customize the Prefix, Suffix, & Referral Code Length based on your needs.
Refer a Friend Settings
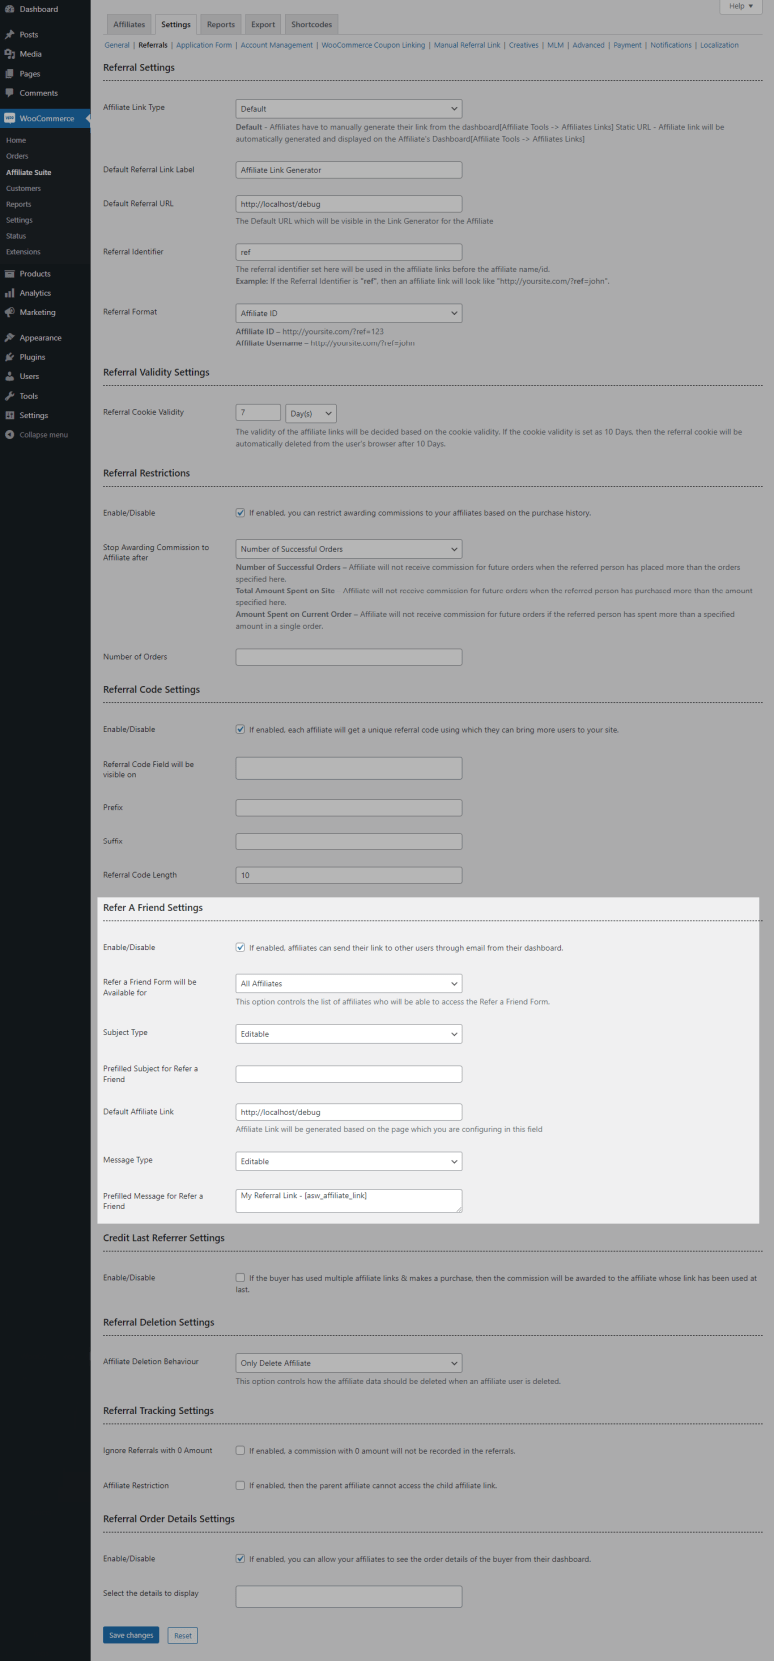
If you wish to allow your affiliates to send their affiliate link to other users through email from the affiliate dashboard, then enable the checkbox & configure the options based on your needs.
Affiliates can view the refer a friend form in Affiliate Dashboard -> Affiliate Tools -> Refer a Friend.
Credit Last Referrer Settings
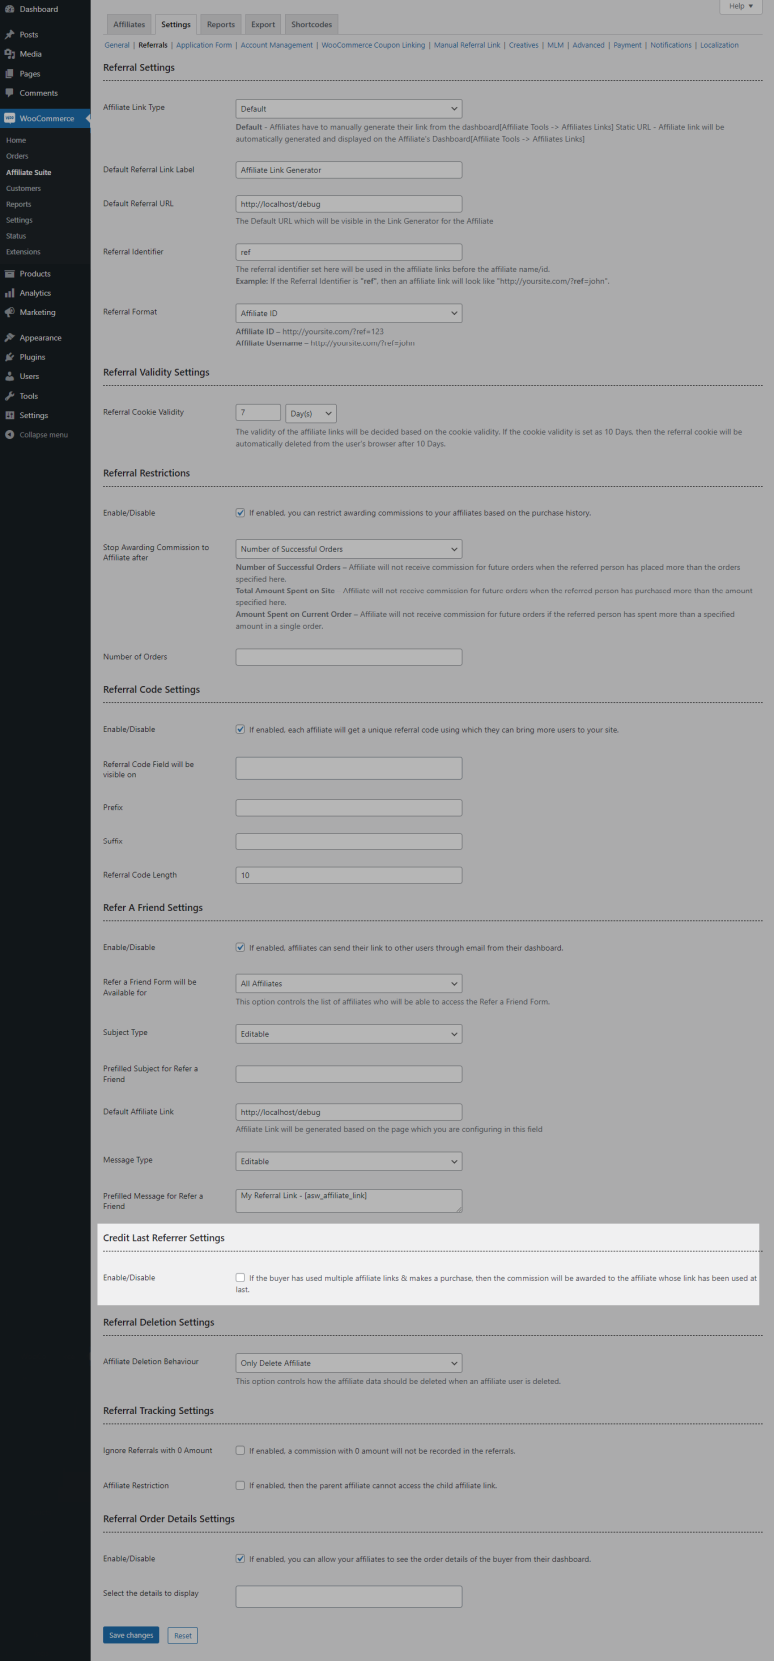
If a buyer makes a purchase with multiple affiliate links, then the commission will be awarded to the affiliate whose link has used at first by default. If you wish to award the commission to the affiliate whose link has been used at last, then enable the checkbox.
Referral Deletion Settings
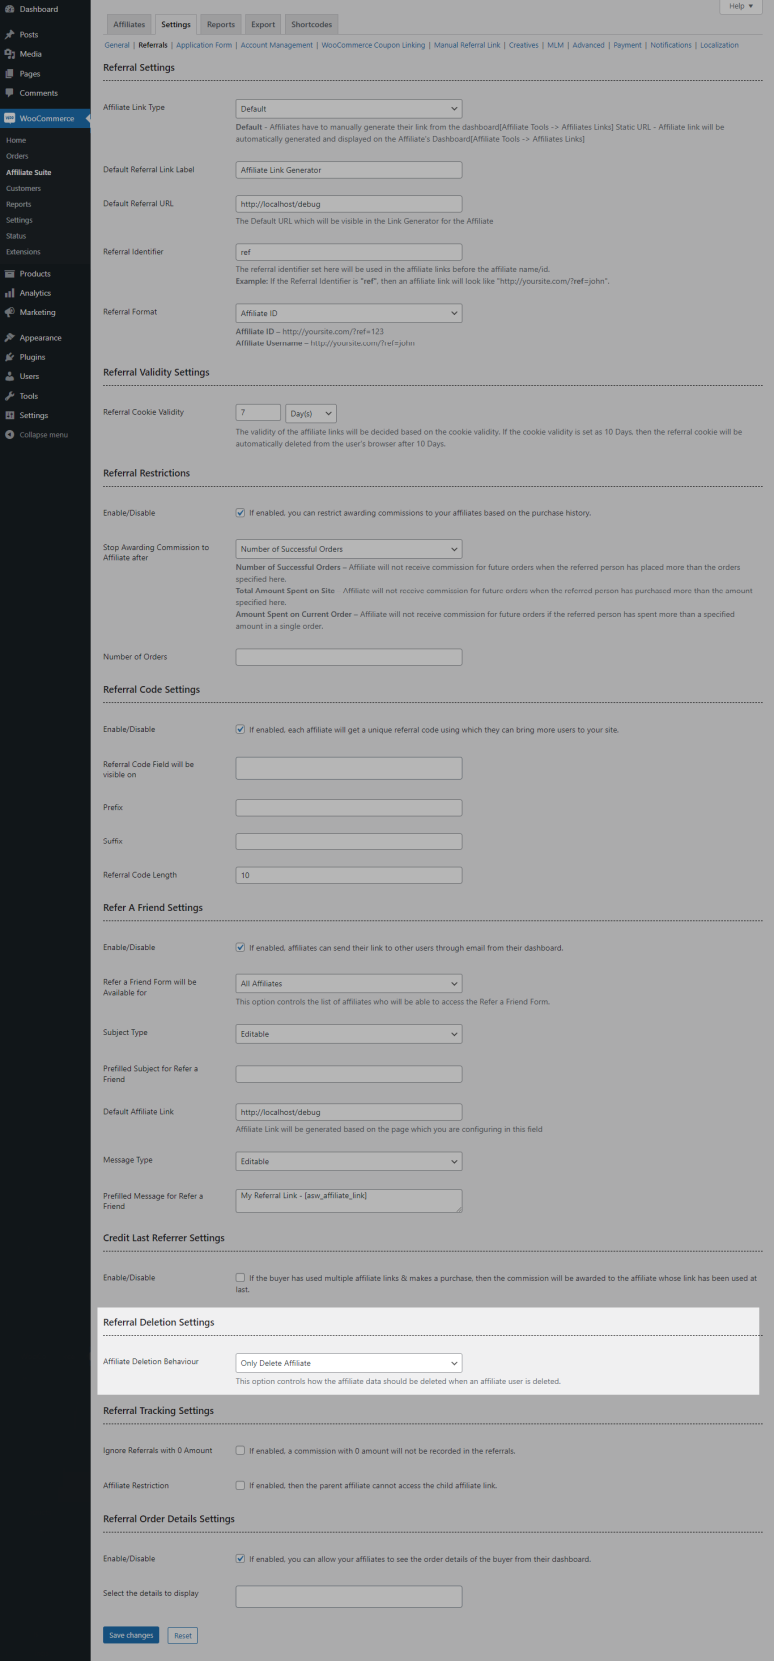
In this settings, you can choose whether only the affiliate account has to delete/delete both the affiliate account & user account as well.
Referral Tracking Settings
- By default, a commission recorded with a 0 value will be displayed in Referrals section. If you wish to hide it, then enable Ignore Referrals with 0 Amount checkbox.
- By default, the parent affiliate can access the child’s affiliate link. If you wish to restrict it, then enable Affiliate Restriction checkbox.
Referral Order Details Settings
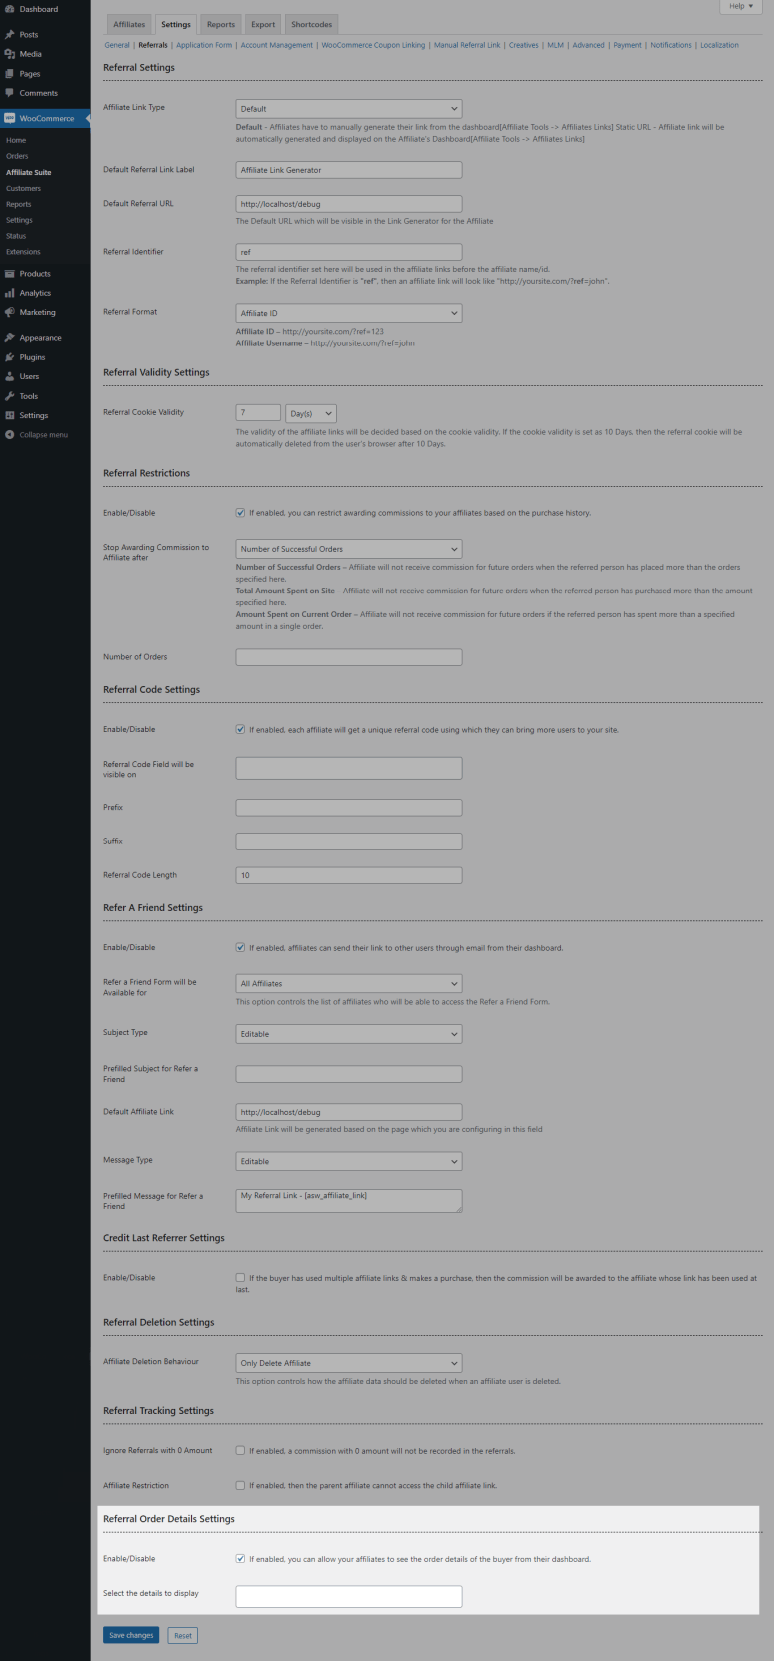
If you wish to allow your affiliates to see the referral order details of the buyer, then enable the checkbox & select the details to display.
Affiliates can see these details in Affiliate Dashboard -> Referrals -> Reference number will be displayed in hyperlink.
Application Form
↑ Back to top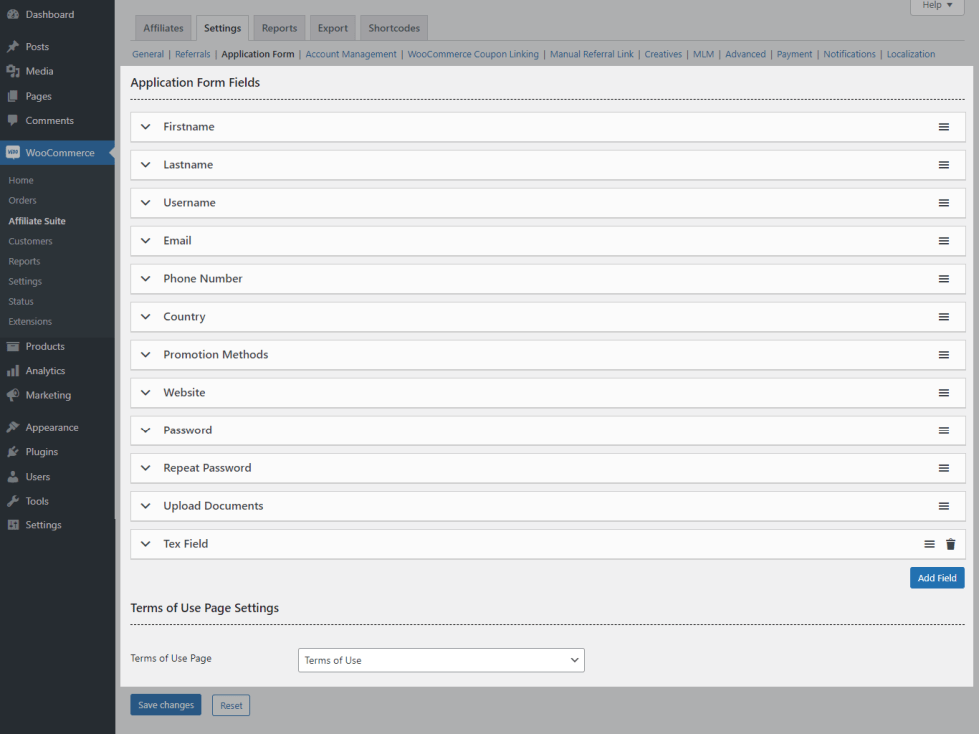
In this section, you can customize the Affiliate Application form fields.
Account Management
↑ Back to topAccount Registration Settings
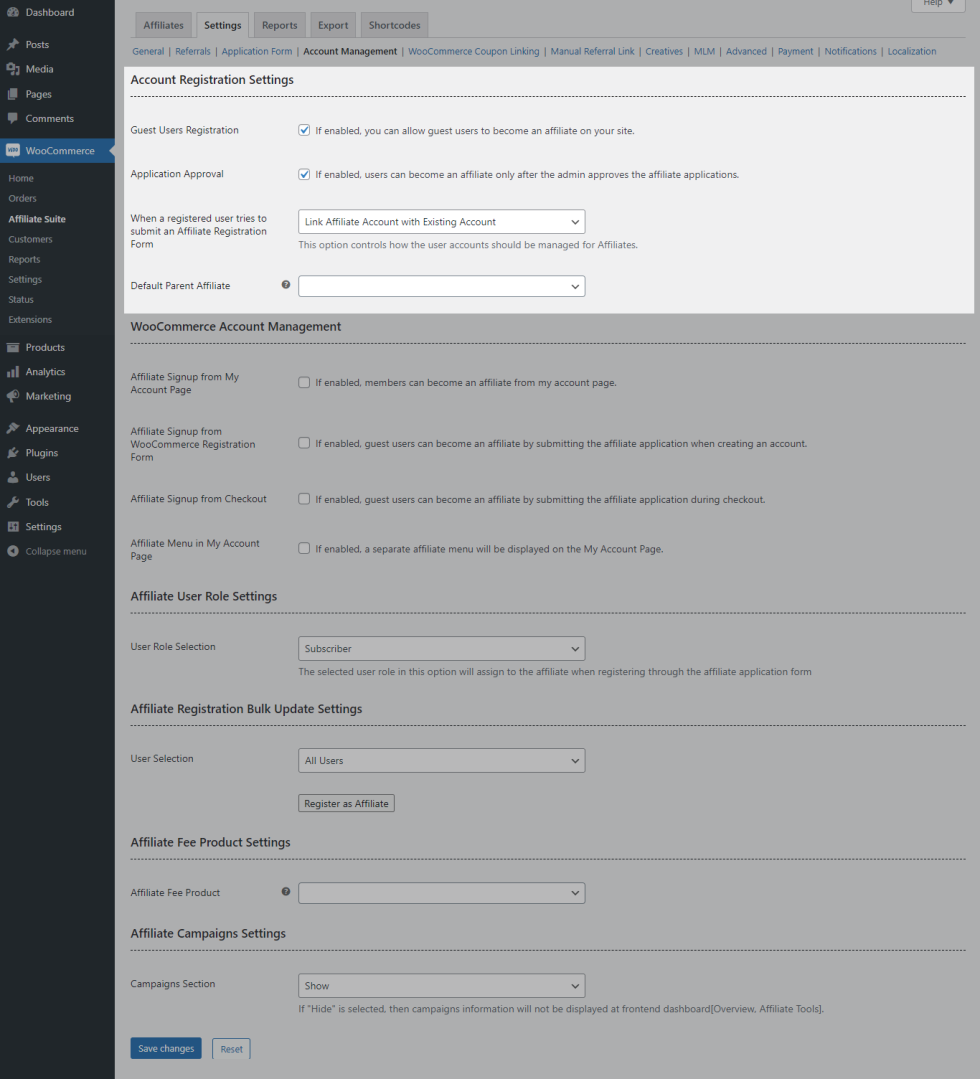
- By default, guest users can submit the Affiliate Registration Form & become an affiliate. If you wish to restrict them from becoming an affiliate, then disable Guest Users Registration checkbox.
- By default, the affiliate application submitted will be reviewed & manually approved by the site admin. If you wish to avoid this scenario, then disable Application Approval checkbox.
- When a registered user tries to submit an Affiliate Registration Form, you can set how the user accounts have to be managed for affiliates.
i) Link Affiliate Account with Existing Account
ii) Create a Separate Affiliate Account
iii) Allow Users to Decide
- If you wish to set the parent affiliate for the users who are becoming an affiliate without any referral link/referral code, then search & select the affiliate in Default Parent Affiliate option.
WooCommerce Account Management
- If you wish to allow your registered users to become affiliates from the My Account Page, then enable Affiliate Signup from My Account Page checkbox.
- If you wish to allow your users to become affiliates when creating an account in My Account Page, then enable Affiliate Signup from WooCommerce Registration Form checkbox.
- If you wish to allow your users to become affiliates when creating an account on checkout page, then enable Affiliate Signup from Checkout checkbox.
- If you wish to display a separate affiliate menu in My Account Page, then enable Affiliate Menu in My Account Page checkbox.
Affiliate User Role Settings
- By default, the subscriber user role will be assigned to the affiliates when they create an account through Affiliate Registration Form.
- You can customize it in User Role Selection option.
Affiliate Registration Bulk Update Settings

If you wish to manually register your users to become an affiliate, then make use of this settings.
Affiliate Fee Product Settings
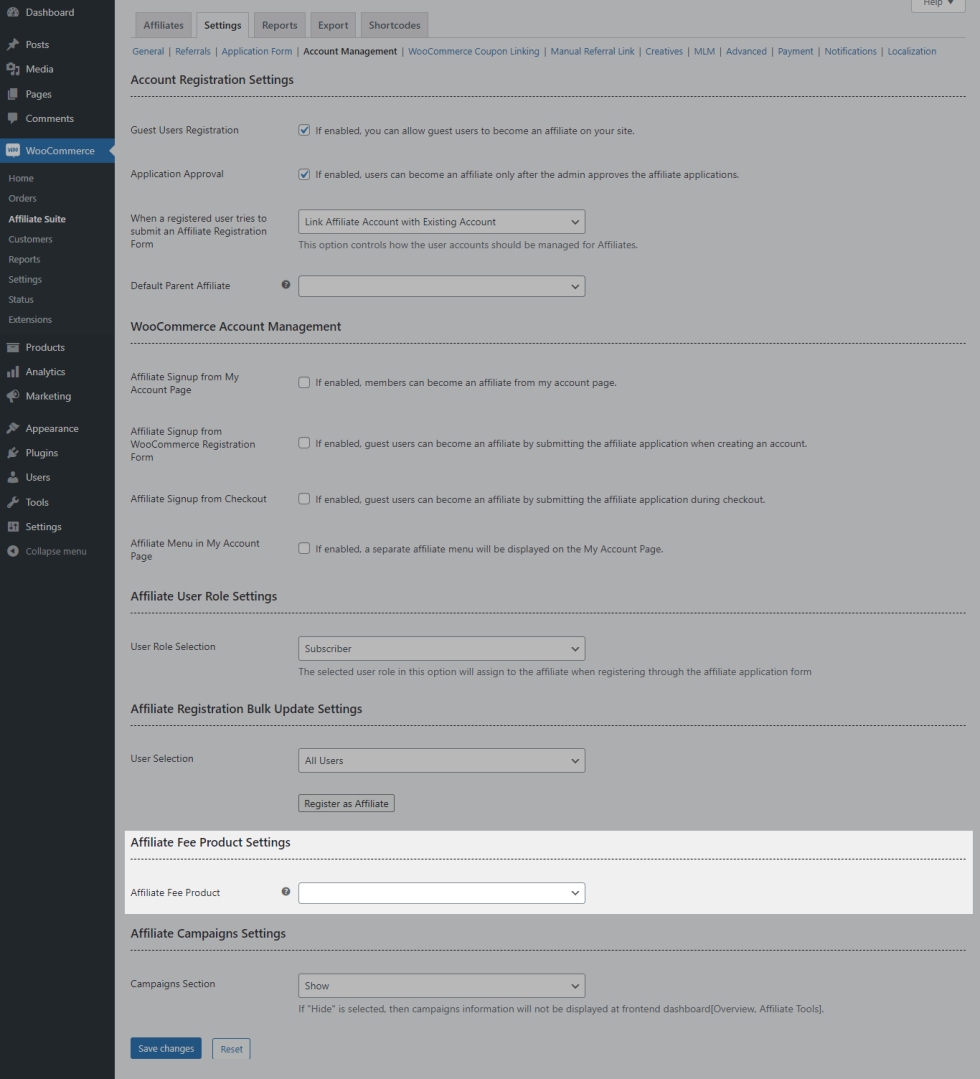
If you wish to allow your users to become affiliates only when getting some payment, then search & select the product in Affiliate Fee Product field.
Affiliate Campaign Settings
If you wish to allow your users to promote your site through a campaign, then select Show in Campaign Section option.
Affiliates can view the campaign section in Affiliate Dashboard -> Affiliate Tools -> Campaign.
WooCommerce Coupon Linking
↑ Back to topIf you wish when a buyer makes a purchase, the affiliate should get a commission & buyer can get a discount for their order, then link a coupon & affiliate in this section.
Creatives
↑ Back to top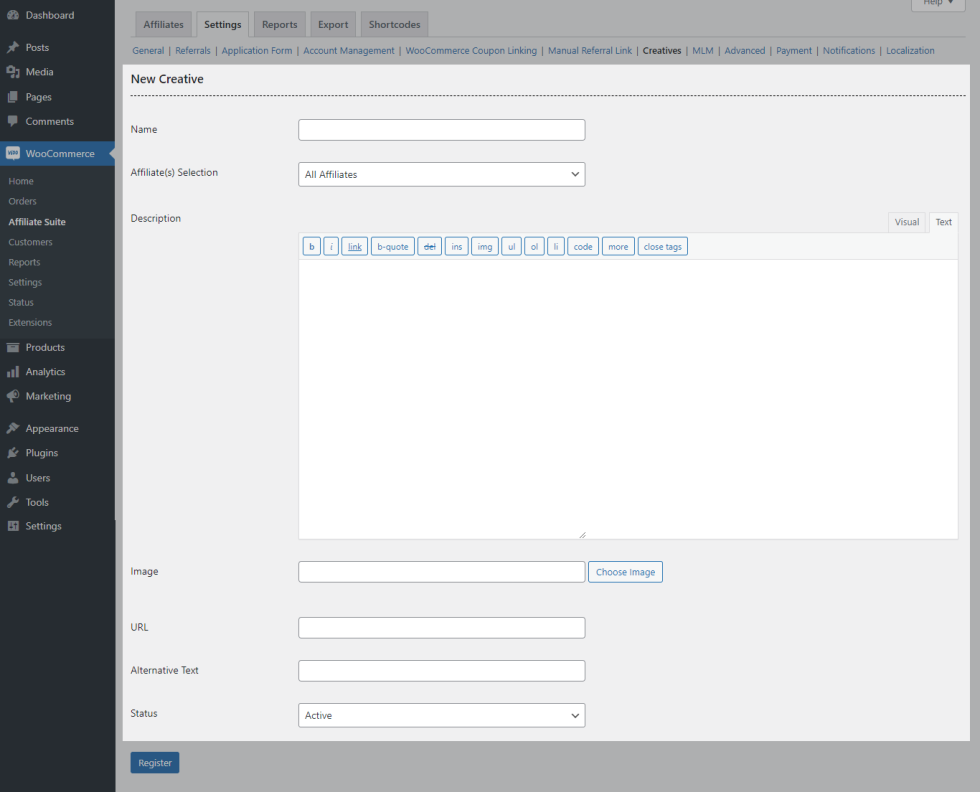
In this section, you can create and display Creatives that the affiliate can use for affiliate promotions.
MLM
↑ Back to top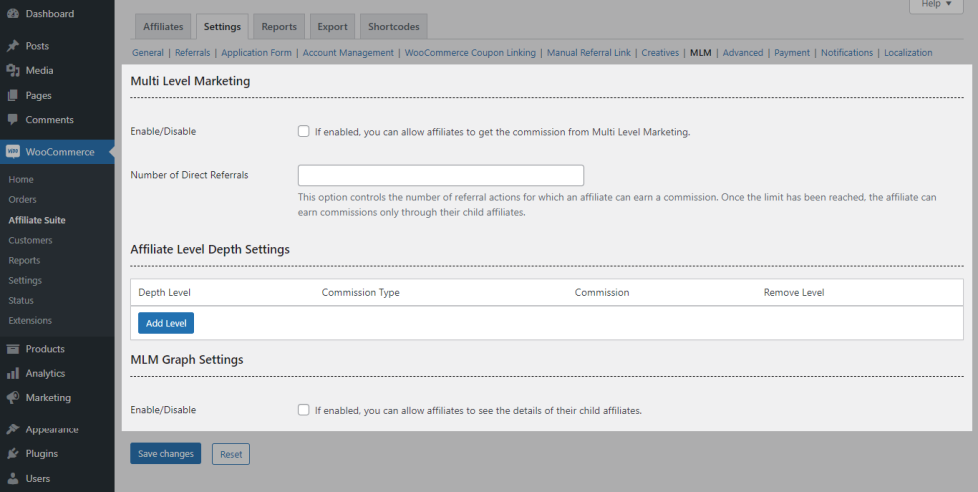
- Site Admin can manually enable multi-level marketing for the Affiliates. In the Number of Direct Affiliates option, set the number of direct referral actions, and the affiliate is eligible to receive the commission.
- In the Affiliate Depth Settings, input the depth level and set the commission value for each level.
- You can optionally choose to display the MLM Graph settings.
Advanced
↑ Back to topSlug Modification Settings
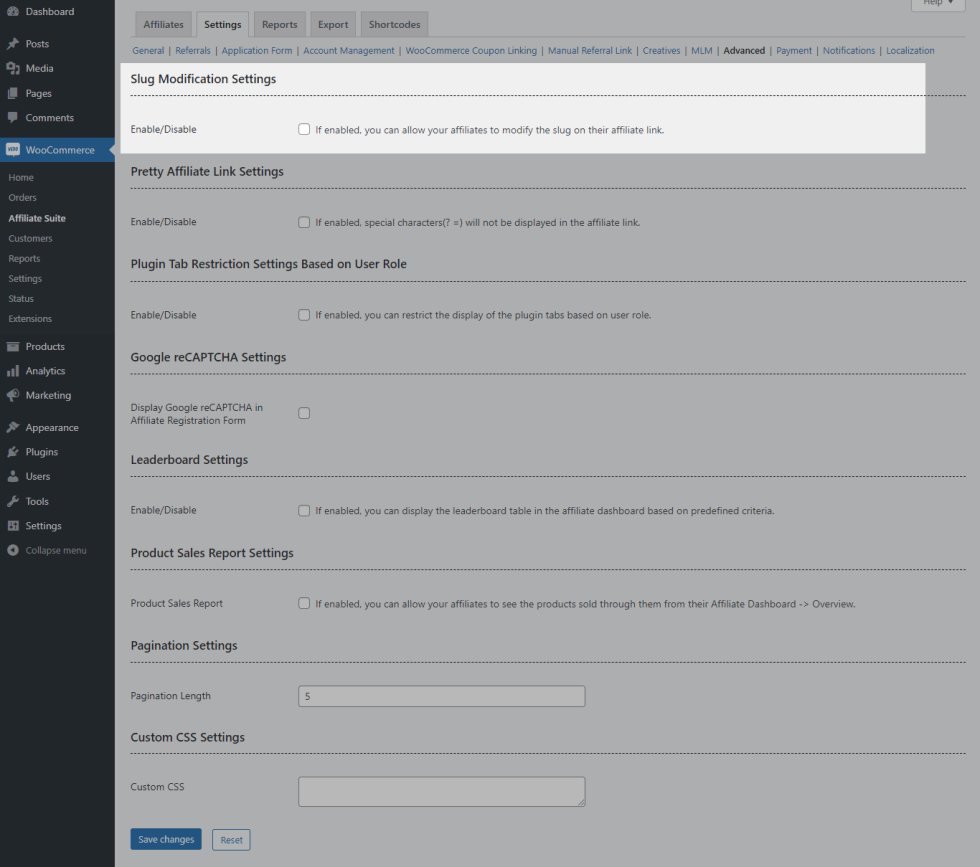
In this section, you can allow your affiliates to modify their affiliate slug.
Pretty Affiliate Link Settings
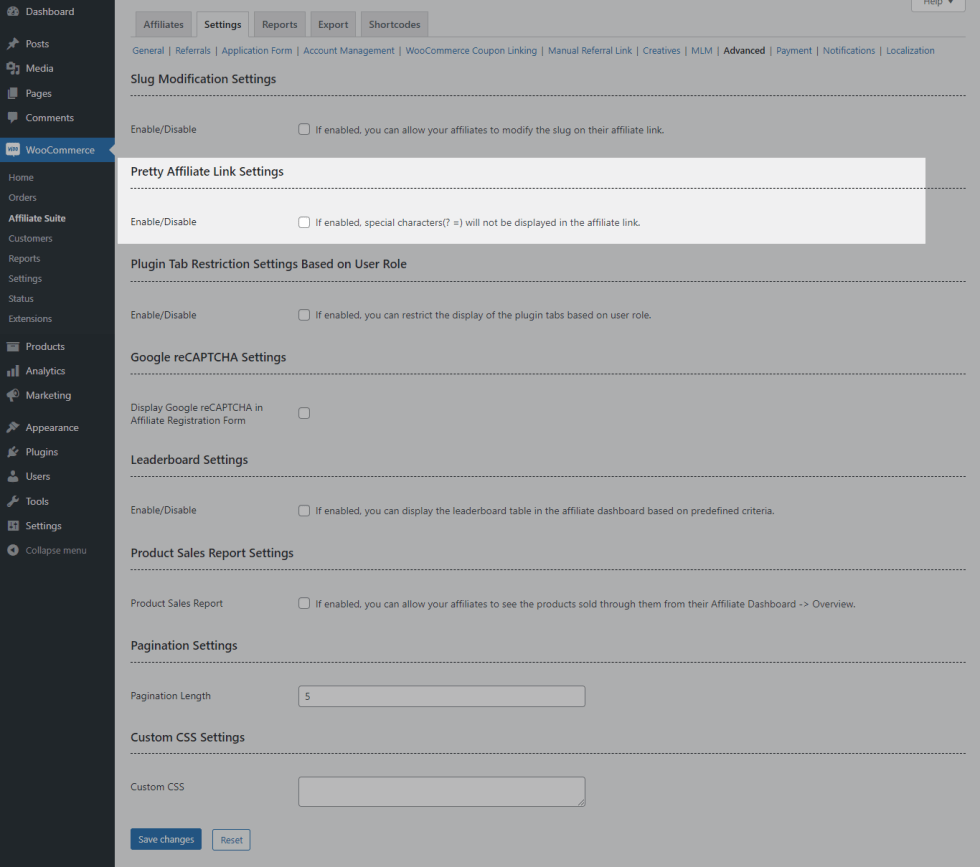
When enabled, the affiliate links will be readable.
Plugin Tab Restriction Settings Based on User Role
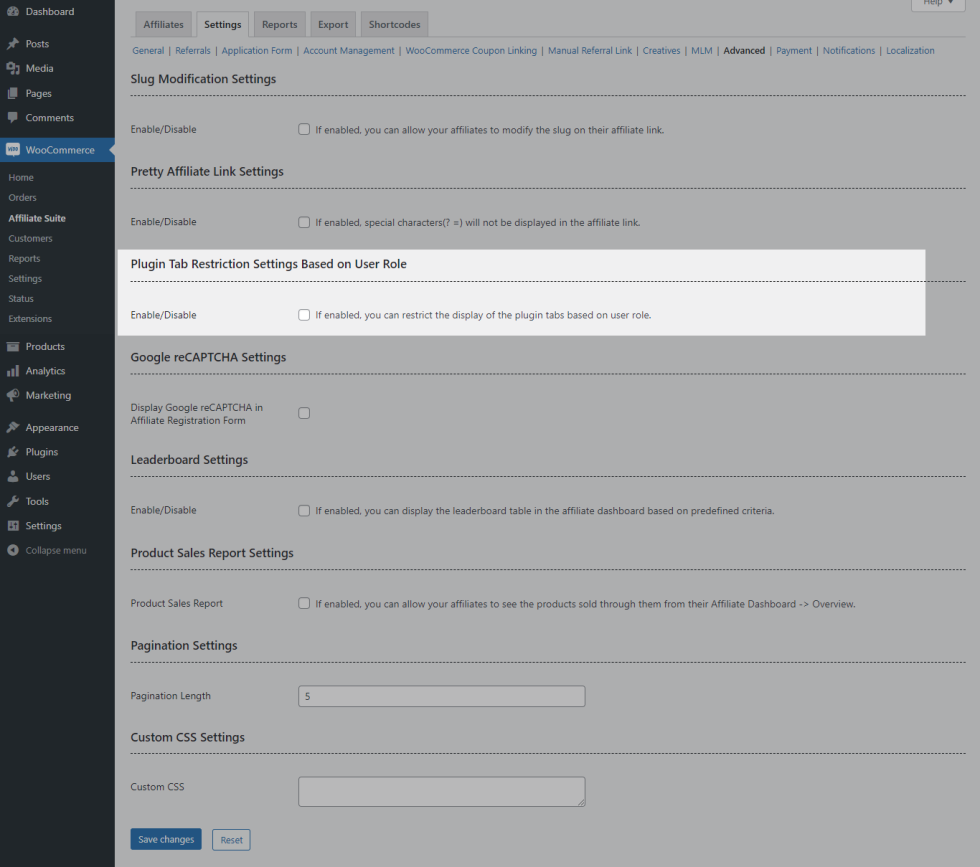
If you wish to hide the certain plugin settings tab based on user role, then enable the checkbox & configure it.
Google reCAPTCHA Settings
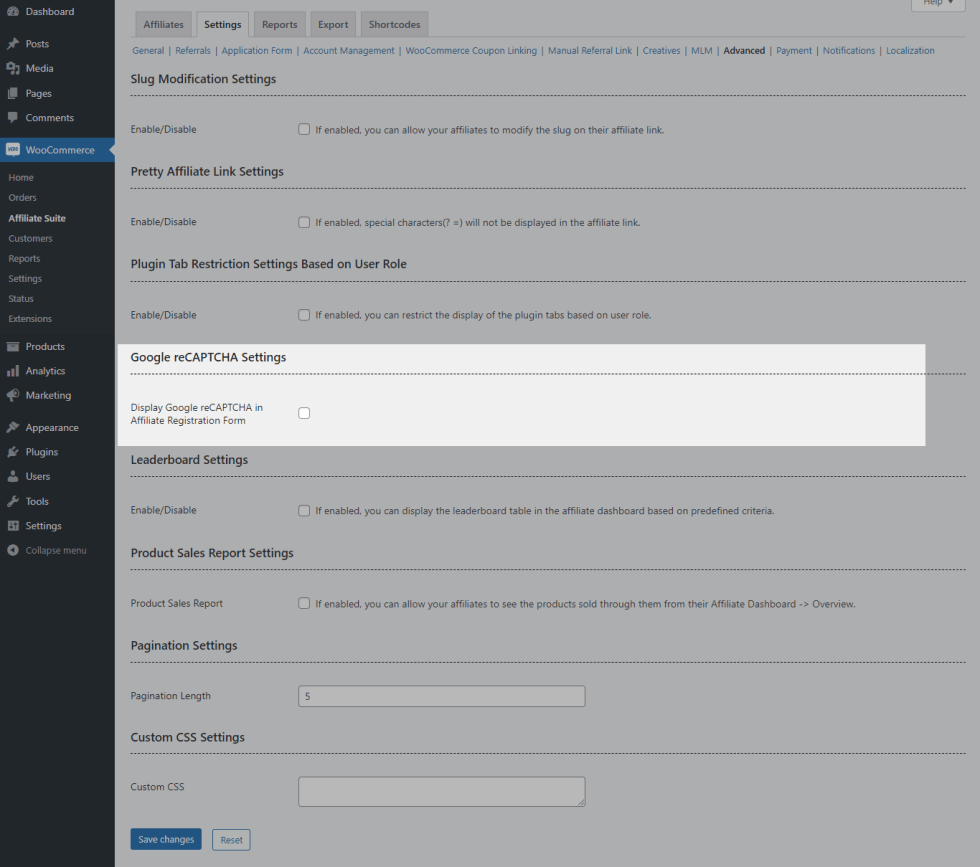
Option for the site admin to add a Google reCAPTCHA to the affiliate application form.
Leaderboard
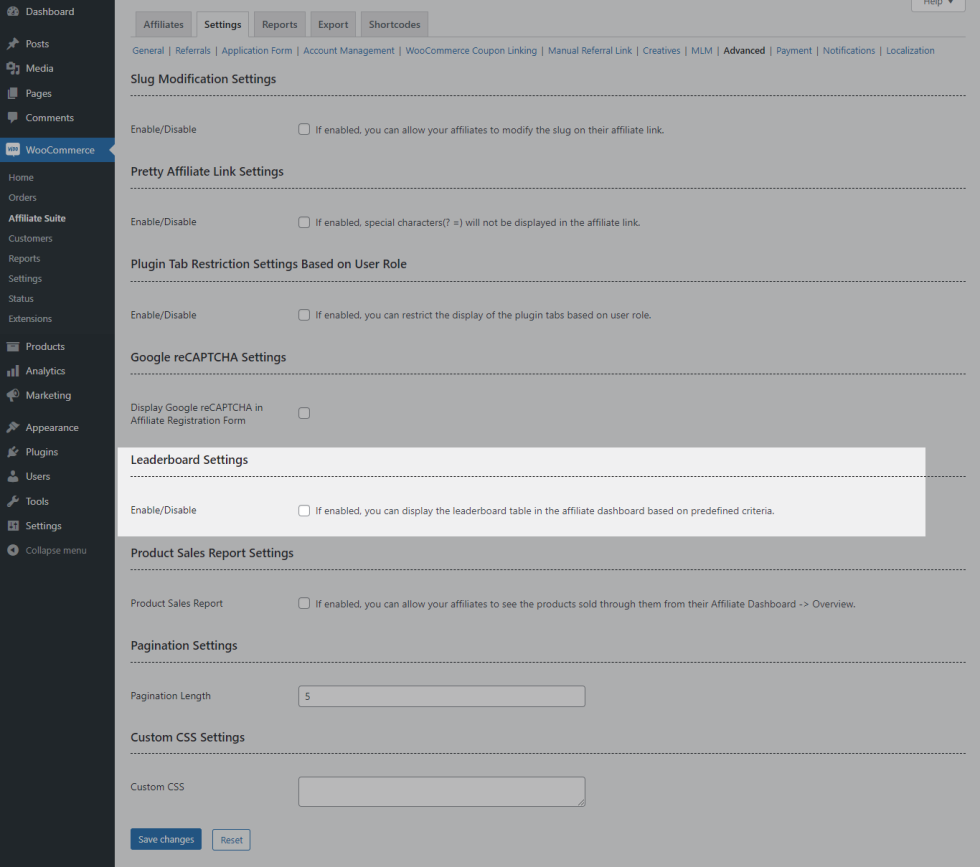
Site admin can display the Affiliates Leaderboard table based on the following options,
- Commission Earned
- No of Referrals
- No of Orders placed by Referrals
- Amount Spent by Referrals
Product Sales Report

If you wish to allow your affiliates to see the products sold through them, then enable Product Sales Report checkbox.
Affiliates can view this section in Affiliate Dashboard -> Overview.
Pagination Settings
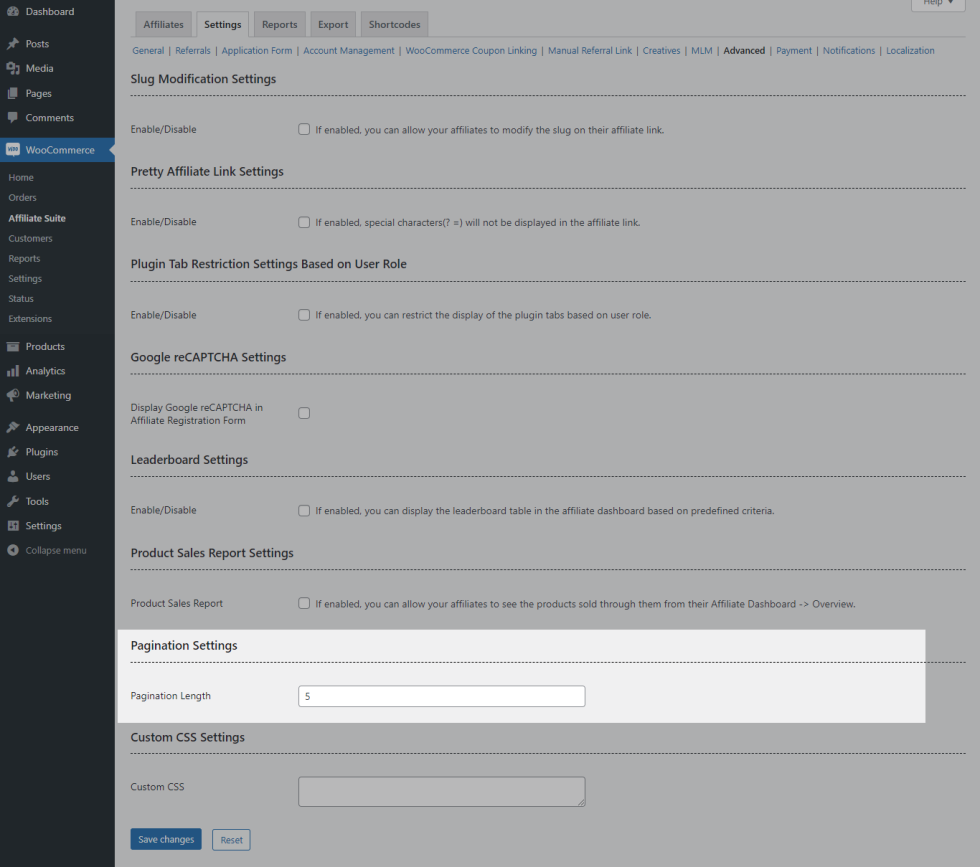
You can set the pagination length to be displayed for the tables present on the affiliate dashboard based on your preferences.
Custom CSS Settings
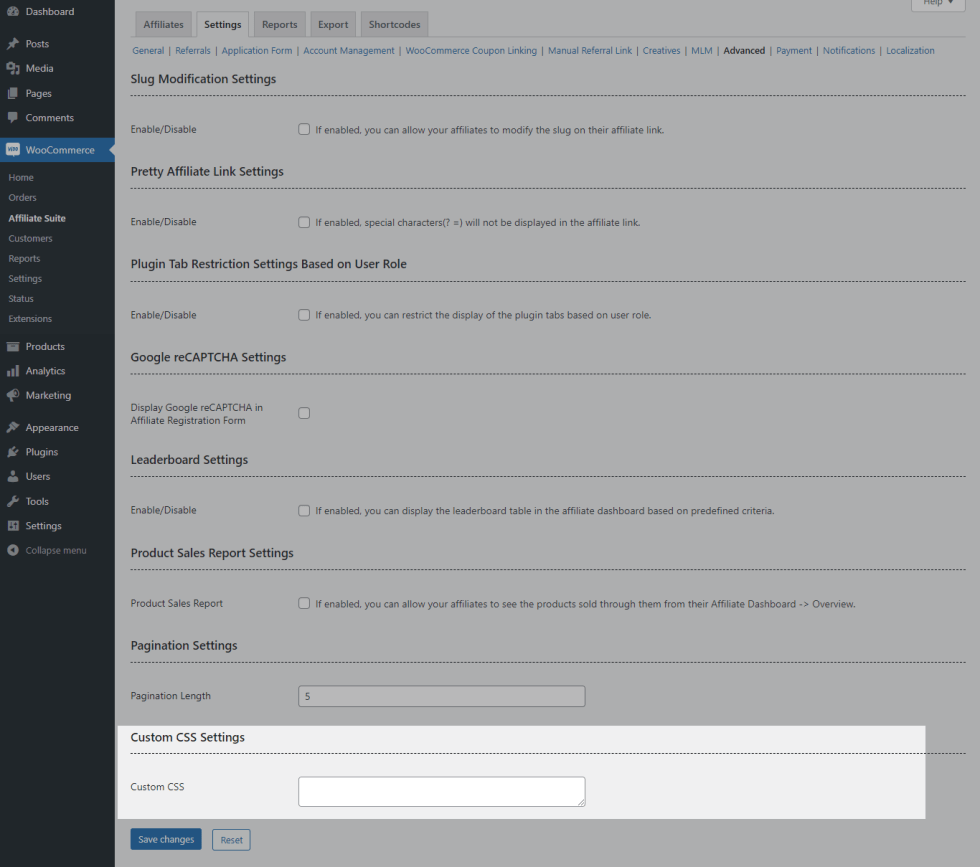
You can customize the look & feel of the Affiliate Dashboard using the Custom CSS option.
Payment
↑ Back to topPayment Settings
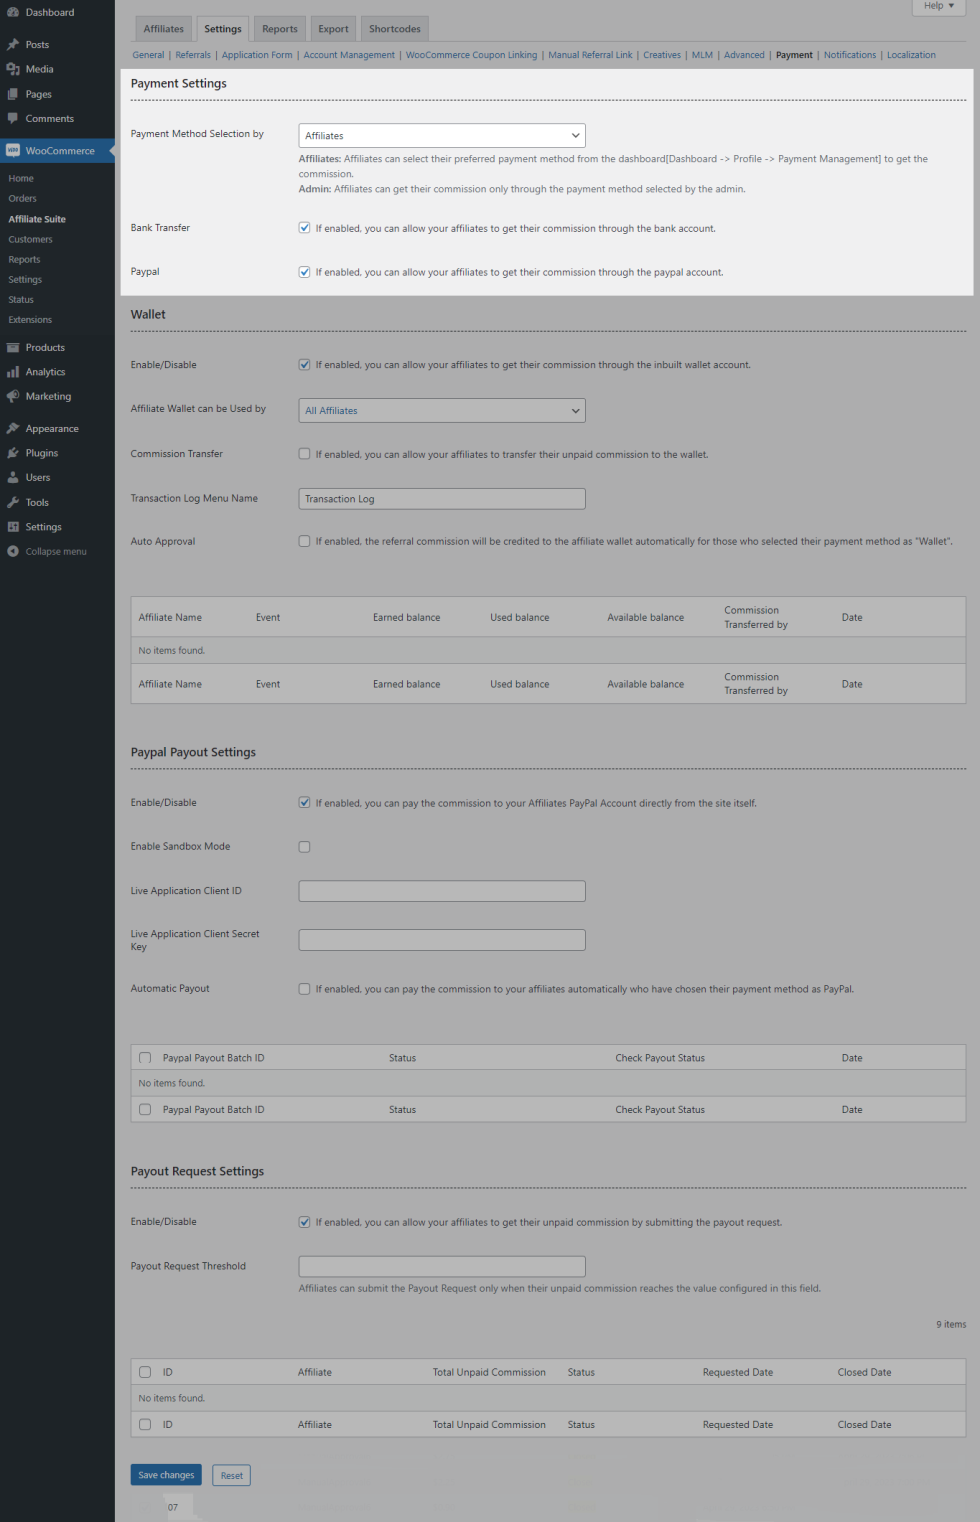
- By default, affiliates can select their preferred payment method in Affiliate Dashboard -> Profile -> Payment Management. If you wish to have this control from your side[i.e Affiliates can get their commission only through the payment method selected by the admin.], then select Admin in Payment Method Selection by option.
- If you don’t want your affiliates to get their commission through a Bank Account, then disable the Bank Transfer checkbox.
- If you don’t want your affiliates to get their commission through PayPal Account, then disable PayPal checkbox.
Wallet
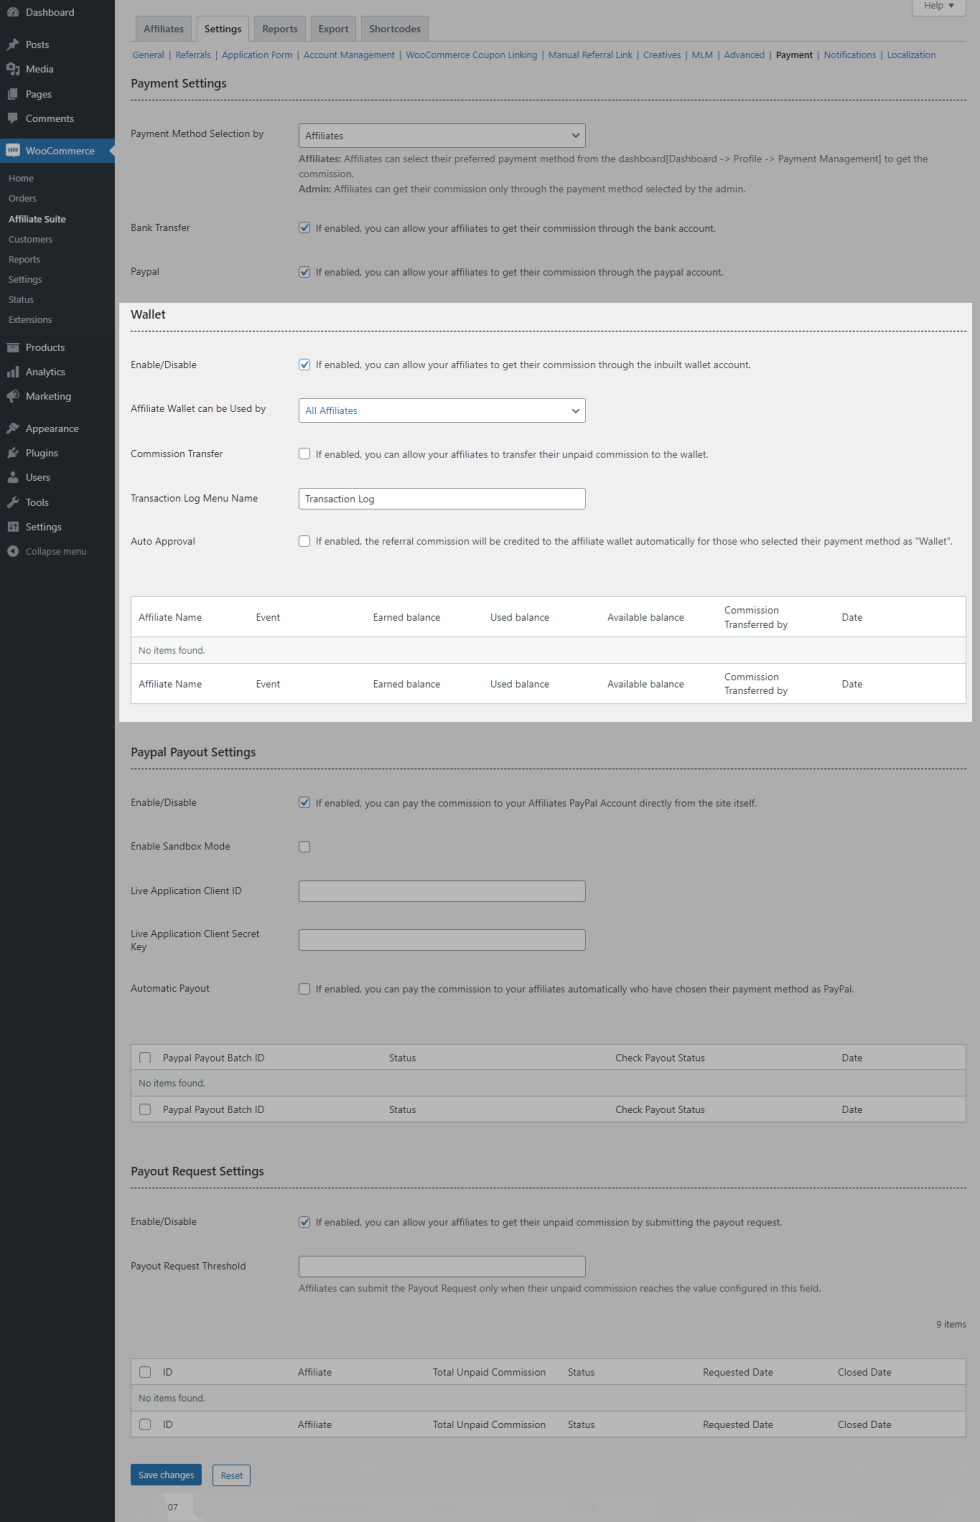
- If you wish to allow your affiliates to get their commission through wallet, then enable the checkbox.
- By default, the wallet can be used by All Affiliates. If you wish to restrict for certain affiliates, then choose Selected Affiliates in Affiliate Wallet can be User by option & select the affiliates.
- If you wish to allow your affiliates to transfer their unpaid commission to wallet, then enable Commission Transfer checkbox. Affiliates can see the form in Affiliate Dashboard -> Wallet -> Commission Transfer.
- By default, the commission will be transferred to the affiliate wallet only after approval by the site admin. If you wish to transfer automatically[i.e without admin approval], then select the Auto Approval checkbox.
PayPal Payout Settings

- If you wish to pay the commission to your Affiliate PayPal Account through PayPal Integration, then enable the checkbox.
- Select Sandbox Mode for testing purpose by entering the valid Client ID & Secret Key in respective fields.
- If you go with Live Mode, then disable the Sandbox Mode checkbox & enter the live credentials in respective fields.
- By default, the commission will be paid to the affiliate paypal account only after approved by the site admin. If you wish to pay automatically[i.e. without admin approval], then select the Automatic Payout checkbox.
Payout Request Settings
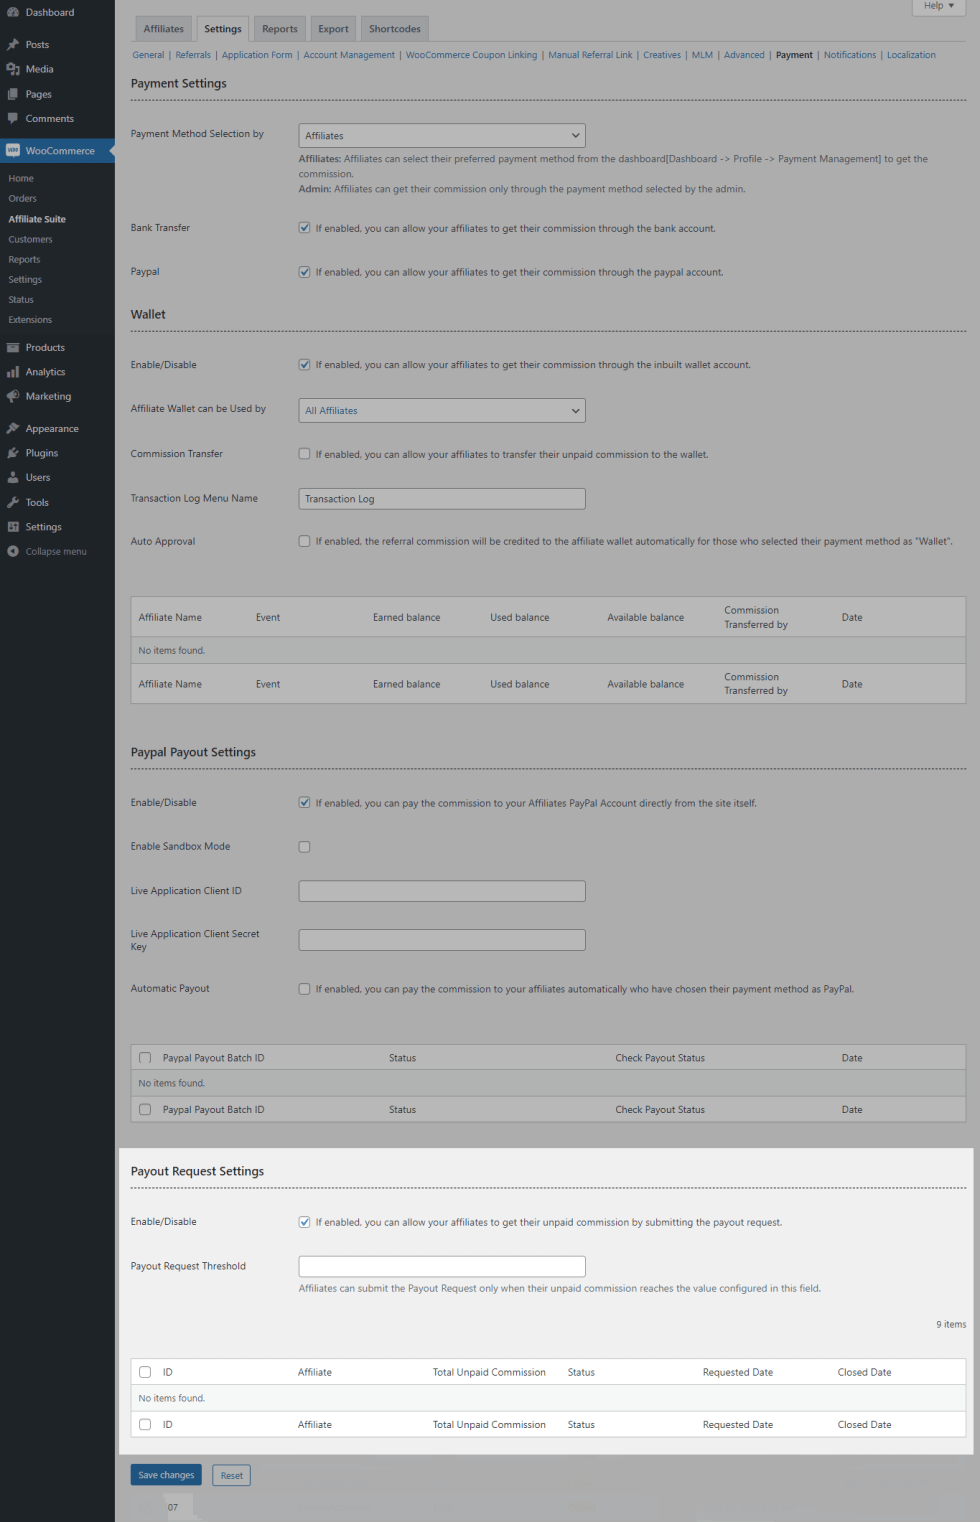
- If you wish to allow your affiliates to give the payout request to get their unpaid commission, then enable the checkbox.
- If you wish to allow your affiliates to give the payout request only when the certain unpaid commission amount reaches, then enter the value in the Payout Request Threshold field.
Notifications
↑ Back to top
In this section, you enable/disable the email notifications sent for Admin/Affiliate activity. You can also customize the email content.
Export
↑ Back to top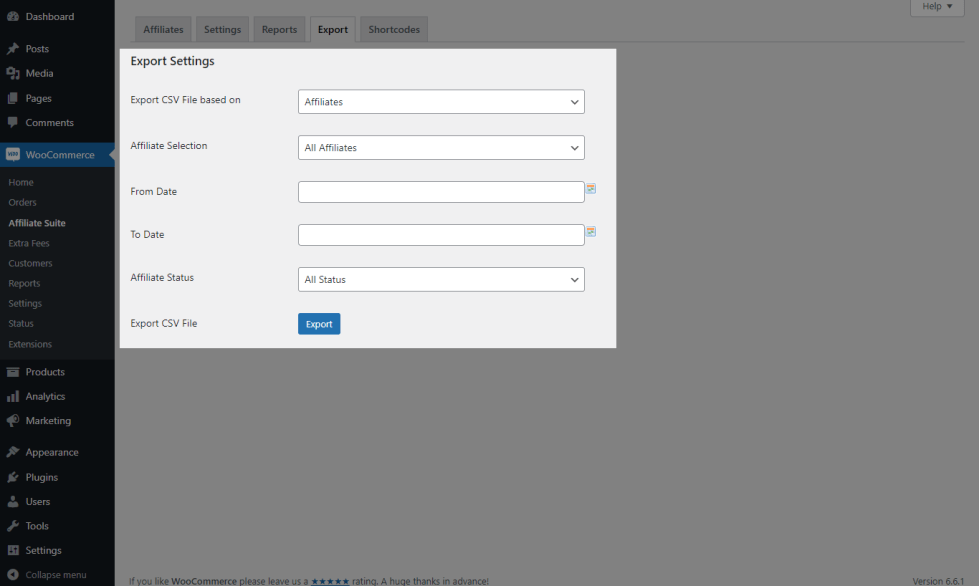
You can export the CSV File based on the following actions,
- Affiliates
- Referrals
- Visits
- Payouts
Shortcodes
↑ Back to top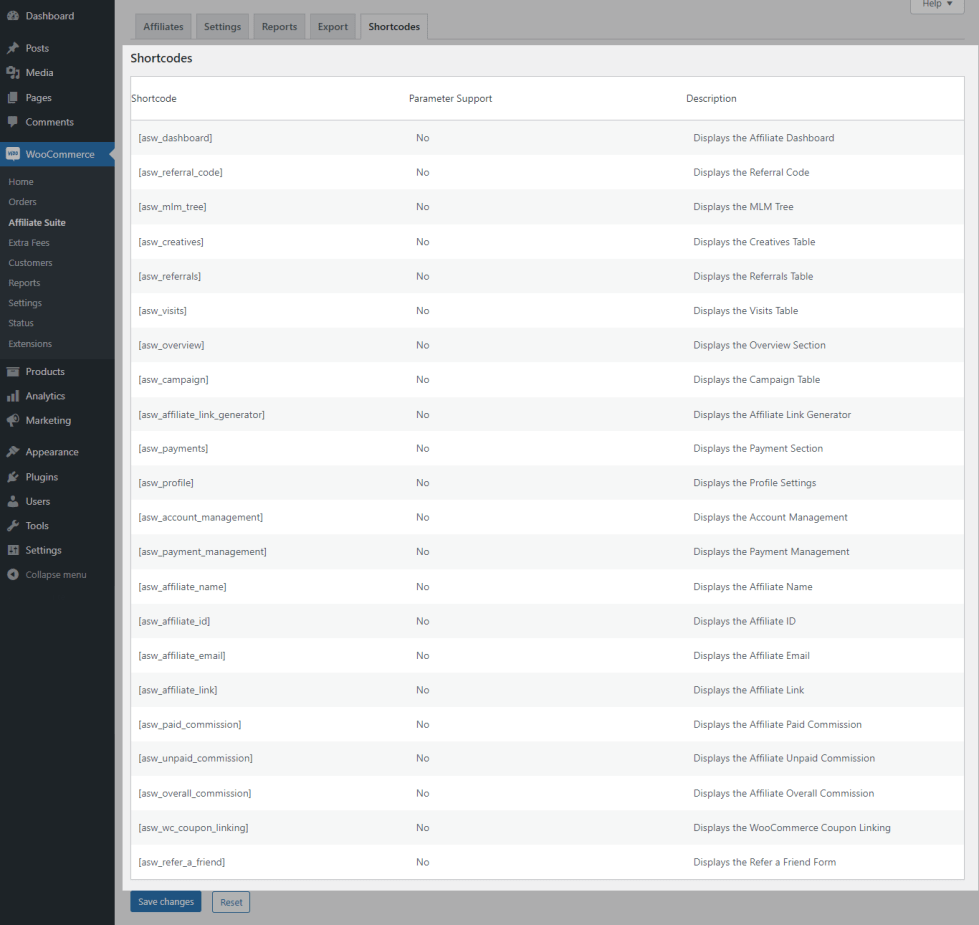
You can find the extensive list of shortcodes in this section using which you can display the affiliate-related details anywhere on your site.
Localization
↑ Back to top
You can customize the labels displayed to the user in this section.
Usage
↑ Back to topApplication Submission and Approval
↑ Back to top

- When the plugin is installed and activated for the first time, A page for the Affiliate Application form is automatically created.
- A user can submit an Affiliate Application by filling in the Mandatory fields.
- Once the application form is submitted, the site admin is notified by email. They can review the application, set the commission rate, and approve it.
- Once the application is approved, the user is notified by email.
Affiliate Promotion Tools
↑ Back to topThe following promotion tools are available for the Affiliate on their Affiliate Dashboard,
Affiliate Link
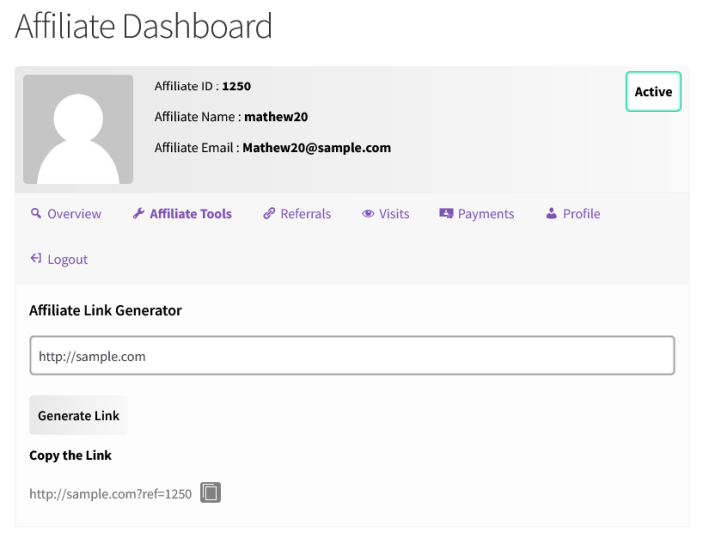
A user will be considered as referred by the affiliate when they access the site using the affiliate link.
Refer a Friend Form
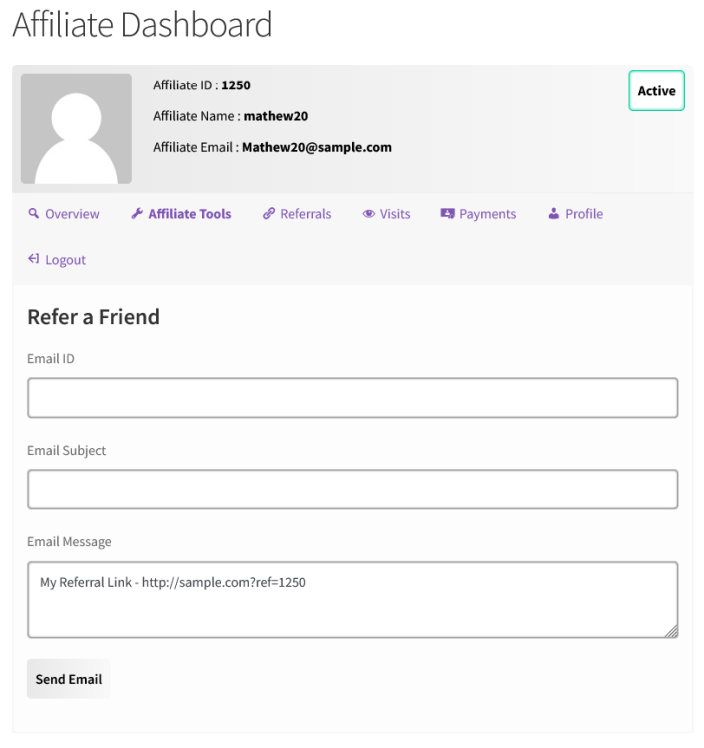
Affiliates can send Affiliate links to other users using the refer a friend form.
Creatives
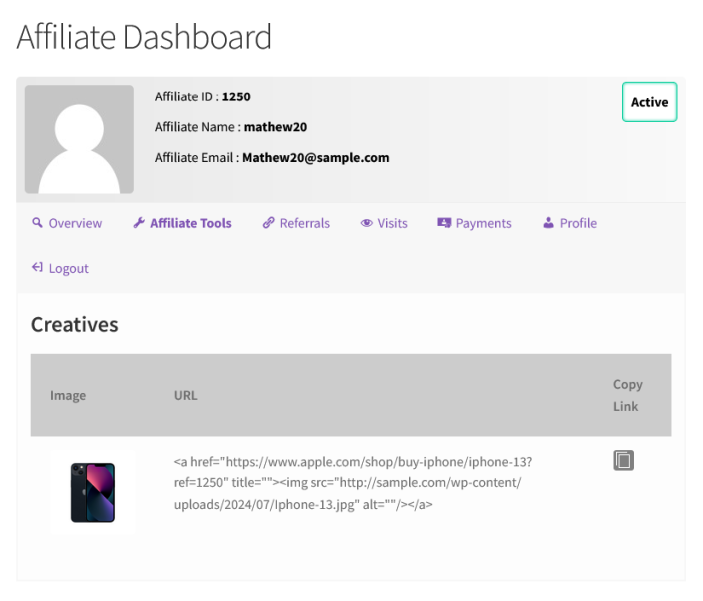
Affiliates can embed their Affiliate links inside creatives. When the user clicks on the creatives, they will be considered as referred by the Affiliate.
Conversion Using Affiliate Links
↑ Back to top
Once the User accesses the site using Affiliate Link/Code and creates an account/completes the product purchase, they will be considered as the affiliate’s referral.
User Receiving Commission
↑ Back to top- The admin must approve the referral activity before it can be added to the Affiliate’s account as an unpaid commission.
- The Site Admin can pay the Affiliate via the Inbuilt PayPal Payouts integration/ Pay the affiliate to the Inbuilt Wallet system. The admin can also manually export information about the unpaid affiliates and make the payment outside the site.
Reports
↑ Back to top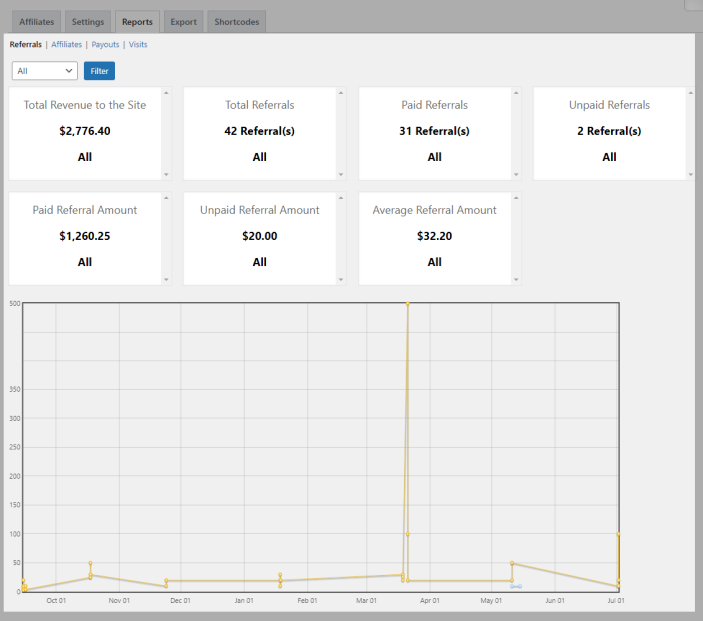
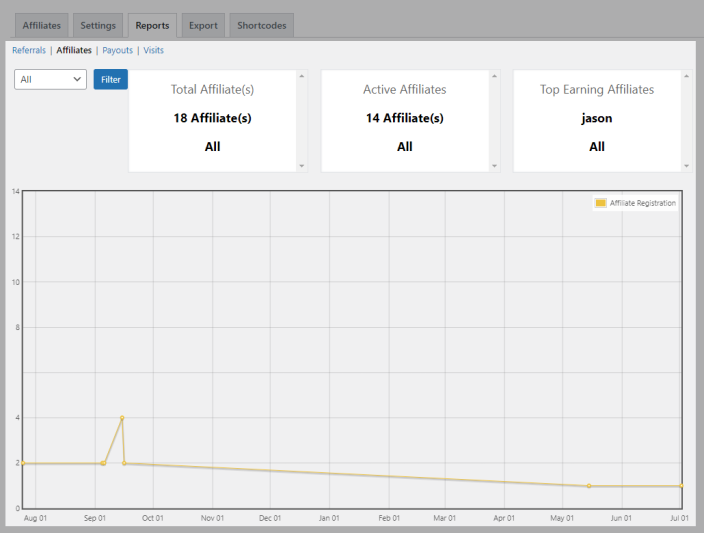
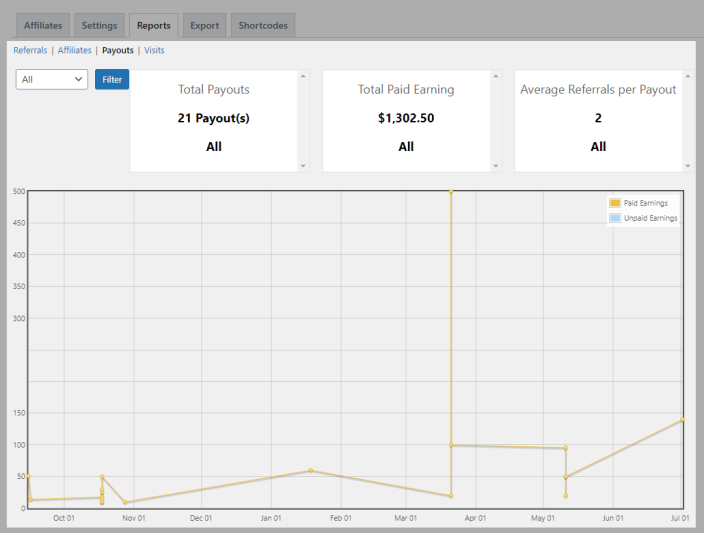
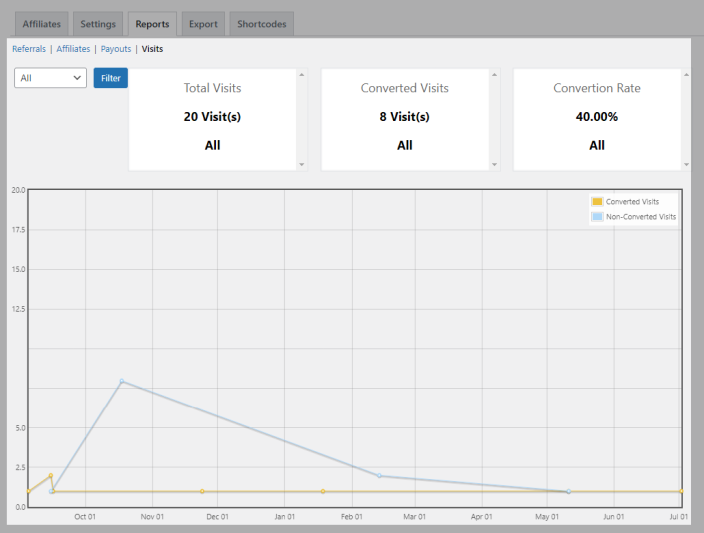
Site Admin can get insights on the Affiliate activity on the site.
Translation
↑ Back to topAffiliates Suite Plugin is translation-ready, meaning you can edit the PO files by which you can translate the text to any language.
The steps to do the translation are as follows. For example, let us consider translation to French.
- Download and install Poedit
- Open the file affiliates-suite-for-woocommerce -> languages folder -> affiliates-suite-for-woocommerce.pot using Poedit.
- Create a new translation file by clicking Create new translation button
- Choose the Source text and set its corresponding French text in the Translation Text Area.
- Save the changes.