Installation
↑ Back to top- Download the .zip file from your WooCommerce account.
- Go to: WordPress Admin > Plugins > Add New and Upload Plugin. Select Choose File for the file you have downloaded.
- Click Install Now and Activate Plugin.
More information is available at Install and Activate Plugins/Extensions.
Setup and Configuration
↑ Back to topAfter activation of the Digital Goods Checkout extension, navigate to the extension settings menu under WP Admin > WooCommerce > Settings > Digital Goods Checkout.
Hide checkout fields for virtual products:
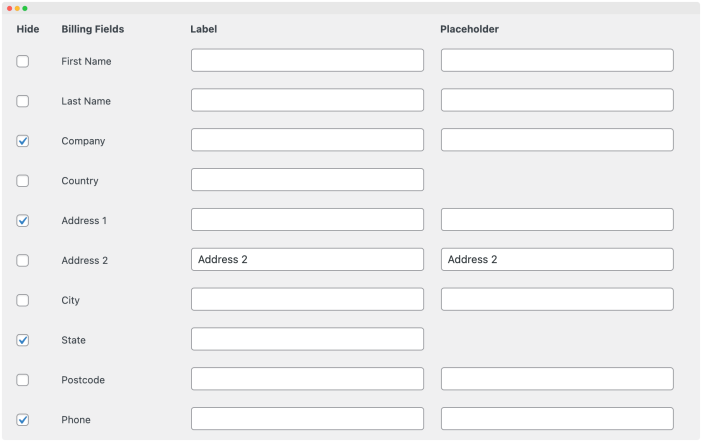
↑ Back to topHide billing fields:
↑ Back to topYou can choose to hide, change label or add place order for your billing fields appearing on checkout page. This change will appear only when your customers have a virtual product in cart.

Hide additional notes field:
↑ Back to topAlong with billing fields, you can also choose to hide the WooCommerce default additional notes field for digital products.

Cart mixing and user role restrictions:
↑ Back to topYou can choose apply the above field restrictions to all or specific user roles only. This control is helpful when you have different types of customers and your store catalog and marketing efforts are optimized based on customer types. You can also choose to prevent customers from mixing virtual products with non-virtual products in cart. When mixing is disallowed, the WooCommerce checkout will not show shipping fields on checkout page, offering a better checkout experience for customers.

Quick buy now button settings:
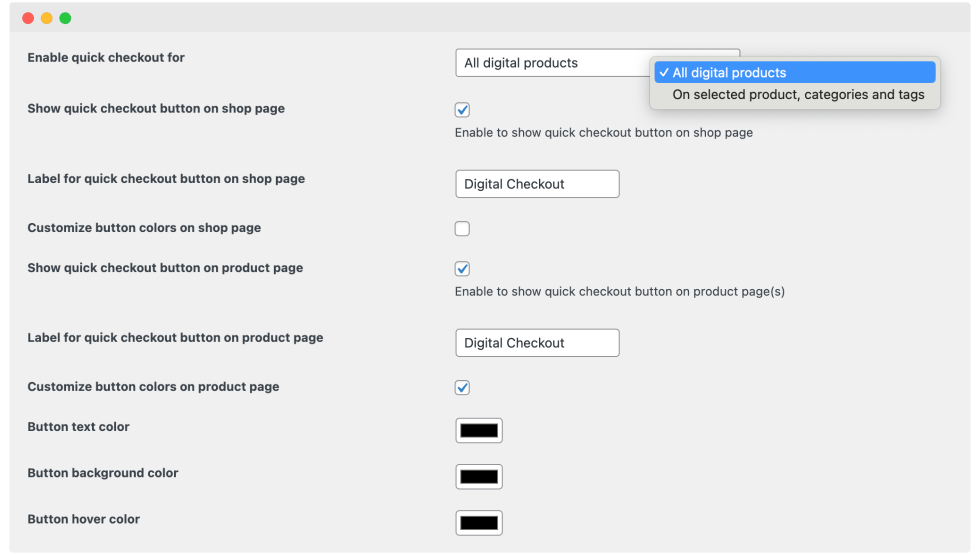
↑ Back to topYou can customize following options of quick buy now button,
- Enable quick buy button for all virtual products or specific virtual virtual products by categories and tags
- Choose to enable button on listing pages and customize button label, text and background color
- Choose to enable button on product pages and customize button label, text and background color

