WooCommerce Upload Files and Product Attachments Plugin allows your customers to upload files on the product, cart, or checkout page. You can also attach important files to products, which customers can download from the product page.
Installation
↑ Back to top- Download the upload files & product attachments .zip file from your WooCommerce account.
- At the WordPress Admin Panel, go to Plugins > Add New and Upload Plugin with the file you downloaded after purchase.
- Install Now and Activate extension.
More information at: Install and Activate Plugins/Extensions.
Setup and Installation
↑ Back to topAfter installation, Go to WooCommerce>Settings>Upload Files and Product Attachments to configure this extension. Here you will find three tabs such as Manage Rules, Add Rules, and General Settings.

Manage Rules
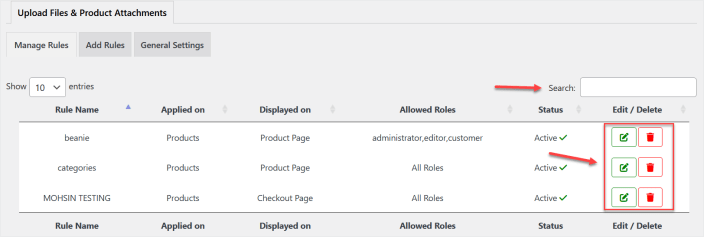
↑ Back to topClick the “Manage Rules” tab to see all the existing rules and you can search, edit or delete any rule from here as well.
Add Rules
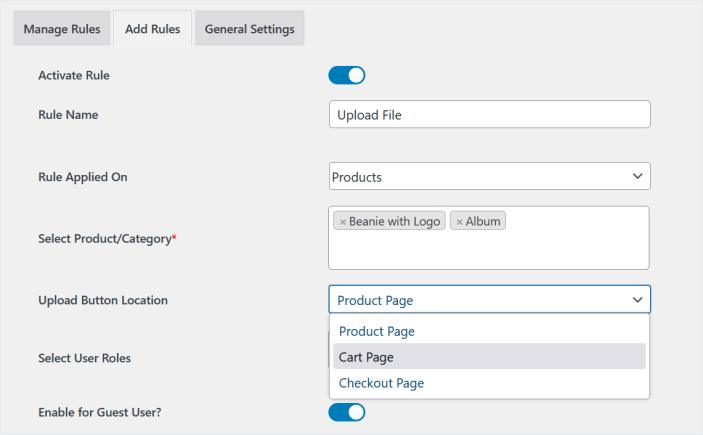
↑ Back to topMove to the “Add Rule” tab to create a new rule. In each rule setting, you can apply a rule to specific products or categories and select the location of the upload file button such as product, cart, or checkout page.
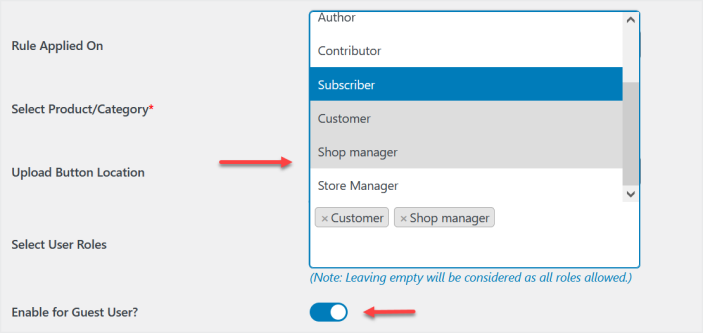
Option to restrict the rule to specific user roles and guest users.
You have the option to create a single upload button or multiple upload buttons.

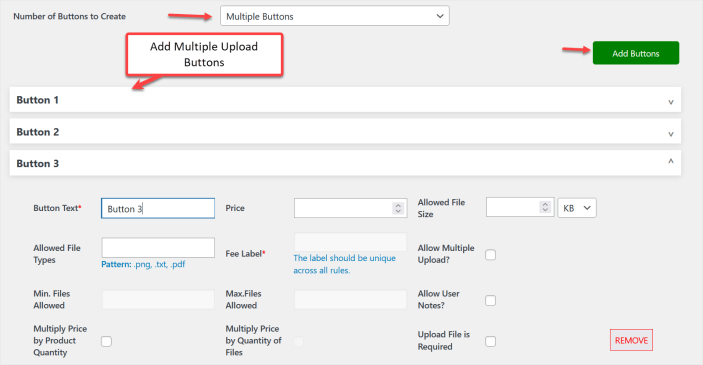
In each upload button kit settings you can set the button text, price, file types allowed, file size limit, minimum files allowed, maximum files allowed and many more settings.
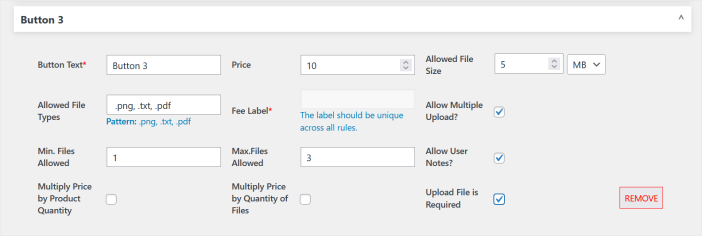
You also have the option to multiply file price by product quantity and number of files uploaded by customers.

You can also enable the “Admin Attachment” option to attach the files on product pages and set it’s location as well as format.
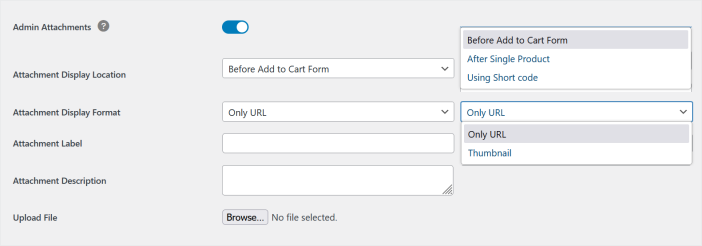
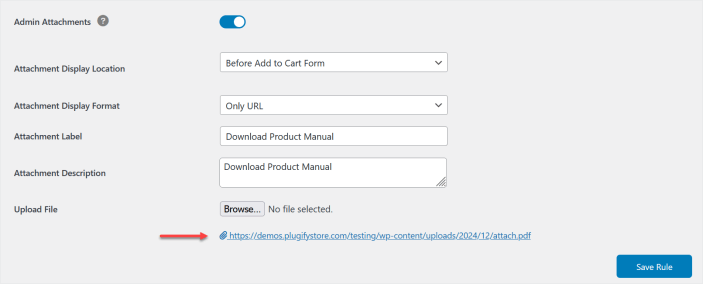
You can upload the file and set the attachment label and description.
General Settings
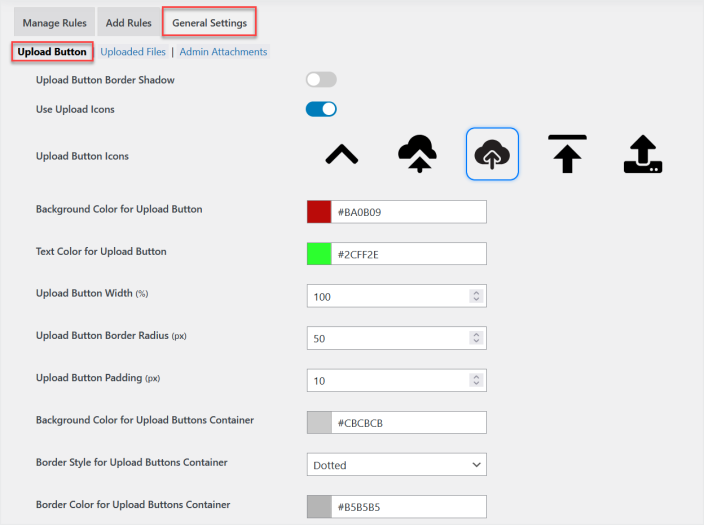
↑ Back to topGo to General Settings>Upload Button tab to customize the upload the button text, icons, styles, and labels for the frontend.
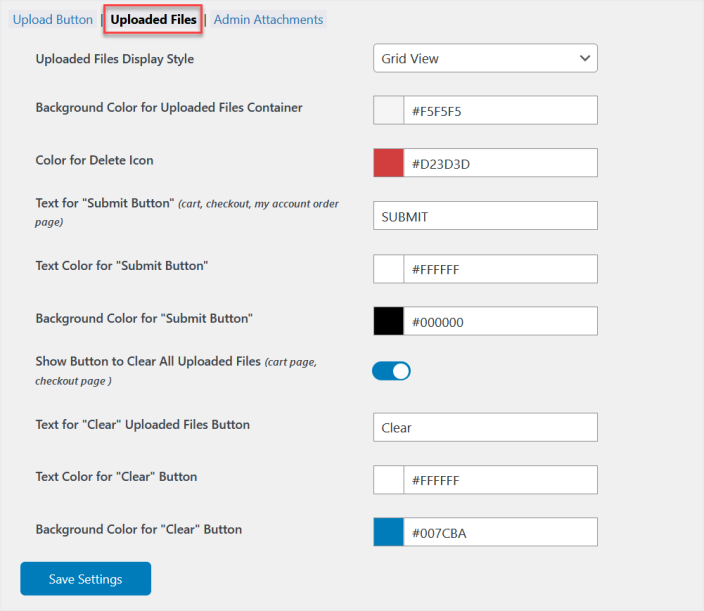
Click the “Uploaded Files” tab to customize the uploaded files container such as display style, text, and colors. You can also customize the “Submit” and “Clear” button from here.
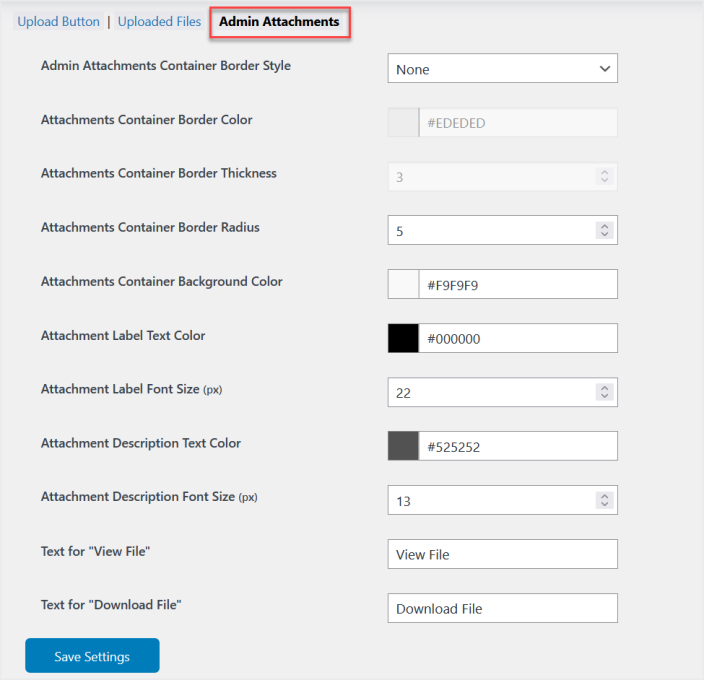
Toggle to the “Admin Attachments” tab to configure the display of admin attachments on the frontend such as style type, color, and labels.
Customize Emails
↑ Back to topGo to WooCommerce>Emails to customize the emails for “User Re-Uploaded the file” and “Admin Reject the Files“.

