NOTE
This product is no longer sold on WooCommerce.com. This document has been left available for existing users, but will no longer be updated.
Personalized Greeting Cards for Gifts
↑ Back to topAdd the Loom Gift Notes extension, and your customers can include personalized gift cards with their orders. Gain a new revenue stream for your WooCommerce store and delight your customers. They will love adding custom cards to gift purchases.
How Does the Loom Gift Notes Extension Work?
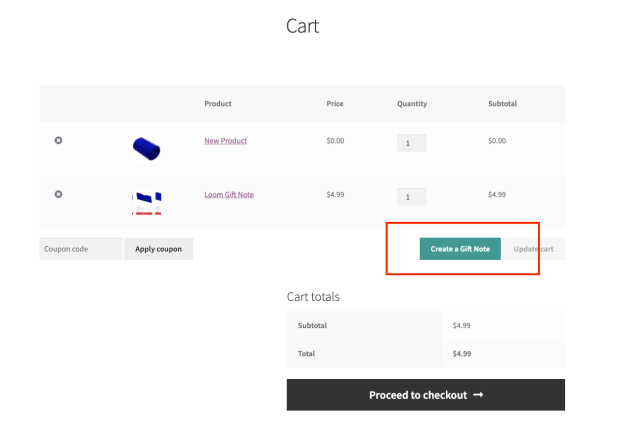
↑ Back to topLoom Gift Notes places a button on your customer’s cart page. The button gives them the option to create and add a 5″ x 7″ gift note to their order. The Gift Note button launches our creation engine model, where the customer can create a personalized note, with a photo and message, in just a few minutes.
Installation
↑ Back to top- Download the .zip file from your WooCommerce account.
- Go to: WordPress Admin > Plugins > Add New and Upload Plugin with the file you downloaded with Choose File.
- Install Now and Activate the extension.
More information at: Install and Activate Plugins/Extensions.
Setup and Configuration
↑ Back to topOutside of activating your Loom plugin through the Plugins section of WordPress, there is no setup or configuration required at this time. Future configurations and settings may be applied.
Notes:
After you have activated the Loom plugin, there will be a “Loom Gift Note” product that is added to your store. This gift-note is automatically added to the users cart when creating a gift note upon checkout. You have the ability to customize the Loom Gift Note product, and change the pricing of it for your users.
However, the product name (ie “Loom Gift Note”) must remain the name of the product. If you change the product name the gift note process will still function as intended, but the gift note product will not be automatically added to the users cart.
That being said, we are working diligently on updates to the plugin to allow for further customization within the WordPress/Woocommerce dashboard.
Usage / User Experience
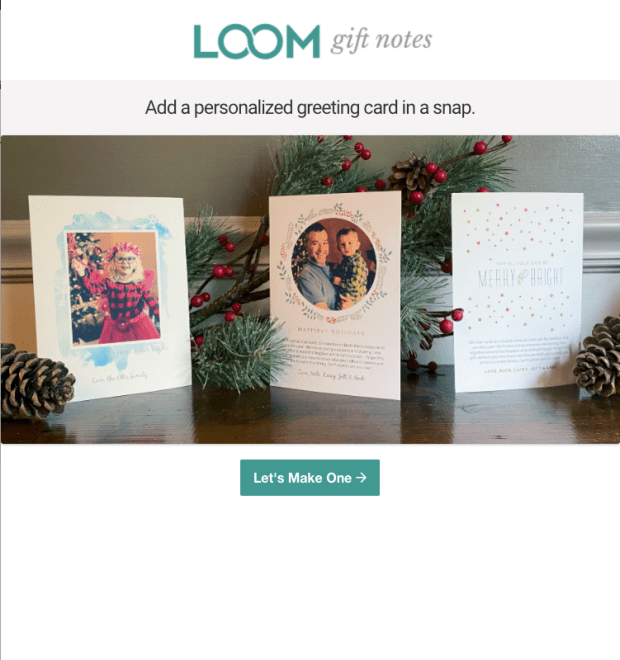
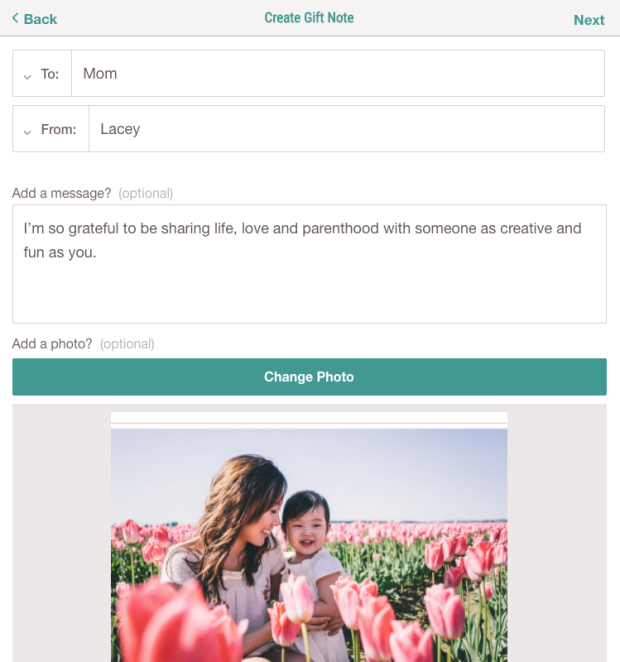
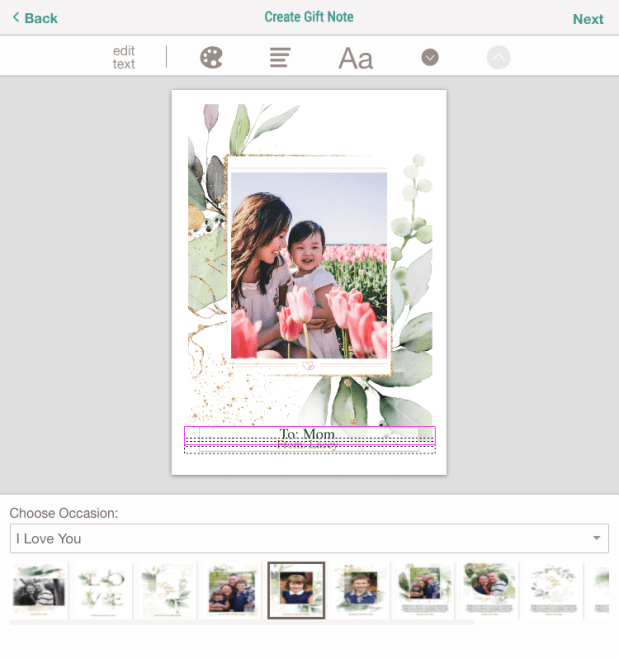
↑ Back to topUpon checkout users will now see a new “Create Gift Note” button. Clicking this button will launch the Loom Gift Note Creator. The gift note creations takes the user through a series of steps to generate a custom gift note, with the ability to edit text, font, colors, etc.

Step1: Launch Page

Step 2: Input text and Upload Photo


Step 3: Edit Design

Step 4: Design Preview/Confirmation

