Description
↑ Back to topThe Abandoned Cart for WooCommerce serves to boost sales by converting potential customers who were close to making a purchase but didn’t, ensuring that fewer sales opportunities are not lost. Notifying with the help of Emails.
Features
↑ Back to top- Settings
- Abandoned Cart
- Abandoned Cart Email
- Abandoned Cart Logs
Installation
↑ Back to top- Download the .zip file from your WooCommerce account.
- Go to WordPress AdminDashboard > Plugins > Upload Plugin > Choose File.
- Install Now and Activate Plugin.
Getting Started
↑ Back to topAbandoned Cart Settings
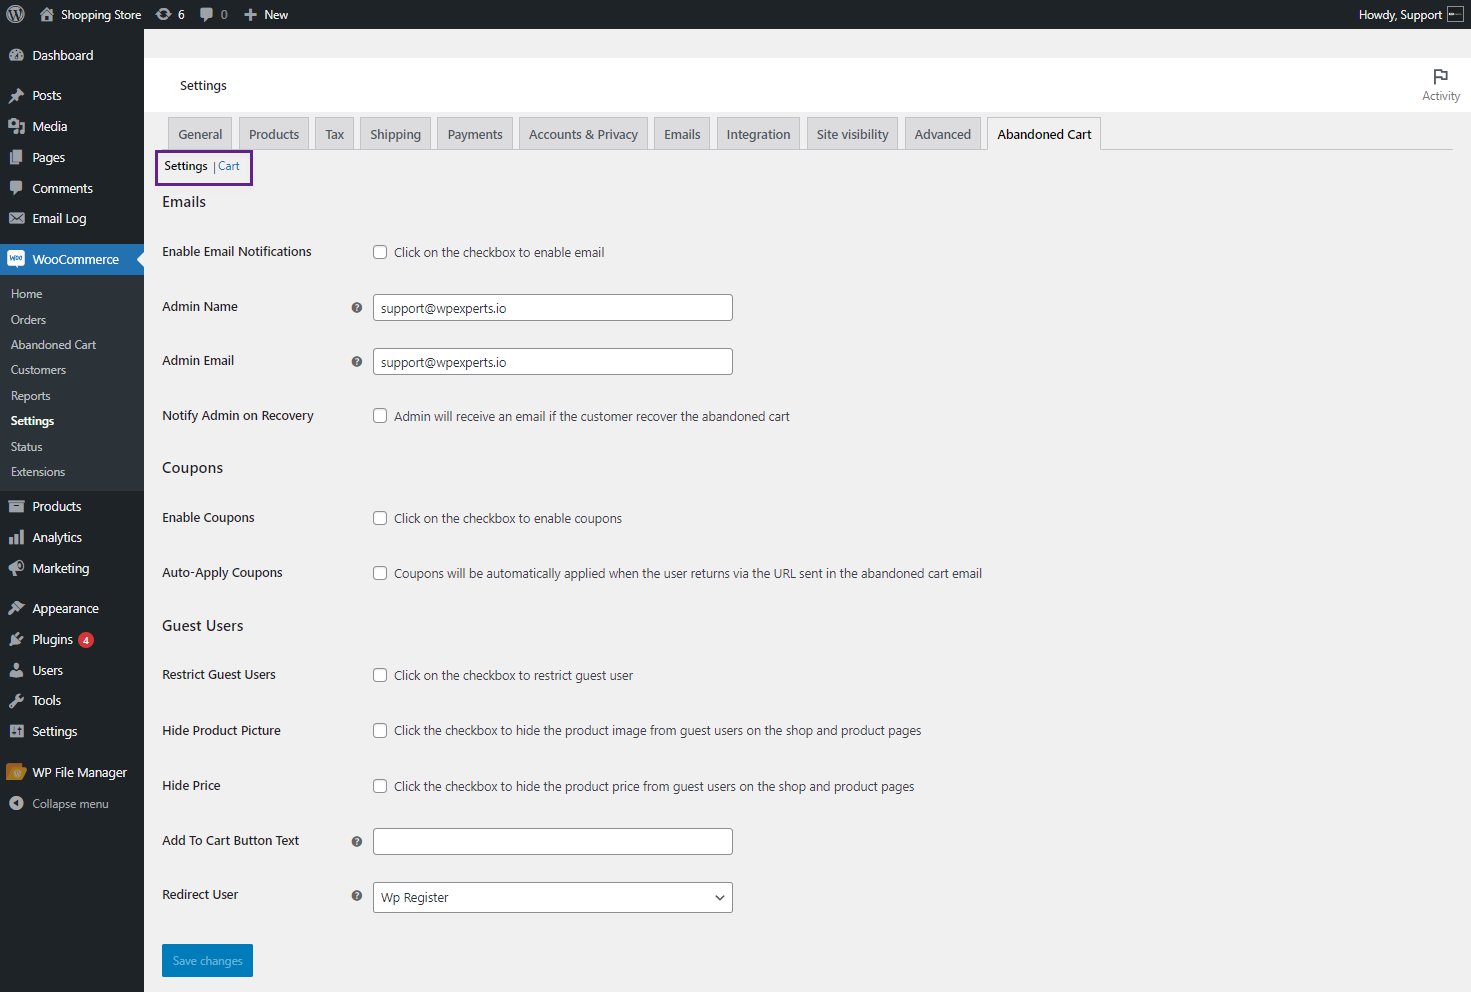
↑ Back to top- For the general settings of the Abandoned Cart, Go to WordPress Admin Dashboard > WooCommerce > Settings > Abandoned Cart.
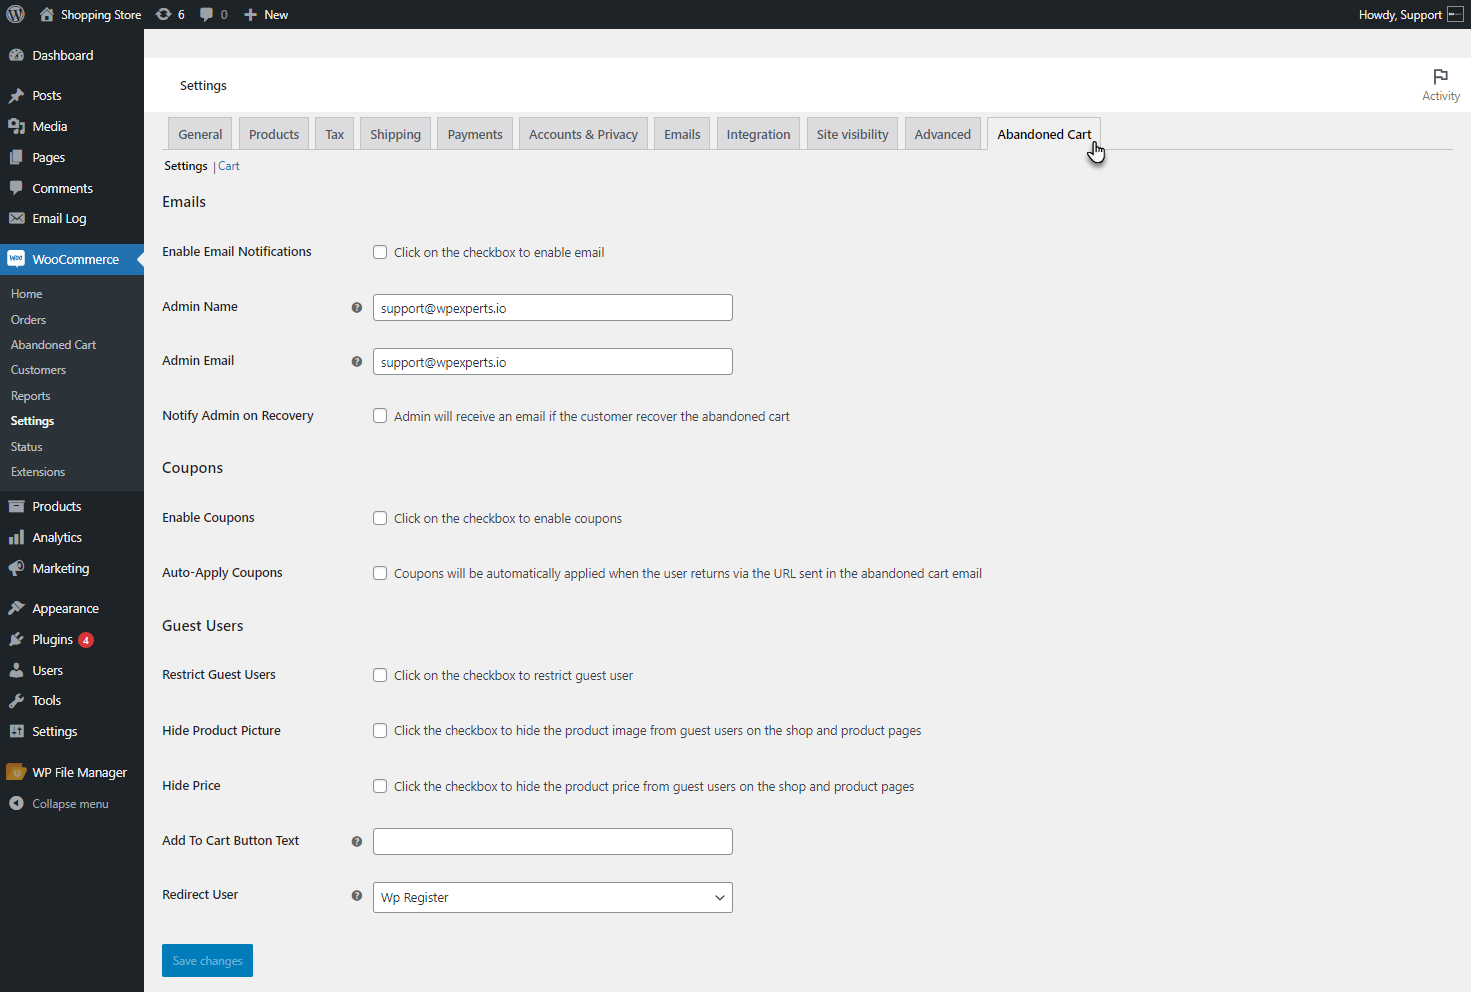
- There are two tabs to configure the plugin.
- Settings
- Car
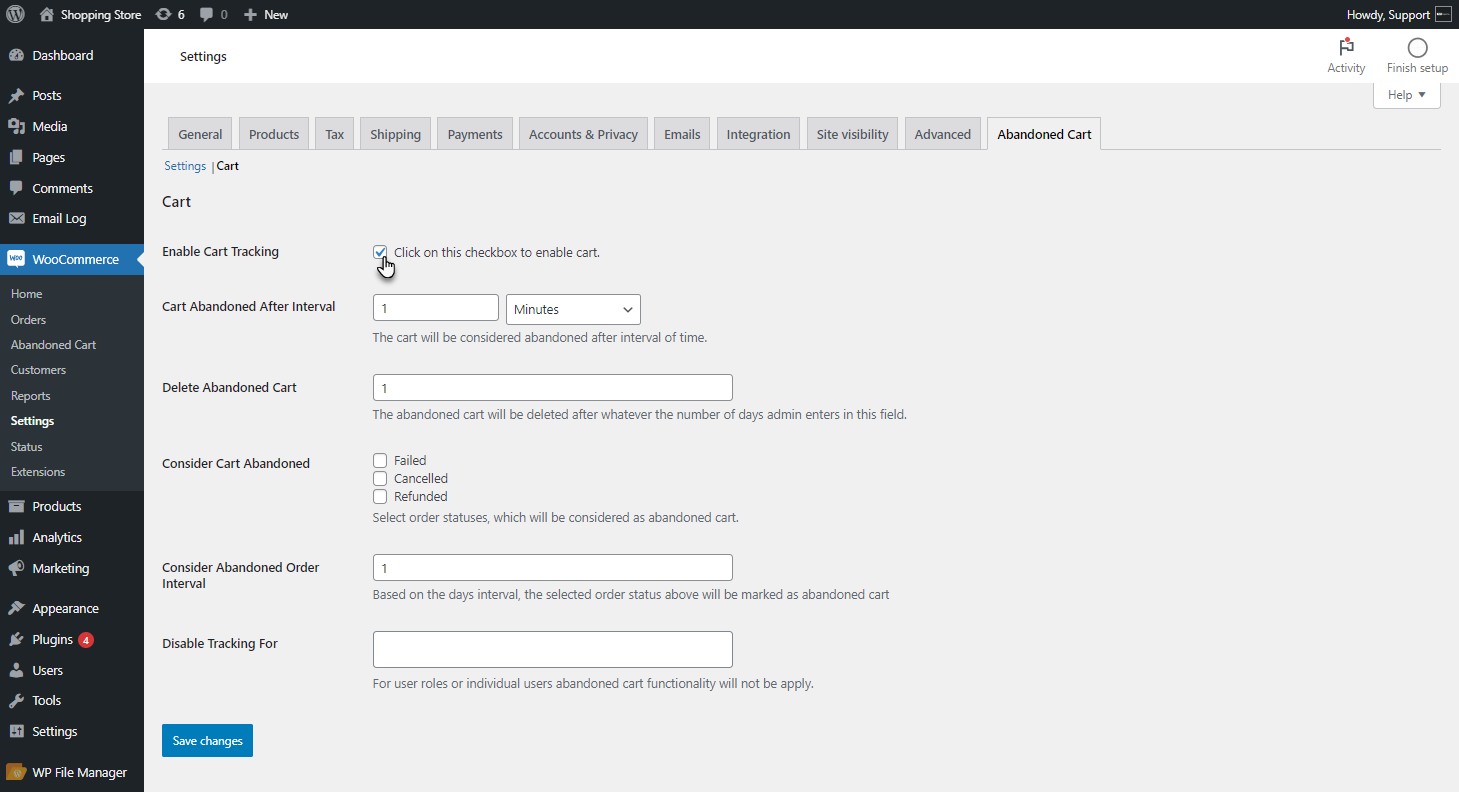
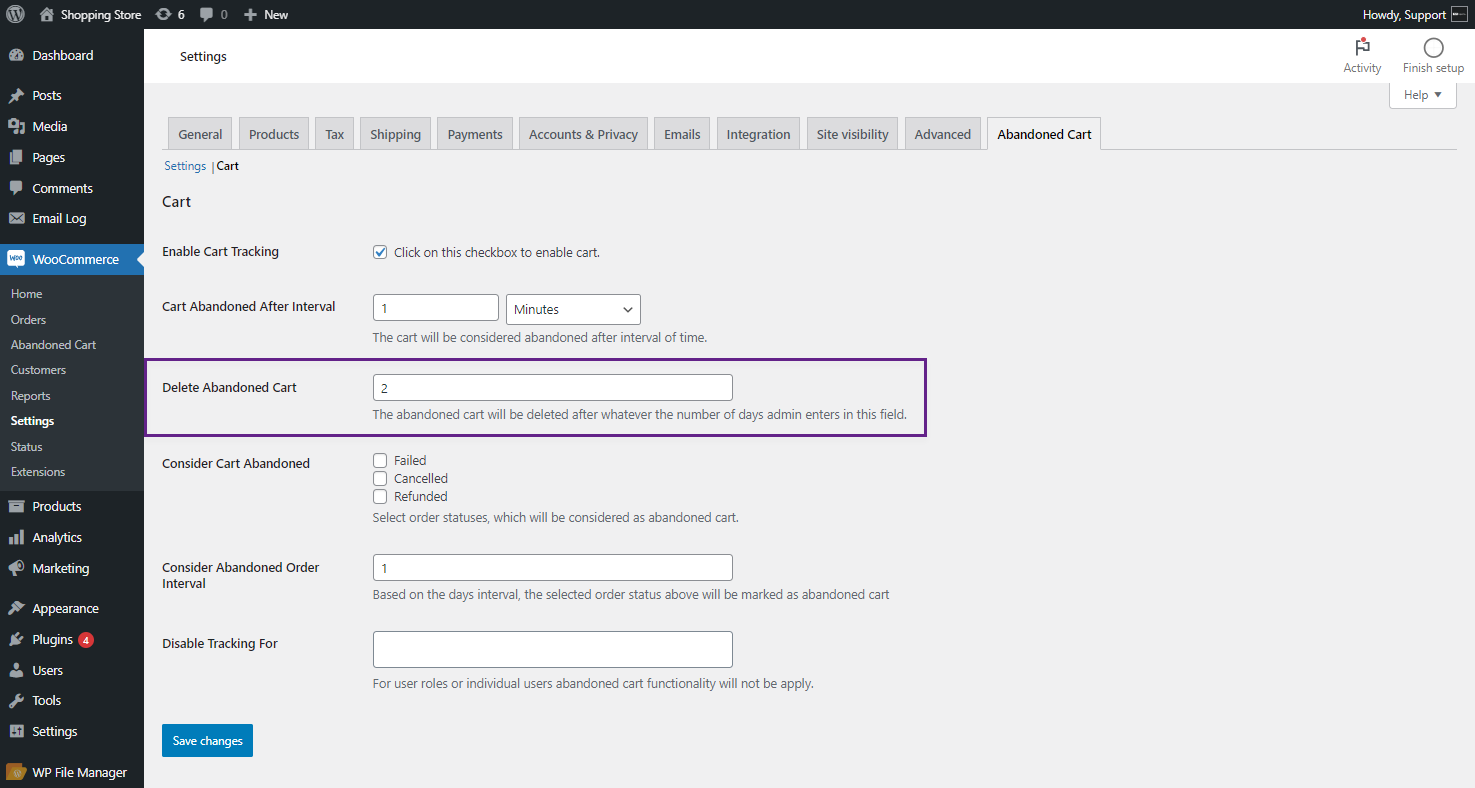
Cart
↑ Back to top- Navigate to the Cart tab. The admin can configure the cart settings from this tab.
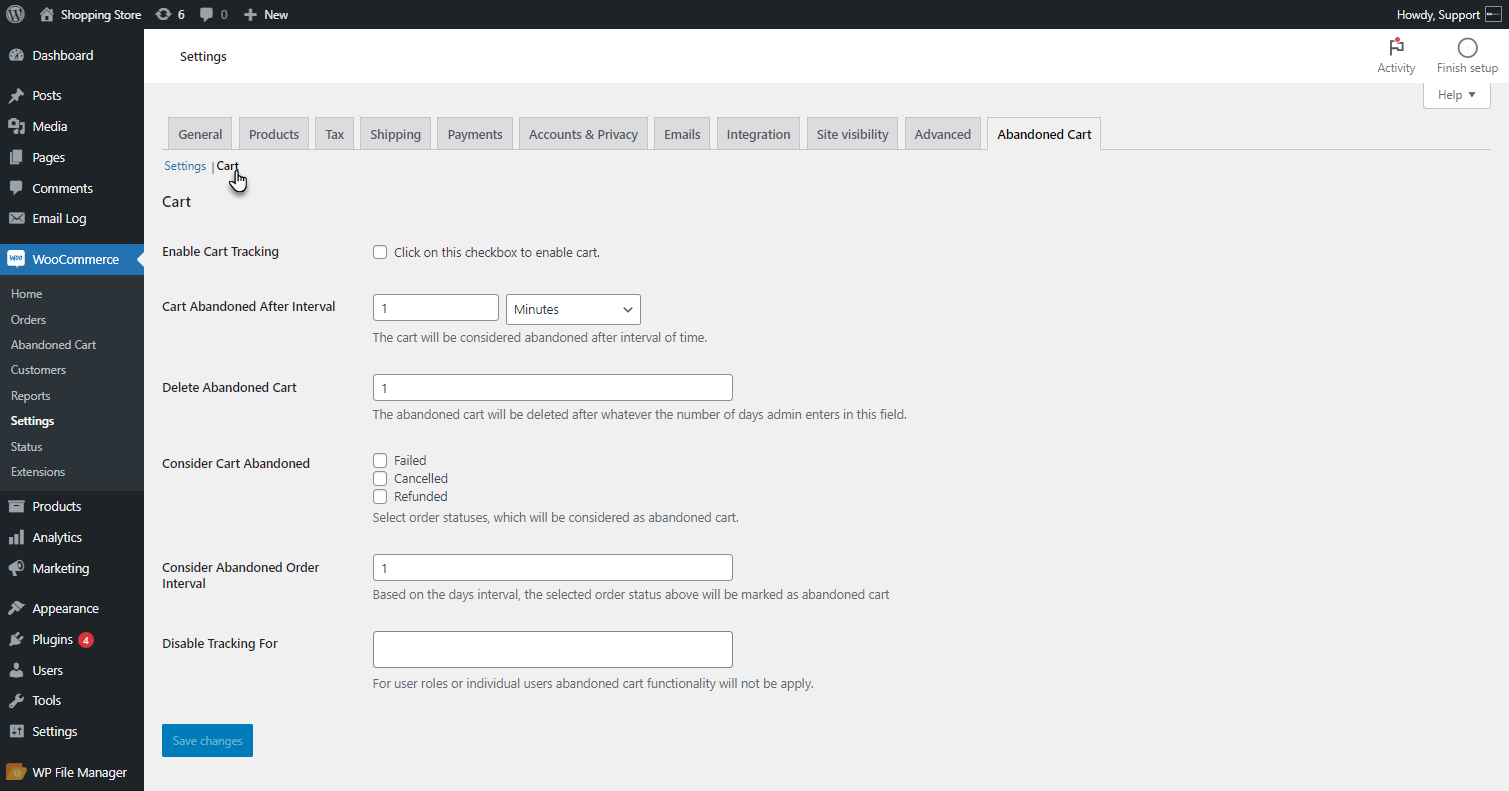
Enable Cart Tracking
- Enable the Cart Tracking option to track abandoned carts.
Cart Abandoned After Interval
- The admin can set the interval for when a cart is considered abandoned. The interval can be set in minutes, hours, or days.
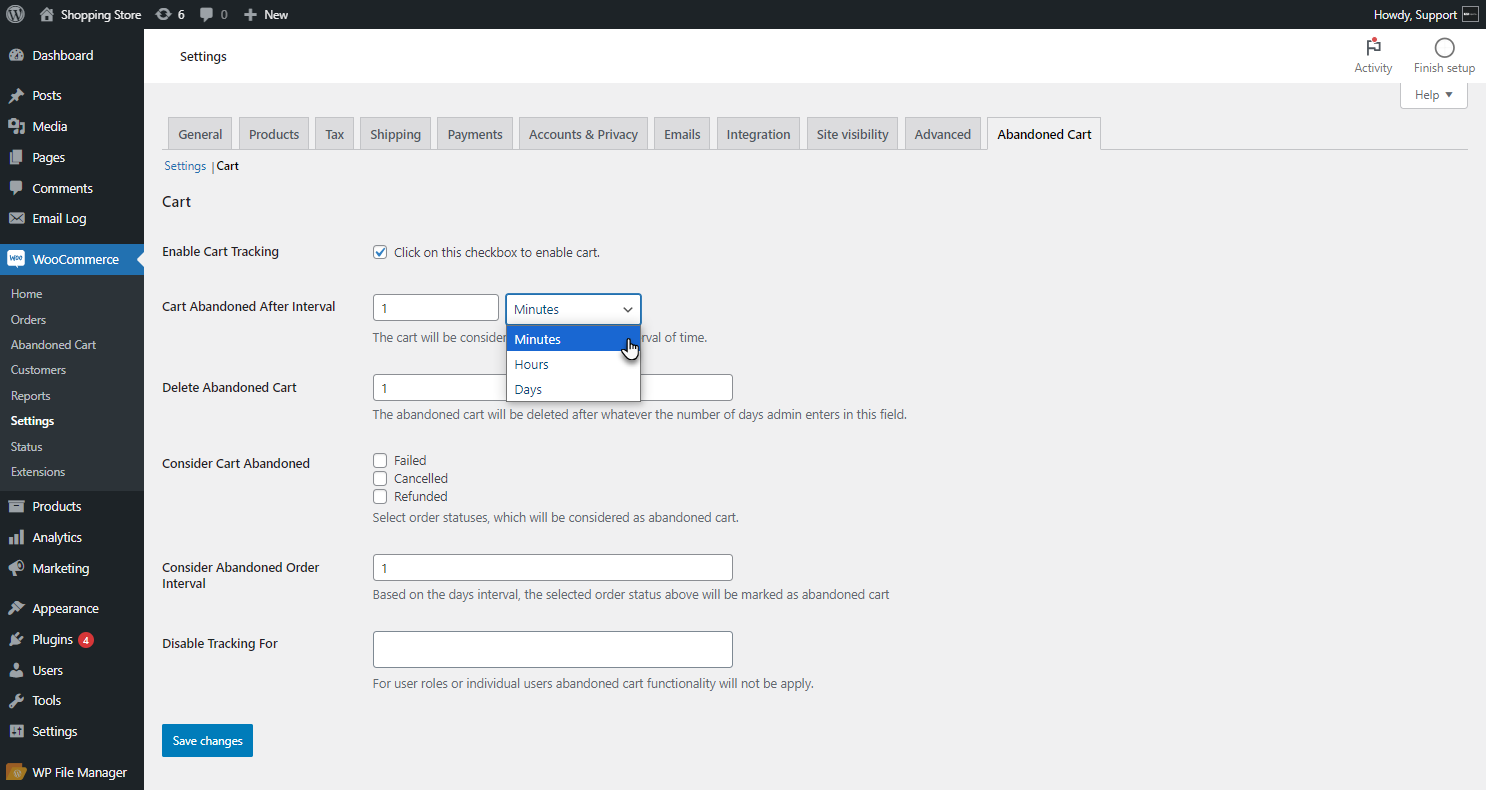
- When the user does not perform any activity on the cart or leaves the cart and signs out for the time interval specified by the admin, the cart will be considered an abandoned cart.
- For the Abandoned Cart, Navigate to the WordPress Admin Dashboard > WooCommerce > Abandoned Cart. The details of the abandoned cart will be displayed.
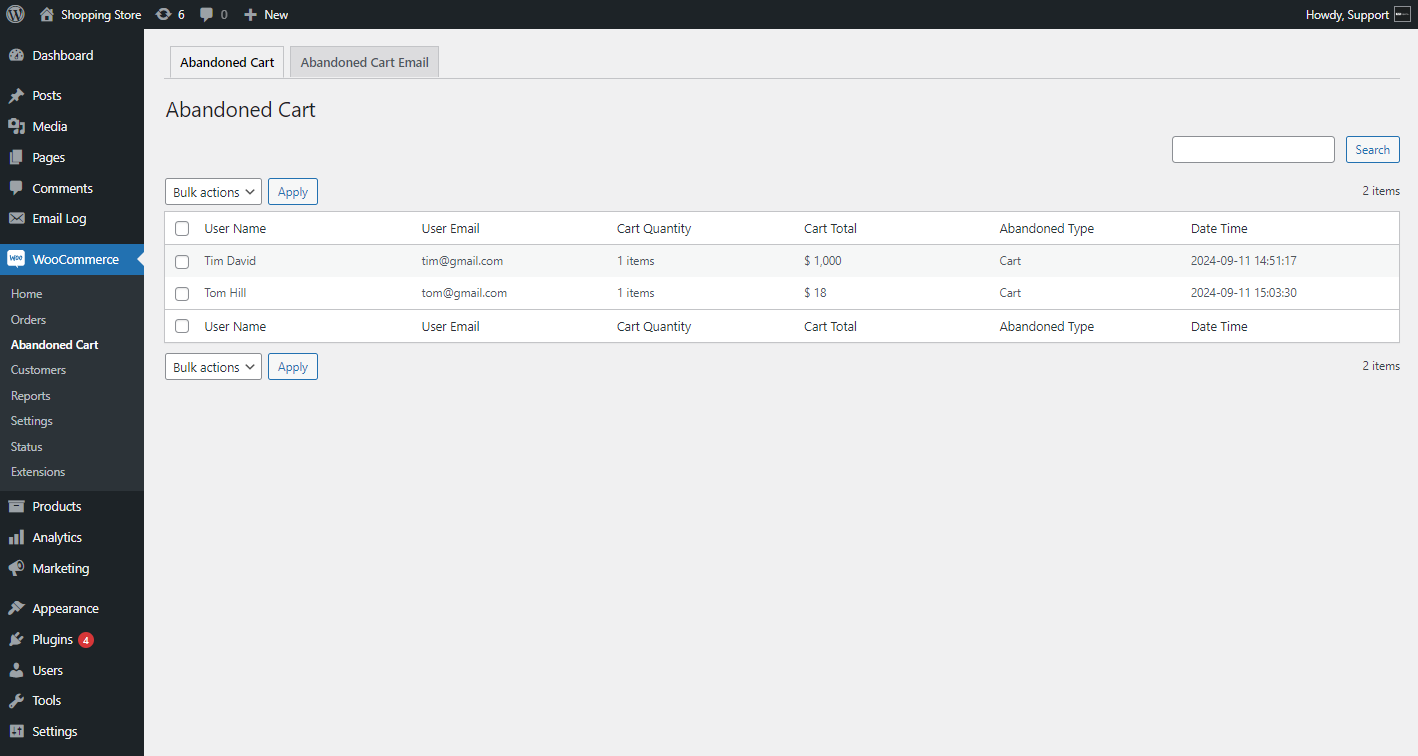
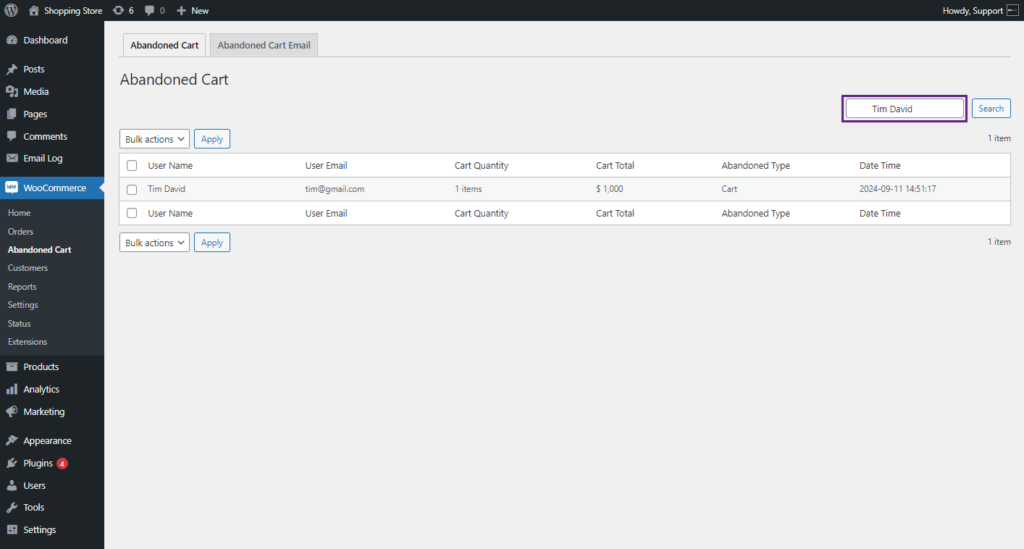
- The admin can search for a specific user by clicking on the Search field.
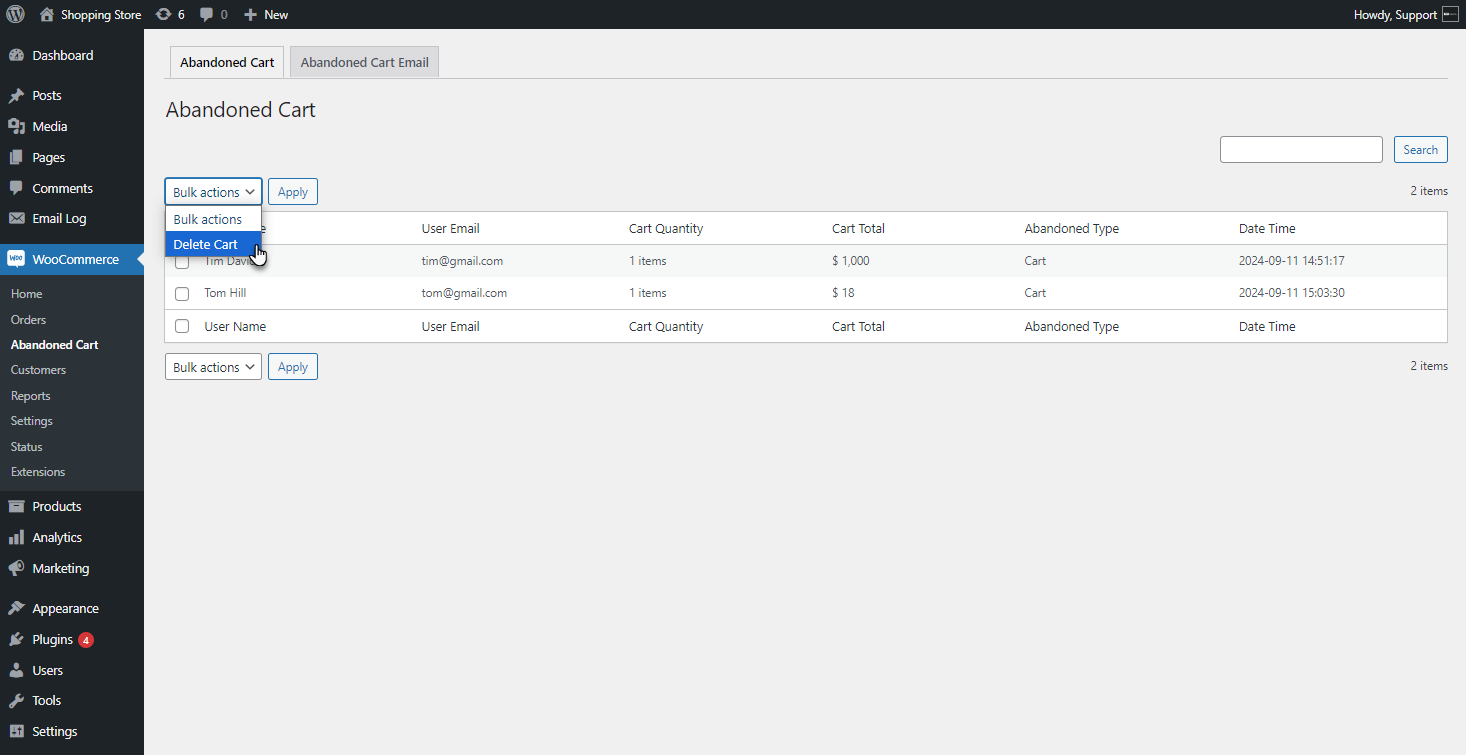
- The admin can use the bulk action option to delete multiple abandoned cart entries.
Delete Abandoned Cart
- The admin can define the interval in days after which the abandoned cart will be deleted.
Consider Cart Abandoned
- The admin can select specific order statuses that will be considered abandoned carts.
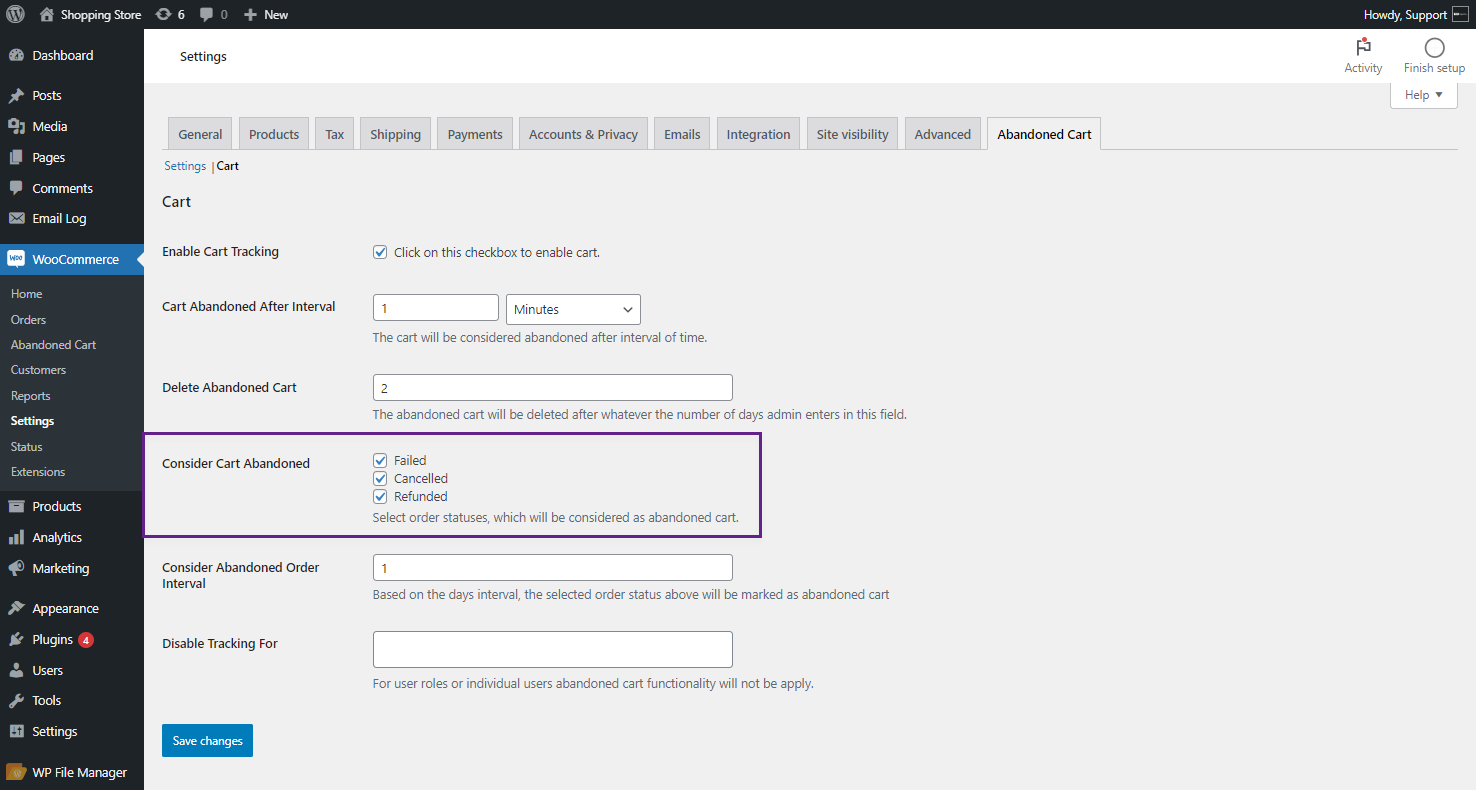
- Navigate to WordPress Admin Dashboard > WooCommerce > Orders. The order status is Failed. This order will be considered an Abandoned Cart.

- For the Abandoned Cart, Navigate to the WordPress Admin Dashboard > WooCommerce > Abandoned Cart. The specified Order Status will be marked as Abandoned Cart.

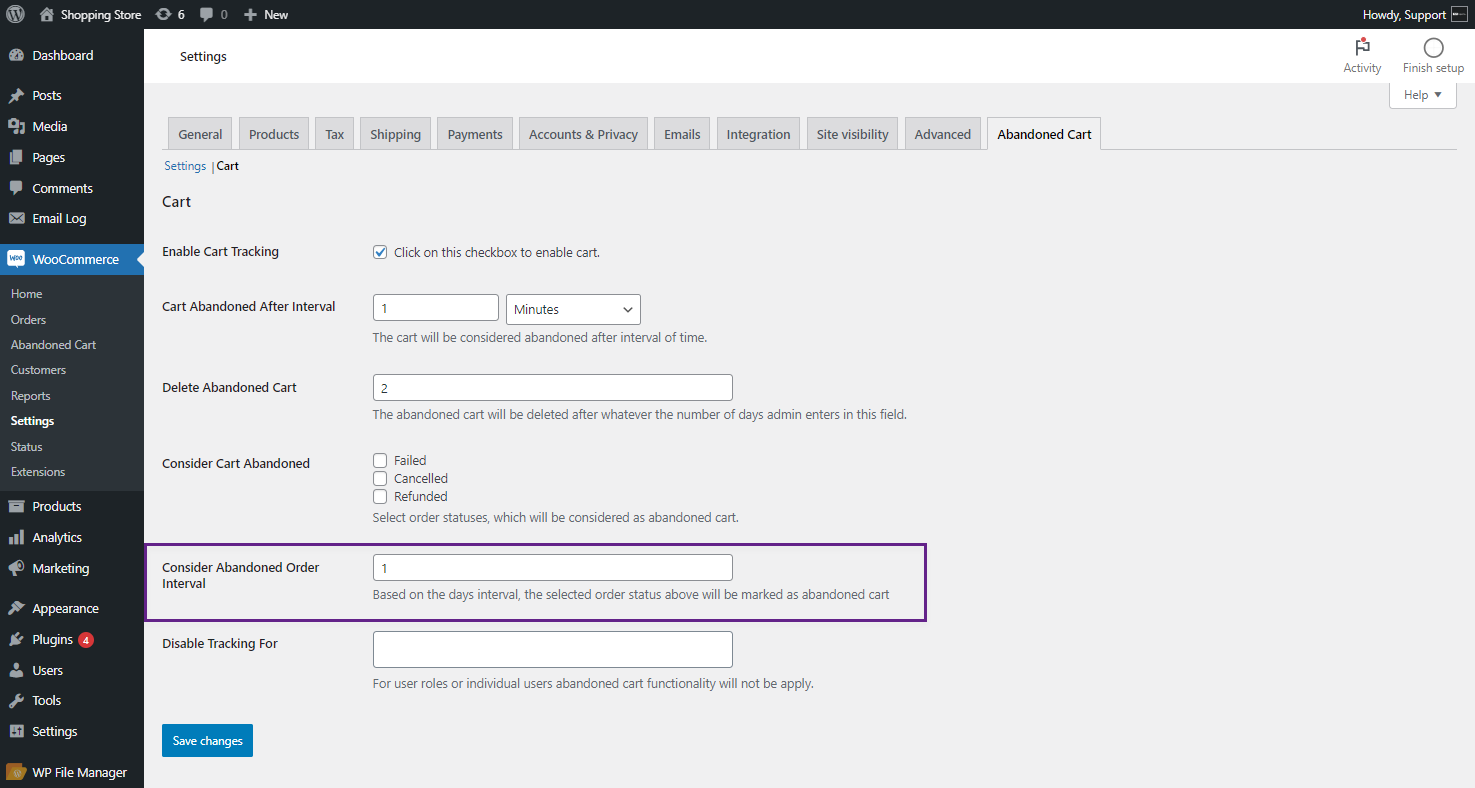
Consider Abandoned Order Interval
- The admin can set an interval for the selected order statuses, after which they will be considered abandoned carts.
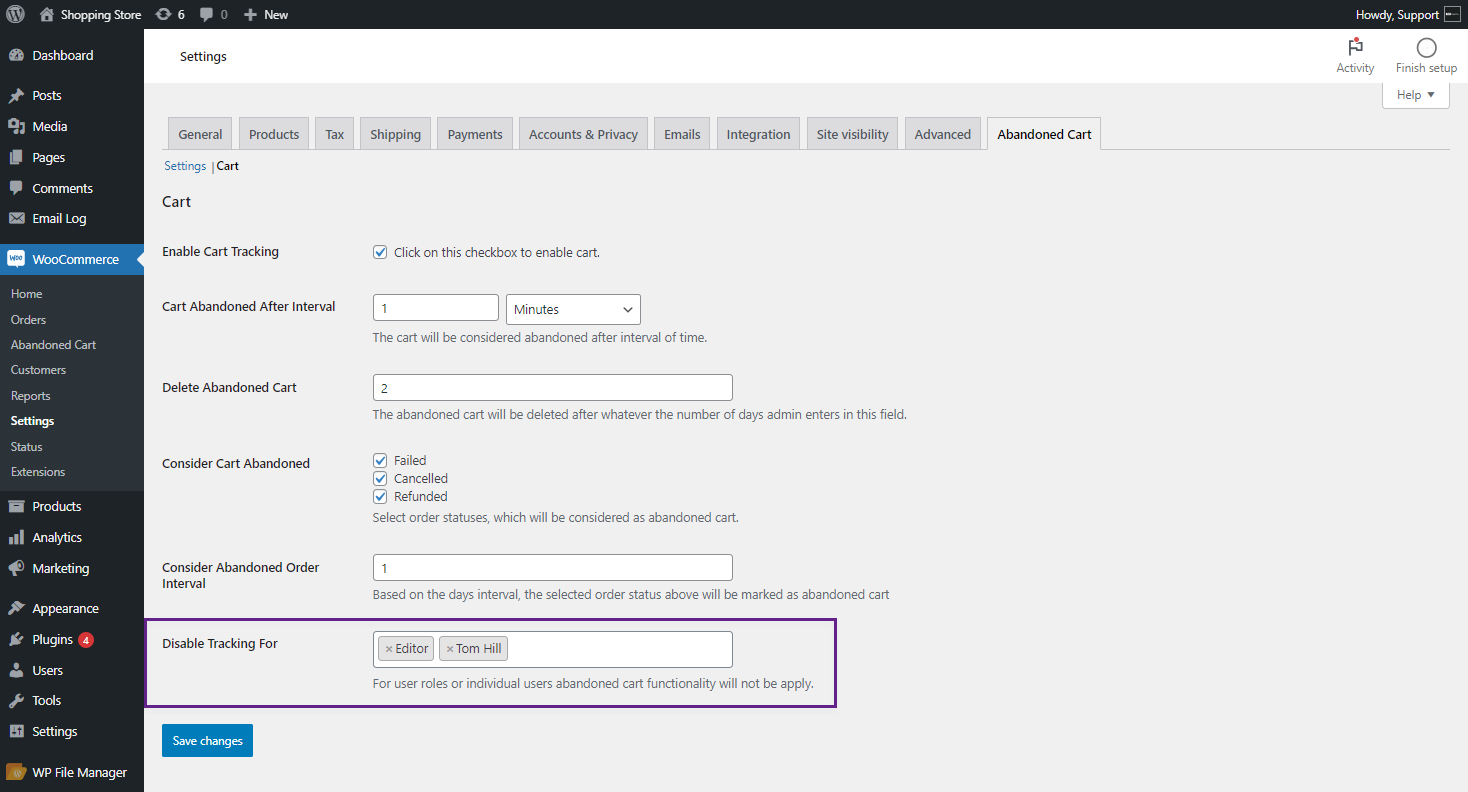
Disable Tracking For
- The admin can disable cart tracking for specific User Roles or individuals. The abandoned cart feature will not apply to the selected User Roles or individuals.
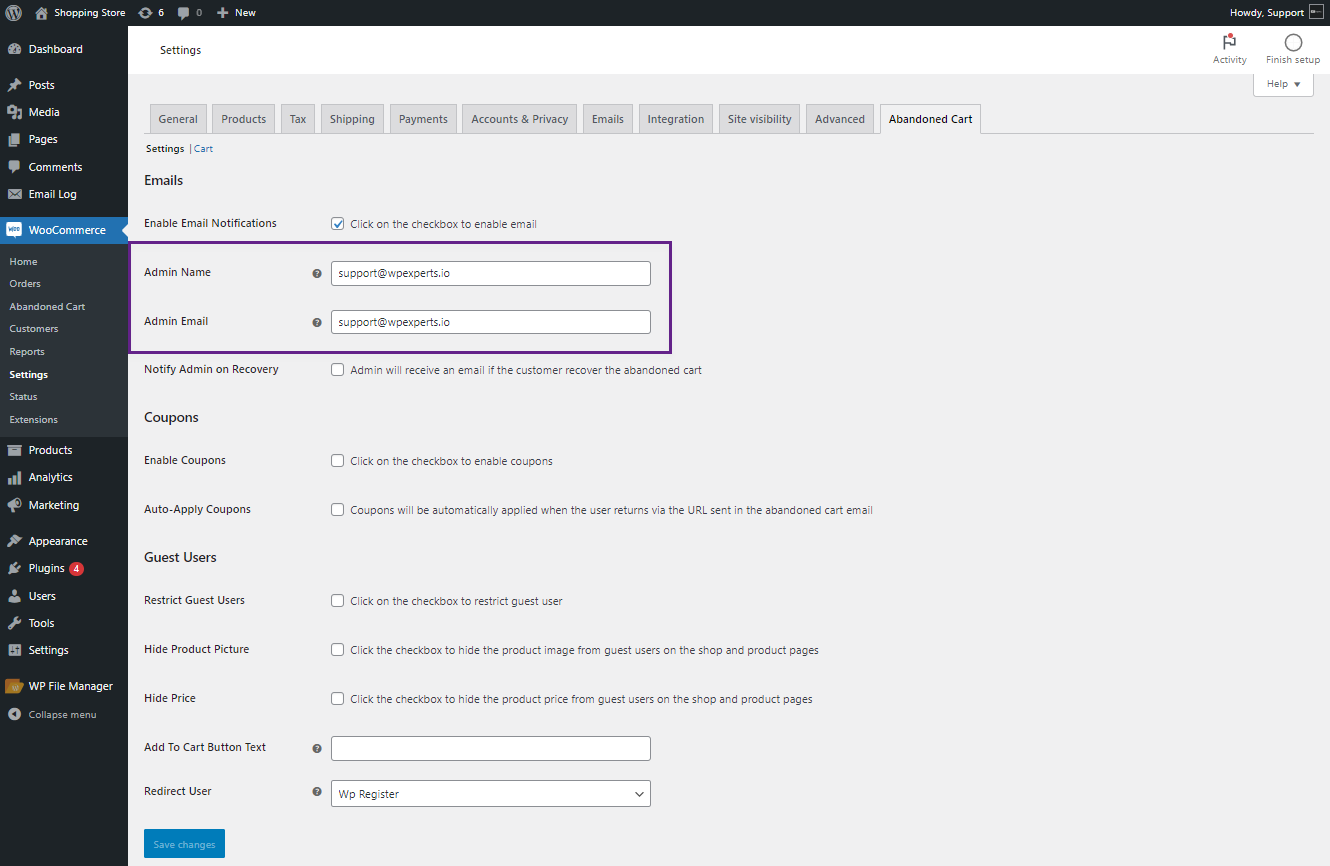
Settings
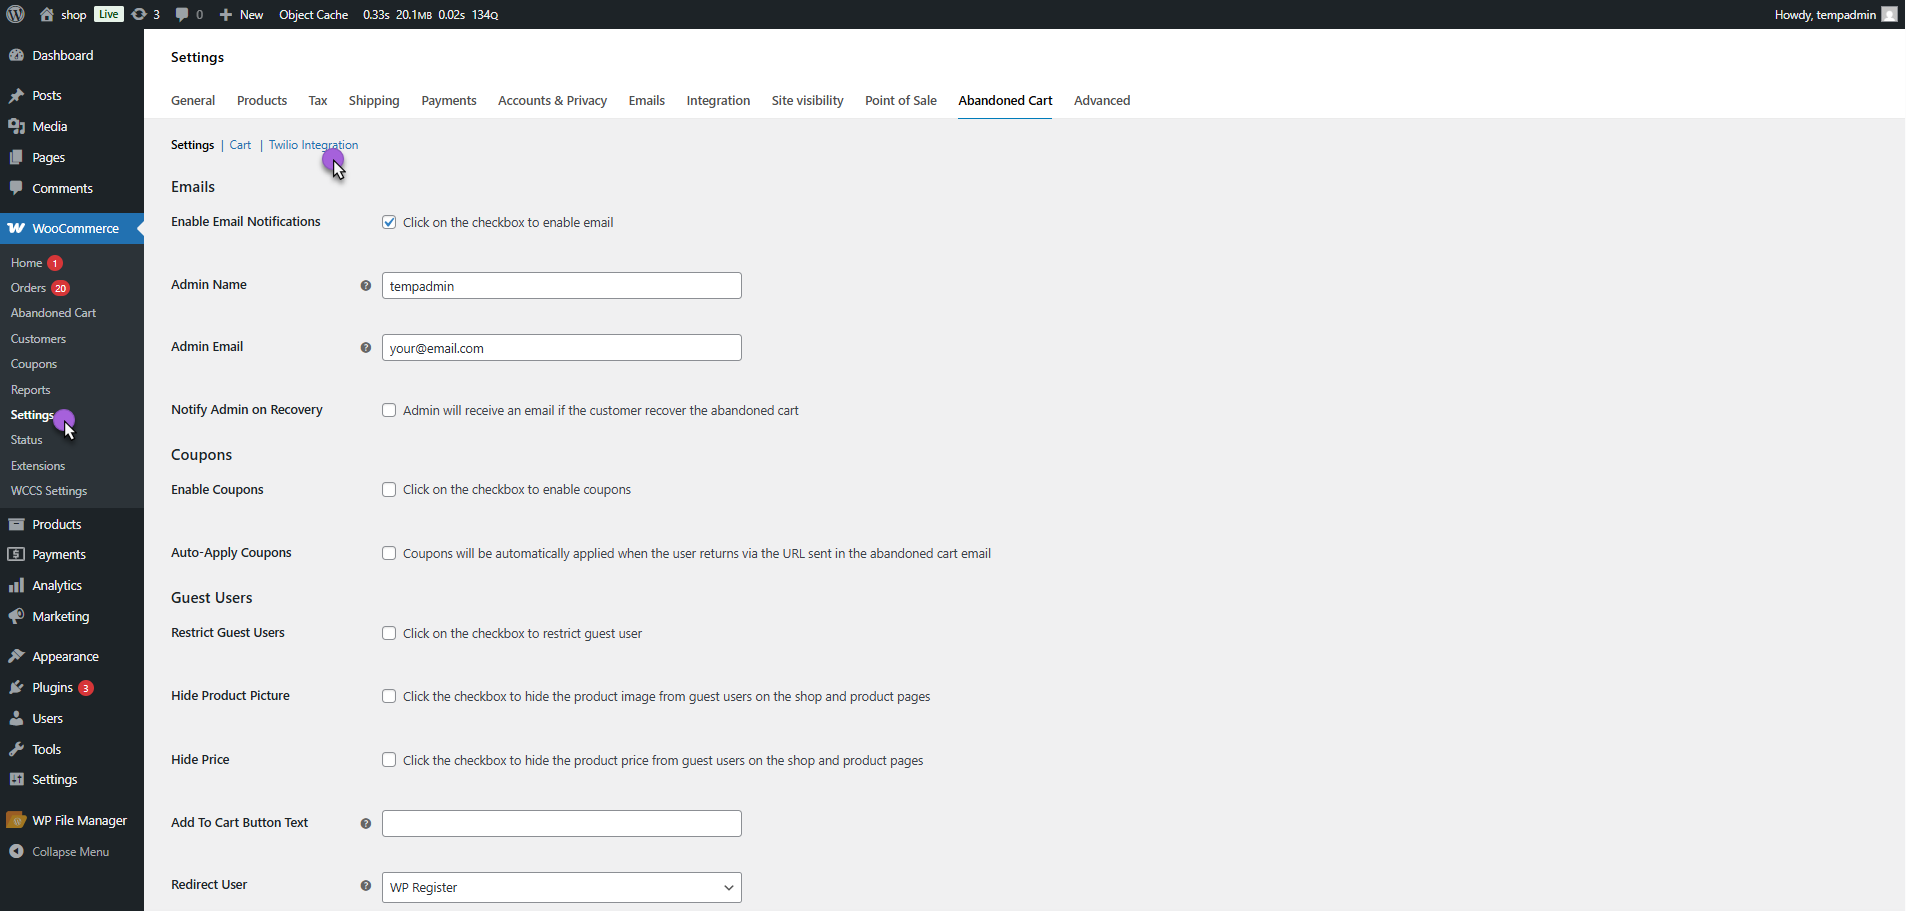
↑ Back to top- Navigate to the Settings tab. This tab enables the admin to configure the plugin’s basic settings.
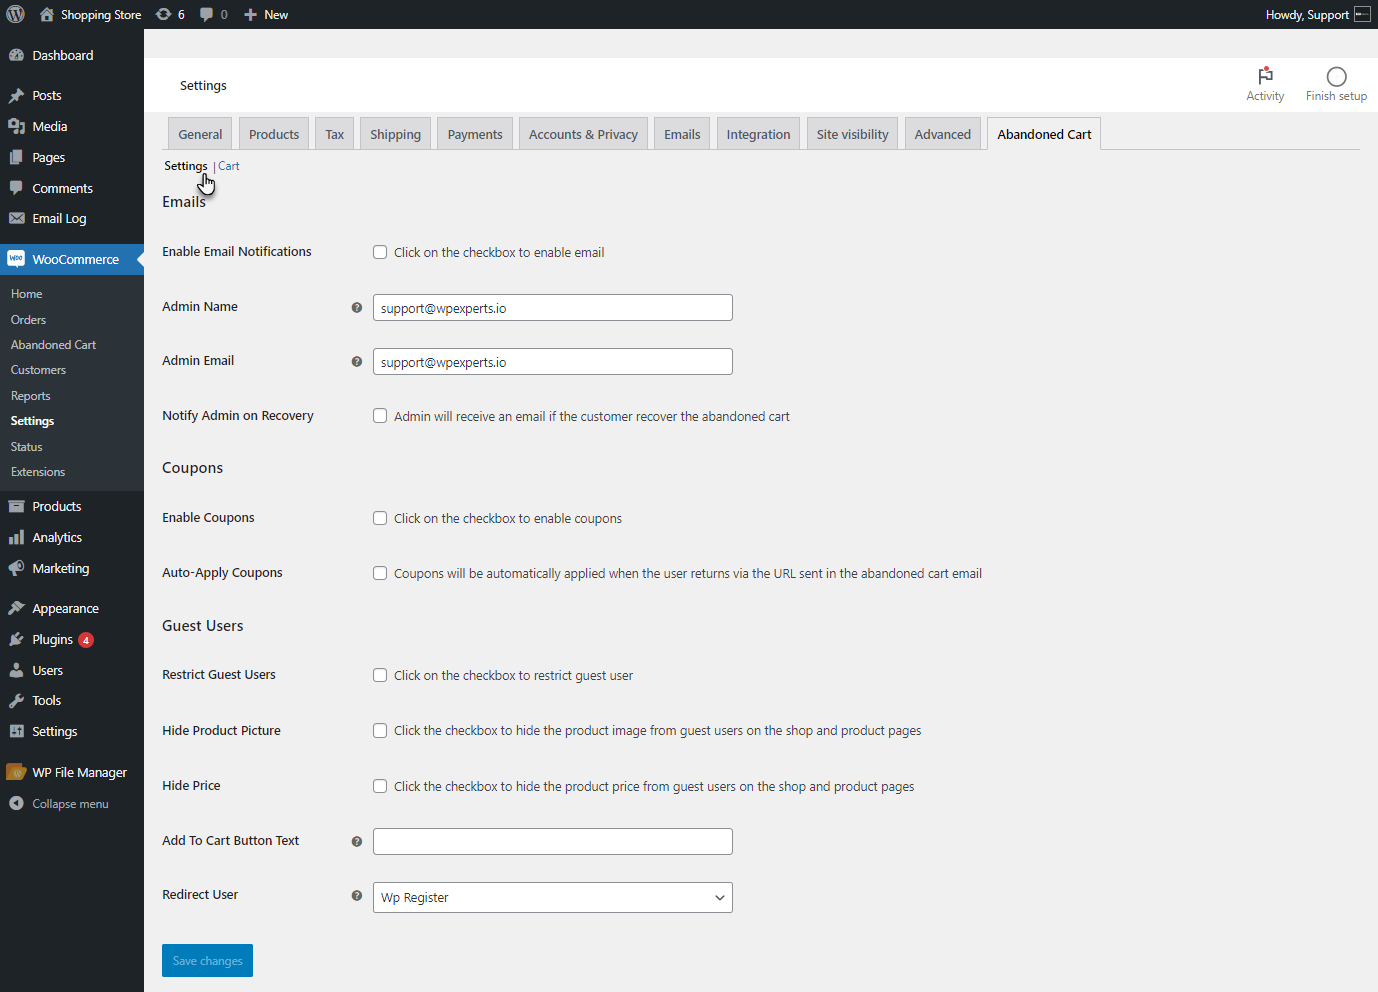
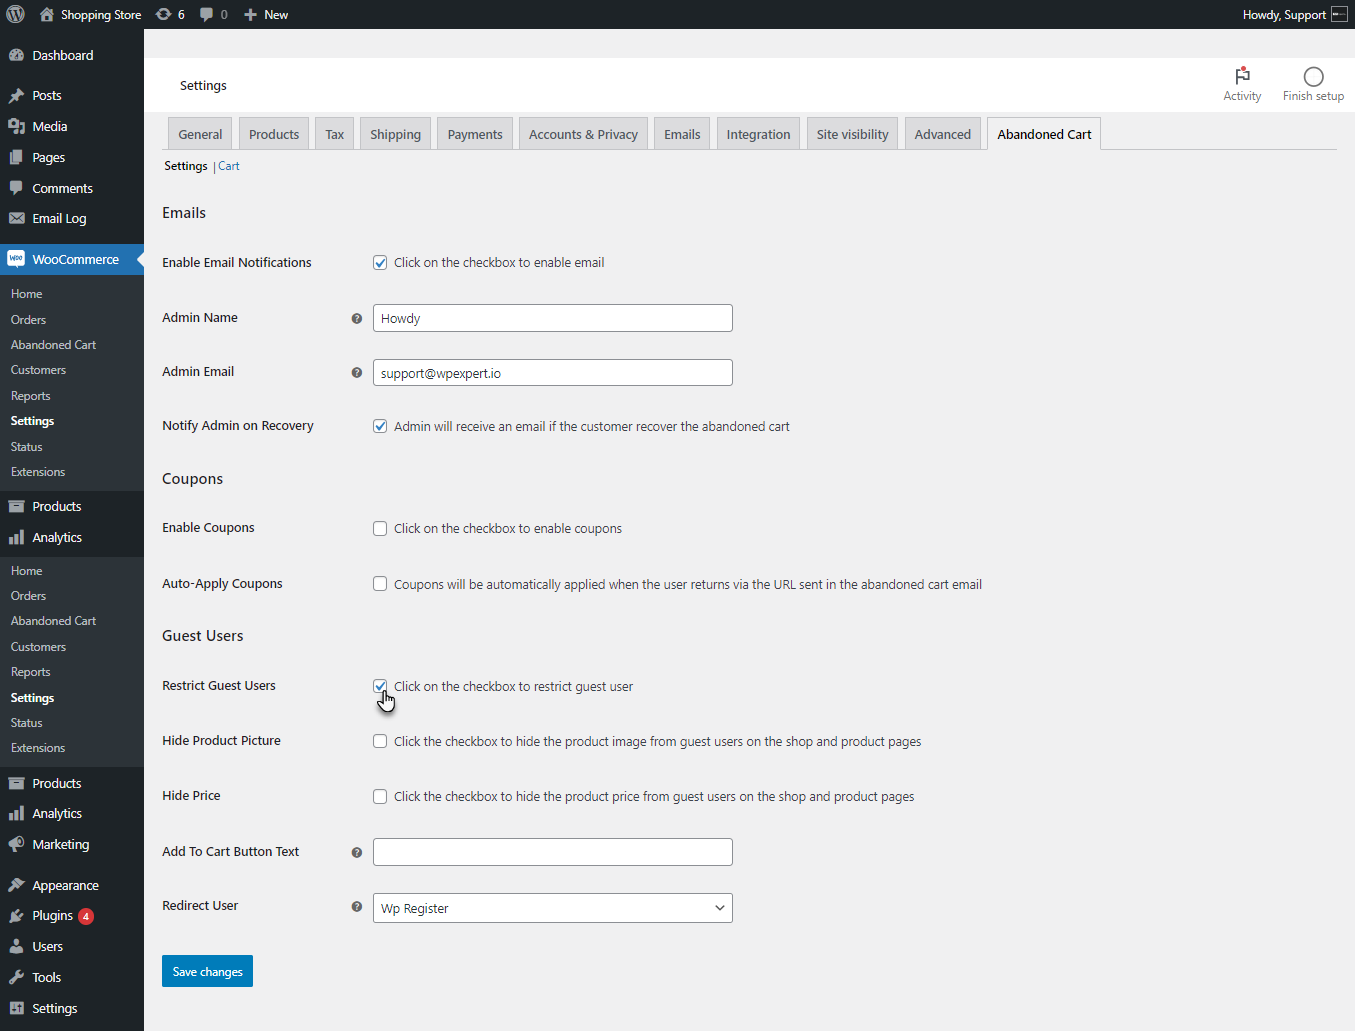
Emails
- Enable the Email Notifications options. This will email the user about the Abandoned Cart and Retain Customer Email.

- The admin can set the name displayed in the email as the Admin Name and specify the email address in the Admin Email from which the user will receive the email.
- Enable the Notify Admin on Recovery option. This will send an email to the admin when a user recovers an abandoned cart.

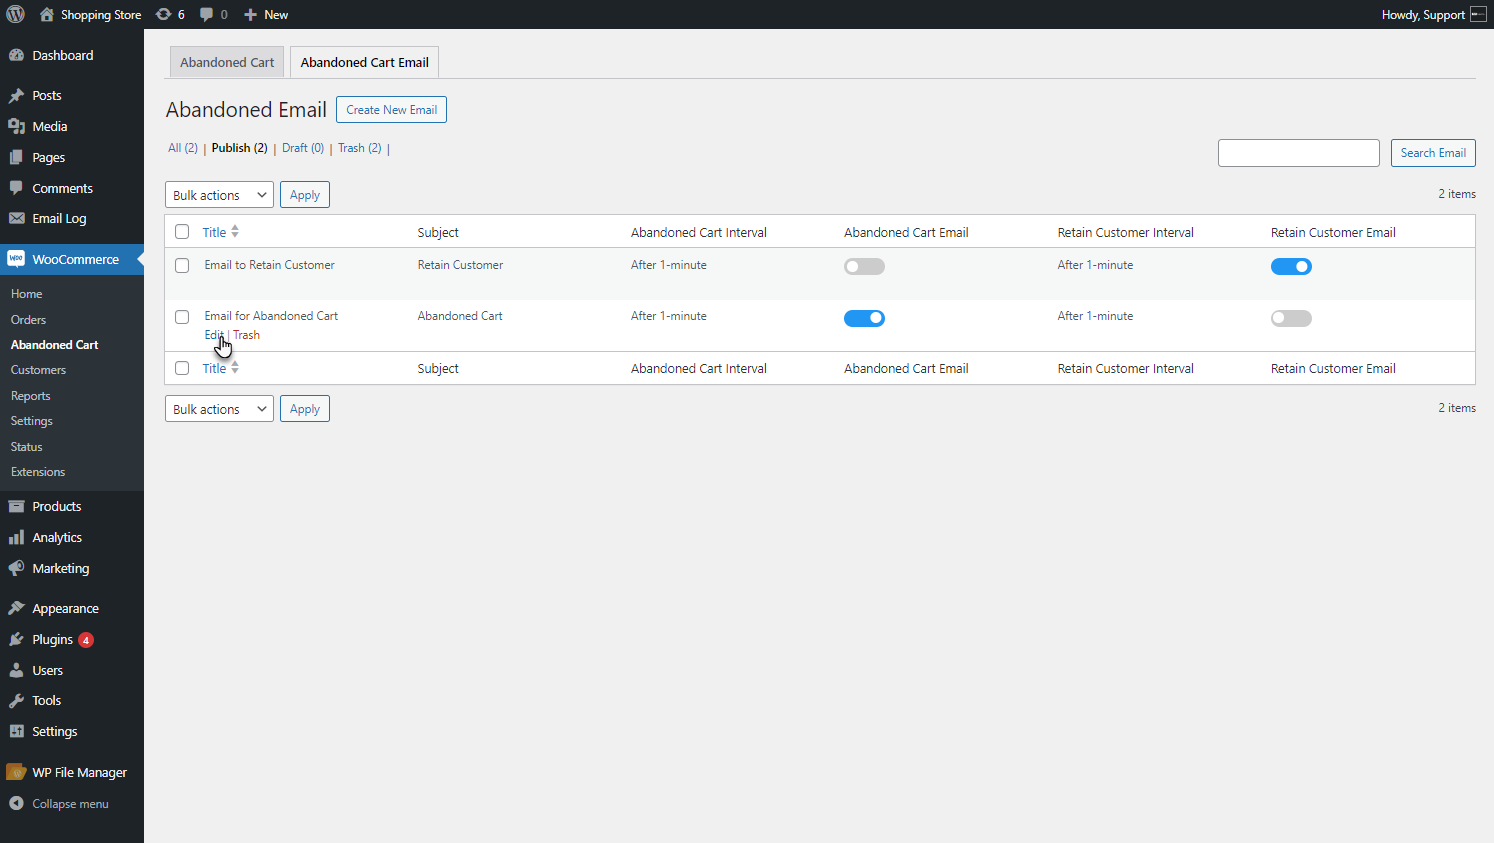
- Once done with the Email Settings, Navigate to WordPress Admin Dashboard > WooCommerce > Abandoned Cart > Abandoned Cart Email.

- Click on the Create New Email button.
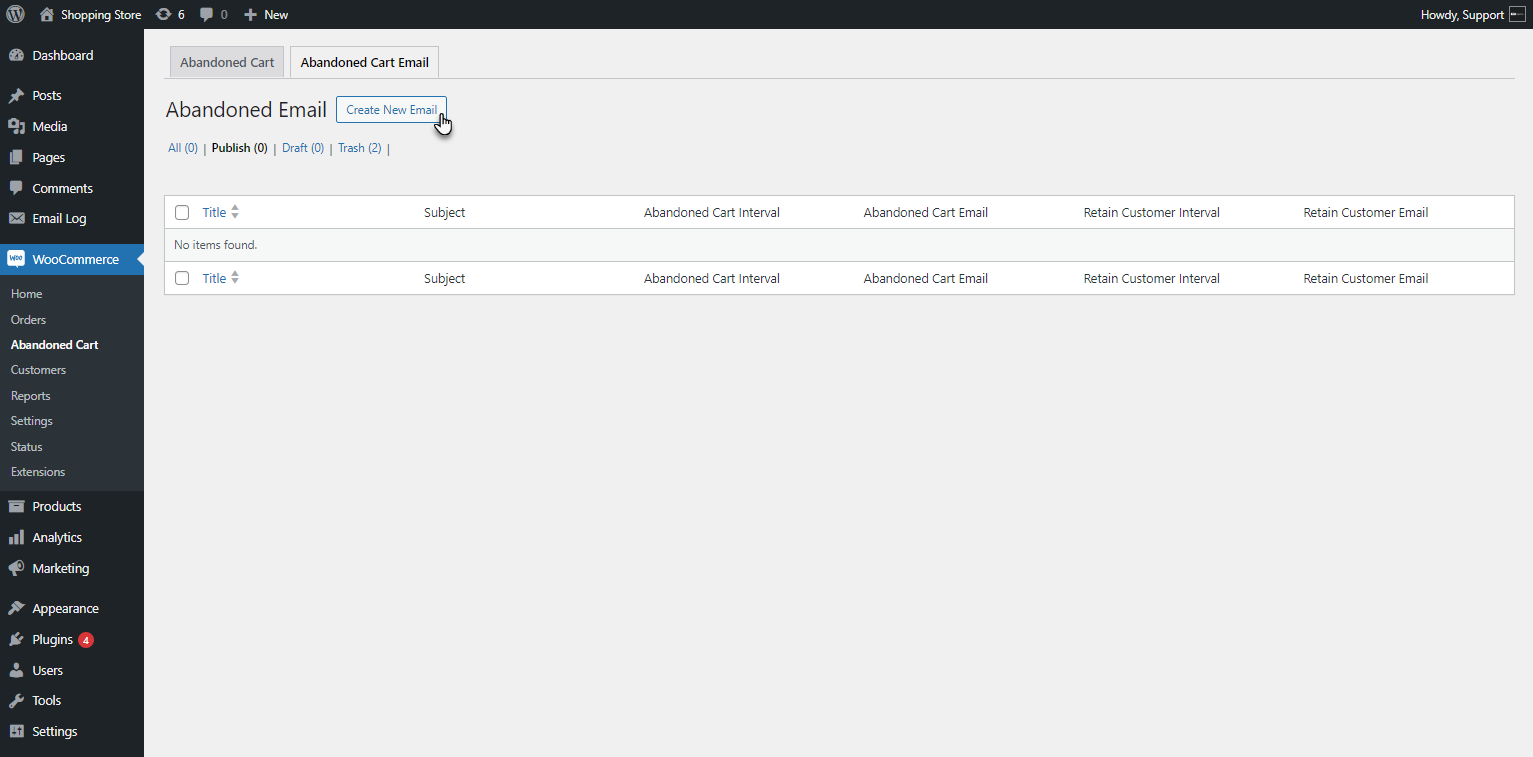
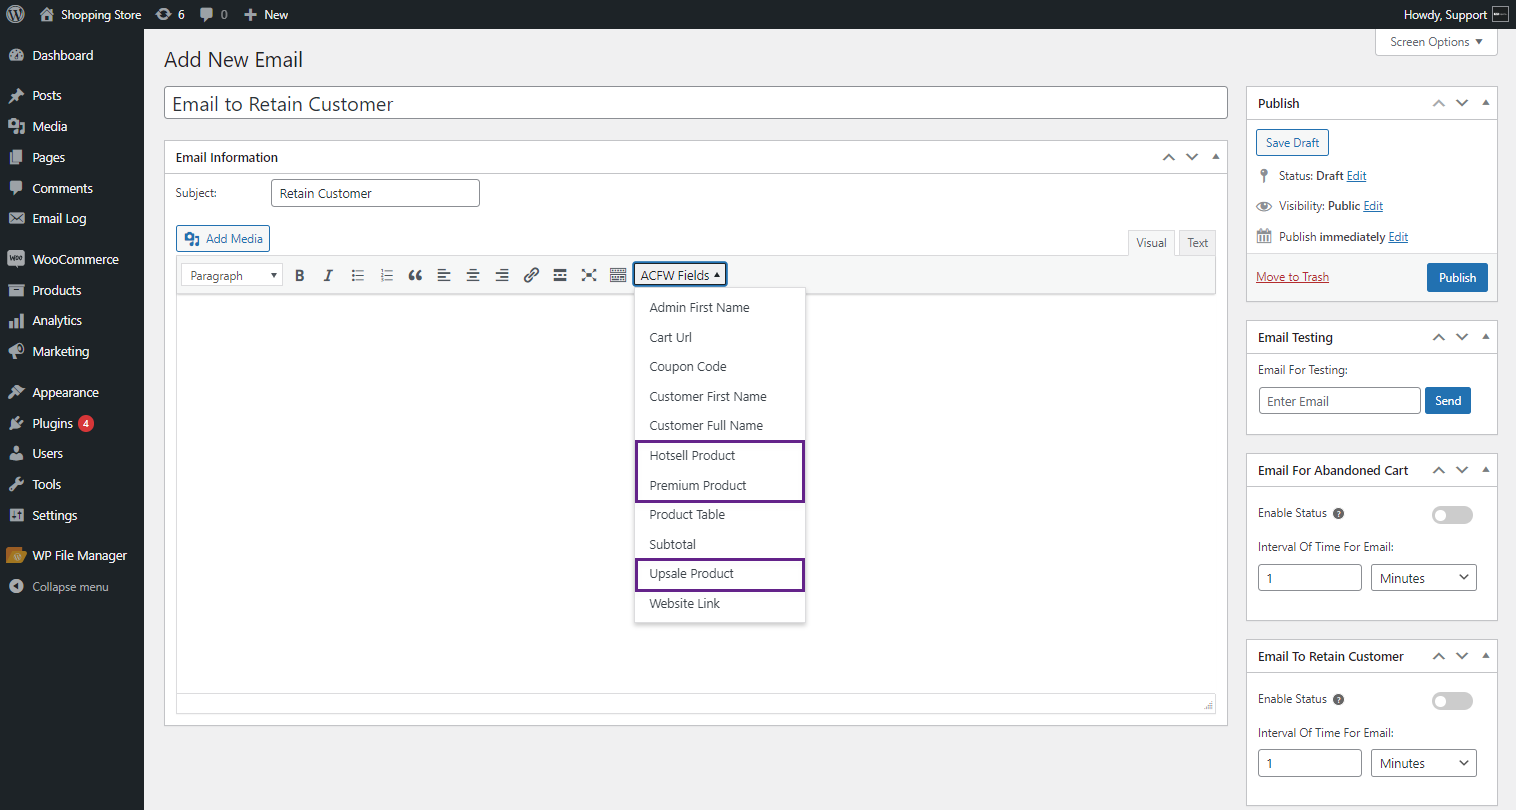
- An Add New Email screen will appear where the admin can create an email template for the Abandoned Cart and Customer Retention.

- Add a title to the email.
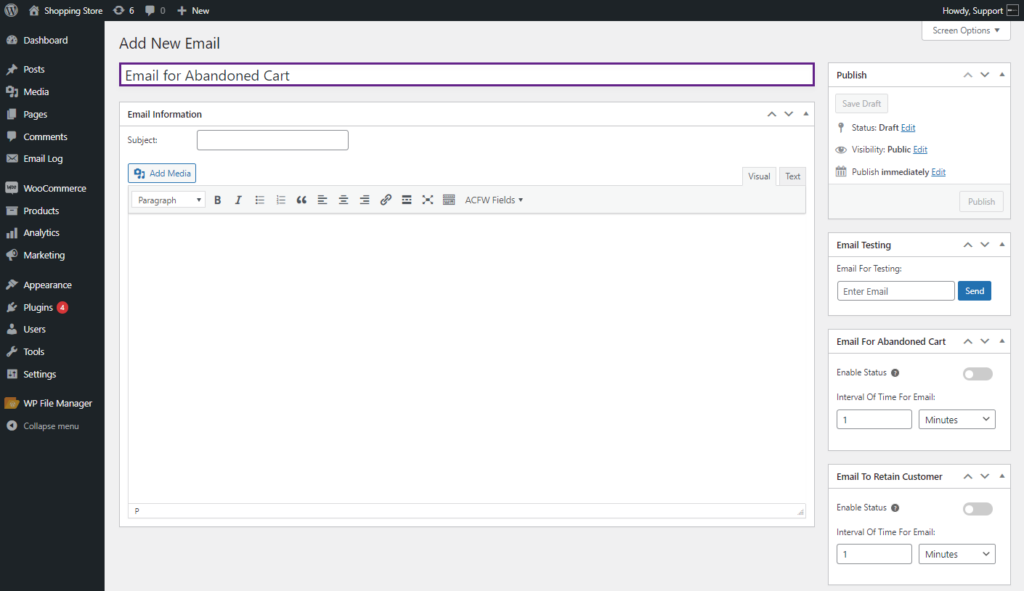
- In the Email Information section, add a subject for the email.
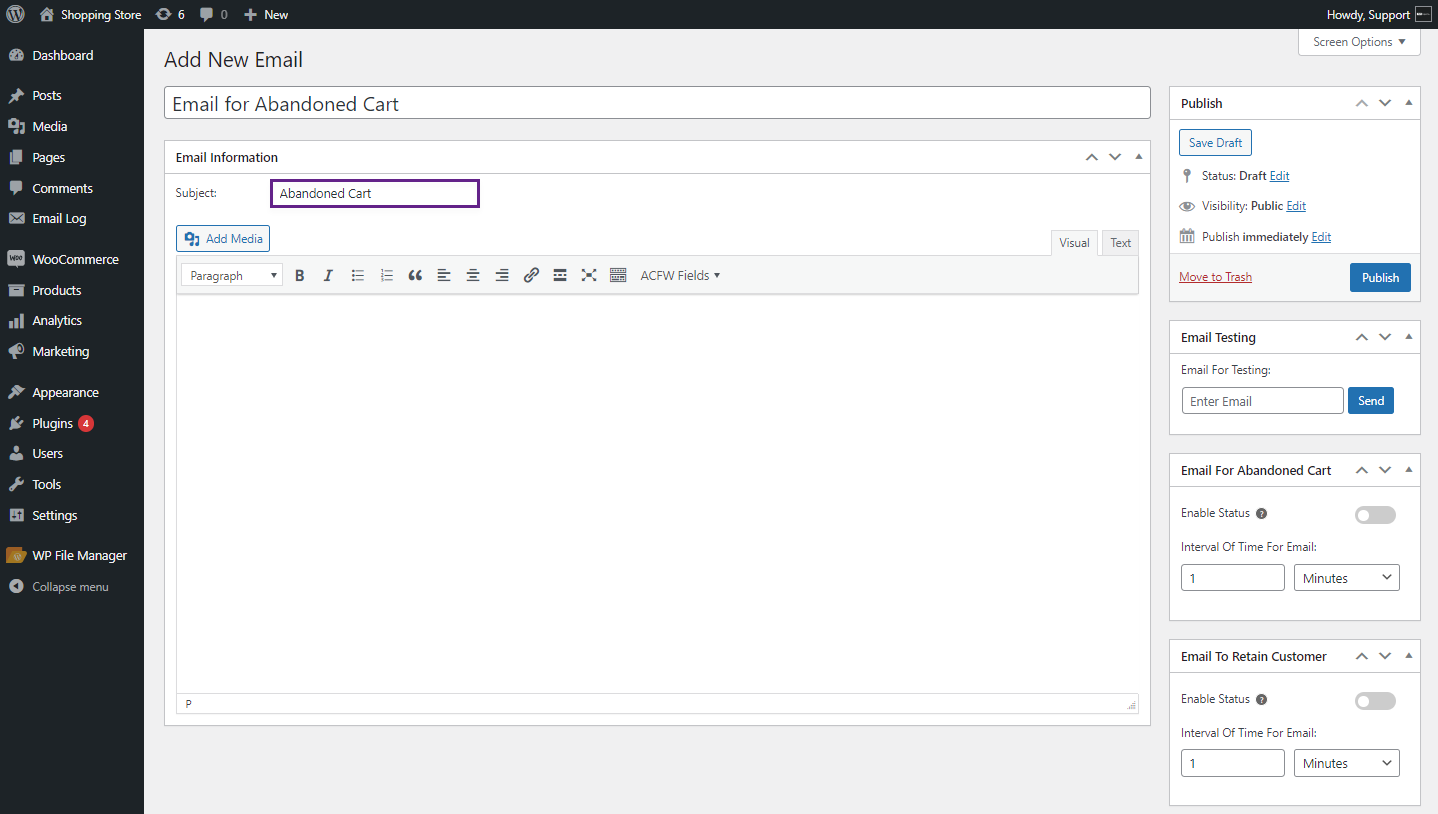
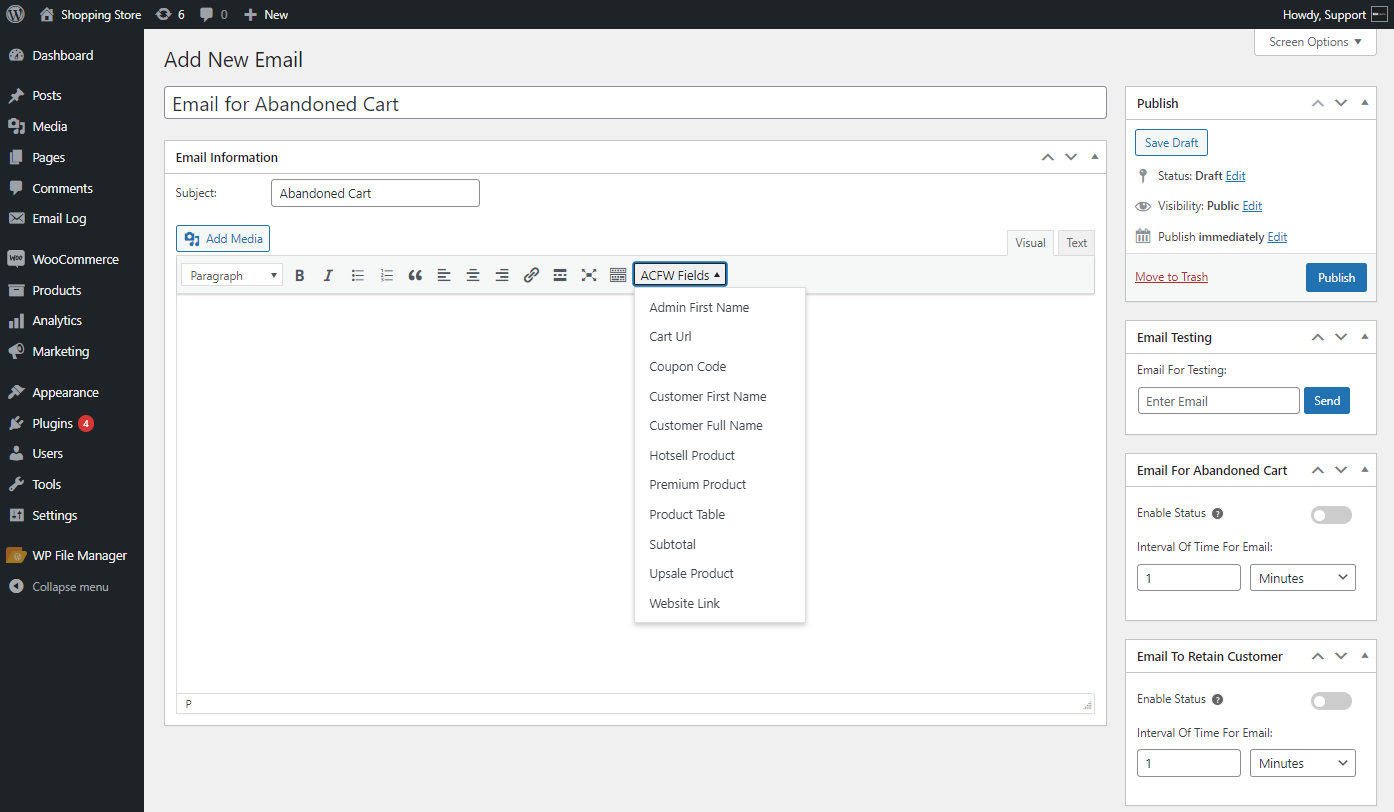
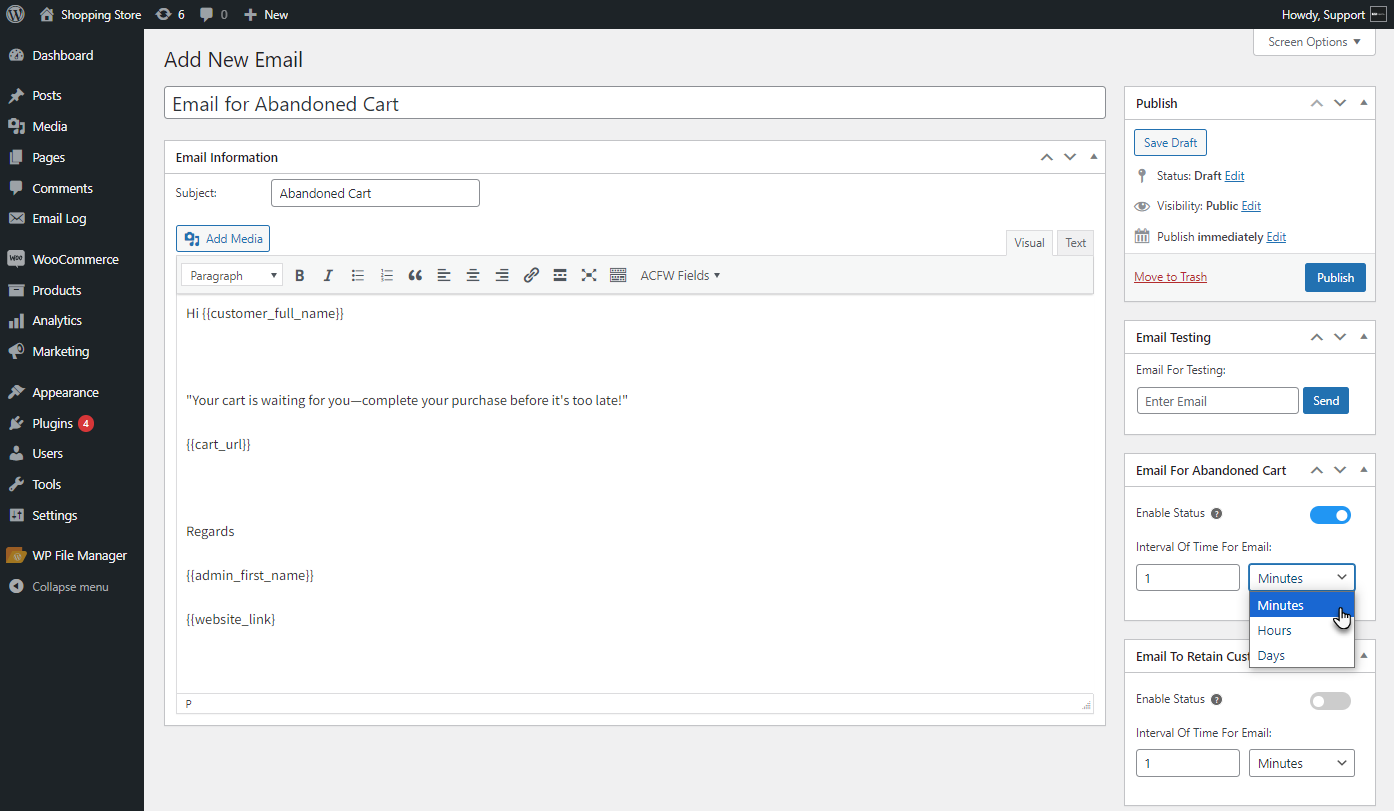
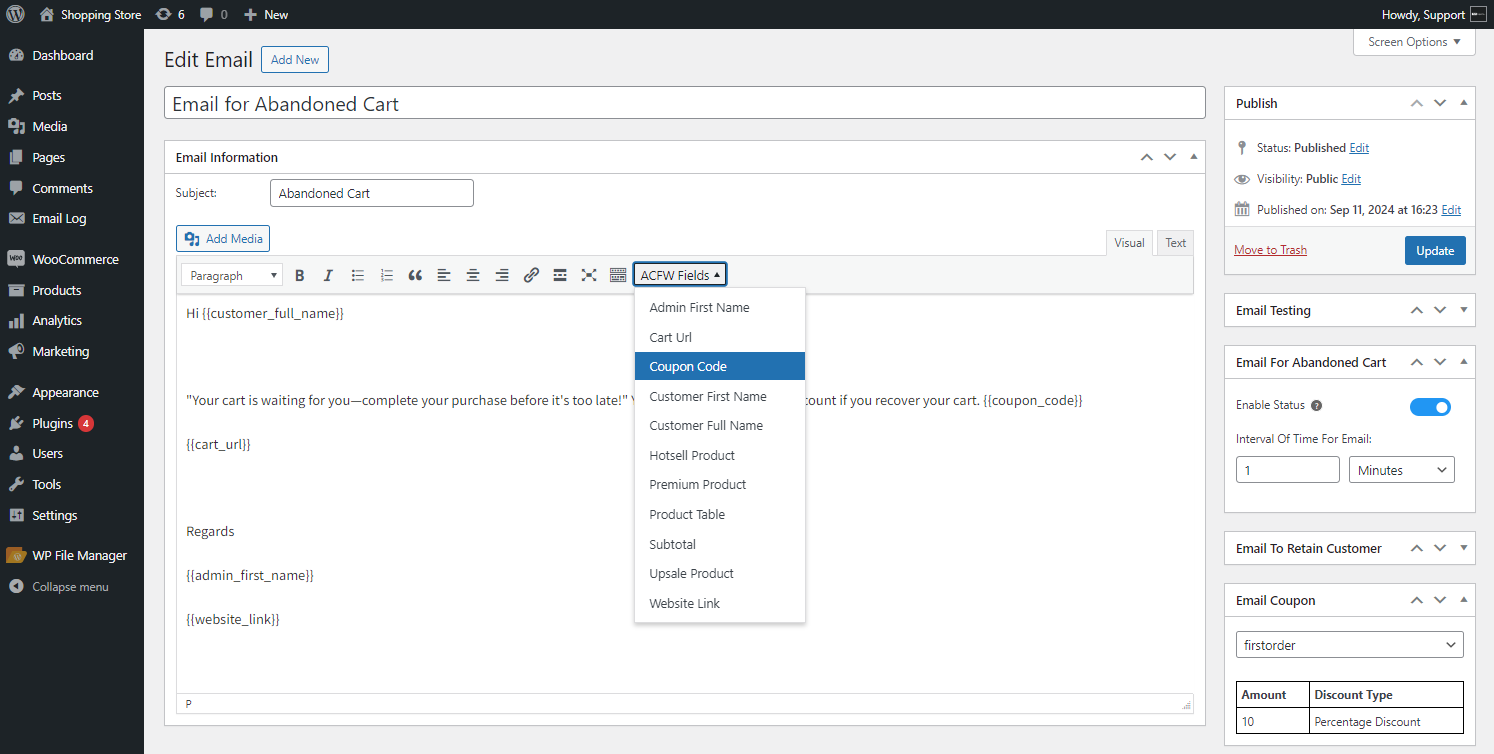
- The admin can create the email body using placeholders from the ACFW Fields drop-down.
- After creating the body, the admin can test the email using the Email Testing option.

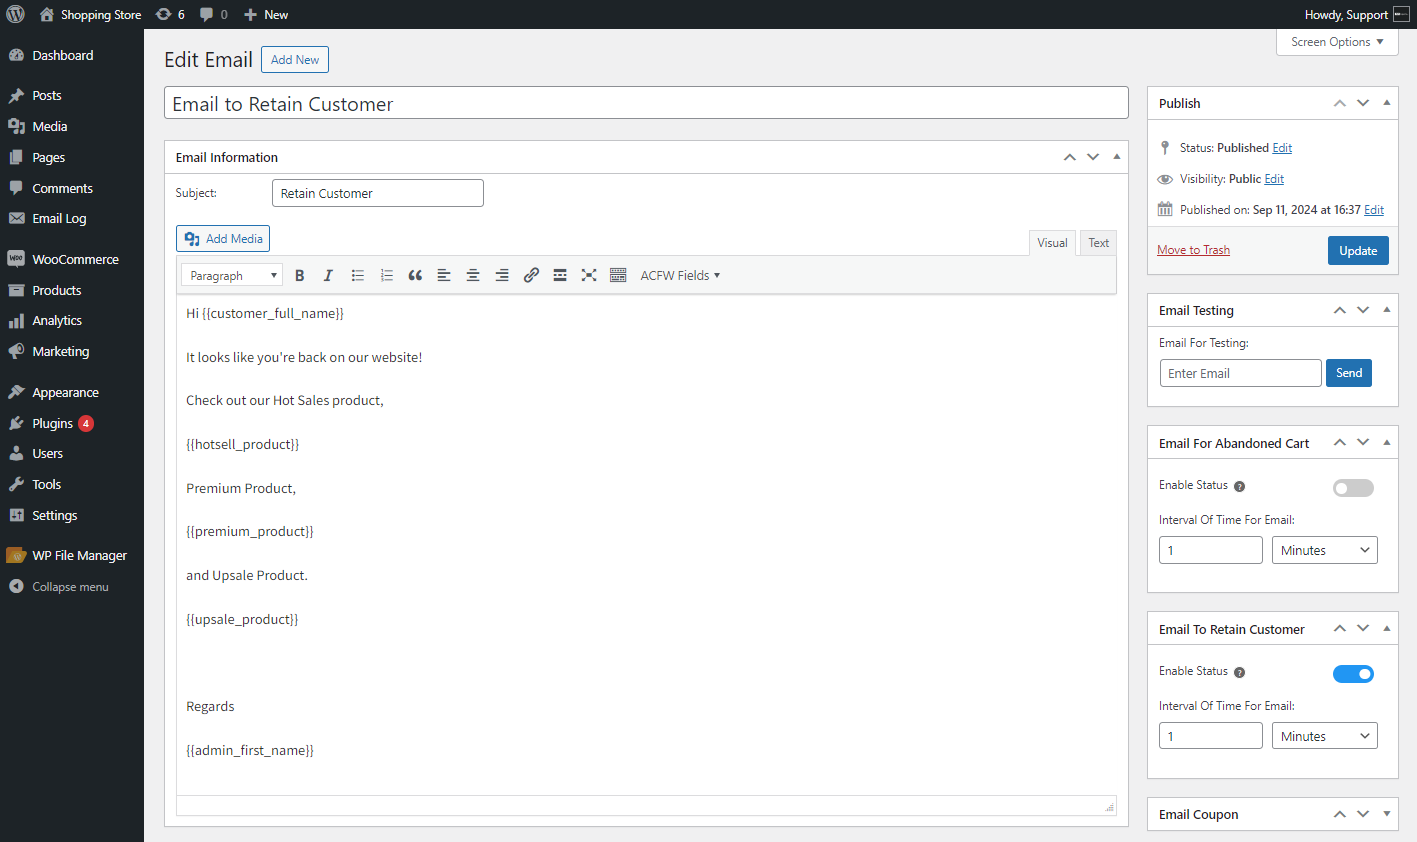
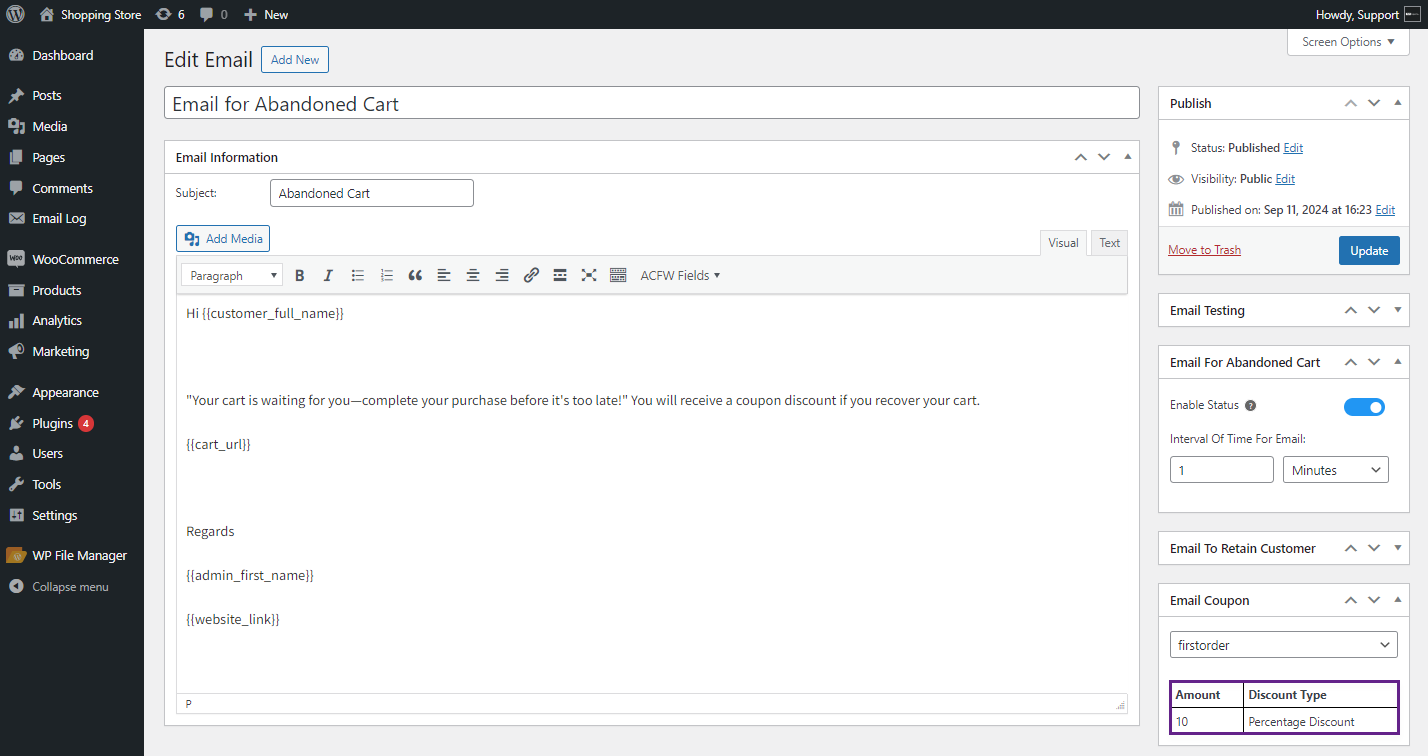
- Select the email type, either Email for Abandoned Cart or Email to Retain Customer.
- Enable the Email for Abandoned Cart option and set the interval time after which the email will be sent.
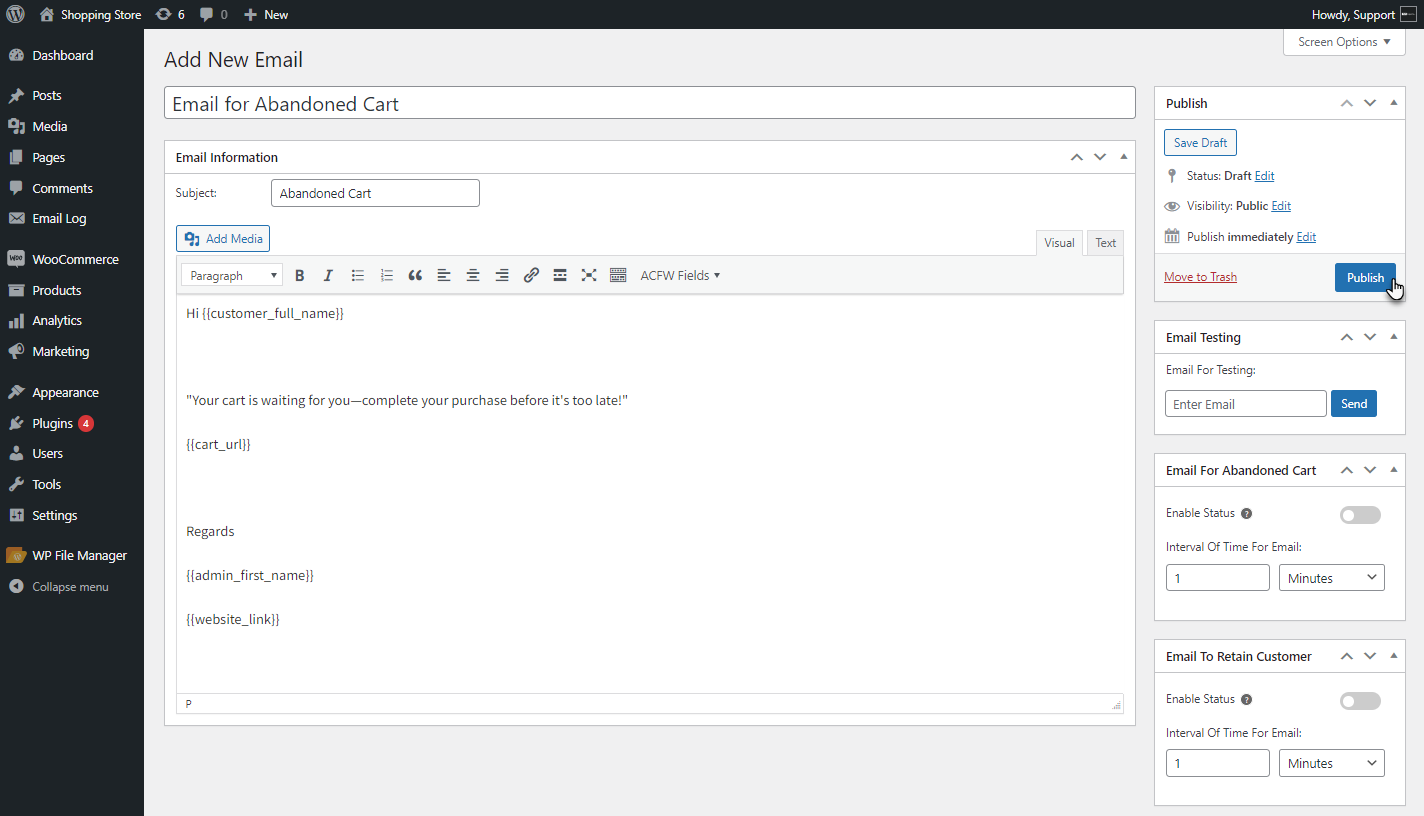
- Click Publish to save the email template.
PLEASE NOTE: For the Email to Retain Customer email, enable the Email to Retain Customer toggle and set the interval time for when the email should be sent.
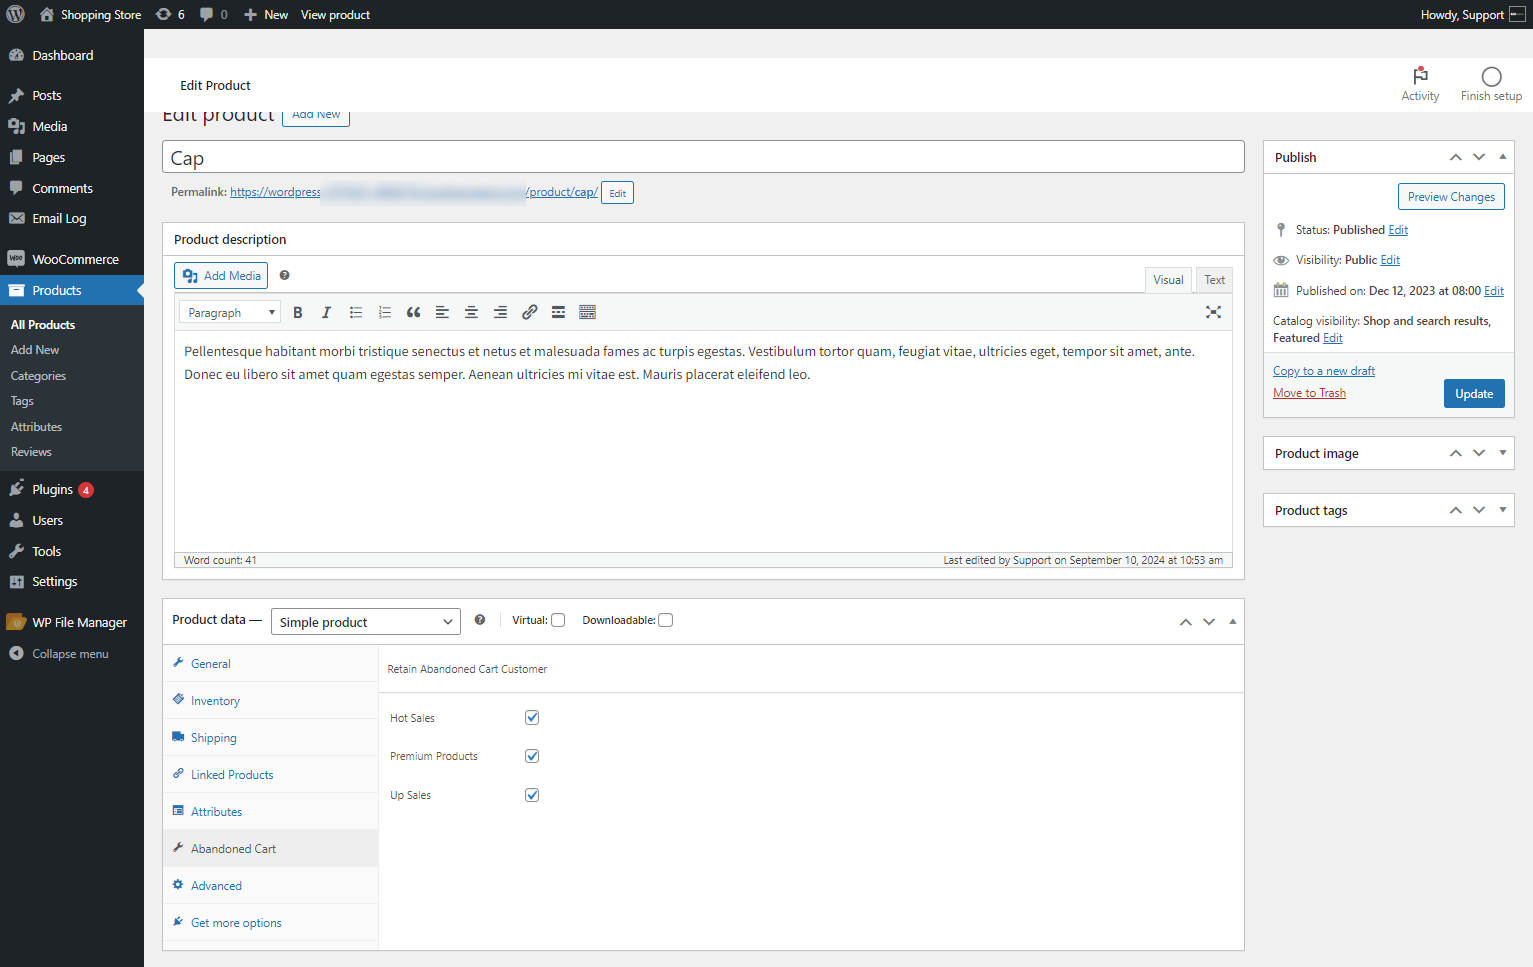
- Navigate to the WordPress Admin Dashboard > Products > Edit Product.
- In the Product Data section, Navigate to the abandoned Cart tab.
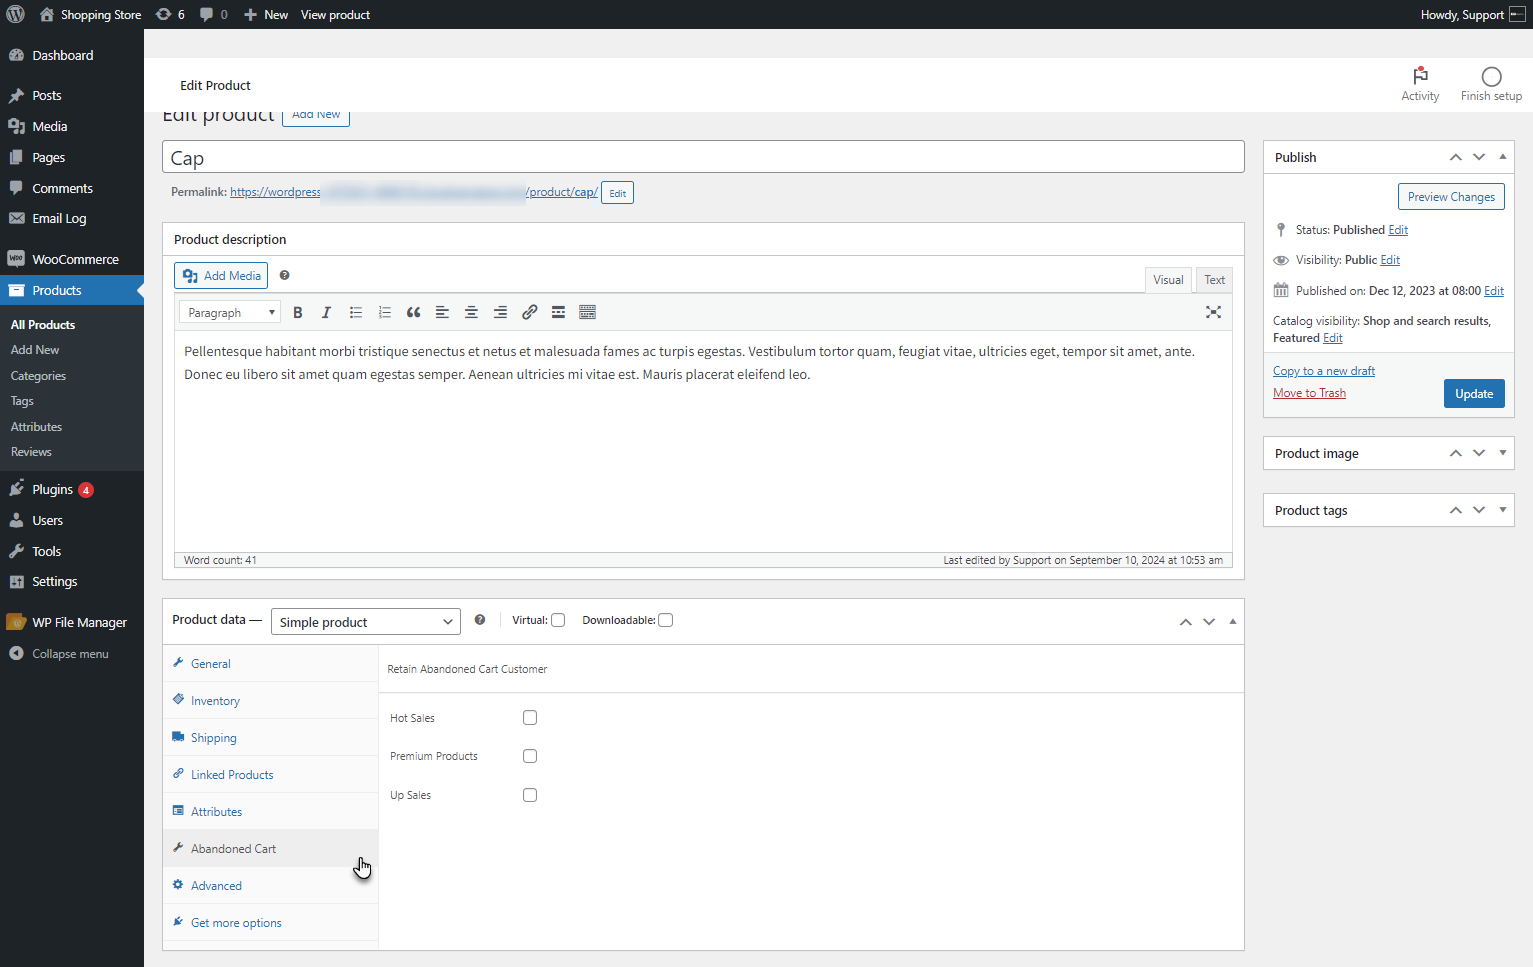
- The admin can choose from the available options, which will be accessible in the Email templates.
- The Placeholders will be available in the ACFW Fields dropdown.
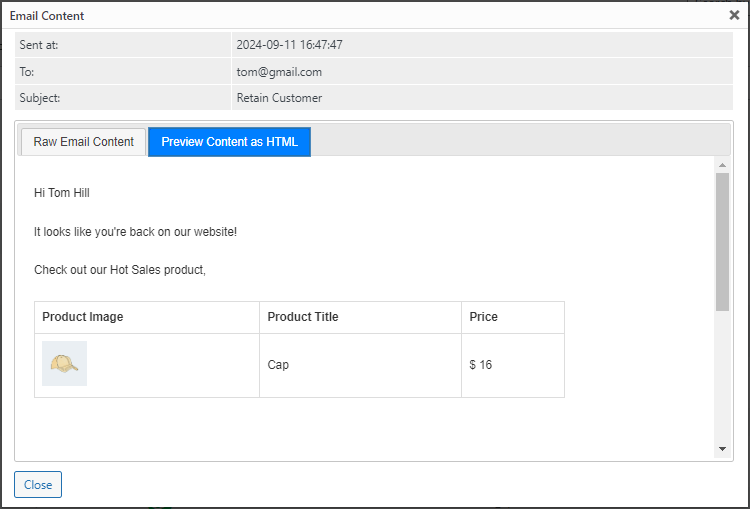
- The template for Email to Retain Customer.
Front End Impact
Email For Abandoned Cart
- This email will be sent to the user when the Cart is considered to be Abandoned.

Email To Retain Customer
- This email will be sent to the user when the Abandoned cart is recovered.
Email to Admin after Customer Recover Abandoned Cart
- This email will be sent to the admin when the Abandoned cart is recovered.

Coupons
- This feature enables the admin to send coupons to users through emails.
- Go to WordPress Admin Dashboard > WooCommerce > Settings > Abandoned Cart.
- Navigate to the Coupon option and Enable it.
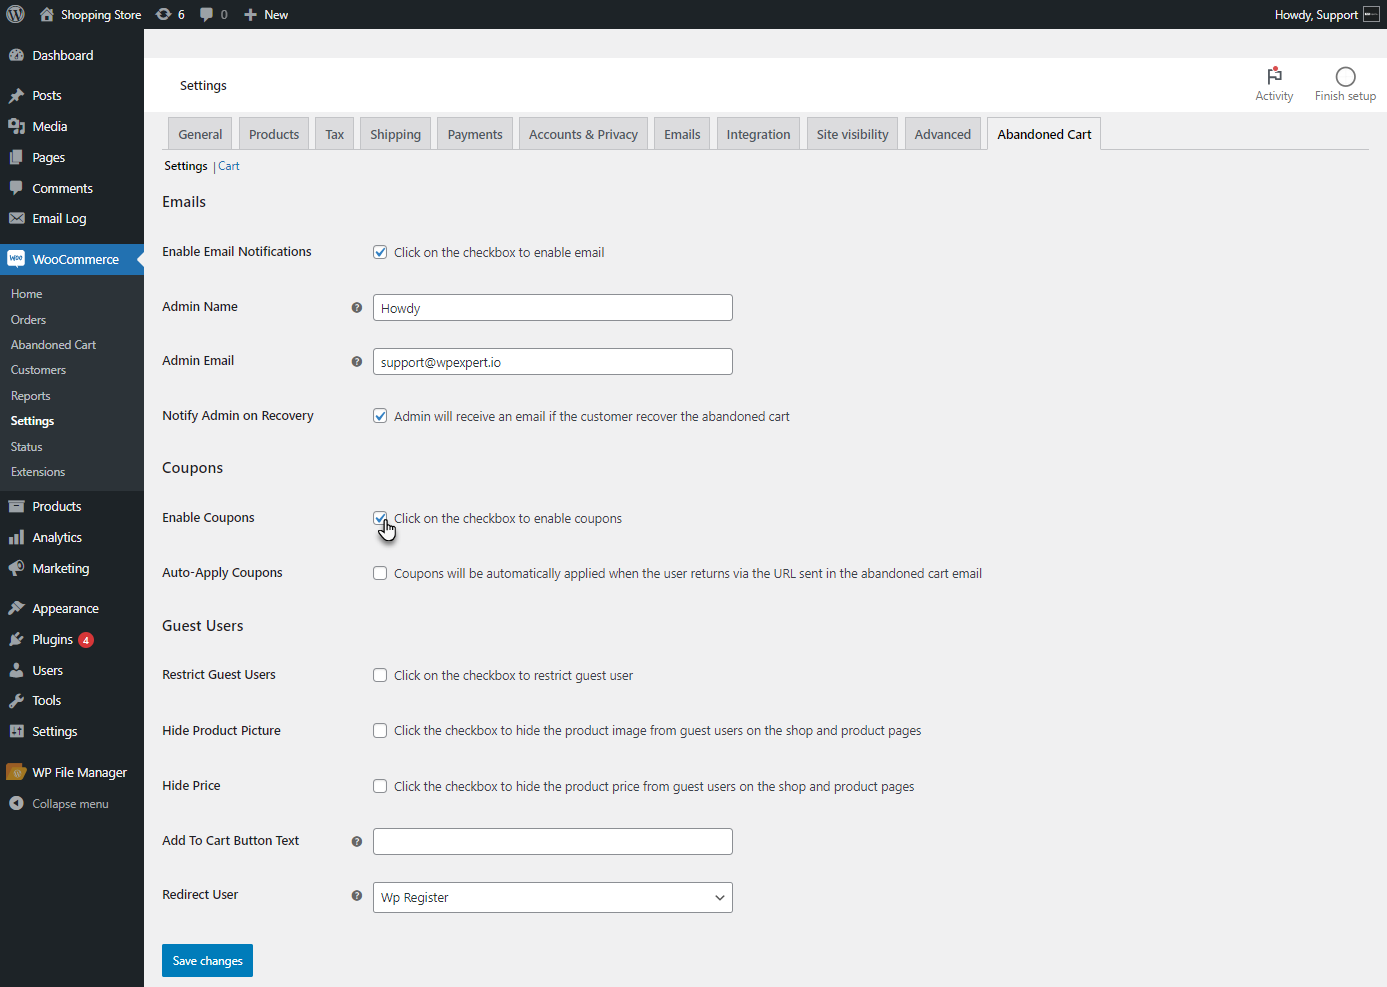
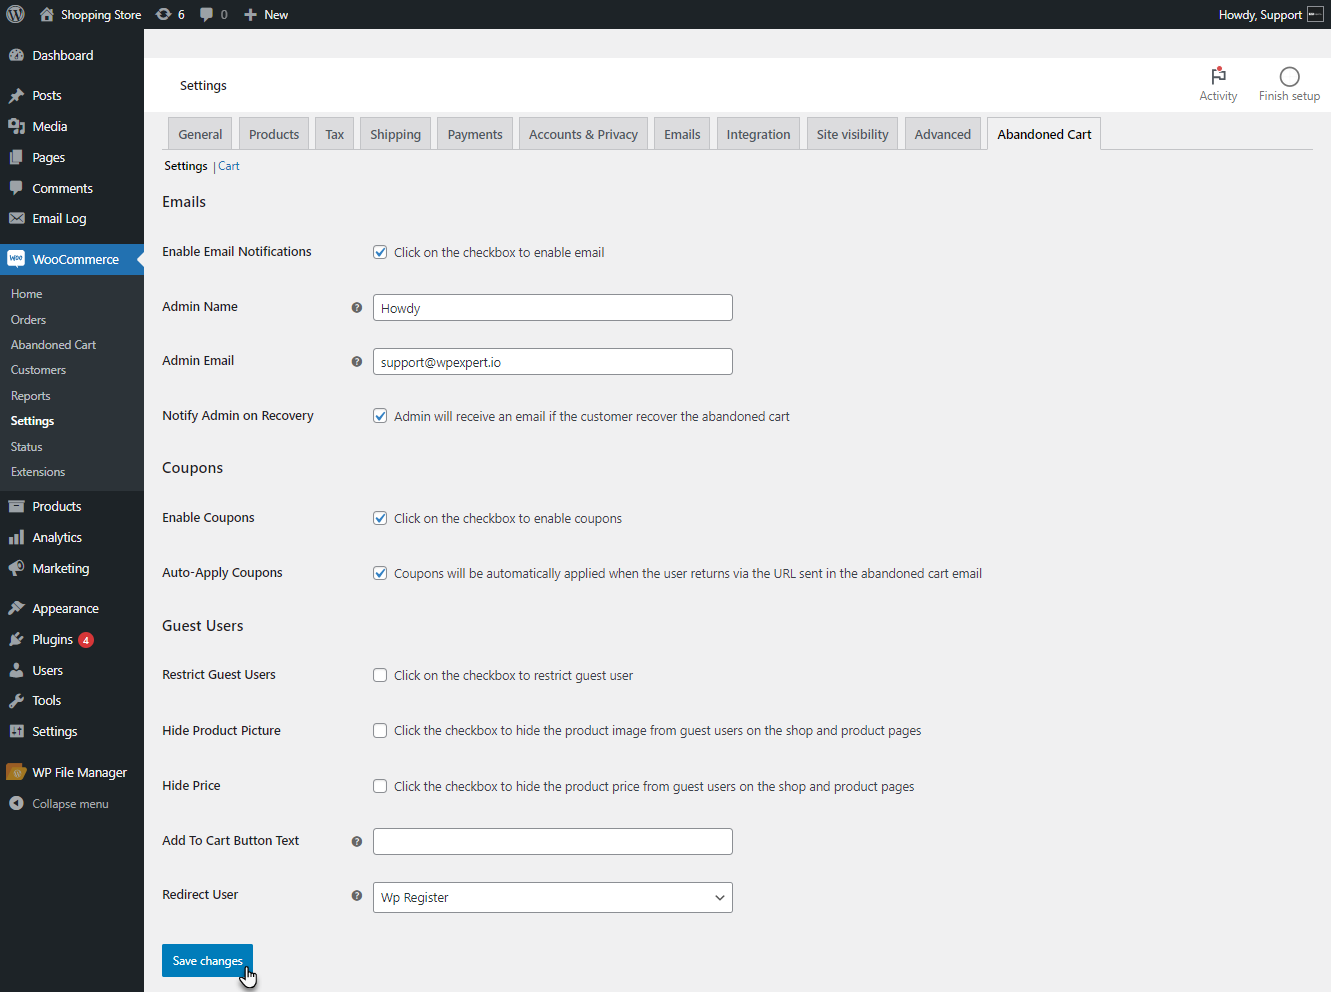
- Enable the Auto Apply Coupons options. This feature will auto apply the offered coupon when the user opens the URL mentioned in the Email.

- Click on the save button to save the changes.
- Once done with the settings, Go to the WordPress Admin Dashboard > WooCommerce > Abandoned Cart > Abandoned Cart Email.
- The created Email templates will appear. Edit the email in which you want to send Coupons to the user.
- An Edit Email screen will appear. There is an Email Coupon option in the side tab.

- The available coupon list will appear. The admin can select coupons as per requirement.
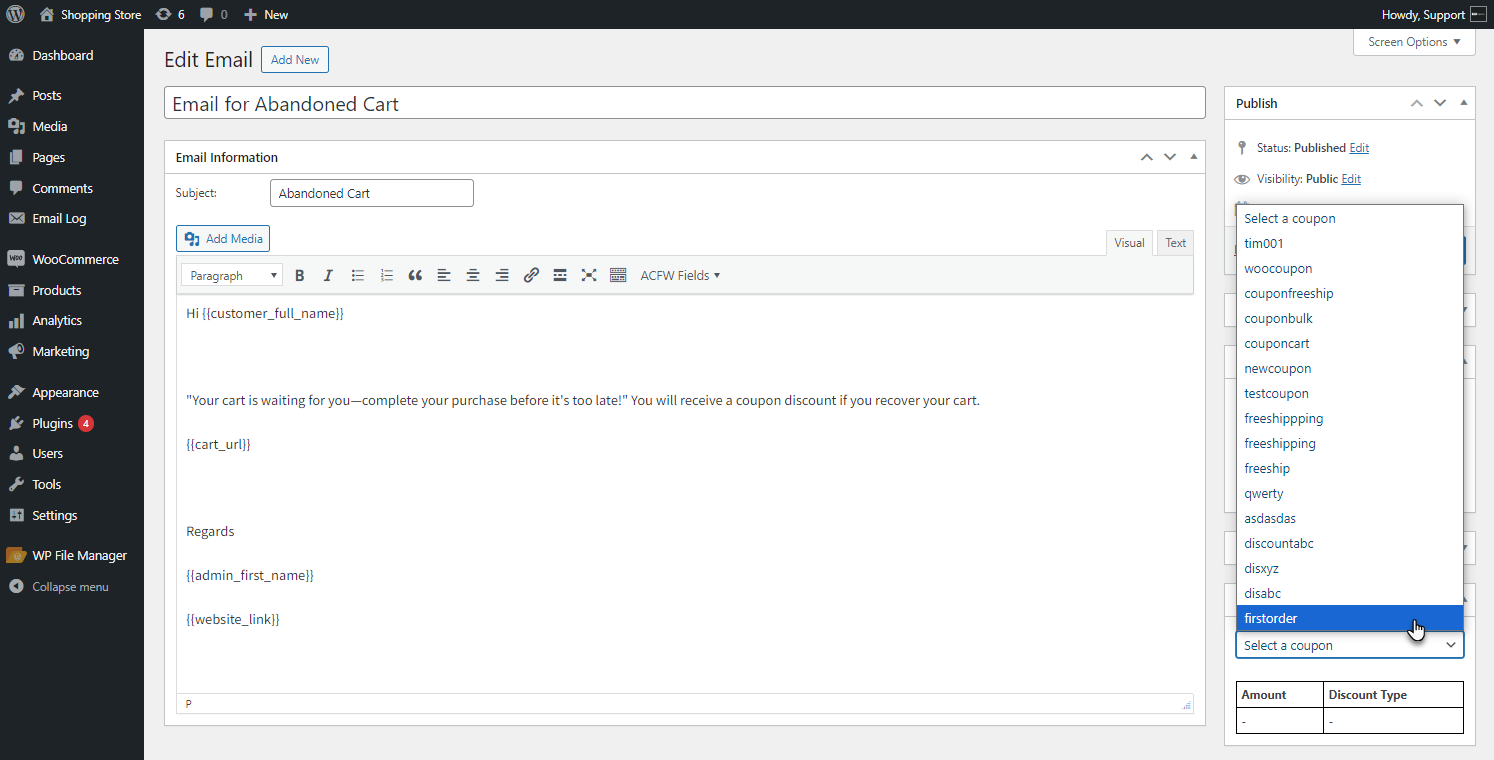
- The Coupon will be selected. The Discount amount and Discount type will appear.
- The admin can add the Coupon Code placeholder from the ACFW Fields if the Auto Apply option is disabled.
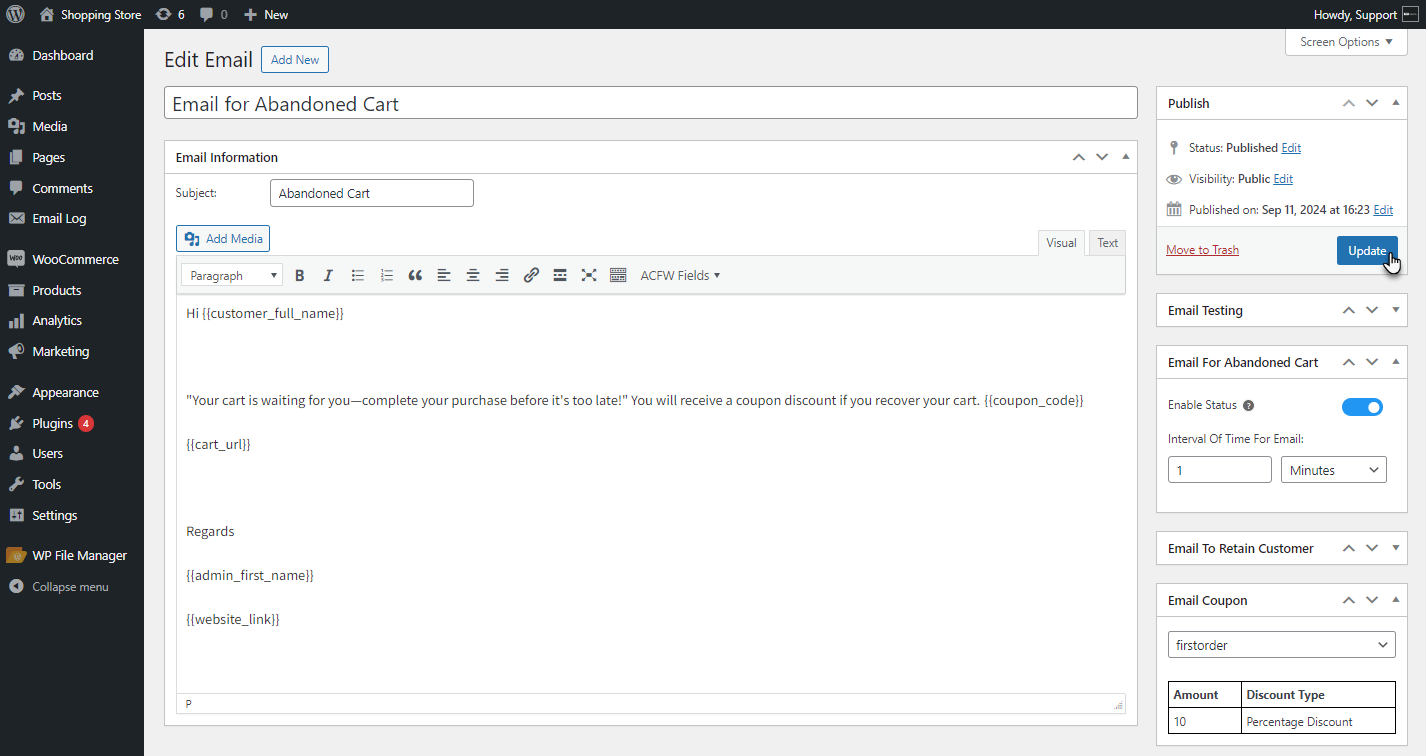
- Click on the Update button to save the changes.
Front End Impact
Coupon Code in Email
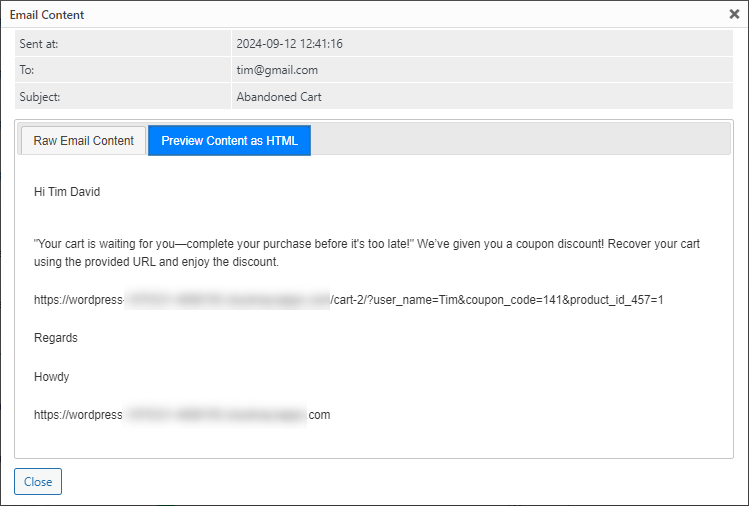
- As the cart will be considered Abandoned. The user will receive an Email containing the Coupon Code.
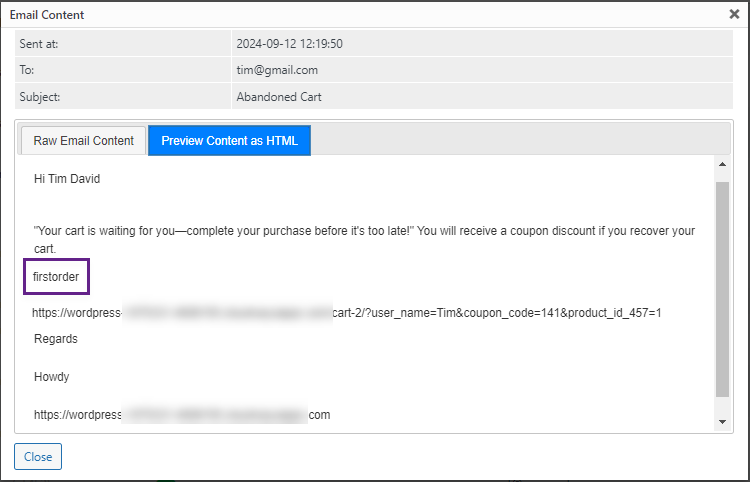
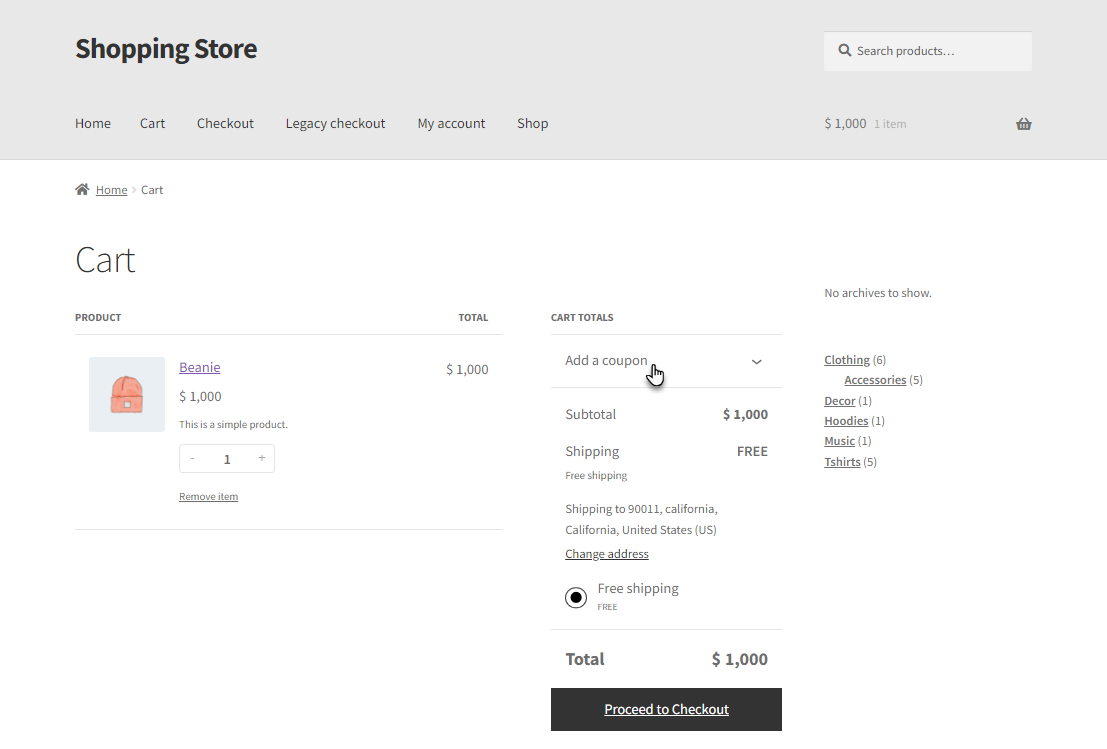
- By using the URL, Proceed to the Cart page.
- Click on the Add a Coupon button.
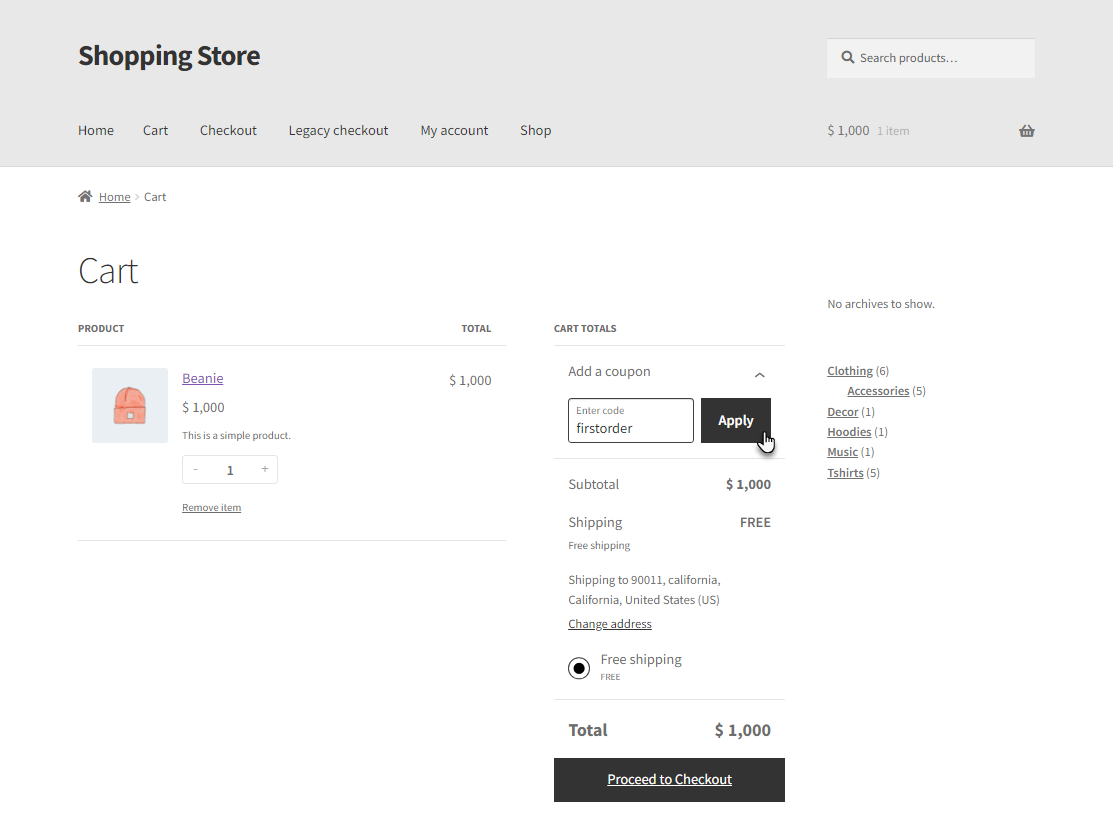
- Enter the Coupon Code and Click on the Apply Button.
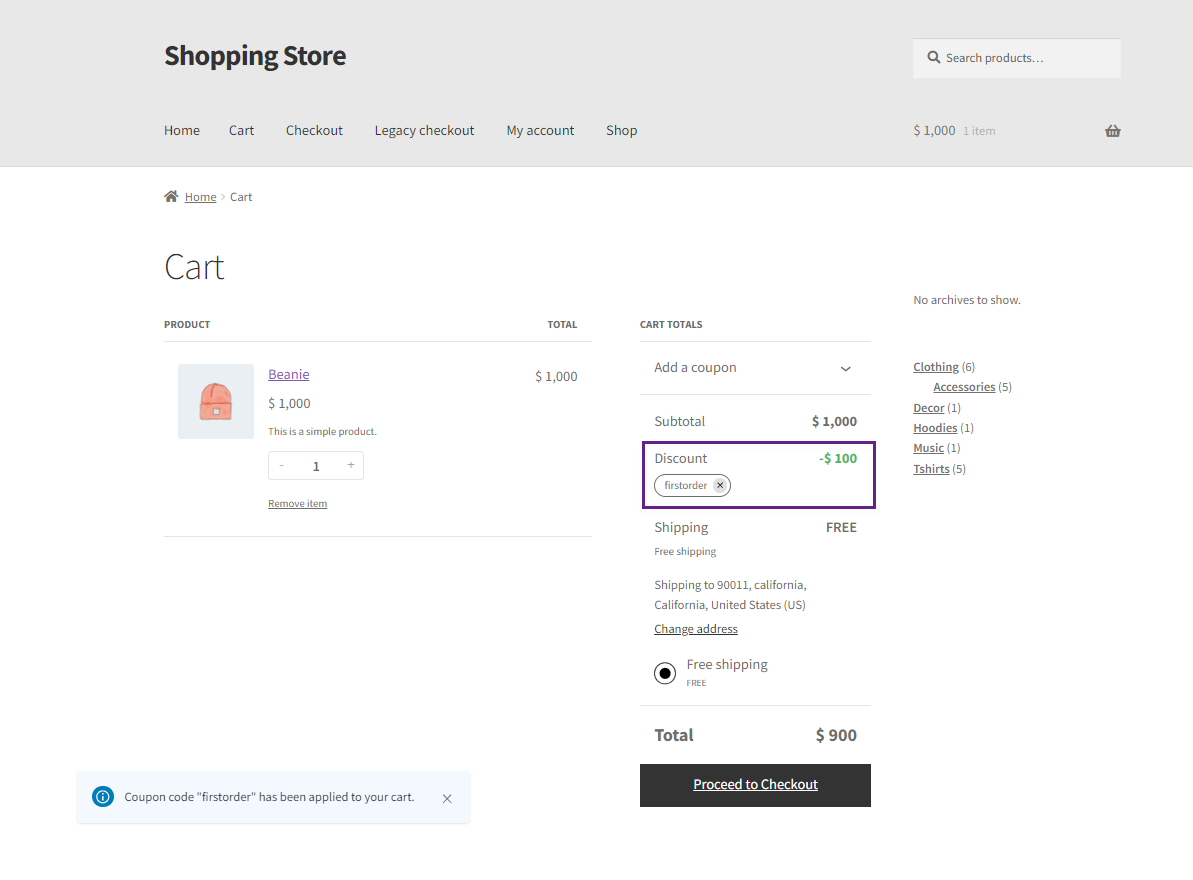
- The Coupon will be applied.
Auto Apply Coupon
- As the cart will be considered Abandoned. The user will receive an email with a URL where the coupon will be automatically applied to the cart.
- By using the URL, Proceed to the Cart page.
- The Coupon will be auto applied to the cart.
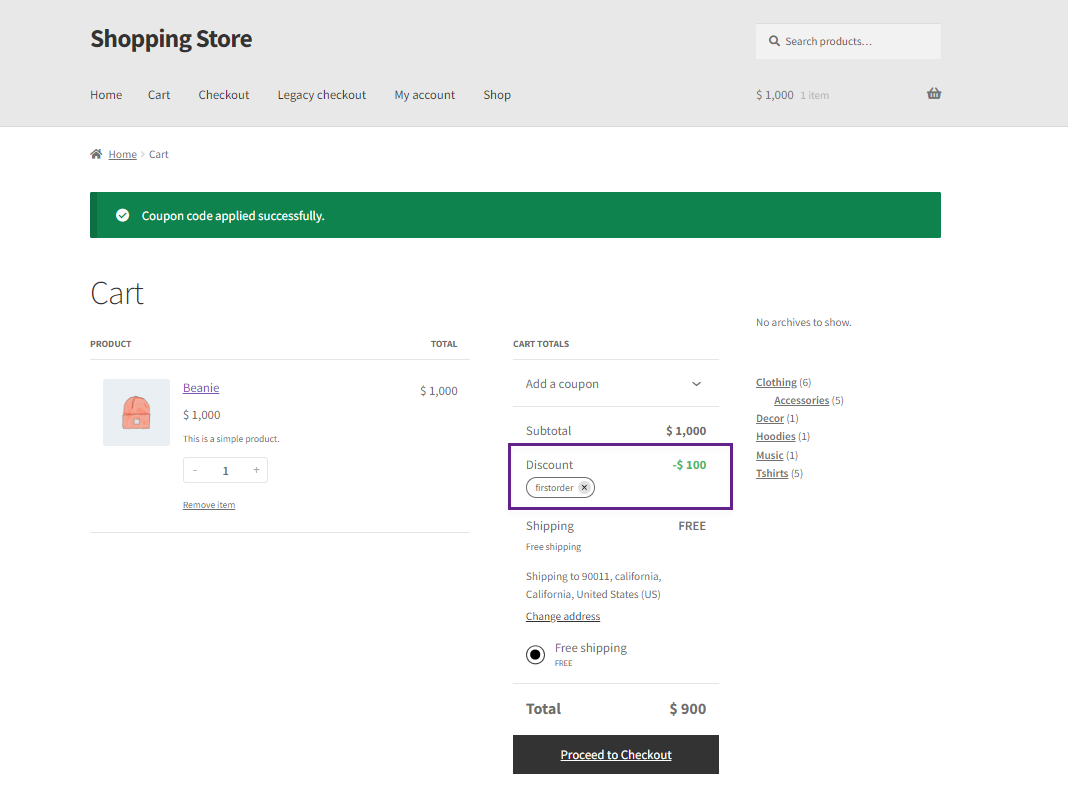
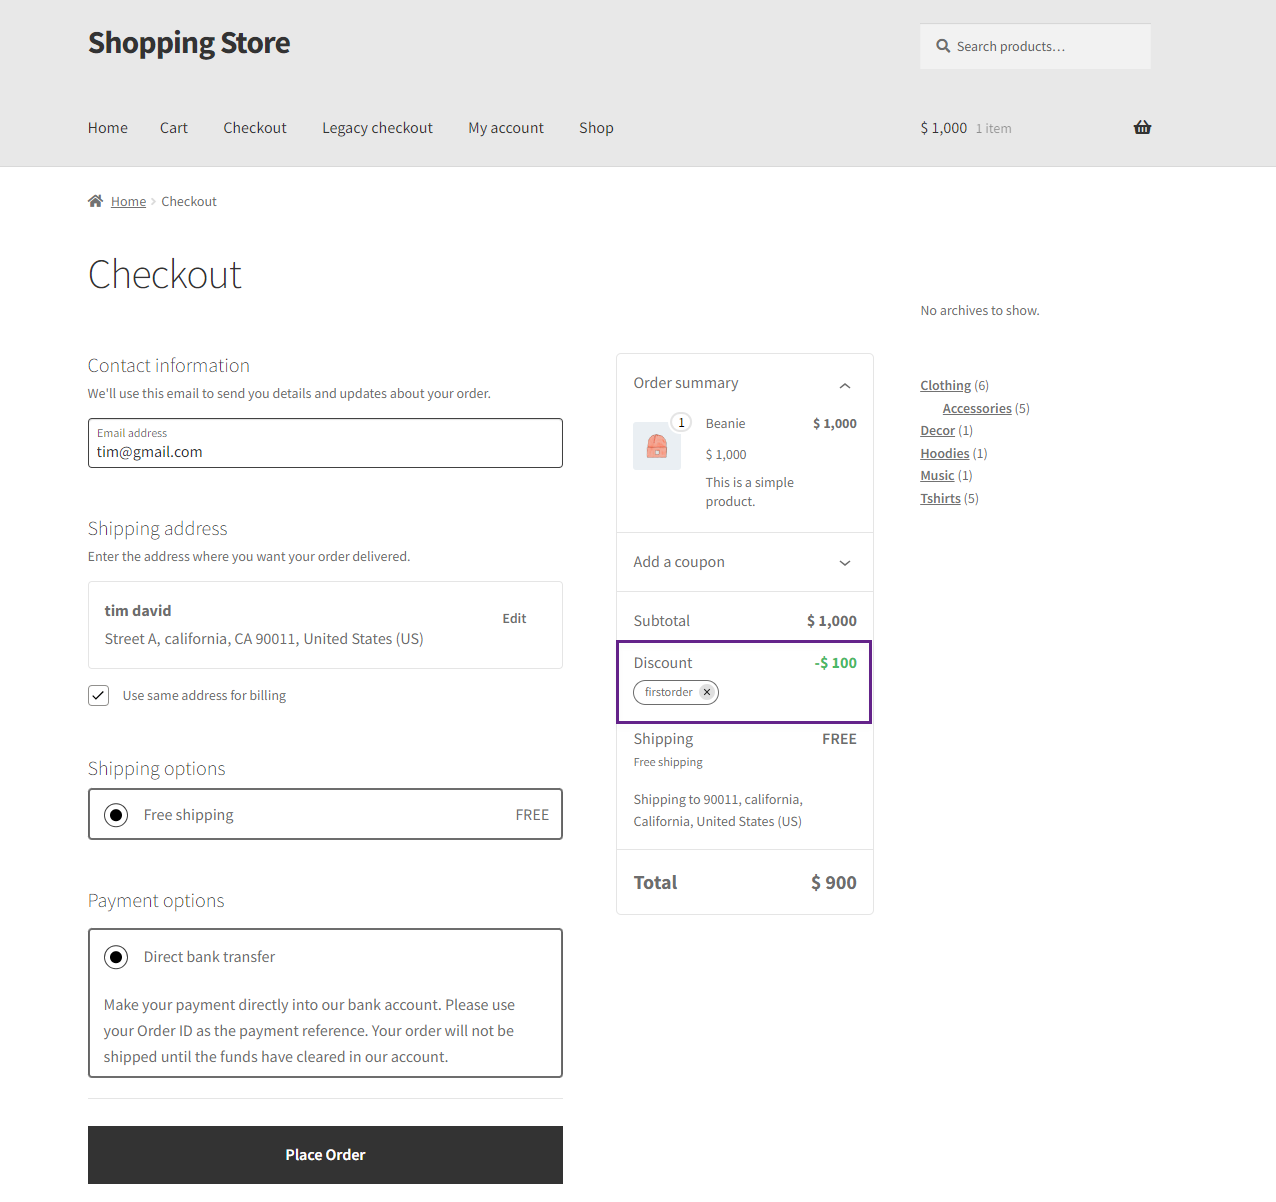
- The coupon discount will also be visible at the Checkout page.
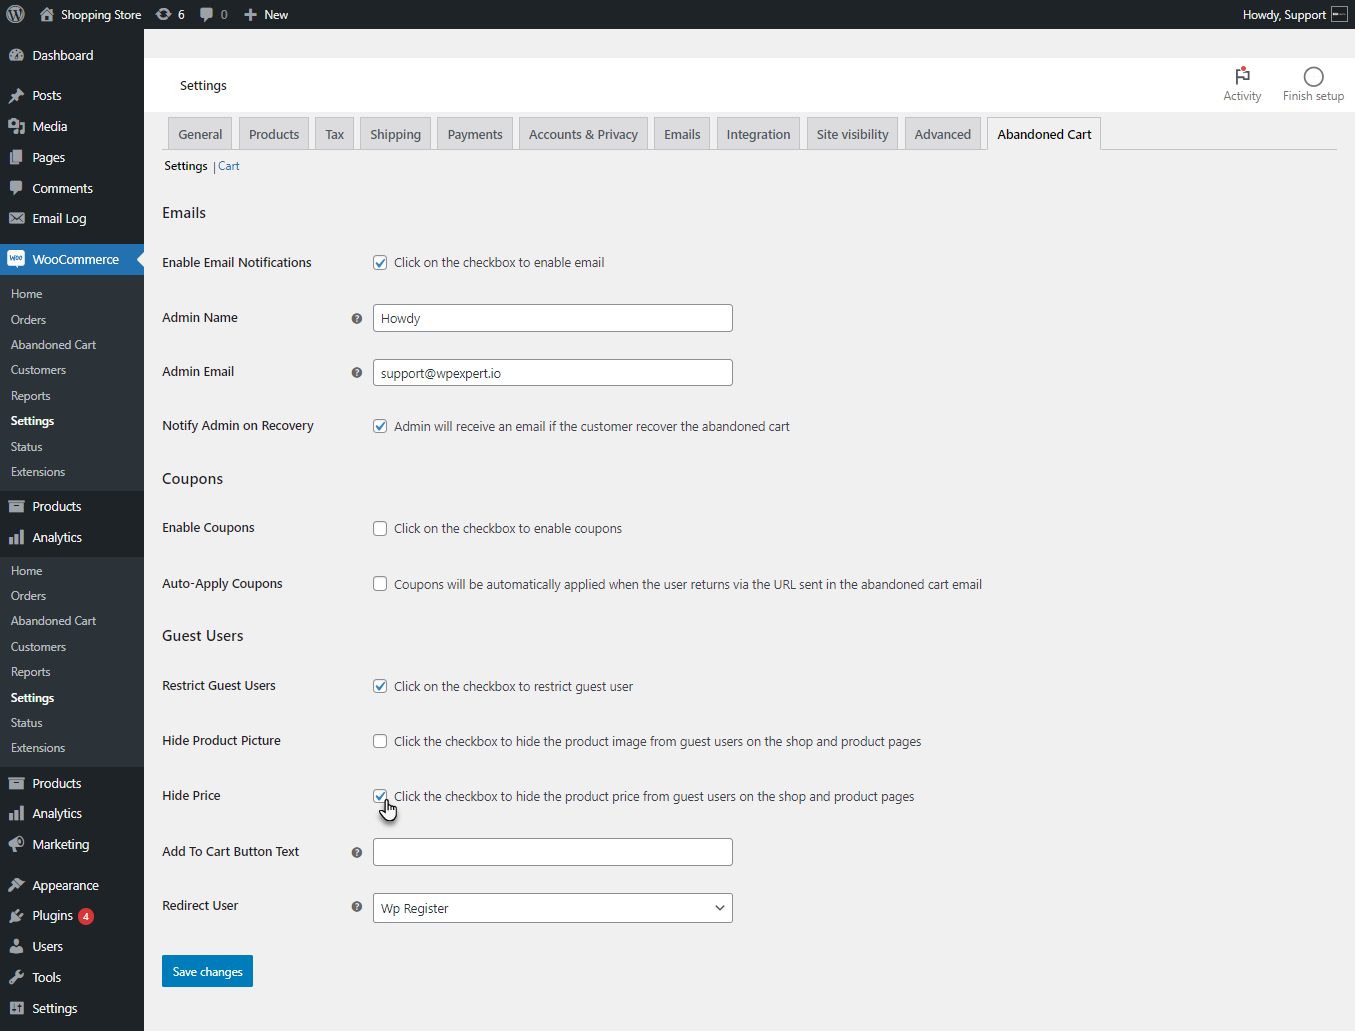
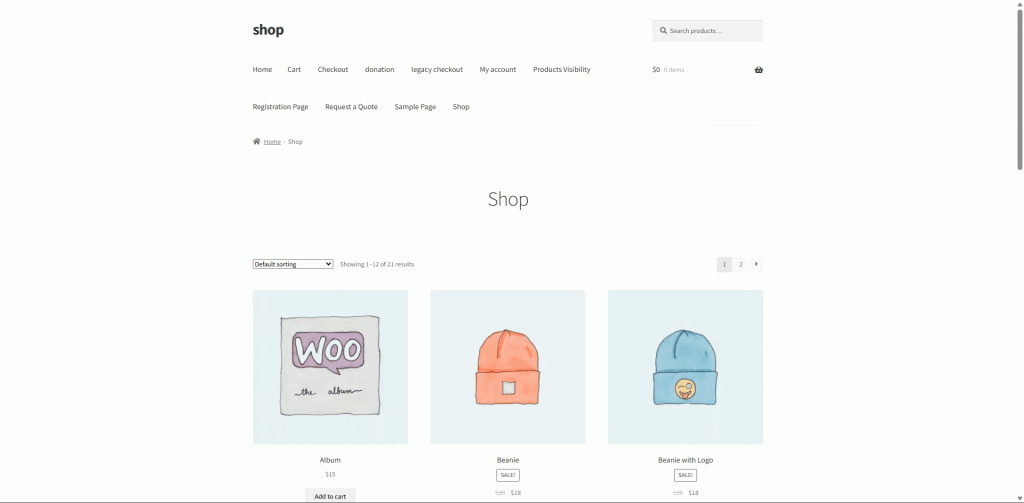
Guest Users
Restrict Guest Users
- Enable the Restrict Guest User option. This will prevent the tracking of abandoned carts for guest users.
Hide Product Picture
- Enable the Hide Product Picture option. This will hide the product picture from guest users on the shop and single product pages.

Front End Impact
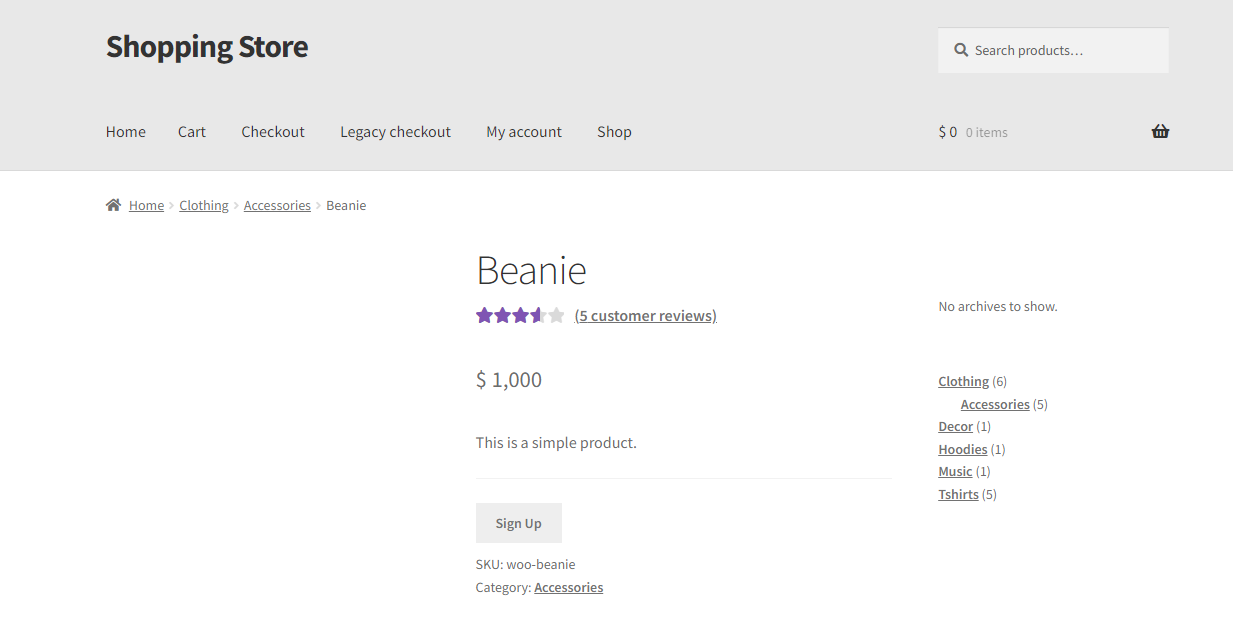
- Go to the Shop page. The Product Picture will be hidden.
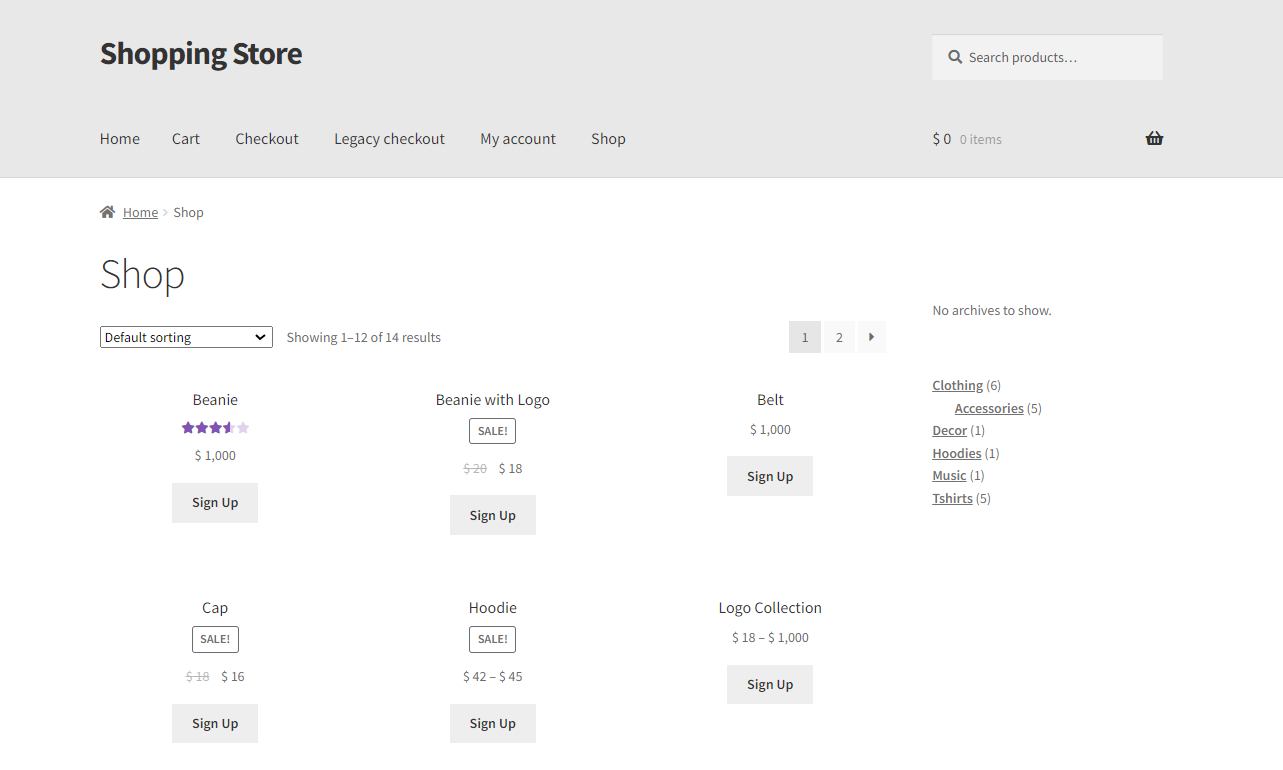
- Go to the Single Product page. The Product picture will also be hidden on the single product page.
Hide Price
- Enable the Hide Price option. This will hide the price from guest users on the shop and single product pages.
Front End Impact
- Go to the Shop page. The Product Price will be hidden.
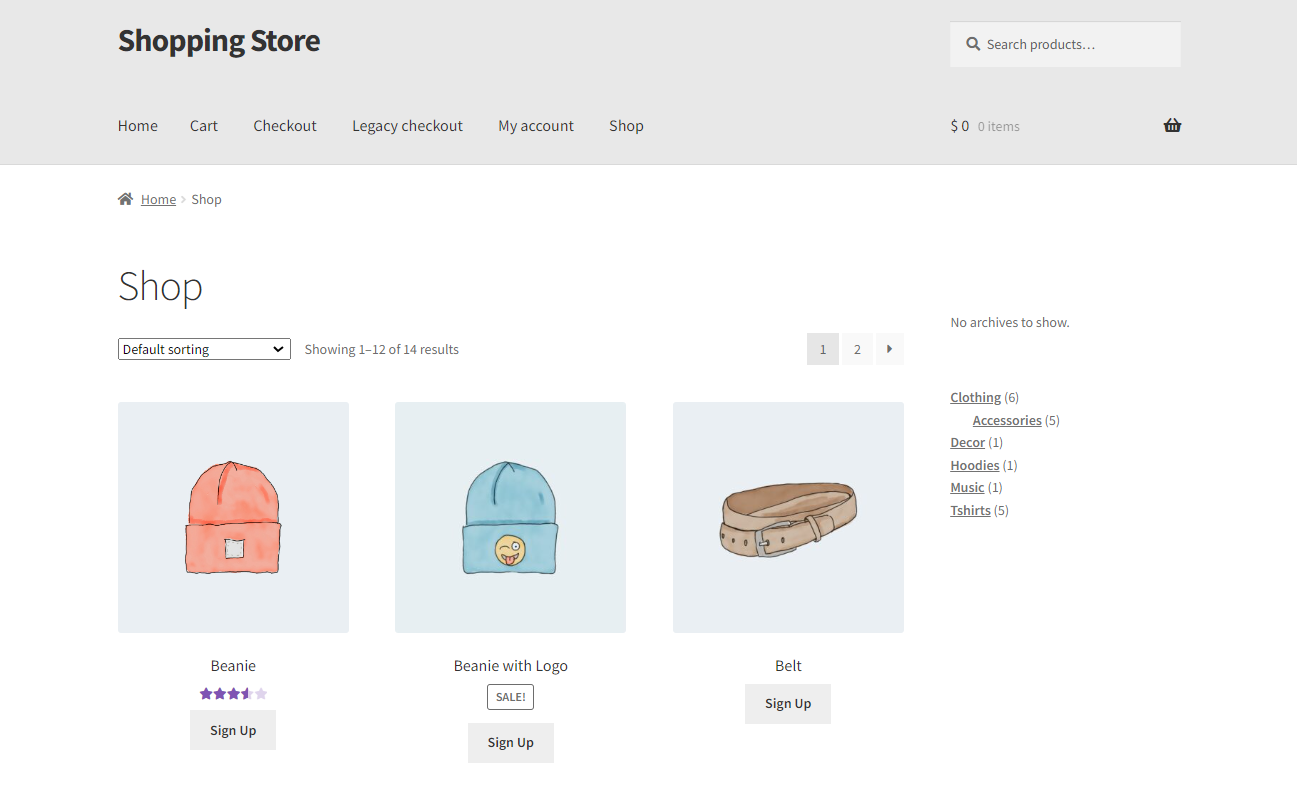
- Go to the Single Product page. The Product Price will also be hidden on the single product page.
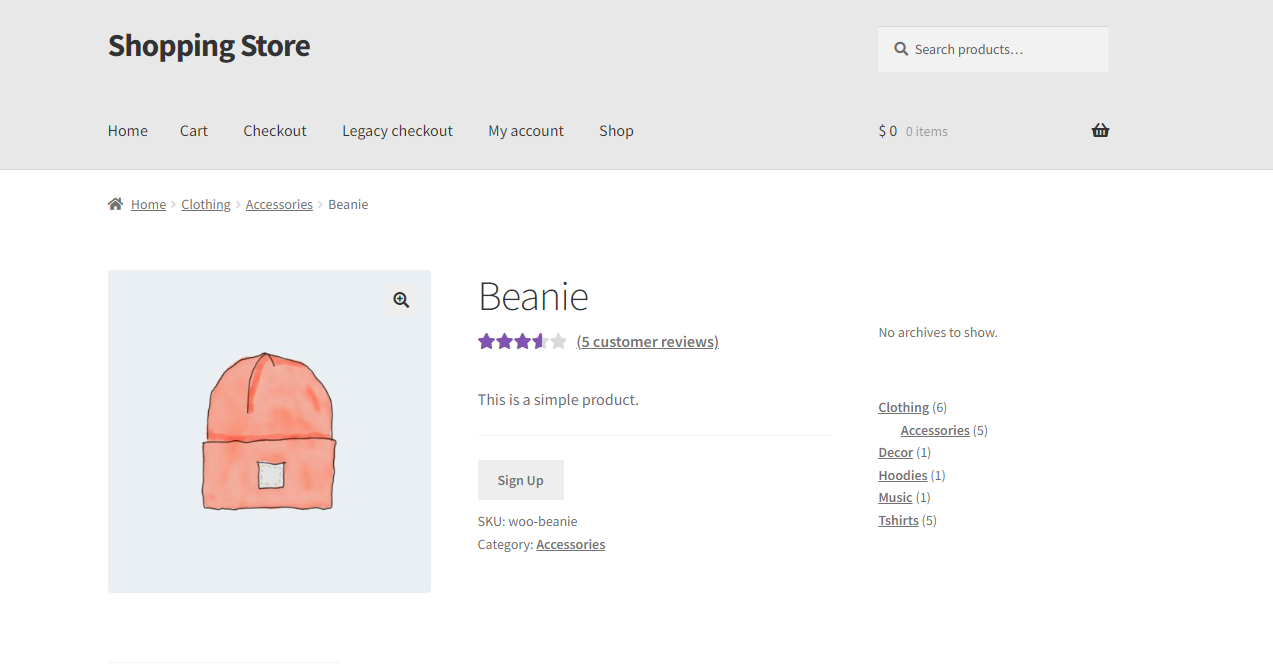
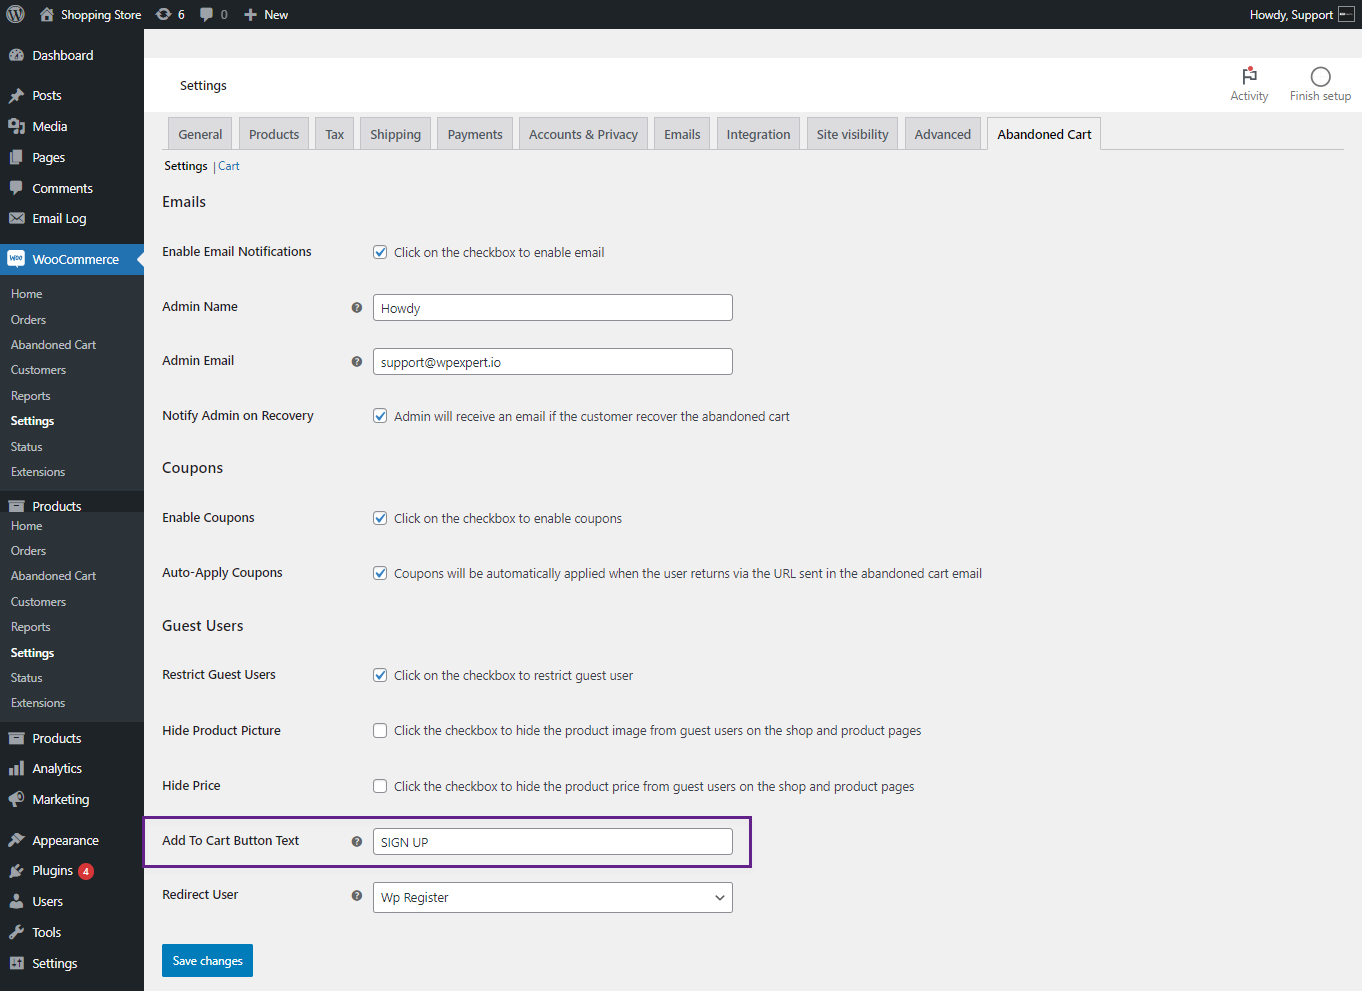
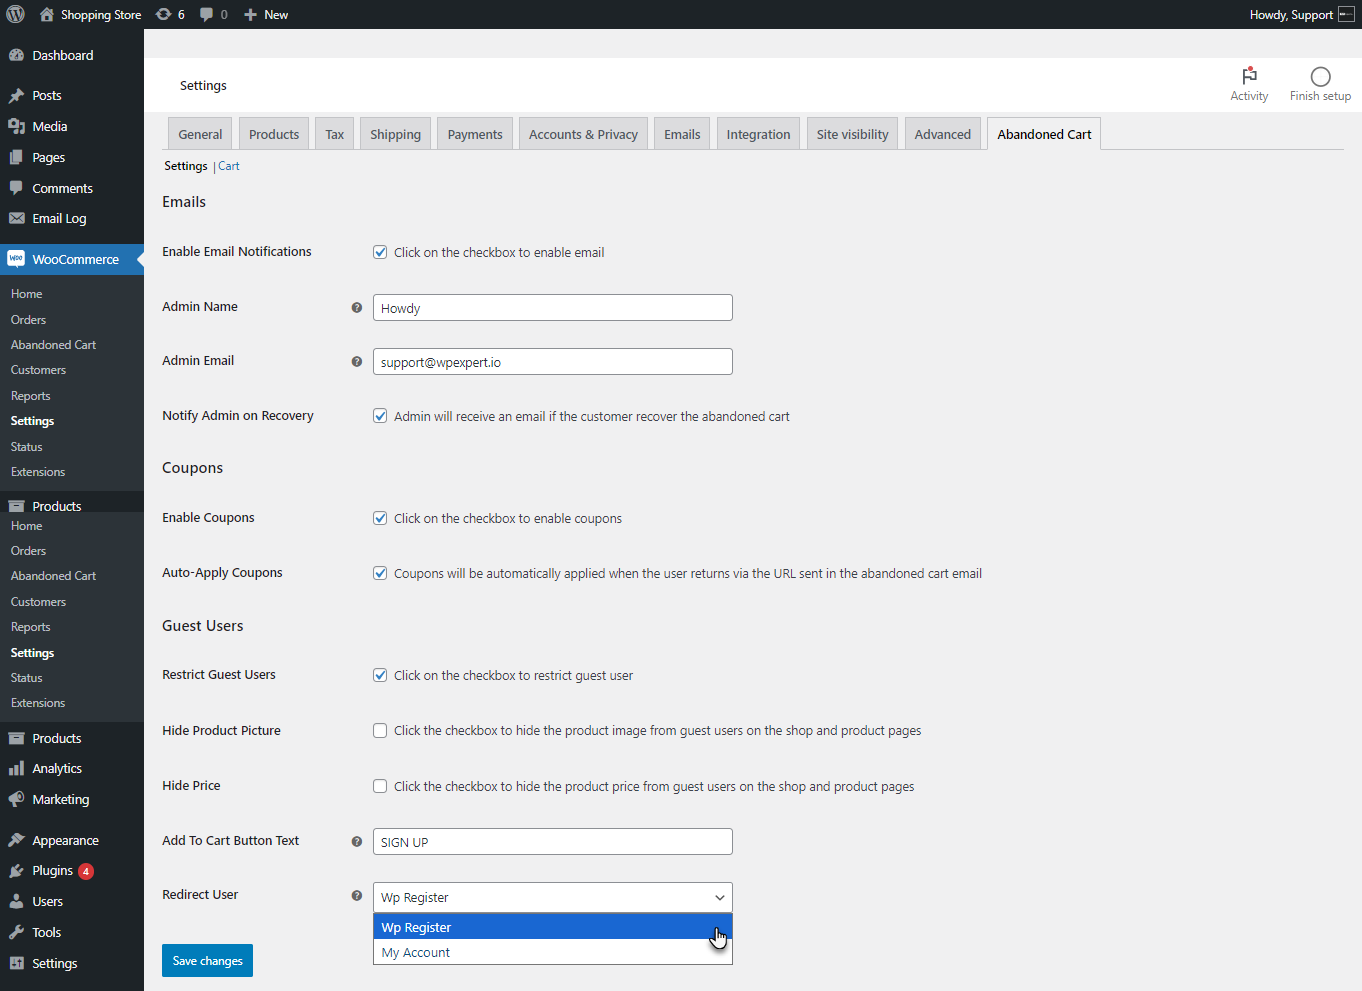
Add To Cart Button Text
- The admin can change the text of the Add to Cart button.
Front End Impact
- Go to the Shop page.
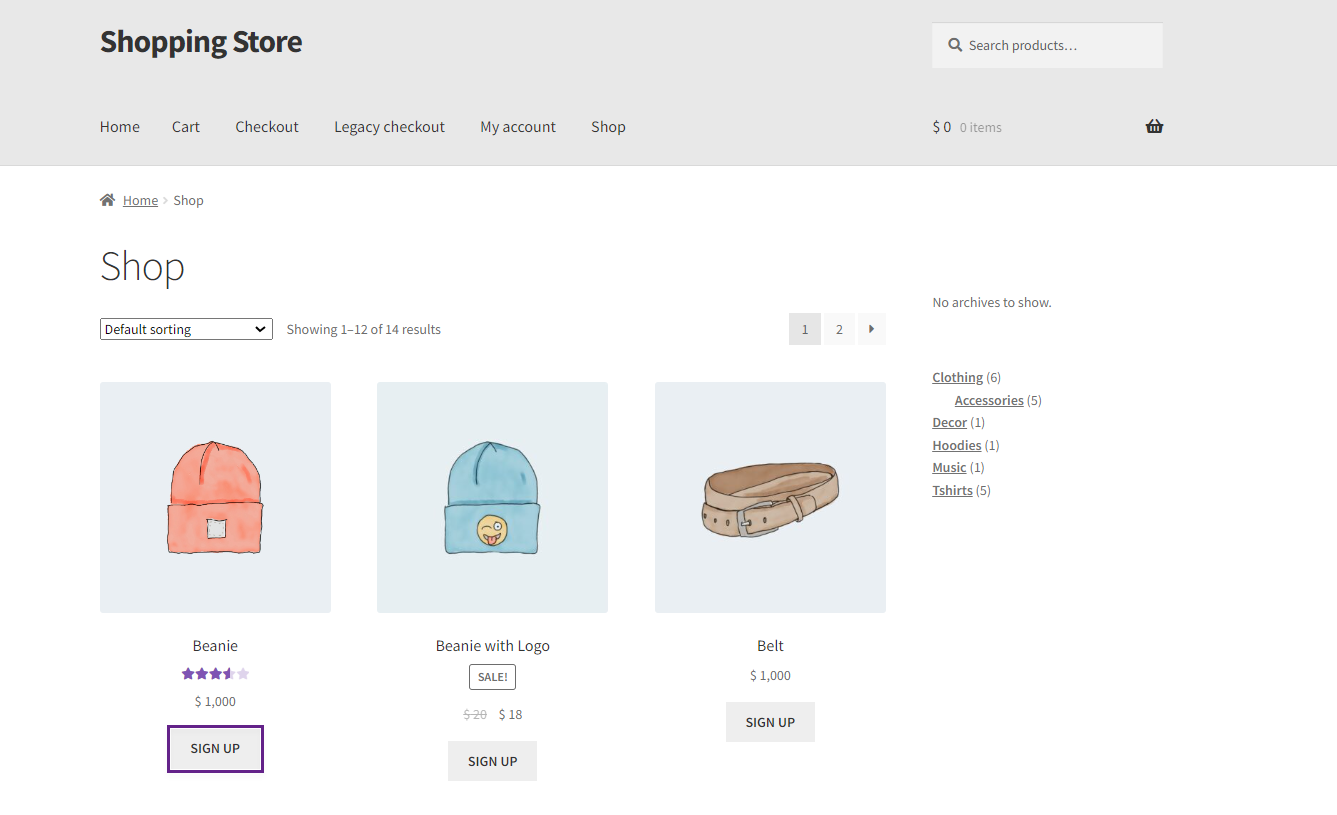
- Redirect User
- The admin can select the page to which the guest user will be redirected when they click on the Add to Cart button.
Front End Impact
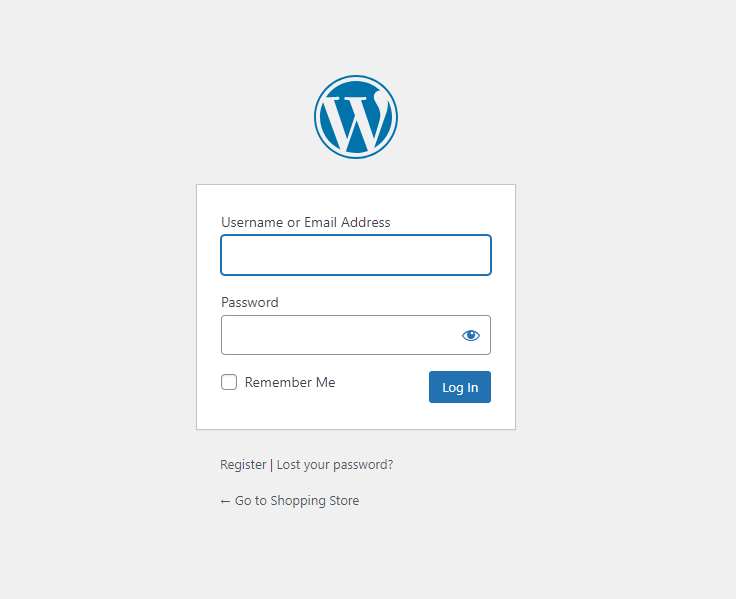
- Go to the Shop page. Click on the Sign Up button.
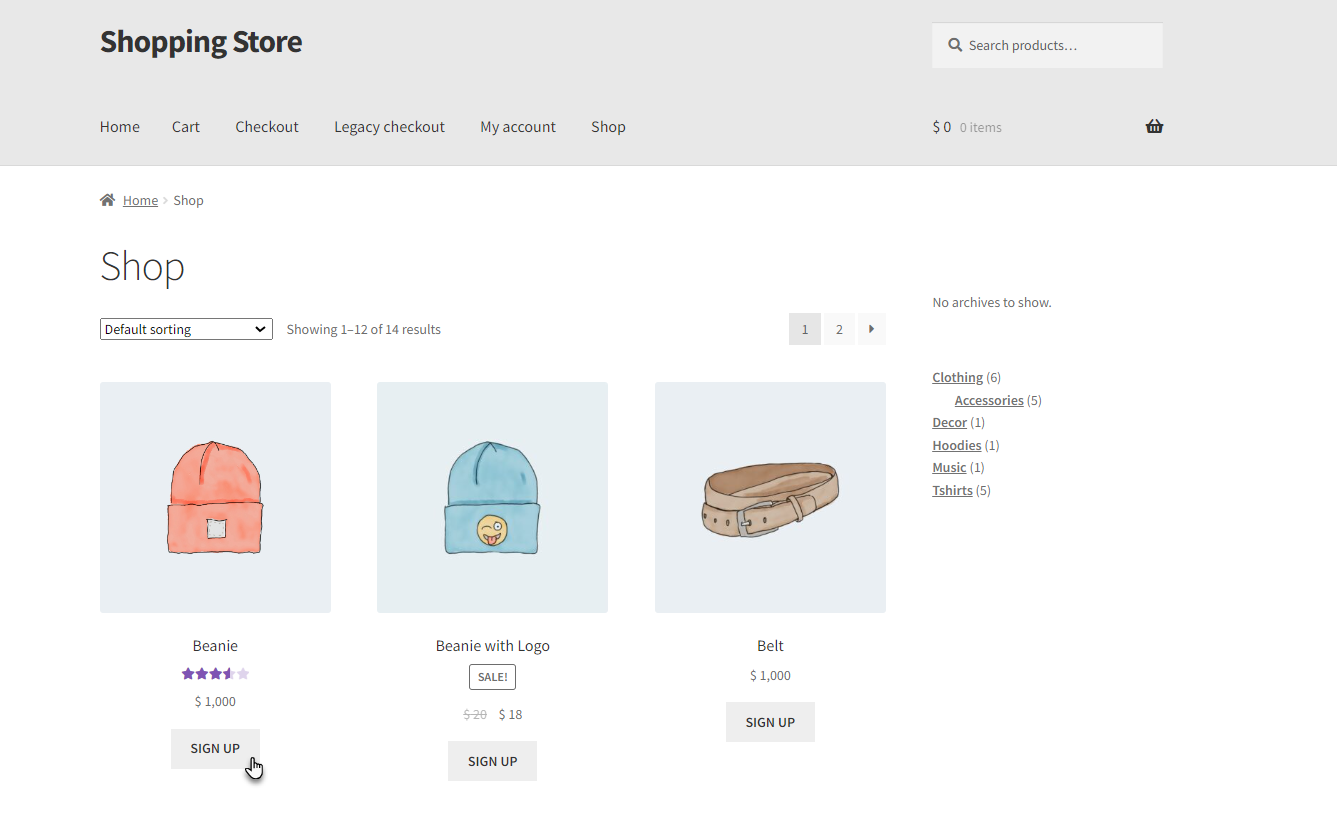
- The Guest User will be redirected to the page set by the admin.
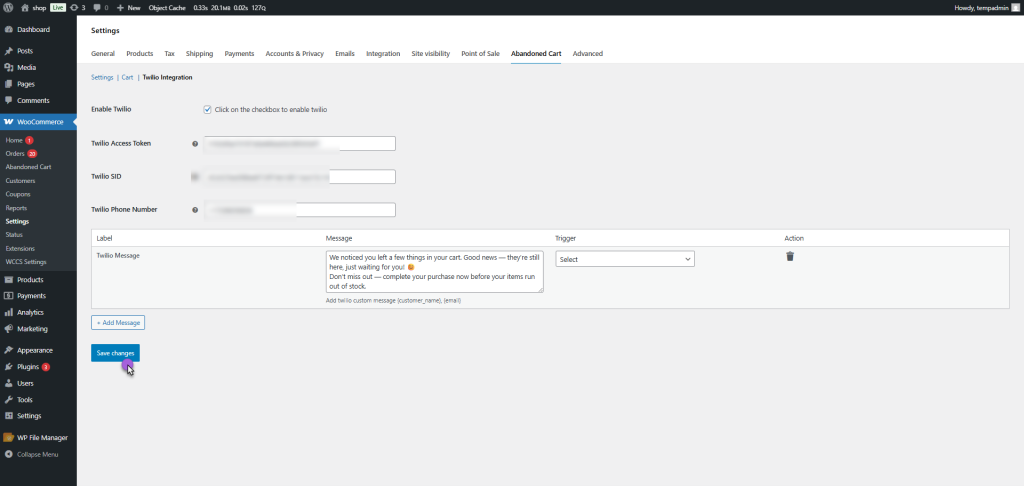
Twilio Integration
↑ Back to topTwilio Integration allows you to automatically send SMS messages to your registered customers using their saved phone numbers whenever specific email notifications are triggered (such as Abandoned Cart reminders).
- Navigate to: WooCommerce > Settings > Abandoned Cart > Twilio Integration
- Enable Twilio Integration. Use the checkbox to activate the feature.

Enter API Credentials
- Twilio Auth Token
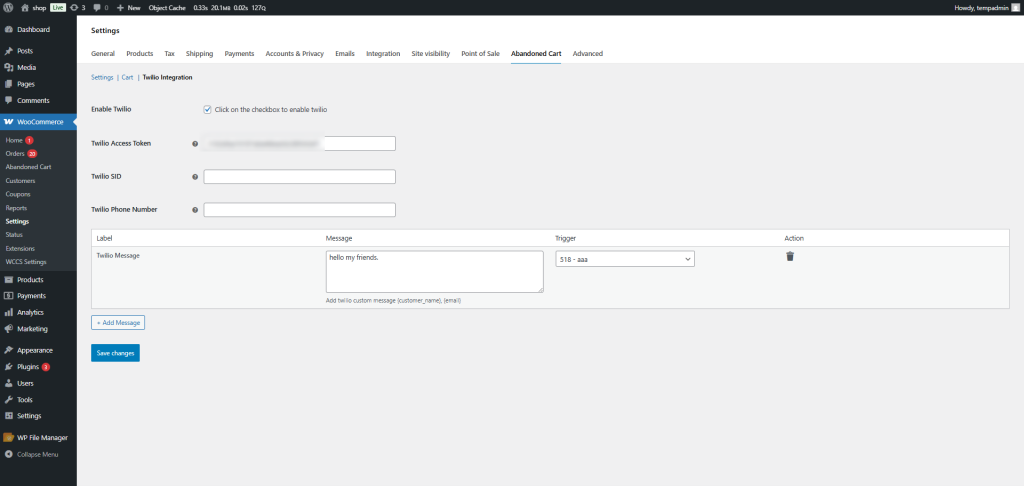
- Twilio SID
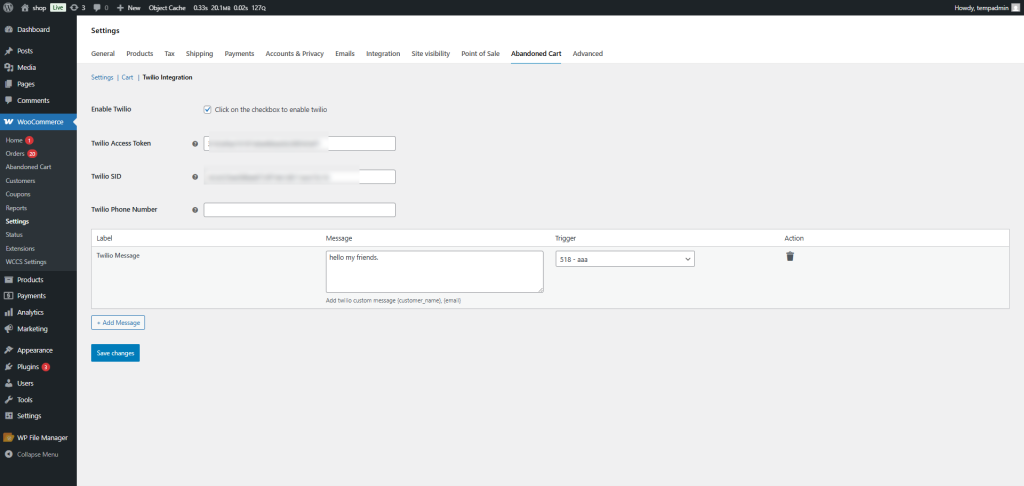
- Twilio Phone Number
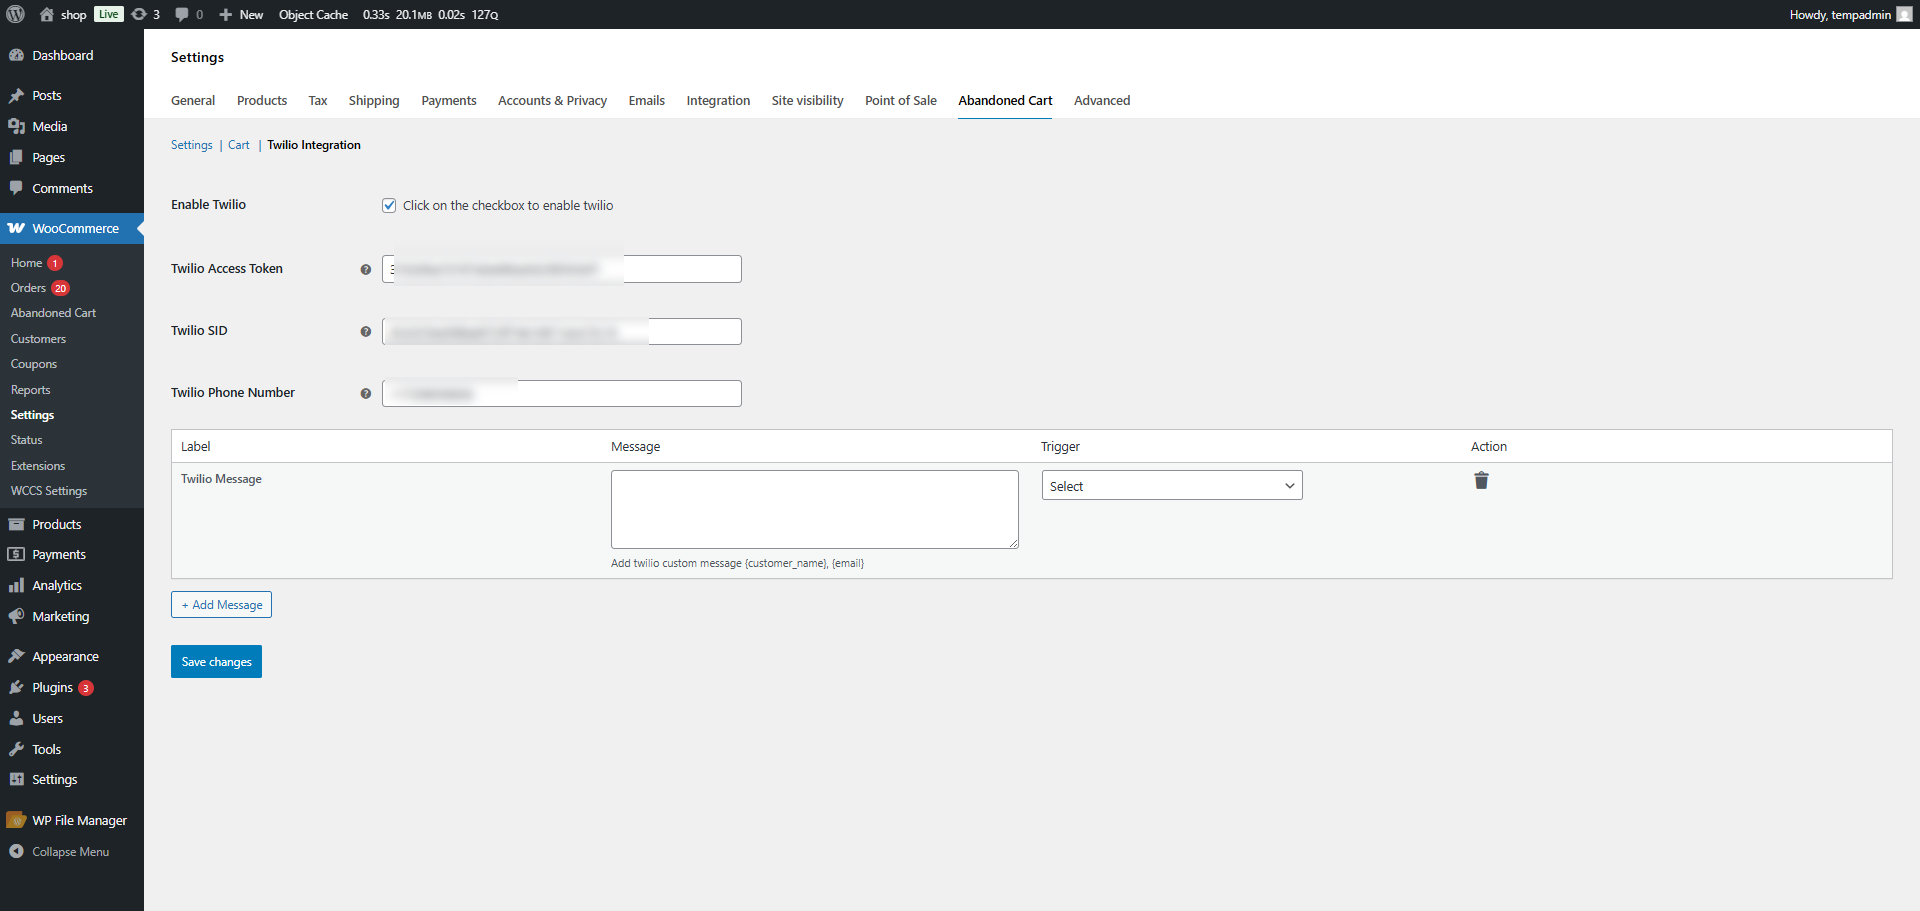
Create SMS Message Rules
- Write the message you want to send via SMS.
- Select the event that should trigger the SMS.
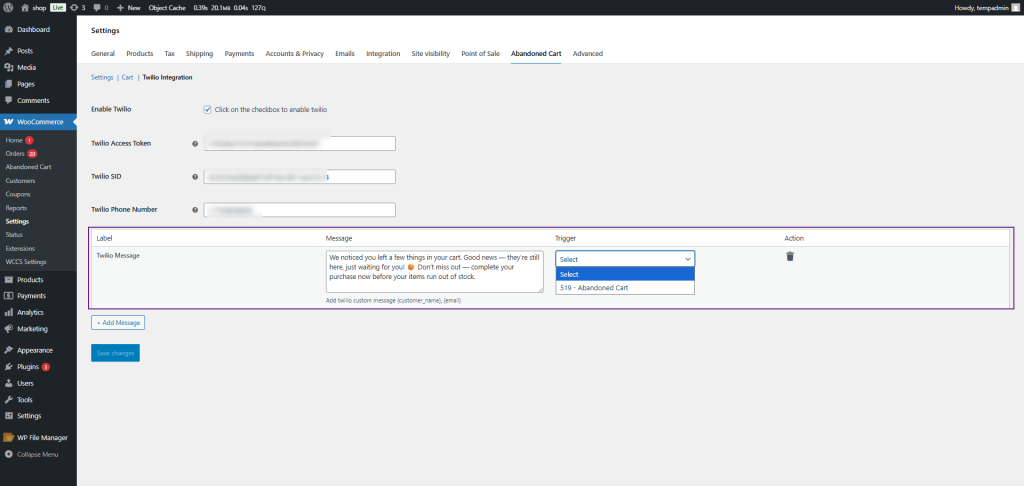
- Click Save Changes to apply your configuration.
Frontend Impact
- Once you click Save Changes, the configured SMS message will automatically be triggered.
- The SMS is sent to the customer’s phone number saved in their accounts.
- The message is delivered based on the selected trigger event (e.g., cart abandonment).
- No manual action is required; the process runs automatically in the background.
- This ensures timely communication with customers via SMS as per your configured rules.
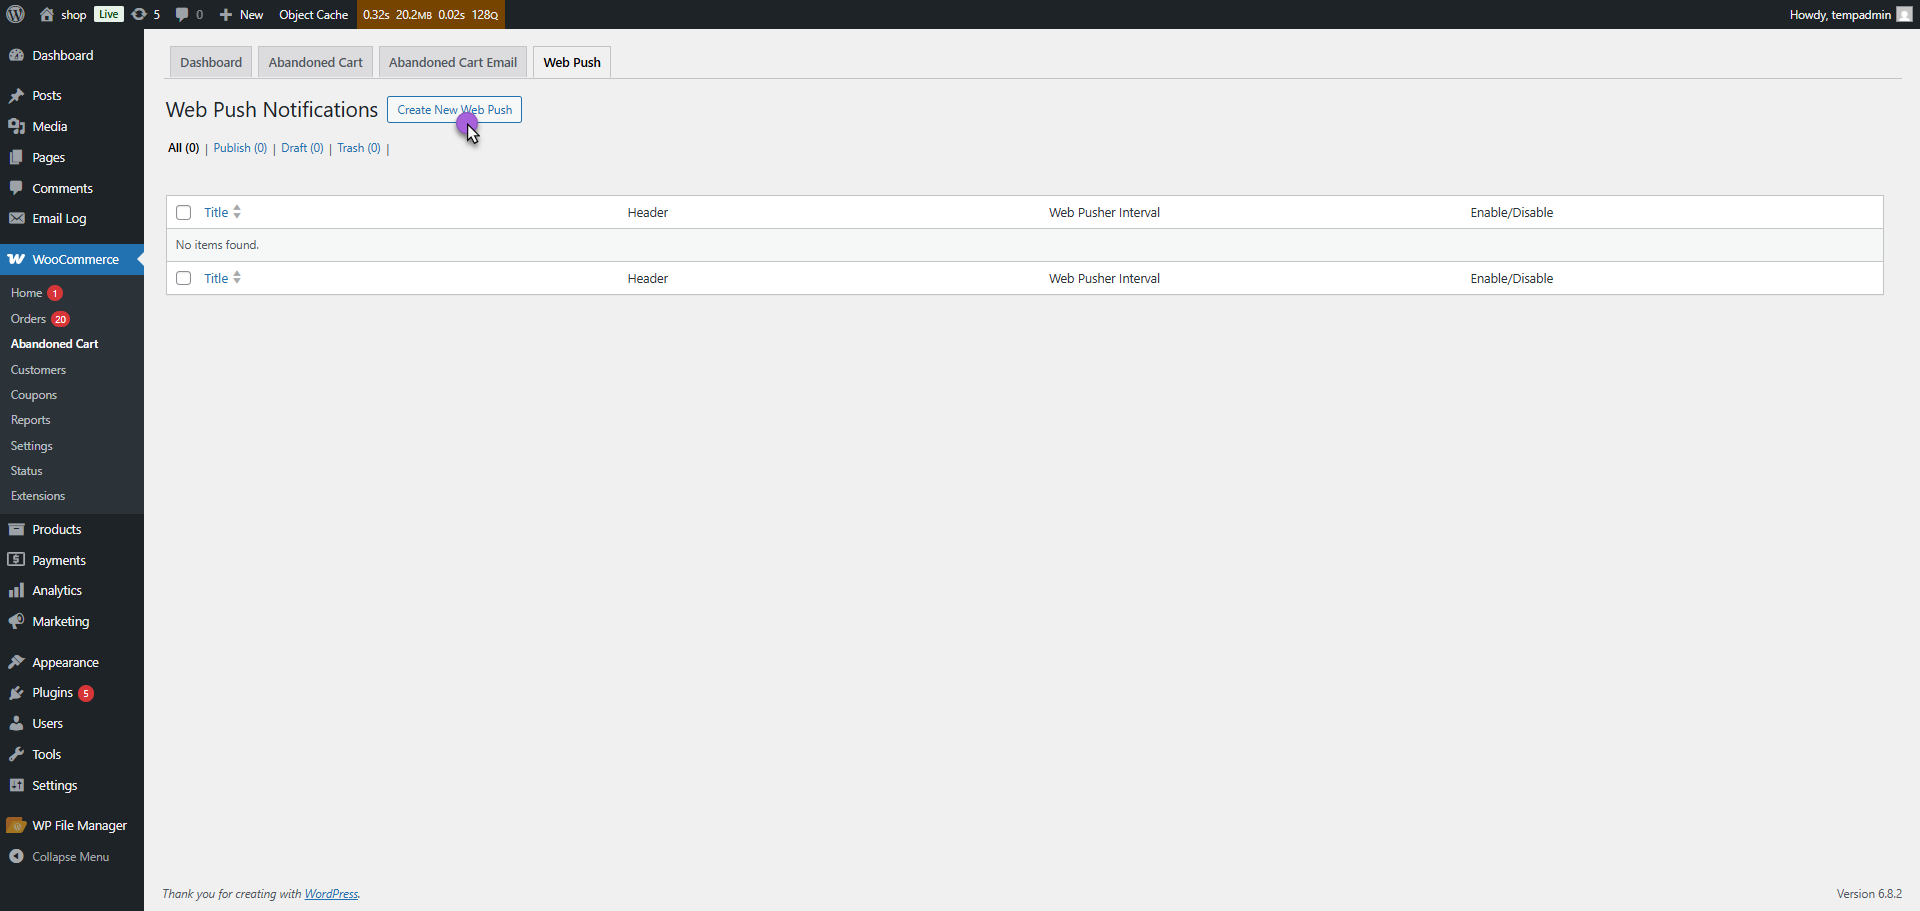
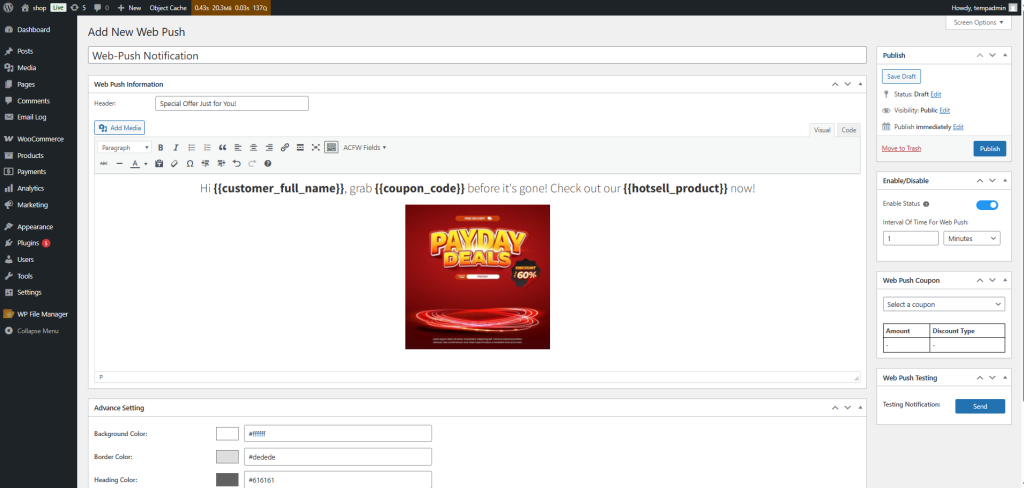
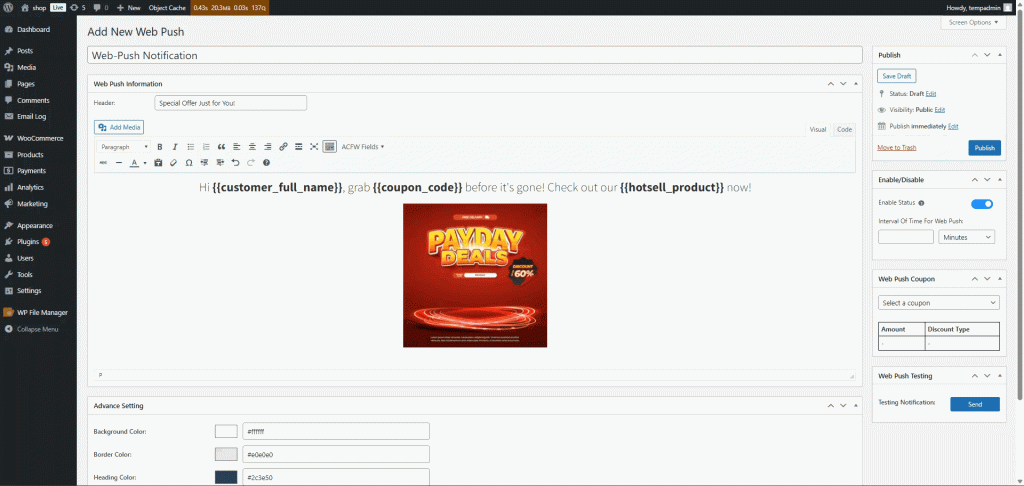
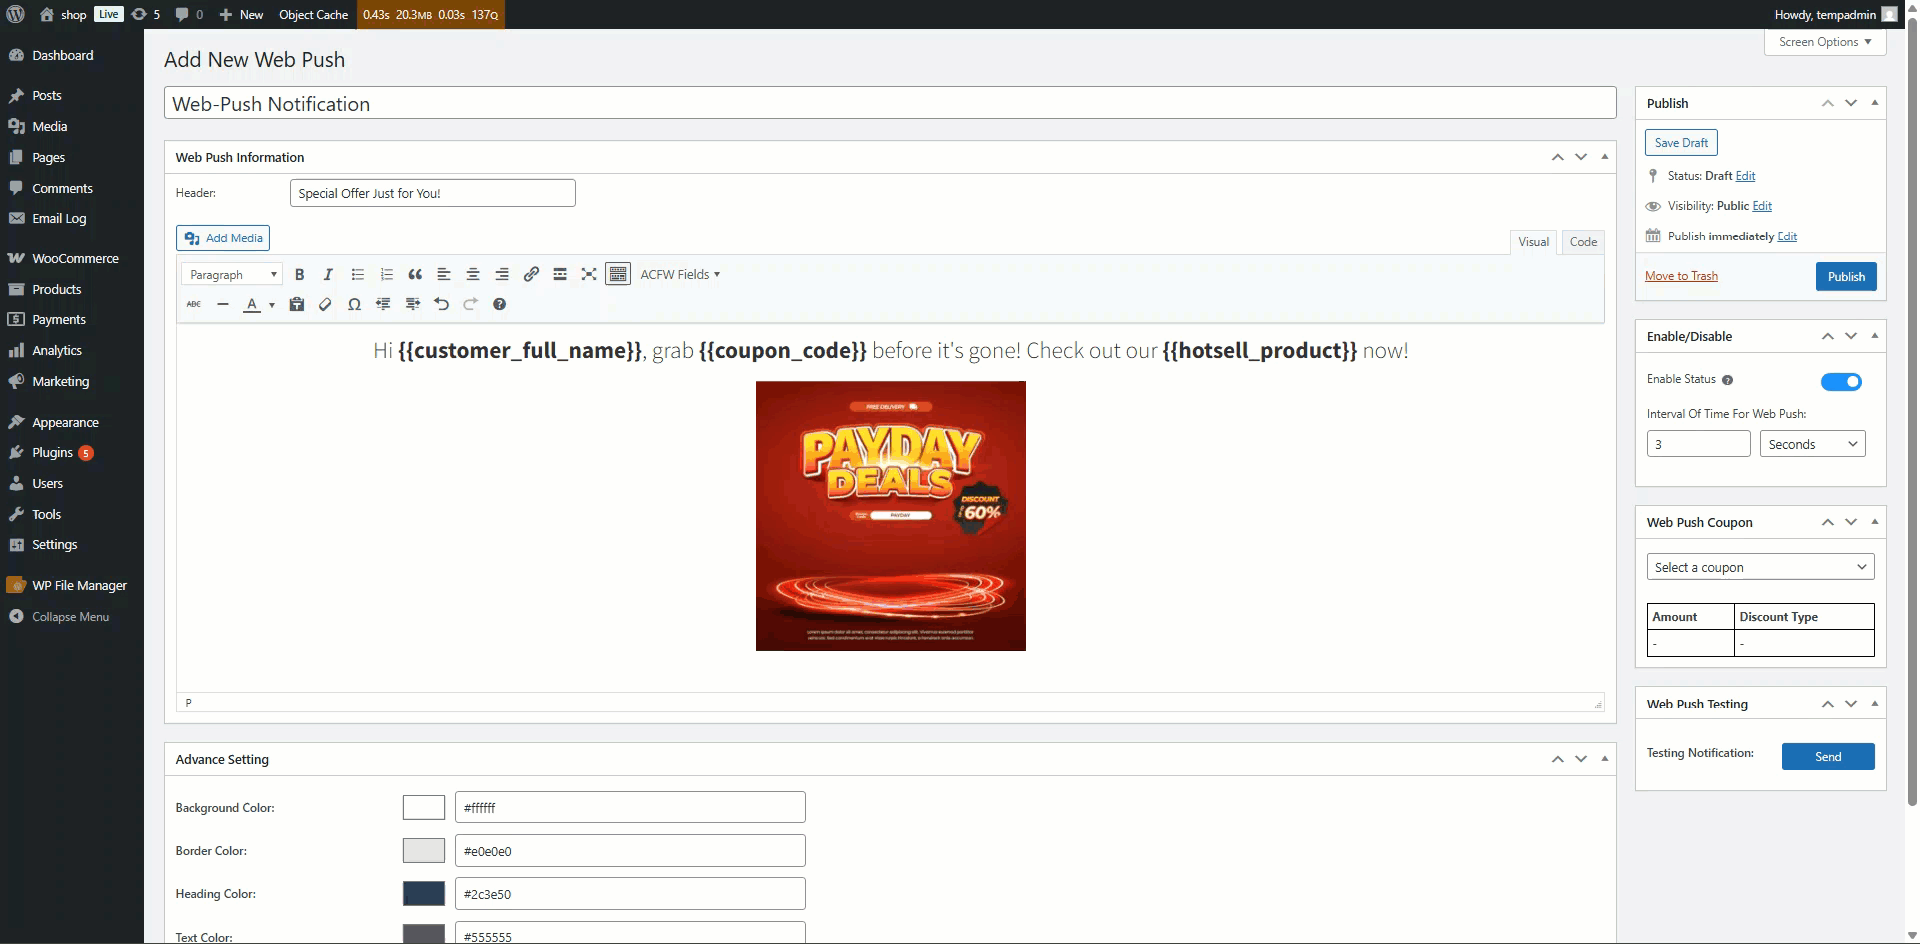
Web-Push Notification
↑ Back to topWhen any user, whether logged in or not, visits your store, a custom-designed pop-up appears after a specific time delay set by the admin. This pop-up is used to invite users to subscribe to web push notifications.
- Navigate to: WooCommerce > Abandoned Cart > Web-Push
- When the admin navigates to the Web-Push tab, a table will open.
- Click on Create New Web-Push to build a notification.
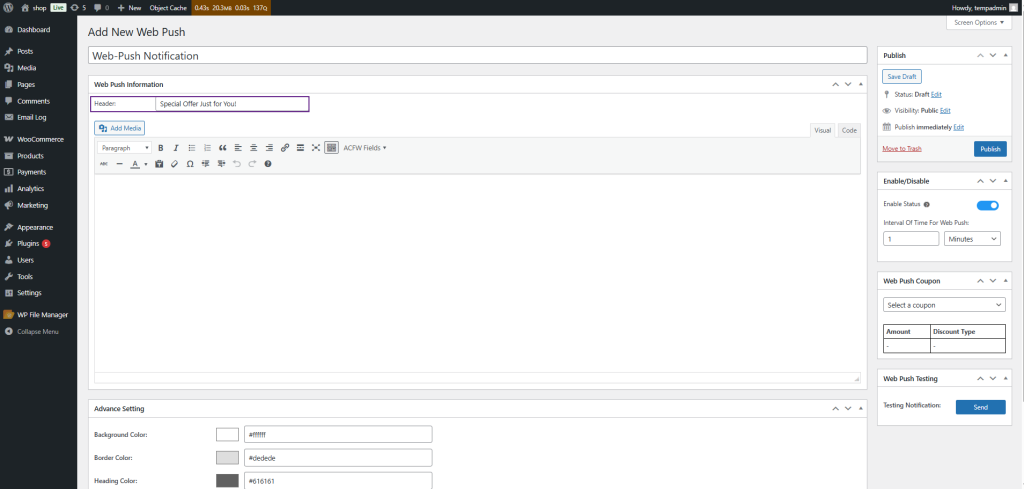
Web-Push Notification – Admin Template Builder
↑ Back to topWhen the admin clicks “Create New Web Push,” a detailed editor opens, allowing for full customization of the push notification content, appearance, timing, and coupon integration.
Header Title
- This is the visible headline shown inside the Web-Push popup on the front end.
- Example: Hello or Special Offer Just for You!.
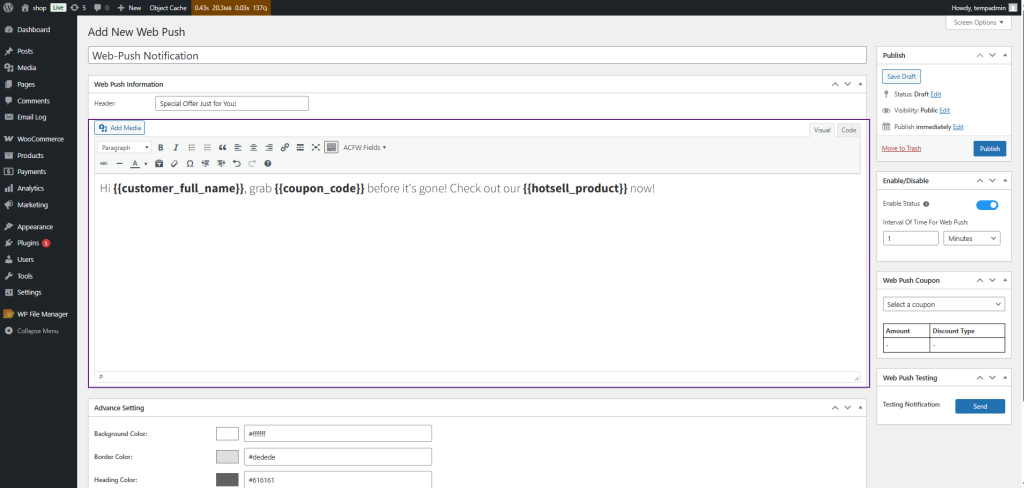
Message Body
- This section allows the admin to compose a custom message that incorporates dynamic tags.
- You can use ACFW fields from the dropdown to personalize content:
- {{admin_name}}
- {{company_name}
- {{coupon_code}}
- {{customer_full_name}}
- {{hotsell_products}}
- {{premium_products}}
- {{upsale_products}}
- {{website_link}}
Add Media
- Upload an image that will appear in the notification body (e.g., banner or product image).
- Appears above the message area.
Advanced Settings
- Customize the UI of the popup:
- Background Color: Sets the background of the notification card
- Border Color: Sets the border outline
- Header Color: Color for the header/title text
- Paragraph Color: Color for the body/message text
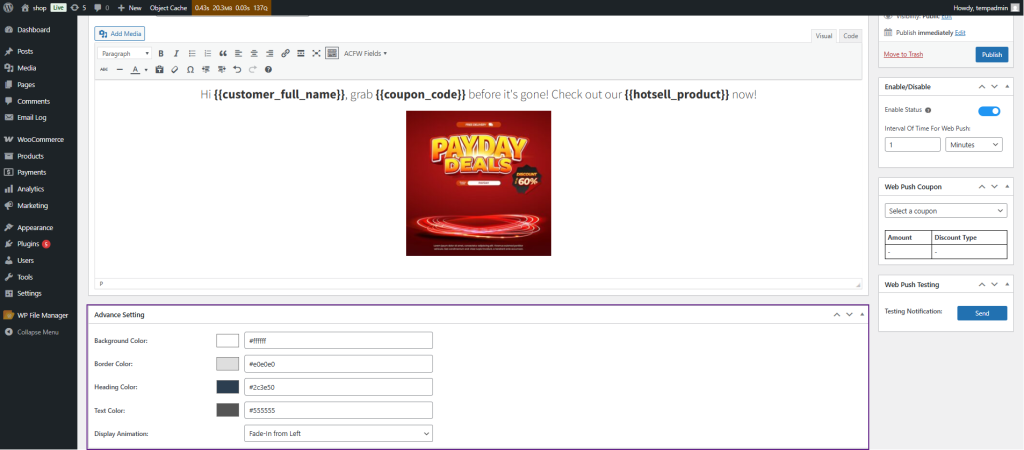
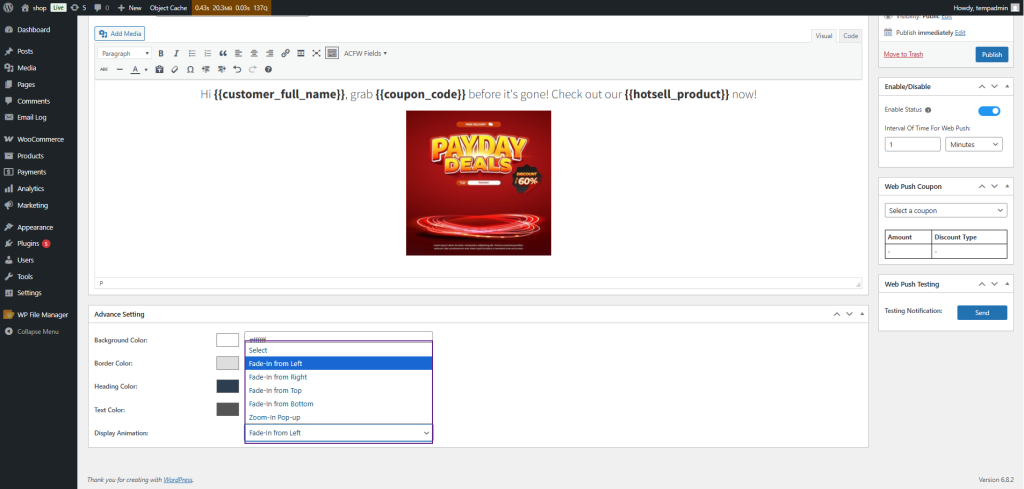
Display Animation
- Choose how the Web Push Notification appears on the screen. This helps draw attention and improve visibility.
- Fade-In from Left: The notification fades in smoothly from the left side.
- Fade-In from Right: The notification fades in from the right side.
- Fade-In from Top: Slides down with a fade from the top.
- Fade-In from Bottom: Slides up with a fade from the bottom.
- Zoom-In Pop-up: The notification zooms in from the center like a pop-up.
Enable/Disable & Timing
- Enable Status Toggle: Turns the notification ON or OFF.

- Interval of Time for Web Push:
- Enter a number and select a unit to determine the interval for the web push notification to appear on the customer’s end (e.g., 1 Second, 10 Seconds, 2 Minutes).
- This controls when the notification appears after the user visits the site.
Web Push Coupon Integration
- Select an existing WooCommerce Coupon.
- View its amount and discount type below.
- You must manually paste {{coupon_code}} into the message to show the code in the pop-up.
Web Push Testing
- Click the Send button to test how the notification will look and behave.
- This sends a test message to the browser session.
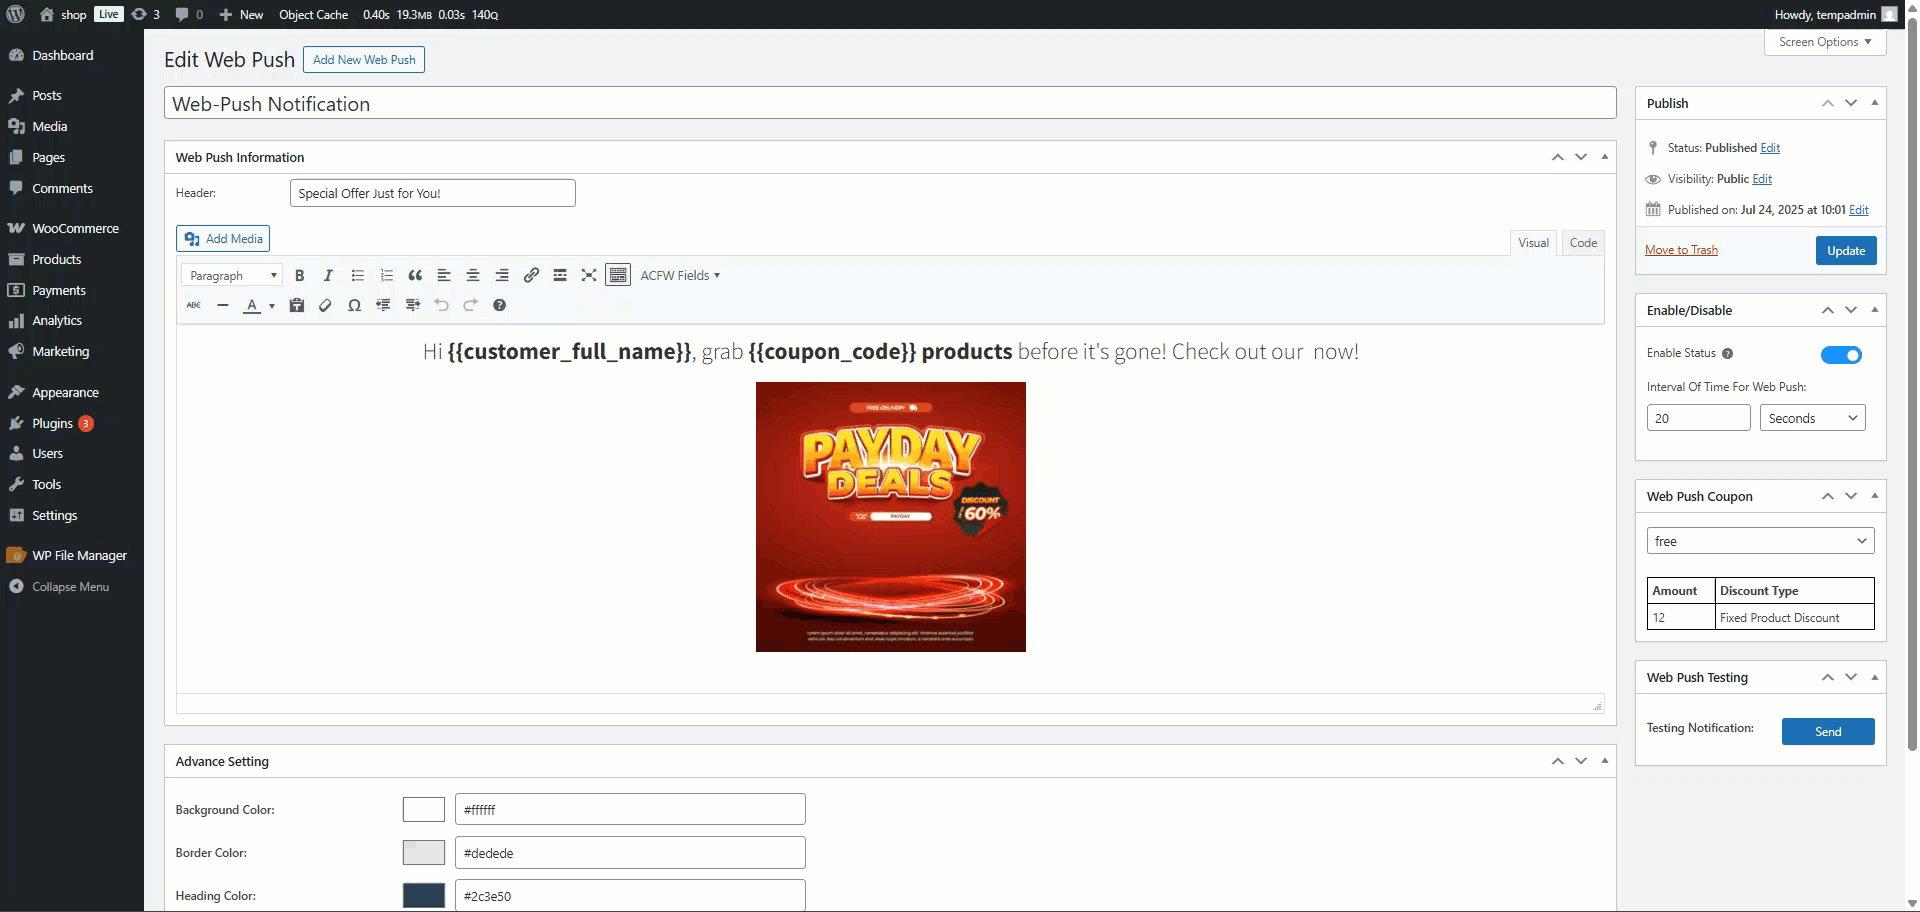
- Use the Publish/Update button to activate changes.
- The notification will be pushed to users once it is enabled and triggered by the specified interval.

Frontend Impact
- Go to the Website.
- The web push pop-up appears after the defined time delay.
- Popup displays a custom message, coupon code, or product promotion.
- Smooth animations (e.g., fade-in, zoom-in) enhance the display.
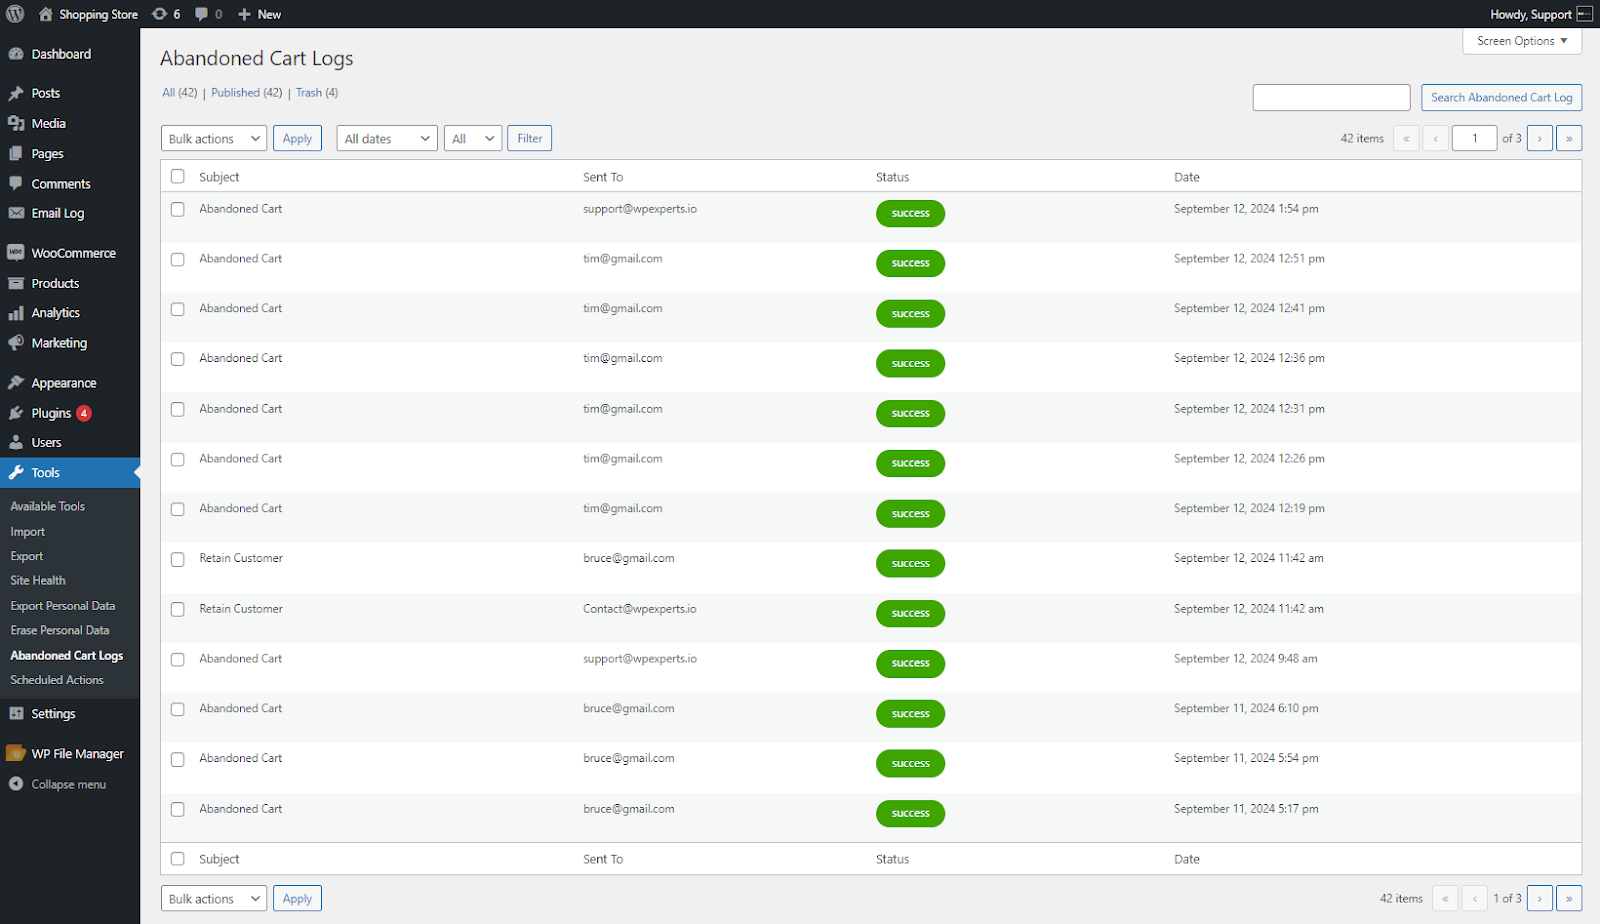
Abandoned Cart Logs
↑ Back to top- The logs of the emails sent to the admin and the user will be visible in the Abandoned Cart Logs. Go to WordPress Admin Dashboard > Tools > Abandoned Cart Logs.
Dashboard
↑ Back to top- Go to WordPress Admin Dashboard > Abandoned Cart > Dashboard.

- The Dashboard will load for the admin, giving the admin insights into key metrics and performance.
- The Dashboard has been divided into four major sections.
- Top Metrics Cards
- Sales Graph
- Email Records – Donut Chart
- Abandoned Cart Logs

- A date filter is available for the admin to refine the dashboard data based on the selected date range.

- The dashboard data will appear for the date range selected in the date filter.
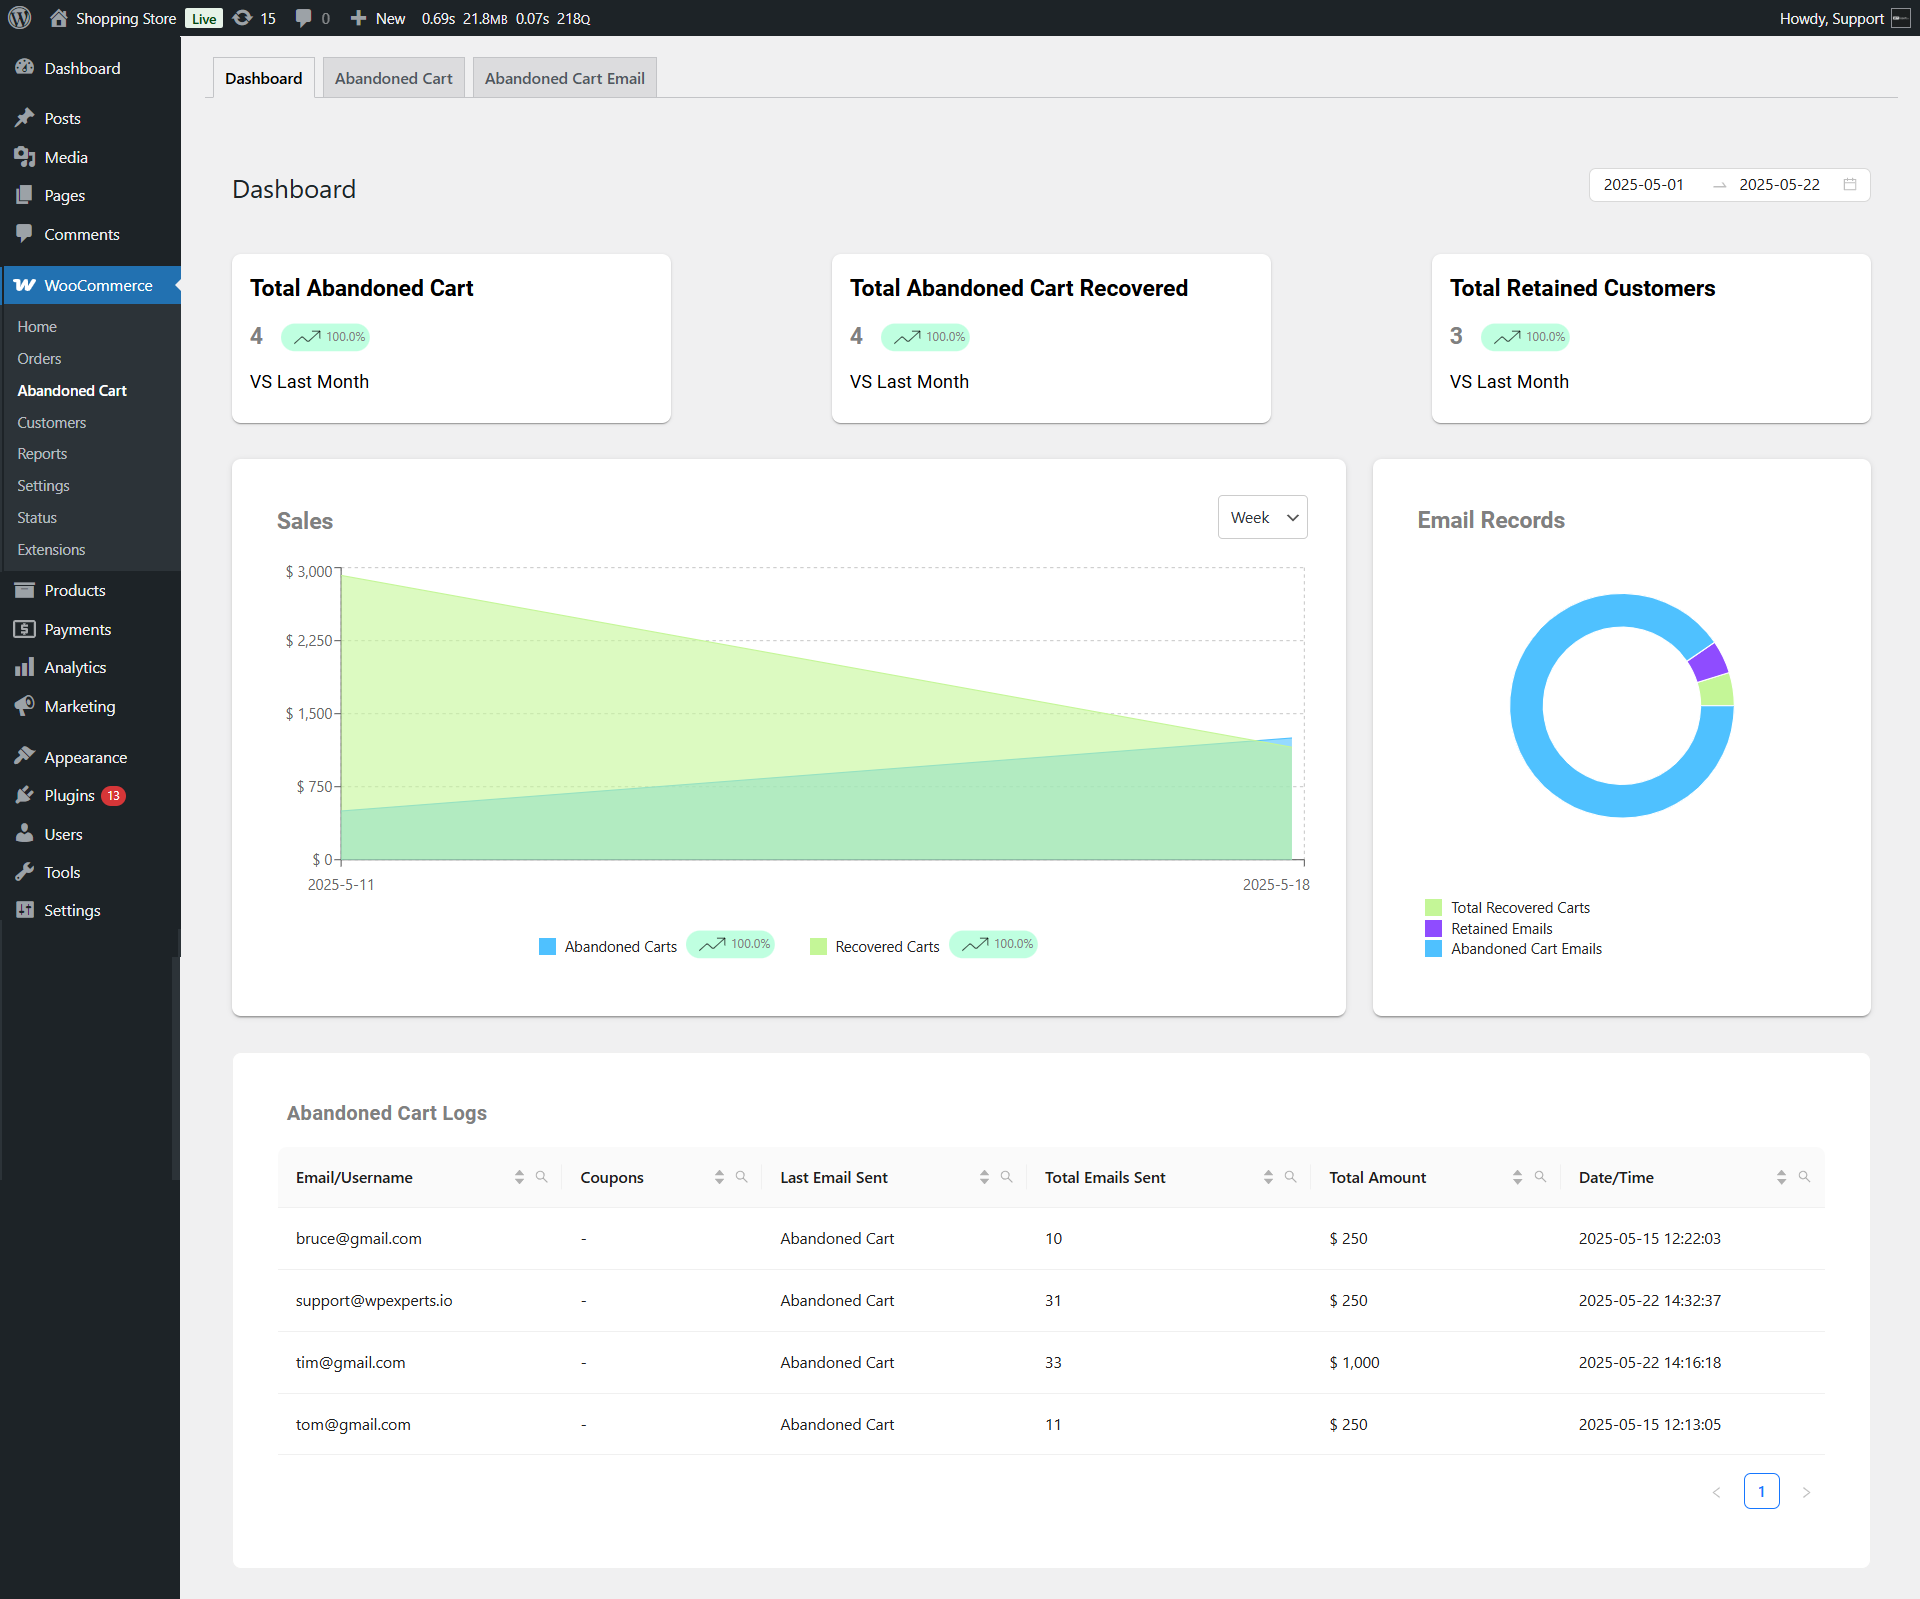
Top Metrics Cards
↑ Back to top- These three summary cards display quick stats:
- Total Abandoned Cart
- It shows the total number of abandoned carts and compares it with last year’s data using percentage indicators.

- Total Abandoned Cart Recovered
- Displays the number of carts successfully recovered via email campaigns or customer returns.

- Total Retained Customers
- Indicates how many users returned and completed their purchases, converting into retained customers.

Sales Graph
↑ Back to top- The graph in the middle of the screen shows sales trends for Abandoned and Recovered Carts.

- The admin can filter the data using the available filters based on Day, Week, Month, or Year.

- The graph will appear concerning the metrics selected in the filter.

- The admin can hover to view the details at a particular instance.

Email Records – Donut Chart
↑ Back to top- This is the Donut Chart on the right side of the screen. It visually displays the Total Recovered Carts, Retained Emails, and Abandoned Cart Emails.

- The admin can hover at any instance to view the details of a particular chart slice.

Abandoned Cart Logs
↑ Back to top- This table offers a detailed overview of all abandoned carts, displaying key information such as the Email/Username, Coupons, Last Email Sent, Total Emails Sent, Total Amount, and Date/Time for each cart entry.

- The admin can utilize the filters next to each column header to easily sort and filter the data based on specific values or criteria.

- The graph will appear using the selected filter.
