Documentation of WooCommerce Multi Inventory Management Extension.
Installation
↑ Back to top- Download the .zip file from your WooCommerce account.
- Go to: WordPress Admin > Plugins > Add New and Upload Plugin the file you have downloaded.
- Install Now and Activate.
More information at Install and Activate Plugins/Extensions.
Initial Setup:
↑ Back to topAfter activating the WooCommerce Multi Inventory Management extension, you can see a new “Multi Inventory” option under the WooCommerce admin menu. The extension settings can be accessed from WooCommerce > Settings > “Multi inventory” tab.
Creating new inventory location:
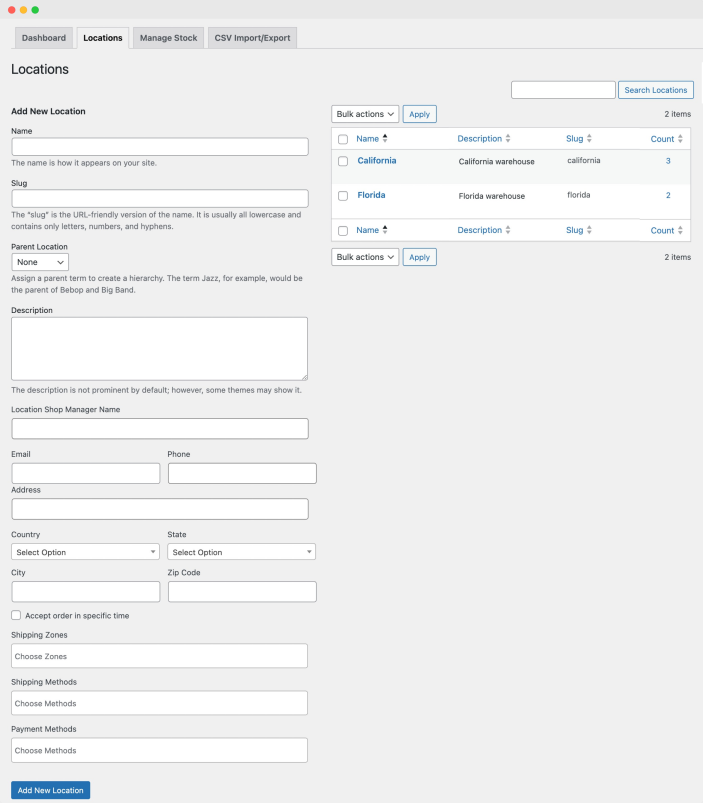
↑ Back to topYou can add unlimited inventory locations as per your business needs based on warehouses, stores and stock types. While creating new location you can add following options,
- Location name (Same will be displayed on frontend)
- Slug
- Select parent location if there is any
- Add location description
- Add location manager name
- Add location email, phone number and address
- Specify country, state, city, zip-code
- Accept orders in specific time only
- Restrict shipping zones, shipping method and payment gateways (Leave empty to keep same)
Once the inventory is created, you can see the inventory details and edit information at any time using the location listing grid on the right.
Adding location stock from product page
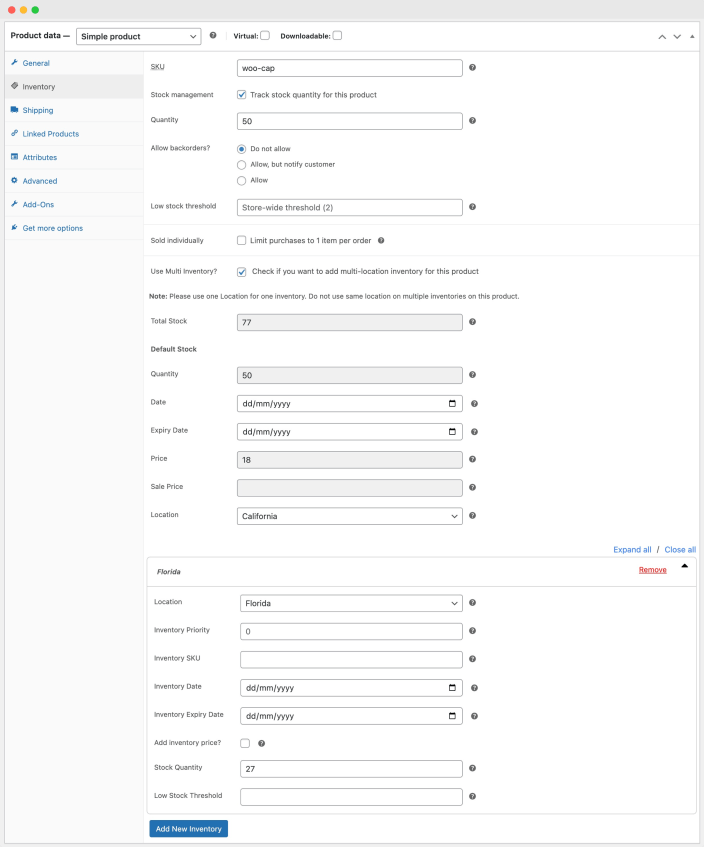
↑ Back to topOnce the inventory has been created, you can add location specific stock from your product detail page. Each product can have its own stock and personalized multi-inventory settings. To add stock on product level enable “Track stock quantity for this product” and then select checkbox “Use Multi-Inventory”. The extension keeps the default product stock active by using that stock as first main/default location stock. You can customize and view following while setting up multi location stock from product page.
The total stock
↑ Back to topThe sum of all stock available across different inventory locations including the default location)
Default location
↑ Back to topIts the default product stock which can be assigned to a location. Instead of overiding the default stock, this extension keeps the default stock field active and allows you to assign that stock to any location.
-
- Stock quantity shows the stock added in WooCommerce default stock field
-
- Add start and expiry date for default stock
-
- The extension will inherit the standard product price as price for this stock. To change the price, you need to change the standard and special price of the product
-
- Select location for the default stock
Adding custom inventories:
↑ Back to topClick on “Add new Inventories” to add more stock by different locations. You can add stock for all or specific locations that you have created in first heading (Creating new inventory location:). You can customize following options for inventories,
-
- Select inventory location
-
- Specify inventory priority and SKU
-
- Add inventory start and expiry date for default stock (Leave empty if you don’t wish to use it otherwise the inventory will show expired once the expiry date is passed)
-
- Select “Add inventory price?” to add a different inventory price otherwise the extension will use existing product price
-
- Add stock quantity and low quantity threshold
Import/Export inventories stock:
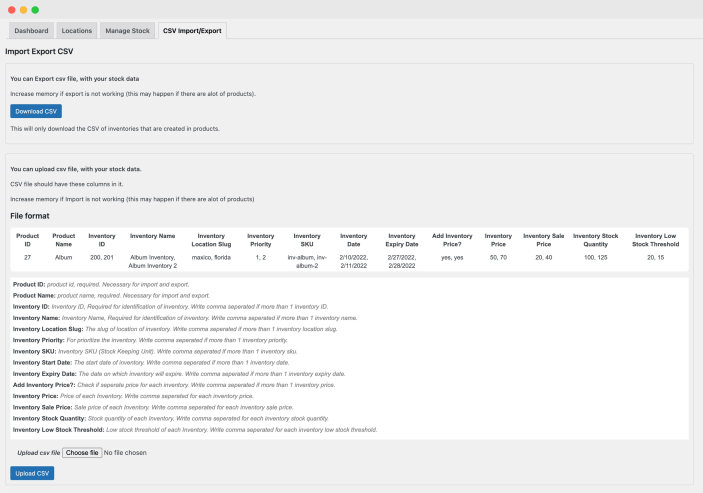
↑ Back to topYou can import/export stock for your inventories in bulk using a CSV file. The file format is shared to correctly import inventories for your location. If you are going to upload stock for the same inventory, be-sure that the extension will over-ride existing stock and add replace with new stock quantity.
Dashboard:
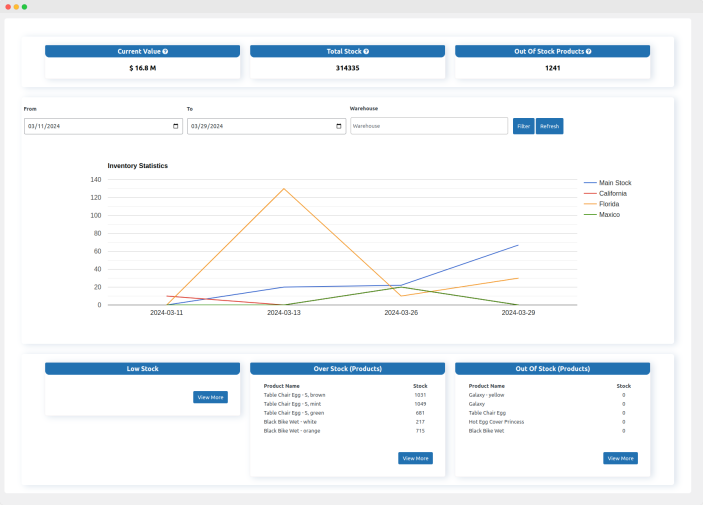
↑ Back to topThe dashboard shows the basic information about your product stock helping merchants to quickly view their stock quantity, value in dollars, overstock, low stock and out of stock products. The graph represents the total stock trends which starts building after the extension installation. The graph is updated every day at midnight.
Managing stock using list view:
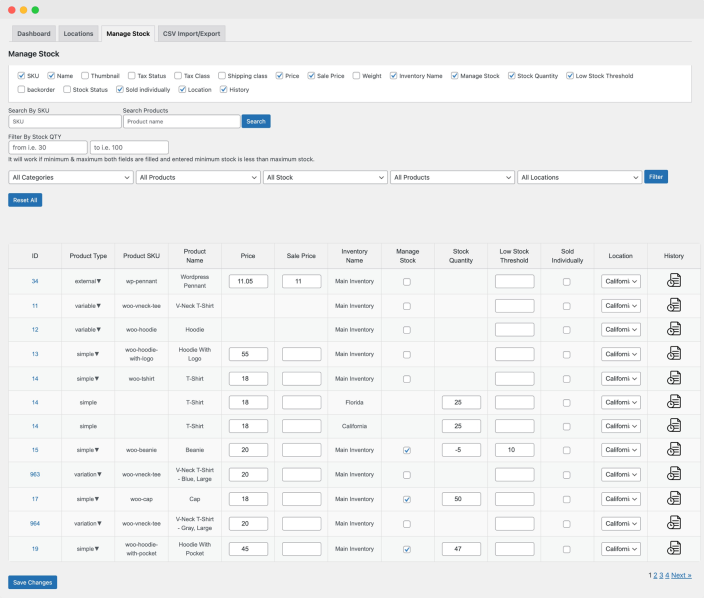
↑ Back to topThe extension provides a list view table to let store admin view and update stock of different products from the same page. Instead of visiting every page, the store admin can see stock, price and other details of entire catalog. You can add/update stock of any product or variations against default or custom inventories locations. Using the filters and advance search, you can quickly find required products to make adjustments.
Extension Settings:
↑ Back to topYou can customize following extension settings from WooCommerce > Settings > Multi Inventory tab.
General:
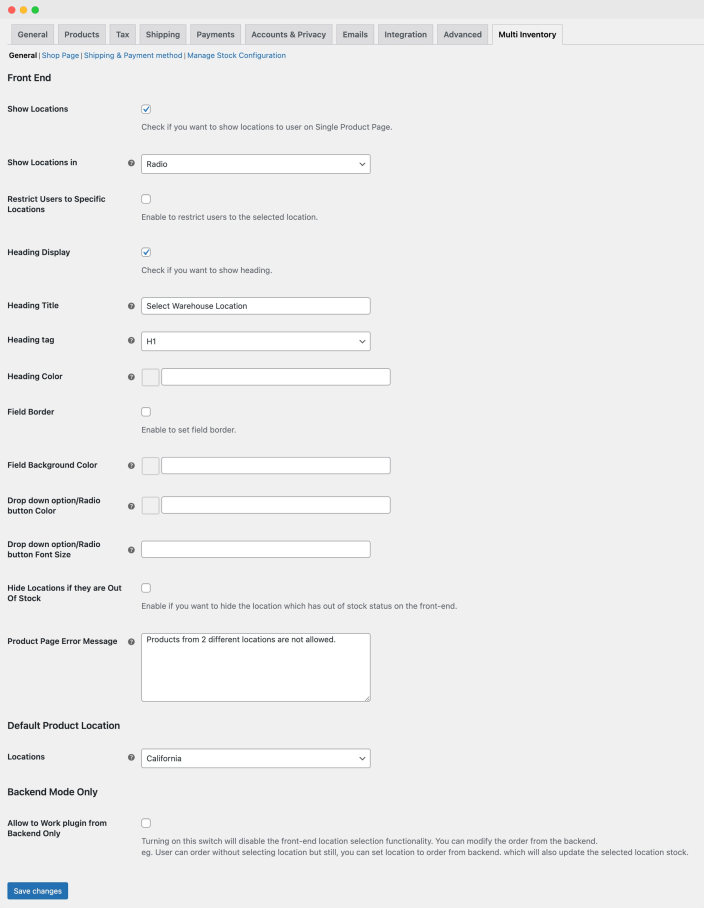
↑ Back to top- Enable checkbox to show inventories selection dropdown/radio button on product pages
- Show inventory selection as dropdown or radio buttons
- Restrict/hide specific locations from customer selection
- Enable and customize inventory selectbox heading text, color and more
- Enable border for entire inventory selection area on product page
- Customize colors if needed
- Hide out of stock locations from frontend
- Customize error message when customer adds same product from 2 different locations
- Set a location for default inventory stock
- Enable backend mode only (Customer won’t see locations – only admin can see locations and reduce stock from appropriate location after order is placed.)
Shop page:
↑ Back to topFrom the shop page settings tab, you can customize following options,
- Enable inventory name and stock quantity display on listing page
- Show inventories prices
- Hide out of stock locations
- Show location filter in default WooCommerce filter widget.
Shipping & payment method:
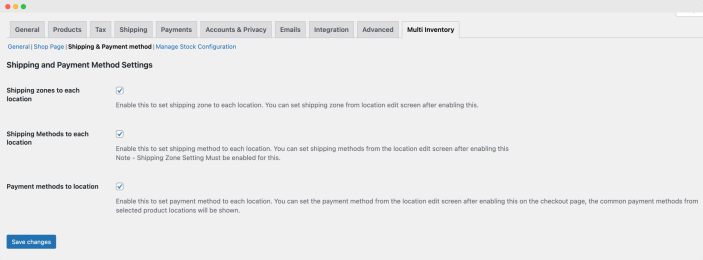
↑ Back to topSelect these checkbox if you wish to restrict shipping zones, shipping methods and payment methods in specific locations. Once these checkboxes are enables, you should be able add restriction while creating new or editing existing location from WooCommerce > Multi Location > Locations.

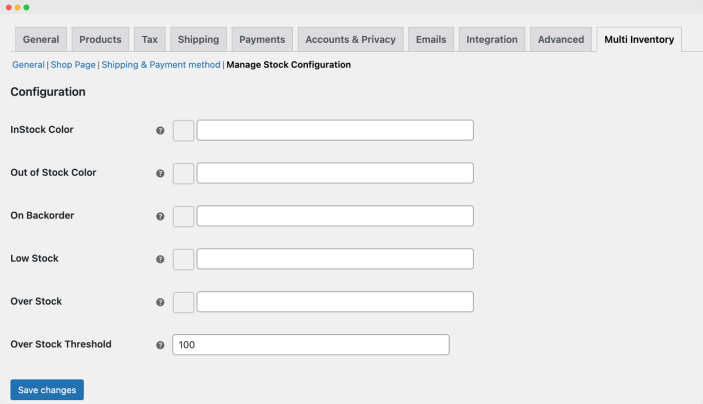
Manage stock configurations:
↑ Back to topUsing this tab, you can customize colors for different stock statuses, these colors appear in WooCommerce > Multi Location > Manage Stock table that helps admin to quickly identify stock status through different colors.
