Installation Guide
↑ Back to top- Log in to your WordPress Admin Panel.
- Navigate to the WordPress Admin Dashboard > Plugins > Add New.

- Click the Upload Plugin button available on the top left corner of your screen.
- Next, click the Choose File button in the box below.
- Select the zip file you have downloaded and upload it.
- Click the Activate Plugin button.
Getting Started
↑ Back to top- Go to Admin Dashboard > WooCommerce > Settings.

- Navigate to the Emails tab.
- Click the New Advanced Order Notes tab in the Email column.
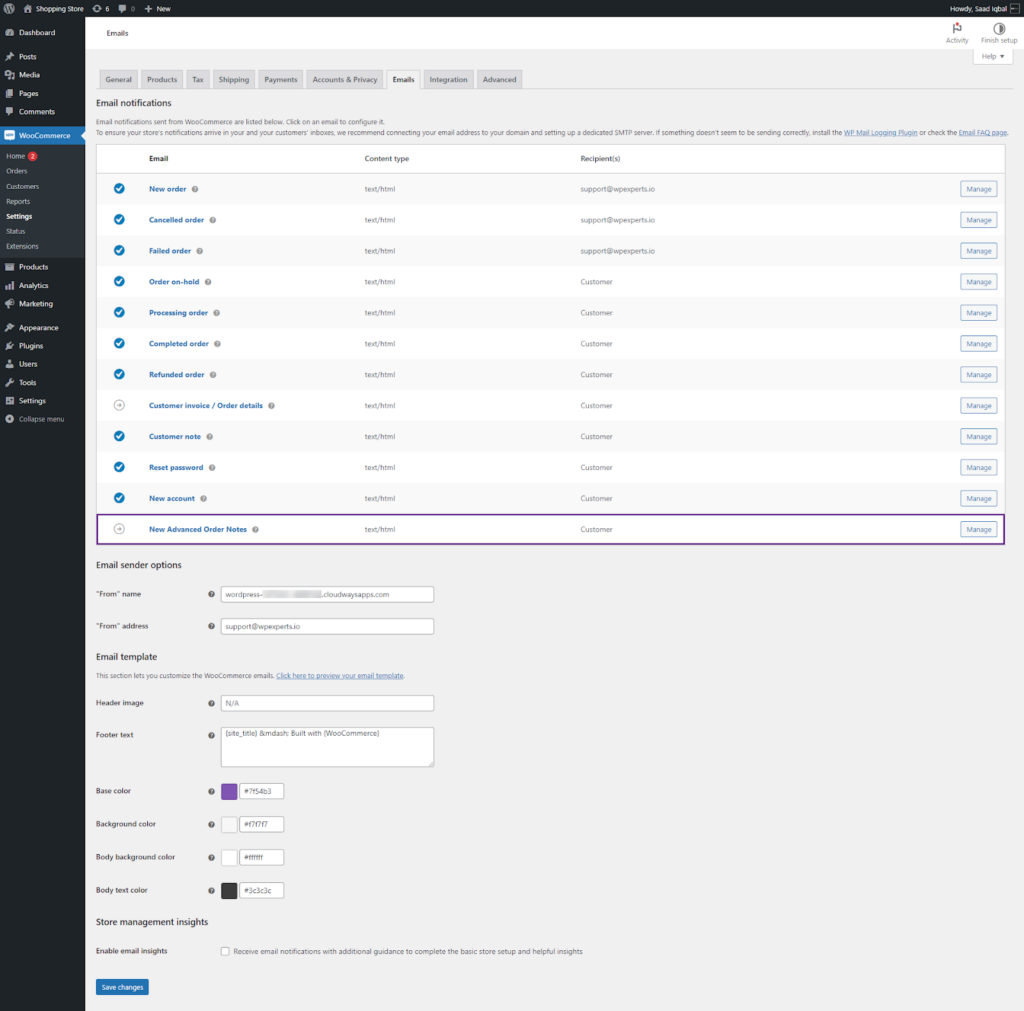
- Once done, you’re in the Advanced Order Notes Email section.
- There are two options available under this section:
- Customer Email Subject
- Customer Email Body

Customer Email Subject
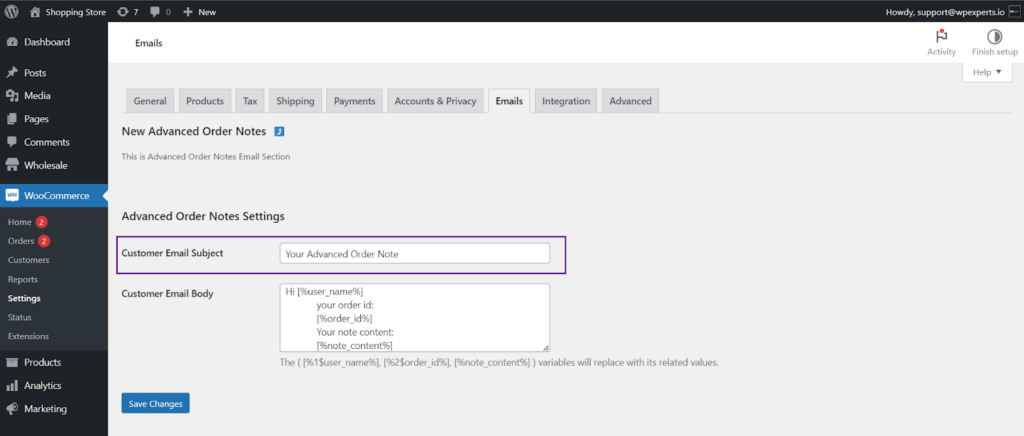
↑ Back to topUnder the Customer Email Subject settings, the Administrator can specify the email subject.
Front-End Impact
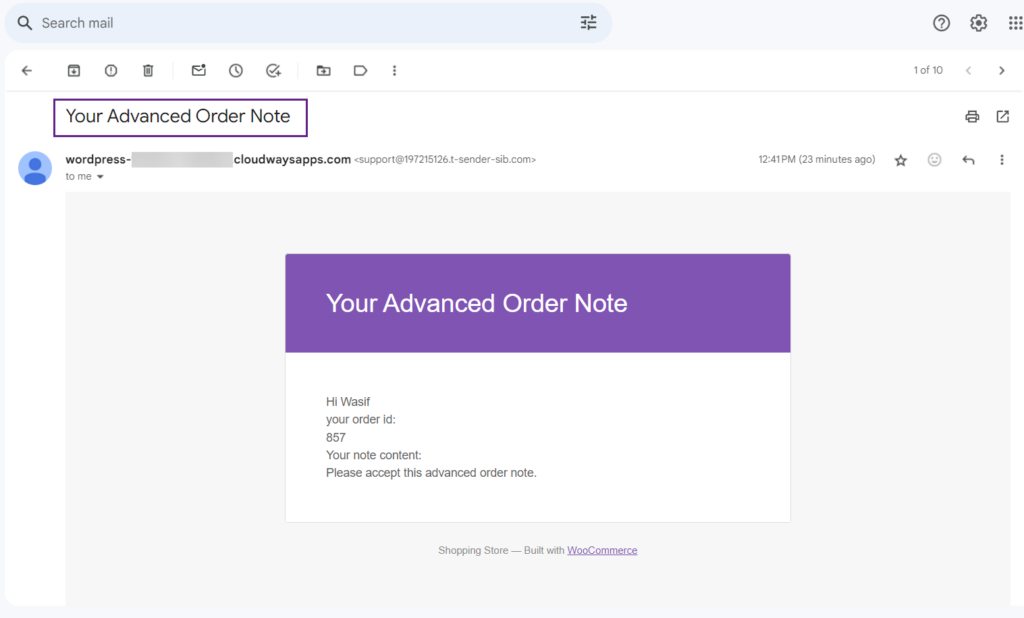
As you can see, the email subject I set up before is now visible on the front end.
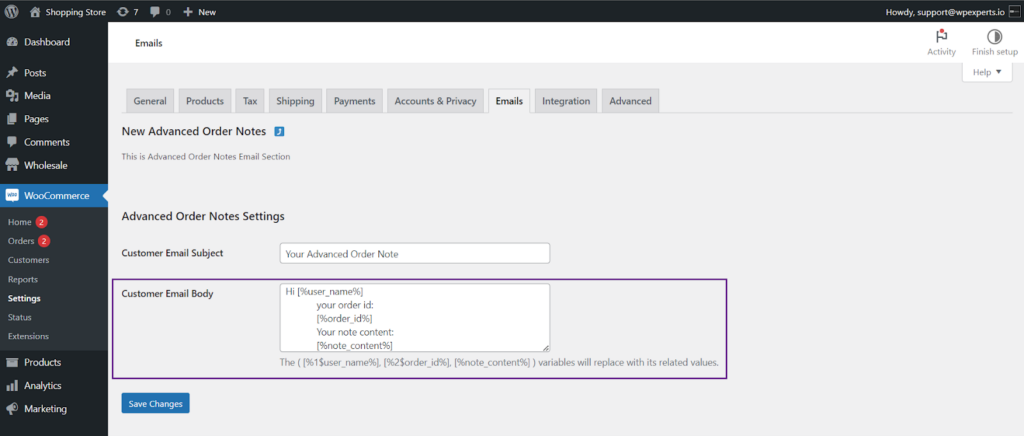
Customer Email Body
↑ Back to topThe Administrator can define the email body within the Customer Email Body option.
Front-End Impact
As you can see, the settings I set up above are visible on the front end

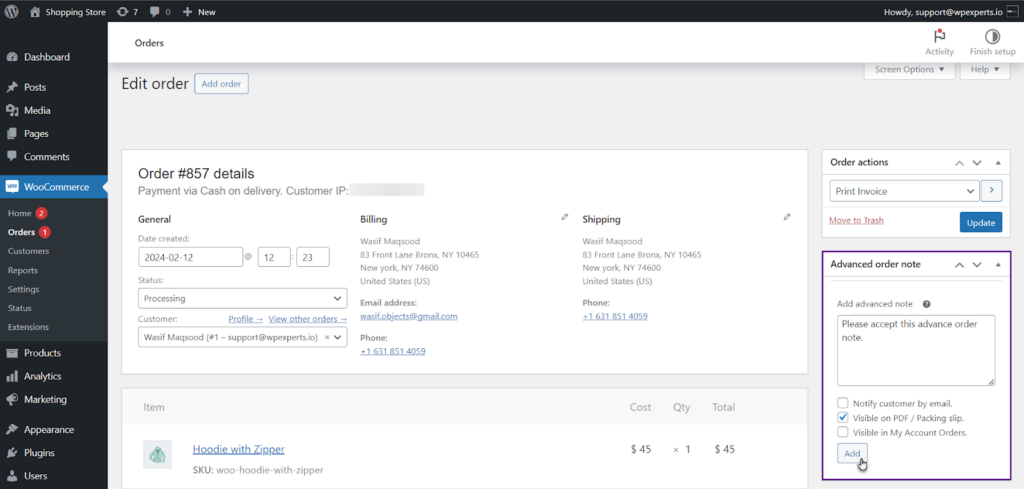
Advanced Order Note – Edit Order Page
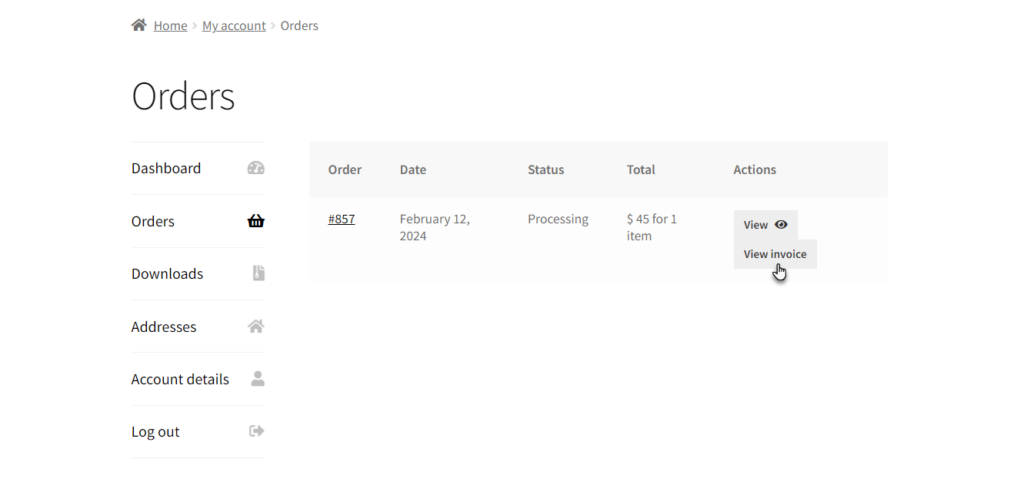
↑ Back to topVisible in My Account Orders
↑ Back to top- Go to Admin Dashboard > WooCommerce > Orders.
- Select the order for which you wish to send a note.
- Select the Visible in My Account Orders checkbox.
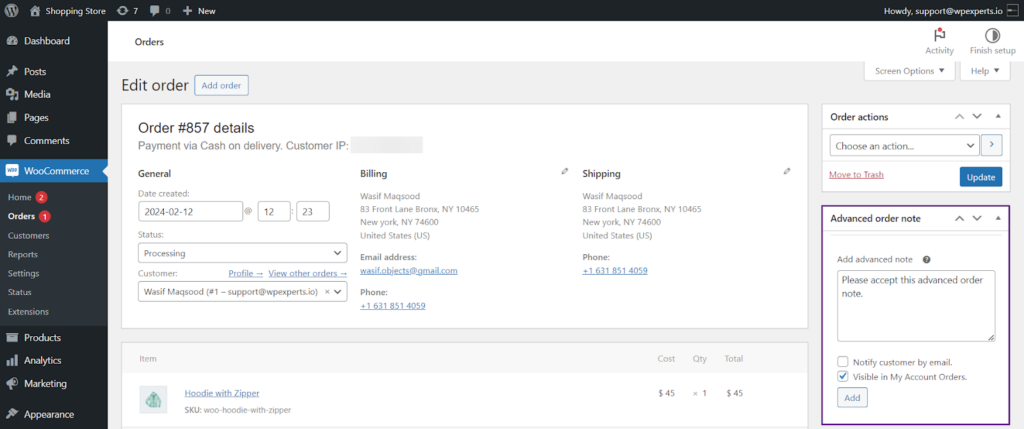
- When a note is added, and this checkbox is enabled, the note also displays on the customer’s My Account > Orders.
- Click the View button under the Actions column.
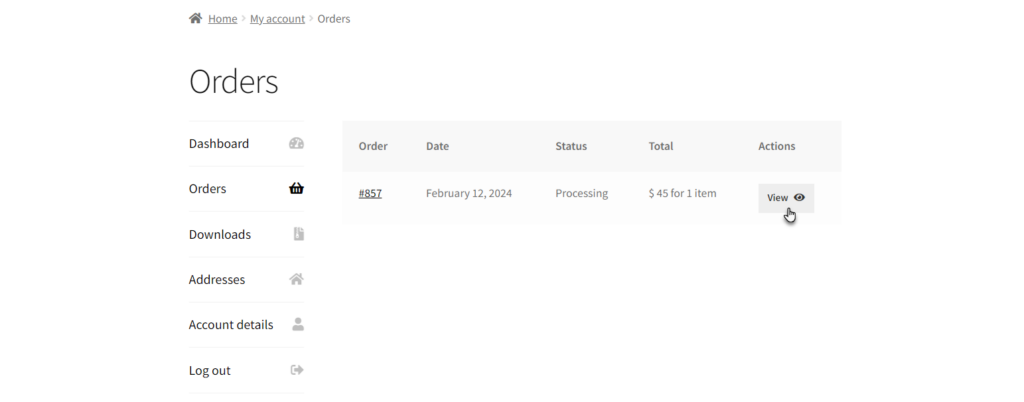
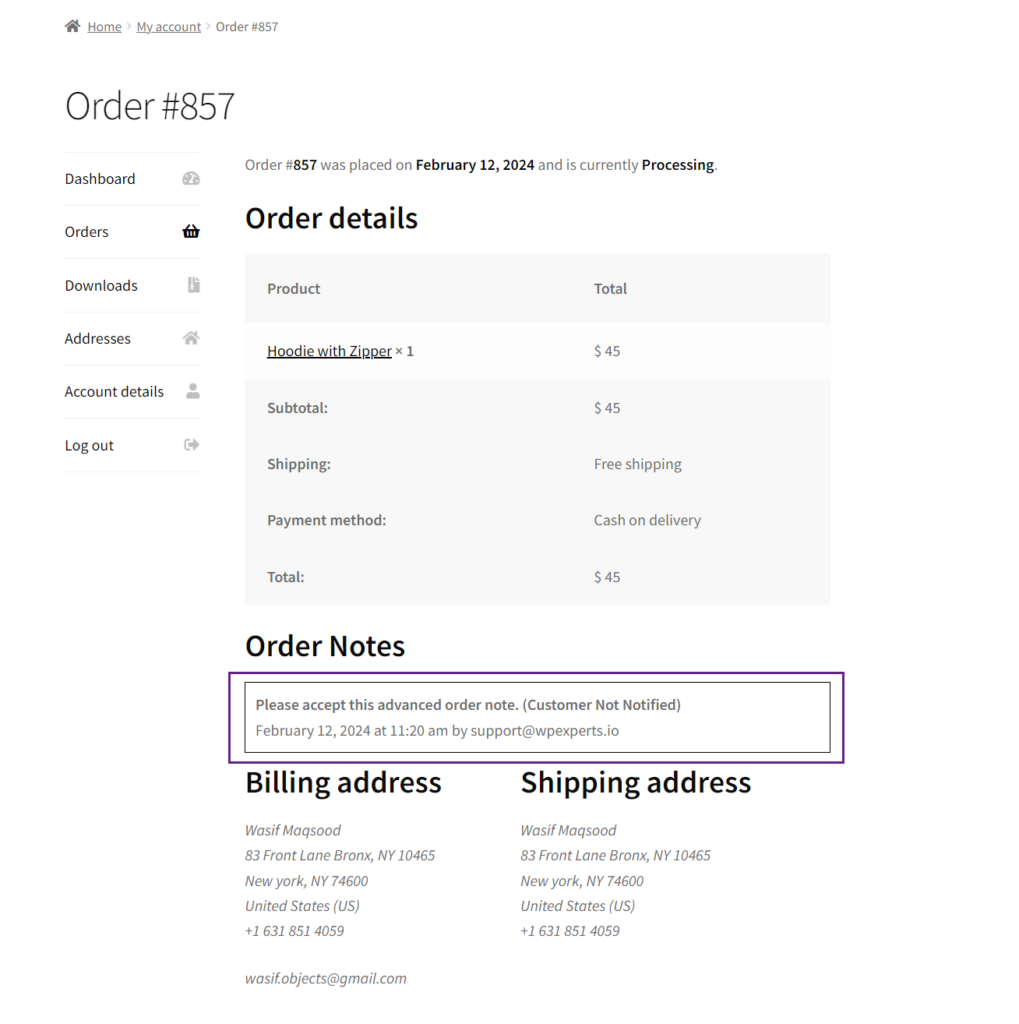
- Within the Order Details section, you will find the visible order notes.
Front-End Impact
Compatibility with WooCommerce Print Invoices and Packing Lists by SkyVerge
↑ Back to topVisible on PDF / Packing slip checkbox
↑ Back to top- Go to Admin Dashboard > WooCommerce > Orders.
- Select the order for which you wish to send a note.
- Once done, a new checkbox is added in the Advanced order note section titled Visible on PDF / Packing slip.

- Check mark the Visible on PDF / Packing slip checkbox.
- Choose the Print Invoice option from the Order Actions dropdown menu.

- Click the Add button.

Front-End Impact
- When Visible on PDF / Packing slip is enabled, your Advanced Note will be visible on the PDF/packing slip.
- The View Invoice button will be visible beneath the View button associated with the order to which you added your advanced note.
- Go to My Account > Orders.
- Click the View Invoice button.
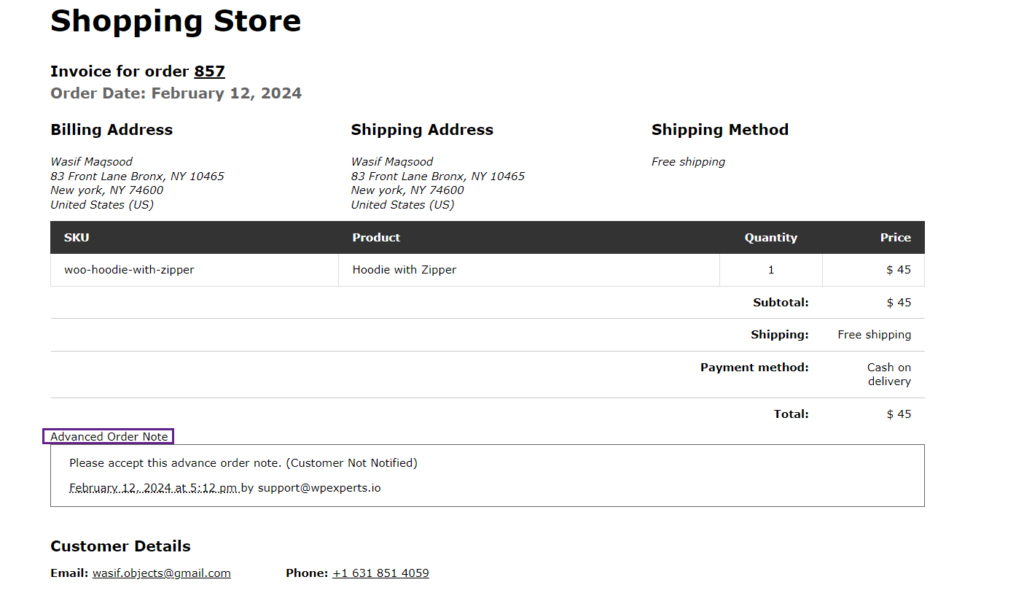
- As you can see, the advance order note is visible on the front end of the invoice slip.

PDF Order Notes Header
↑ Back to top- Install the Sky Verge PDF/Packing Slip Plugin plugin.
- Once done, a new option will appear under the Customer Email Body option, labeled PDF Order Notes Header.
- In the PDF Order Notes Header option, the Administrator can set the header for the PDF file.
- Set the PDF Order Note according to your wish.
- Once done, click the Save button.

- Add an Advanced Order Note.
- Select the Visible on PDF / Packing slip checkbox.
- Choose the Print Invoice option from the Order Actions dropdown menu.

- Once done, click the Add button.
Front-End Impact
As you can see, the PDF header is visible on the front end of the invoice.