Marketplace Overview
↑ Back to topThe catch is one of the leading eCommerce marketplaces in Australia, with an exceptional growth record. It has set the bar high for other marketplaces by providing innovative shopping experiences to its customers. The platform has delivered invariable results to a competitive market by accomplishing relationships with suppliers, developing a world-class IT platform, and investing in its supply chain.
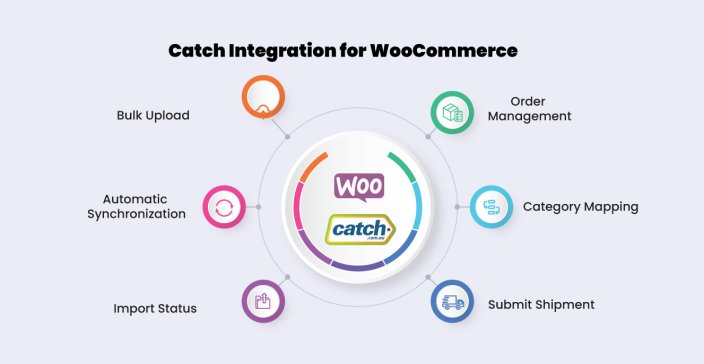
Catch Integration for WooCommerce
↑ Back to topThe integration allows you to manage your orders from a central platform and facilitates the easy listing of products on Catch directly from the existing WooCommerce store. Manage your inventory and stocks in a synchronized manner and stay updated at all times.
Key features of the integration
↑ Back to top- It allows the admin to perform product-related tasks such as product upload, product archive, and product view using the bulk upload feature.
- Upload hundreds of products in just a few clicks.
- Import orders from Catch marketplace to WooCommerce and manage them from a single platform.
- Create different profiles for every product and upload them based on those profiles, easing the uploading process by eliminating repetitive steps.
How to get started with a Catch Seller Account?
↑ Back to topTo get started with the Catch seller account, go through the link here.
Once you open the link, you will be redirected to the seller panel of the Catch marketplace.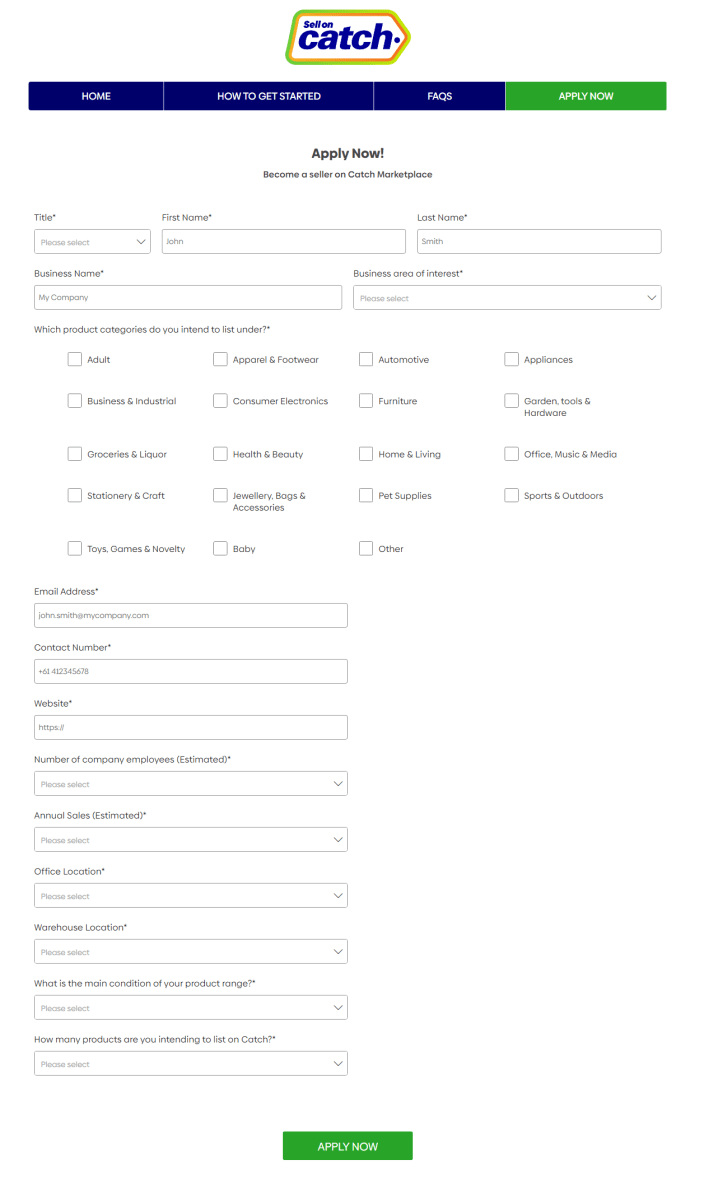
Fill in the required details and click on the Apply Now button.
Once your account has been approved, click here
to get API keys. You will be redirected to the API keys panel, as shown in the screenshot below.
WooCommerce Catch Configuration
↑ Back to topOnce you are through with the registration process on Catch marketplace, establish a connection between your Catch seller account and the WooCommerce store. Simply use Catch integration for WooCommerce and enjoy seamless synchronization between the two platforms.
Connect your store with WooCommerce
↑ Back to topClick on the Catch menu, as shown in the screenshot below.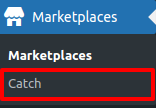
Click on Add account button and enter the API key that you obtained from the previous step. Select the operation mode and then hit the Authorize button as shown below.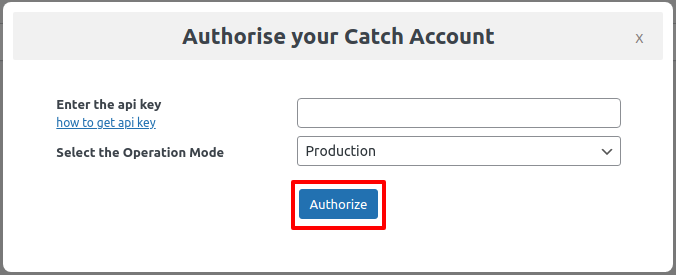
After that, hit on the Configure tab.
Global Settings
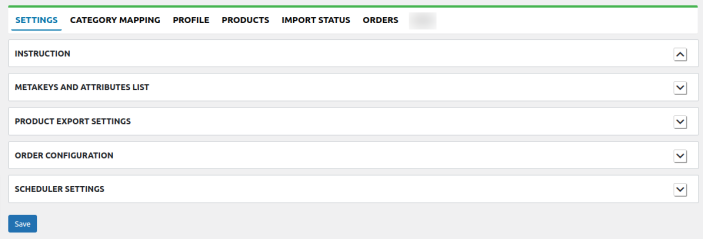
↑ Back to topThe Global Setting for Catch include-
- The meta keys and attributes list section helps you choose the required meta keys and attributes required for product details.
- These meta keys and attributes can be further used in the Product export setting and for listing products on the Catch marketplace from the WooCommerce store.
- You can easily select the required meta key or attribute by expanding the meta keys and attributes list section and enter the product name/keywords.
- Configure the order-related settings in the Order configuration section.
- You can also automate the updates related to inventory, order and enable the features per Schedulers requirement.
- Meta keys and Attributes.
- Order Confirmation.
- Scheduler List.
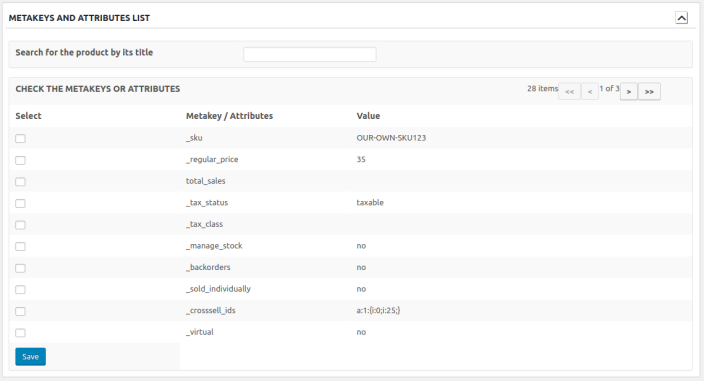
Meta keys and attributes list
↑ Back to top- The Meta-keys and Attributes List section helps you in choosing the required meta-keys or the specific attributes. These will store the product information on the WooCommerce store.
- Expand the meta-keys and attributes list section, enter the product name/keywords, and display the list under this section.
- Select the meta-keys or attributes as per requirement and save the setting.
Order Configuration
↑ Back to top- You can easily configure the order-related settings in Order Configuration.
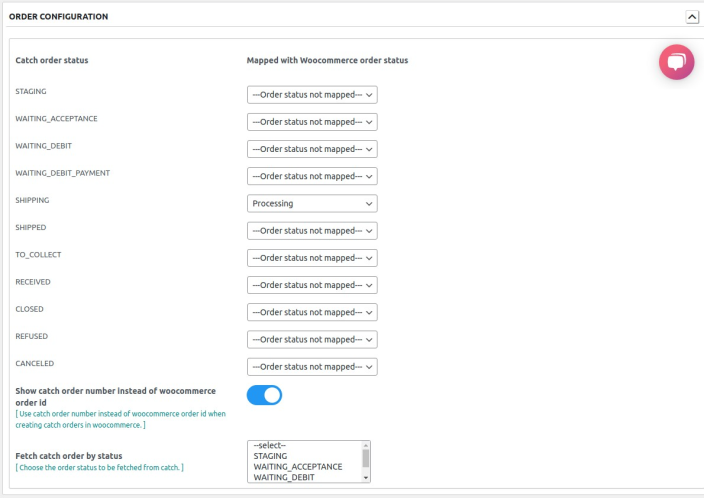
Show catch order number instead of WooCommerce order id:
Use Catch order number instead of WooCommerce order ID when creating Catch order in WooCommerce store. The feature lets you show the Catch order ID instead of the WooCommerce ID.
Fetch Catch order by status:
Choose the order status to be fetched from the Catch marketplace. You are provided with a different option to select from the drop-down menu. In case none of the options are selected, the default option is “WAITING_ACCEPTANCE.”
Schedulers
↑ Back to topEnable the Schedulers’ setting to automate the process related to inventory management, order management as mentioned in the captured image below: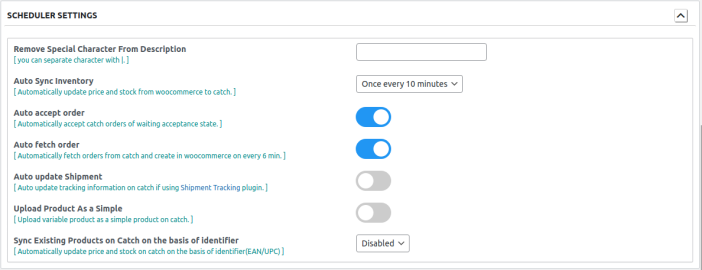
Auto Fetch order from Catch
Auto fetch Catch orders and create them on the WooCommerce store.
Auto Sync Inventory from WooCommerce
Auto-update stock and price of the products from WooCommerce to Catch.
Auto-Accept order
You can easily accept orders automatically with this feature.
Upload Product as simple
The feature lets you upload the different sets of product variations as a separate product on the Catch marketplace. Enable the key to make the feature work for you.
Sync existing products on Catch based on the identifier
You will be able to sync the existing product strictly based on their identifiers. Enabling the feature will automatically sync the existing products.
Category Mapping
↑ Back to topFollow these steps to carry out the category mapping.
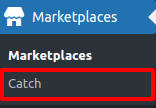
- Go to the WooCommerce admin panel, click on Catch below the Marketplaces menu at the left navigation bar.
- Click on the Category Mapping to map the categories.
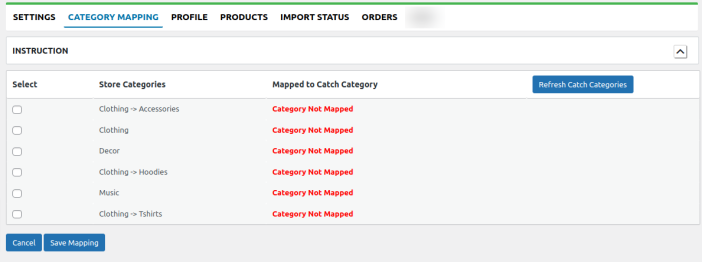
- In the assignage, select the checkbox and map the categories by selecting it from the drop-down, as shown in the screenshot below.
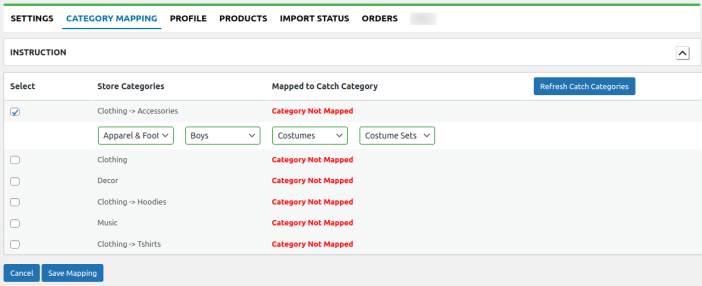
- Once you select all the categories, click on the Save button. It will then automatically create a profile based on the selected categories.
Profiles
↑ Back to topManaging Catch Profiles
↑ Back to top- Profile-based product uploading helps you create profiles for products with common meta keys and then upload the products in one go through uploading that profile.
- Admins can create new profiles and assign them to the group of particular products and then upload the profile on Catch.
- Admin can select the products and the corresponding meta keys while creating and editing the profile. These meta keys apply to all the products that are assigned to the profile.
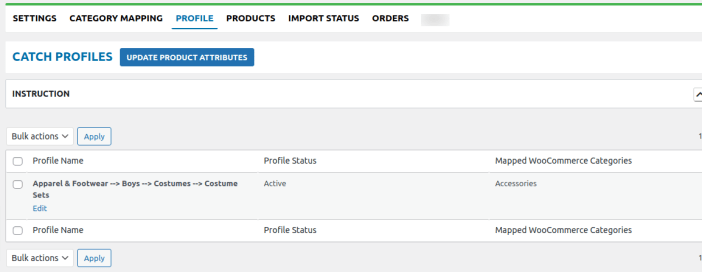
- You will get a list of products as specified in the image, select the products you want to edit, as shown-
- For this admin will perform the following tasks-
Edit the existing profile –
- Click on the Edit button just below the Profile, as shown in the screenshot above.
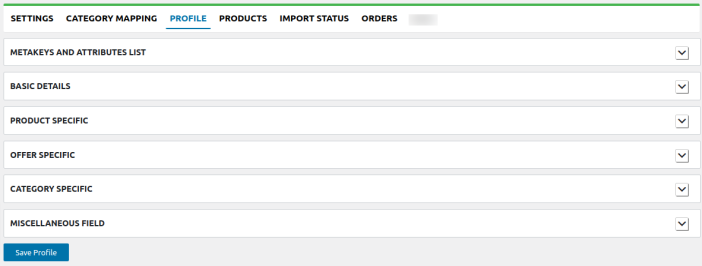
- Once you fill in all the details, click on the Save button.
Managing Catch Products
↑ Back to top- Admins can view all the product details such as assigned profile name, product selling price, and product inventory.
- Admin can edit the product meta-keys and assign the profile to the products. Also, the admin can upload the selected products to the Catch marketplace.
- The admin can also search the products with the product SKU.
Admins can perform the following activities-
- Uploading/Updating Catch Products
- Uploading/Updating Catch Offers
- Removing Catch Offers
Uploading/ Updating Catch Products
↑ Back to topThe product appears as shown below.
- To update the products, select the checkboxes places before the required products to Update products.
- Click the dropdown next to the Bulk action fields, click update products, and then click the Apply button as shown below.
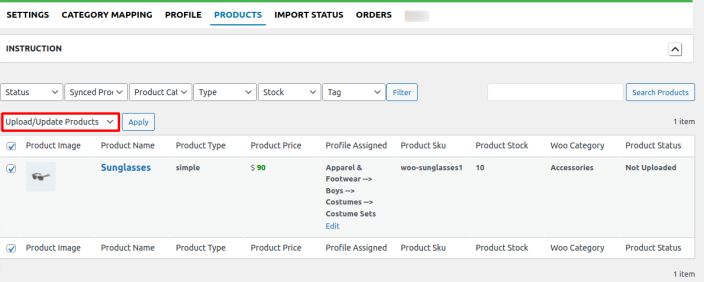
- The selected products are updated, and a success message appears on the page.
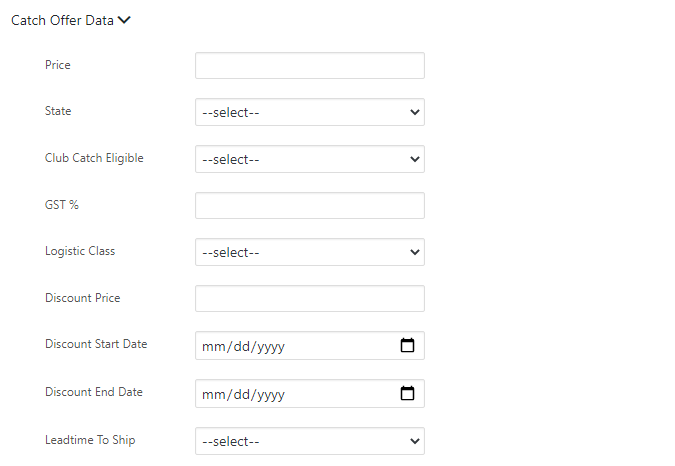
- Admins can also send unique information from WooCommerce to Catch marketplace for all the products. You can fill in the values in the Catch data section provided in the product edit section of WooCommerce.
- You can easily overwrite all the global and profile-level settings.
- Refer to the captured image below for the Product Data page:
Uploading/Updating Catch Offers
↑ Back to top- To update offers/update inventory on your products, the product page appears like this.
ss - Select the checkboxes placed before the products to Update Offers/ Update Inventory.
- Click the dropdown next to the Bulk action fields. Click Update offers/Update inventory and then click the apply button as shown in the image-
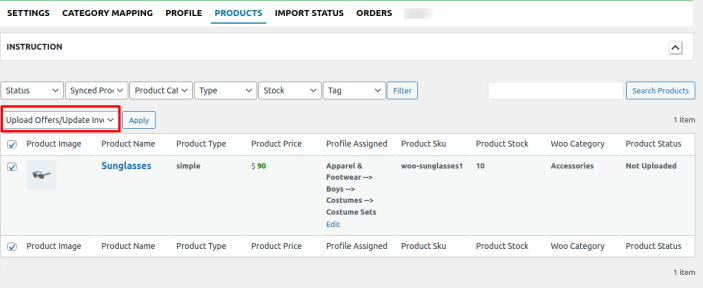
- The offers are updated, and a success message appears on the page.
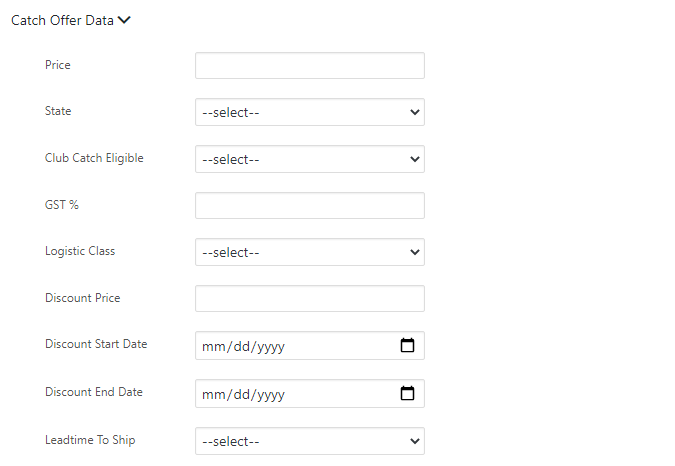
- The admin can also send unique information from WooCommerce to Catch marketplace for all products. You can fill in the values in the Catch data section provided in the product edit section of WooCommerce.
- You can easily overwrite all the global and profile-level settings.
- Refer to the captured image below for the Product Data page.
Removing Catch Offers
↑ Back to top- Select the checkboxes placed before the products to Remove Offers.
- You can easily overwrite all the global and profile-level settings.
- Refer to the captured image below for the Product Data page:
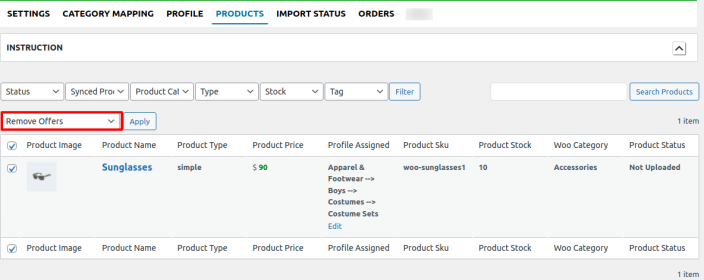
- Click the dropdown next to the Bulk action fields. Click Remove offers and then click the Apply button as shown in the image-
ss - The offer will be removed from the selected products, and a success message appears on the page.
Import Status on Feed
↑ Back to top- The admin can check the feeds of the products or the orders which are uploaded.
- Click on the view option as can be seen in the captured image below-
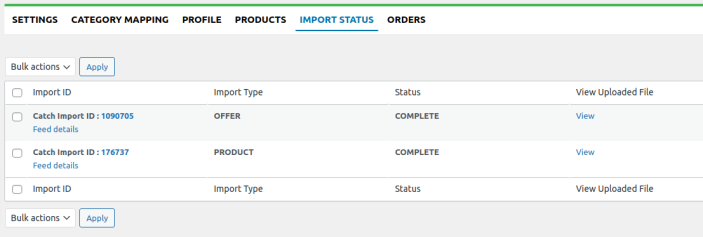
- You can quickly check the uploaded CSV file.
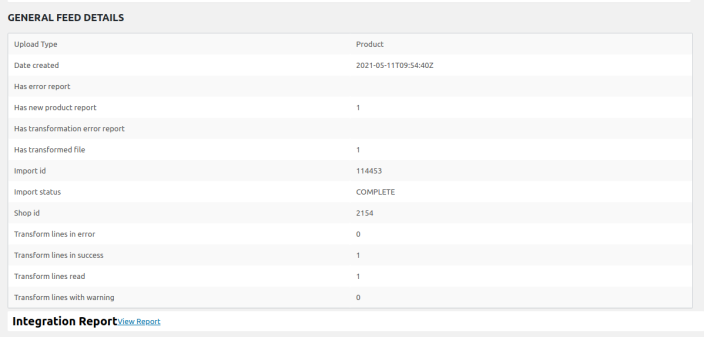
- When you click on the feed details, the information related to the number of products uploaded along with the number of products showing any error can also be seen.
- Refer to the image below for the General Feed Detail Page:
Catch Order Management
↑ Back to topThe order page appears as below.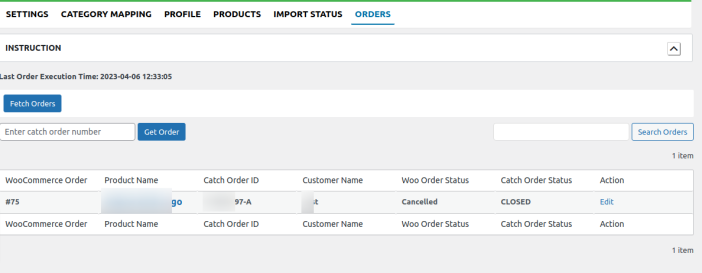
Click Fetch orders to fetch your orders. All the fetched orders will be listed as shown in the captured image above.
Get Order
↑ Back to topIf you want to get an order using Catch order ID, enter the catch order ID and click on the Get Order button. Refer to the image above.
You can also search orders from the “Search Order” option located on the right side.
Submit Shipment
↑ Back to topSubmit shipment provides you with various options for your fulfillment. Refer to the image below-
- Click on the edit options in the Order section, and you will be redirected to this page.
- Fill in the details related to your Shipping carrier code, name, URL for the shipping carrier, and the product’s tracking number.
- Click on submit, and your details for the product shipment will be submitted.
FAQs
↑ Back to top1. Is there any possibility to set different prices just for Catch marketplace while syncing products from WooCommerce?
Ans. Yes, you can set different prices while syncing products on Catch. You have two options available.
- The first one is by using the custom price option at the WooCommerce product edit section.
- The second option is to use the feature called “Markup”. You can increase the price of your products by a percentage or by a fixed amount.
2. Are the stock levels synchronized when it is placed on WooCommerce or Catch?
Ans. Yes, the stock is reduced on Catch once the order is placed on WooCommerce and vice versa.
3. Are there any limitations for products and orders syncing?
Ans. No, there is no limit for products and orders. Unlimited products and orders will be synced between both platforms at a specific time interval.
4. How can I manage those products which are already available on both platforms?
Ans. If the products are available on both the platforms and the product SKU is the same for each product, it will be linked automatically.
5. Is there any way to upload the products in bulk from WooCommerce, or do I need to upload them one by one?
Ans. Yes, there is an option of uploading products in bulk using the bulk action of the plugin.
6. Can I choose and update the selected products on Catch?
Ans. Yes, sellers can choose those products they want to list or update on the Catch marketplace.
7. Do I need barcode information to upload products on Catch?
Ans. Yes, barcode information is required to upload products on Catch. There is also a possibility of uploading products without a barcode if you have requested a barcode exemption from Catch Support.
8. Can I auto-upload the tracking details from WooCommerce to Catch?
Ans. Yes, you can upload the tracking information using the plugin. You need to fill in the tracking information in the section provided in the WooCommerce order edit page and hit the submit button.
Still have questions and need assistance?
Get in touch with our dedicated account managers, who will assist you throughout the onboarding process. Our team will be available 24*7 for your support.
