The
Crowdfunding for WooCommerce extension makes it possible to raise the funding or collect donations for the specific goals & meet the desired target through donations in a group. The extension is helpful to support the community by creating goals of desired target amount.
After downloading the plugin from WooCommerce follow the below instructions to install & activate the plugin.
- Login to your WooCommerce.com account dashboard.
- Navigate to Plugins > Add New.
- Click the Upload Plugin button at the top of the screen.
- Upload the crowdfunding-woocommerce.zip file you’ve downloaded from WooCommerce.com dashboard.
- Install and Activate the plugin.
After installing & activating the Crowdfunding for WooCommerce extension, add a new product.
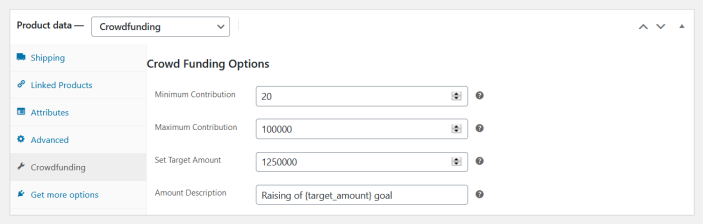
- Choose the product type to Crowdfunding.
- Click on the Crowdfunding product data tab to personalize your settings.
- Minimum Contribution: This options lets customers to enter the minimum amount for the contribution.
- Maximum Contribution: This option restricts customers to enter the maximum amount for the funding.
- Set Target Amount: Here you can enter the desired amount for the goal to raise the funding for.
- Amount Description: Here you can add the description for the created goal.
Once the extension is installed & activated you can find the
Crowdfunding menu in the admin menu. By clicking the
Crowdfunding admin menu you can setup some necessary options for the plugin.
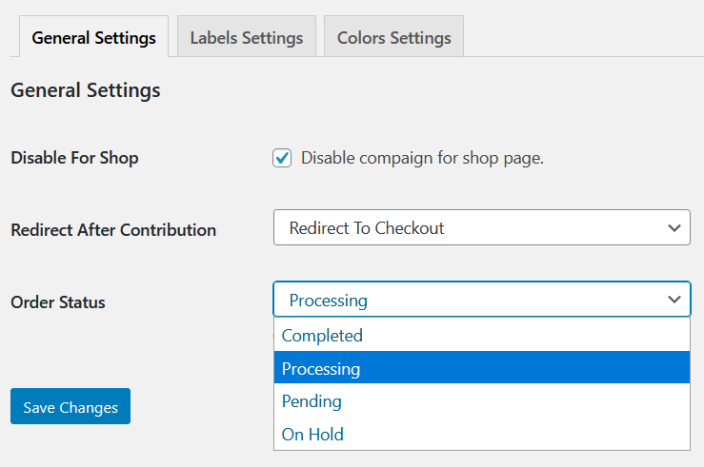 Disable For Shop:
 The extension allows you to enable or disable the crowdfunding products’ visibility from the shop page.
Redirect After Contribution: If you want to redirect the customers after contribution, You have two options to apply either:
- Redirect to Cart page
- Redirect to Checkout page
Order Status: Admin need to choose the order status for the contribution orders to effect the target goal from the following order status.
- On Hold
- Completed
- Processing
- Pending
The chosen order status will be used to effect the target amount for the goal on the order status change.
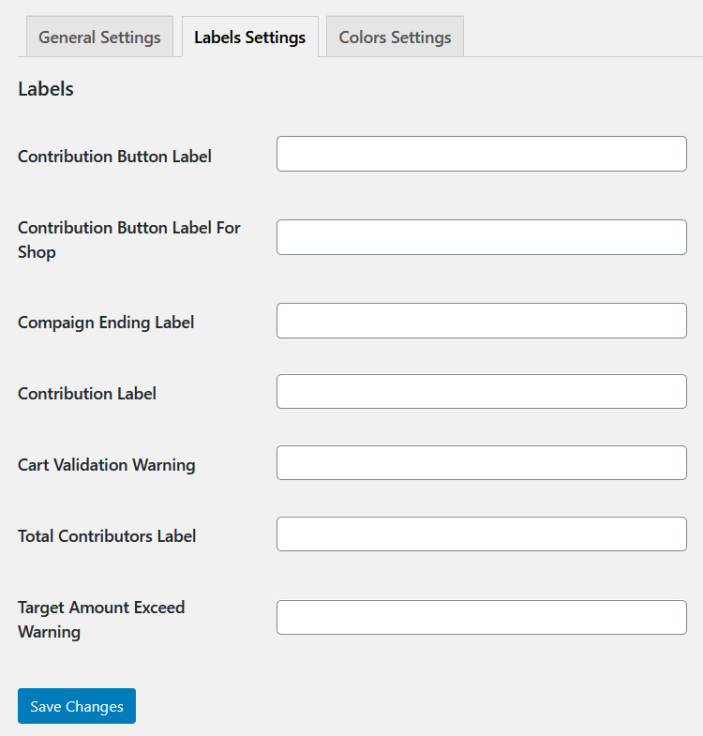
In the label settings, you can see the following settings.
Contribution Button Label: Admin can set the custom name for the contribution button label.
Contribution Button Label For Shop: You can add custom text for the shop page’s contribution button label.
Campaign Ending Label: Add the custom text for the campaign ending label.
Contribution Label: It allows the admin to add a custom name for the contribution label.
Cart Validation Warning: You can add custom text for the cart validation warning.
Total Contributors Label: Add the custom text for total contributors label.
Target Amount Exceed Warning: Add description for target amount exceed warning.
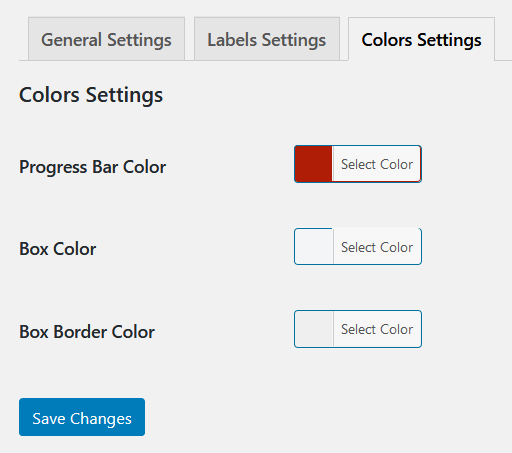
In the colors settings, you can see the following settings.
Progress Bar Color: You can add a custom progress bar color.
Box Color: However, you can also select the box color.
Box Border Color: You can add a custom box border color.