Installation
↑ Back to top- Download the .zip file from your WooCommerce account.
- Go to: WordPress Admin > Plugins > Add New and Upload Plugin the file you have downloaded.
- Install Now and Activate Plugin.
Configuration
↑ Back to topAfter activating the Custom Order Status extension, a new “Order Statuses” option will appear under the WooCommerce navigation menu in your WordPress Admin panel. Click to access the extension settings.
Creating custom statuses
↑ Back to top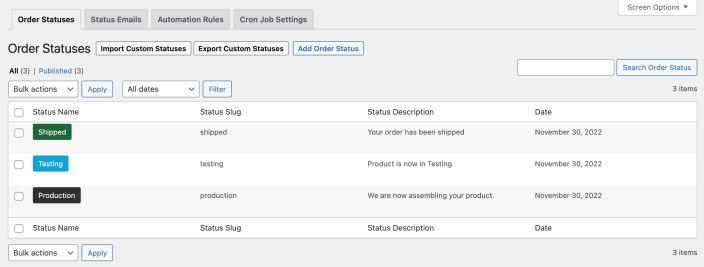
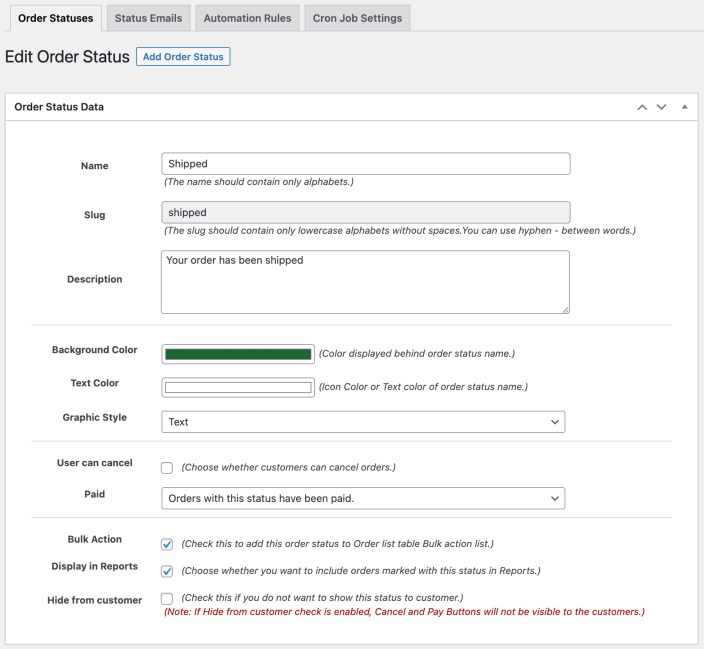
- Add status title, slug and description
- Choose a text or icon-based order status
- Customize icon, text and background color
- Allow users to cancel orders with the specified status
- Set payment status
- Orders are neither paid or nor require payment
- Orders with this status have been paid
- Orders with this status require payment (similar to pending payment).
- Include in bulk action of order listing page
- Hide this status from customers (My-Account orders listing & order detail page)
- Exclude order from report
Import export statuses
↑ Back to top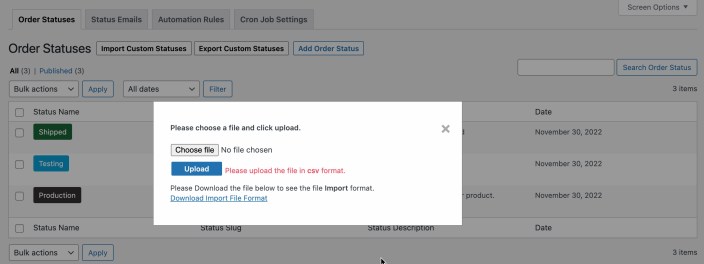
Assigning Order Statuses
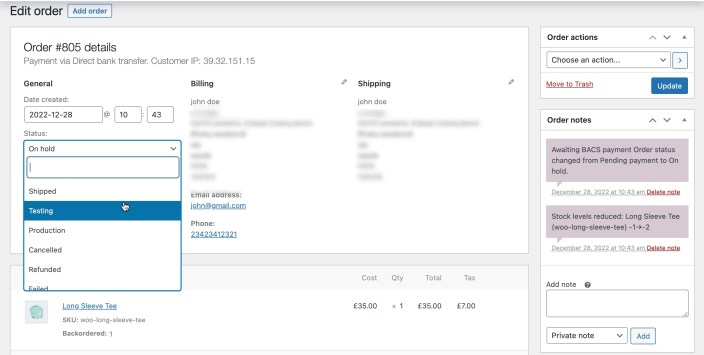
↑ Back to topAssign Order Statuses – Manually
You can assign order status from the admin Orders detail page or using the bulk action on the Orders listing page.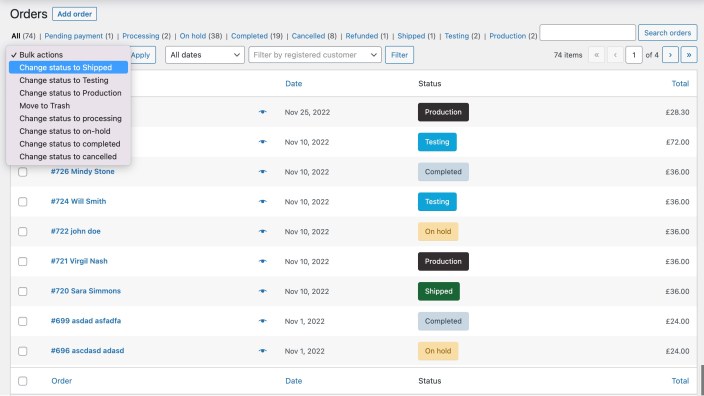
Assign Order Statuses – Automatic
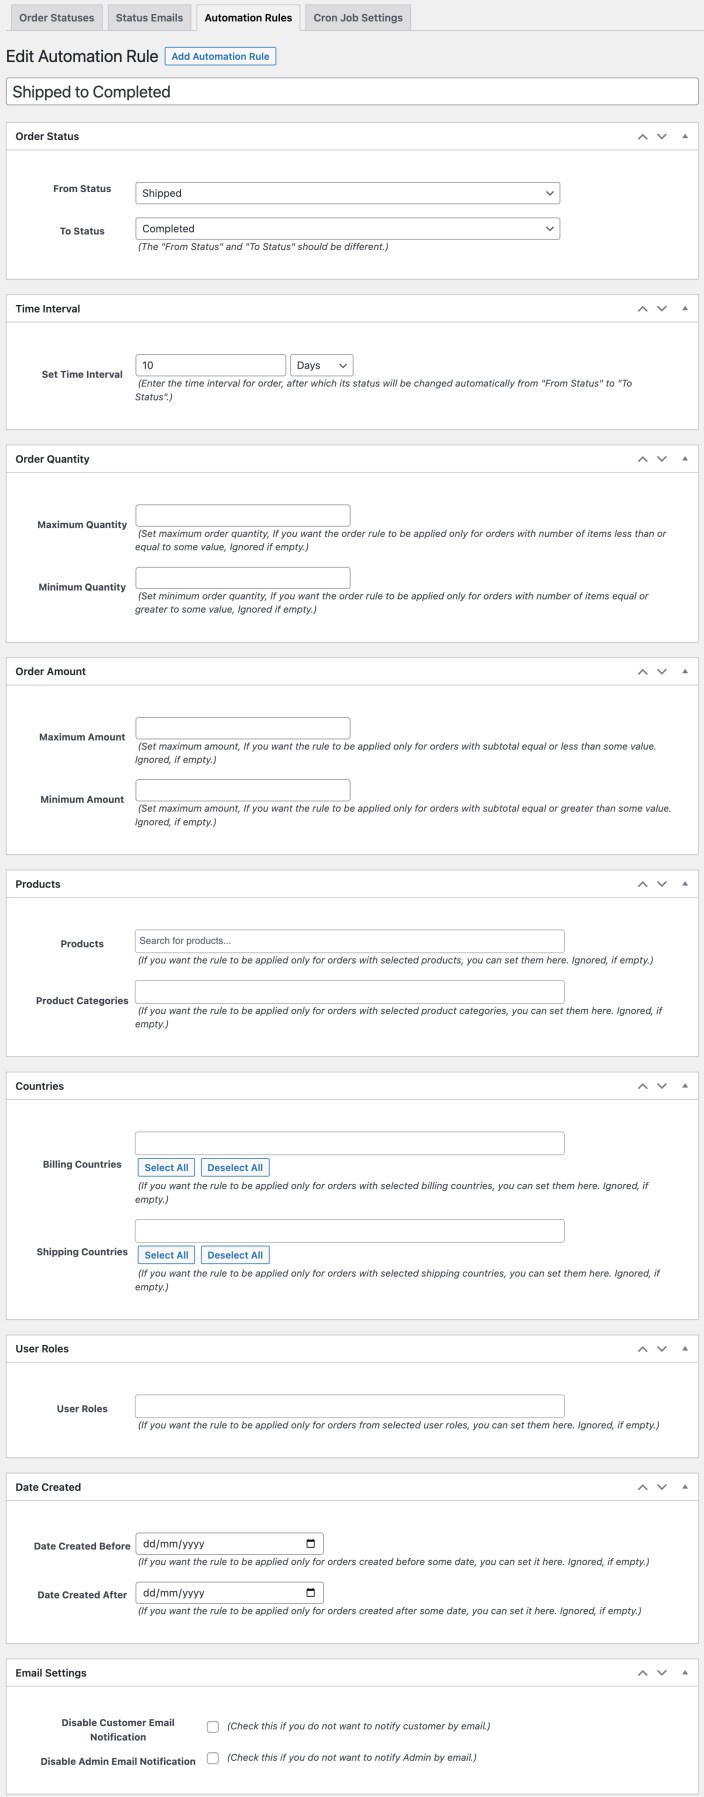
You can create multiple automation rules to assign different statuses to separate orders. While creating a new automation rule, you can customize the rule with the following options:
- Order status – Select current order status and new status to be assigned. The extension will switch the status, it does not assign an additional status.
- Condition – Only the orders matching the current status will change to the new status based on the following conditions:
- Time Interval – Time passed since placing the order; define the amount of time in minutes, hours or days after before new statuses are assigned.
- Order Quantity – Minimum and maximum order quantity ranges to change statuses. As soon as the order moves into the specified range, the status will update.
- Order Amount – Minimum and maximum order amount ranges to change statuses. As soon as the order moves into the specified range, the status will update.
- Products/Categories – The order includes specific products or categories.
- Countries – The order belongs to a specific billing or shipping country.
- User Roles – The customers linked to the order have a specific user role.
- Order Date – The order creation date falls within a defined range. As soon as the order moves into the defined range, the status will update.
- Email Notifications – You can disable email notification for customers and admin.
Email Notification
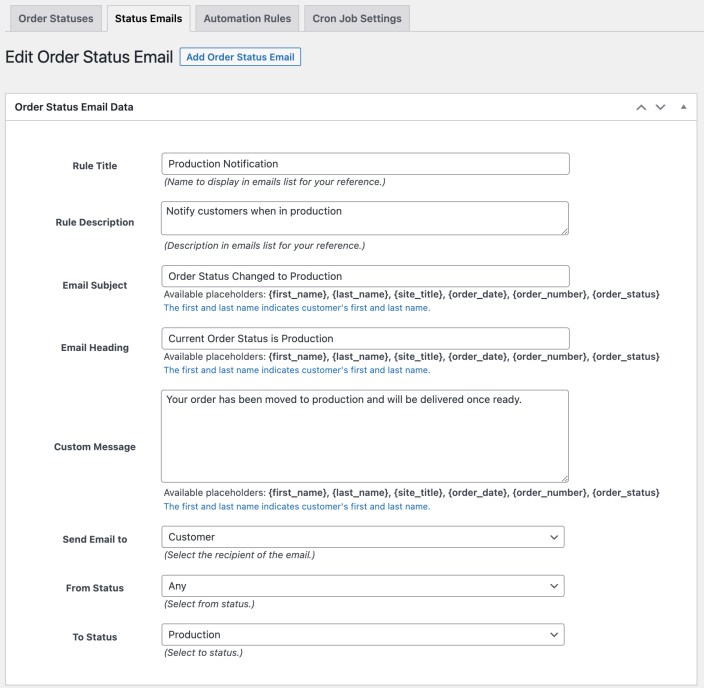
↑ Back to top While creating new email notification rule, you can:
- Set rule title and description for internal use
- Customize email subject, heading and message using various variables
- Choose to send email to admin or customer
- Select current and new status to trigger email
CronJob Settings
↑ Back to top
FAQs:
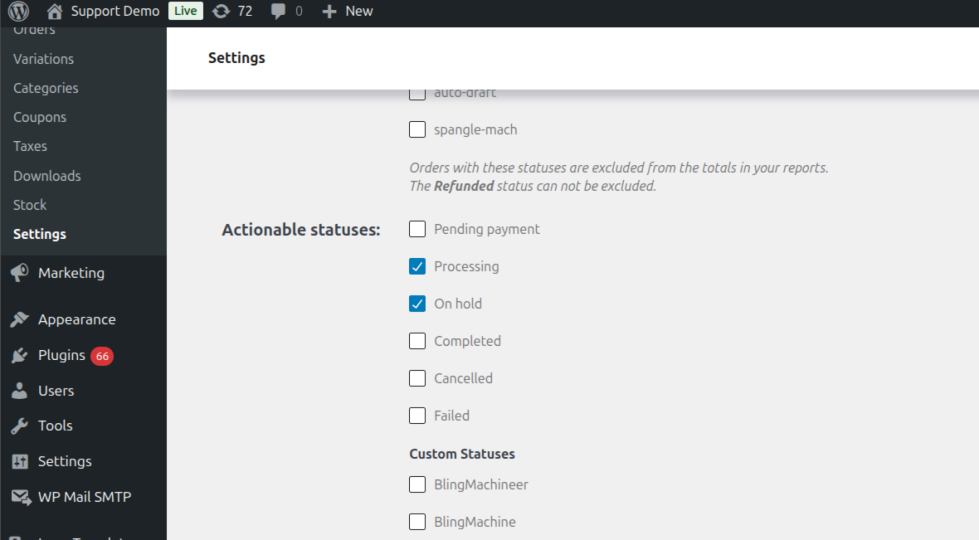
↑ Back to topWooCommerce Analytics Not Showing Custom Order Status Data:
↑ Back to top-
- Added to Actionable Statuses – Go to Analytics → Settings → Actionable Statuses and check that your custom status is enabled.
-
- Please make sure that the settings below are enabled in the custom order status rule, and the payment is complete for the order that you want to show in the analytics report.
-
- Go to WooCommerce → Status → Tools.
-
- Click Clear analytics cache.
-
- Re-import historical data to refresh your reports.