Add custom stock status based on quantity ranges to communicate precise information about your stock availability.
Installation
↑ Back to top- Download the .zip file from your WooCommerce account.
- Go to: WordPress Admin > Plugins > Add New and Upload Plugin the file you have downloaded.
- Install Now and Activate.
Setup and Configuration
↑ Back to topAs soon as the plugin has been installed, you can view the plugin in WordPress Admin Panel > Custom Stocks. To customize plugin settings, click on Custom Stock.
How to Add Custom Stock Status:
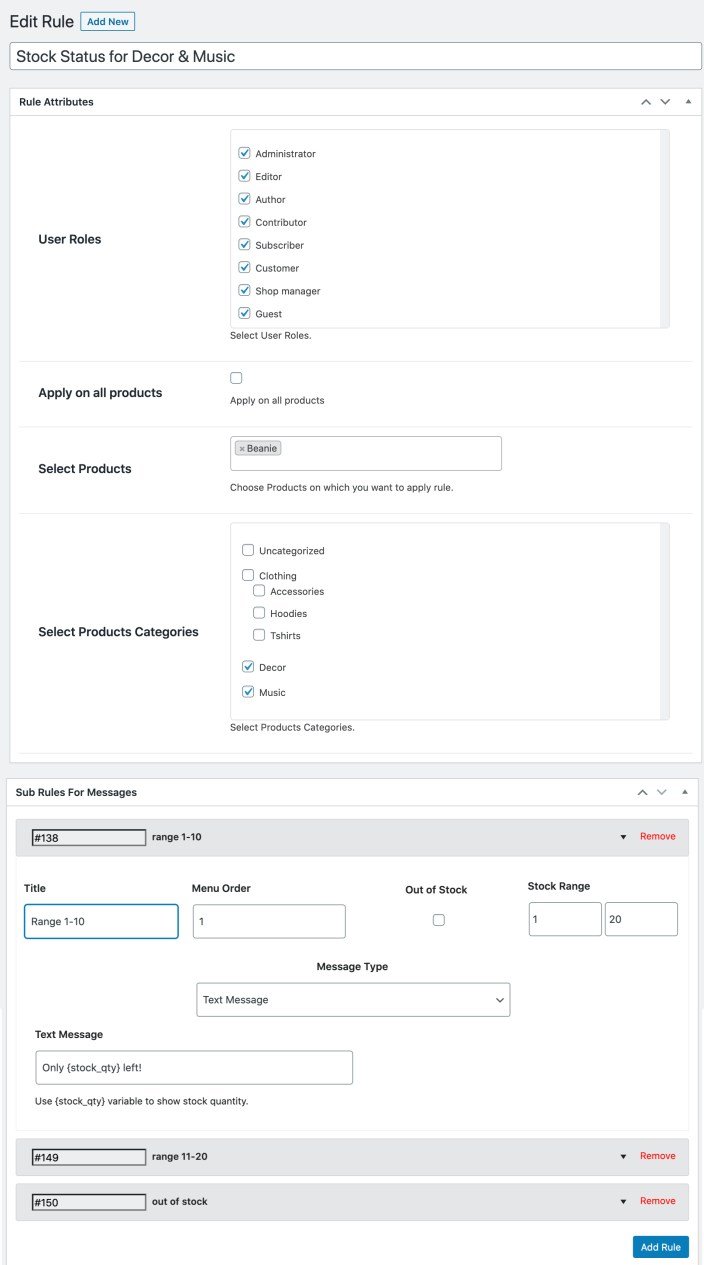
↑ Back to top- User Roles: Select the User Role(s) to assign this custom stock rule to.
- Apply to Product: Place a check in this box to apply this single rule to all products. (Note: If you check this box, both Select Products and Select Product Categories options will be hidden as this no longer is relevant to your selection)
- Select Products: Assign a selective product(s) to this newly created custom stock rule. Typing in a minimum of three characters will trigger predictive text.
- Select Product Categories: Select any one or multiple product categories that the rule is intended to include.
- Add Title: Add a title that helps you easily find this when you need to edit this in future..
- Menu Order: If you choose to create multiple sub-rules within the same rule, use this option to prioritize which sub-rule should apply first, second, and so on.
- Out of Stock: Check this box to create a custom message for out-of-stock. (Please note that by default this box is not selected, if you select this box it will remove Stock Range as this no longer remains applicable to your selection).
- Stock Range: Define maximum and minimum quantities to trigger the message. Your message will be shown when the product stock lies within the defined range.
- Message Type: In the dropdown, you will find four different types of messages to choose from:
-
- Text Message: Use this option to create urgency with simple text. Selecting this option will reveal a text field. Type in an influential message. Remember to use the {stock_qty} variable in with your text to show a message with the stock quantity.
- Text Message with Icon: Use this option to attract customers with text and a relevant icon.
- Image: To display an image only.
- Text Message with Date: Use this option to convey a limited stock or inventory restock. Selecting this option will reveal a text field. Type in an influential message and add a date to it. To assign a date, click on the date-picker, and pick a date.
- Remember to use the {stock_qty} variable in your text message to show a message with the current stock quantity.
- Rule Priority: You can set the priority of the entire rule here.

General Configuration Options
↑ Back to topManage Custom Status Visibility
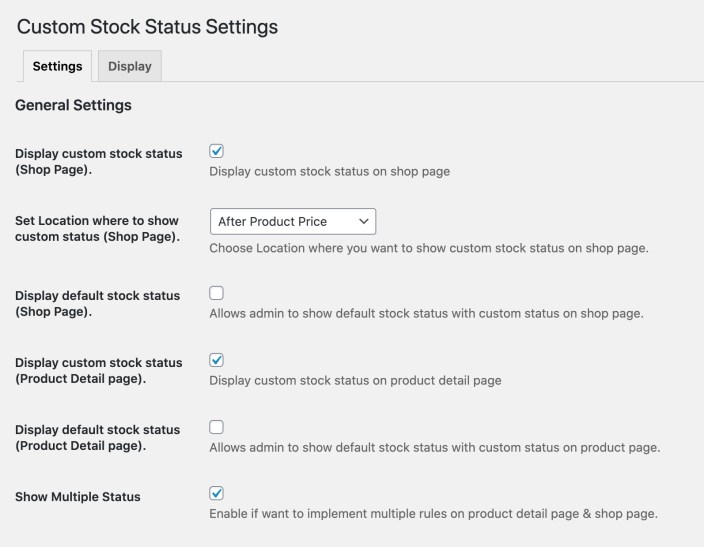
↑ Back to top- Display Stock Status –Shop Page: This option allows you to display your custom stock status on the shop page
- Define Display Location – Shop Page: Use this option to set where to display the shop status. Clicking on the dropdown reveals the following four locations to choose from.
-
- Before Product Title: stock message/image will be placed above the entire product description and below the product image
- After Product Title: stock message/image will be placed below product title and above price/sale price
- After Product Price: stock message/image will be placed below price and above Add to Cart button
- After Add to Cart Button: stock message/image will be placed under the entire product description including the Add to Cart button
- Display Stock Status – Product Page: Check this checkbox to allow the custom stock status to show on the product page(s). The custom stock message will appear under the price and above the Add to Cart button.
Disabling Default Stock Statuses
↑ Back to top- Display Default Stock Status – Shop Page: Enable the default stock status to show under the price, on the shop page. (Note: Default stock status settings cannot be changed through the plugin, you can only enable and disable its display)
- Display Default Stock Status – Product Page: Activating this option will reflect the default stock status under the custom stock status and above the Add to Cart. (Note: Default stock status settings cannot be changed through the plugin, you can only enable and disable the option)
Displaying Multiple Statuses
↑ Back to top
Customize Status Font & Color
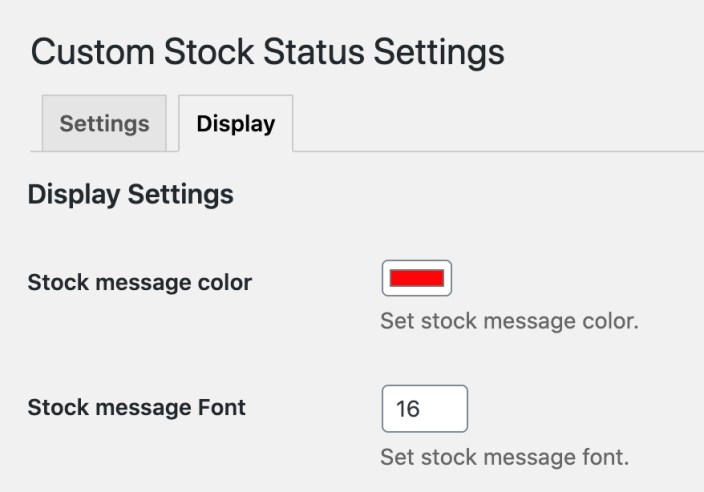
↑ Back to top- Stock Status Color: Choose a color for the text in the custom stock status. To select a color, click on the color box to reveal a color-spectrum and select any color from the predefined range. For more precise color selection, enter the RGB code of the desired color.
- Stock Status Font: Define the stock status’s font size, from a range of 9pt-72pt.

