WooCommerce Digital Order Signature Plugin allows you to request customers to sign their orders at checkout before placing them. Customers can use a mouse to draw their signature or type text to sign the order.
Installation
↑ Back to top- Download the Digital-order-signature.zip file from your WooCommerce account.
- At the WordPress Admin Panel, go to Plugins > Add New and Upload Plugin with the file you downloaded after purchase.
- Install Now and Activate extension.
More information at: Install and Activate Plugins/Extensions.
Configurations:
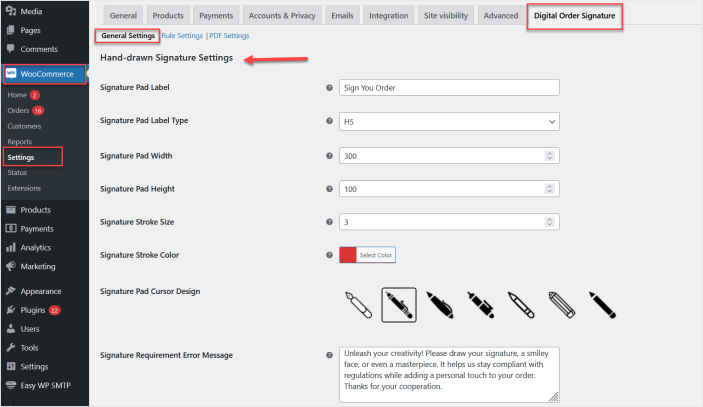
↑ Back to topAfter installation, Go to WooCommerce>Settings>Digital Order Signature and click the “General Settings” tab to configure the settings of this plugin
General Settings:
↑ Back to topIn a “General Settings” tab, you can customize the hand-drawn signature settings such as pad label, pad size, signature stroke, pen design, and many more.
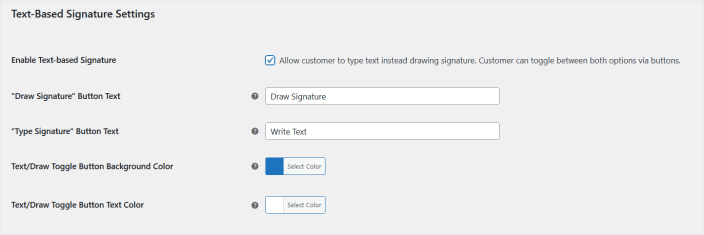
You can also enable and configure the text-based signature settings such as label, button text, and color.
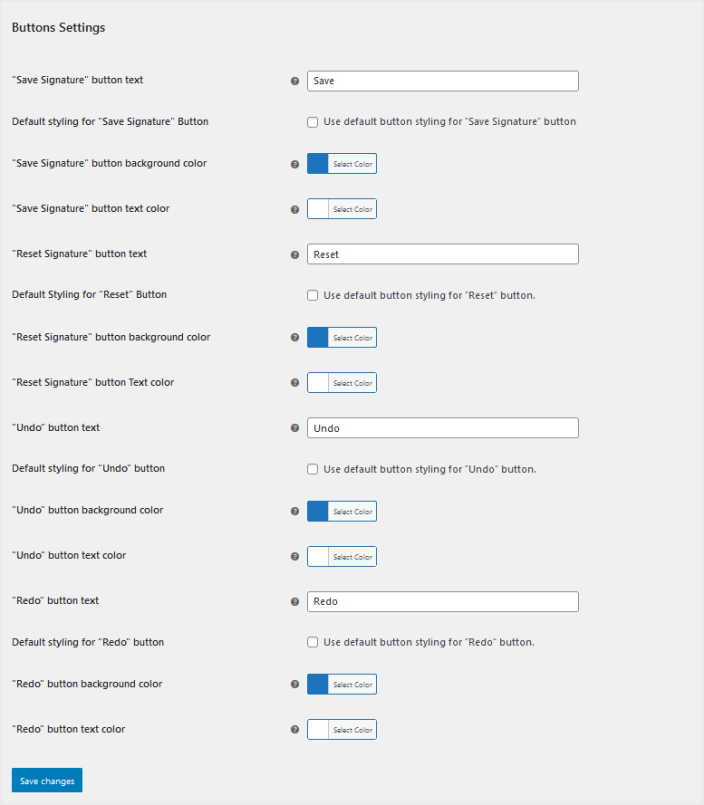
Option to customize the signature pad buttons such as Undo, Redo, Save, and Reset.
Rule Settings:
↑ Back to topMove to the “Rule Settings” tab configure rule for digital order signature. In a rule you can enable/disable the order signature functionality and apply it for all or specific products or categories and user roles.
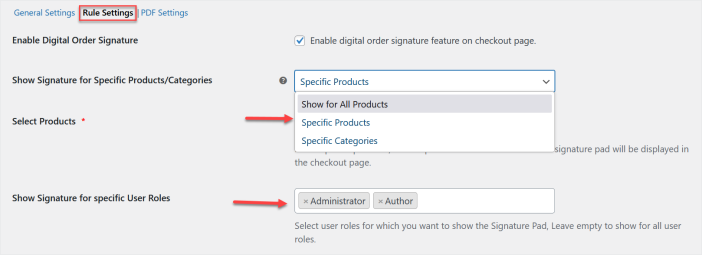
You can also enable the order signature feature for specific payment methods.

Option to enable a single product checkout option for the whole shop or sell some specific products, or categories individually on one-per-order basis.

PDF Settings:
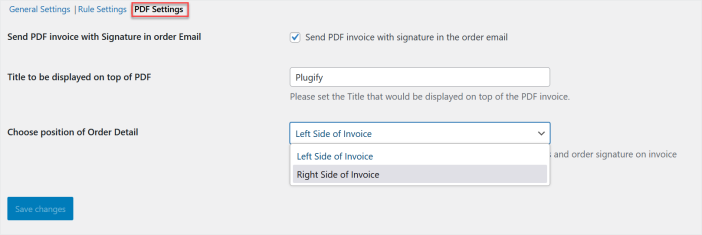
↑ Back to topNow click the “PDF Settings” tab and enable the “Send PDF invoice with Signature” option to automatically send the PDF invoices with client’s signature in order to email to customers as well as admin. You can also set the title of the invoice and choose the location as left or right for the order details on the PDF invoice.
