Installation
↑ Back to topHow to install the plugin and get it working.
- Download the rd-wc-enhanced-order-notes-pro.zip file from your WooCommerce.com account.
- Go to WordPress Admin > Plugins > Add New > Upload Plugin > Choose File and select this file.
- Install Now and Activate the extension.
You can find more information at Installing and Managing Plugins.
Once installed and activated, an Enhanced Order Notes settings tab appears in your WooCommerce -> Settings -> Emails menu.

Configuration
↑ Back to topYou can easily configure the Enhanced Order Notes for WooCommerce plugin from the settings tab by navigating to
WooCommerce -> Settings -> Emails -> Enhanced Order Notes. From here you can manage your templates and configure your settings and upgrade license key.
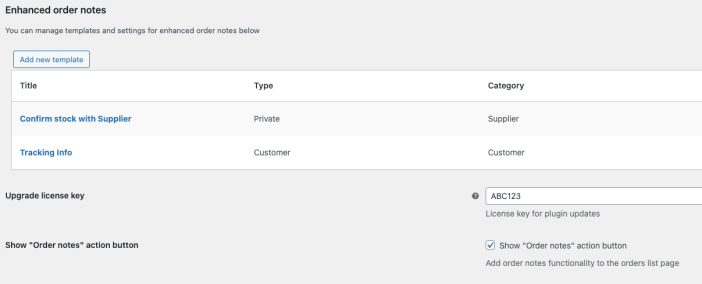
Show “Order notes” action button
Adds an order notes action button to the order list page for quick management of order notes.
Using the plugin
↑ Back to topThe Enhanced Order Notes for WooCommerce plugin works primarily within the Edit Order screen in your WooCommerce dashboard. The main purpose of the plugin is to allow you to add order notes from predefined templates that you create.
Managing Templates
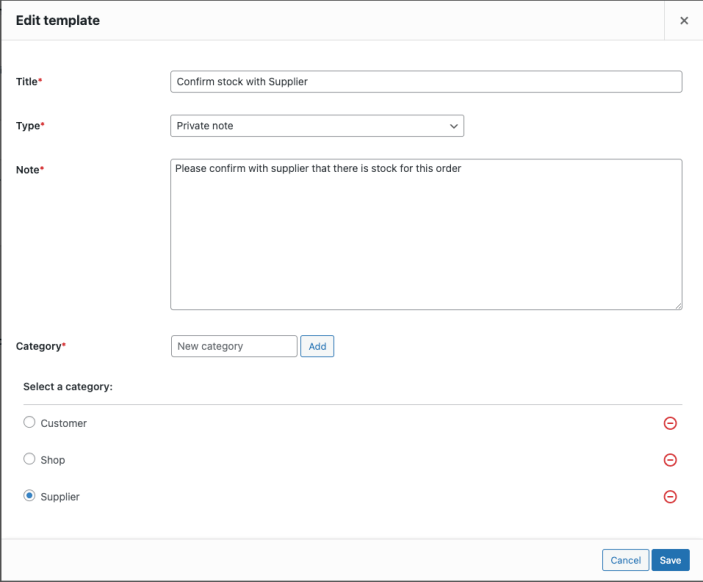
↑ Back to topFrom the Settings screen, you can click the Add new template button create a new template or click the title or pencil icon of an existing template to edit it. Click the no entry icon to delete a template.

The following settings will be displayed in a popup
- Title: A title or name for the template
- Type: Whether the note is a Private note or a Customer note
- Note: The text for the note
- Category: A category for the template, you can either add a new category or select an existing one. You can also delete categories by clicking the no entry icon alongside the relevant category
Using Templates
↑ Back to topOnce you have created a template, it will be available for use in the Edit Order screen in the Order Notes meta box.
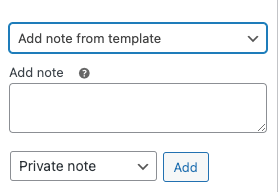
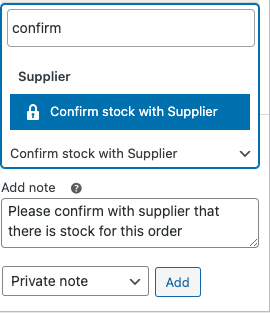
Click the Add note from template dropdown and you can then select or search for the template you wish to use. Selecting the template will populate the Add note field with the text from your template, which you can either use or edit before clicking Add. The note type will also change the Private note / Note to Customer box to the relevant setting. Click Add to save the note as per normal.
Manage Order Notes in Order List Screen
↑ Back to topIn addition to the Edit Order screen, the plugin also allows you to manage order notes from the Order List screen. You will need to perform the following actions to activate this functionality.
Ensure the Show “Order notes” action button checkbox is ticked in the Enhanced Order Notes for WooCommerce plugin settings:

Ensure the Actions column checkbox is ticked in the Screen Options of the Order List screen:

This will toggle the Actions column on the Order List screen, click the Order notes action button to show the order notes for the relevant order.
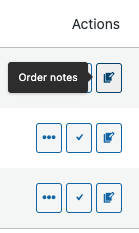
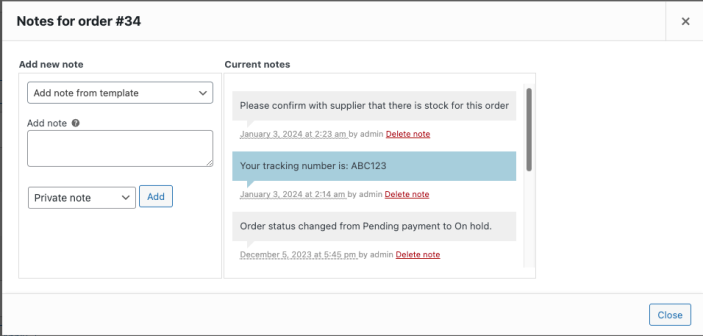
This will display a popup where you can view the current order notes, add new order notes or delete notes from the selected order.
Enable HTML Markup for Order Notes
↑ Back to topThis plugin also allows you to add HTML markup to your order notes using the same rich text editor that WordPress posts use. You can enable this functionality by ticking the Enable HTML editor for order notes checkbox in the Enhanced Order Notes for WooCommerce plugin settings:

This will enable the HTML markup rich text editor in the order notes screens as well as in the template editor so that you can use HTML markup in your order note templates as well.
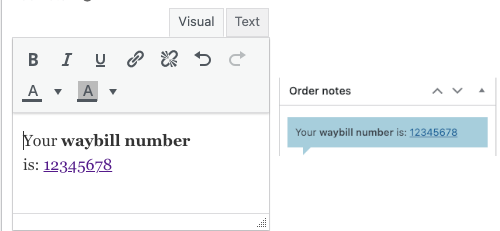
Enable User Tagging / Mentions in Order Notes
↑ Back to topThis plugin also lets you tag or mention colleagues in order notes. You can enable this functionality by ticking the Enable user mentions for order notes checkbox in the Enhanced Order Notes for WooCommerce plugin settings NB: This function is only enabled if the HTML editor is enabled:

This will enable the ability to add user mentions when you press the “@” key in the rich text editor. A dropdown menu will appear and you can select the user to tag. When you add the note the mentioned user(s) will be highlighted in the note and a notification email will be sent to each user mentioned.
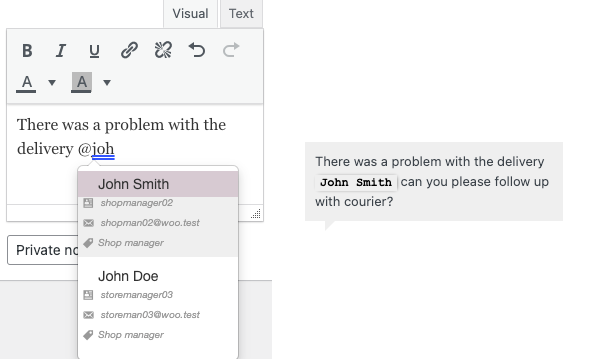
You can enable or disable this email notification in the WooCommerce -> Settings -> Emails -> Email Options menu where the notification is listed together with the rest of the WooCommerce email notification templates. You can read more on how to manage WooCommerce emails at the following link: How to Customize Emails in WooCommerce

