Developers selling on the Woo Marketplace can edit product pages, access information like usage data and sales, and manage reviews for their products.
Editing a product page
↑ Back to topMost of the work for managing products can be done from the Products screen in the Vendor Dashboard. To get there:
- Log in to the Vendor Dashboard
- Go to Products > All Products
- Select the product you want to work on
From there, you can see information about usage, upload a new version or edit the product page.
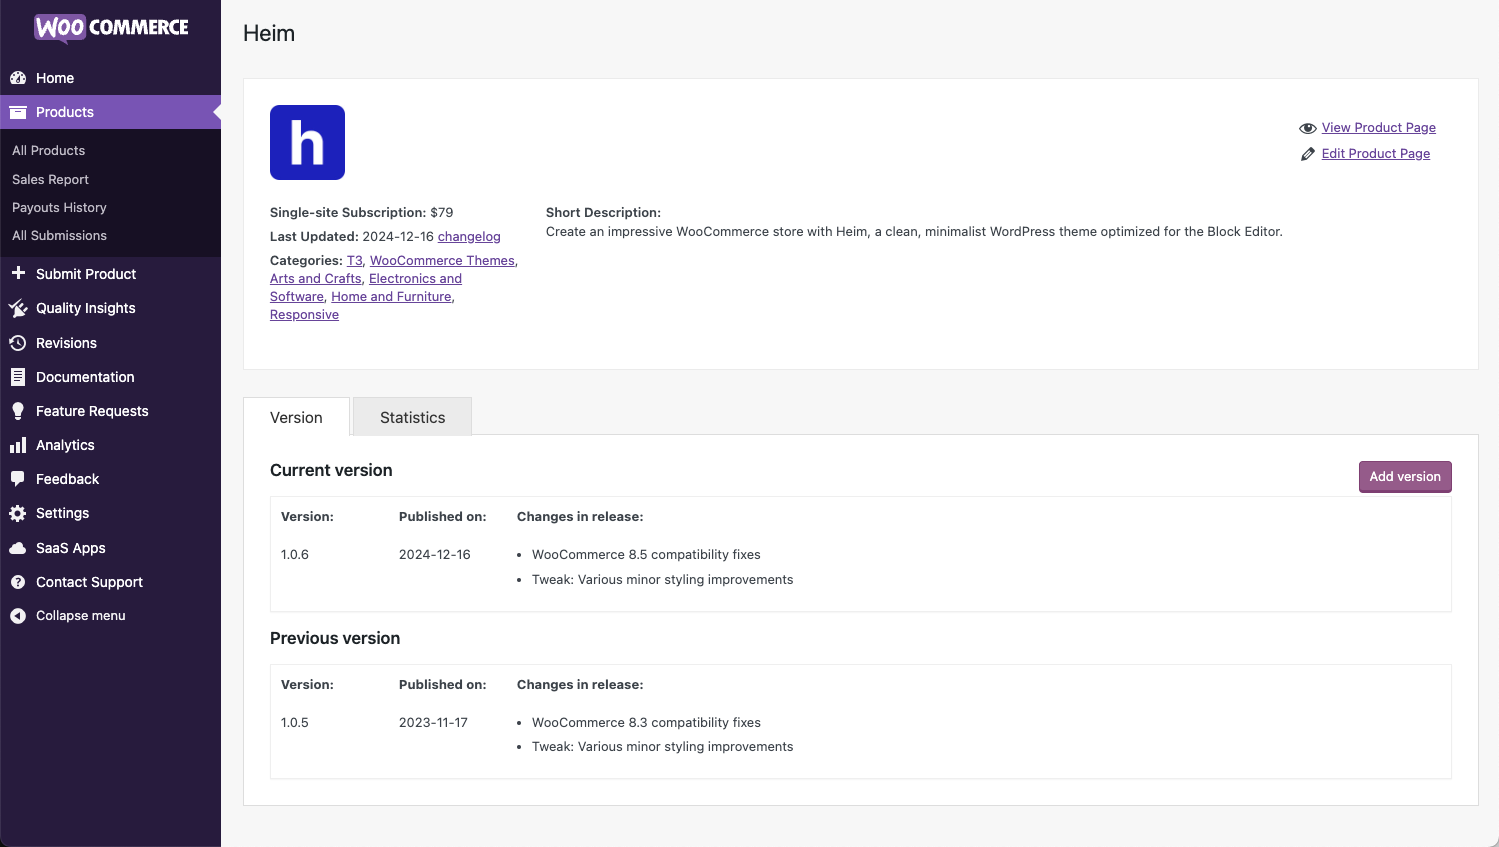
For more on how to make the most of your product pages, read the guidelines for writing marketing content.
Adding or editing documentation
↑ Back to topTo review, edit or add documentation, go to the Documentation tab.
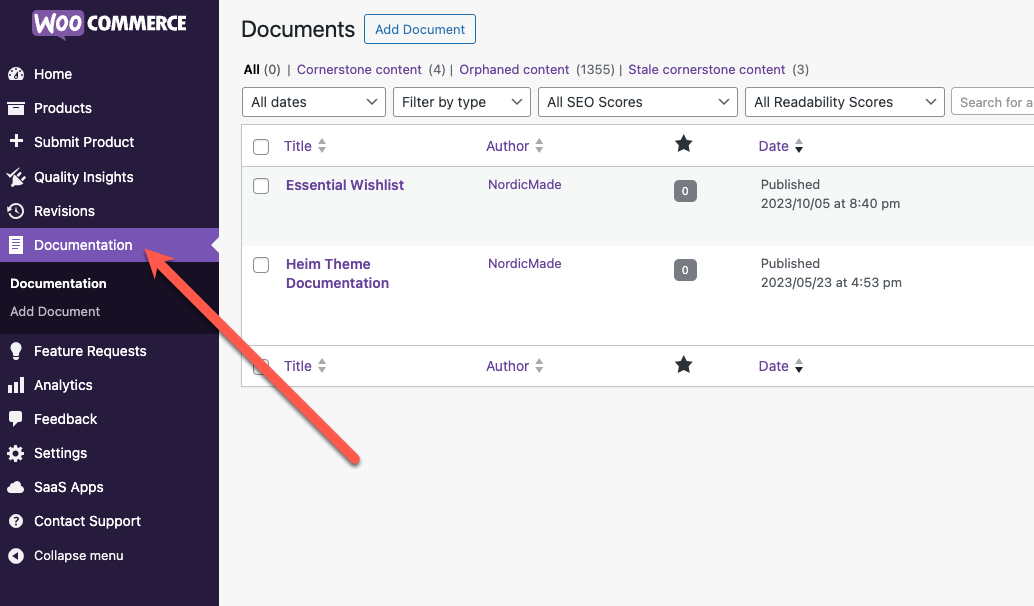
For more on how to format documentation, read the guidelines.
Uploading new versions
↑ Back to topBefore uploading a new version of your extension, it is important to ensure that it passes all QIT quality standards. You can easily run these checks from your partner dashboard by selecting the Quality Insights menu option. To learn more about the types of tests and how to run them, please refer to the provided documentation.
You can upload the updated version after your extension passes all QIT checks.
Select the Versions tab. You’ll see all the versions you’ve previously uploaded, including highlights about what was in each version.
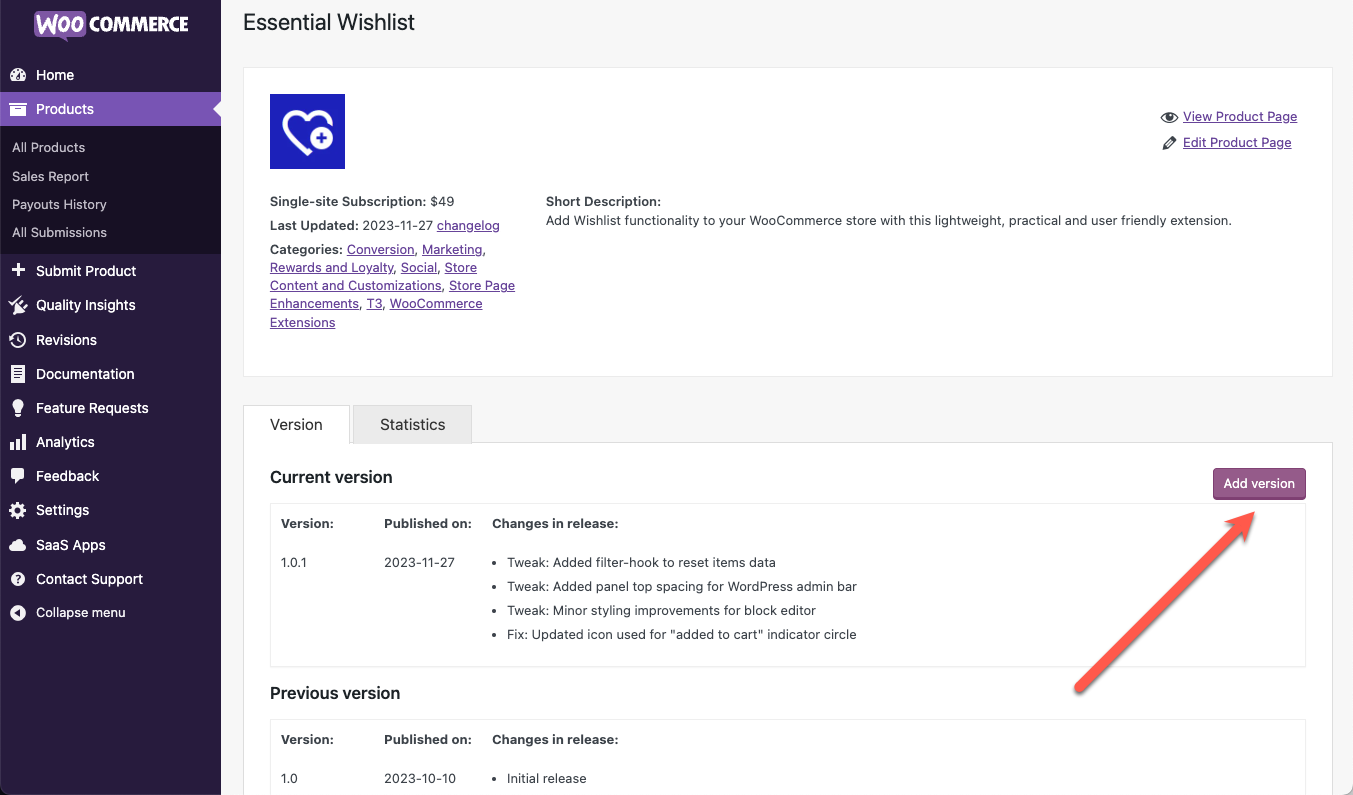
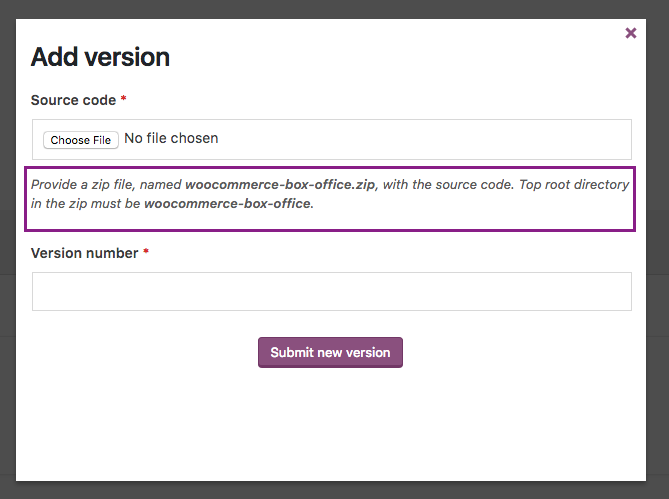
Select Add Version to upload an updated version, then:
- Select the .zip file you want to upload from your computer
- Add the version number
- Click Submit new version
Once submitted, we will run the following tests on the uploaded file:
All Vendor Admins will receive email notifications throughout the process, including:
- Confirmation: Vendor Admins will get an email when a new version is submitted, confirming that it is in the queue. No action is needed here.
- Rejected: If a version fails any part of our automated testing, Vendor Admins will receive an email letting them know, including the specific error. Developers should try to resolve the error and submit a new version when ready.
- Live: If a version passes automated testing, it will be automatically deployed and made available to customers. No action is needed.
Formatting the changelog
When uploading a version, WooCommerce.com looks for a specific format for the changelog. The name of the file should be changelog.txtand it should have the following formatting:
*** Product Name Changelog ***

yyyy-mm-dd - version x.x.x
* Item one
* Item two
The date format, the space between the -, and the word version are all important there.
Common errors
If an upload fails, there are a few common errors you should check first.
- The name of file: WooCommerce.com looks for a specific name for your .zip file and the main folder within it. You’ll see the expected name when you try to upload a product:
- That a changelog is present: A file named changelog.txt must be present to serve as a record of what’s changed from version-to-version.
- Invalid changelog: The changelog.txt provided does not match the expected format.
- Mismatch Version Header: The version in the plugin header doesn’t match the version provided during the upload process.
- Mismatch version: The version in the plugin header and the changelog.txt don’t man.
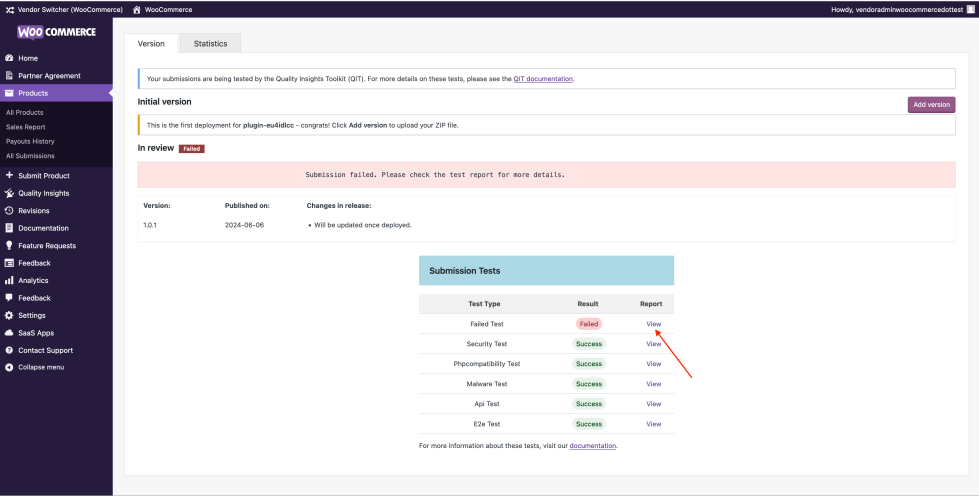
Viewing Test Results
The results from the automated tests will be in the Submission Tests table which can be viewed by clicking the associated ‘View’ link identified in the image below.
Programmatically uploading new versions
↑ Back to topTo deploy a plugin programmatically, it must be a plugin update and not a new submission. This method serves as an alternative to logging into the vendor dashboard and using the UI to perform the same action.
Generating an Application Password
- Ensure that you are logged into the WooCommerce vendor dashboard.
- Create an application password via the following link: Generate Application Password.
Note: To be extra secure, this application password is scoped to the deploy endpoint and cannot be used to perform any other action on the user’s behalf.
Deploying Your Product
Make a POST request to deploy your product using the following command:
curl -X POST https://woocommerce.com/wp-json/wc/submission/runner/v1/product/deploy \
  -F "file=@/path/to/zip" \
  -F "product_id=<product_id>" \
  -F "username=<username>" \
  -F "password=<app_password>" \
  -F "version=<product_version>"
Replace <product_id>, <username>, <app_password>, and <product_version> with your actual product ID, username, application password, and product version, respectively.
Checking Deployment Status
To check the status of your deployment, use the following command:
curl -X POST https://woocommerce.com/wp-json/wc/submission/runner/v1/product/deploy/status \
  -F "product_id=<product_id>" \
  -F "username=<username>" \
  -F "password=<app_password>"
Status Response
When you query the deployment status, the response will provide details about the progress, including the status of various test runs. Here is an example of the response:
{
  "status": "queued",
  "version": "1.0.0",
  "test_runs": {
    "12345": {
      "test_run_id": "12345",
      "status": "success",
      "test_type": "activation",
      "result_url": "https://qit.woo.com/?qit_results=12345"
    },
    "67890": {
      "test_run_id": "67890",
      "status": "success",
      "test_type": "api",
      "result_url": "https://qit.woo.com/?qit_results=67890"
    }
    ...
  }
}
This response includes the deployment status, product version, and details of each test run, including test type and result URL.
The following statuses can be returned in the status field:
queuedfailedsuccesspending-deploydeployed
Maximize Compatibility and Reliability Through Custom E2E Tests
↑ Back to topWe strongly encourage the contribution of E2E tests for your extensions built on top of the Quality Insights Toolkit(QIT) custom E2E testing framework . By sharing these tests with us, you play a crucial role in ensuring true compatibility across different WordPress and WooCommerce versions, various PHP environments, and alongside other popular extensions. Our Custom E2E testing framework, equipped with a dockerized development environment and easy-to-use command tools, empowers you to design and execute comprehensive tests using Playwright that are tailored to your plugin’s unique functionalities. Not only does this initiative help mitigate potential compatibility issues before they affect users, but it also enhances the overall reliability of the products within our marketplace. Participating in this process not only contributes to a robust ecosystem but also elevates your extension’s reputation for quality and reliability. Please visit the QIT Custom Test documentation to begin leveraging the power of custom tests to guarantee your extension works seamlessly in real-world scenarios and stands out in the competitive marketplace.
Understanding product sales
↑ Back to topVendors have access to reports on how their products are performing, including:
- Earnings: New sales, renewal sales, and refund amount.
- Commissions: The amount the Vendor earns from net product sales – net revenue is defined as revenue received from extension purchases minus refunds, chargebacks, disputes, discounts, and affiliate fees.
- Subscriptions: Total active subscriptions, including new and renewing this month, as well as refund rate and renewal rate.
To find this information, log in to the Vendor Dashboard and go to Products > Sales Report.

Reviewing feature requests
↑ Back to topEach product sold on the WooCommerce.com Marketplace has a dedicated page where customers can submit feature requests. Learn more about the customer experience with the Feature Request Portal.
In the vendor dashboard, you’ll see a list of all feature requests for your products in the marketplace, along with number of votes and publish date.

- Open: This is the first status after the feature request is submitted and approved. It is not yet acted upon.
- Planned: You intend to build this feature.
- In Progress: You are currently working on this feature.
- Completed: You have completed the feature.
- Rejected: You will not implement this feature.
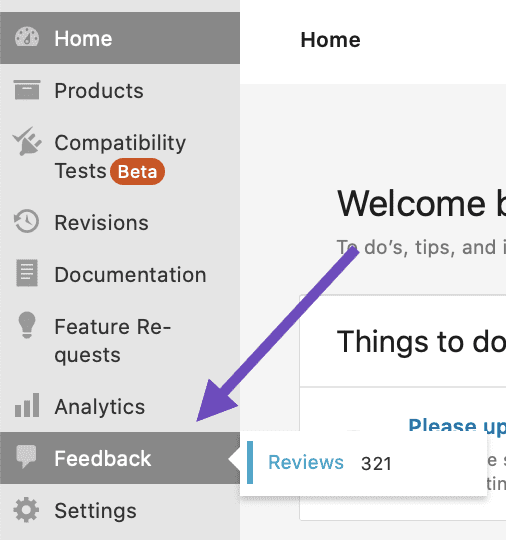
Seeing reviews
↑ Back to topCustomers who have purchased a product may leave a rating and review. When there are a minimum of 3 ratings, reviews are shown on the product page, and ratings are visible on the product page, category page, and in search results. Read our guidelines around ratings and reviews.
Whether reviews are public or not, Vendor Admins can see reviews for their own products by logging in to the Vendor Dashboard and then going to Feedback > Reviews.