- Download the .zip file for the plugin from your WooCommerce account.
- Go to: WordPress Admin > Plugins > Add New and Upload Plugin with the file you downloaded with Choose File.
- Install Now and Activate the extension.
More information at
Install and Activate Plugins/Extensions.
After the successful installation of
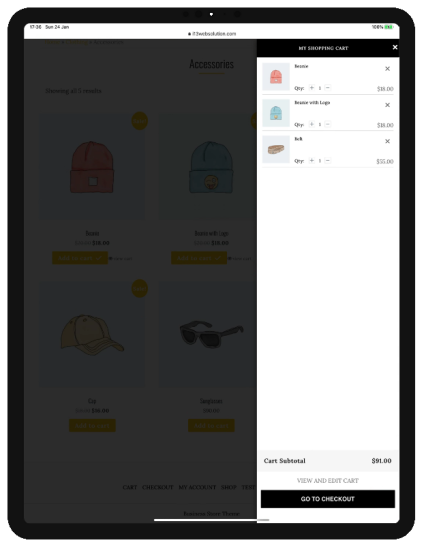
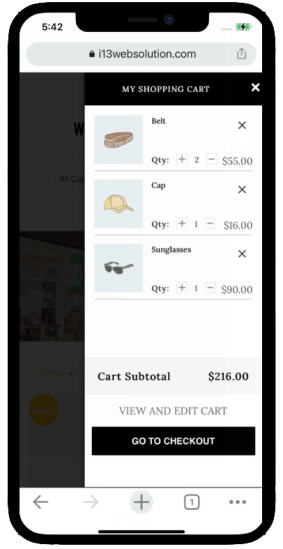
Mini Floating Cart For WooCommerce, You will see a Floating cart icon on your website. If you want to customize some settings you can set some settings as per needs.
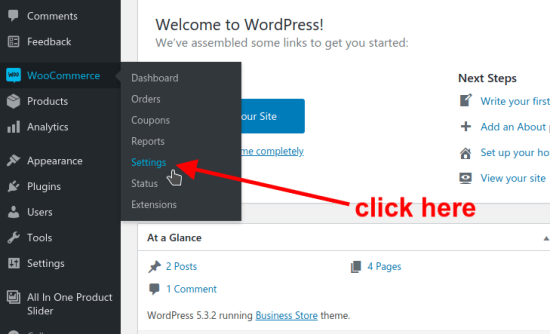
- On left side bar click on “wooCommerce” –> “settings”
- On left side bar click on “wooCommerce” –> “Floating Cart” tab
 Now on this, you can set some customization like cart position, Icon position, background colors, font colors etc.
Once you install this extension, You can see you have floating cart functionality loaded on your website.