Order Bump for WooCommerce helps you to increase the Average Order Value of your site by presenting last minute offers to your customers.
Installation
↑ Back to top1. Download the order-bump-for-woocommerce.zip file from your WooCommerce account.
2. Go to: WordPress Admin > Plugins > Add New and Upload Plugin with the file you downloaded with Choose File.
3. Install Now and Activate the extension.
More information at: Install and Activate Plugins/Extensions.
Setup and Configuration
↑ Back to topOrder Bump
↑ Back to topGeneral Settings

- In order to display the Order Bump offers to the users on the checkout page, they first have to be enabled. To enable Order Bumps, enable the “Enable Order Bump” checkbox.
- If you want to hide the Order Bump offer to the user when the offer product is already in the user’s cart, then enable the “Skip if Offer Product is in Cart” option.
- By default, the Order Bump offer will be displayed to the user on the checkout page above the Order Details section. If you want to modify the position, you can do so by changing the position in the “Order Bump Display Location in Checkout Page” option.
- If your checkout page is created using WooCommerce checkout Blocks, you can place the Order Bumps on the checkout page using the “Order Bump” block. The position of the Order bump can be rearranged as per your preference.
- By default, only one Order Bump will be displayed to the user. If you wish to display multiple order bumps to the user, you can do so by customizing the “Order Bump Display Type” option.
- When two or more Order Bump rules match for a user in a single transaction, the first matched rule will be displayed to the user by default.
- If you want to change this behaviour, then you can do so by modifying the priority in “Order Bump Priority in Case of a Overlap” option when Single Order Bump display type is selected. Supported Values: First Matched Order Bump, Last Matched Order Bump, Highest Priced Order Bump and Lowest Priced Order Bump.
- If you want to change this behaviour, then you can do so by modifying the priority in “Multiple Order Bump Priority ” option when Multiple Order Bumps display type is selected. Supported values: Order Bump Created Date, Highest Priced Order Bump and Lowest Priced Order Bump.
- By default 5 order bumps will be displayed to the user when Multiple Order Bumps display type is selected. If you want to display additional order bumps, you can do so by customizing the Order Bump Display Count value.
- By default, your users can apply coupons on offer products. If you wish to prevent users from applying coupon on offer products, you can do so by enabling the “Restrict WooCommerce Coupon Discount for the Offer Product(s) that added in the Order” option.
- By default, while displaying the offer product, only the name of the product will be displayed to the user. If you wish to display a link to the product page you can do so by setting the value as Yes in the Offer Product Name Display Method option.
Upsell Funnel
↑ Back to topGeneral

General Settings
- In order to display the Upsell Funnel offers to the users on the checkout page, they first have to be enabled. To enable Upsell Funnel, enable the “Enable Upsell Funnel” checkbox.
- If you want to hide the Upsell Funnel offer to the user when the offer product is already in the user’s cart, then enable the “Skip if Offer Product is in Cart” option.
- By default, the Upsell Funnel offer will be displayed to the user on the checkout page above the order details section. If you want to modify the position, you can do so by changing the position in the “Upsell Funnel Display Location in Checkout Page” option.
- If your checkout page is created using WooCommerce checkout Blocks, you can place the Upsell Funnels on the checkout page using the “Upsell Funnels” block. The position of the Order bump can be rearranged as per your preference.
- If you want to prevent the coupon discount from being applied to the offer product, you can do so by enabling the “Restrict WooCommerce Coupon Discount for the Offer Product(s) that added in the Order” option.
- By default, while displaying the offer product, only the name of the product will be displayed to the user. If you wish to display a link to the product page you can do so by setting the value as Yes in the Offer Product Name Display Method option.
Offer Product Display Settings
You can customize how the Upsell funnel products are displayed to your users.
Color Customization

You can customize the color options for the Offer Product & Offer Product display method.
Advanced
↑ Back to top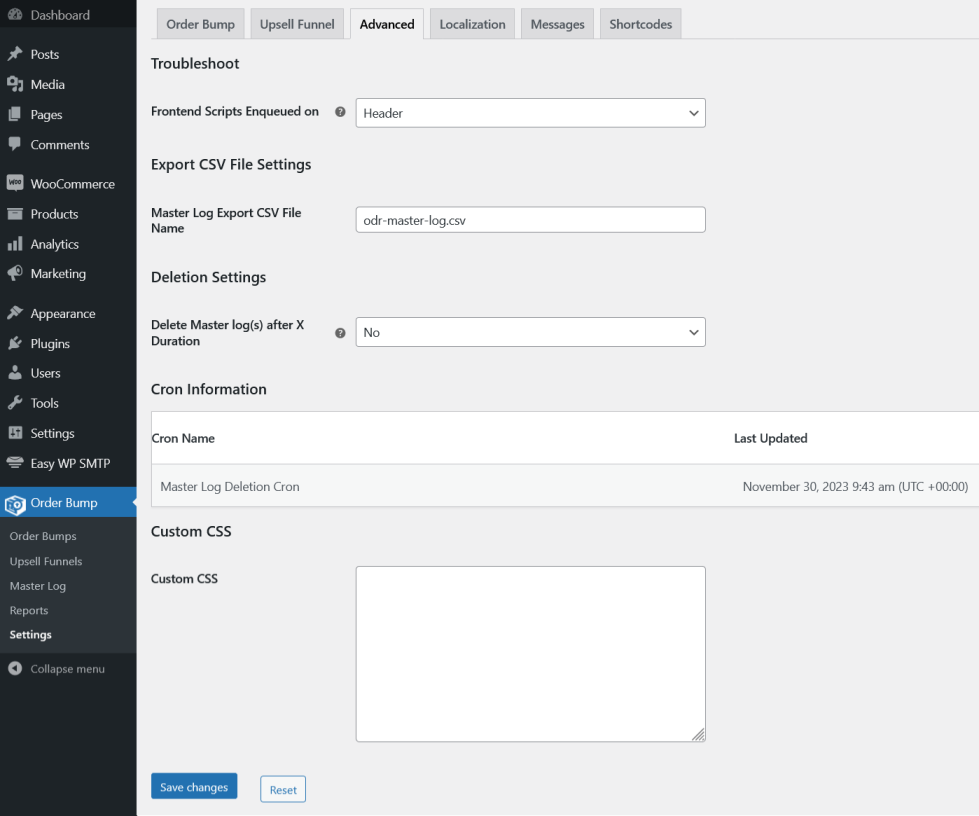
Troubleshoot
By default, the plugin scripts will be loaded on the Header. If you want to load the plugin scripts on plugin footer, you can do so by selecting Footer in the Frontend Scripts Enqueued on option.
Export CSV File Settings
You can customize the file name of the Export CSV file in the “Export CSV File Name” option.
Deletion Settings
If you wish to delete old Master Log(s), you can do so by setting the value to Yes in the “Delete Master log(s) after X Duration” option. The Duration can be set in the “Delete Master Log(s) after” option.
Localization
↑ Back to top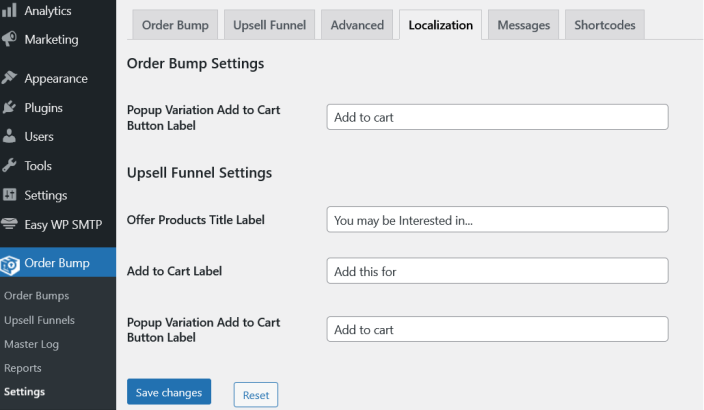
In this section, you can customize the labels displayed on the checkout page.
Messages
↑ Back to top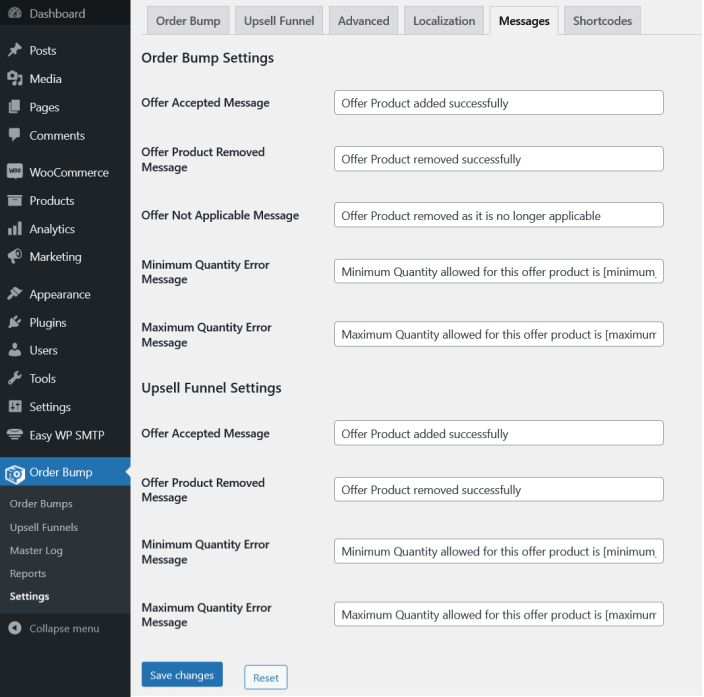
In this section, you can customize the notices and error messages displayed on the checkout page.
Shortcodes
↑ Back to top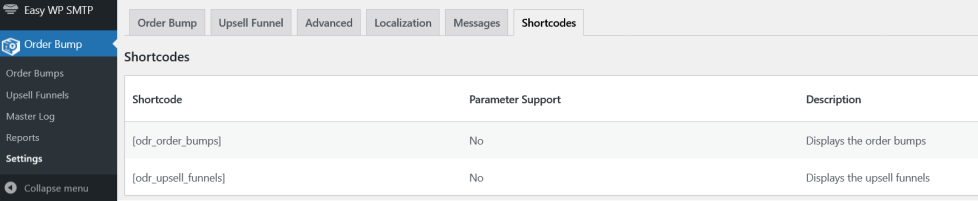
In this section, the available shortcodes will be listed along with the respective details.
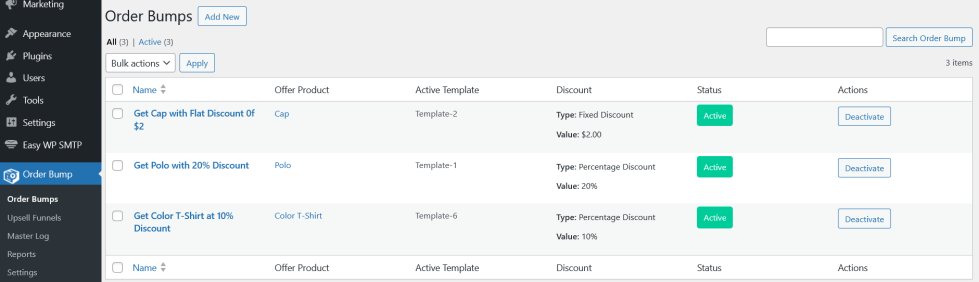
Order Bump – Rule Configuration
↑ Back to topNew Order Bump rules can be created from Order Bump > Order Bump. To Create a new Order Bump Funnel, click the Add New Button.
Order Bump – Rule Configuration – General
↑ Back to top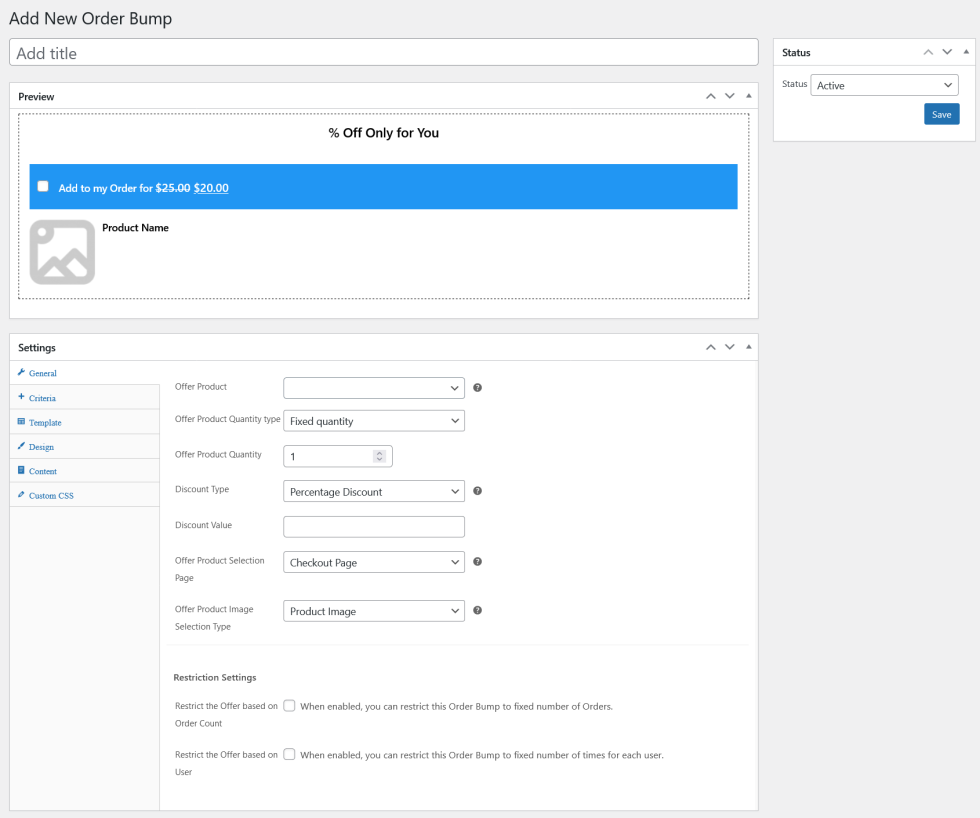
- In the “Offer Product” option, select the product which has to be presented to the user as an Order Bump.
- In the “Offer Product Quantity Type” option select the product quantity selection type which is applicable for the offer.
- Fixed Quantity: The offer product will be awarded with the fixed quantity.
- Customer Selection: The offer product will be awarded with the defined quantity range and the customer can select from it.
- In the “Offer Product Quantity” option input the product quantity which is eligible for the Fixed Quantity type. Enter the quantity range for the selected offer product in the Minimum Offer Product Quantity and Maximum Offer Product Quantity fields for the Customer Selection type.
- In the “Discount Type” option, choose the type of discount which you want to offer and set the discount value.
- By default, the customer can accept the offer in the Checkout Page . Optionally, you can allow the user to accept it in the respective product page using Redirect to Product Page option.
- By default, the Offer Product’s original image will be displayed to the user. Optionally, you can display a custom image by customizing the “Offer Product Image Selection Type” option.
- By default, a single Order Bump can be used for any number of orders. If you want to restrict the number of times a single order bump is used, you can do so by enabling the “Restrict the Offer based on Order Count” option and setting the value in “Maximum Number of Orders to be Applied” option.
- By default, an Order Bump will be visible to a user every time the Order Bump criteria matches with that user. If you want to restrict the number of times a single order bump is displayed to a user, you can do so by enabling the “Restrict the Offer based on User” option and setting the value in “Maximum Number of Orders per User” option.
Order Bump – Rule Configuration – Criteria
↑ Back to top- To create a Criteria, click the “Add Rule” button.
- Configure the Criteria based on your preferences and needs.
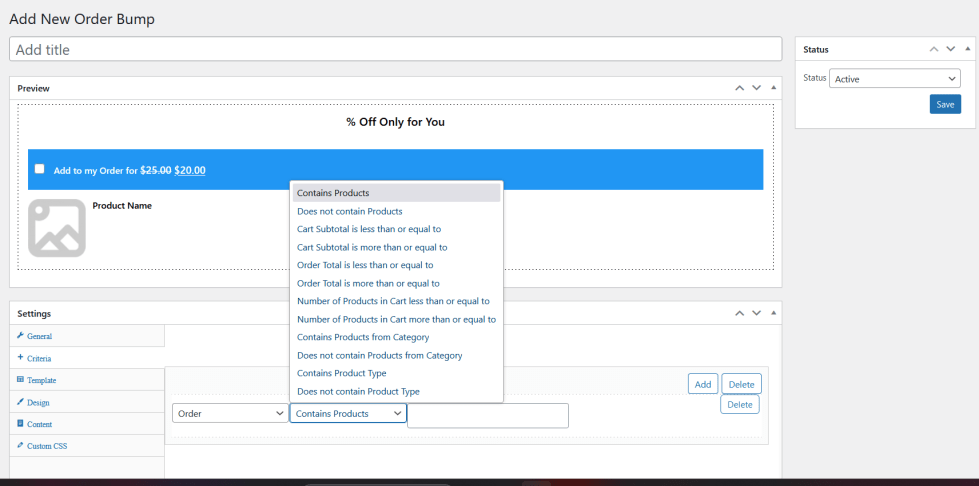
- Order based Criteria – Criteria related to Order
- Contains Products
- Does not contain Products
- Cart Subtotal is less than or equal to
- Cart Subtotal is more than or equal to
- Order Total is less than or equal to
- Order Total is more than or equal to
- Number of Products in Cart less than or equal to
- Number of Products in Cart more than or equal to
- Contains Products from Category
- Does not contain Products from Category
- Contains Product Type
- Does not contain Product Type
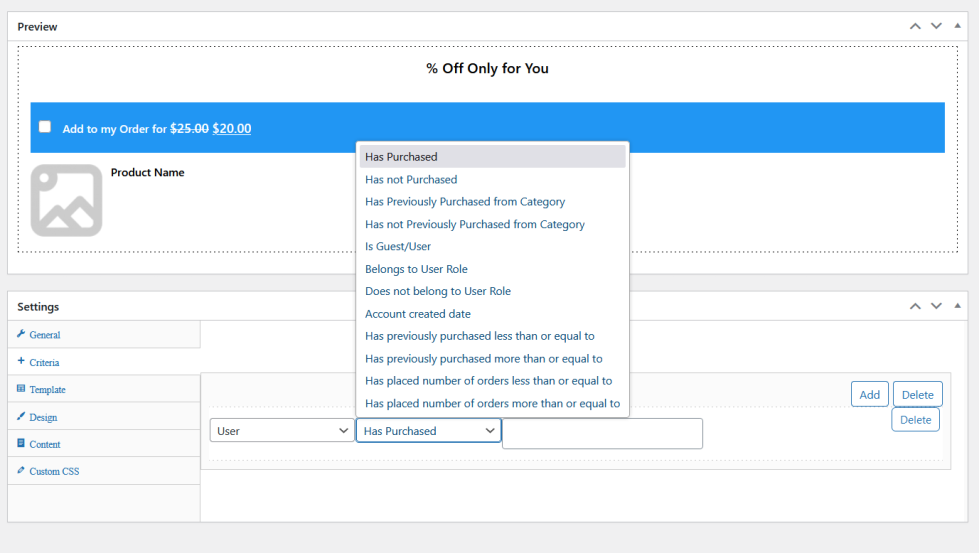
- User based Criteria – Criteria related to User
- Has Purchased
- Has not Purchased
- Has Previously Purchased from Category
- Has not Previously Purchased from Category
- Is Guest/User
- Belongs to User Role
- Does not belong to User Role
- Account created date
- Has previously purchased less than or equal to
- Has previously purchased more than or equal to
- Has placed number of orders less than or equal to
- Has placed number of orders more than or equal to
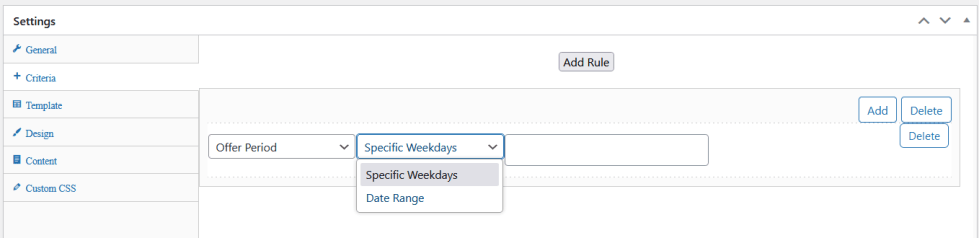
- Period based Criteria – Criteria related to Period
- Date range
- Weekdays
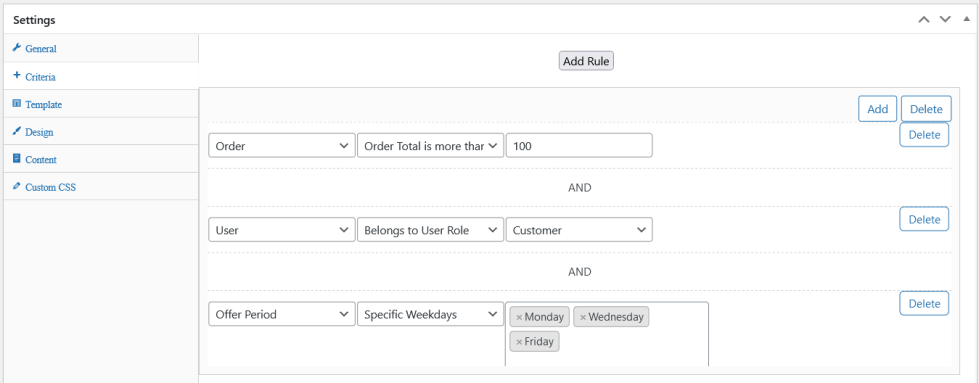
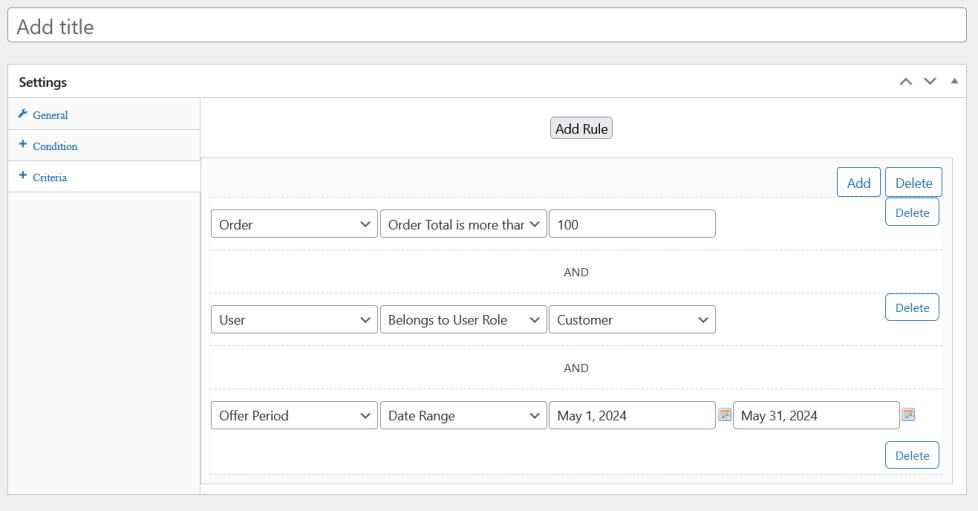
- You can create a Criteria with a single condition or you can create a Criteria with multiple conditions.
- To create a Criteria with multiple conditions, click the Add button. When multiple conditions are configured, your customers match all the conditions within the Criteria to be eligible for an Order Bump.
Example:
Customer’s cart must contain Product A and the Cart Sub Total should be more than $100.

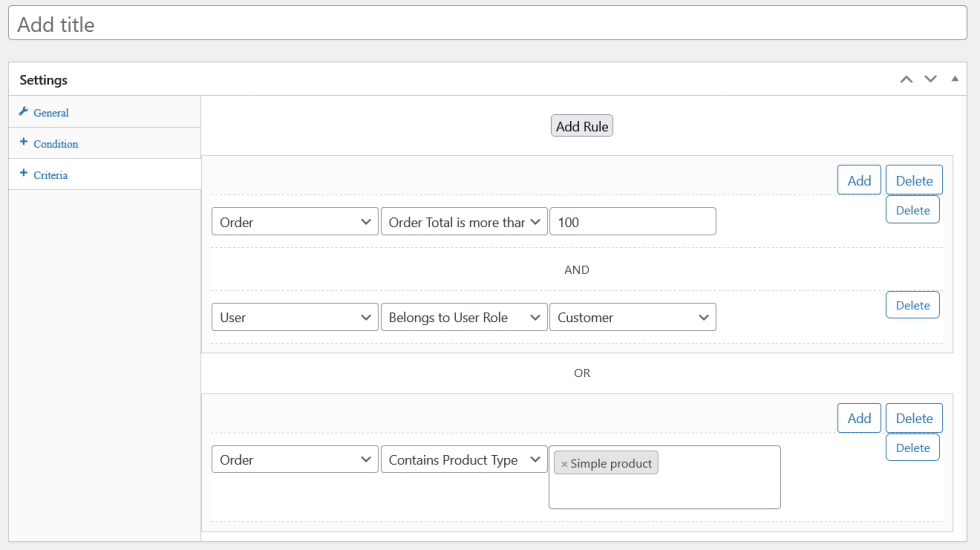
- You can also create 2 or more unique sets of Criteria for an Order Bump.
- When 2 or more unique sets of criteria are configured, the customer only needs to satisfy one Criteria. To create a new set of Criteria within the Order Bump, click the Add Rule button.
Example
Customer’s cart must contain Product A and the cart subtotal should be more than $100.
Or
Customer’s cart must contain Product A and the previous purchase history should be more than $500.
Order Bump – Rule Configuration – Templates
↑ Back to top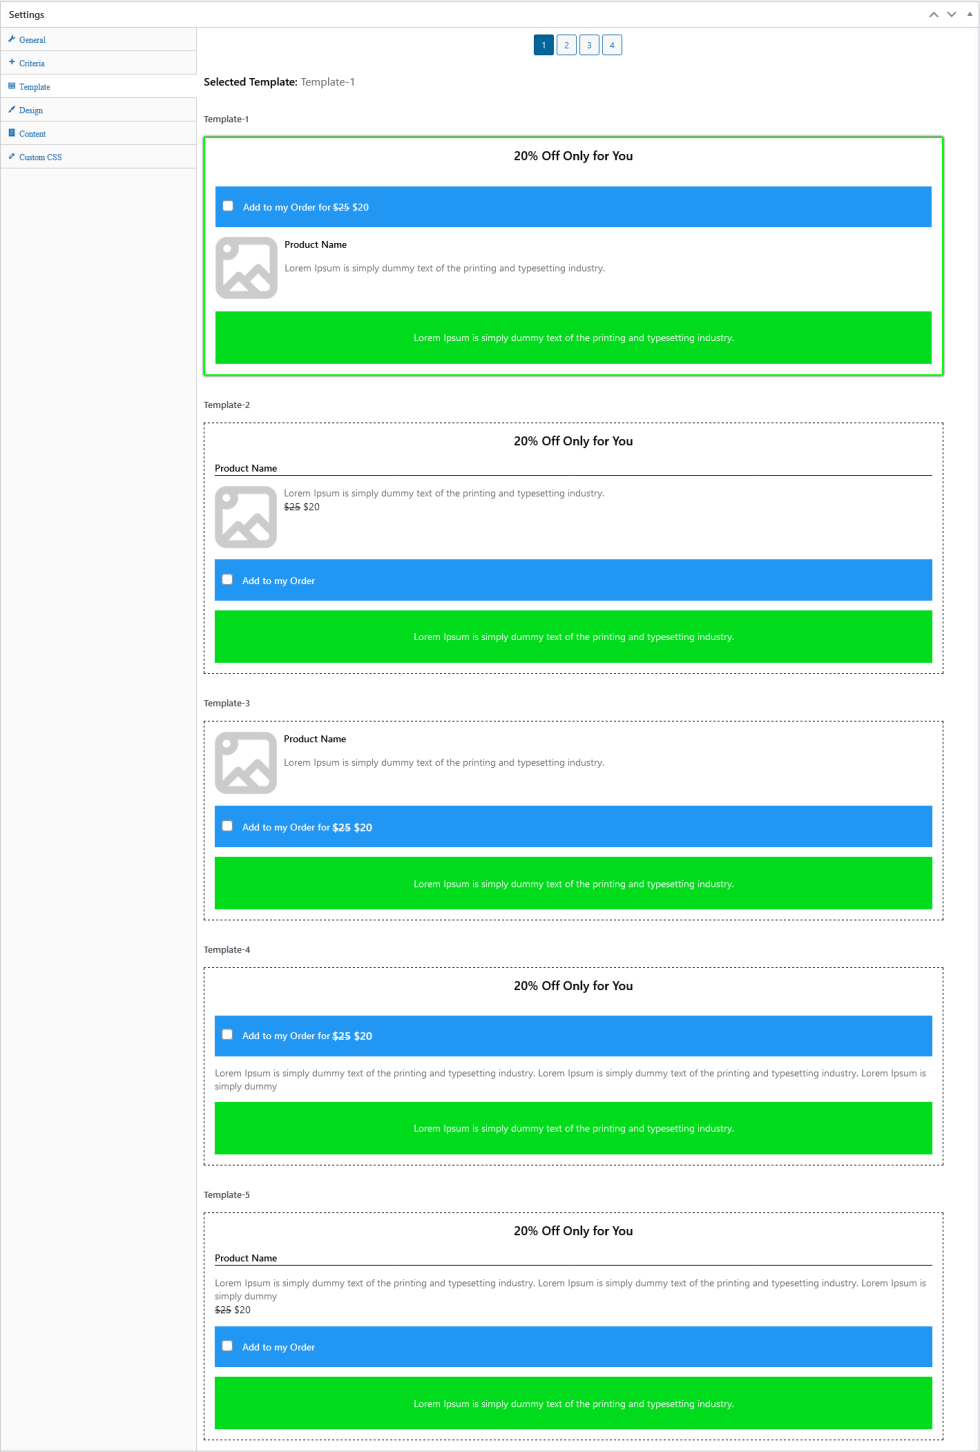
- You can choose the Template for each Order Bump separately.
- By default, Template 1 will be chosen as the default template. If you want to change the template of an Order Bump, click on the template which you want to be selected as the template. You will be presented with a Confirmation dialog to save the design and content changes which were made to the current template.
- Once you click Ok, the Order Bump will be switched to the new Template.
- Each Template has its own set of content fields and design fields. So, if you make any changes in the Design Tab and Content Tab, the changes will only affect only the currently selected template.
- You can also switch between templates in an Order Bump.
Note:
Only the Saved Template Number will be displayed in Selected Template notice.
Order Bump – Rule Configuration – Design
↑ Back to top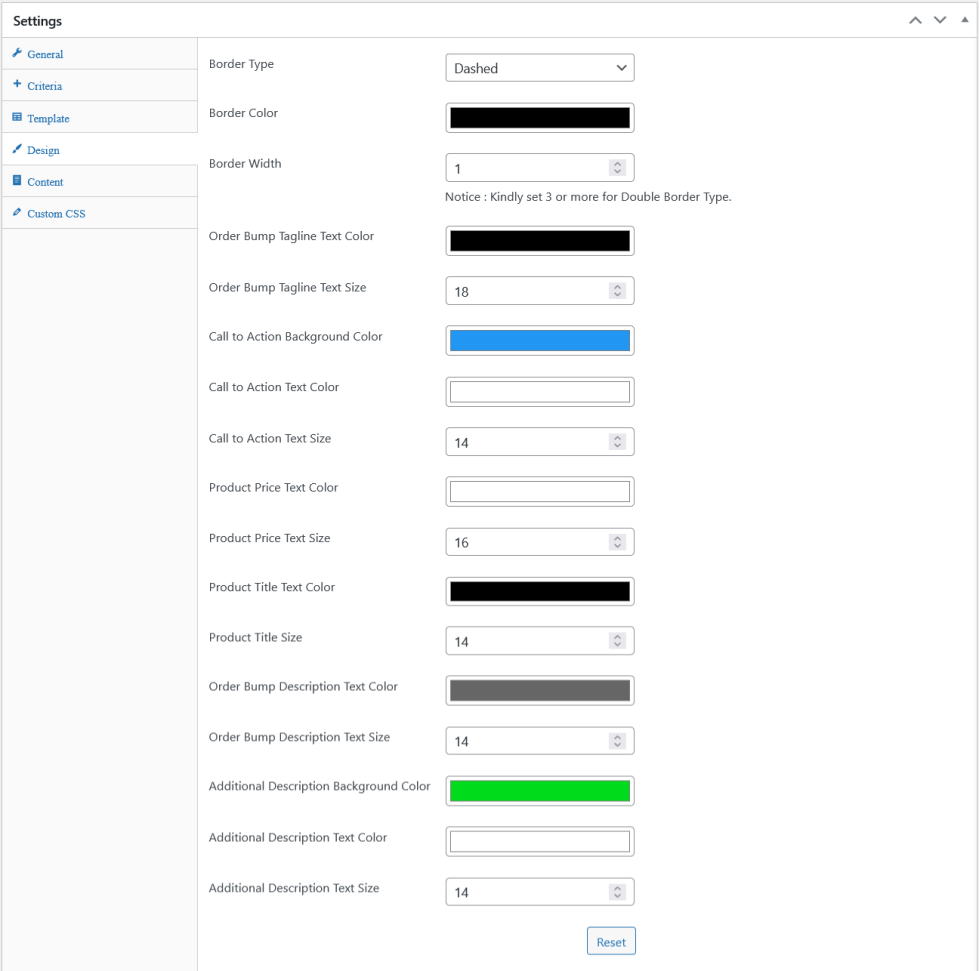
You can customize the size and color of the elements presented in the Order Bump Template.
Note
The elements which can be customized is dependent on the actively selected Template.
Order Bump – Rule Configuration – Content
↑ Back to top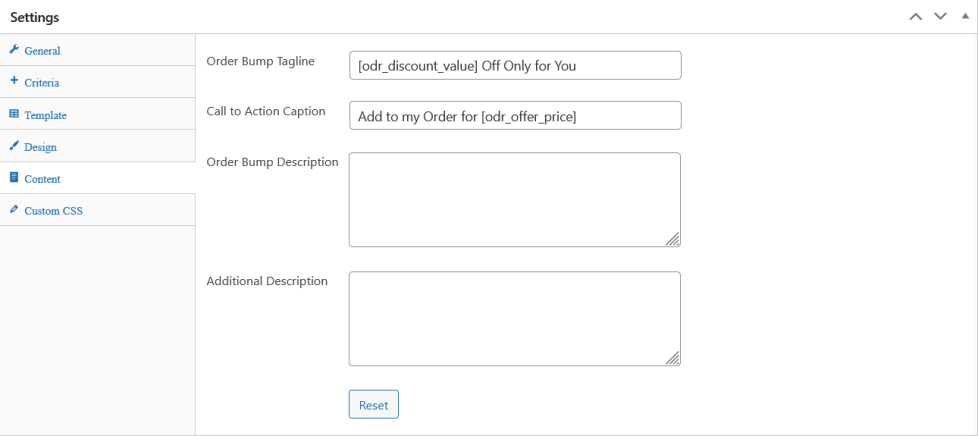
You can customize the content presented in the Order Bump Template.
Order Bump – Rule Configuration – Custom CSS
↑ Back to top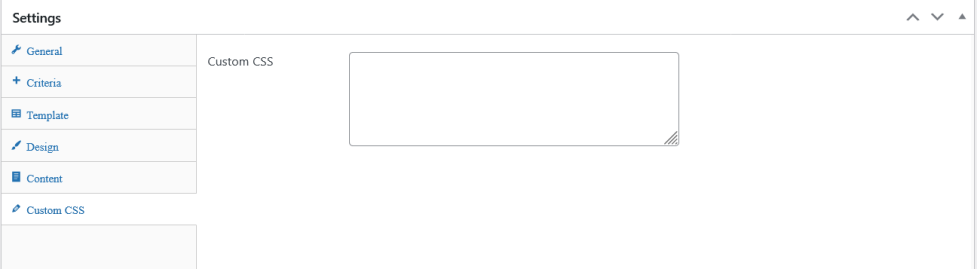
You can customize the offer look and feel by using the Custom CSS option which is available under each rule configuration.
Order Bump – Configured Offer – Preview
↑ Back to top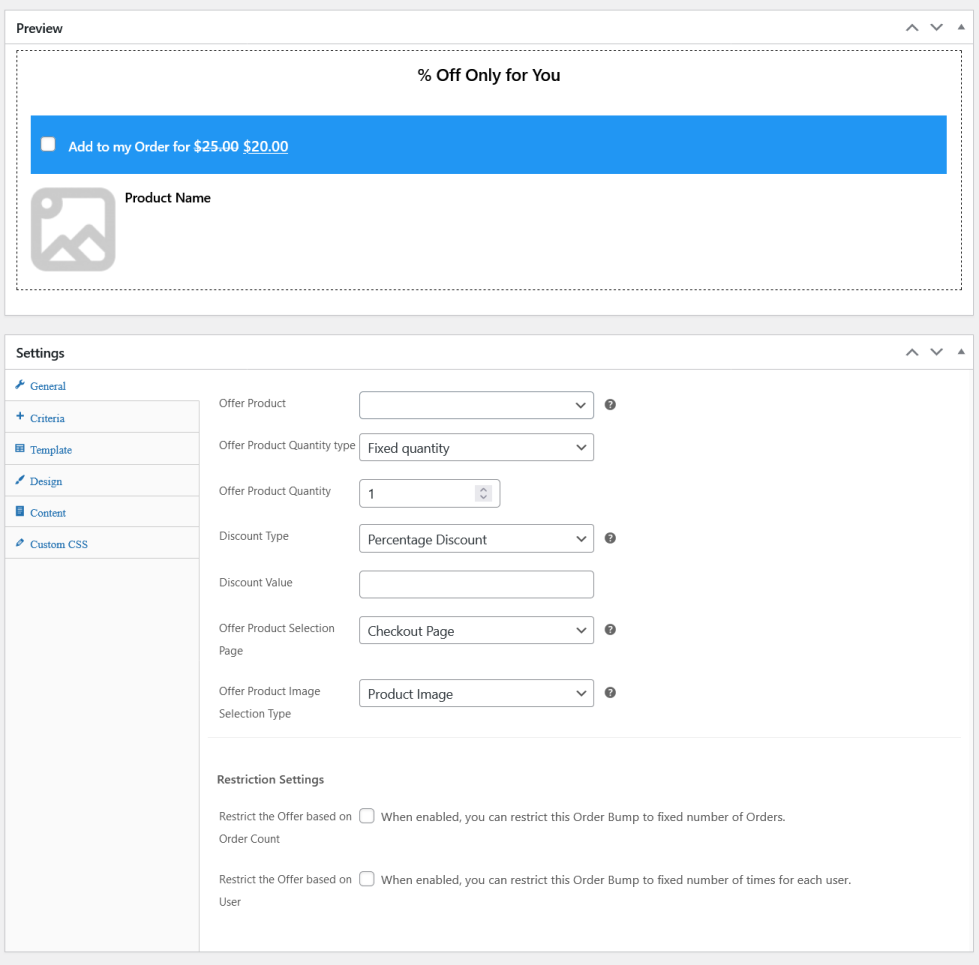
You can get the preview of the configured Order Bump Offer under rule configuration.
Note
The elements which can be customized is dependent on the actively selected Template.
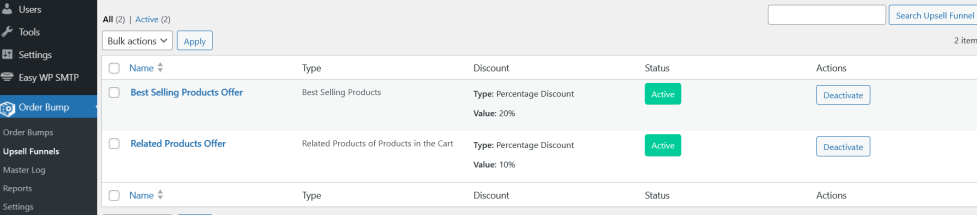
Upsell Funnel – Rule Configuration
↑ Back to topNew Upsell Funnel rules can be created from Order Bump > Upsell Funnels. To Create a new Upsell Funnel, click the Add New Button.
Upsell Funell – Rule Configuration – General
↑ Back to top
- In the “Type” option, select what type of products has to be presented to the user in the Upsell Funnel. As of now, the following options are available,
- Best Selling Products
- Featured Products
- On Sale
- Recently Published Products
- Recently Viewed Products
- Related Products of Products Published in the Cart
- Up-Sells of Products in the Cart
- Cross-Sells of Products in the Cart
- Selected Products
- Selected Categories
- In the Number of Products to Display option, you can set the number of products which has to be displayed to the user.
- In the “Offer Product Quantity Type” option select the product quantity selection type which is applicable for the offer.
- Fixed Quantity: The offer product will be awarded with the fixed quantity
- Customer Selection: The offer product will be awarded with the defined quantity range and the customer can select from it
- In the “Offer Product Quantity” option input the product quantity which is eligible for the Fixed Quantity type. Enter the quantity range for the selected offer product in the Minimum Offer Product Quantity and Maximum Offer Product Quantity fields for the Customer Selection type
- In the Offer Product Quantity option, you can set the maximum product quantity of the offer product.
- In the “Discount Type” option, choose the type of discount which you want to offer and set the discount value.
- By default, a single Upsell Funnel can be used for any number of orders. If you want to restrict the number of times a single Upsell Funnel is used, you can do so by enabling the “Restrict the Offer based on Order Count” option and setting the value in “Maximum Number of Orders to be Applied” option.
- By default, an Upsell Funnel will be visible to a user every time the Upsell Funnel Criteria matches with that user. If you want to restrict the number of times a single Upsell Funnel is displayed to a user, you can do so by enabling the “Restrict the Offer based on User” option and setting the value in “Maximum Number of Orders per User” option.
Upsell Funnel – Rule Configuration – Condition
↑ Back to top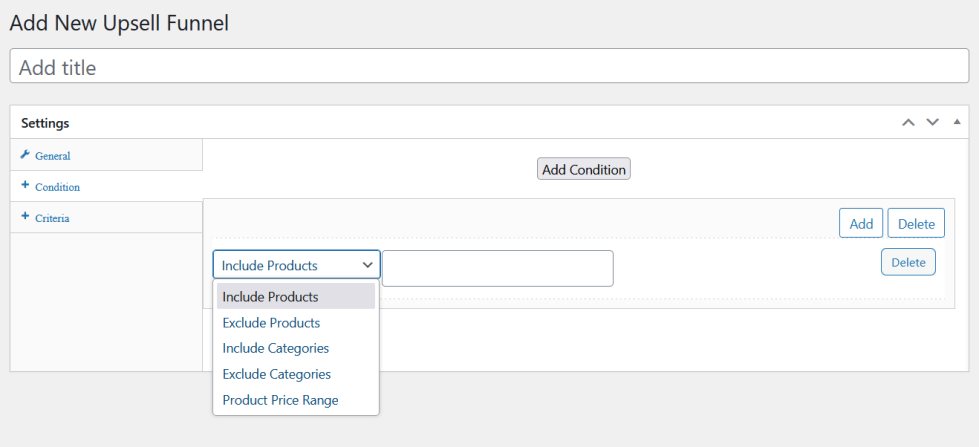
- To create a new Condition, click the “Add Condition” button.
- You can select the type of condition you wish to configure from the list of options available,
- Include Products: You can select the products to be considered for the rule.
- Exclude Products: You can select the products to be excluded for the rule.
- Include Categories:You can select the categories to be considered for the rule.
- Exclude Categories: You can select the categories to be excluded for the rule.
- Products Price Range: You can select the product price range which is applicable for the rule.
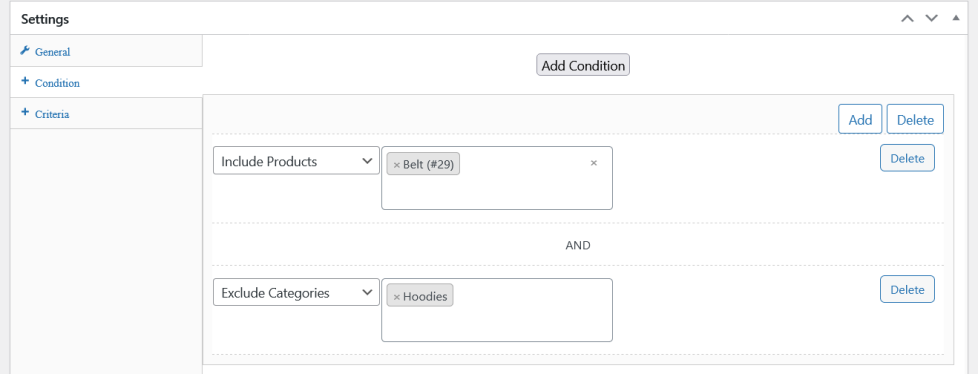
- You can create the Condition with a single condition or you can create the Condition with multiple conditions.
- To create the Condition with multiple conditions, click the Add button. When multiple conditions are configured, your customers should match all the conditions within the Condition section to be eligible for an Upsell Funnel.
Example
Customer’s cart must contain Product A and doesn’t contain products from the Category A.
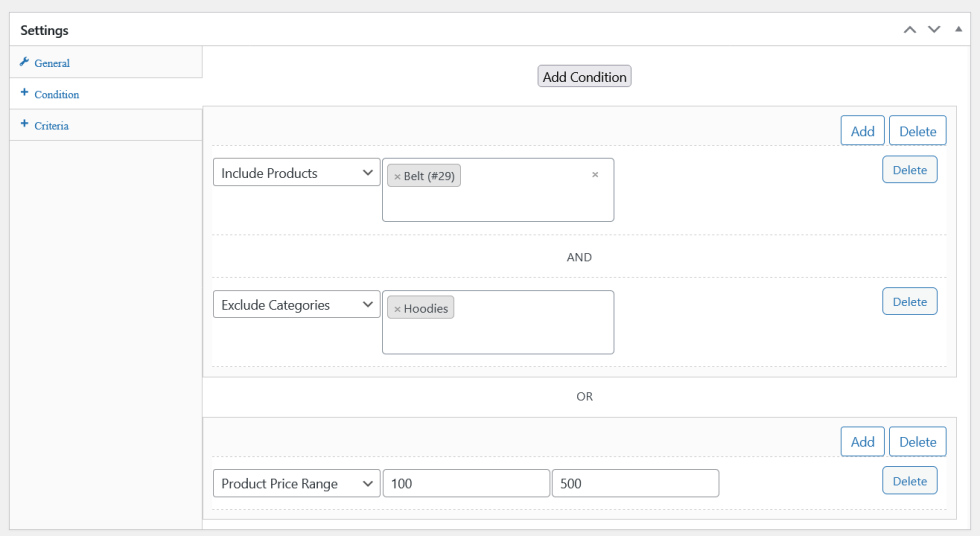
- You can also create 2 or more unique sets of Conditions for an Upsell Funnel.
- When 2 or more unique sets of conditions are configured, the customer only needs to satisfy one Condition. To create a new set of Conditions within the Upsell Funnel, click the Add Rule button.
Example
Customer’s cart must contain Product A and doesn’t contain products from the Category A.
Or
Customer’s cart must contains the Price range between 100 to 500.
Upsell Funnel – Rule Configuration – Criteria
↑ Back to top- To create a Criteria, click the “Add Rule” button.
- Configure the Criteria based on your preferences and needs.

- Order based Criteria: Criteria related to Order
- Contains Products
- Does not contain Products
- Cart Subtotal is less than or equal to
- Cart Subtotal is more than or equal to
- Order Total is less than or equal to
- Order Total is more than or equal to
- Number of Products in Cart less than or equal to
- Number of Products in Cart more than or equal to
- Contains Products from Category
- Does not contain Products from Category
- Contains Product Type
- Does not contain Product Type
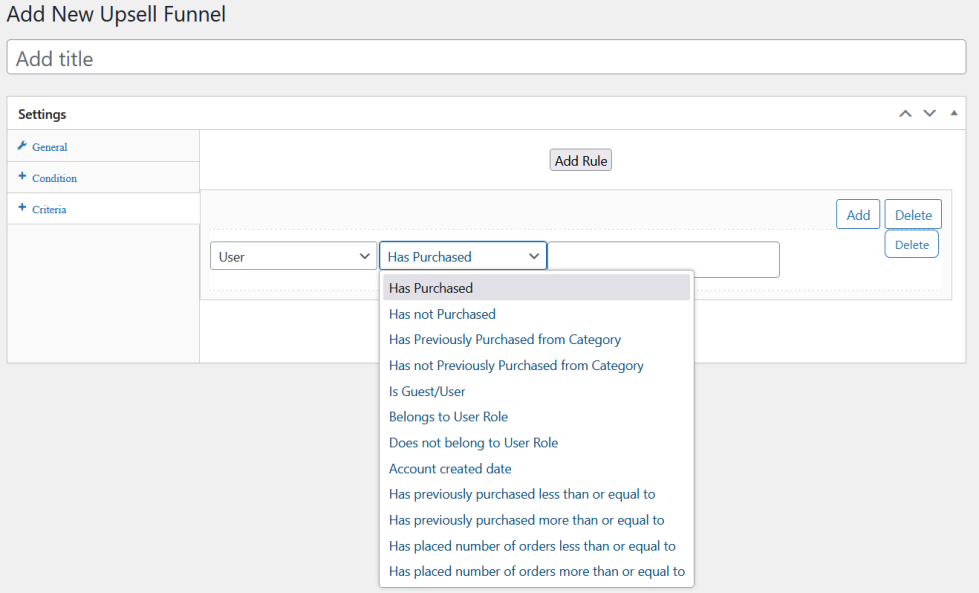
- User based Criteria: Criteria related to User[like Purchase History, Role & more]
- Has Purchased
- Has not Purchased
- Has Previously Purchased from Category
- Has not Previously Purchased from Category
- Is Guest/User
- Belongs to User Role
- Does not belong to User Role
- Account created date
- Has previously purchased less than or equal to
- Has previously purchased more than or equal to
- Has placed number of orders less than or equal to
- Has placed number of orders more than or equal to
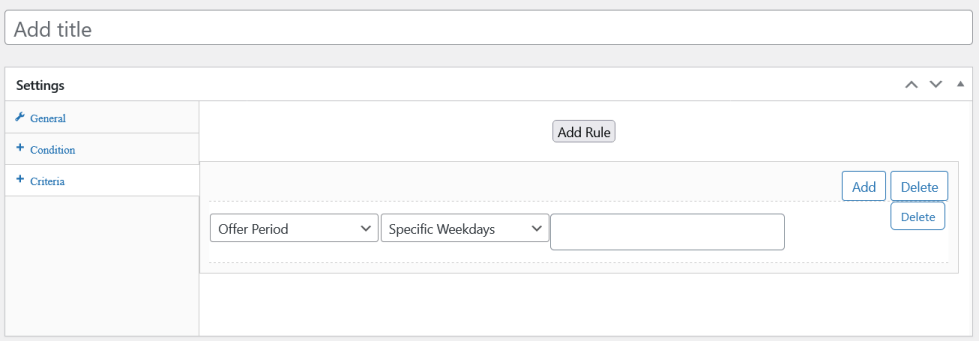
- Period based Criteria: Criteria related to Period
- Date range
- Weekdays
- You can create a Criteria with a single condition or you can create a Criteria with multiple conditions.
- To create a Criteria with multiple conditions, click the Add button. When multiple conditions are configured, your customers match all the conditions within the Criteria to be eligible for an Upsell Funnel.
Example:
Customer’s cart must contain Product A and the Cart Sub Total should be more than $100.
- You can also create 2 or more unique sets of Criteria for an Upsell Funnel.
- When 2 or more unique sets of criteria are configured, the customer only needs to satisfy one Criteria. To create a new set of Criteria within the Upsell Funnel, click the Add Rule button.
Example
Customer’s cart must contain Product A and the cart subtotal should be more than $100.
Or
Customer’s cart must contain Product A and the previous purchase history should be more than $500.
Master Log
↑ Back to top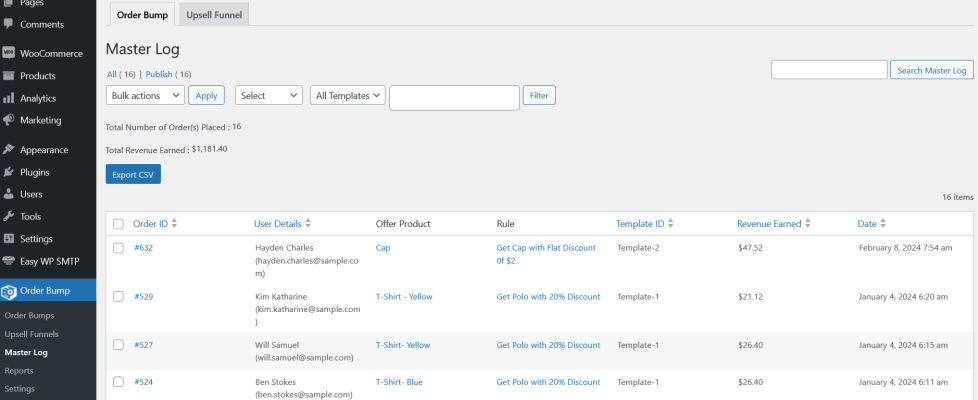
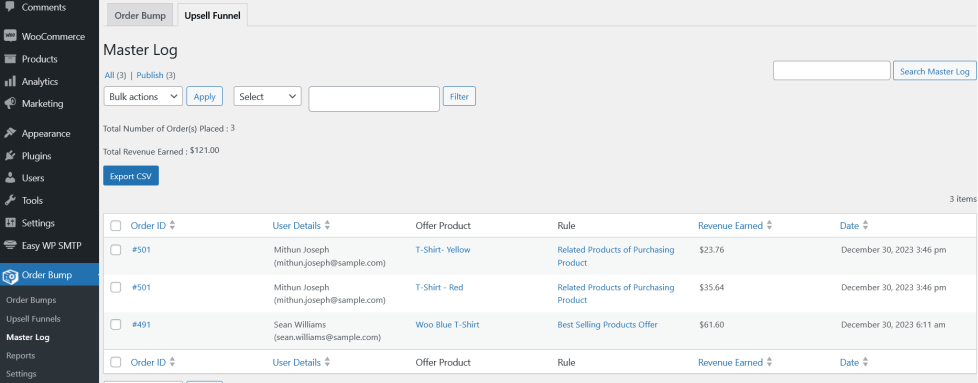
The Order Bump and Upsell Funnel activity will be listed in the Master Log section.
Reports
↑ Back to top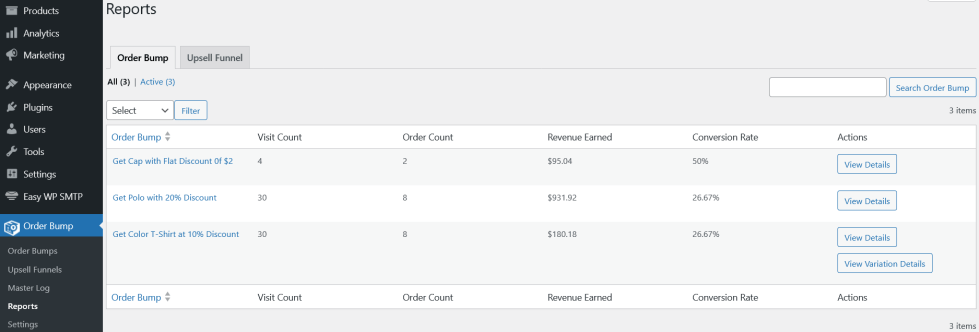
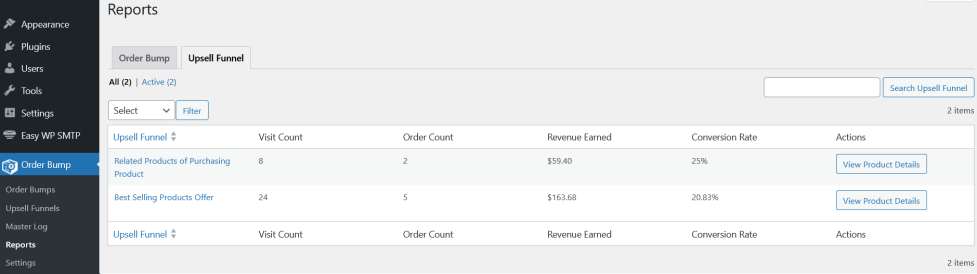
Site Admin can get insights on the Order Bump and Upsell Funnel activity by reviewing the reports.
Usage
↑ Back to topOnce the plugin settings and the rules have been configured, the plugin will be ready for use. The workflow of the plugin is as follows,
Order Bump
↑ Back to top- The user adds products to their cart, proceeds to the checkout page for completing their purchase.
- On the checkout page, the user will be presented with an offer.
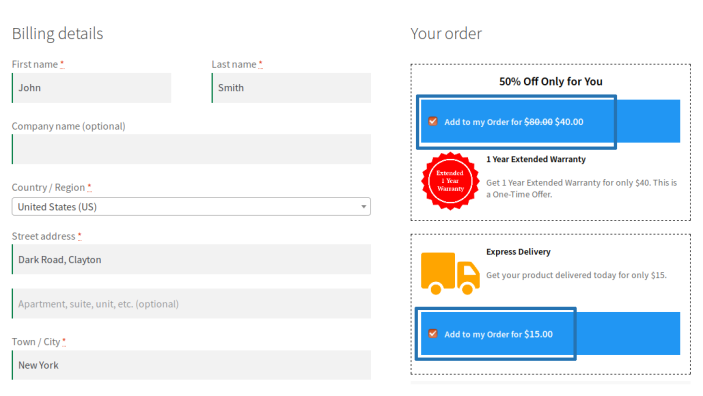
- To accept the offer, they will have to enable the “Add to my Order” checkbox.
- Once the checkbox is enabled, the product associated with the offer will be added to the cart automatically and the order total will be updated.

- Once the offer product is added to the cart, the user can place their order.
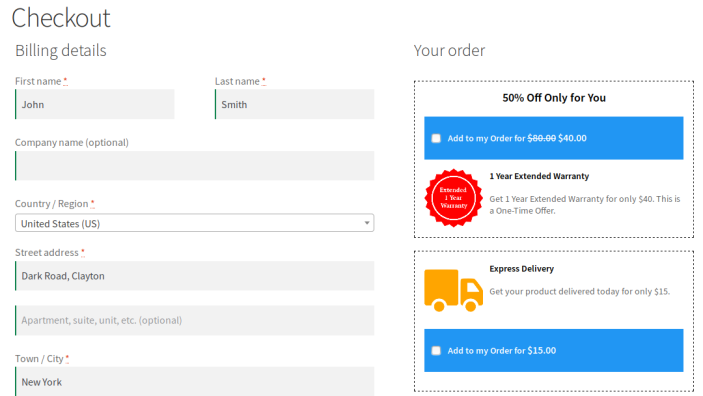
Upsell Funnel
↑ Back to top- The user adds products to their cart, proceeds to the checkout page for completing their purchase.
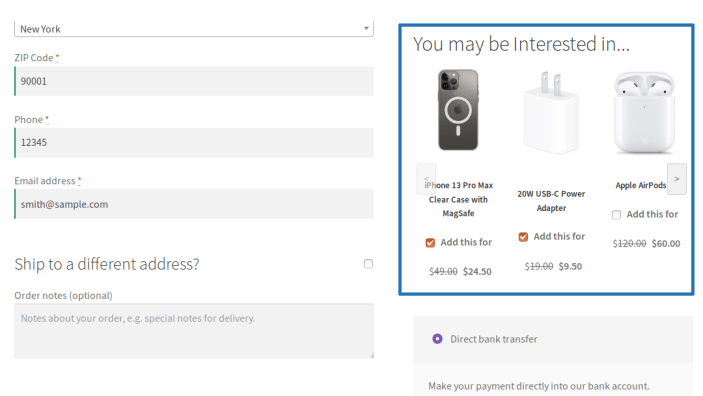
- On the checkout page, the user will be presented with offers multiple offers(Based on Configuration).
- To accept the offer, they will have to enable the checkbox.
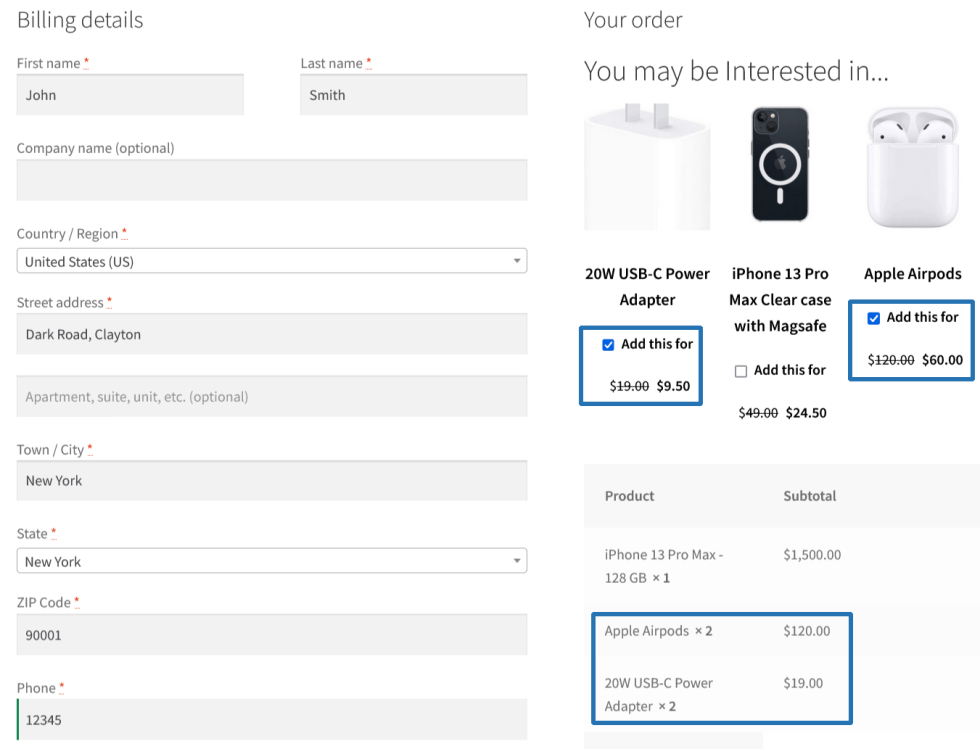
- Once the checkbox is enabled, the product associated with the offer will be added to the cart automatically and the order total will be updated.
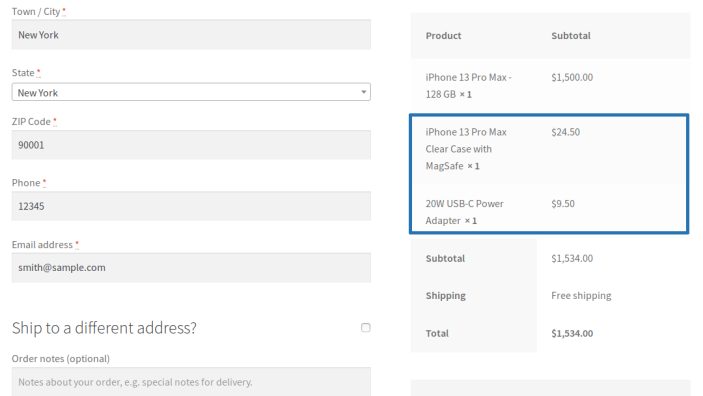
- Once the offer product is added to the cart, the user can place their order.
Translation
↑ Back to topOrder Bump for WooCommerce Plugin is translation ready meaning you can edit the po files by which you can translate the text to any language.
The steps to do the translation are as follows. For eg let us consider translation to French.
- Download and install Poedit
- Open the file order-bump-for-woocommerce -> languages folder -> order-bump-for-woocommerce.pot using Poedit.
- Create a new translation file by clicking Create new translation button
- Choose the Source text and set its corresponding French text in Translation Text Area.
- Save the changes.
- Save the file name as order-bump-for-woocommerce-fr_FR.po
- Then go to WordPress dashboard -> Settings -> General and select the Site Language as French
Questions and Feedback
↑ Back to topHave a question before you buy? Please fill out this pre-sales form.
Already purchased and need some assistance? Get in touch with us via the Help Desk.