This plugin sends WhatsApp notifications using the official WhatsApp Cloud APIs for WooCommerce orders.
Overview
↑ Back to topNowadays, everyone uses WhatsApp as their primary messaging application instead of the native SMS application on their phone. It is best to use WhatsApp to communicate effectively with customers regarding their order notifications. Using the native WhatsApp API, this plugin sends all order-related updates directly to the customer’s WhatsApp number.
The order notifications would be sent to the store admin as well. So now each time an order pops up, the store admin will get a WhatsApp notification instantly. No more missed orders, no more constant email checks.
Features
↑ Back to top- Send order notifications directly on WhatsApp .
- This plugin uses WhatsApp API. No third-party service is needed.
- Notifications will be sent for both customer & admin.
- No more missed orders, no more constant email checks.
- Admin can create the message templates from the plugin dashboard.
- Admin can send WhatsApp messages to customers from the order edit screen.
Installation
↑ Back to top- Download the extension from your WooCommerce dashboard.
- Go to Plugins > Add New > Upload and select the ZIP file you just downloaded.
- Click Install Now, and then Activate.
Setup and Configuration
↑ Back to topWhatsApp API
↑ Back to top- Go to Dashboard > WhatsApp Notifications > Settings
- Enable: Check this tickbox to enable “WhatsApp Order Notifications”
- WhatsApp Bearer Token: Enter your WhatsApp bearer token here.
- WhatsApp Mobile Number: Enter your WhatsApp mobile number here.
- WhatsApp Business Account ID: Input your WhatsApp business account ID here.
- WhatsApp Phone number ID: Put your WhatsApp phone number ID here.
- Admin Mobile Number: Enter the store admin’s WhatsApp mobile number here.
- Enable Logging: Check this checkbox to enable logging.
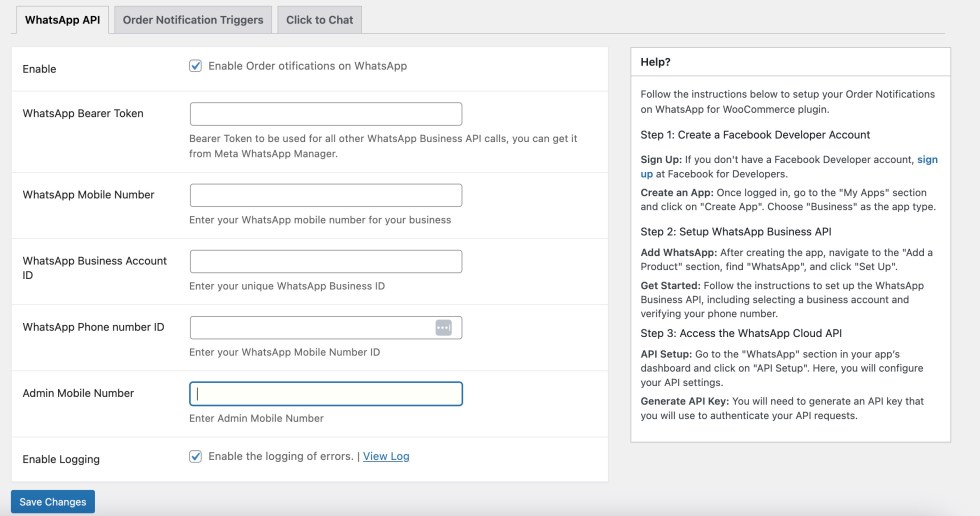
Follow the below instructions to retrieve all the above numbers/keys:
WhatsApp Cloud API Setup
↑ Back to topSetting up the WhatsApp Cloud API involves several steps to ensure you can send and receive messages using WhatsApp’s platform. Here’s a step-by-step guide to get you started:
Step 1: Create a Facebook Developer Account
Sign Up: If you don’t have a Facebook Developer account, sign up at Facebook for Developers. Create an App: Once logged in, you need to select your “Business Profile”.
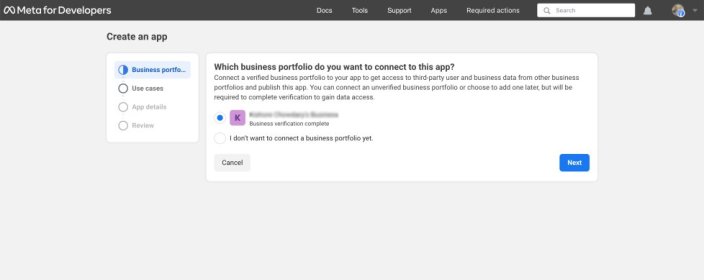
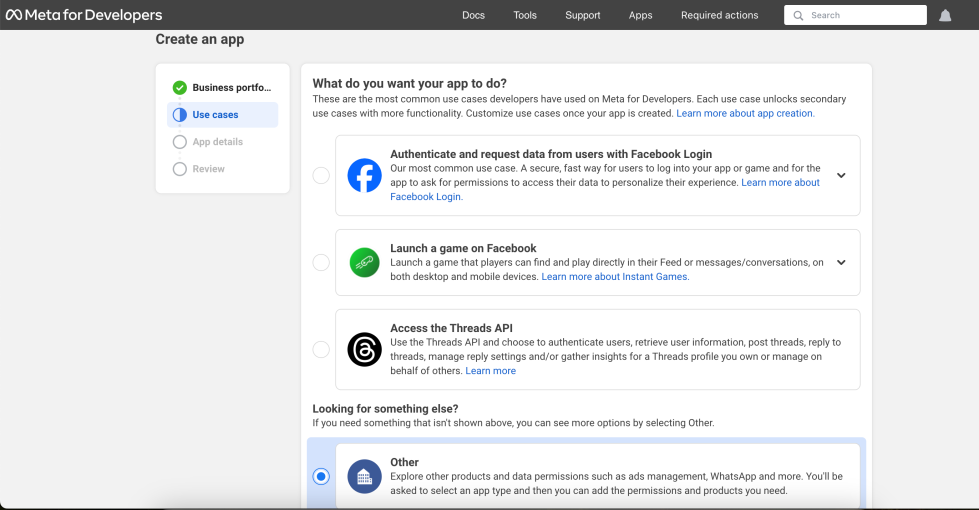
After that, please select “Others” in the “Use Cases” tab.
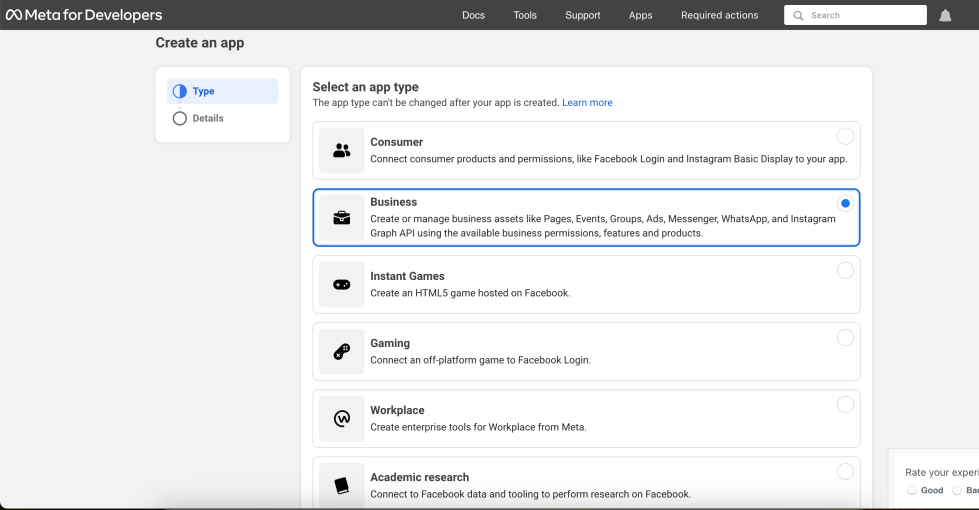
Now select the App Type “Business”.
After that, in the “Details” tab, give your app a name and click on the “Create App” button.
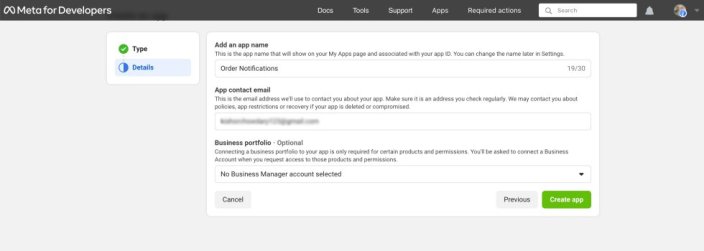
Step 2: Setup WhatsApp Business API
Add WhatsApp: After creating the app, navigate to the “Add a Product” section, find “WhatsApp”, and click “Set Up”.
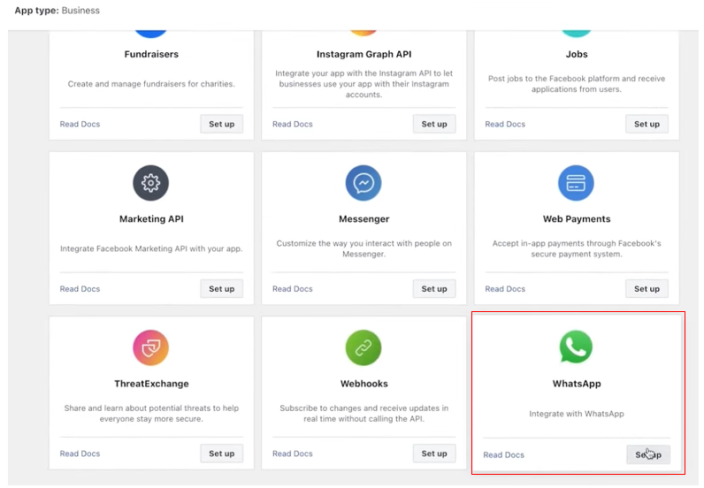
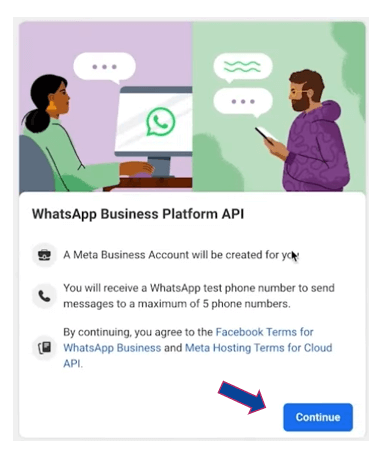
Get Started: Follow the instructions to set up the WhatsApp Business API including selecting a business account and verifying your phone number.
Step 3: Access the WhatsApp Cloud API
API Setup: Go to the “WhatsApp” section in your app’s dashboard and click on “API Setup”. Here, you will configure your API settings. Generate API Key: You will need to generate an API key that you will use to authenticate your API requests.
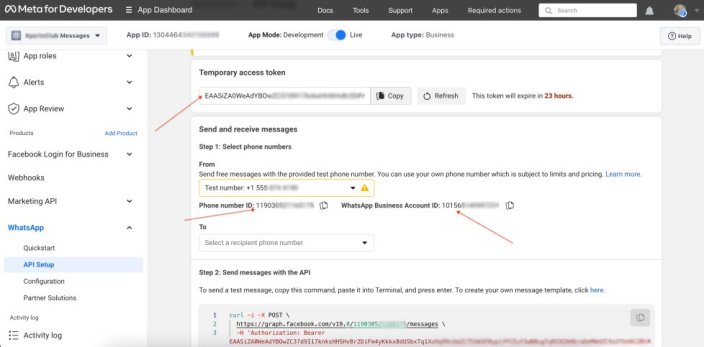
Now let’s see how to generate a permanent token.
Steps to generate Permanent API token for WhatsApp
1) log in to Facebook Business Manager and click on “App Dashboard” then navigate to “Business settings”
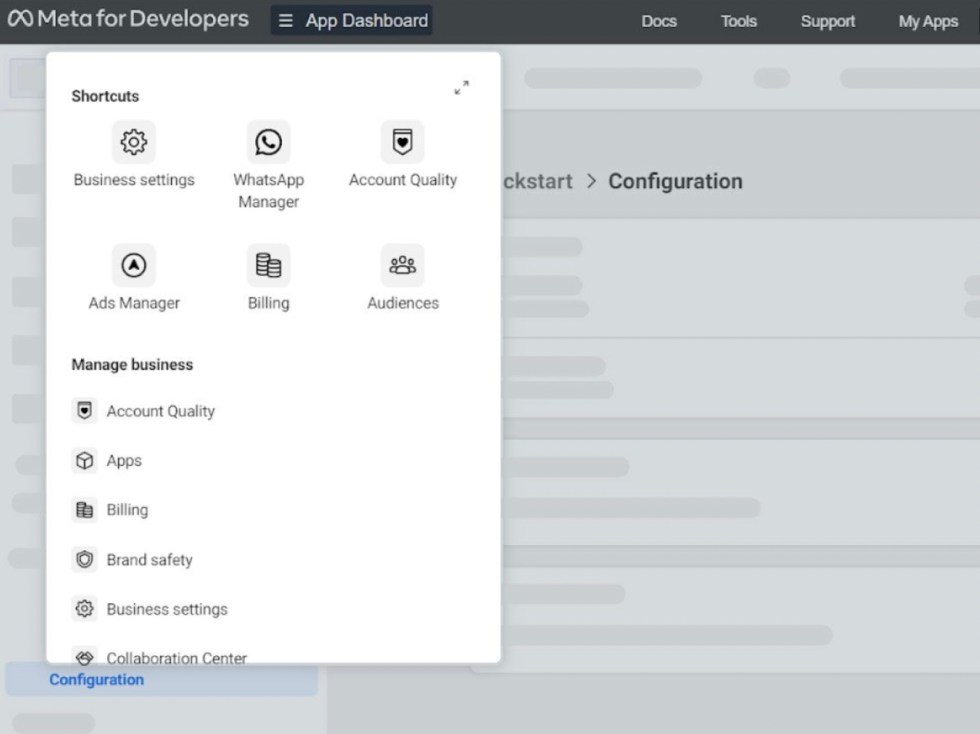
2) Now please navigate to “System users” (Business Settings > Users > System Users) and click on “Add”.
3) Enter the System Username and choose the System User Role for the user. Click “Create System User”. (Please select the system user role as ‘admin’).
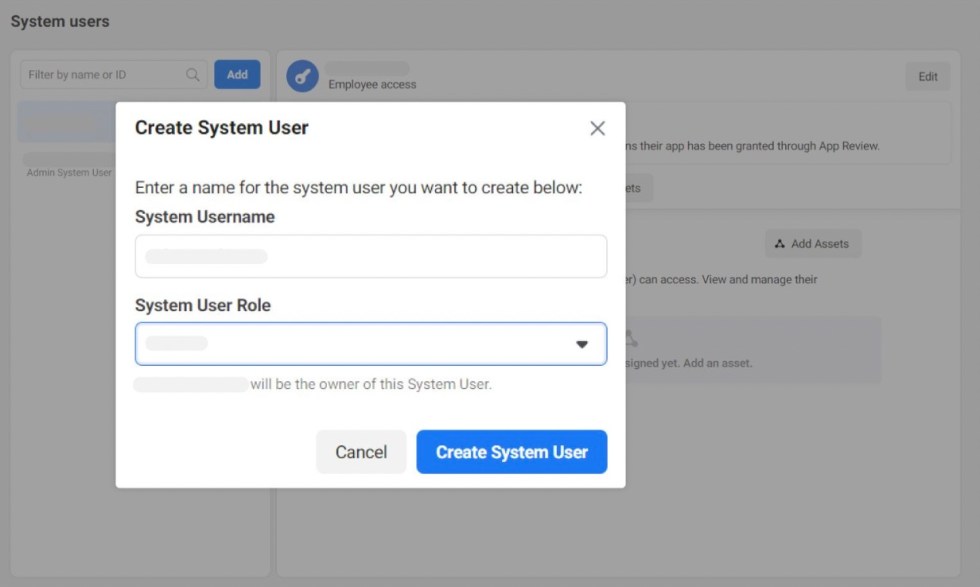
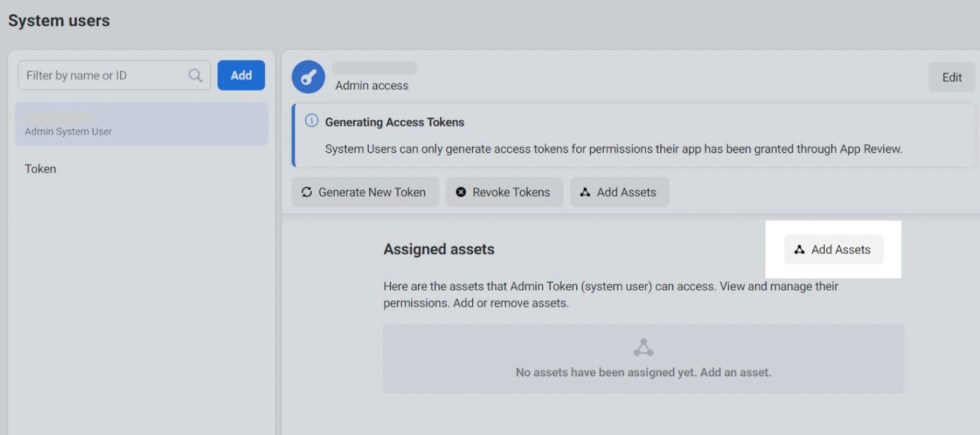
4) Now click on “Add Assets” and navigate to Apps.
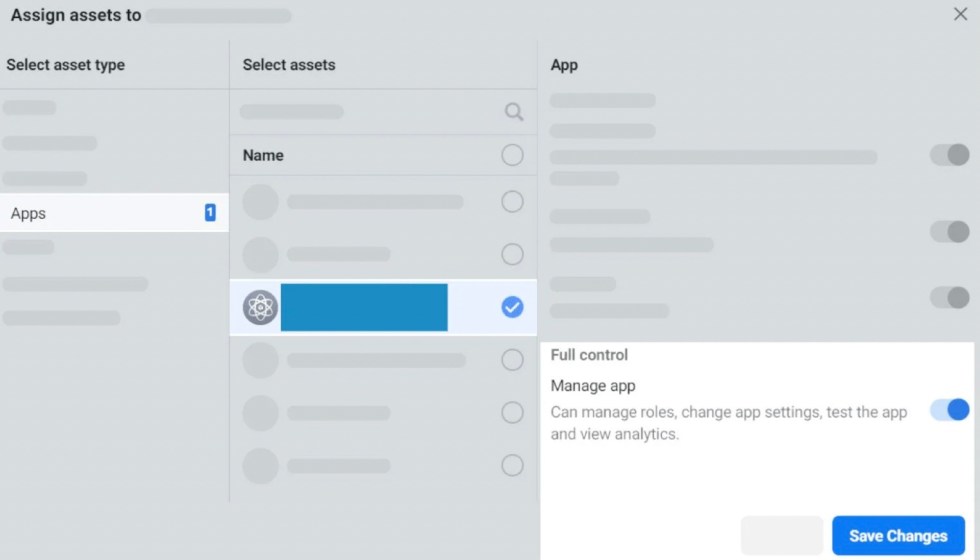
5) Now choose your app and then, enable the toggle of “Manage app” and click on “Save Changes”.
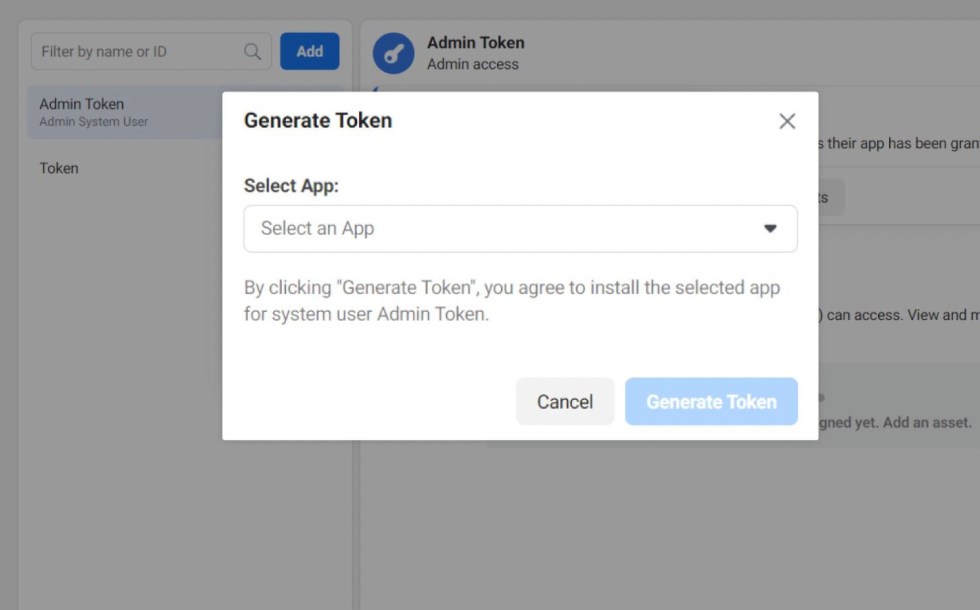
6) Now please click on “Generate New Token” and choose your app.
7) Check WhatsApp_business_management” and “WhatsApp_business_messaging”.
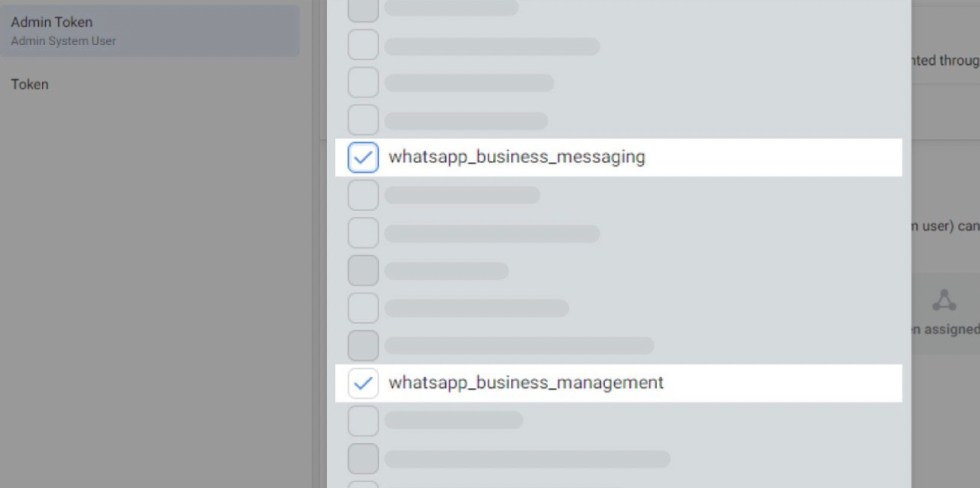
8) Finally, click on “Generate Token” and use it.
WhatsApp Templates
↑ Back to topNavigate to Dashboard > WhatsApp Notifications > WhatsApp Templates and click on Add new
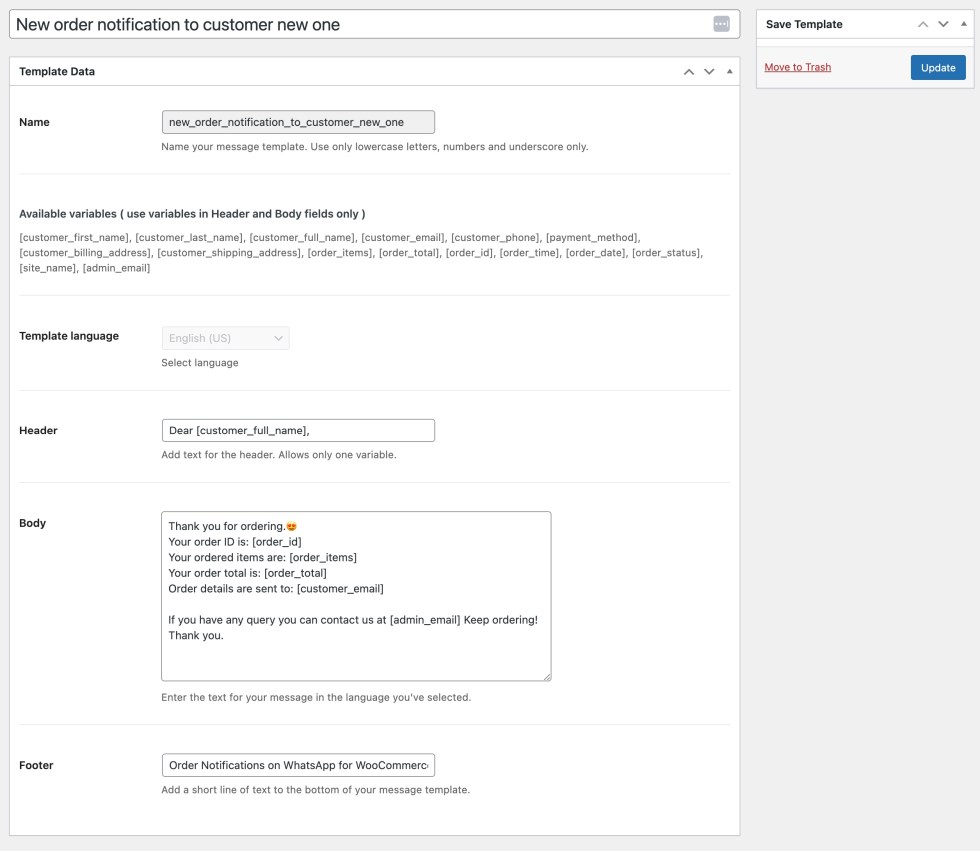
Give your template a name and add message ‘header’, ‘body’, and ‘footer’ content to it. And publish it.
Now it is time to assign the created templates to ‘Order Notifications’.
Order Notification Triggers
↑ Back to topNavigate to Dashboard > WhatsApp Notifications > Settings > Order Notification Triggers
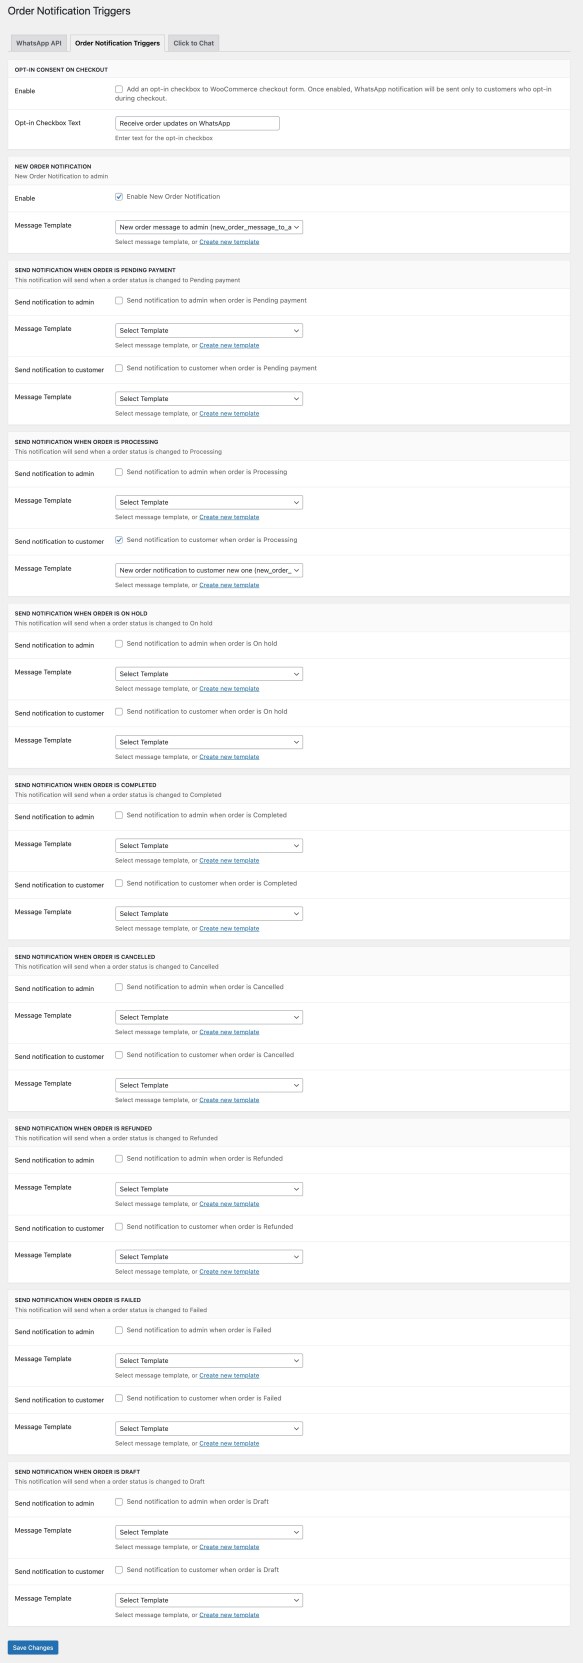
In this tab, you can Enable the “Opt-in” checkbox for the customer to opt-in for the WhatsApp order notifications. If you enable this, the opt-in will be displayed for the customer on the checkout page.
The rest of the settings in this tab are to enable order notifications on WhatsApp for different order statuses like ‘order placed, pending, processed, shipped, completed…’ etc. You can choose a different WhatsApp template for each order status here.
Click to Chat
↑ Back to topWe also have an interesting “Click to Chat” feature. To enable this awesome feature, please navigate to Dashboard > WhatsApp Notifications > Settings > Click to Chat
Enabling this option will show a floating WhatsApp chat button on your website. By clicking on this button, your customers can interact with the store admin on WhatsApp regarding their product-related queries.
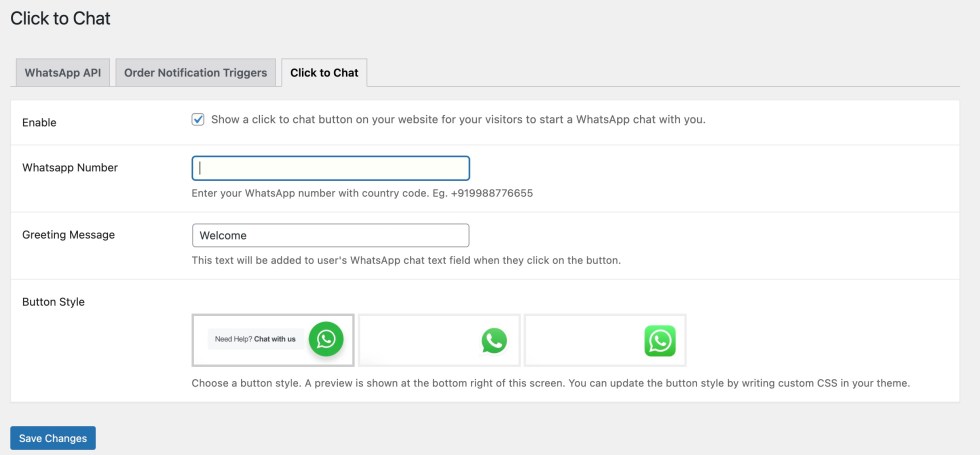
Greeting Message: This text will be displayed in the user’s WhatsApp chat when they click on this button.
Button Style: Choose your desired button style.
