Installation
↑ Back to top- Download the .zip file from your WooCommerce account.
- Go to: WordPress Admin > Plugins > Add New and Upload Plugin. Select Choose File for the file you have downloaded.
- Install Now and Activate Plugin.
Setup and Configuration
↑ Back to topAfter activating Order Tracking for WooCommerce, “Order Tracking” will display in the WordPress admin under the WooCommerce menu. Click to view settings and get started.
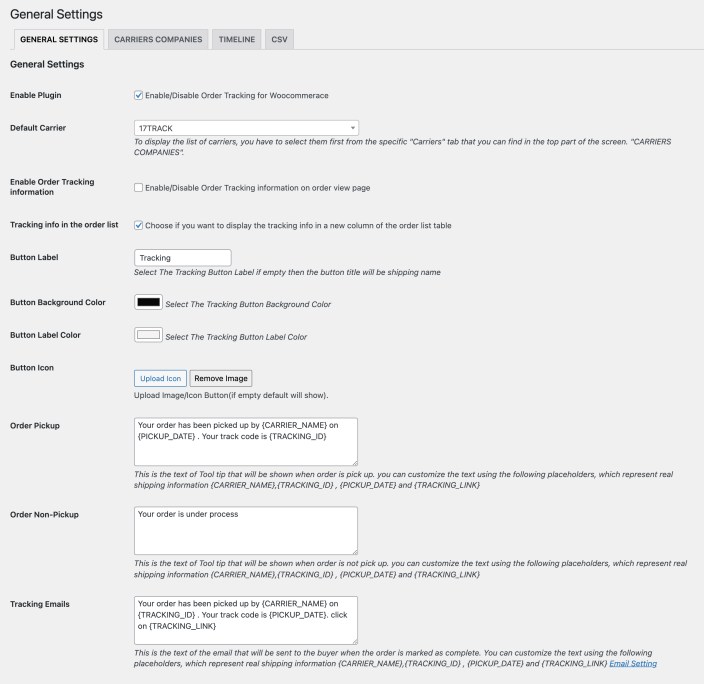
General Settings:
↑ Back to top- Enable extension
- Select default carrier
- Enable order tracking information to display on the My Account > Orders Listing
- Enable order tracking information to display on the My Account > Order Detail page
- Fully customize the tracking button (on Order Detail page) by setting the label, icon, text, text color and background color
- Customize the Order Pickup message (message appears on tooltip once order is marked as picked up)
- Customize the Order Non-Pickup message (message appears on tooltip before the order is marked as picked up)
- Customize the text of Tracking Emails sent to customers once an order is marked as complete (the email will automatically include an order summary)

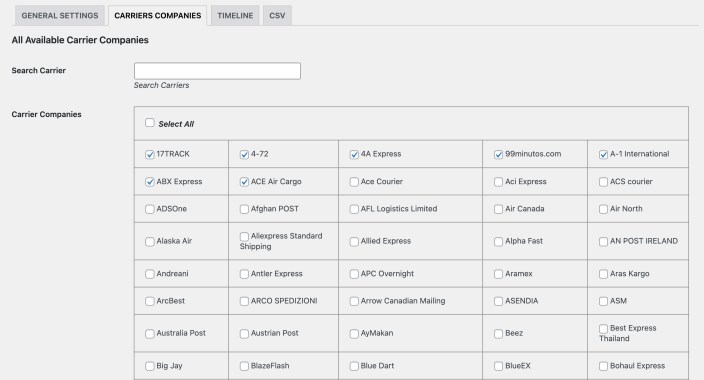
Carrier Companies:
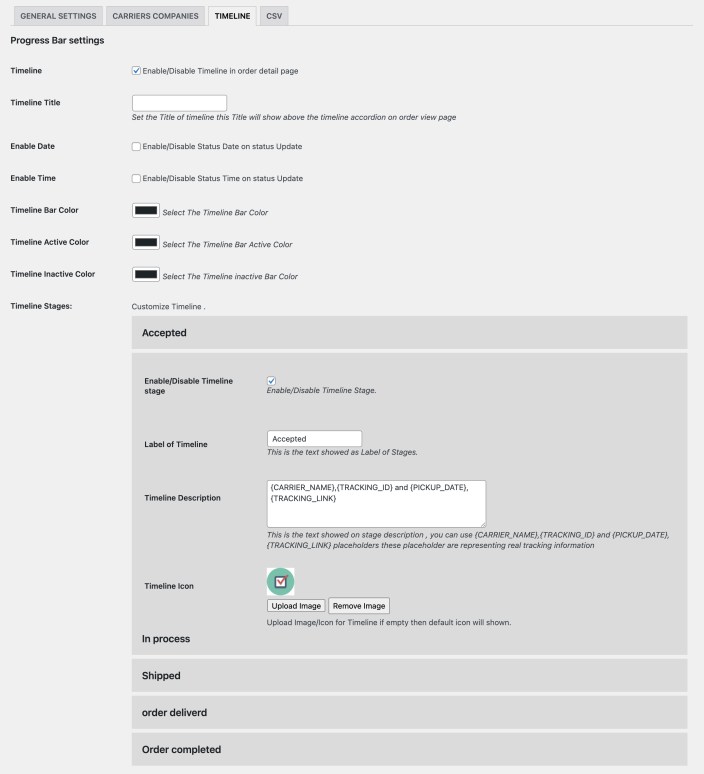
↑ Back to topTimeline:
↑ Back to top- Enable and add timeline title to be displayed on the My Account > Order Detail page
- Enable date and time to be displayed on status updates
- Customize timeline bar, active and inactive stage colors
- Option to set up to 5 timeline stages and further customize:
- Timeline Label
- Timeline Description
- Timeline Icon

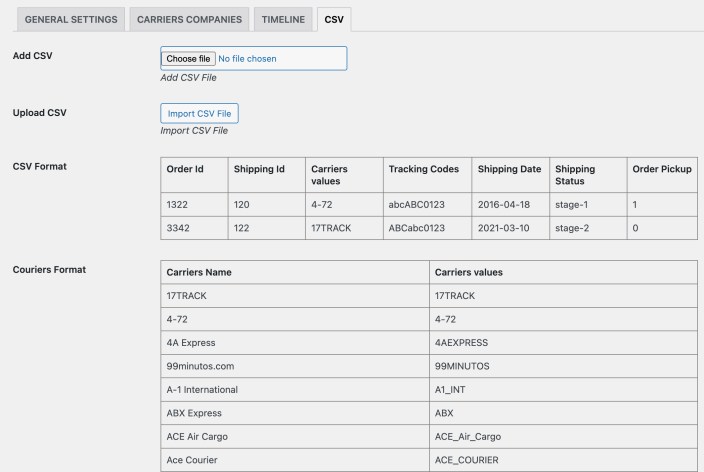
Import tracking codes:
↑ Back to top
Adding Tracking Information from Order:
↑ Back to top- Tracking code received from the carrier
- Tracking company
- Pickup date
- Show timeline and select status
- Select order pickup checkbox to notify customer on My Account page and via email notification about order tracking information

