Installation
↑ Back to top- Download the .zip file from your WooCommerce account.
- Go to: WordPress Admin > Plugins > Add New and Upload Plugin. Select Choose File for the file you have downloaded.
- Click Install Now and Activate Plugin.
More information is available at Install and Activate Plugins/Extensions.
Setup and Configuration
↑ Back to topAfter activation of the Password Protected for WooCommerce, navigate to the extension settings menu under WP Admin > WooCommerce > Password Protected. Within this section, you will see 3 options: Rules, View Analytics, and View Order Analytics. Through these settings, you can easily create rules and view how password-protected products are performing.
Adding New Password Protection Rule:
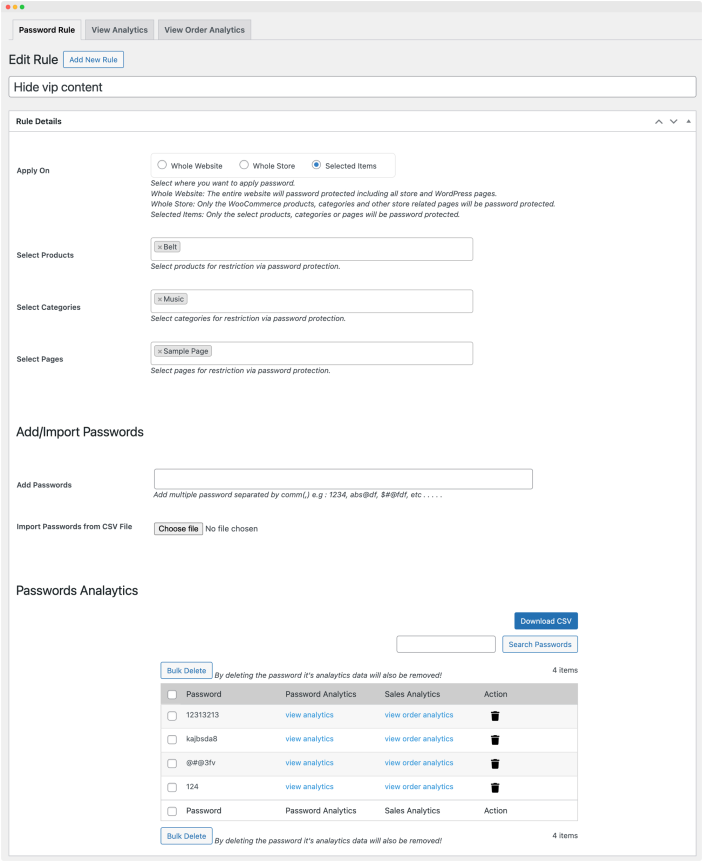
Go to WooCommerce > Password Protected > Rules tab in order to add new password protection on your store. Click on Add new and you would be able to customize following options,
1) Apply Passwords on the Whole Website or Desired Sections
You can create multiple rules to choose which website sections are password-protected. You can choose from the following options to apply password protection:
- Whole website: Entire store including WordPress default pages
- Whole store: Only the WooCommerce store section (Shop, categories, tags, products, cart, checkout and other store related pages)
- Selected items: Products, categories, pages etc
If you are apply password protection to specific items, you choose to password protect following items,
- Products – Password protection will only be applied on selected products
- Categories – Password protection will only applied on selected categories
- Pages – Password protection will only be applied on selected pages
2) Add Multiple Passwords or Import in Bulk
After choosing a desired section to password-protect, you can lock it by entering a custom password or importing passwords in bulk. You can do so through the following options:
Custom Password: Enter multiple passwords and separate them using a comma “,”
Bulk Import: You can import passwords from a CSV file by listing all the passwords in its first column, separated by cells vertically.

View Detailed Analytics of Password Protected Products
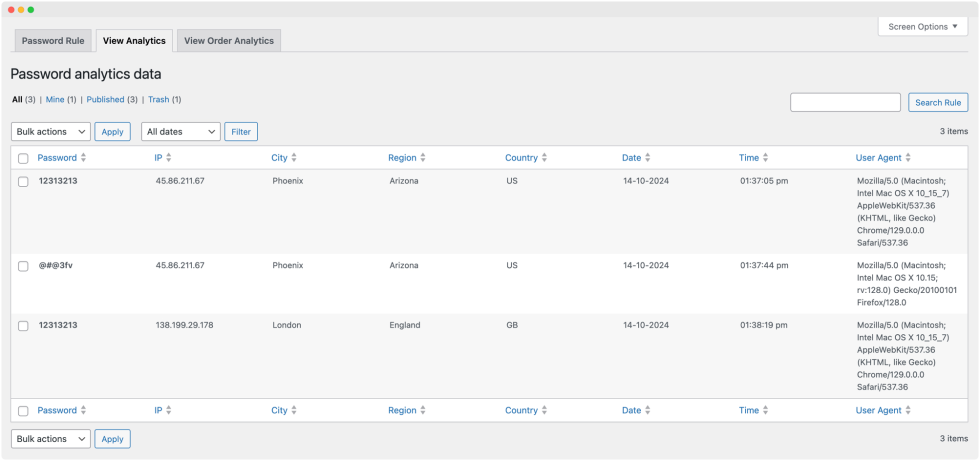
↑ Back to topTo better analyze the customers accessing the password-protected products, you can view the detailed password analytics log. Through the log, you can view the following details:
- Password: The password for which information is being displayed
- IP Address: IP of the customer based on geolocation
- State/City: User’s state based on geolocation
- Region: User’s region
- Country: User’s country
- Date: Date when a password-protected product was accessed
- Time: Time when a password-protected product was accessed
- User Agent: User’s browser information

View Order Analytics of Password Protected Products
↑ Back to topTo explore how protected products are performing, you can view a detailed order log with the following details:
- Password: password for which details are being displayed
- Order ID: ID associated with the password
- Product name: product associated with the password
- Product quantity: product quantity associated with the password
- Price: price of the password-protected product
- Customer name: name of the customer
- Email: customer’s email
- Purchase date: date of purchase

Customize Colors and Text of the Password Form
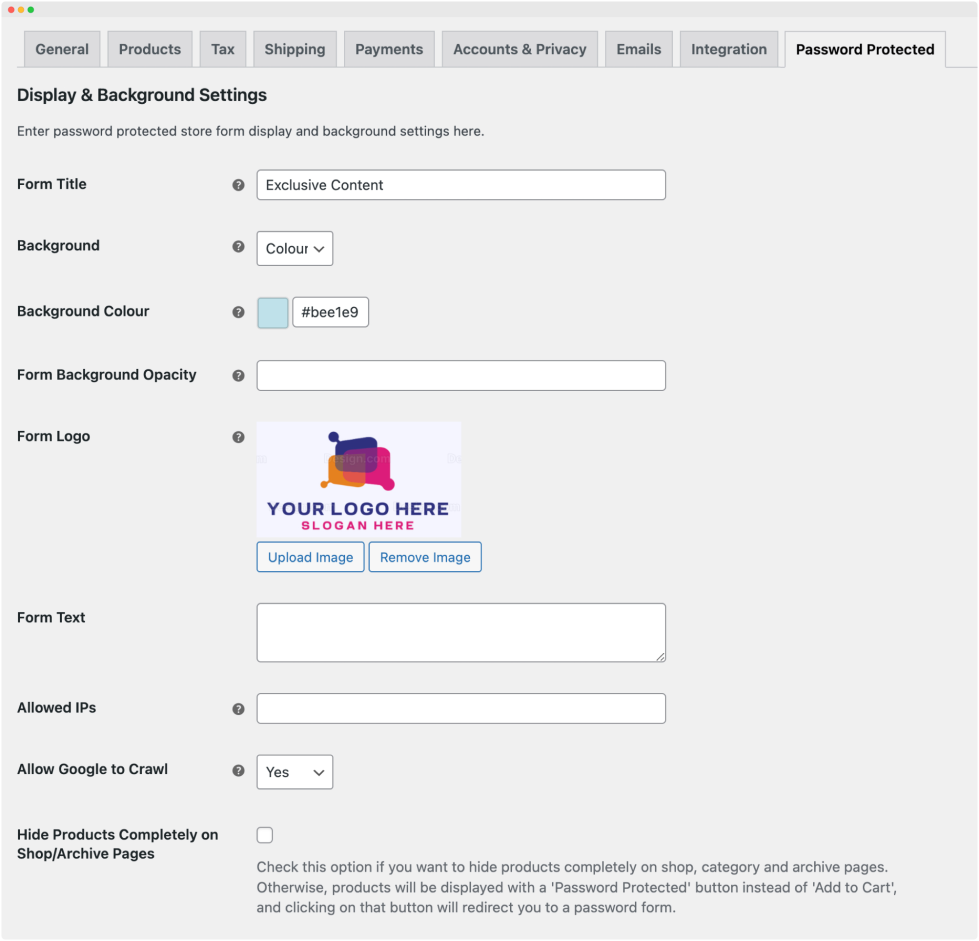
Control Visuals of the Password Protected Form through the following options:
- Form Title – Add a title that will be shown on top of the password-protected form
- Background – Choose from 2 types of backgrounds for the form:
- Image – Upload a custom image to be used as a background
- Color – Choose a color to be used as the background for the form
- Form Background Opacity – Choose the opacity for the form background, applicable on both image and color-based backgrounds.
- Form Logo – Choose a logo to be displayed on password form
- Form Text – Choose a text to guide users on how they can access restricted content by entering the password
Block Google From Crawling Password Protected Pages
Limit page visibility on search engines through the following settings:
- Insert allowed IPs: IPs that can access restricted content without needing a password.
- Allow Google to Crawl: Google will be able to crawl, index, and rank password-protected pages; if disabled, the restricted content will not show up in Google results.
- Hide Products Completely on Shop/Archive Pages: Password-protected products will not be shown on listing pages.
Hiding products completely will keep items hidden on the shop, category, and archive pages. If you disable the setting, the products will be displayed with a ‘Password Protected’ button instead of ‘Add to Cart,’ and clicking on that button will redirect you to a password form.

