Purpose
↑ Back to topPay Your Price allows the admin to display a price field on the front end, enabling users to enter their desired price and place an order. The admin can set minimum, maximum, and suggested prices, giving users the option to input their desired amount within these parameters.
Installation Guide
↑ Back to top- Log in to your WordPress Admin Panel.
- Navigate to the WordPress Admin Dashboard > Plugins > Add New Plugin.
- Click the Upload Plugin button on the top left corner of your screen.
- Next, click the Choose File button in the below box.
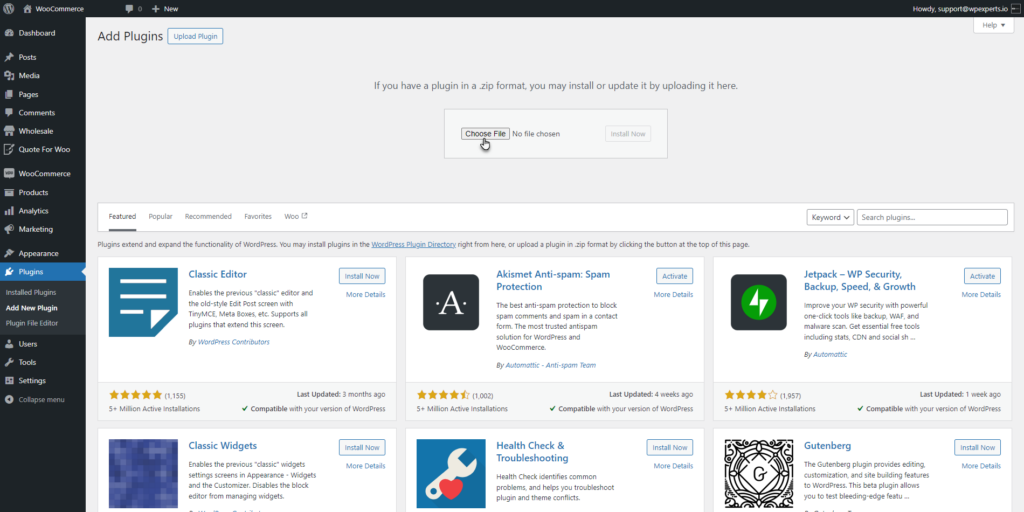
- Select the zip file that you have downloaded and upload it.
Note: For Pay Your Price to work, the admin needs to install the WooCommerce plugin as well.
Pay Your Price Rules
↑ Back to top- Go to Admin Dashboard > WooCommerce > PYP Rules.
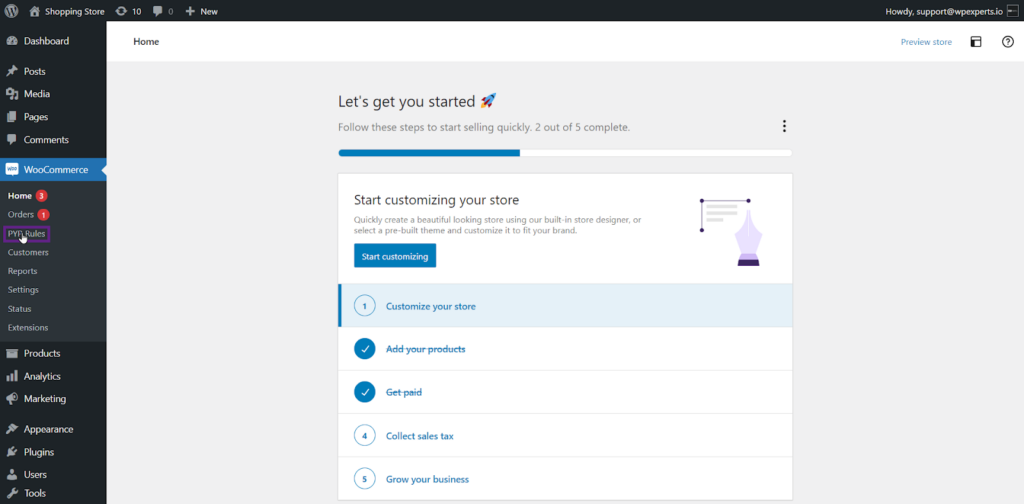
- Once on the PYP Rules page, click the Add Rule button.

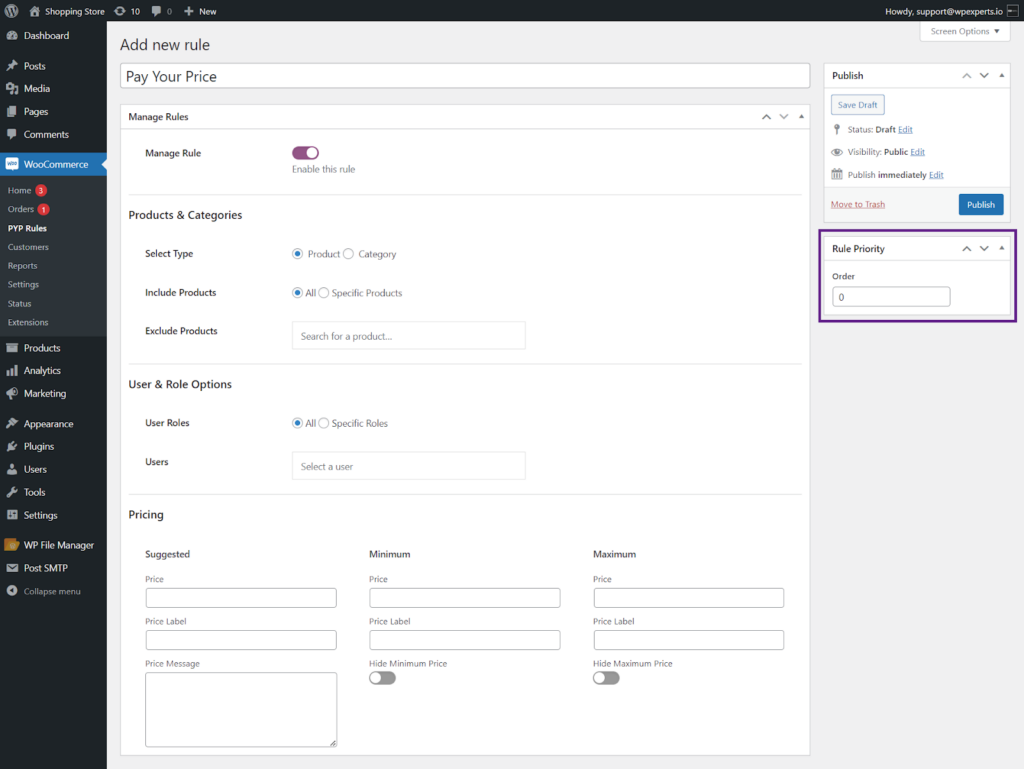
- The admin is now on the Add New Rule backend page.
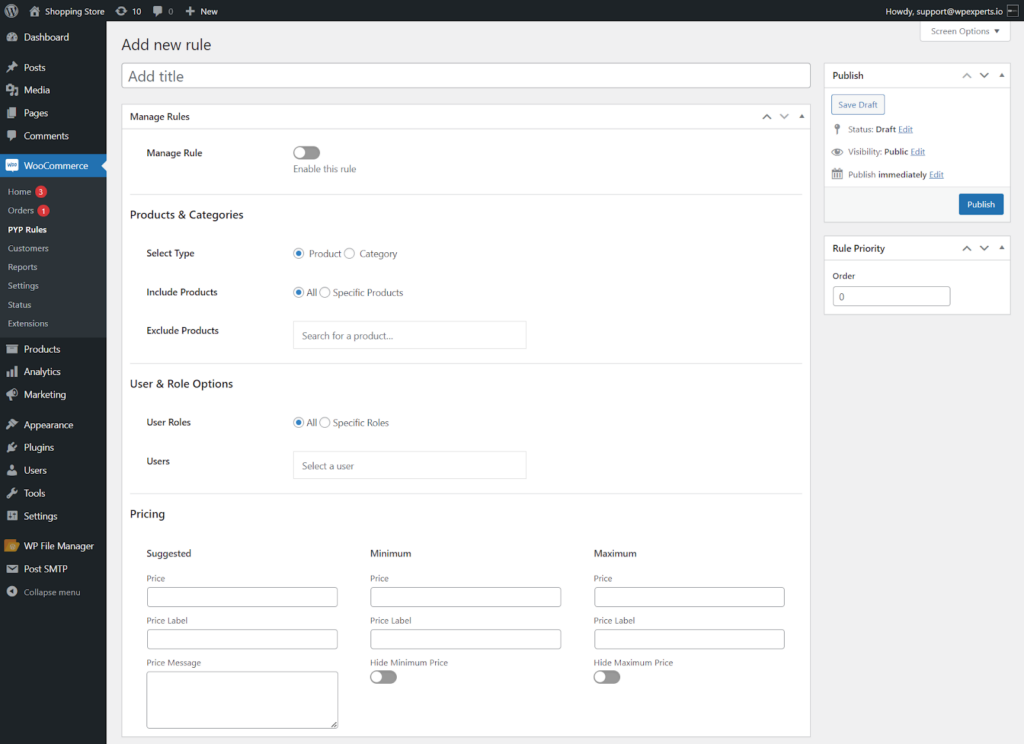
- Add the title in the Add title field.
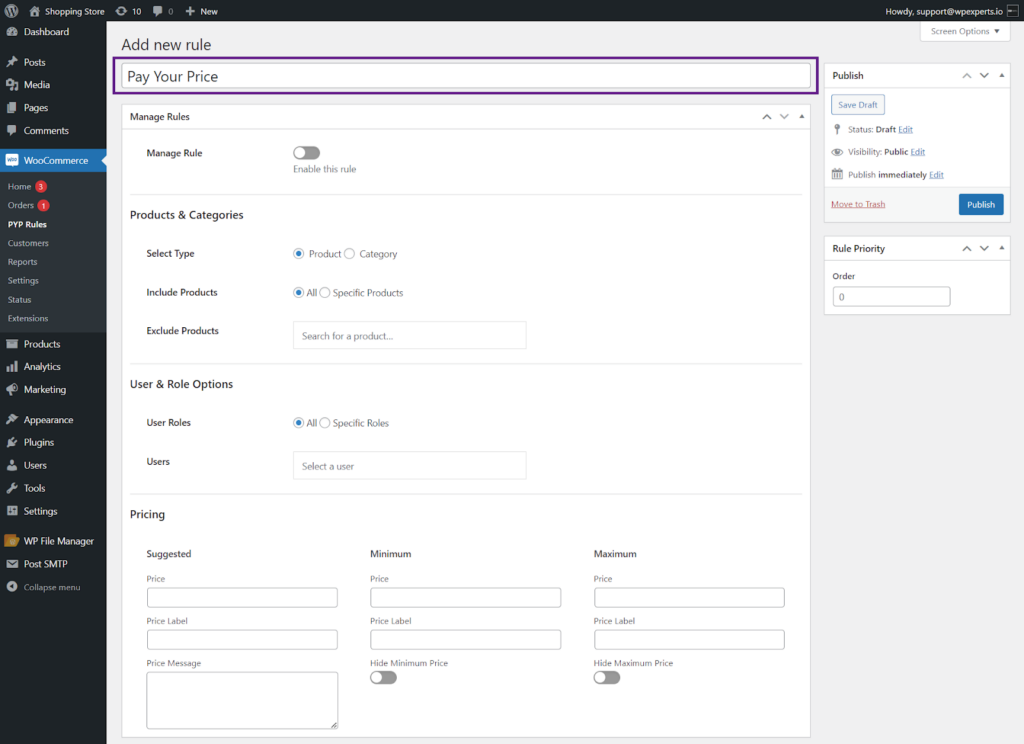
- Admin can now set the rule priority for a specific rule.
- This will be implemented when there are multiple rules.
- The rule with the Lowest order number will be implemented first.
- Higher priority order starts from 0 and decreases as the number increases.
Manage Rule
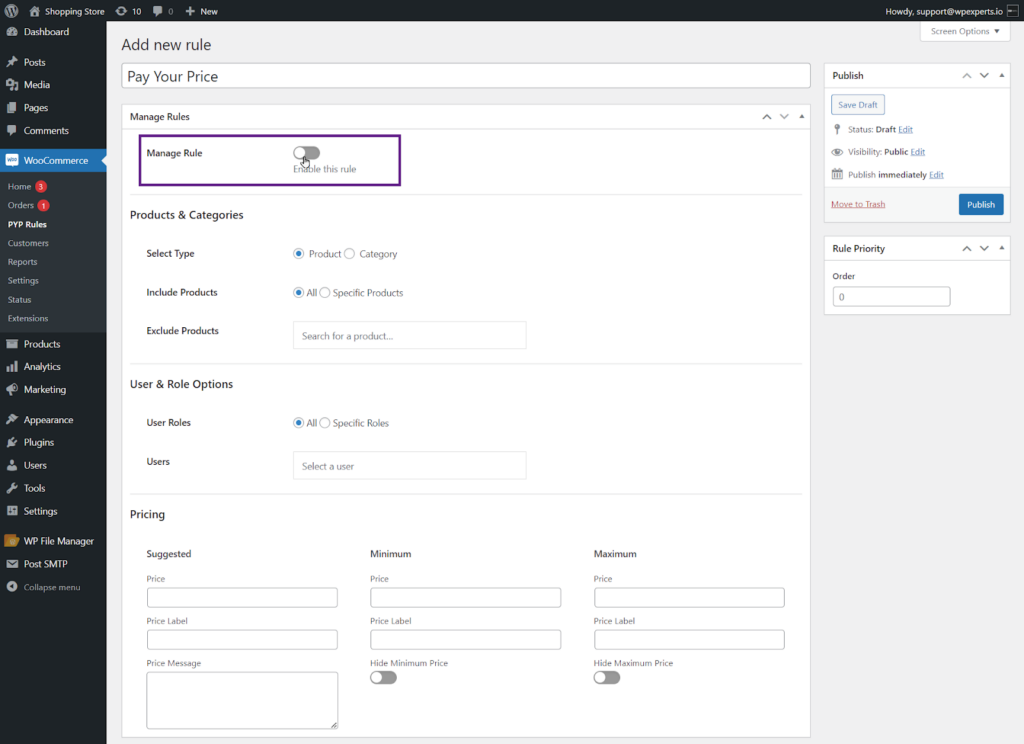
↑ Back to top- Under the Manage Rule section, there are multiple sections available;
- Product & Categories
- User & Roles Options
- Pricing
- Click the Manage Rule toggle button beside the Manage Rule label.
Products & Categories
- Once the Manage Rule toggle button is enabled.
- Under the Products & Categories section, there are two main options, with two sub-options:
- Select Type:
- Product
- Category
- Include Products/Category:
- All
- Specific Products/Category
- Exclude Products/Category
- The admin can select either Product or Category according to their needs.
Select Type
Product
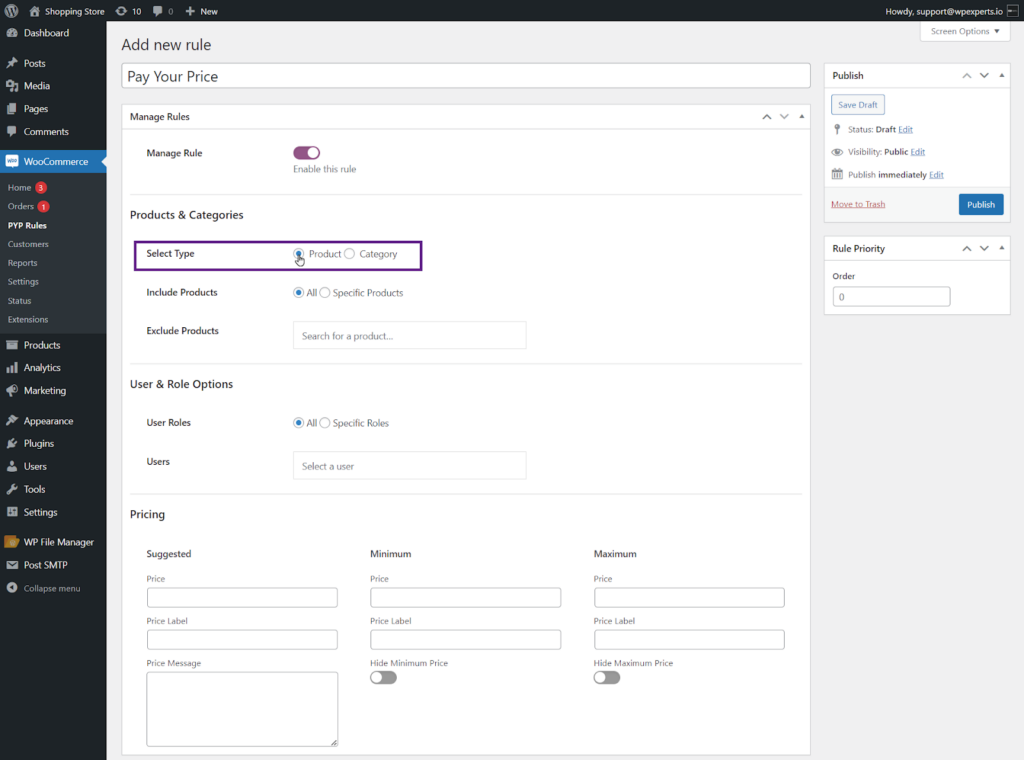
- Select the Product radio button as the Select Type option.
Category
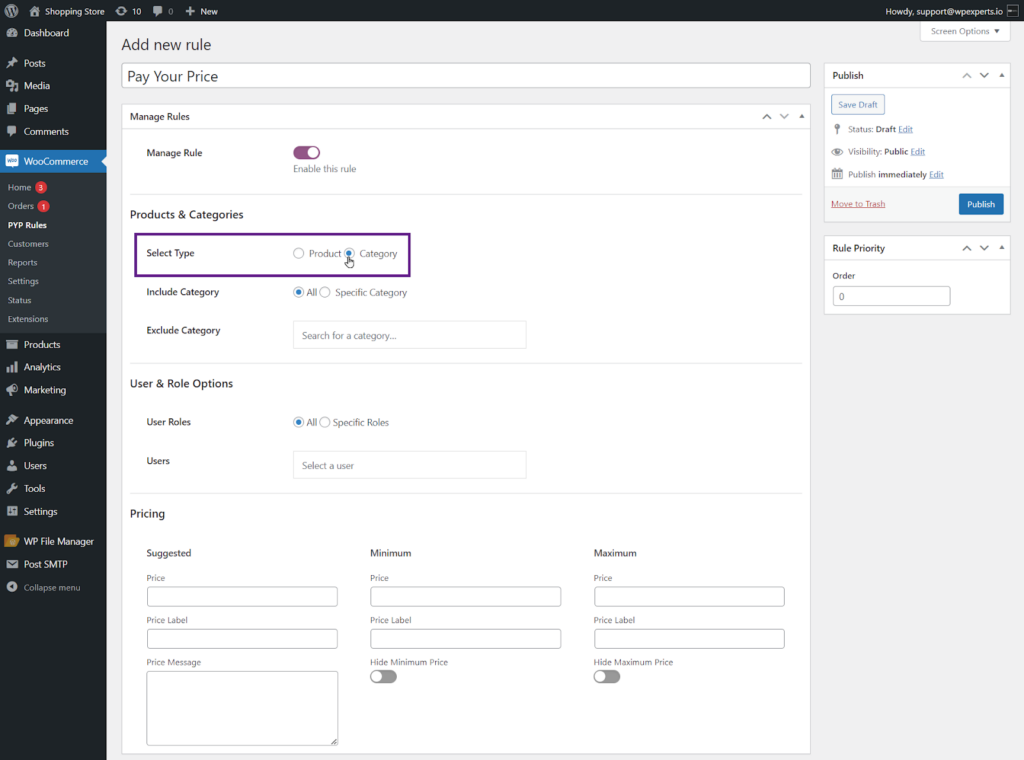
- Select the Category radio button as the Select Type option.
Include Products/Category
Note: The settings will adapt based on your selection between Product and Category. If the admin chooses Product, the configuration will be tailored for products, and if Category is selected, it will be adjusted for categories.
All
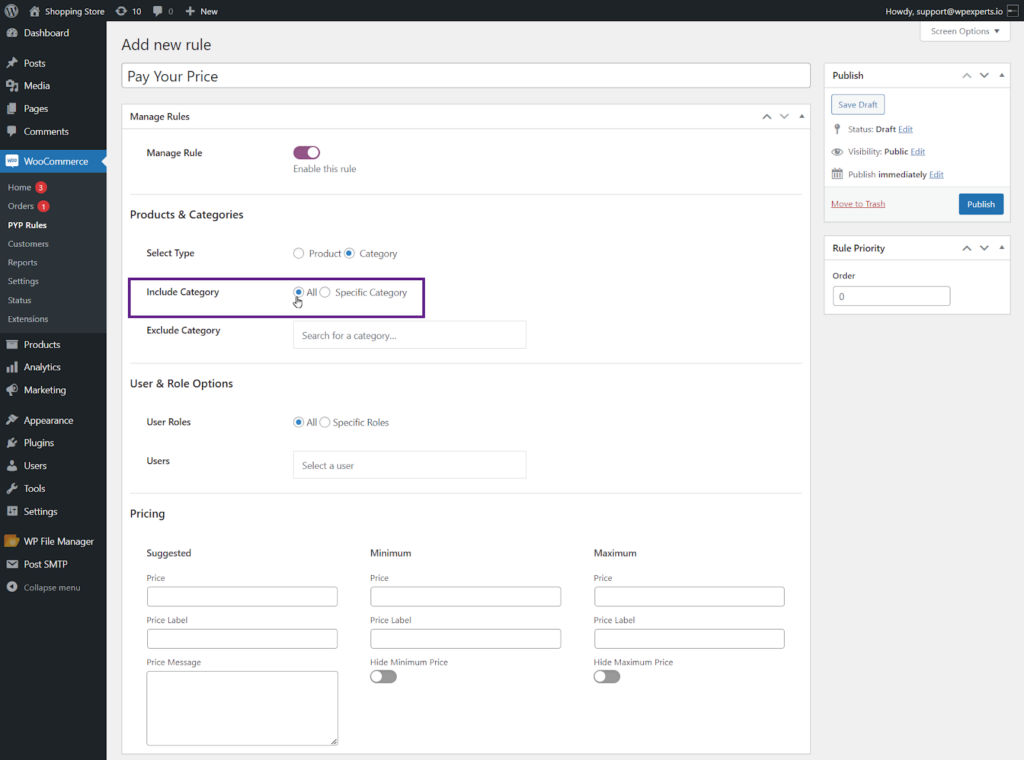
- Select the All radio button as the Include Category option.
Specific Category
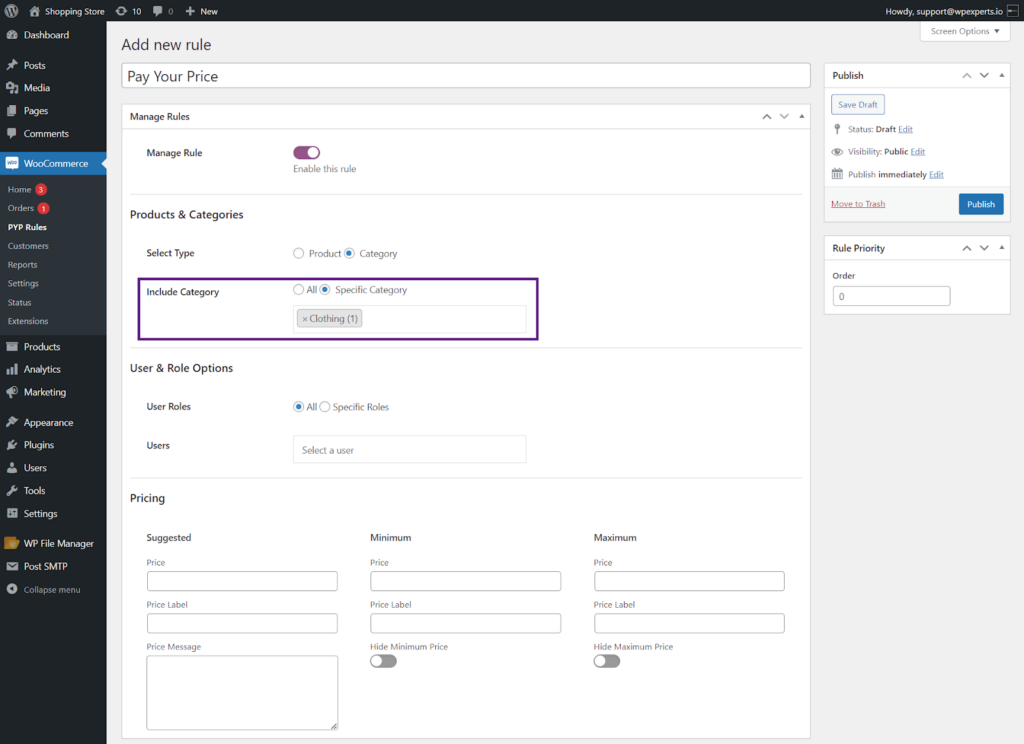
- Select the Specific Category radio button as the Include Category option.
Note: When the Specific Category option is selected, the Exclude Category option will be unavailable.
Exclude Category
- This option will only be available when the All radio button is selected in the Include Category option.
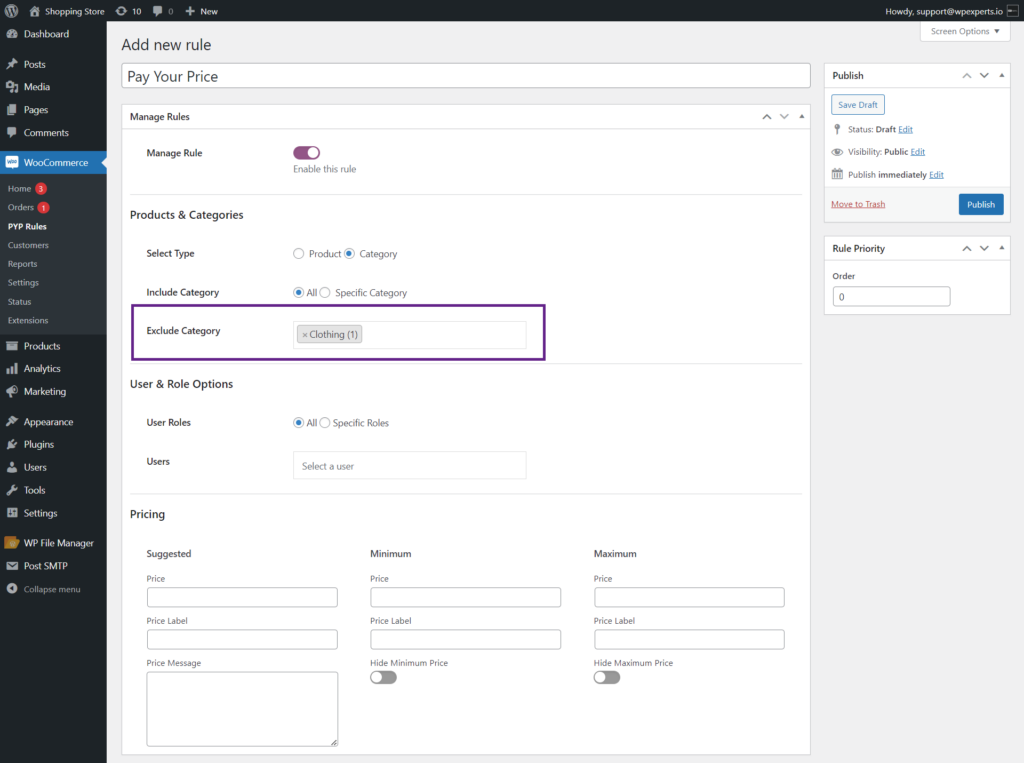
Note: In our case, we will choose a Specific Category, meaning we won’t be excluding any categories.
User & Role Options
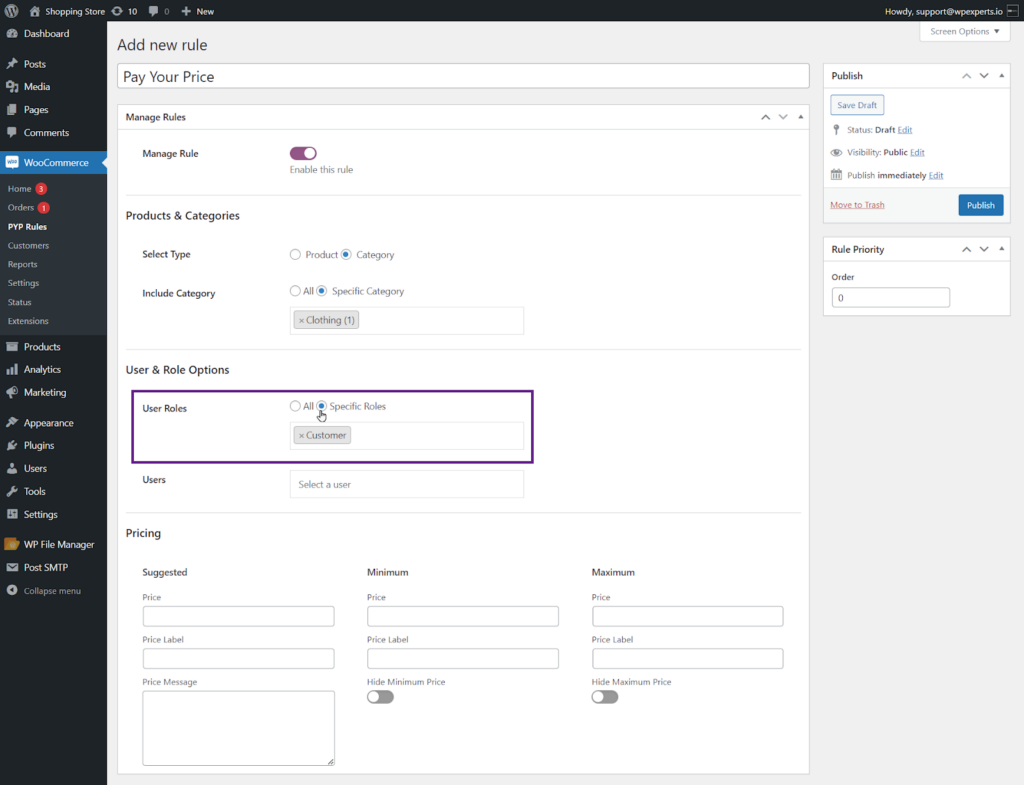
- In the User & Role Options section, there are two choices: User Role and Users, with User Role having two sub-options:
- All
- Specific Roles
User Roles
All
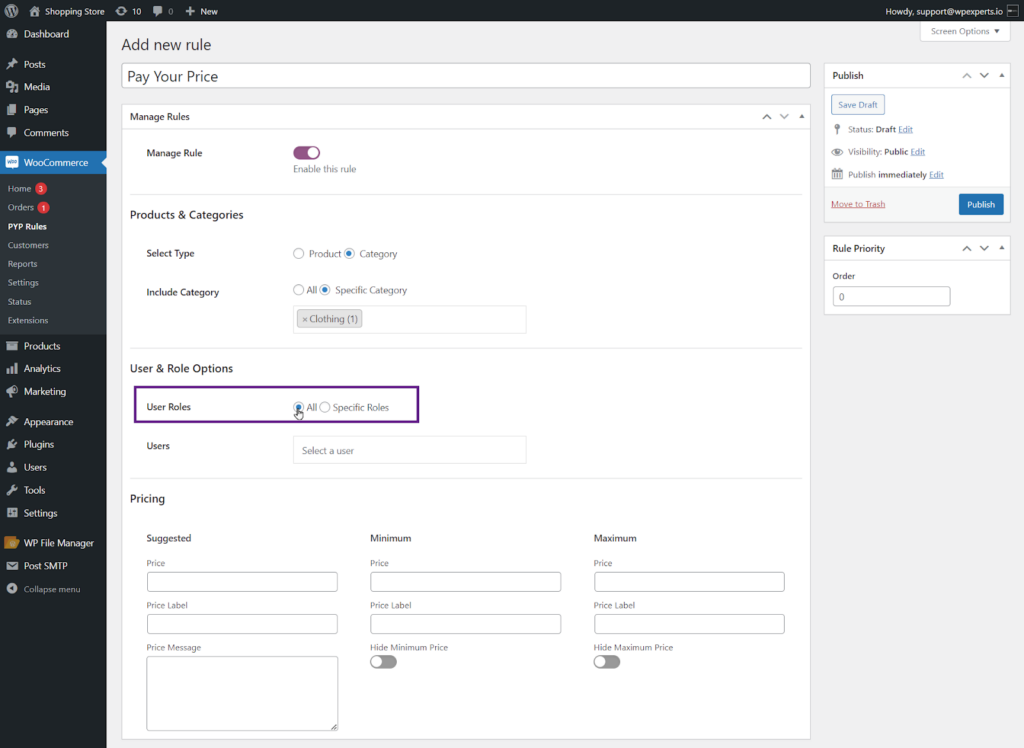
- Select the All radio button as the Users Role option.
Specific Roles
- Select the Specific Roles radio button as the User Role option.
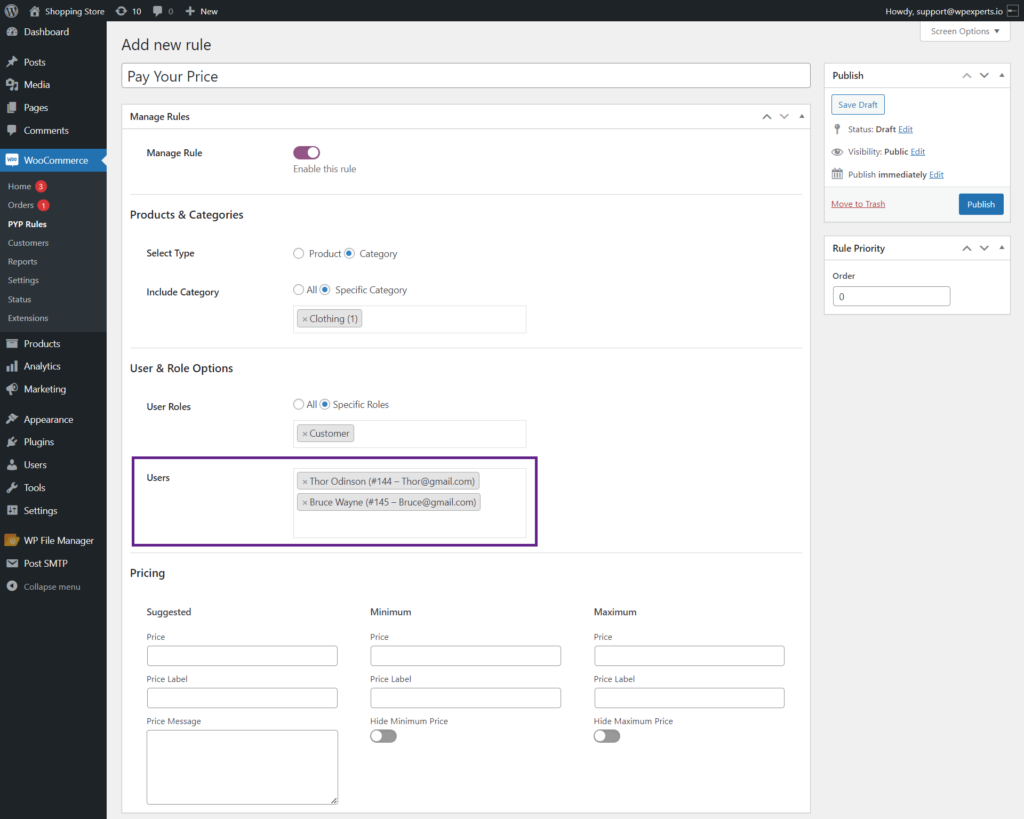
Users
- This option allows the admin to include the specific users they wish to include.
Pricing
- In this section, the admin can define Suggested, Minimum, and Maximum prices.
Suggested
- In the Suggested section, the admin can set Price, Price Label, and Price Message.
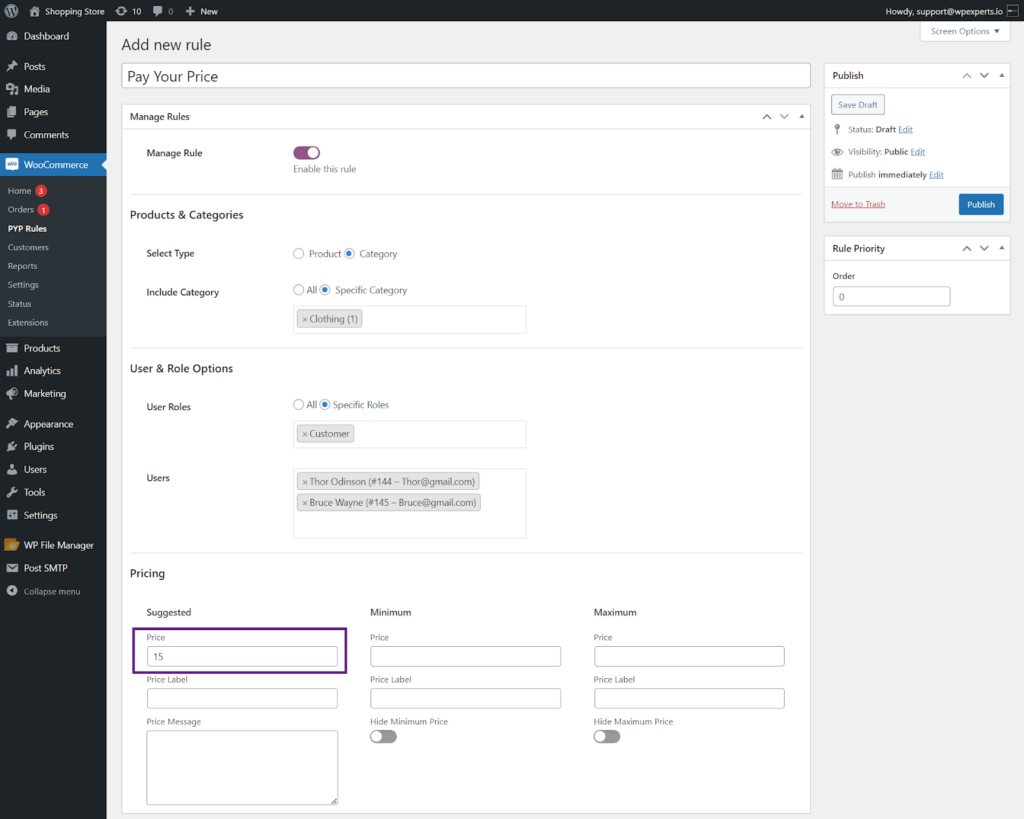
Price
- The admin can define the suggested price in the Price field.
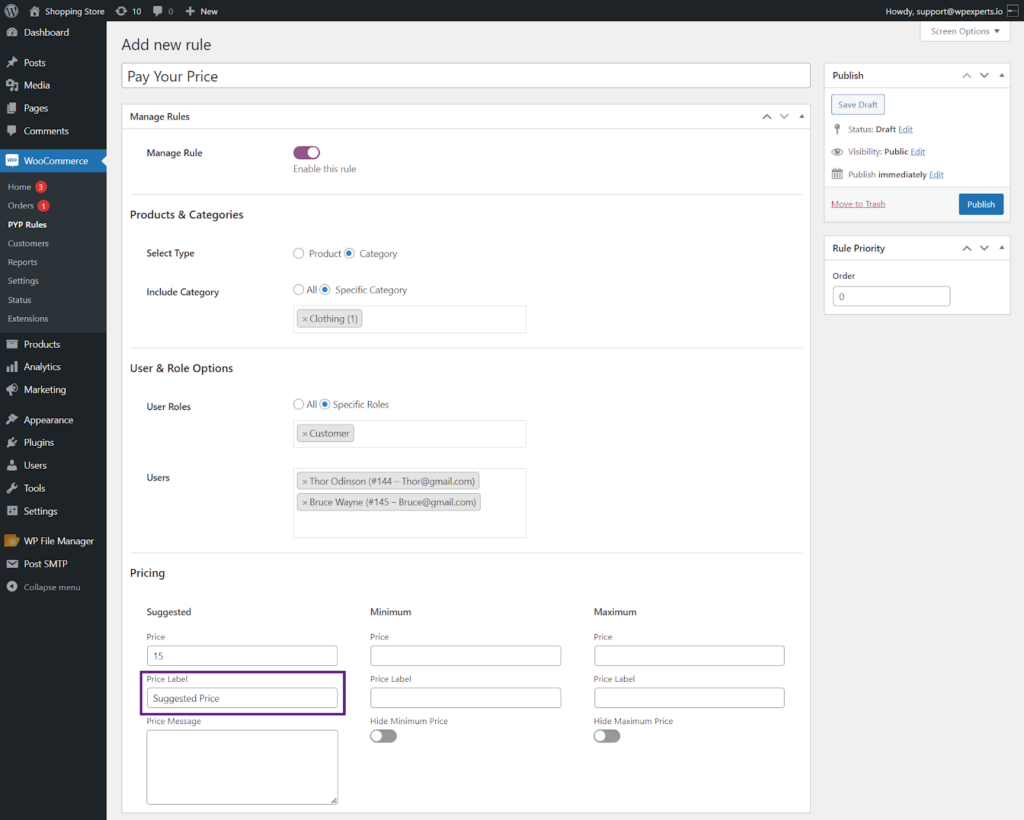
Price Label
- The admin can set the price label within the Price Label field.
Price Message
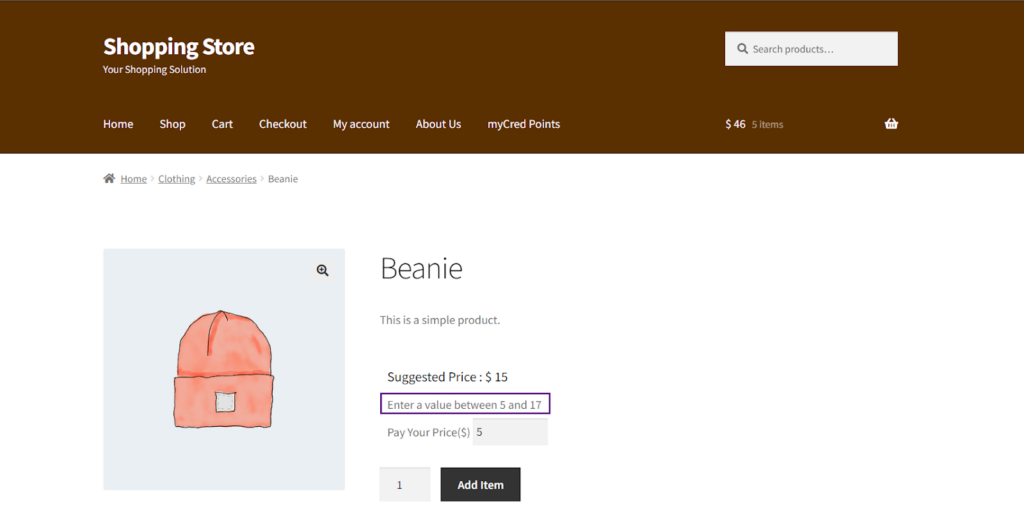
- The admin can enter a custom message to be displayed on the front-end when the user enters a price below the minimum or above the maximum. Minimum and maximum tags will be available for use within the message.
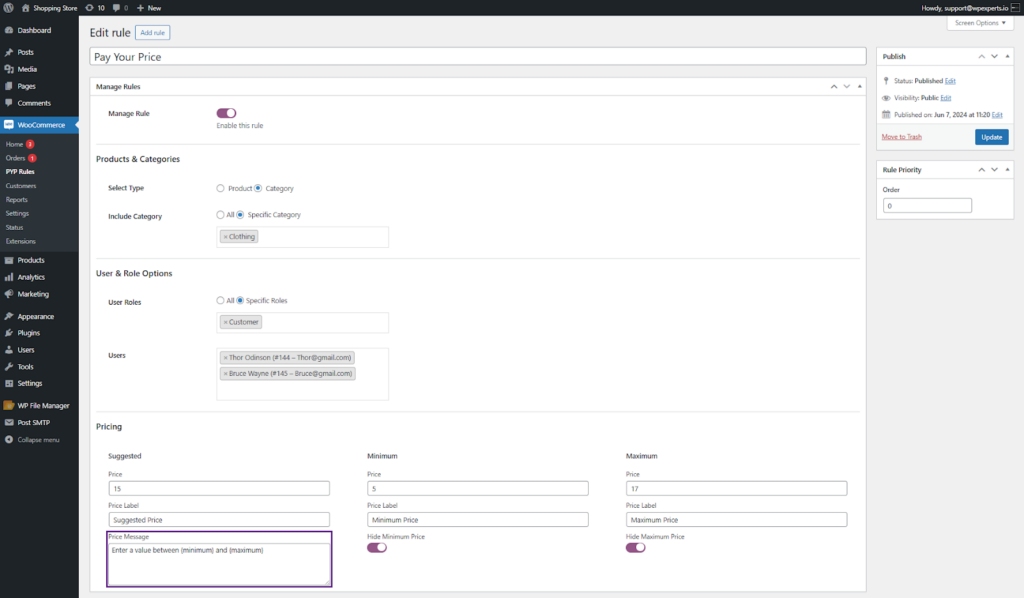
Front-End Impact
Minimum
- In the Minimum section, the admin can set the minimum Price, Price Label, and Hide Minimum Price.
Price
- The admin can define the minimum price in the Price field.
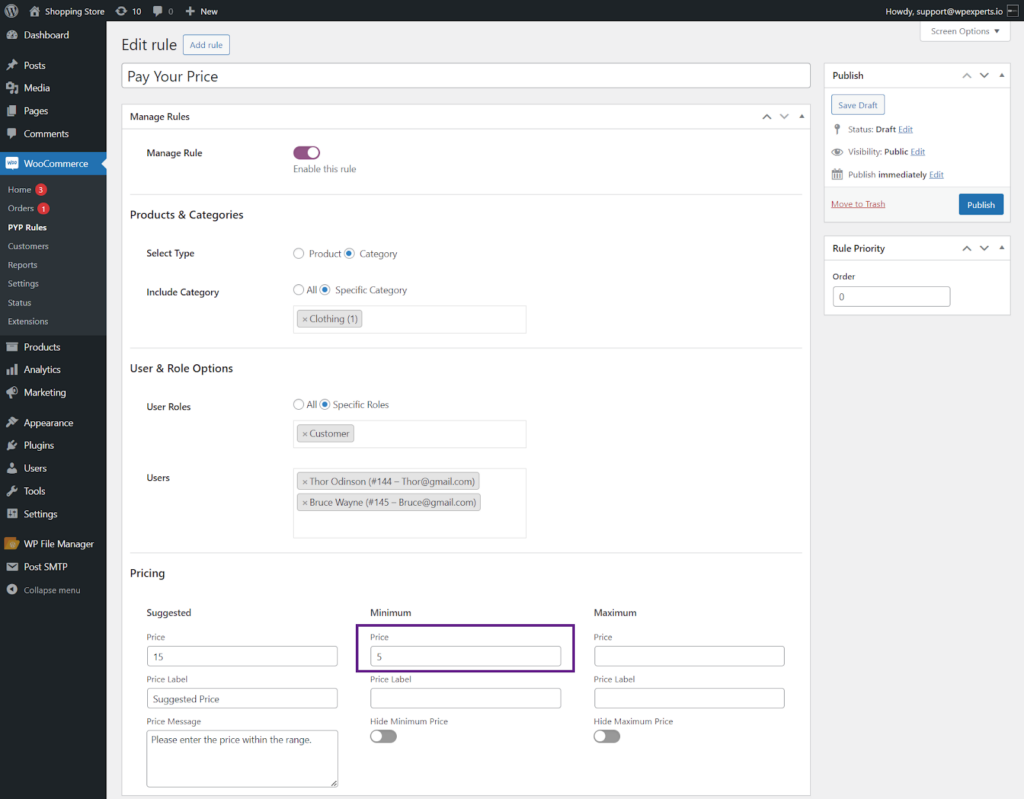
Price Label
- The admin can set the price label within the Price Label field.
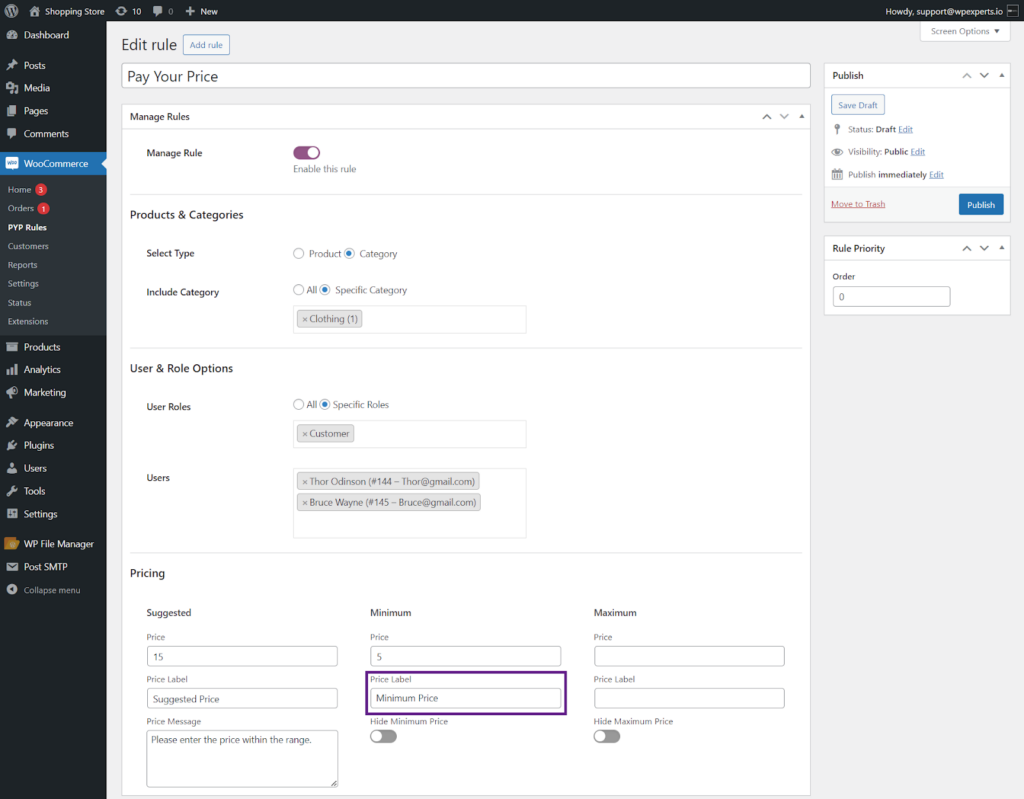
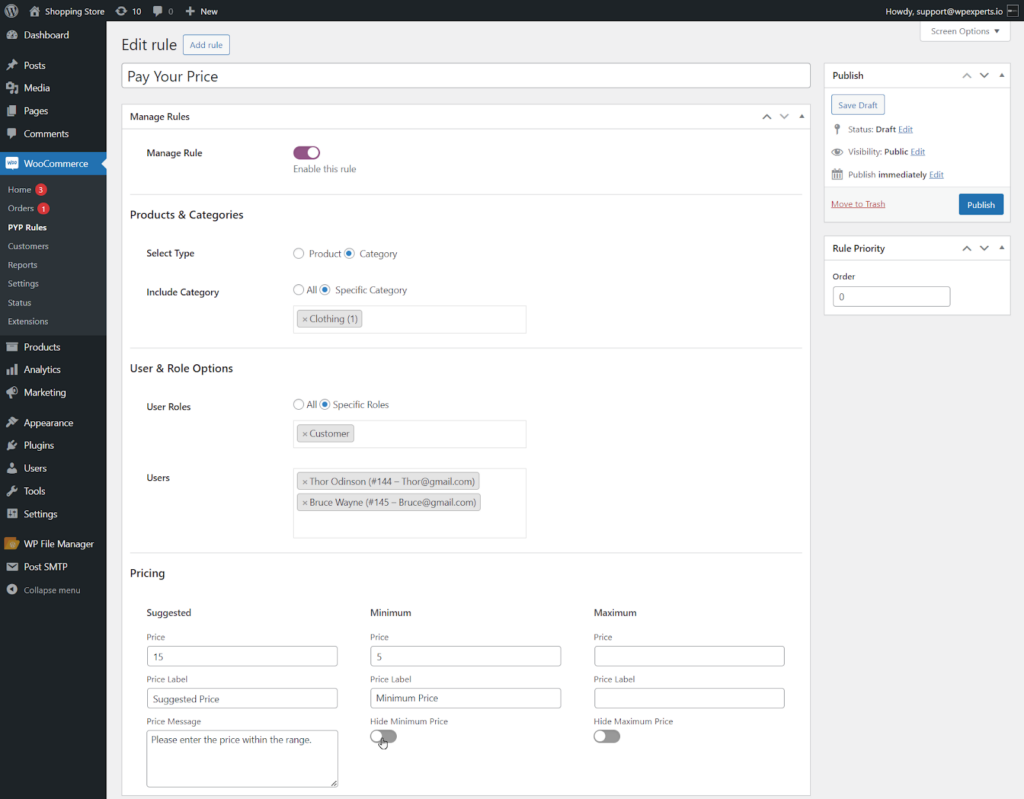
Hide Minimum Price
- The Hide Minimum Price option allows the admin to prevent users from seeing the minimum price on the front end.
- Click the Hide Minimum Price toggle button to hide the minimum price.
Maximum
- In the Maximum section, the admin can set the maximum Price, Price Label, and Hide Maximum Price.
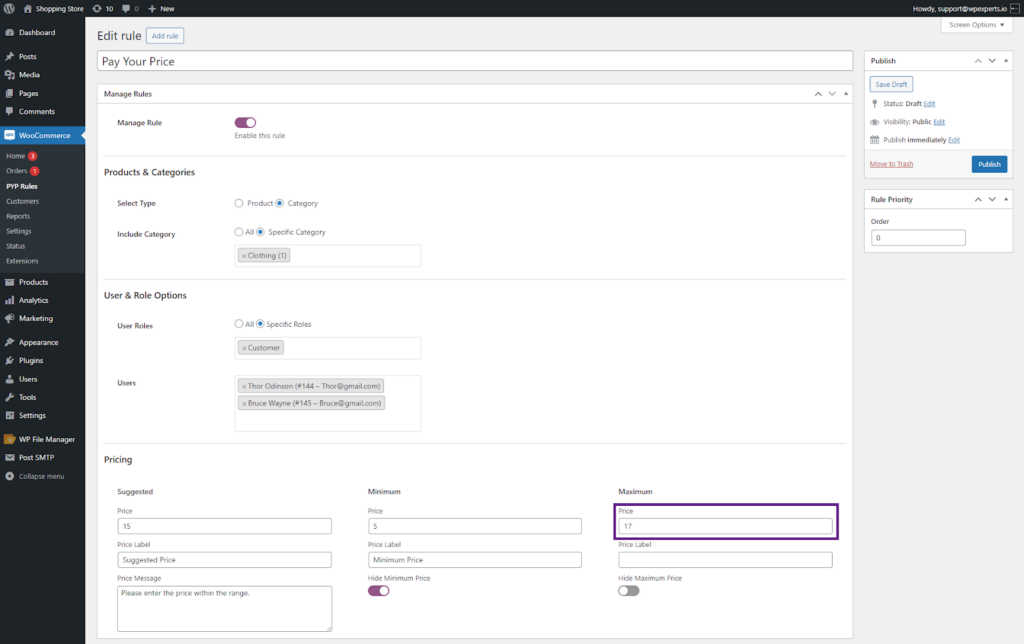
Price
- The admin can define the maximum price in the Price field.
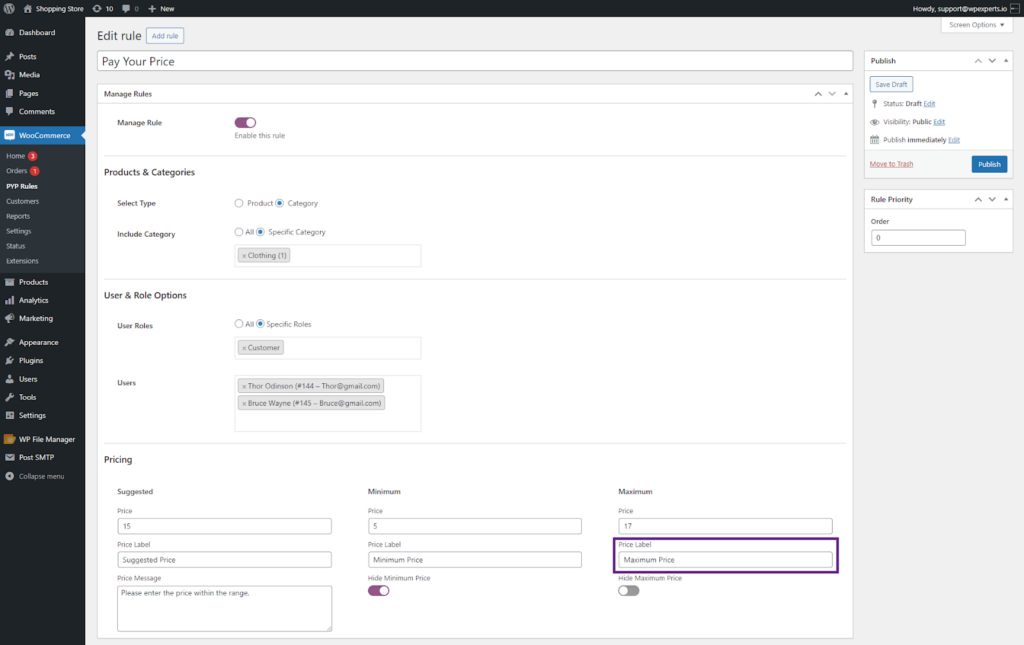
Price Label
- The admin can set the price label within the Price Label field.
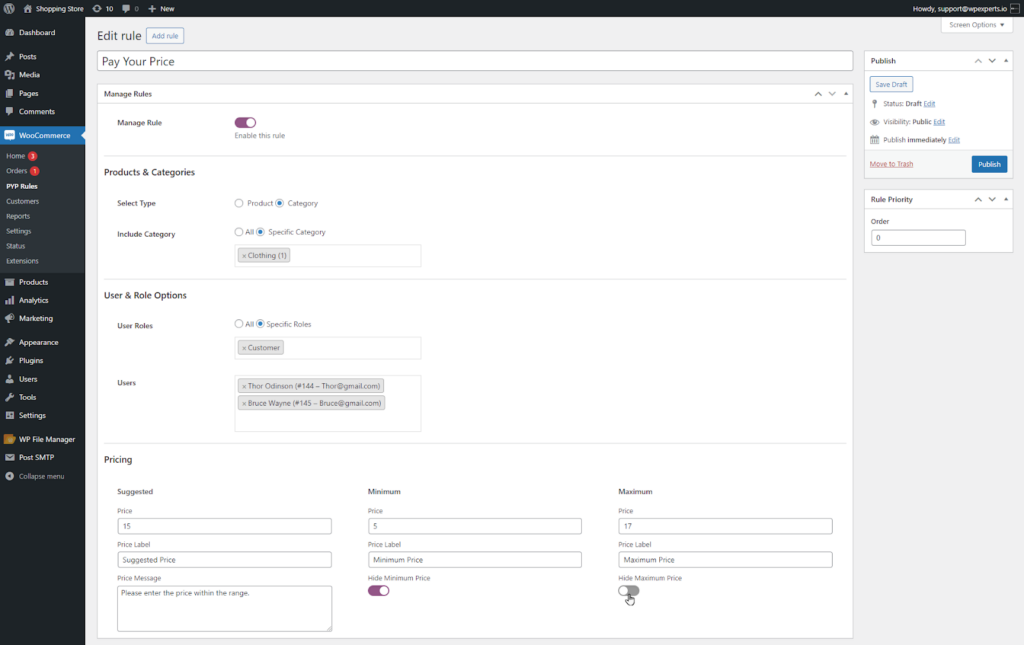
Hide Maximum Price
- The Hide Maximum Price option allows the admin to prevent users from seeing the maximum price on the front end.
- Click the Hide Maximum Price toggle button to hide the maximum price.
Front-End Impact ( Without Hide Prices)
- Go to the website.
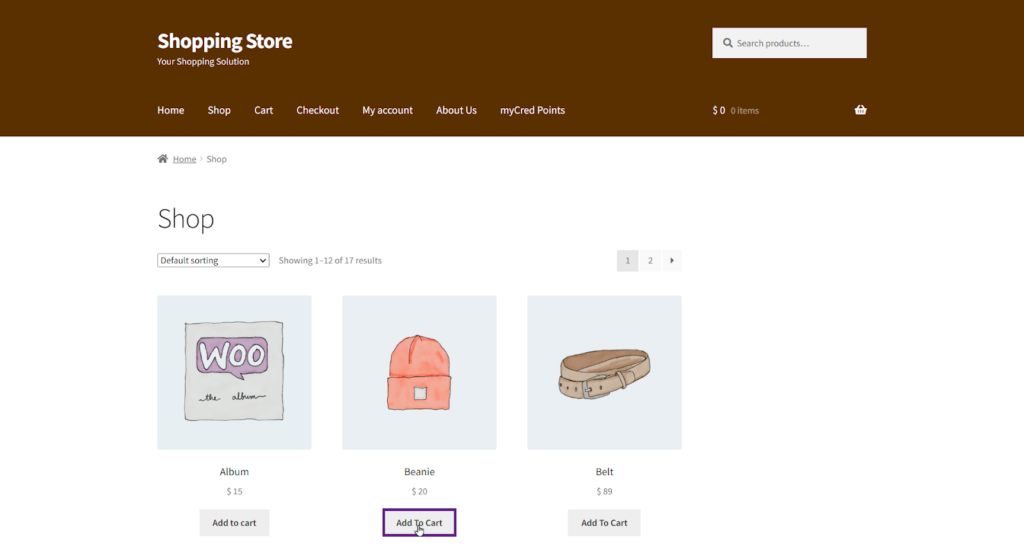
- Navigate to the Shop page.
- Click the Add To Cart button, and the user will be redirected to the Product page.
- The user is now on the Product page.
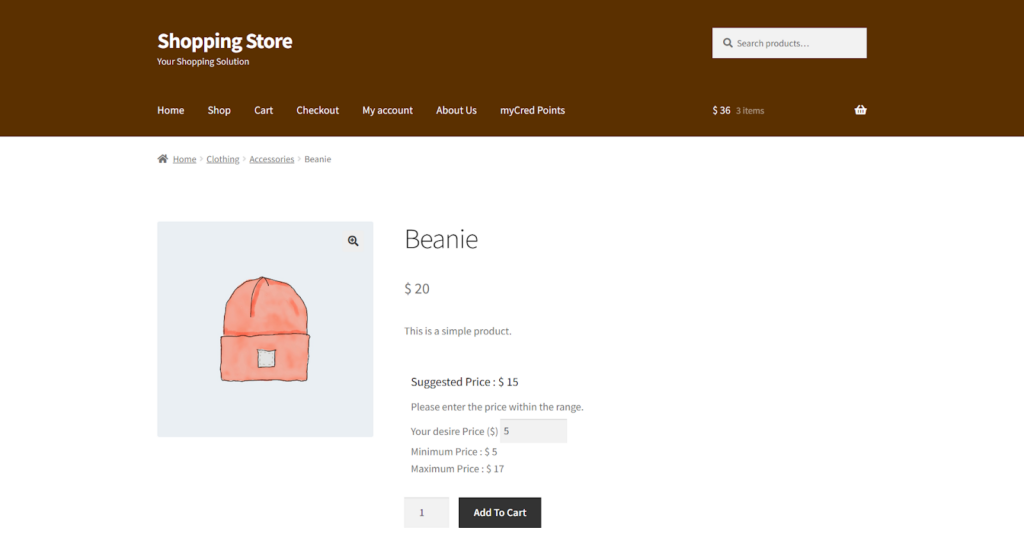
- Now, the user can input their desired price.
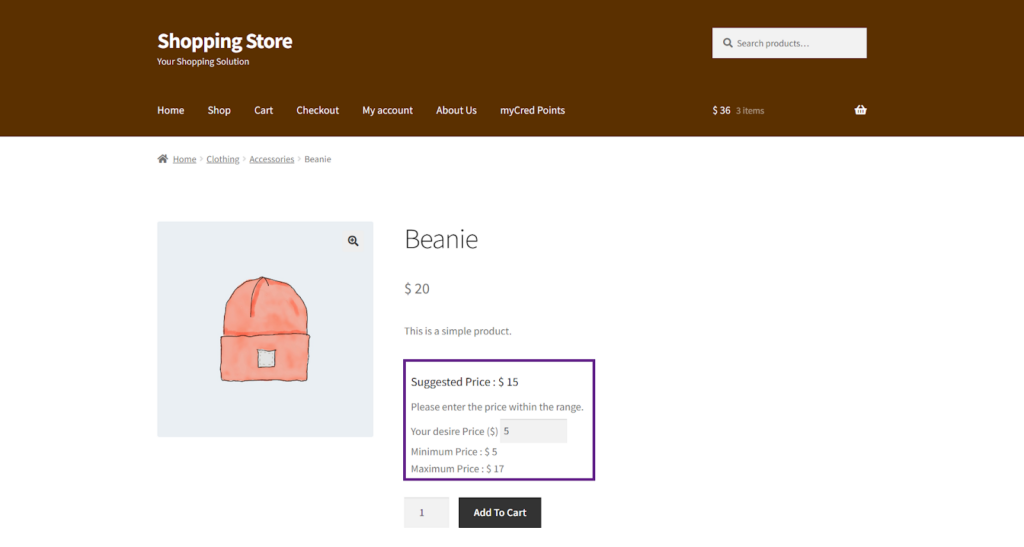
Note: By default, the Desired Price will be set to the Minimum Price, but the user can adjust it as needed. The Desired Price must fall within the range of the Minimum and Maximum prices.
Front-End Impact ( With Hide Prices)
- Go to the website.
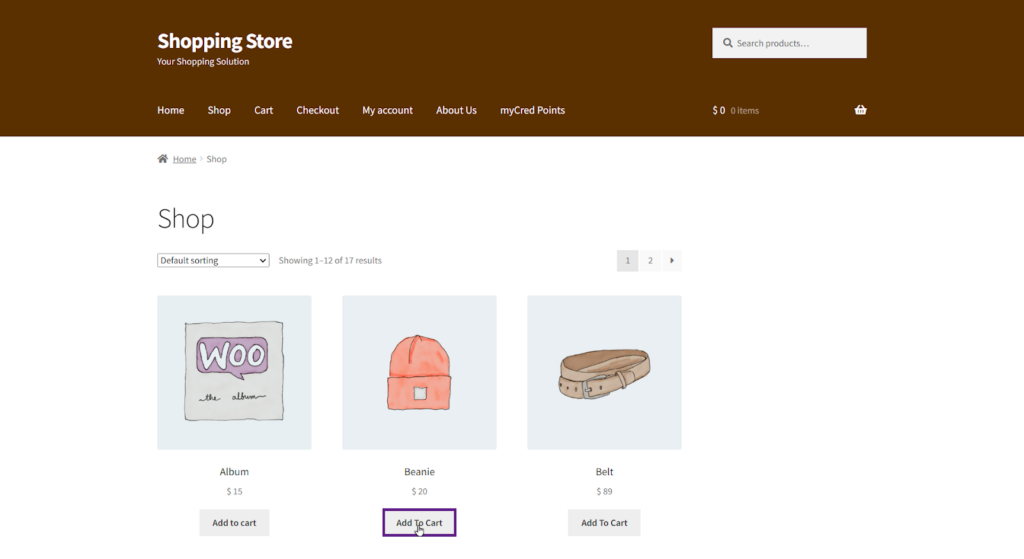
- Navigate to the Shop page.
- Click the Add To Cart button, and the user will be redirected to the Product page.
- The user is now on the Product page.
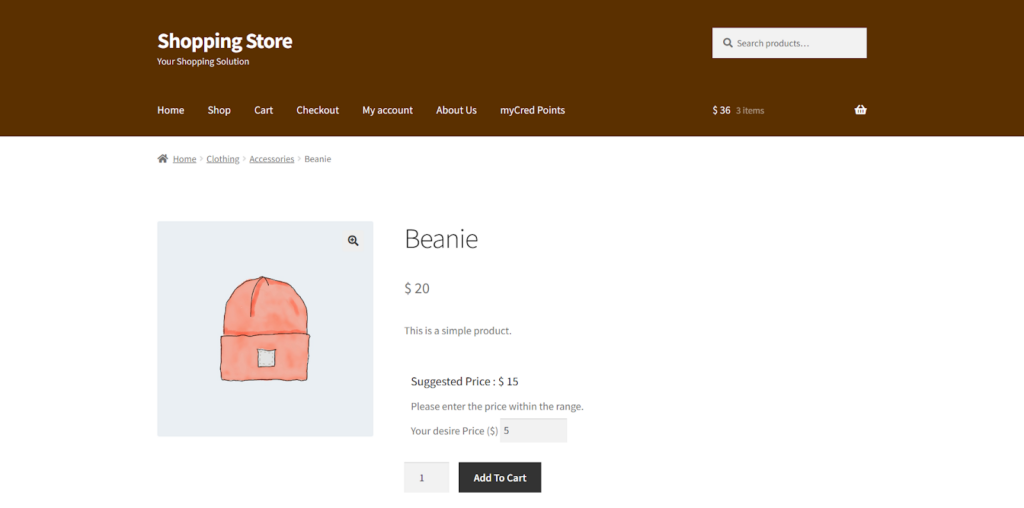
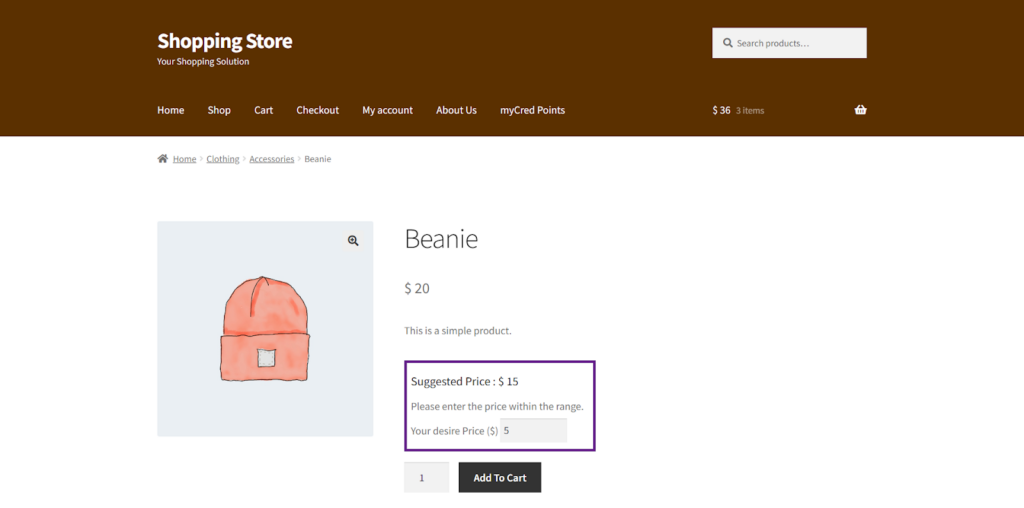
- As you can observe, the Minimum and Maximum prices are currently concealed.
General Settings
↑ Back to top- The admin can now change the labels of the text button :
- Add to Cart Text Shop Page
- Add to Cart Text in Single Product Page
- Pay your Price Label Text
- To set the labels, navigate to the WordPress Admin Dashboard > WooCommerce > Settings.
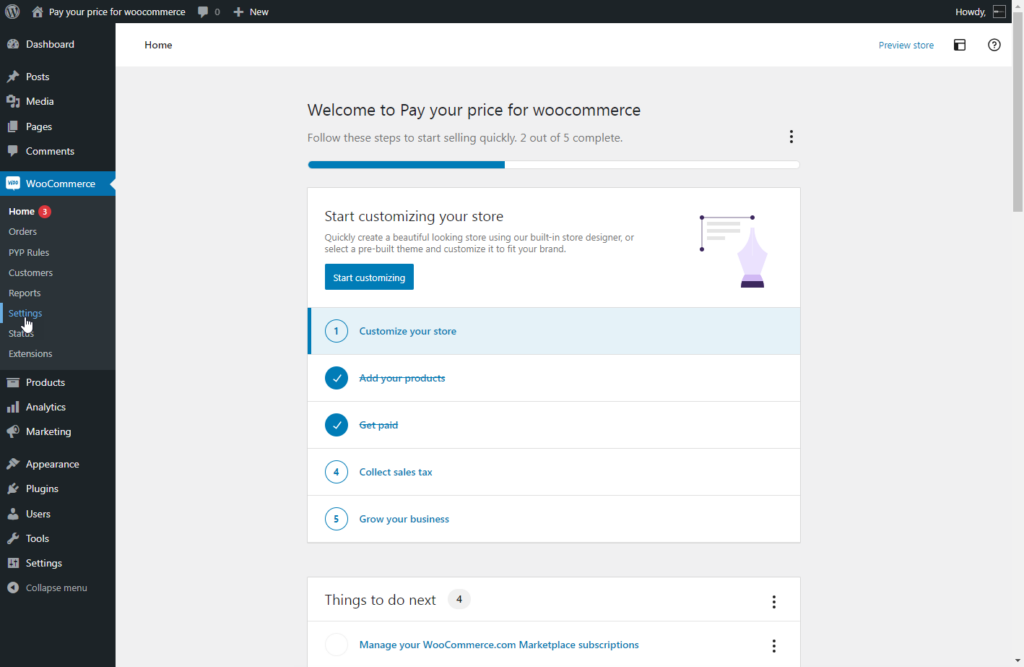
- Once on the settings tab, click the Pay Your Price Tab
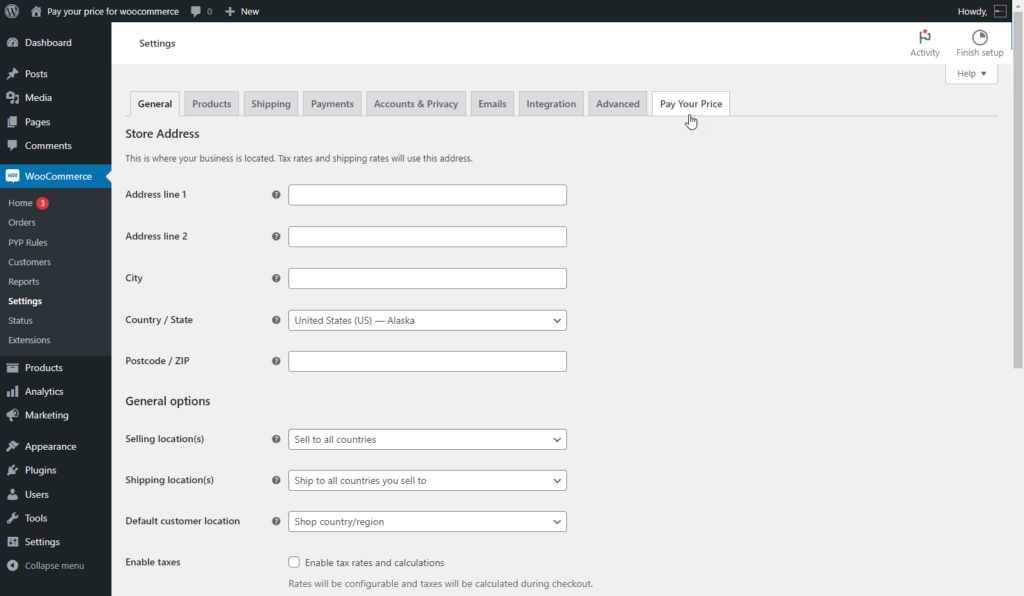
- Admin can now edit all buttons;
- Add to Cart Text in Shop Page
- Add to Cart Text in Single Product Page
- Pay your Price Label Text
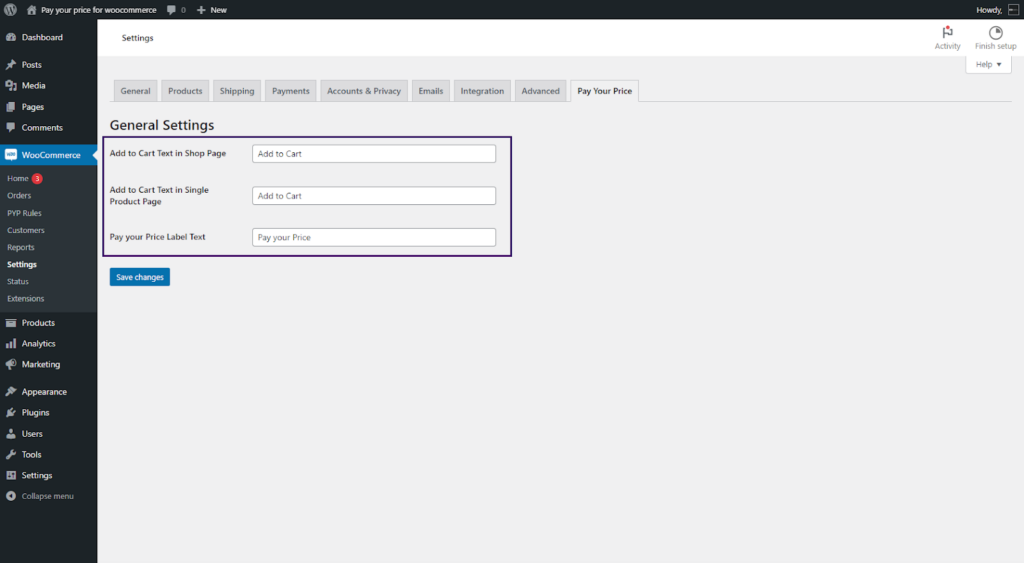
Add to Cart Text in Shop Page
↑ Back to top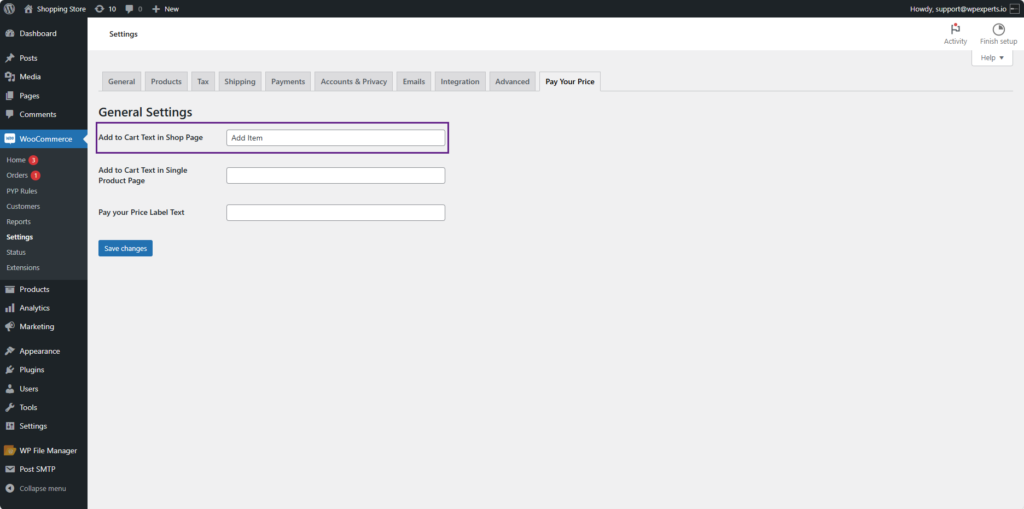
Frontend Impact
Before
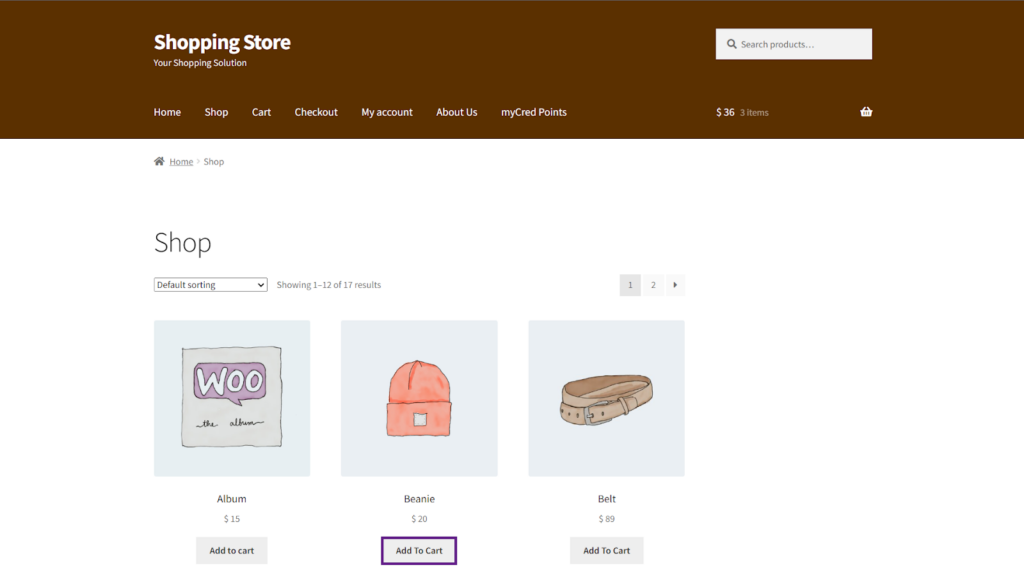
After
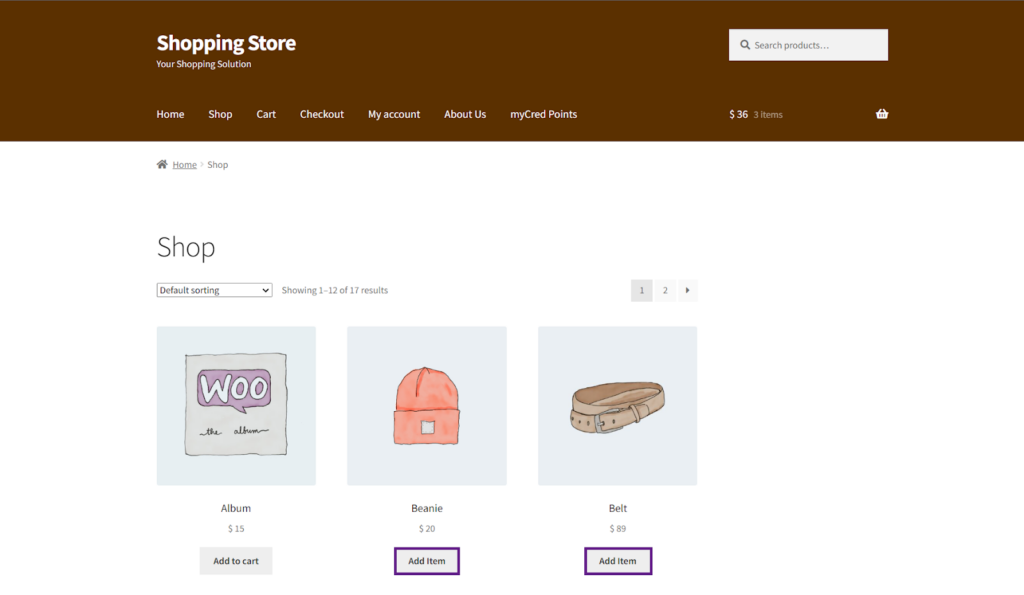
Note: Since the Album is not in the Clothing category, its label hasn’t changed on the front end.
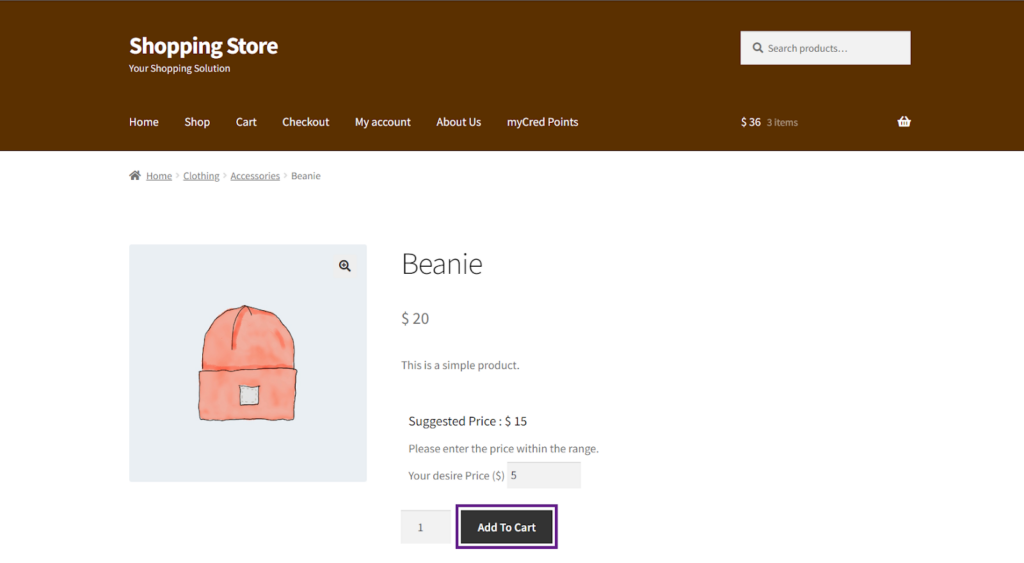
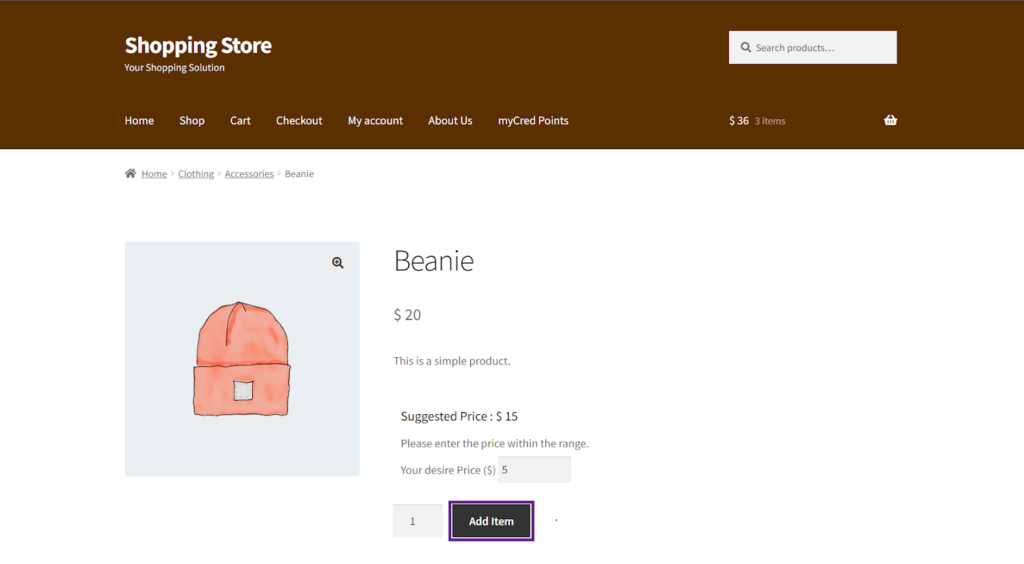
Add to Cart Text in Single Product Page
↑ Back to topFrontend Impact
Before
After
Pay your Price Label Text
↑ Back to top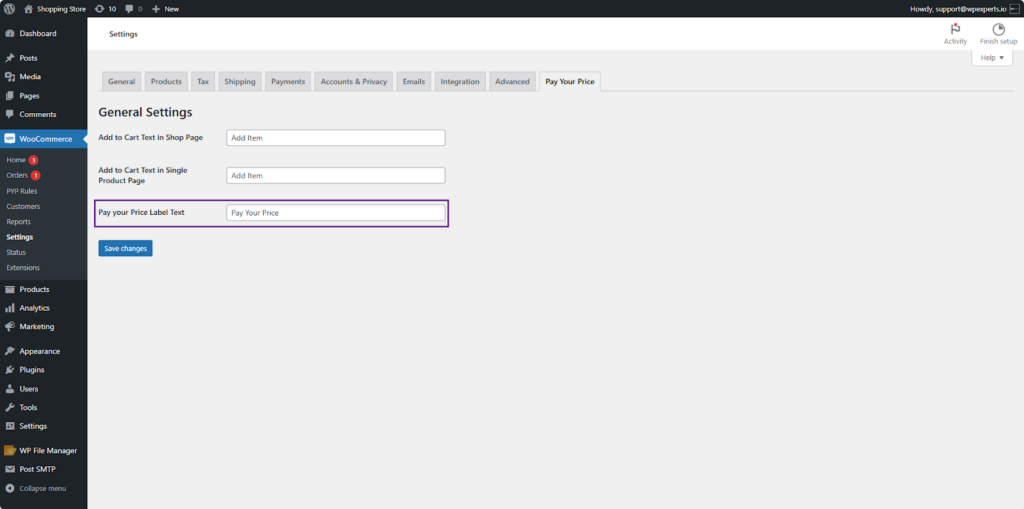
Frontend Impact
Before
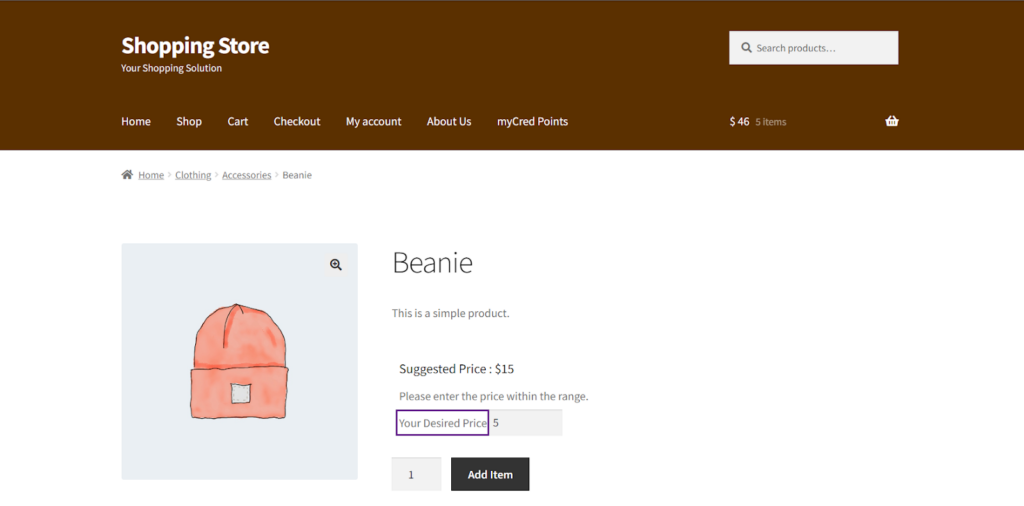
After

Compatibility of Pay Your Price with WooCommerce Bookings
↑ Back to top- Download the WooCommerce Bookings plugin by clicking here.
- Install the plugin and Activate it.
- For further plugin settings and information, please visit the WooCommerce Bookings documentation.
- Set up the Pay Your Price rule.
- Once done, create a Bookable Product.

- Click the Publish button.

Note: For more details on creating a Bookable Product, please refer to the WooCommerce Bookings documentation.
Front-End Impact
↑ Back to top- Go to the website.
- Navigate to the Shop page.
- Select the Bookable Product.
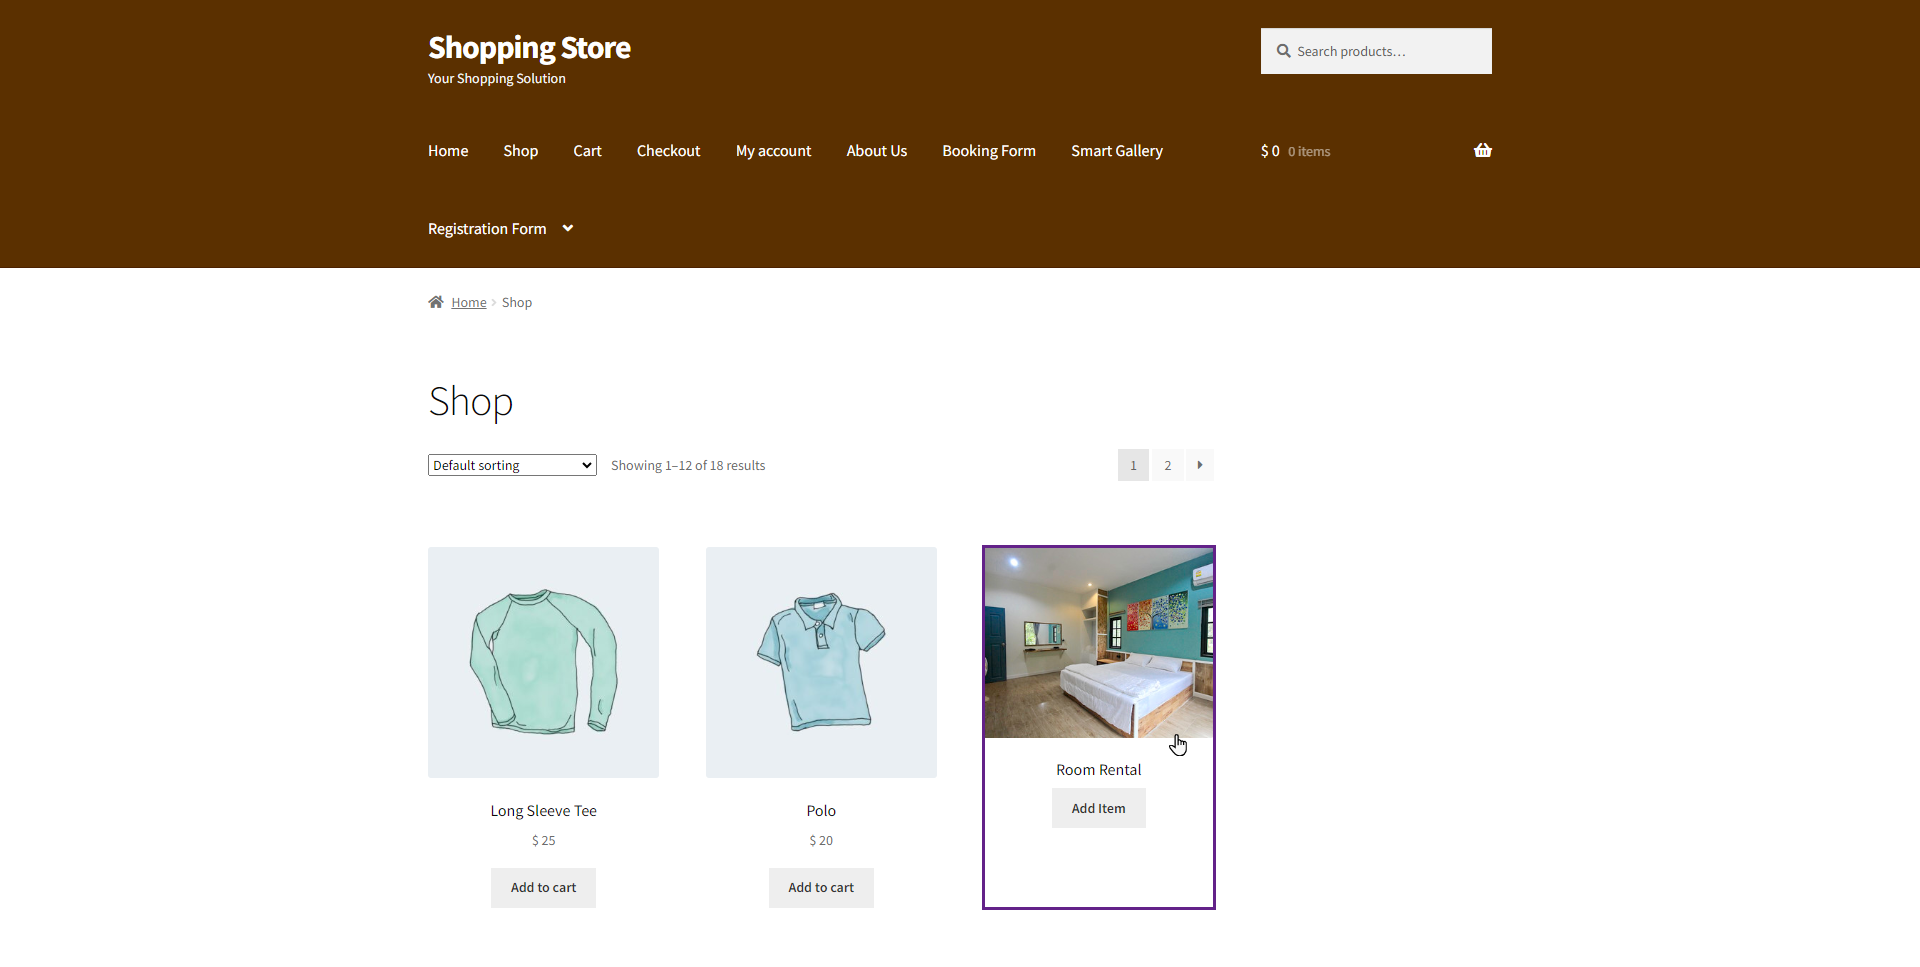
- After selection, a calendar will appear, allowing the user to choose a specific date for booking the product.
- The user can now set the price according to their preferences, but it must fall within the specified minimum and maximum price range.

- The offered price will be displayed on the order receipt.

Compatibility of Pay Your Price with WooCommerce Subscriptions
↑ Back to topSimple Subscription Product
↑ Back to top- Download the WooCommerce Subscriptions plugin by clicking here.
- Install the plugin and Activate it.
- For further plugin settings and information, please visit the WooCommerce Subscriptions documentation.
- Create or Edit a Simple Subscription product.
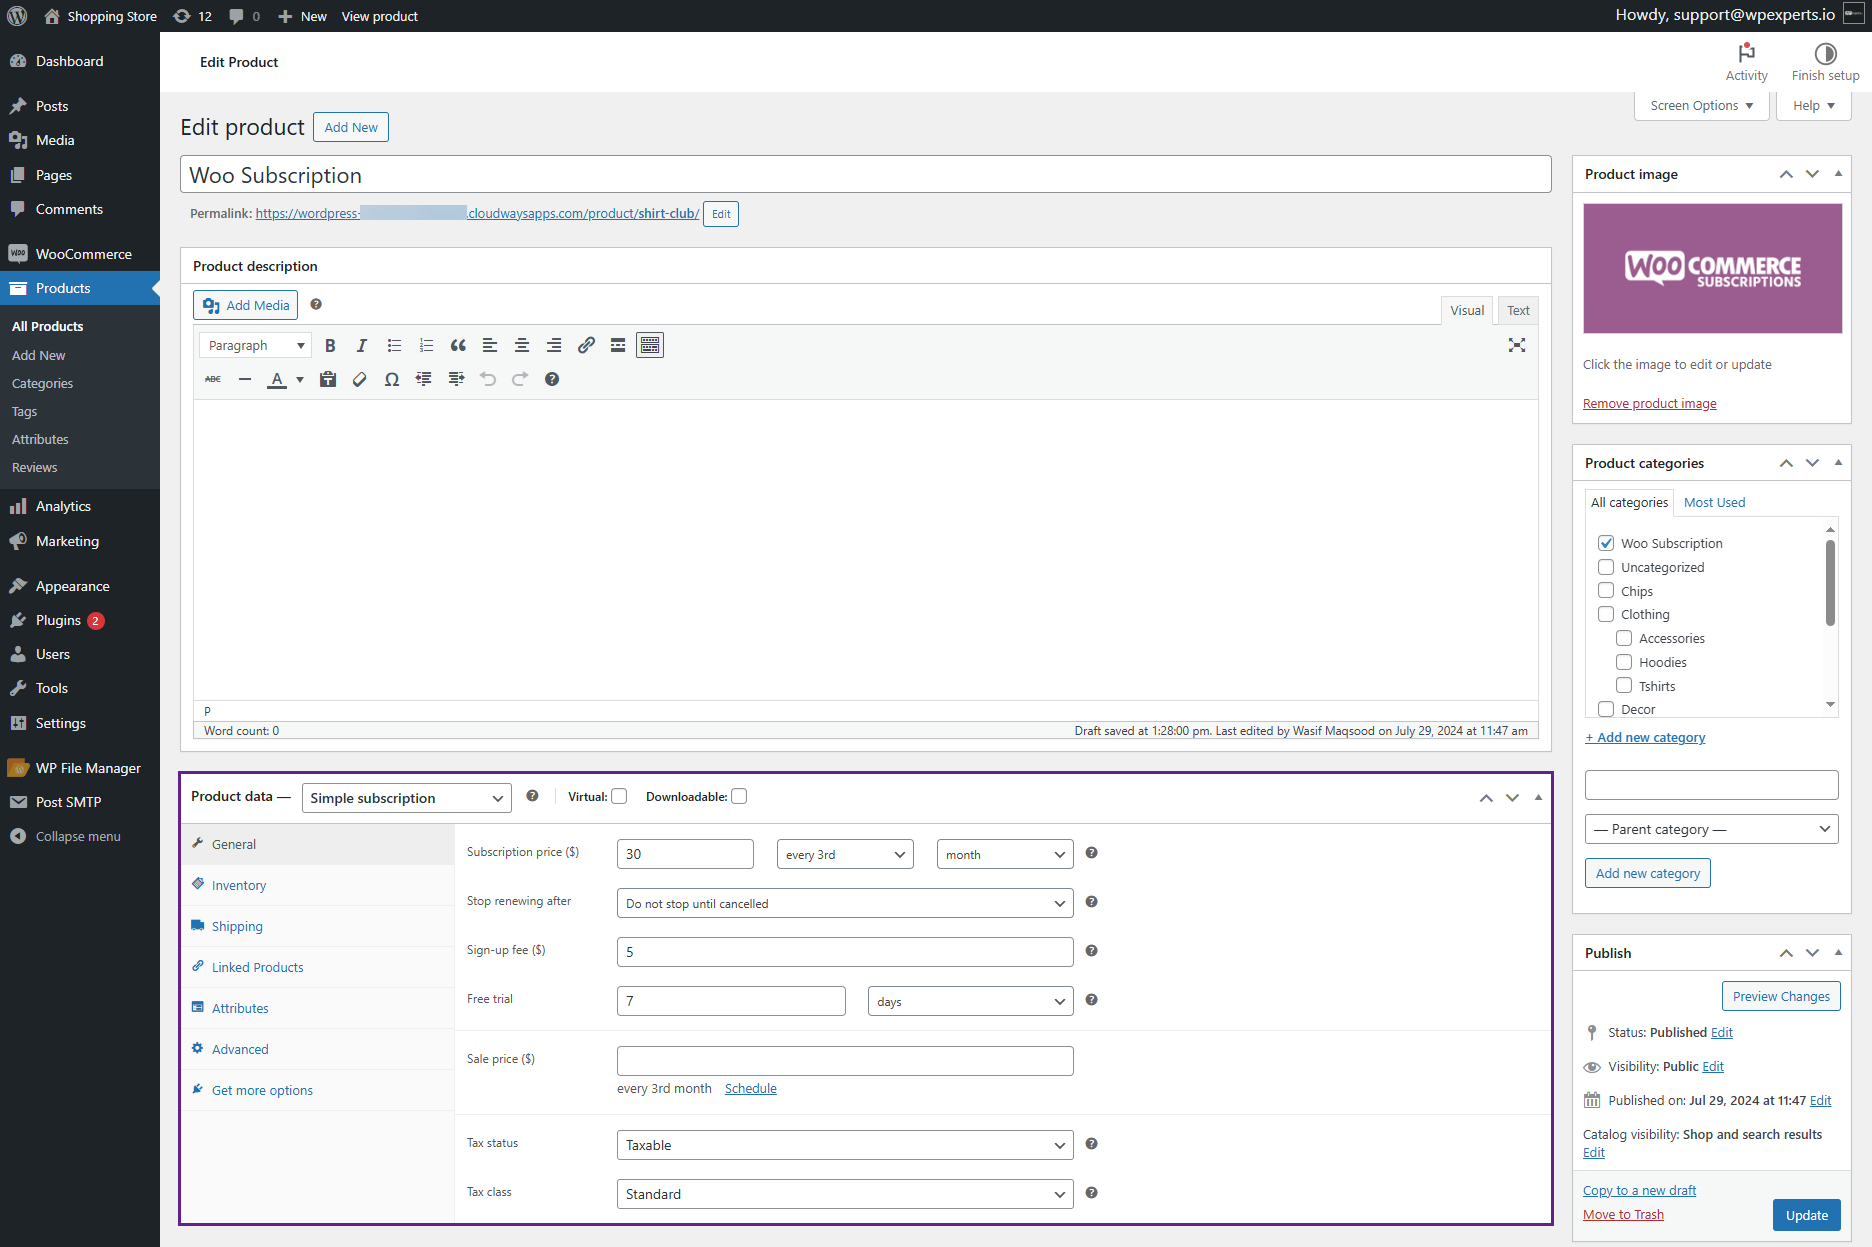
- Click the Update button.

Note: For more details on creating a Simple Subscription Product, please refer to the WooCommerce Subscriptions documentation.
Front-End Impact
- Go to the website.
- Navigate to the Shop page.
- Select a Simple Subscription product from the Shop page.

- Users can now enter their desired price in the Pay Your Price field, but the price must fall within the minimum and maximum price range.

- Proceed to the Checkout page and place an order.

- Once clicked, the user’s order will be placed.

- The admin can view the subscription order placed by the user in the Admin Dashboard > WooCommerce > Subscriptions.

Note: The subtotal displayed on the checkout page includes the signup fee, which is $5 in our case.
Variable Subscription Product
↑ Back to top- Download the WooCommerce Subscriptions plugin by clicking here.
- Install the plugin and Activate it.
- For further plugin settings and information, please visit the WooCommerce Subscriptions documentation.
- Create or Edit a Variable Subscription product.
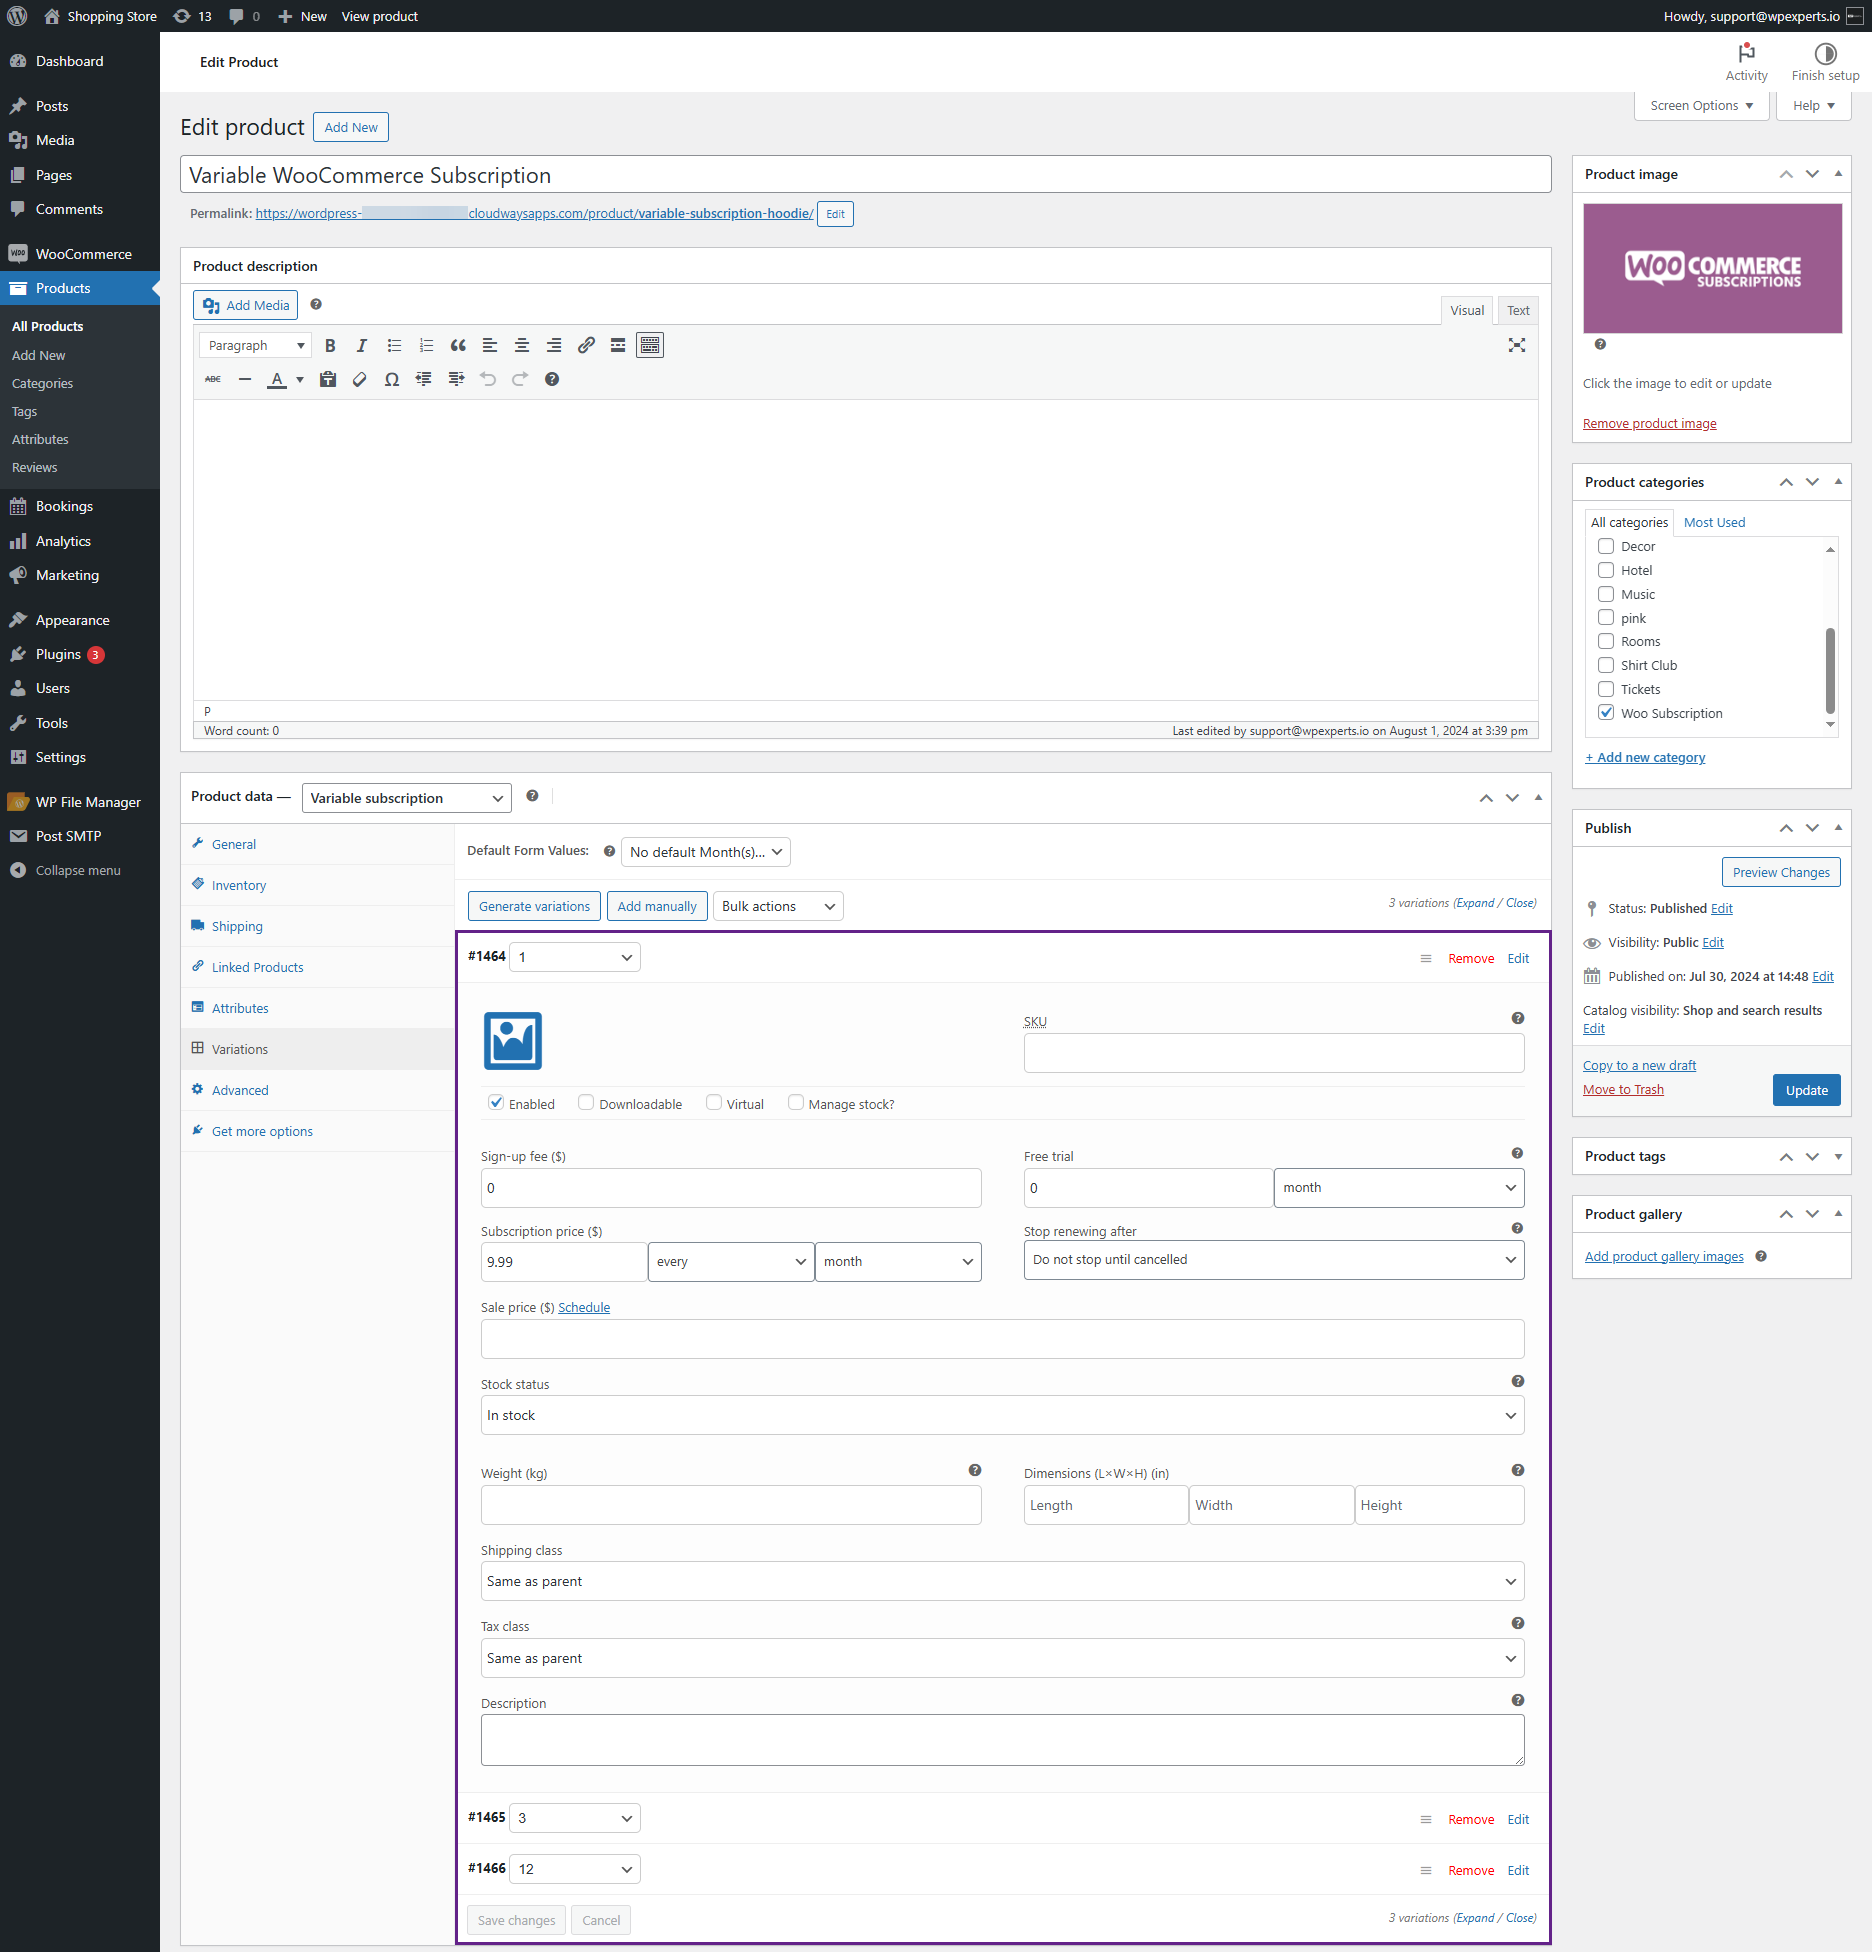
- Click the Update button.
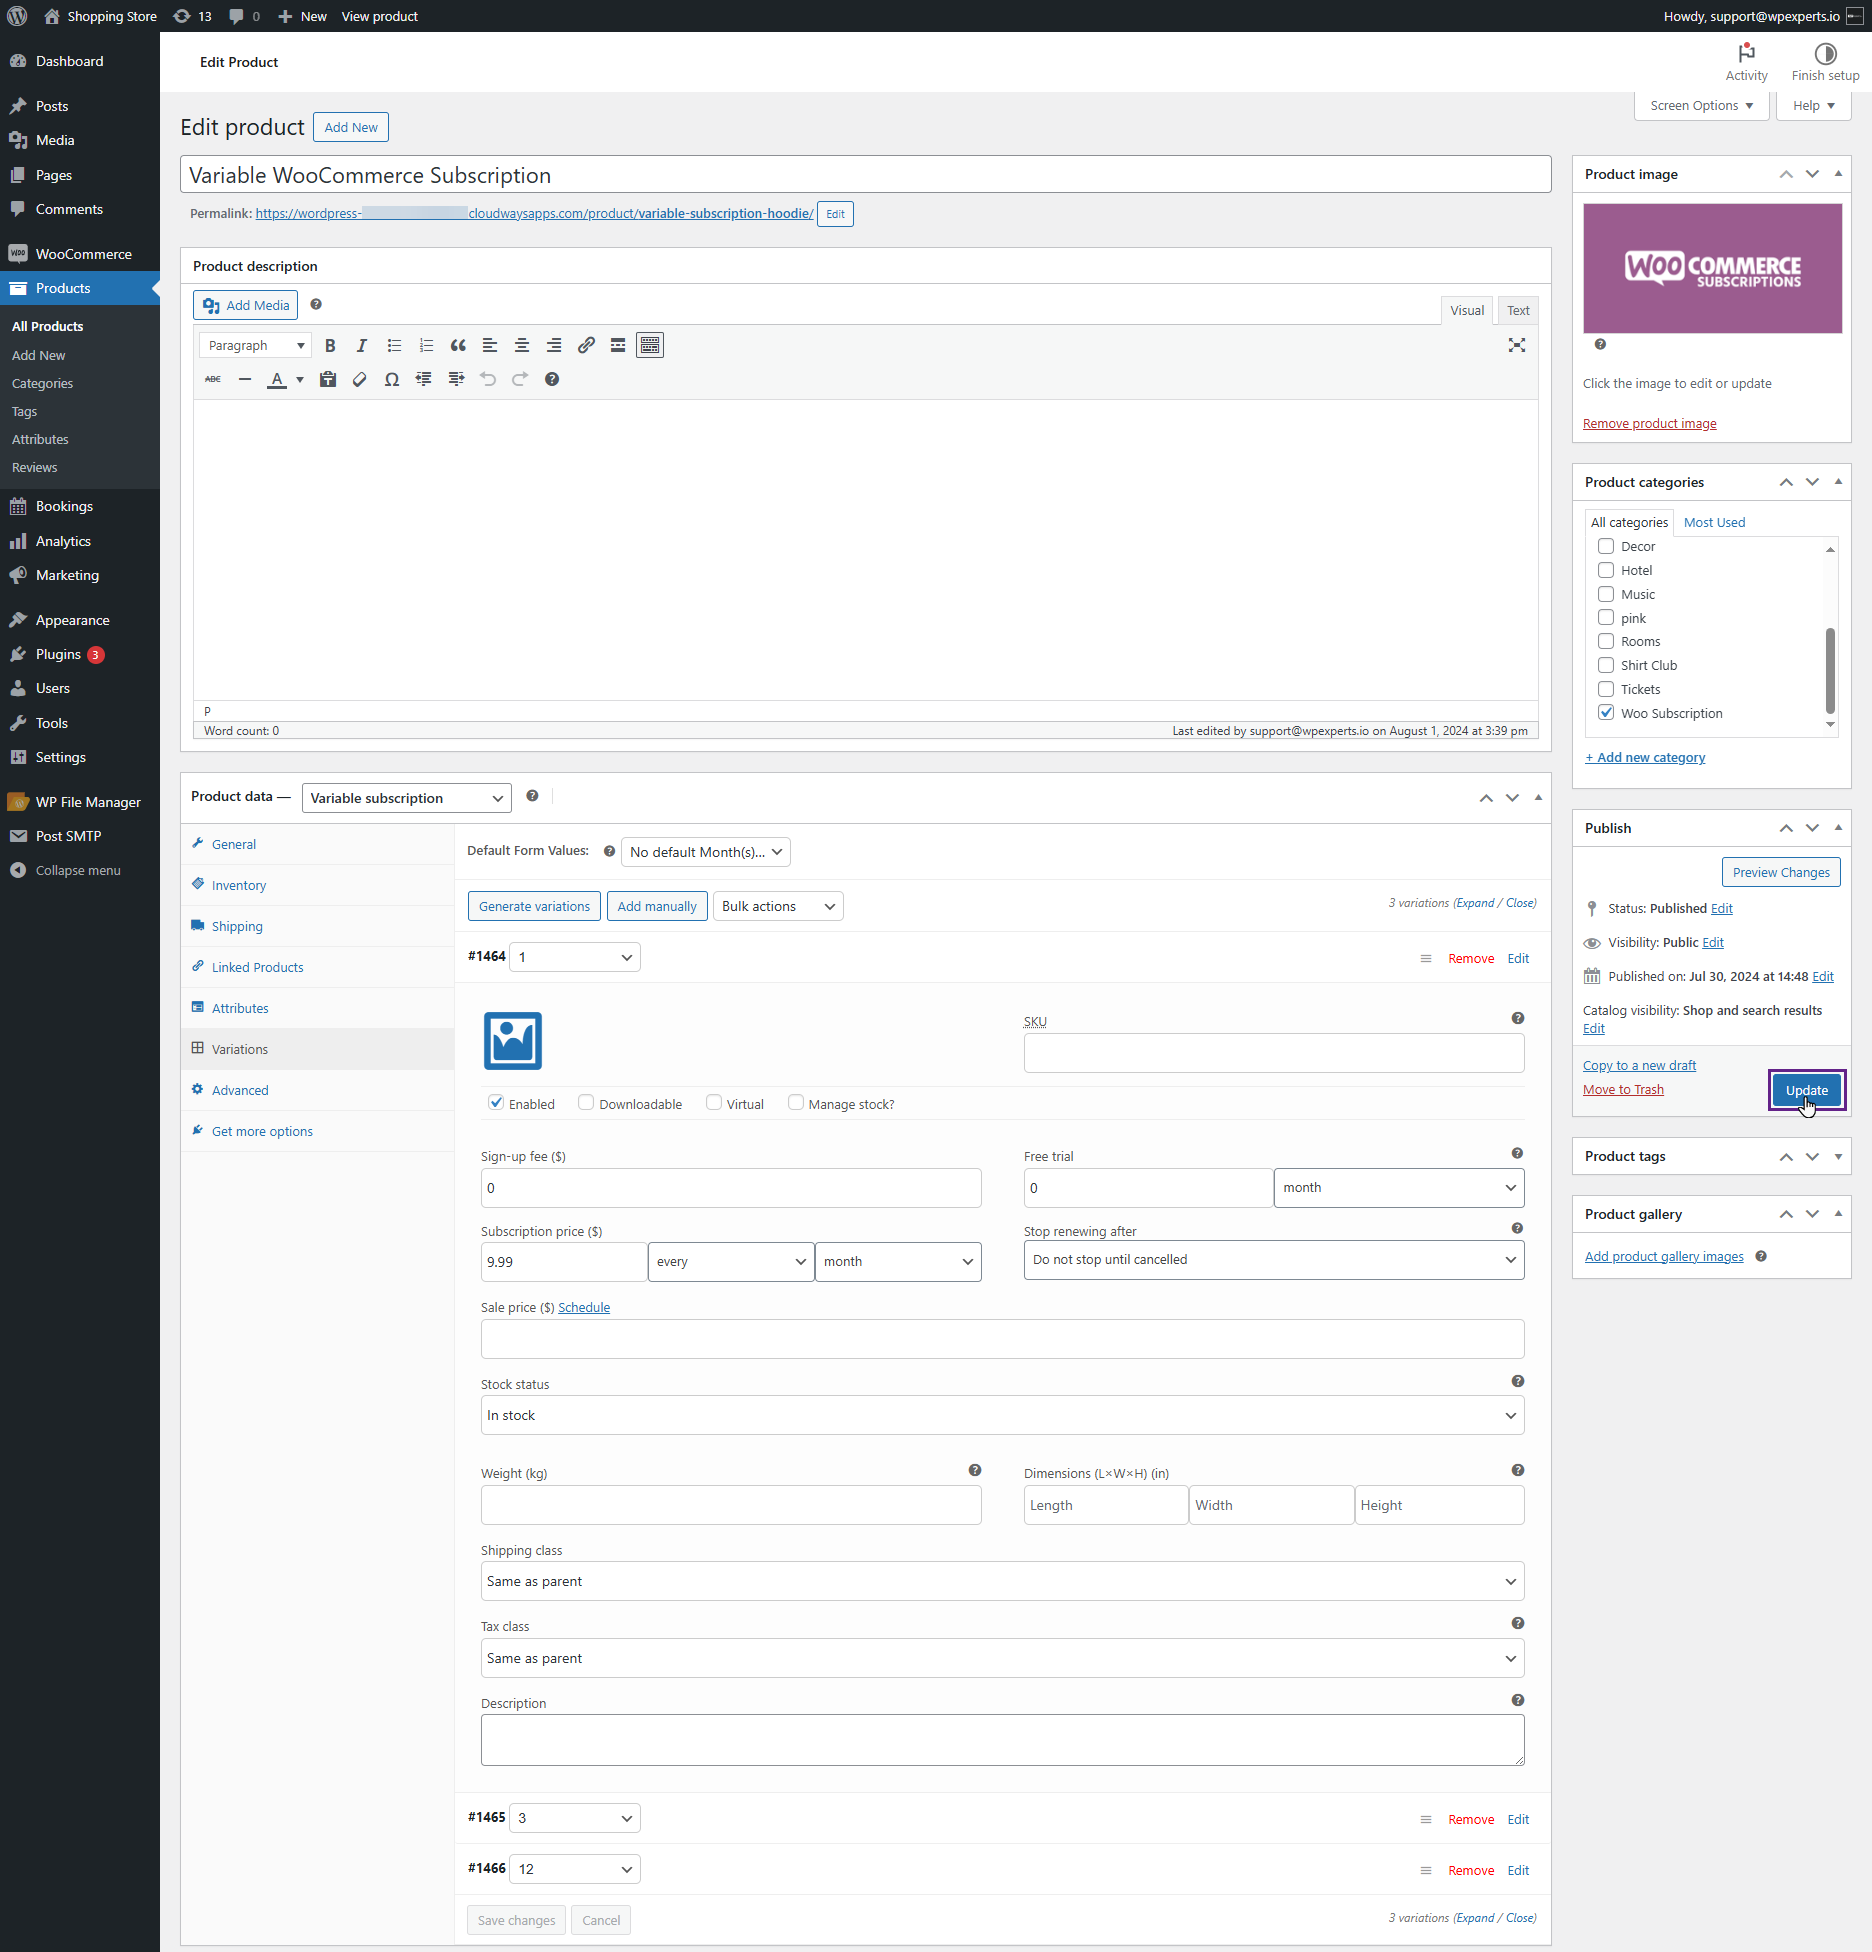
Note: For more details on creating a Variable Subscription Product, please refer to the WooCommerce Subscriptions documentation.
Front-End Impact
- Go to the website.
- Navigate to the Shop page.
- Select a Variable Subscription product from the Shop page.

- Users can now enter their desired price in the Pay Your Price field, but the price must fall within the minimum and maximum price range.

- Proceed to the Checkout page and place an order.

- Once clicked, the user’s order will be placed.

- The admin can view the subscription order placed by the user in the Admin Dashboard > WooCommerce > Subscriptions.

Compatibility of Pay Your Price with Currency Switcher for WooCommerce
↑ Back to top- Download the Currency Switcher for WooCommerce plugin by clicking here.
- Install the plugin and Activate it.
- For further plugin settings and information, please visit the Currency Switcher for WooCommerce documentation.
- Set up the Pay Your Price rule.
- Afterward, configure the Currency Switcher settings based on your requirements.

- Click the Save Changes button.

Front-End Impact
- Go to the website.
- Navigate to the Shop page.
- Select any product from the Shop page.

- The user is now on the Product page.

- Users can now switch to another currency, such as GBP in our case, and enter their desired price in the Pay Your Price field, provided it falls within the minimum and maximum price range.

- Proceed to the Checkout page and place an order.

- Once clicked, the user’s order will be placed.
- The admin can view the order placed by the user in the Admin Dashboard > WooCommerce > Orders.

