Power Automate for WooCommerce enables your WooCommerce store to connect to over 675 services through Microsoft Power Automate, one of the most popular low-code platforms in the world.
Installation
↑ Back to top- Purchase the plugin from the WooCommerce Marketplace.
- Download the .zip file or alternatively, install it from the WooCommerce Marketplace and skip to step 4.
- Go to: WordPress Admin > Plugins > Add New and Upload Plugin. Choose File with the file you downloaded in step 1.
- Install Now and Activate Plugin.
More information at: Install and Activate Plugins/Extensions.
Setup and Configuration
↑ Back to top- Go to: WordPress Admin > WooCommerce > Settings > Advanced > REST API and create a REST API Key. Once created, make a note of the Consumer Key and Consumer Secret.
- Create your first cloud flow on Microsoft Power Automate. When you select an action or trigger from the WooCommerce connector, enter your WordPress Site URL (without trailing /), Consumer Key, and Consumer Secret to complete your connection.
- You can now use Power Automate with your WooCommerce store.
Usage
↑ Back to topTriggers: Starting a flow when a WooCommerce event happens
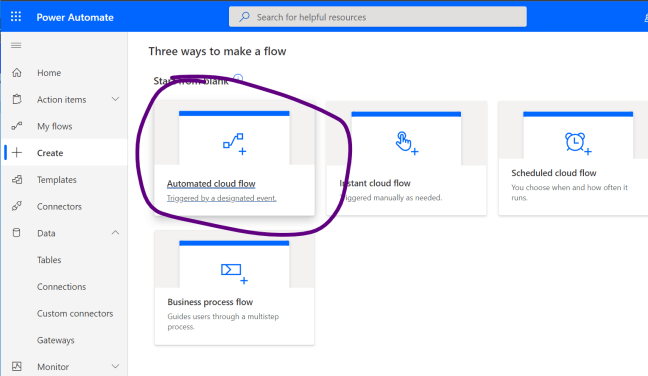
To start flows when an event happens in WooCommerce, go to https://flow.microsoft.com/ and then + Create > Automated Cloud Flow. This is where you will build flows using the Power Automate for WooCommerce connector.
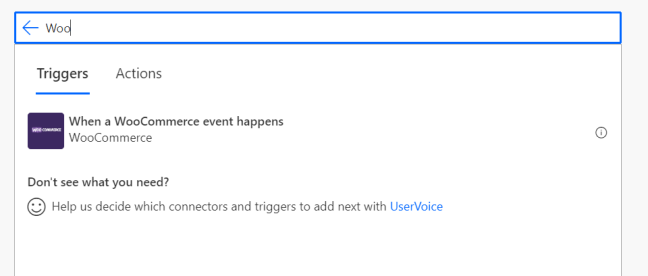
Type Woo and select When a WooCommerce event happens.
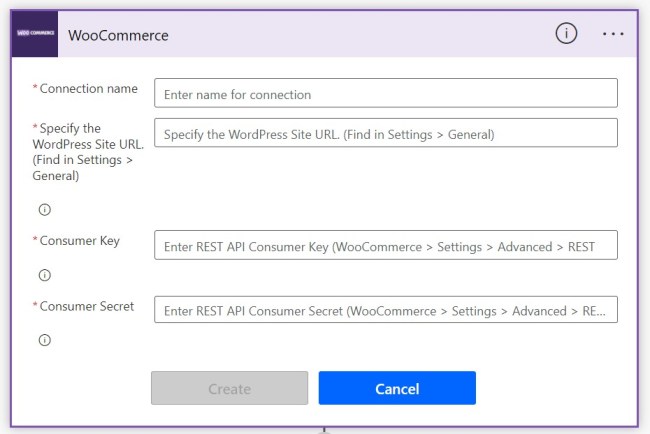
💡 Creating a new connection
When you choose your first action or trigger, you will need to setup a connection to your store. To do this, enter a name for the connection, your WordPress Site URL (without trailing /), Consumer Key and Consumer Secret. This will establish a connection to your WooCommerce store. (See Figure 1 below)
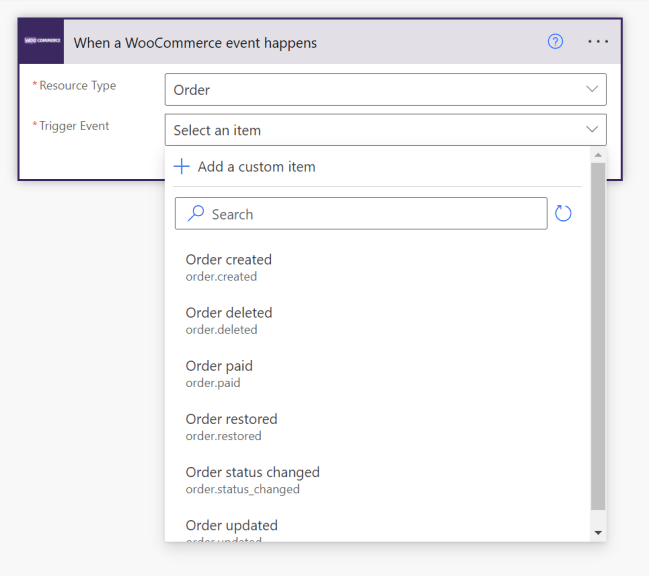
Once you are ready to use the trigger, you must select what type of event you want to start the flow:
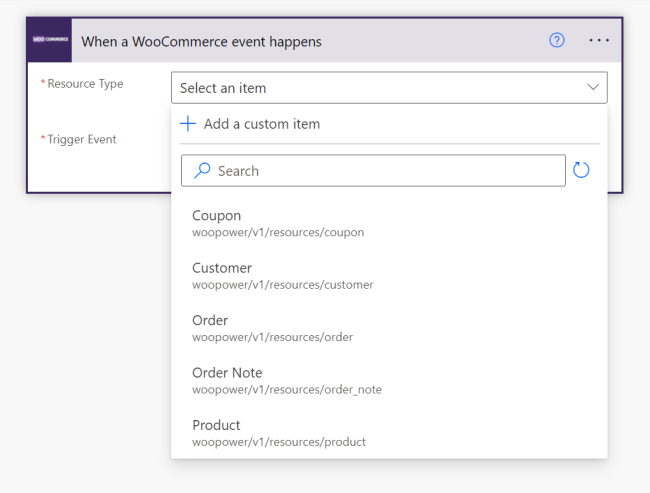
Then you must select the trigger event. When this event happens on your WooCommerce store, your flow will be started:
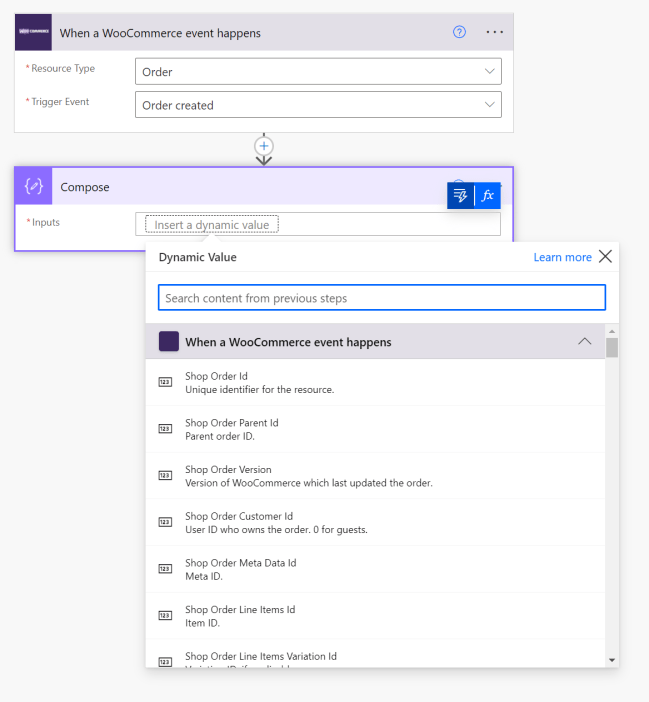
After you have configured your trigger, you can use the trigger outputs as dynamic values in future steps in your flow:
Actions: Perform actions in your WooCommerce store
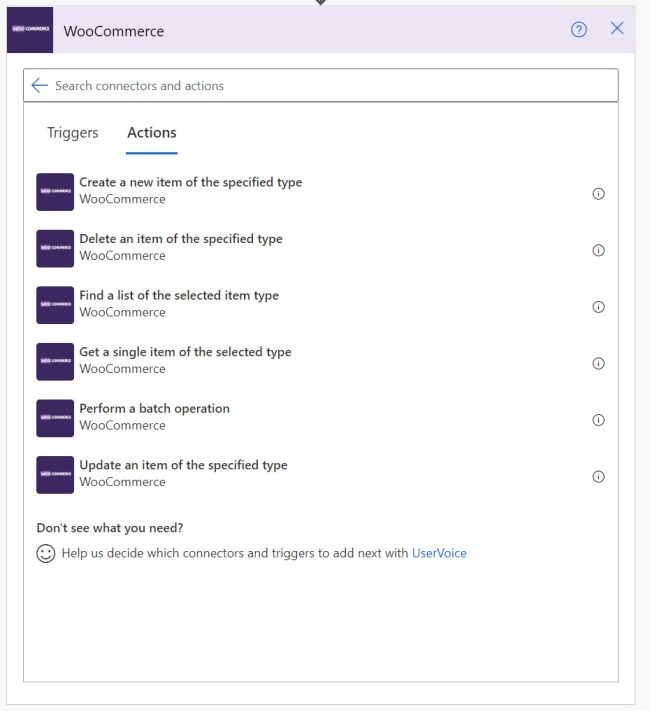
This connector also supplies several actions, which you can use at any time in your flows.
First, press New Step and select the WooCommerce connector, you will see a list of actions available:
If this if the first action you’re using with WooCommerce, you will be prompted to Create a connection which you can do by following the steps further above.
Each step you choose will present you with a list of parameters which you can use to refine the request or complete the operation:

More information about Power Automate can be found in the Power Automate Documentation
Troubleshooting Power Automate for WooCommerce
↑ Back to topPlease contact Reenhanced if you run into any trouble using this connector. We are happy to help! The best way to contact us is by submitting a ticket here.
Questions and Feedback
↑ Back to topHave a question before you buy? Contact us here and select the “I have a question about a specific extension or theme I’d like to purchase” option.
Want to share something you’ve built? Use hashtag #PowerAutomateForWooCommerce