Product Availability Slots for WooCommerce can help you Sell Products on Fixed Time Slots in your WooCommerce Shop.
Installation
↑ Back to top- Download the .zip file from your WooCommerce account.
- Go to: WordPress Admin > Plugins > Add New and Upload Plugin with the file you downloaded with Choose File.
- Install Now and Activate the extension.
More information at: Install and Activate Plugins/Extensions.
Setup and Configuration
↑ Back to topTo set up the extension, go to WordPress Admin > Product Availability Slots
General
↑ Back to topGeneral Settings
- If you wish to display the countdown timer for product availability on shop page, then enable the “Display Countdown Timer for Product Availability on the Shop Page” option.
- If you wish to display the countdown timer for product availability on the product page, then enable the “Display Countdown Timer for Product Availability on the Product Page” option.
- If you wish to hide Expired products from the shop page, enable the “Hide Expired products” option. When enabled, Expired Simple Products will be moved to draft. The expired variant of a Variable Product will be hidden from the variation selection. If all the variations of the product are expire, the entire product will be moved to draft.
- By default, timezone details will be displayed to the user in the product page. If you want to hide the timezone details to the user, enable the “Hide Timezone details in Product Page” option.
- By default, the date will be displayed in the Y-M-D format. If you want the date to be displayed as per the format set in WordPress date settings, choose “WordPress Format” in “Date Format” option.
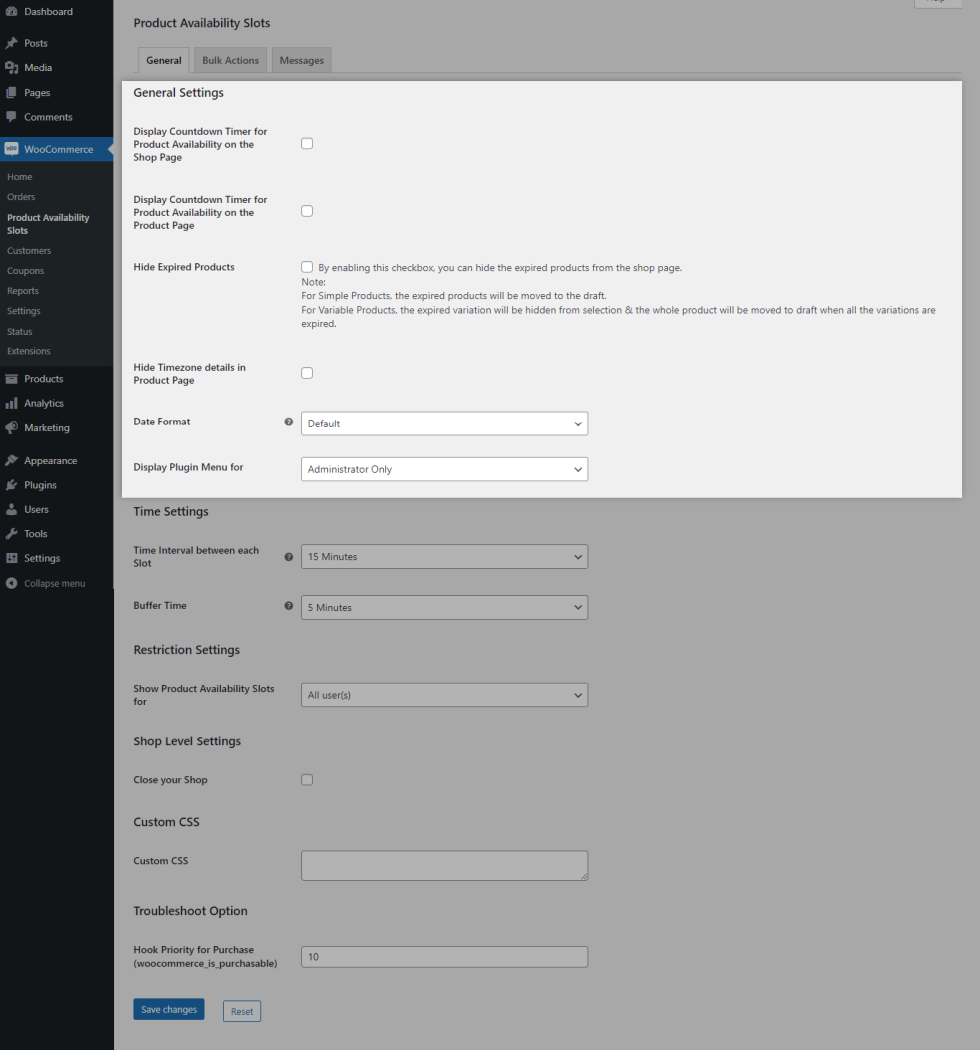
Time Settings
- Using the “Time Interval between each Slot” option, you can set the time to display between each slot at the product configuration .
- You can set the buffer time for your users when they didn’t complete the purchase before the slot time.
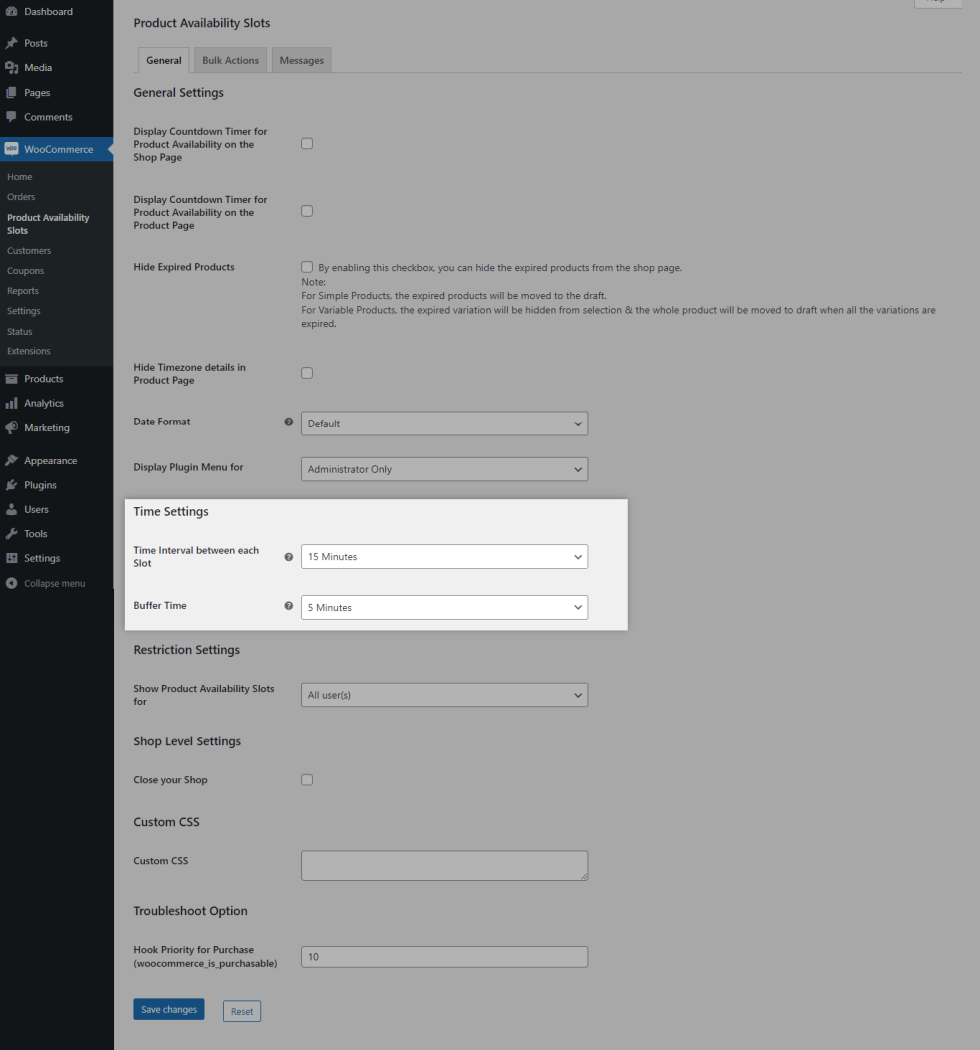
For Example
- You have configured the slot between 6 pm – 8 pm so that users can purchase the product up to 8 pm.
- If a user didn’t complete the purchase before 8 pm, then the product added won’t be removed from the cart. It stays for the time configured in Buffer Time settings and helps them to complete the purchase.
- In case, if they failed to complete the purchase during the buffer time, then the product will be automatically removed from the cart.
- If you wish to display the scheduled products for specific users/user roles, then make use of the options given in the “Restriction Settings”.
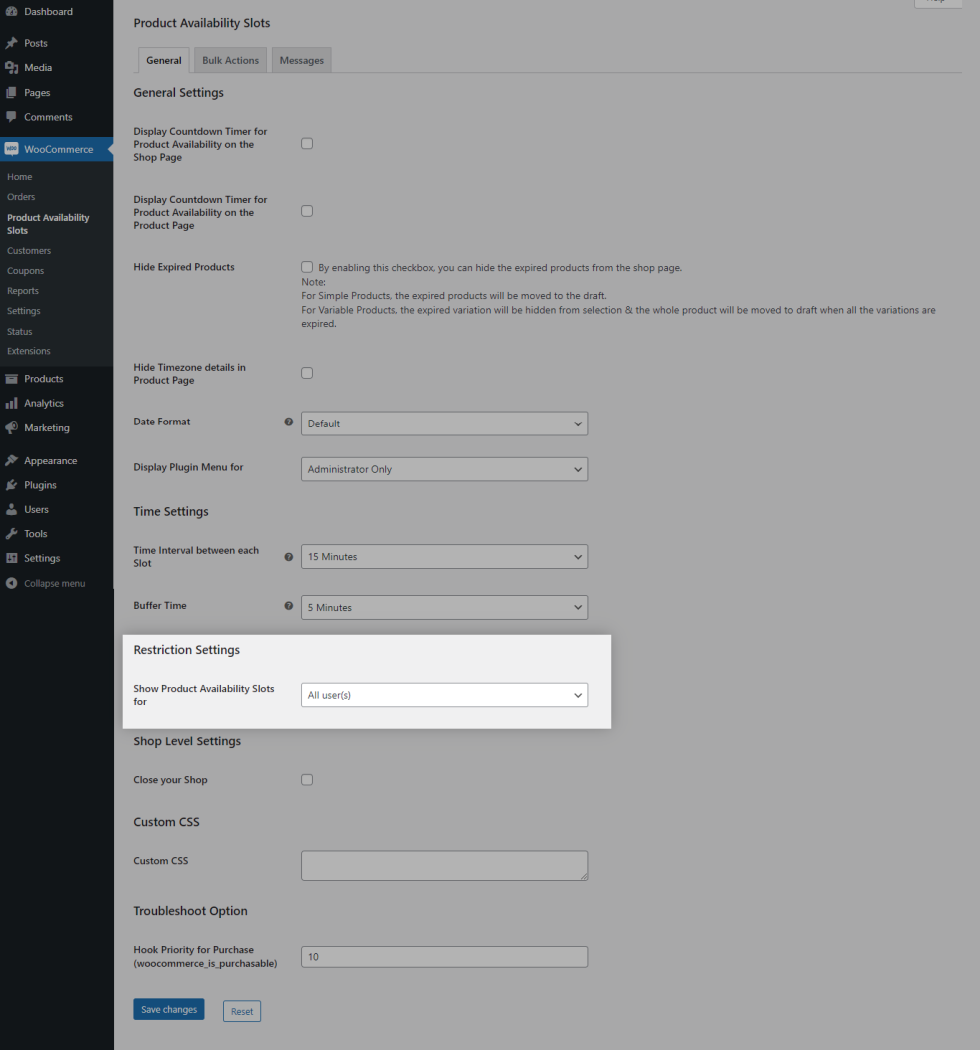
Restriction Settings
↑ Back to top- By default, the product availability slots will be applicable for all users. If you want the product availability slots to be applied to specific users/user roles, you can do so by customizing the “Show Product Availability Slots for” option.
- By default, when a user is restricted, they will not be allowed to purchase the product even when the product is available for purchase. If you want the restricted users to purchase the products anytime they want, select “can purchase the product(s) anytime” in the Restricted Users/User Role(s) option.
Shop Level Settings
↑ Back to top- If you wish to close product purchase on your shop, you can do so enabling the “Close your Shop” option. When this option is enabled, your users will not be able to purchase from your shop.
- A notice will be displayed to the user across the site. The content of notice, display position, notice Background color and Font Color can be customized.

Bulk Actions
↑ Back to topIf you want to configure Product Availability Slots for multiple products at once, you can do so by using the Bulk Update settings. To configure go to WordPress Admin > Product Availability Slots > Bulk Actions.
- In “Product Availability Slots Products/Categories” option, choose the products/categories you want to update.
- Enable the Product Availability Slots checkbox.
- If you want to restrict the product purchase only to days of the week, then in Availability Type option, set the value as “Unlimited Days”.
- If you want to restrict the product purchase to a specific date range, then in Availability Type option, set the value as “Limited Days”.
- Set the Start and End Time for the days in which you want to sell the product.
- If you wish to configure the slots for each day/specific day, then select With Slots in Days option & add the slots based on your needs.
- You can go with Multiple Time Slots/Single Time Slot when choosing With Slots option.
- If you wish to configure the availability of the products for the whole day, then select the Without Slots in Days option & enable the checkbox for the day(s) you wish to configure.
- You can select whether the User(s)/User Role Restriction should apply from either Global Level/Product Level.
- You can setup Days Off by in the Days Off section.
- Click the “Save & Update” Button.

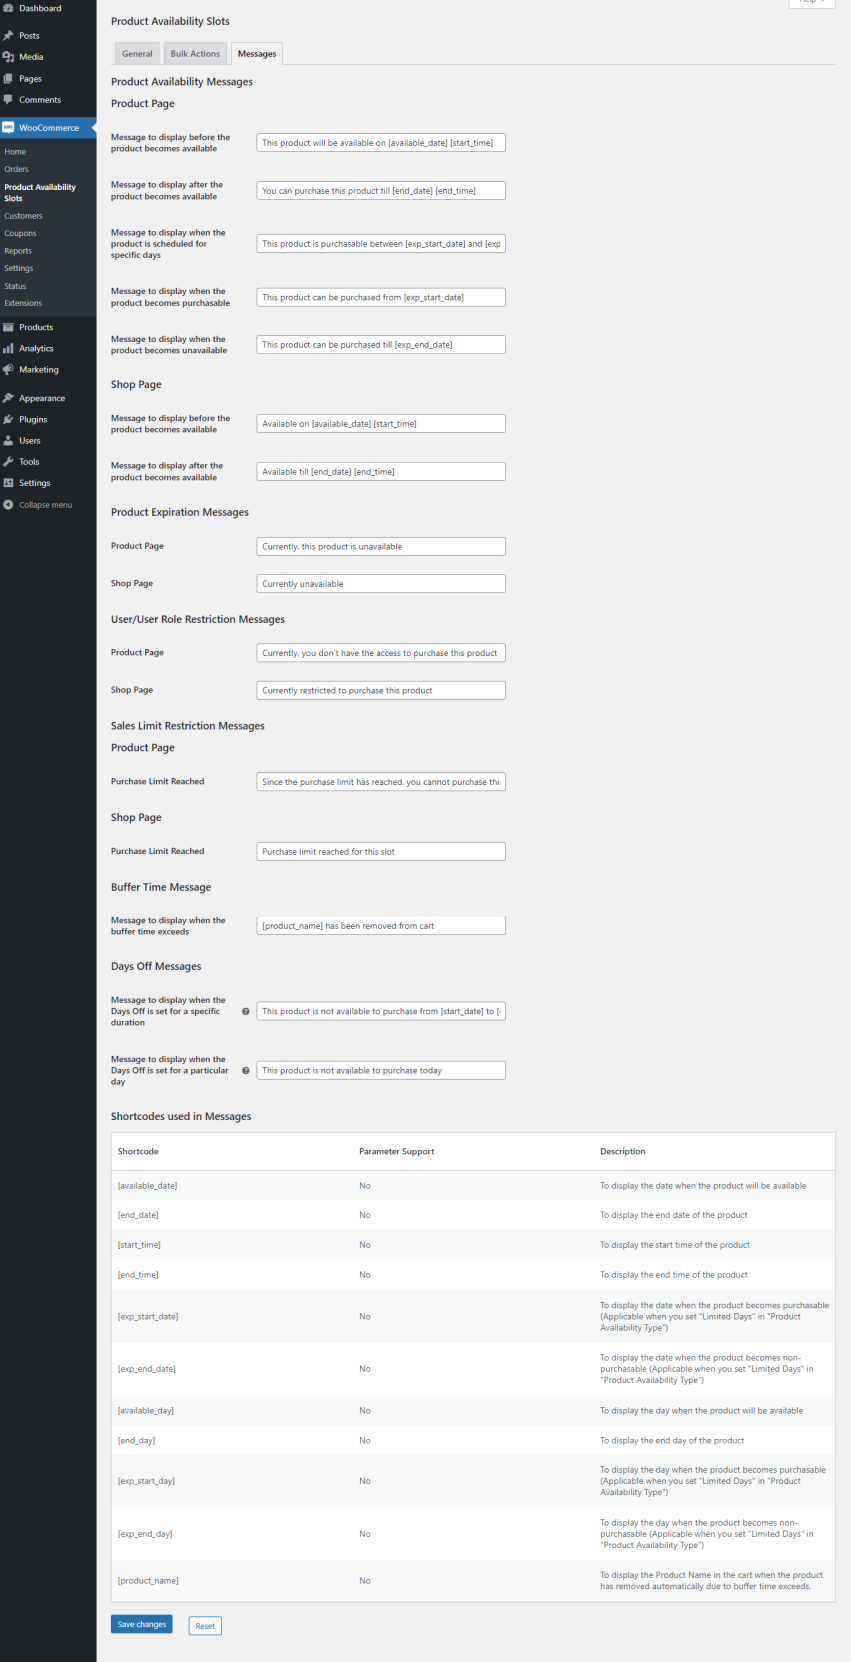
Messages
↑ Back to topIn this section, the messages displayed while interacting with availability of the products can be customized.
Product Configuration
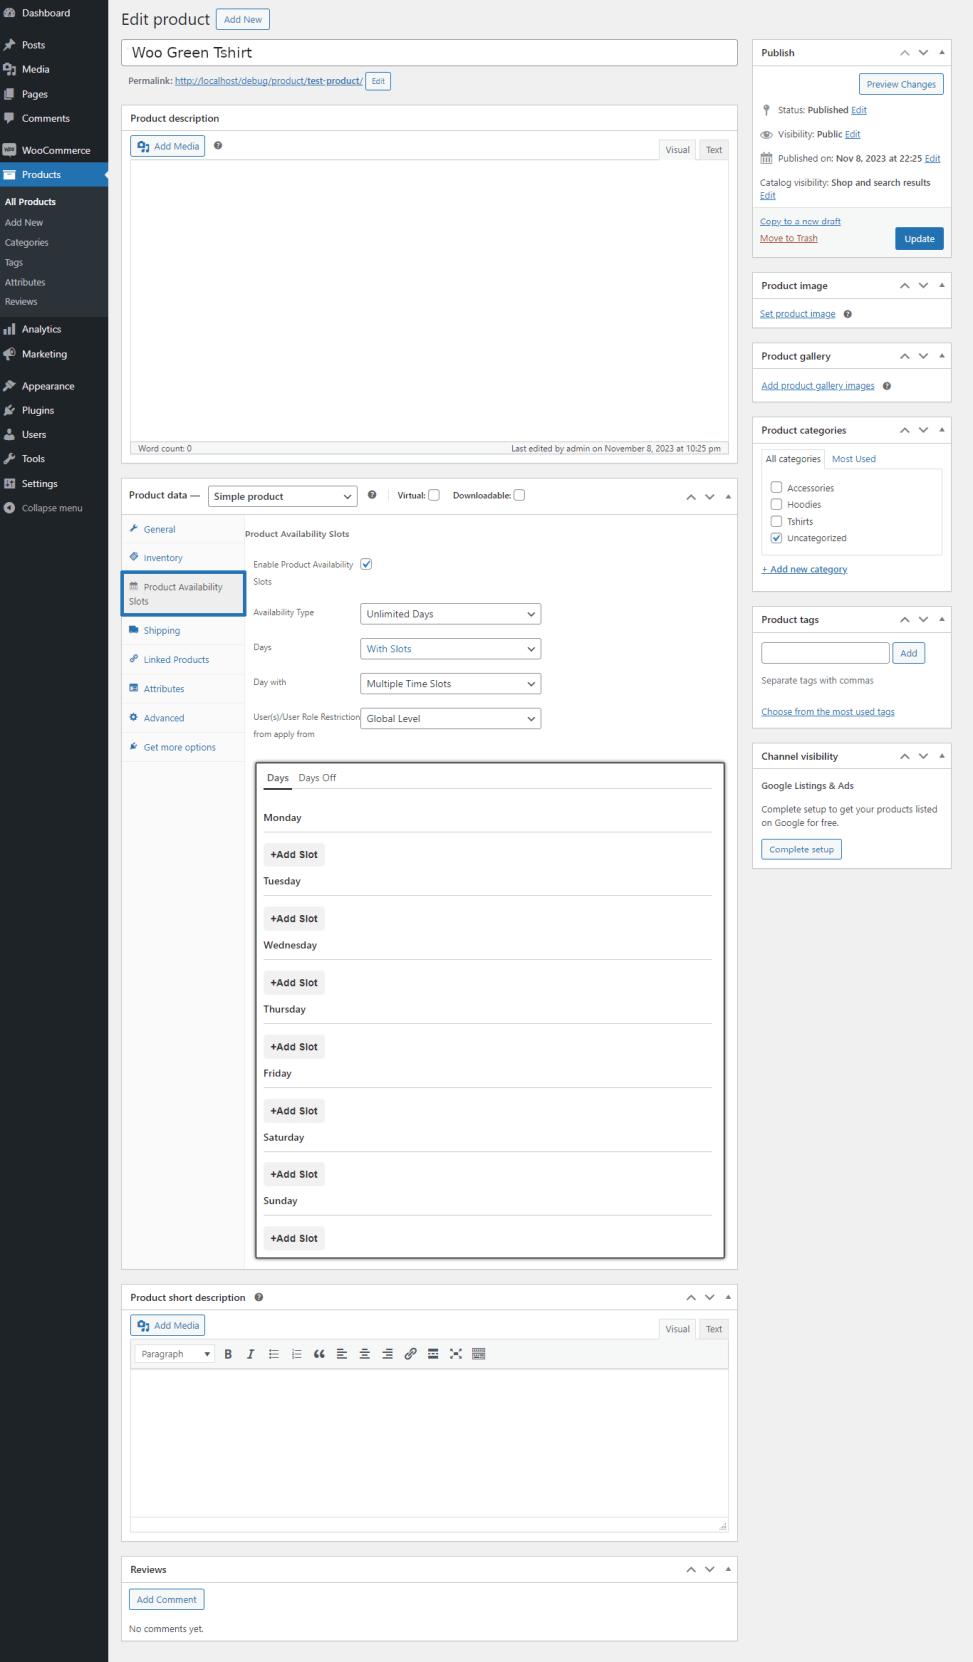
↑ Back to topSimple Product
↑ Back to topFor Simple Products, the settings will be available in the Product Availability Slots section on the Product Configuration page.
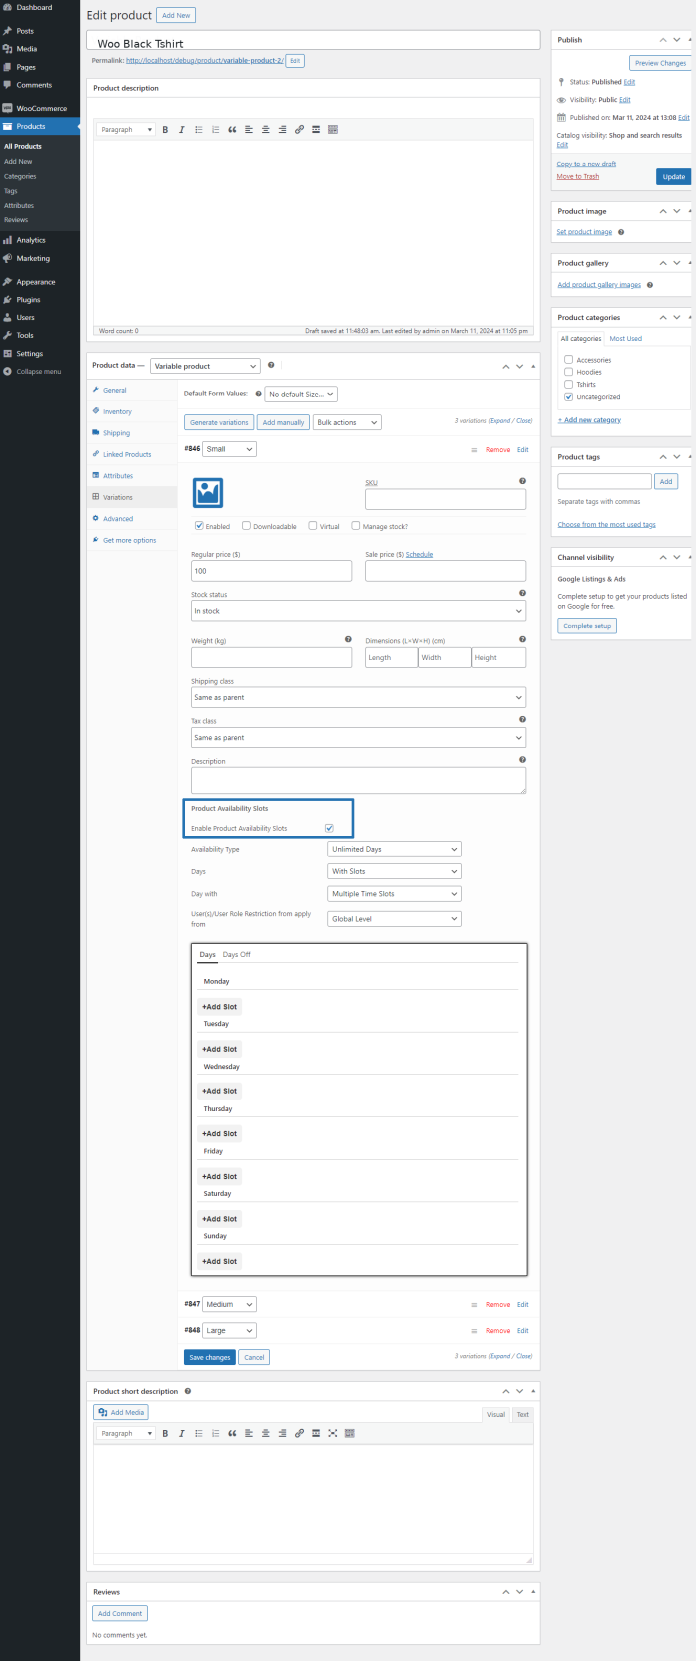
Variable Product
↑ Back to topFor Variable Products, the settings will be available inside each variation on the Product Configuration page.
Translation
↑ Back to topProduct Availability Slots for WooCommerce Plugin is translation ready meaning you can edit the po files by which you can translate the text to any language.
The steps to do the translation are as follows. For eg let us consider translation to French.
- Download and install Poedit.
- Open the file product-availability-slots-for-woocommerce > languages folder > product-availability-slots-for-woocommerce.pot using Poedit.
- Create a new translation file by clicking Create new translation button.
- Choose the Source text and set its corresponding French text in Translation Text Area.
- Save the changes.
- Save the file name as product-availability-slots-for-woocommerce-fr_FR.po.
- If you are using WordPress Version 3.9.13 or below, then in wp-config.php define the WPLANG as French. Syntax is define(‘WPLANG’, ‘fr_FR’);
- If you are using WordPress Version 4.0 or above, then go to WordPress dashboard > Settings > General and select the Site Language as French.
FAQ
↑ Back to topQ: Is it possible to sell the products that can be purchased on specific days of the week with time slots?
Example: Monday (09 am – 11.30 pm), Wednesday (09 am – 11.30 pm) & Friday (09 am – 11.30 pm).
Yes, it is possible. Please check by following the below steps,
- Create a New Product/Edit the Existing Product
- Enable the Product Availability Slots checkbox
- Select “Unlimited Days” in the Availability Type option & select With Time Slots in the Days option.
- Select “Multiple Time Slots” in Days with option.
- Set the Start Time as 09 am & End Time as 11.30 pm for Monday, Wednesday & Friday.
– Save the settings so that users can purchase the products only within the specified time. Outside the specified time, a Notice & Countdown Timer will be displayed about the next Available Date & Time.
Q: Is it possible to sell some of the products only from Wednesday to Saturday every week?
Yes, it is possible. Please check by following the below steps,
- Create a New Product/Edit the Existing Product
- Enable the Product Availability Slots checkbox
- Select “Unlimited Days” in the Availability Type option.
- Select Without Slots in the Days option.
- Enable the following checkboxes
- Wednesday
- Thursday
- Friday
- Saturday
- Save the settings
Q: Is it possible to sell the products that can be purchased only during the Specific Date Range[i.e. AUG 01, 2023 to AUG 31, 2023]?
- Create a New Product/Edit the Existing Product
- Enable Product Availability Slots checkbox
- Select “Limited Days” in the Availability Type option.
- Select Without Slots in the Days option.
- Set the From Date as AUG 01, 2023 & To Date as AUG 31, 2023.
- If you don’t want to sell on some days[i.e. Saturday & Sunday] in between the above date range, then disable the checkboxes for those 2 days.
- Save the settings
Note: Once the To Date has been reached, then the product will not be purchasable anymore on the site.
Q: Why the products are not moving to draft/not hidden when the product becomes unavailable even though I enabled this checkbox[Hide Expired Products]?
Please check the below details about the flow of the Hide Expired Products option,
We have given “Availability Type” as “Unlimited Days” & “Limited Days”.
i) If you choose “Unlimited Days”, then the configured product will be available for purchase based on the slots configured on your site & it will continue.
- If the user comes to your site on the unavailable slot, a message will be displayed with the date & time so that they can come to know when this product will be again available for purchase. In this case, the product will not be hidden in this scenario.
ii) If you choose “Limited Days”, then you need to set the “From & To Date Range” so that the product will be purchasable only in between the From & To Date & users can purchase the product only in the configured slots[ex. every Wednesday from 10:00 a.m. to 06:00 p.m. from June 01 to June 30].
- Once the To Date[June 30] has been reached, then the corresponding product will be expired & from then onward the product is no longer purchasable anymore on your site.
- At this moment, this product will be visible on your site but users can’t purchase & the below message will be displayed on the shop & product page.
“Currently, this product is Unavailable”.
- In this case, if you wish to hide this product automatically from your site, then you can make use of this option[Hide Expired Products].
iv) Similarly, it follows the same behavior for the Variable Products.
For example:
Product A contains two variations[V1 & V2].
V1 – Availability Date Range[10th June – 20th June]
V2 – Availability Date Range[15th June – 28th June]
- In this case, if you view the product between 10th June to 20th June, then you can see the availability information when selecting both variations.
- Variation V1 will be hidden from the selection after 20th June & the whole variable product will be moved to draft after 28th June. This is how this option will work.