PW Sales Scheduler for WooCommerce allows you to schedule sales in advance.
Installation
↑ Back to top
- Download the .zip file from your WooCommerce account.
- Go to: WordPress Admin > Plugins > Add New and Upload Plugin with the file you downloaded with Choose File.
- Install Now and Activate the extension.
Setup and Configuration
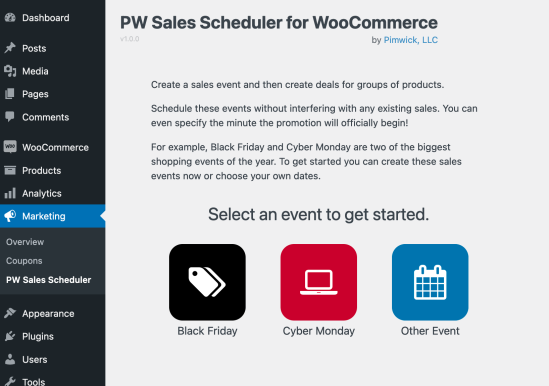
↑ Back to top- Navigate to Marketing > PW Sales Scheduler

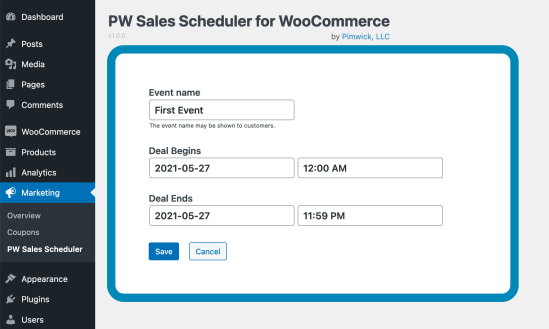
- Click on one of the three buttons to specify the start and end date for the Event.

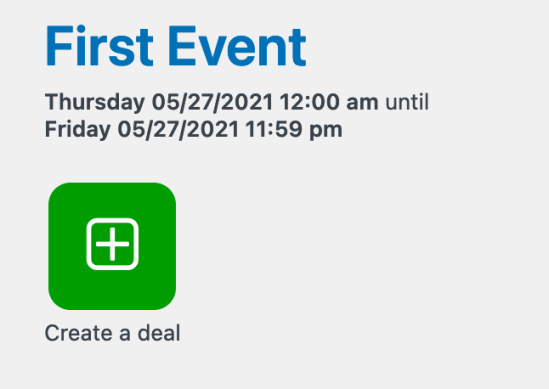
- Click the green button to create your first deal which will indicate the products on sale.

- Walk through the steps in the wizard to add products to the deal.
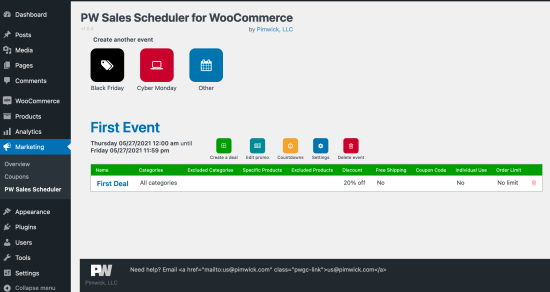
- After adding the deal you will be returned to the Event Dashboard. From here you can create another Event, add more deals to the existing events, and change other settings.

Usage
↑ Back to topTroubleshooting
↑ Back to topFAQs
↑ Back to topHow can I show all products on sale using a shortcode?
↑ Back to top[products limit="4" columns="2" pw_sales_scheduler="8" ]This will show 4 products in 2 columns from the PW Sales Scheduler Event “8”. For more information on the products shortcode, follow this link: https://woocommerce.com/document/woocommerce-shortcodes/ Note: to get the PW Sales Scheduler Event ID, click on the Deal inside the event to edit it. You will see the ID in your browser bar.
