NOTE
This product is no longer available on WooCommerce.com. This document has been left available for existing users, but will no longer be updated.
Setup and Installation
↑ Back to top- Download the .zip file from your WooCommerce account.
- Navigate to: WordPress Admin > Plugins > Add New. Upload the downloaded file by selecting Choose File.
- Click on Install Now button and then click on Activate Plugin.
Admin settings can be found at WooCommerce > Quick Digital Checkout
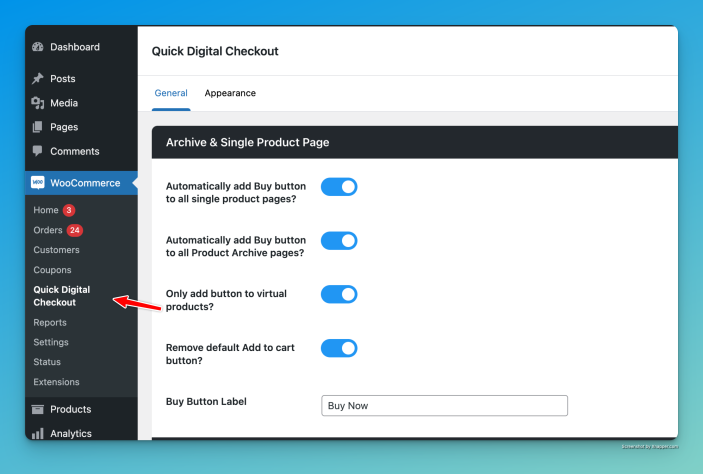
Archive & Single Product Page Settings
↑ Back to top
Automatically add a Buy button to all single product pages: When checked, automatically adds a Quick Buy button to every single product page on your website. You will most likely want to enable this setting.
Automatically add Buy button to all Product Archive pages: When checked, automatically adds a Buy button to the shop page, product category and tag pages. You will most likely want to enable this setting.
Only add button to virtual products: This setting decides if you want to add the Quick Buy button to virtual products only. If unselected, a Quick buy button will be added for all product types.
Remove default Add to cart button: When enabled, the default WooCommerce Add to Cart button will be hidden.
Buy Button Label: Choose what you want the quick buy button added by QDC to say.
Checkout Settings
↑ Back to top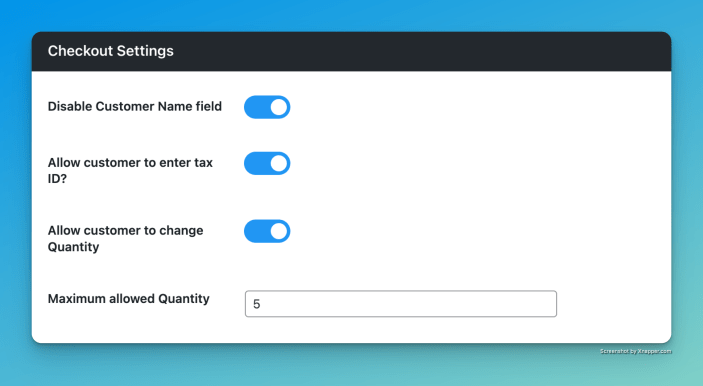
Disable Customer Name: Eliminate the need for customers to enter their name during checkout, making the process quicker.
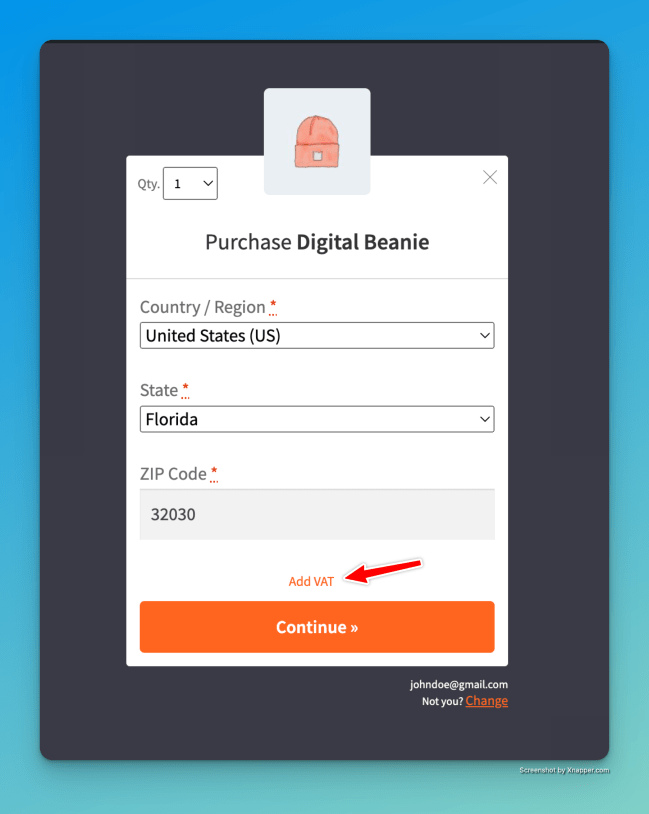
Allow customers to enter tax ID: Give customers the option to enter their tax ID during checkout.
Allow customers to change Quantity: Enable customers to adjust the quantity of products directly on the checkout page.
Maximum allowed Quantity: Set a maximum limit for the quantity dropdown on the checkout page.
Coupon Settings
↑ Back to top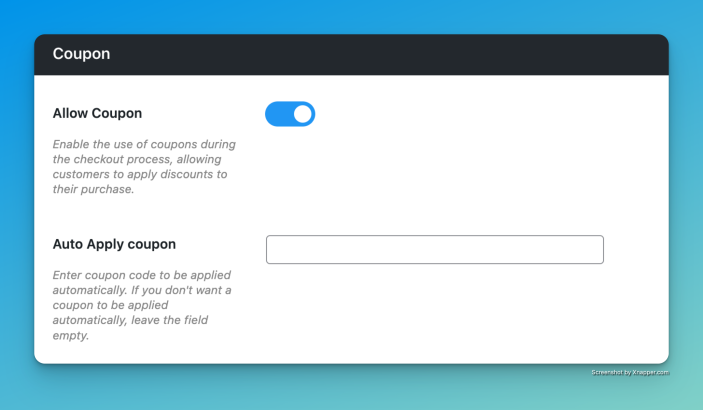
Allow Coupon: Enable the use of coupons during the checkout process, allowing customers to apply discounts to their purchases.
Auto Apply coupon: Automatically apply a coupon code by entering it in the field below. Leave the field empty if you do not want a coupon to be applied automatically.
Popup settings
↑ Back to top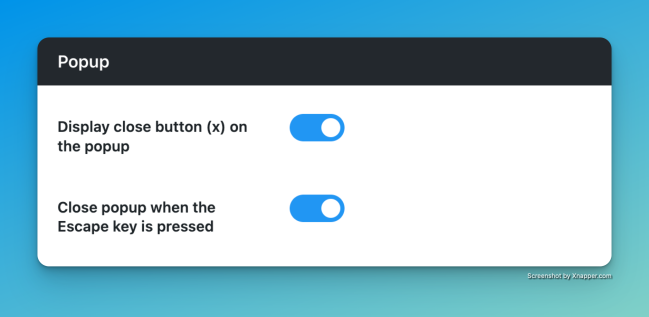
Display close button (x) on the popup: Include a visible close button on the popup checkout window.
Close popup when the Escape key is pressed: Allow customers to close the popup checkout window by pressing the Escape key on their keyboard.
Appearance
↑ Back to top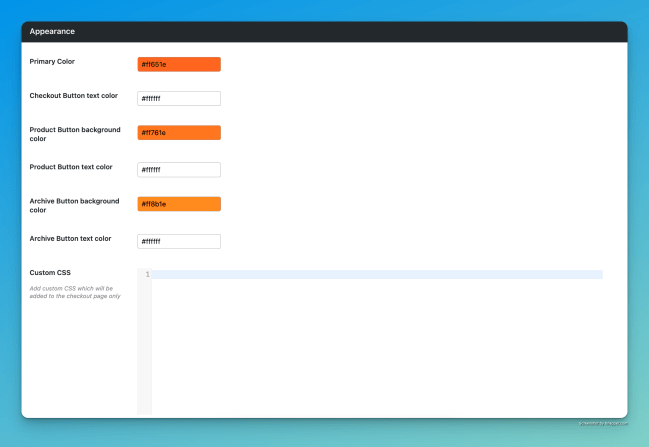
Primary Color: Choose the primary color for the checkout buttons and other elements to match your website’s design.
Checkout Button text color: Customize the text color of the checkout button to ensure it stands out on your website.
Product Button background color: Set the background color of the Buy button on single product pages.
Product Button text color: Customize the text color of the Buy button on single product pages.
Archive Button background color: Set the background color of the Buy button on product archive pages.
Archive Button text color: Customize the text color of the Buy button on product archive pages.
Custom CSS: Add your own custom CSS code to customize the appearance of the checkout popup further. This CSS will only be applied on the checkout popup.