Sezzle is an alternative payment platform that increases sales and basket sizes by enabling your customers to ‘buy now and pay later’ with interest-free installment plans.
This guide describes how to integrate Sezzle into your WooCommerce website so that you can provide Sezzle as a payment option for your customers. After integrating Sezzle, your WooCommerce site will:
- offer Sezzle as a payment option on the checkout page.
- refund Sezzle payments from your WooCommerce order management system.
- display Sezzle promotional messaging.
- authorize and capture payments.
Integration Steps Overview
↑ Back to top- Install and configure the Sezzle WooCommerce extension
- Test your integration
- (Optional) Sandbox Testing
Before You Begin
↑ Back to top- You should have a Sezzle merchant account.
- Please visit our signup page if you don’t have an account.
- Make sure you have the following Sezzle details handy.
- Familiarize yourself with the transaction flow when buying with Sezzle.
Install the Sezzle WooCommerce Extension
↑ Back to top- Log in to your website’s WordPress admin.
- Ex: your-website.com/wp-admin
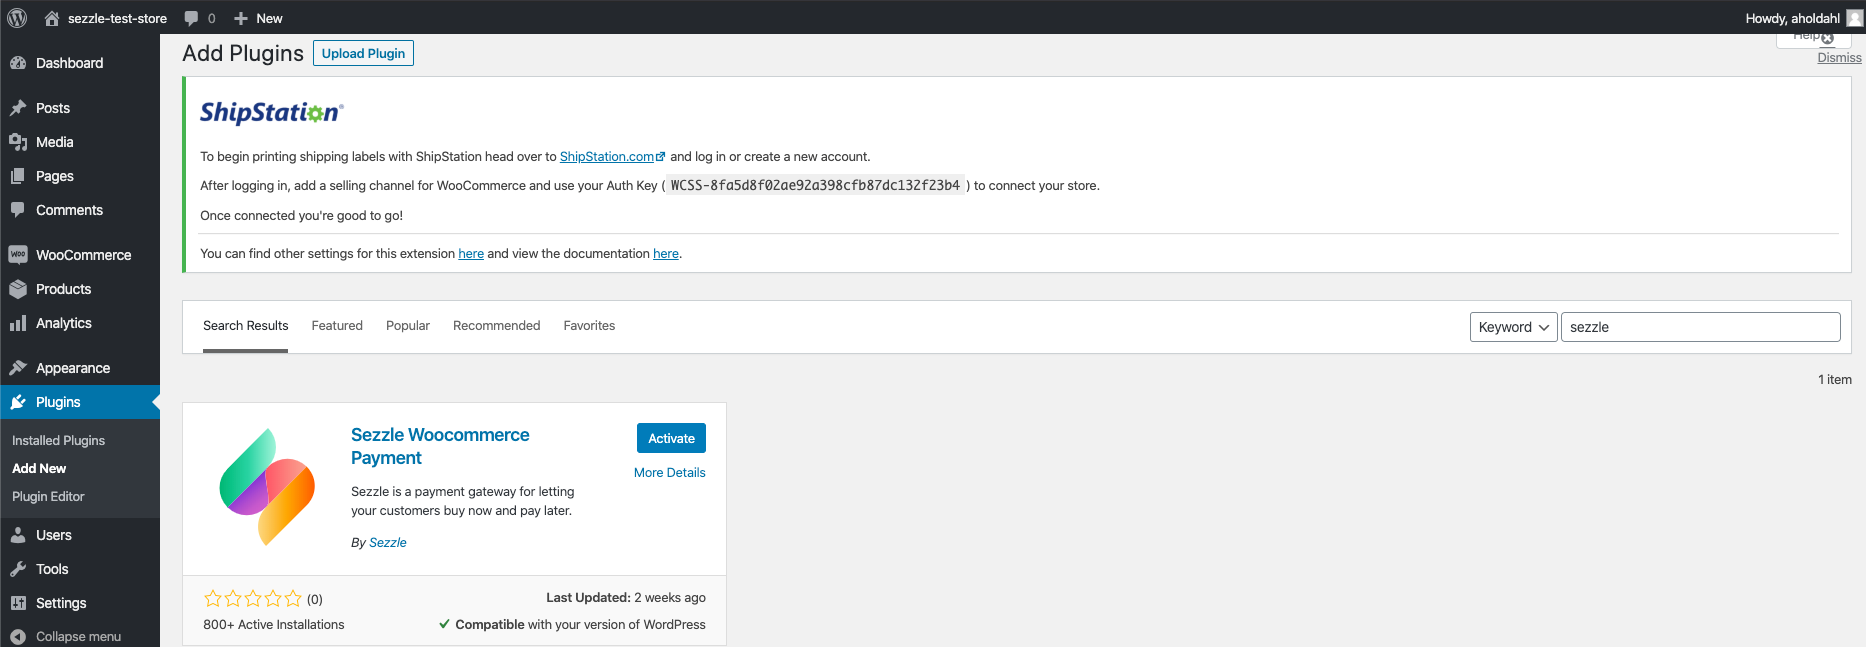
- In the left sidebar, click
Plugins>Add New. - Search for
Sezzle. - Click
Install Now.
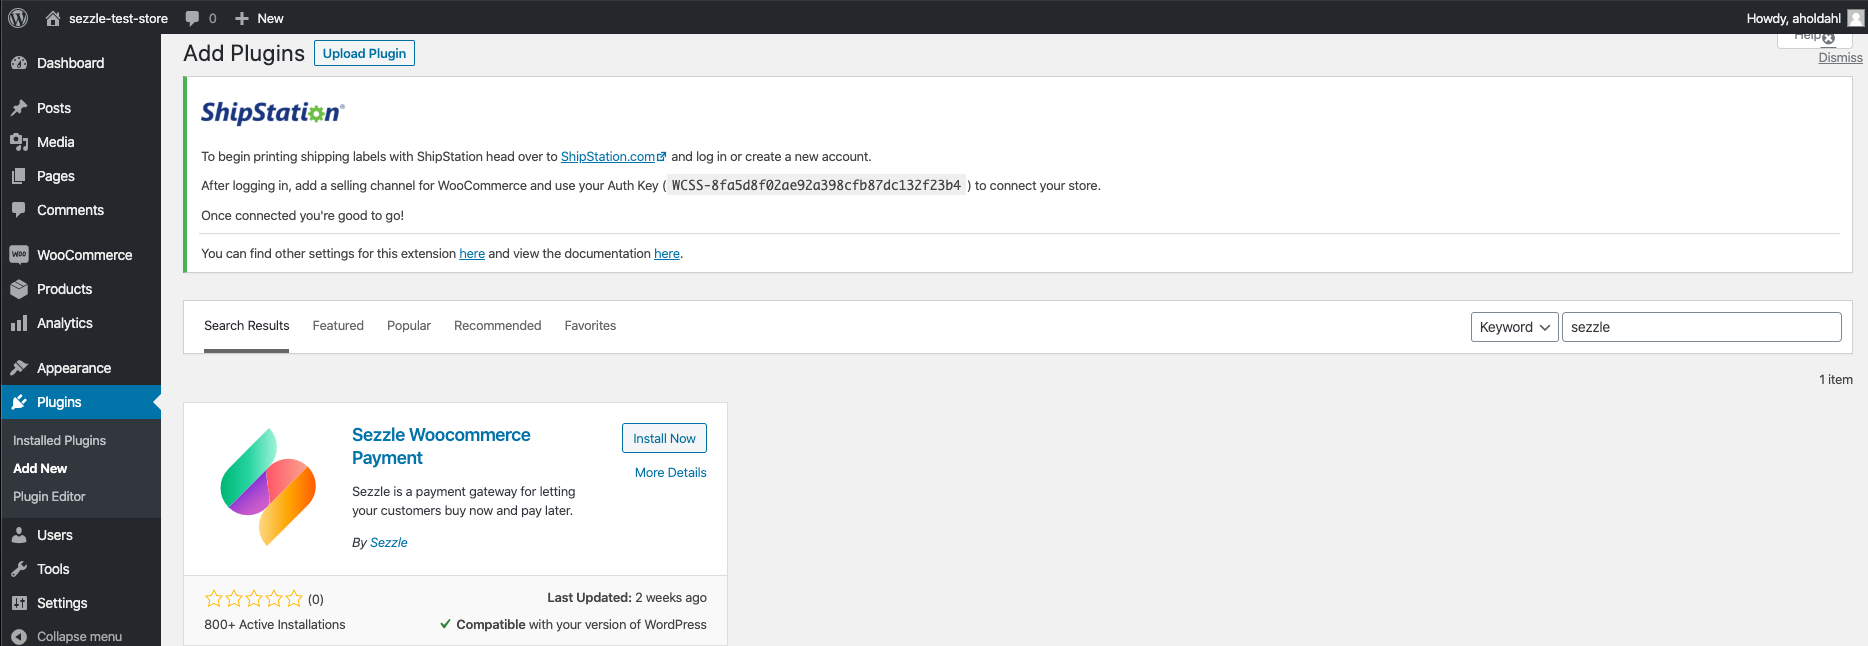
- Click
Activate.
Admin Configuration
↑ Back to top- In the left sidebar, click
WooCommerce>Settings. - Select the
Paymentstab.
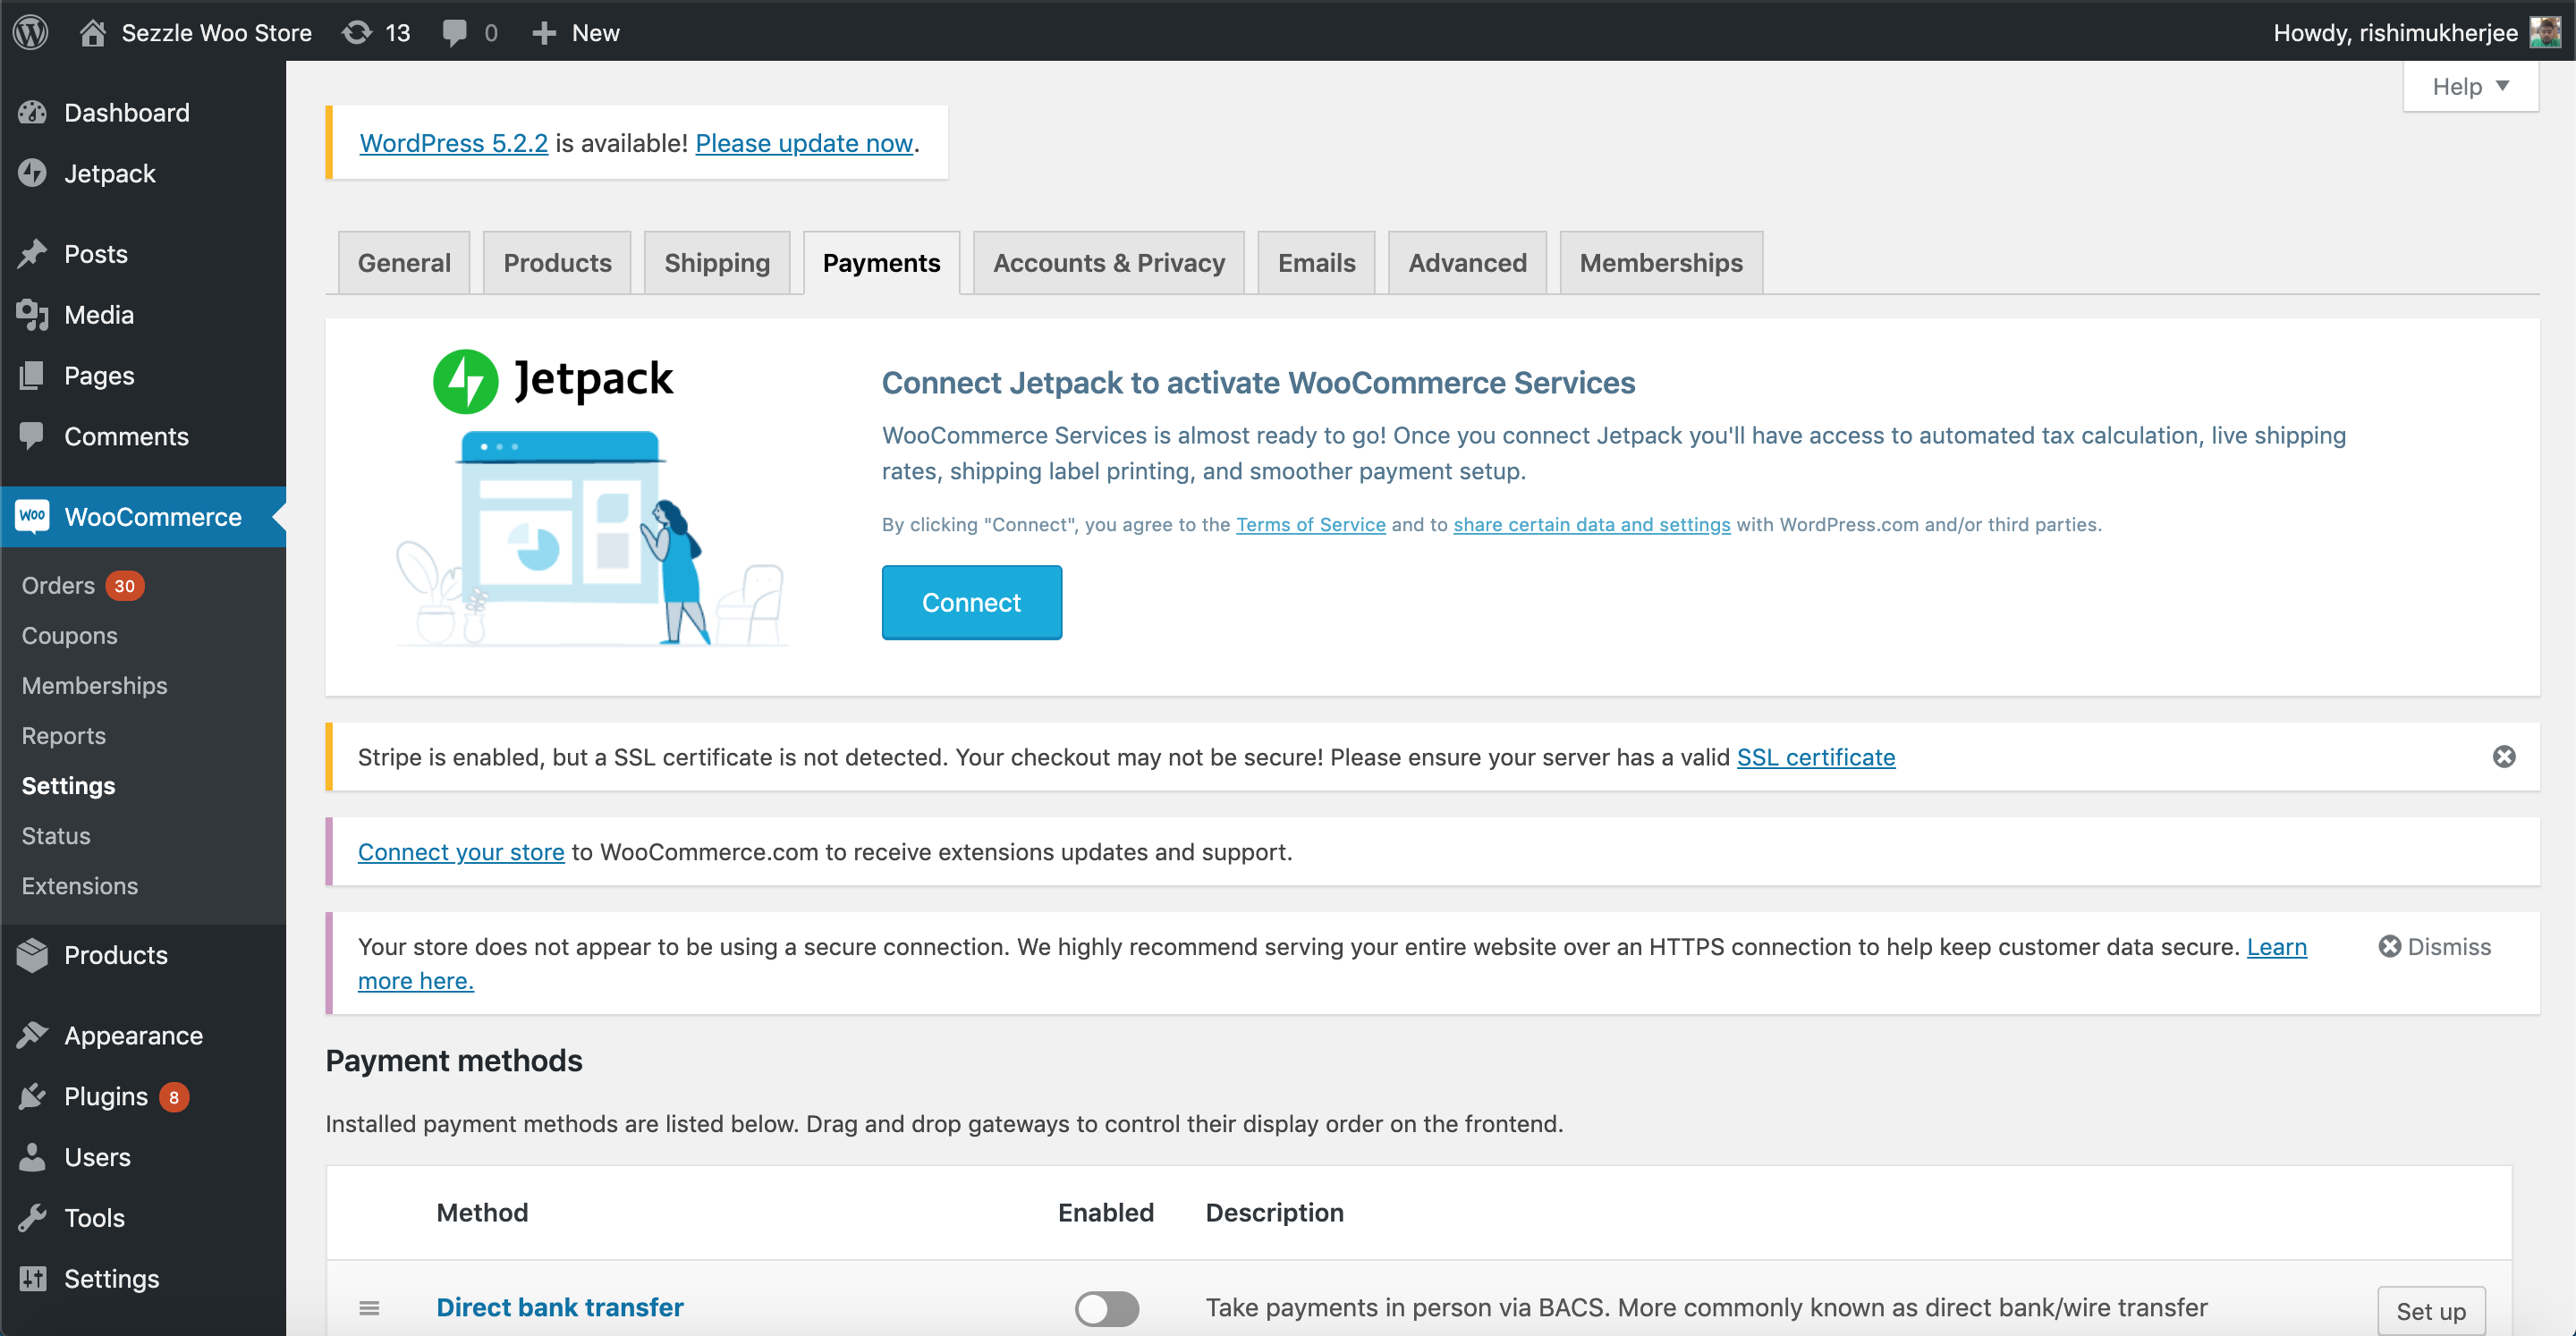
- Click the
Managebutton forSezzle.
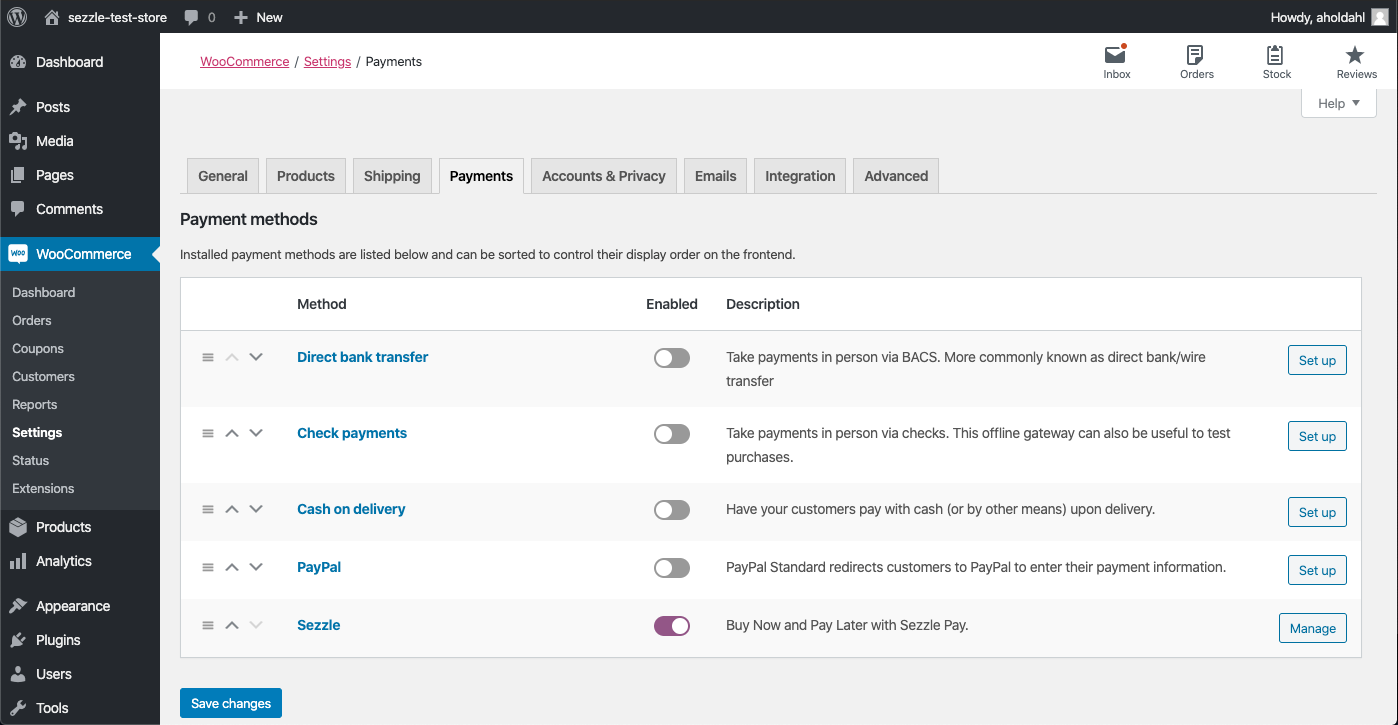
- Check the
Enable/Disablecheckbox for enabling Sezzle. - Check the
Payment option availability in other countriesif you want to allow Sezzle outside ofUSandCanada.
- Note, Sezzle operates only in
USandCanada. Be sure to check this option.
- Set
Merchant IDas received from theBusinesssection of Sezzle Merchant Dashboard. - Copy your
Private KeyandPublic Keyfrom your Sezzle Merchant Dashboard, and paste them into the corresponding fields. - Set
Minimum Checkout Amountif you want to restrict Sezzle based on a minimum order total. - Set the
Transaction ModeasLivefor production andSandboxfor sandbox testing mode. - Check the
Show Sezzle widget in product pagescheckbox for adding widget script in the Product Display Page, which allows enabling Sezzle Widget Modal in PDP. - Configure the installment plan widget under
Installment Plan Widget Configurationsettings - Check the
Enable Installment Widget Plan in Checkout pagecheckbox for enabling installment widget plan. - Set the
Order Total Container Class Name. Default iswoocommerce-Price-amount. - Set the
Order Total Container Parent Class Name. Default isorder-total. - Check the
Enable Loggingcheckbox for logging Sezzle checkout related data. This is helpful for debugging issues, if encountered.
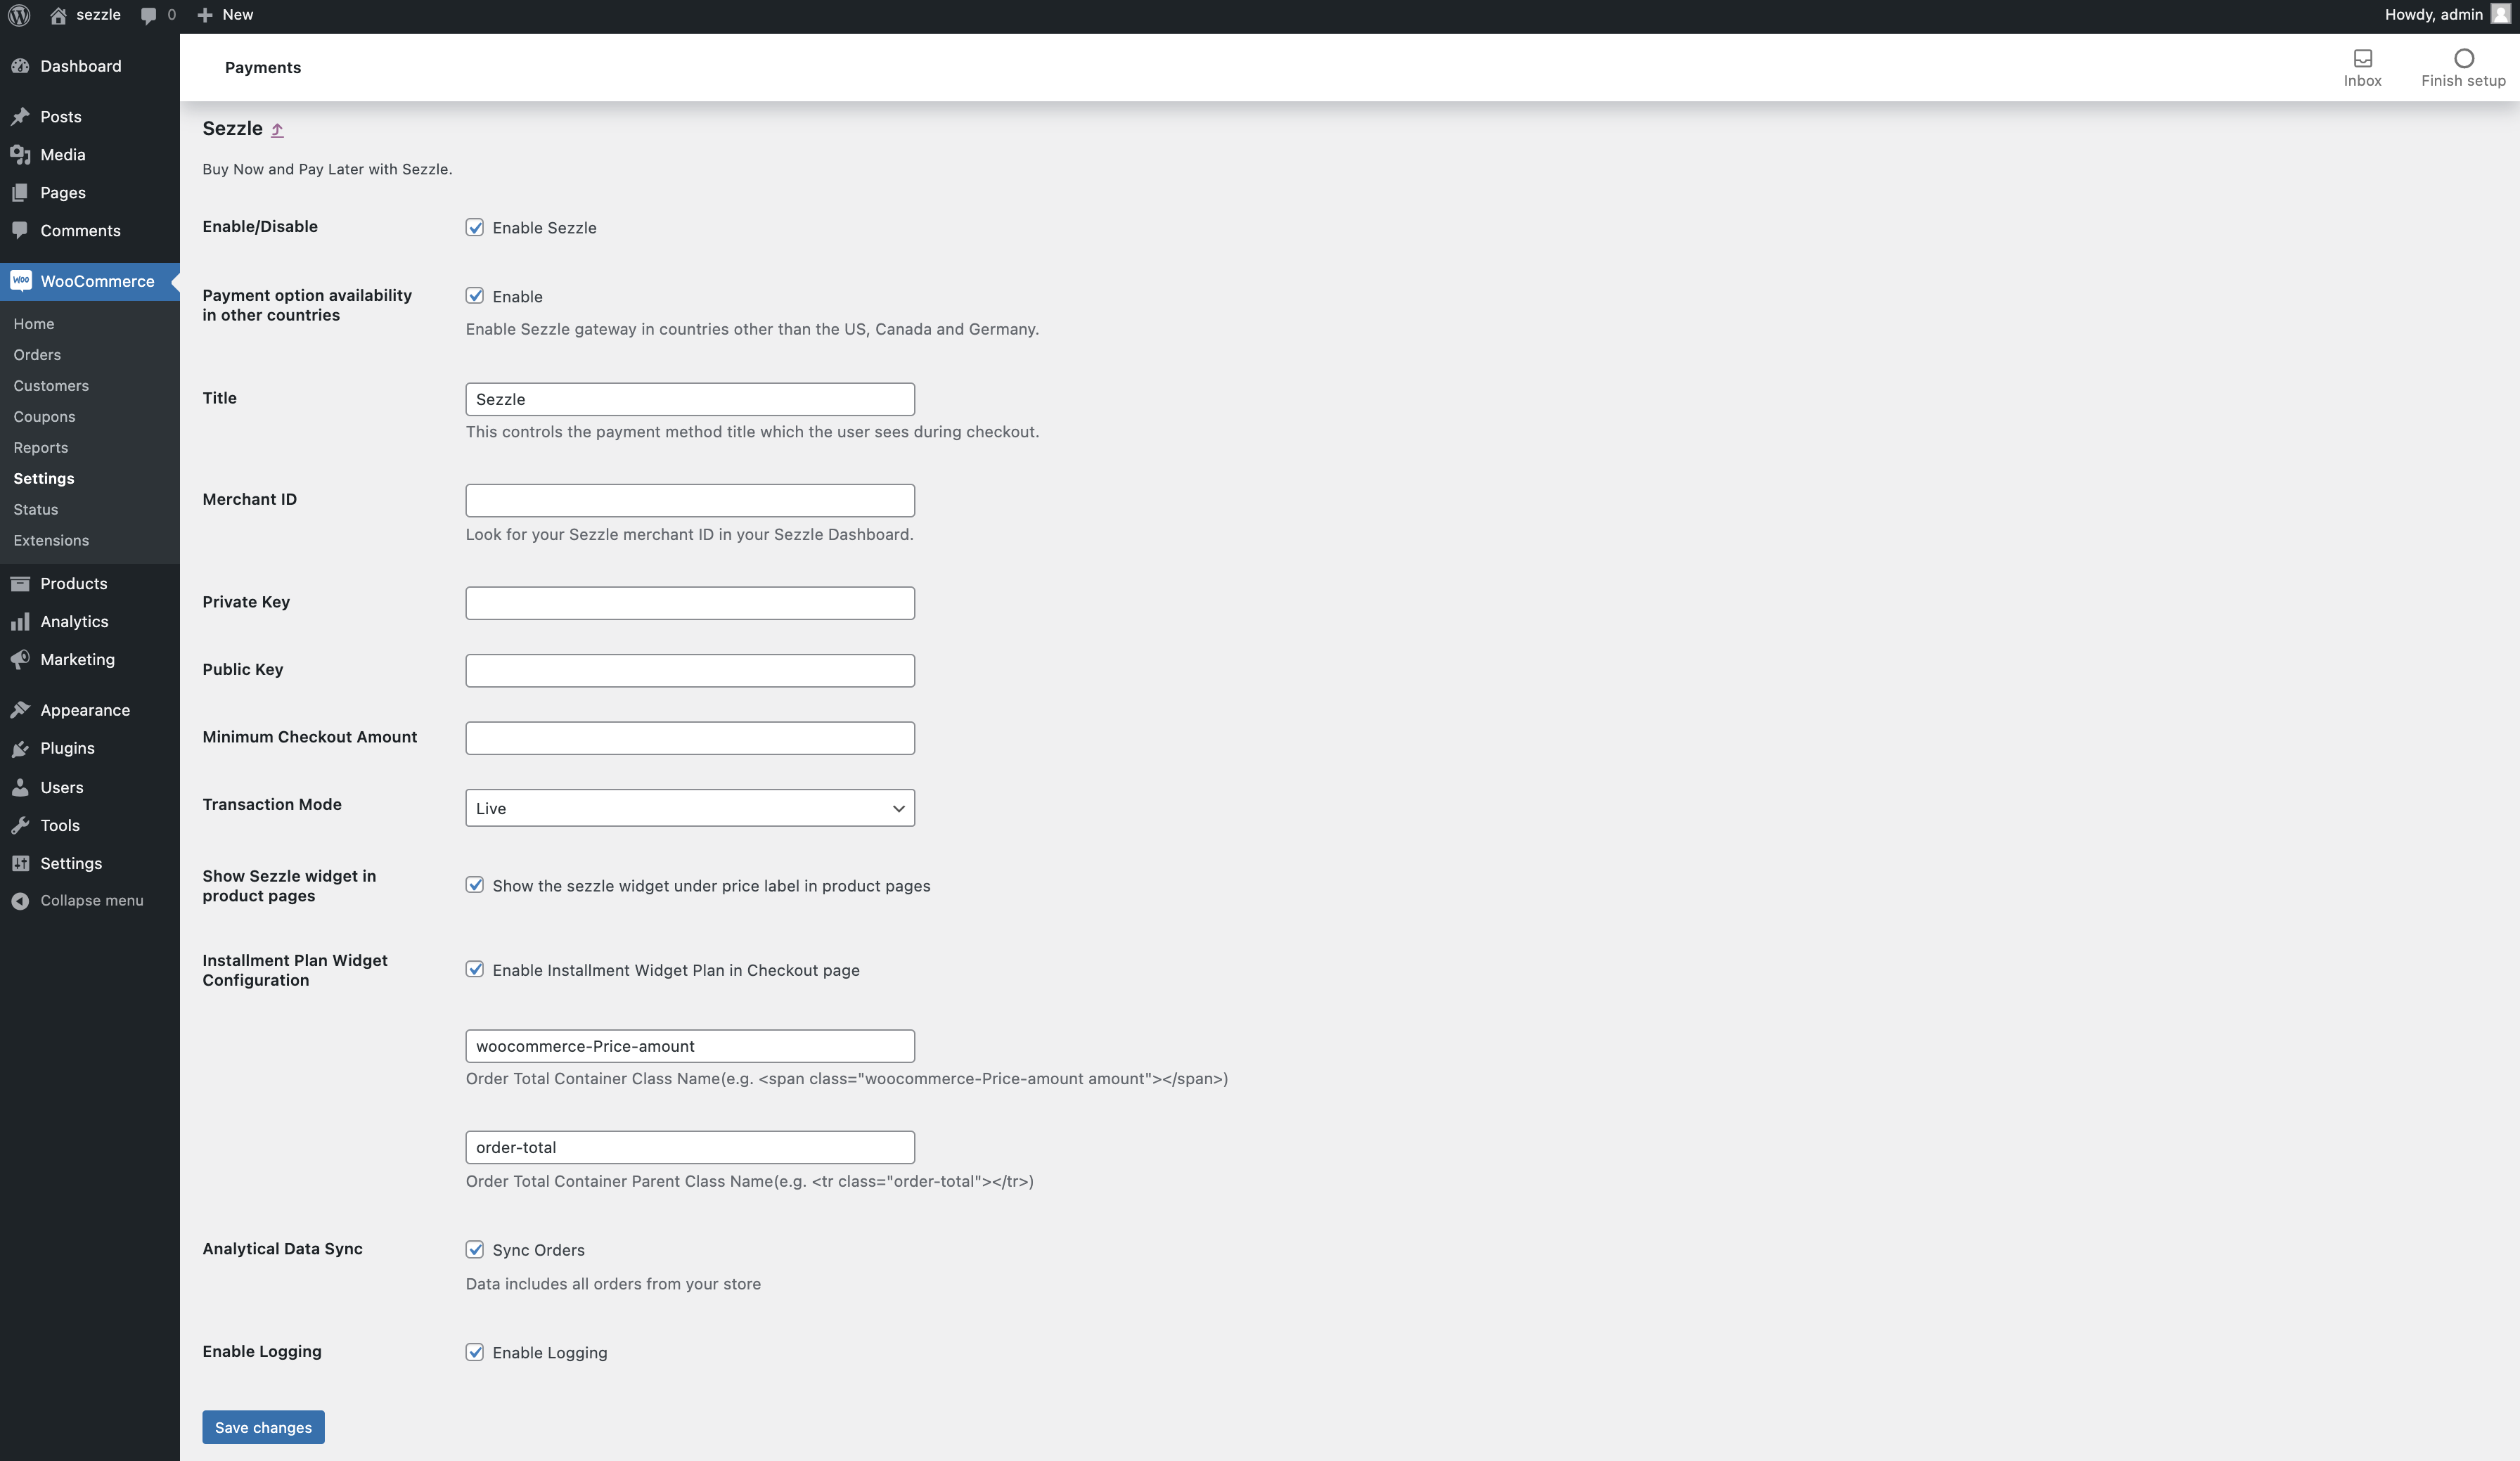
- Click
Save Changes.
WooCommerce Sandbox Testing
↑ Back to top- In the
Sezzleconfiguration page of your WooCommerce admin, enter the Sandbox API Keys from your Sezzle Merchant Sandbox Dashboard and set theTransaction ModetoSandbox, then save the configuration. Make sure you are doing this on yourdev/stagingwebsite. - On your website, add an item to the cart, then proceed to
Checkoutand selectSezzleas the payment method. - Click
Place Order, and you should be redirected to the Sezzle checkout page. If prompted, sign in.
- Enter the payment details using test data then click
Complete Order. - After the payment is completed on Sezzle, you should be redirected back to your website and see a successful payment page.
- Sandbox testing is complete. You can log in to your Sezzle Merchant Sandbox Dashboard to see the test order you just placed.
WooCommerce Live Checkout
↑ Back to top- In the
Sezzleconfiguration page of your WooCommerce admin, enter the API Keys from your Sezzle Merchant Dashboard and set theTransaction ModetoLive, then save the configuration. - On your website, add an item to the cart, then proceed to
Checkoutand selectSezzleas the payment method. - Click
Place Order.

- If you are redirected to the Sezzle checkout page, your integration is complete. Congratulations!
- Warning Don’t complete the payment. Your checkout is now live, so you will be charged if you complete.
Important Note on Order Fulfillment
↑ Back to topBefore shipping the order, ensure that the Order Notes in the WooCommerce interface show the order status is Processing and include Payment approved by Sezzle. When these notes exist, you know that the customer completed the checkout at Sezzle, and you will be paid for the order.
WooCommerce will create an order regardless of whether the customer completes the checkout at Sezzle. Check the Order Notes and do not fulfill orders where the Sezzle checkout is not completed.
Troubleshooting
↑ Back to topIf testing was unsuccessful, review the following:
- Sezzle WooCommerce extension is the most updated version.
- Go to
Plugins>Installed Plugins, then clickView Detailsnext to theSezzle WooCommerce Payment. If there is an option to upgrade, do so now. - Sezzle extension is activated.
- Go to
WooCommerce>Settingsand ensure the switch is turned On. Merchant IDwas entered correctly.- API Keys were entered correctly.
- It is recommended to use the Copy icon in the Sezzle Merchant Dashboard to avoid typos or extra spaces.
- If you have multiple accounts with Sezzle, the merchant ID and API Keys are tied to only one URL.
Show Sezzle widget in product pagesbox is checked.- Widget script is present on your website and reflects the
Merchant IDfrom your Sezzle Merchant Dashboard. - Go to a product page on your website.
- Right-click then select
Inspect. - In the
Elementstab, search forwidget.sezzle.
Uninstall Steps
↑ Back to top- Go to
Plugins>Installed Plugins. - Under
Sezzle WooCommerce Payment, clickDeactivatethen clickDelete.