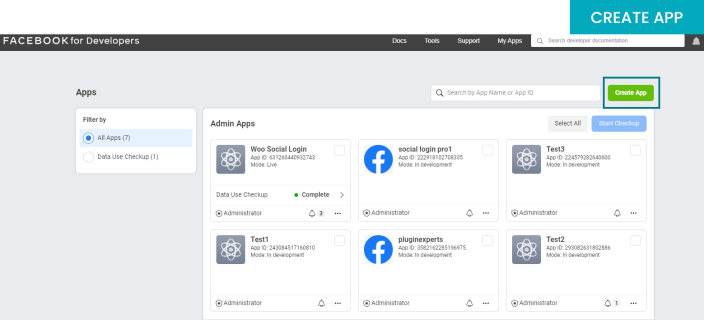
STEP 1
Select ‘Create App’ button on right side corner
Instruction: It is important to use a personal Facebook account to create an App, as business account will not work. The personal account should be
verified Facebook account. In case of your account not verified, Facebook will send a message to notify. Make sure to set the mobile number to your account, or else you won’t be able to create an App.
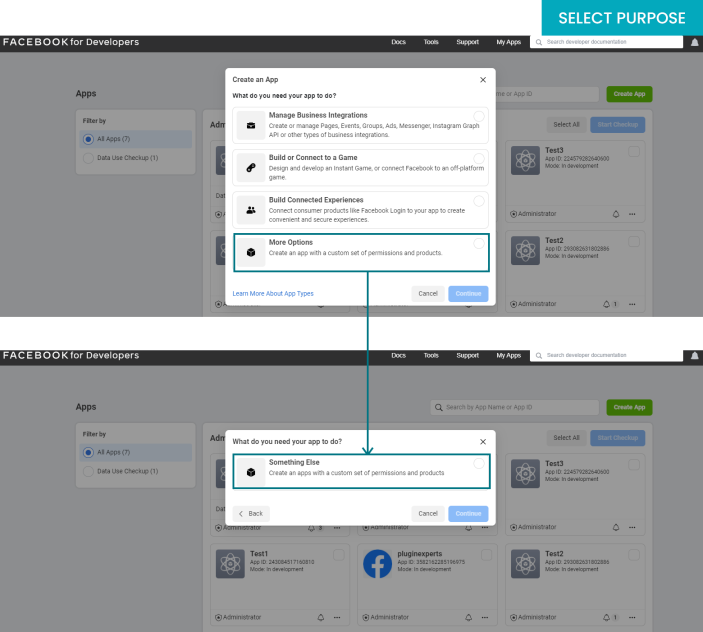
 STEP 2
You will see options showed for the use of the App. Select your purpose and proceed further.
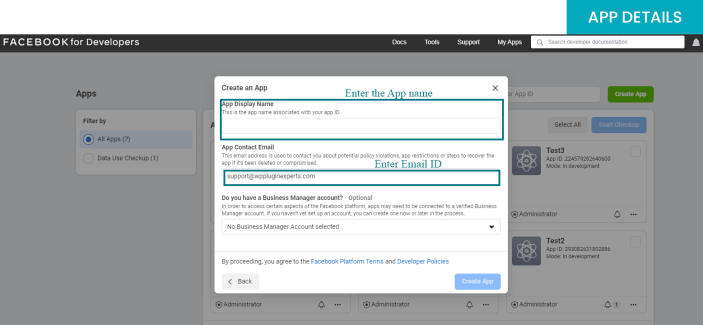
 STEP 3
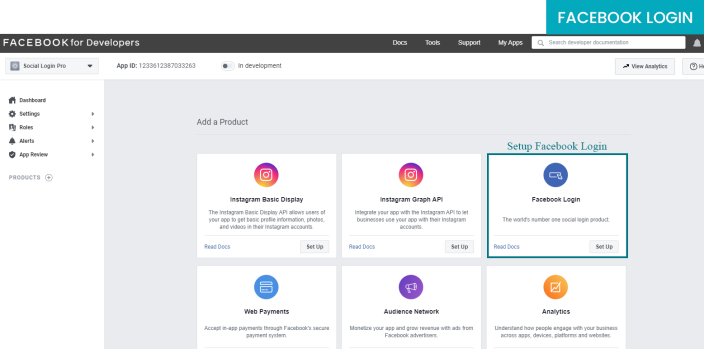
Write the App Display Name, App Contact Email and hit ‘Create App’
The previous action will redirect you to the ‘Add Product’ page and select the ‘Set Up’ icon below in ‘Facebook Login’.
 STEP 4
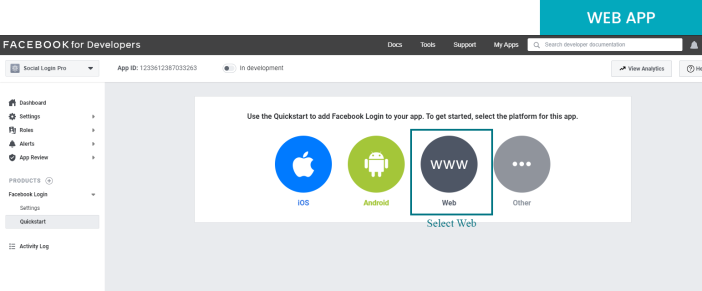
Hit the ‘Web’ option among IOS, Android, Web and other.
 STEP 5
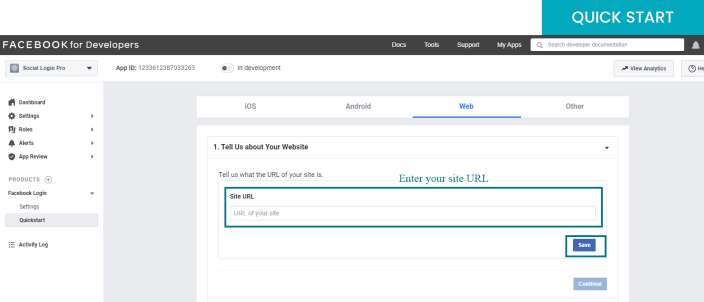
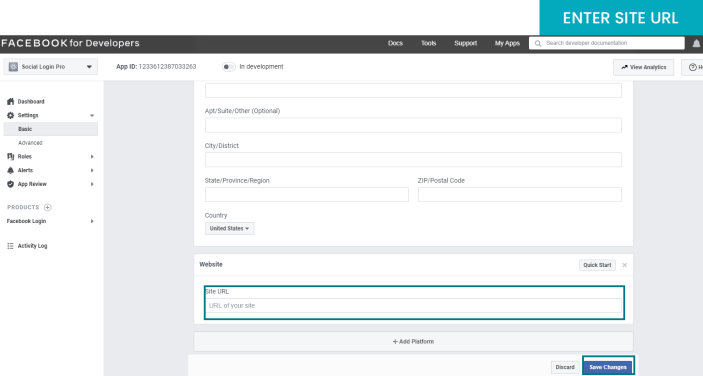
Put the URL in the reflected Site URL section and save it from below icon
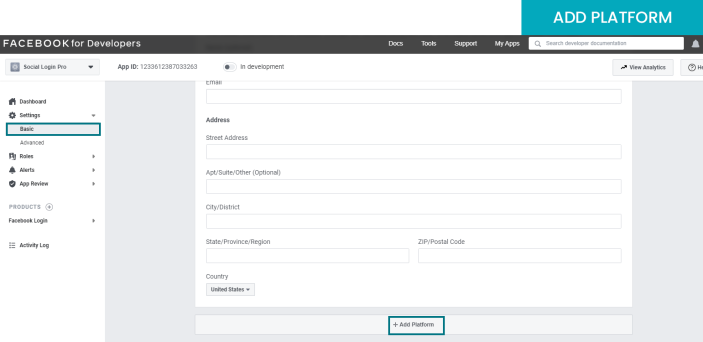
Instruction: You won’t be able to enter the domain URL if the ‘Quickstart’ page is blank. Go to ‘Settings > Basic’ section right below the Dashboard. Select the ‘Add Platform’ visible below.
Now select the ‘Website’ platform option
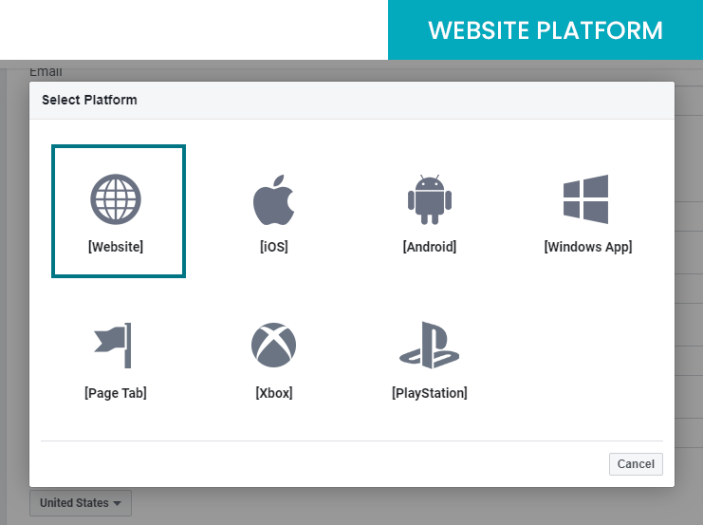
On this page you can add the site URL and ‘save changes’
 STEP 6
Now Copy the valid OAuth Redirect URL from Plugin settings ‘Facebook > API Settings’ link as displayed below
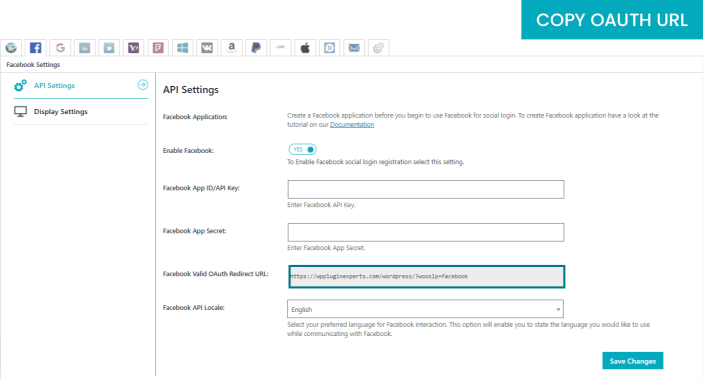
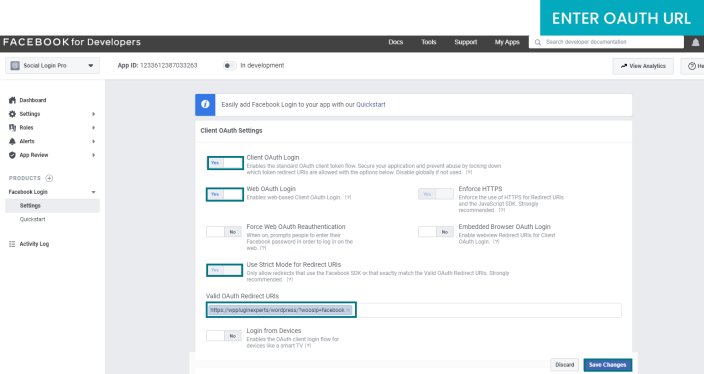
From Facebook login settings paste the ‘Facebook Valid OAuth Redirect URI’ and enable the settings of ‘Client OAuth Login’, ‘Web OAuth Login’ and ‘Use Strict Mode for Redirect URIs’ and
save changes
 STEP 7
Your app is all set now. Go to the option of ‘Settings > Basic’ link in the menu and find out the App ID and App Secret
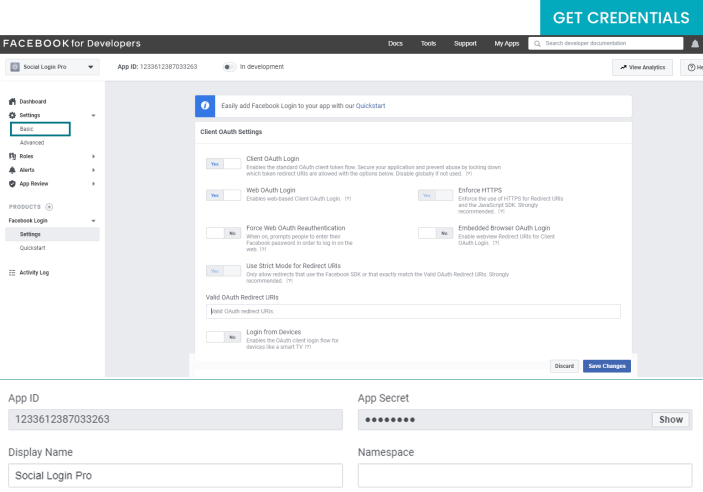
The App ID and App Secret are processed. Chose the ‘show’ button to check the App Secret.
STEP 8
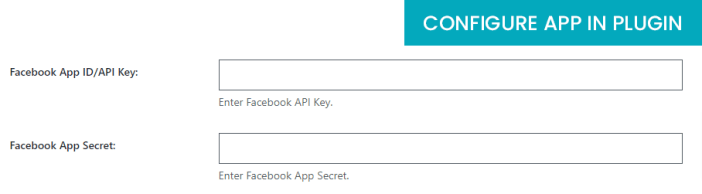
Final step is to configure the App ID and App Secret with the plugin.
 STEP 1:
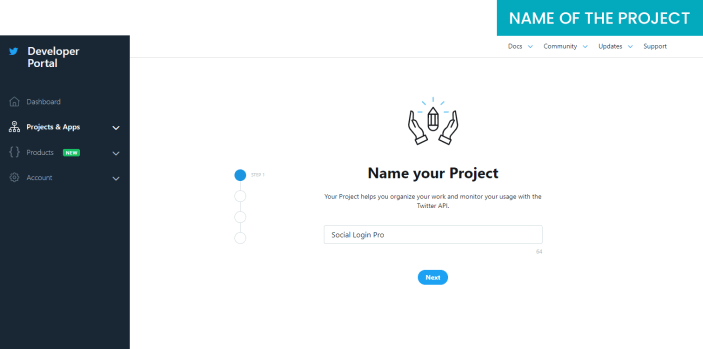
Login to the developer account with your Twitter account and create a new project from dashboard.
Note: For Twitter developer account you first need to apply for it. Once you will get an approval you can able to create a Twitter app from developer portal.
 STEP 2:
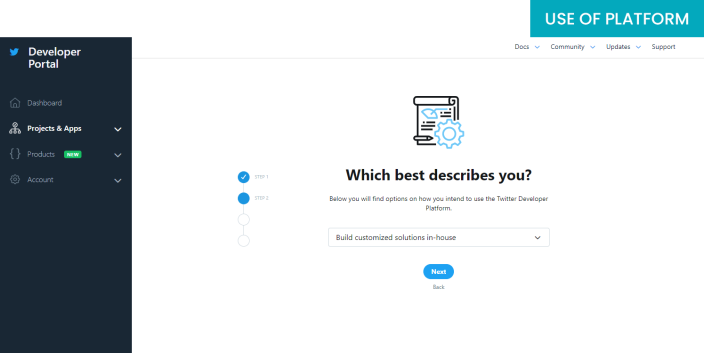
Now, you need to enter details of your project step wise like Name, Platform and Description of your project.
 STEP 3:
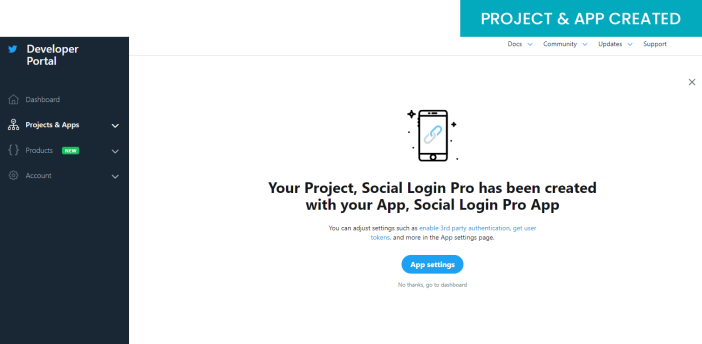
Create a new app for your project and click on complete.
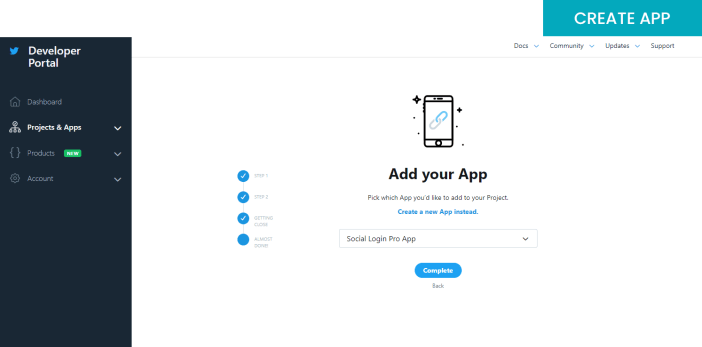
Once you created Project and APP you will see successful screen with name like below.
 STEP 4:
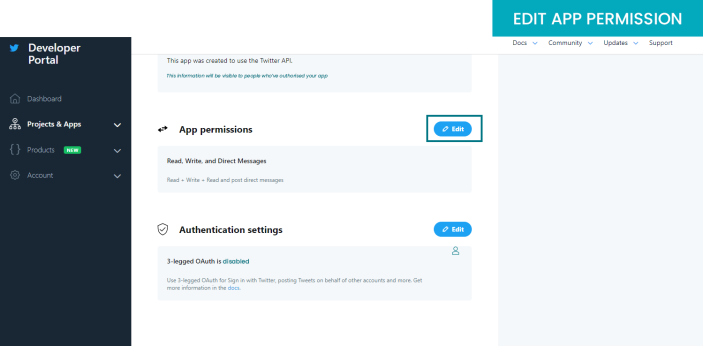
From App settings edit the App Permissions.
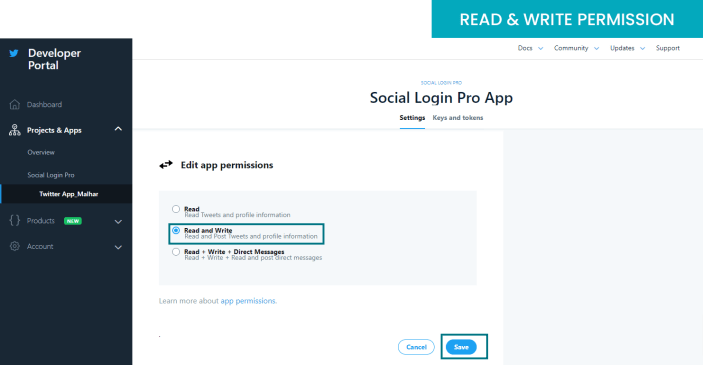
Select Read and Write permission and click on save button.
Note: You must select this permission then only the plugin will work.
 STEP 5:
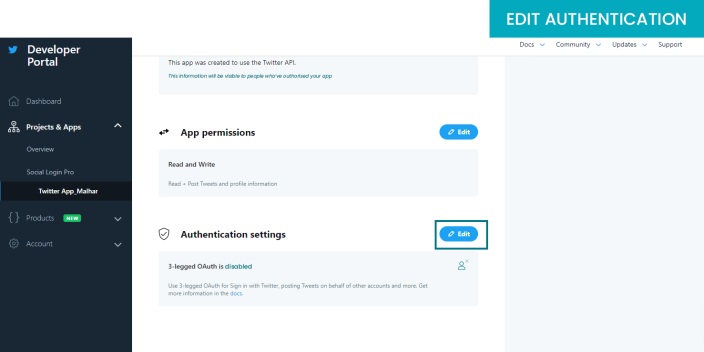
Now from App settings edit the Authentication settings.
Fill up all the information’s and also enable 3
rd party authentication and request email ID from users.
Note 1: 3
rd party authentication permission is must required for Social Login Pro Plugin
Note 2: Request email ID from users permission must be enable to get email id’s from Twitter accounts.
Note 3: Callback URL should be exact match of your website URL.
 STEP 6:
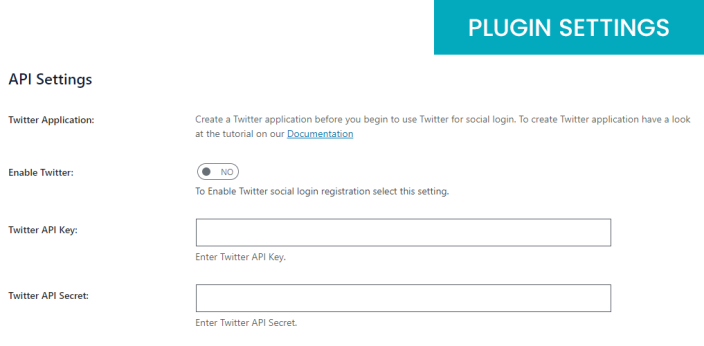
From Keys and Tokens section you will get an Twitter API Key and API Secret copy these keys and paste it in you plugin settings.
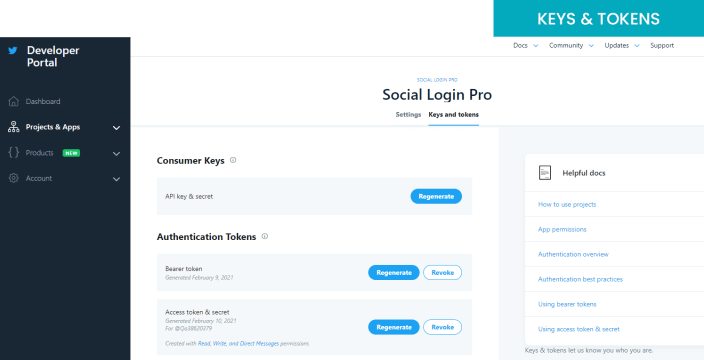 Note
Note: When you copy and paste Keys make sure you don’t leave any empty spaces at the beginning or at the end of the text.
 STEP 1:
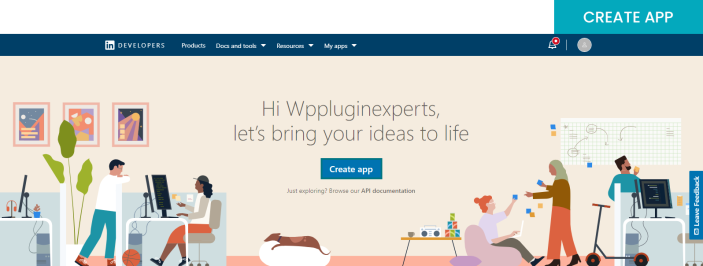
Create an LinkedIn APP
First you need to be login to your LinkedIn account to access developer account, Then from My apps section you are able to create your own first LinkedIn app. Follow the image below for better understanding.
 STEP 2:
Now you need to enter all information’s related to your APP, Fill all the details which are mandatory they are required.

In the Application Info you must search and select your LinkedIn page. So the page you will select will be associate with your APP. APP logo will be at least 100px.
After you entered all the required information, check the box at the bottom of the page to agree to the LinkedIn API Terms of Use and click on the “Create app” button.
After you added the application you will see a app listing page which will contain all the needed information in tabs to integrate that App in to your website.
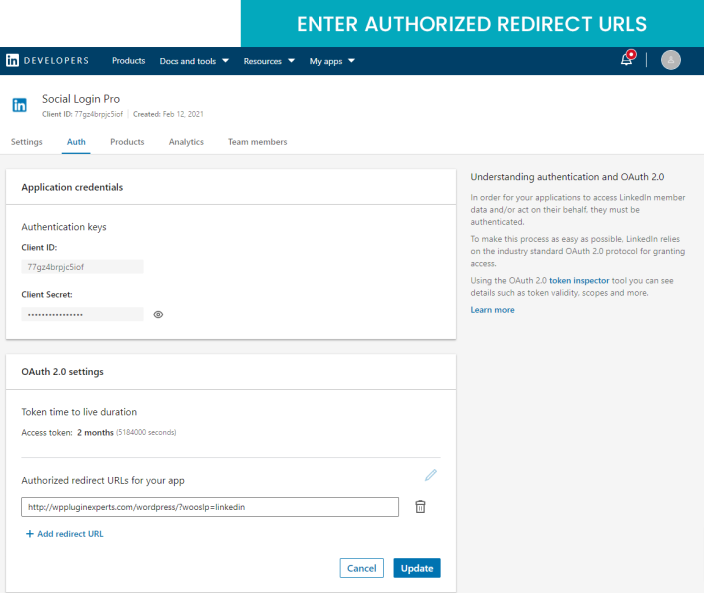
STEP 3:
From Auth tab you need to enter “OAuth 2.0 Redirect URLs” field same as the LinkedIn callback url. Once you entered click on update button.
Note1: You will get your Redirect URLs from Social login Pro plugin settings.
Note2: LinkedIn will work only with SSL enabled domain.
 STEP 4:
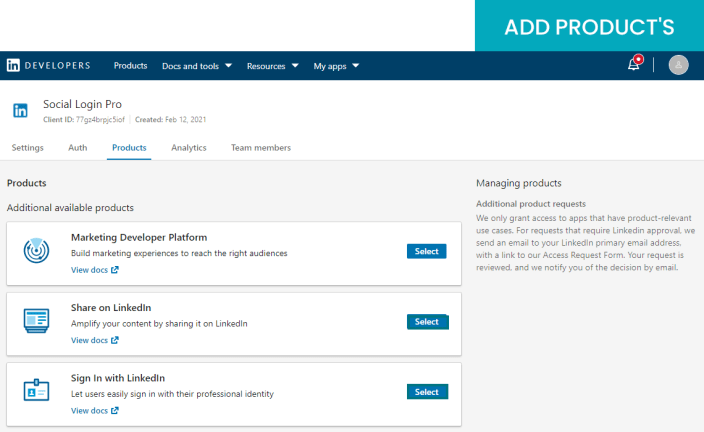
From Products tab you need to select permission of two product’s select “Share on LinkedIn” & “Sign in with LinkedIn”. After you selected it will be on for review process.
 STEP 5:
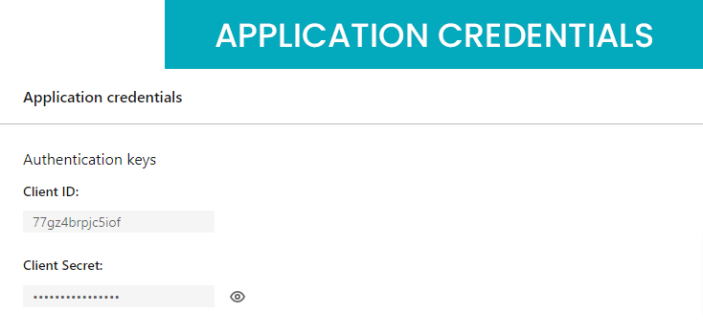
In Auth tab you will get your LinkedIn Authentication Keys. Copy the Client ID and Client Secret and paste it in your Social Login Pro Plugin settings.
 Note
Note: When you copy and paste Keys make sure you don’t leave any empty spaces at the beginning or at the end of the text.
STEP 1:
Login with your Google developer account and create new project.
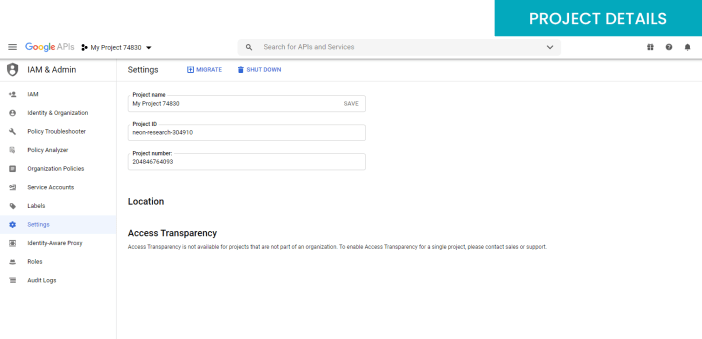
 STEP 2:
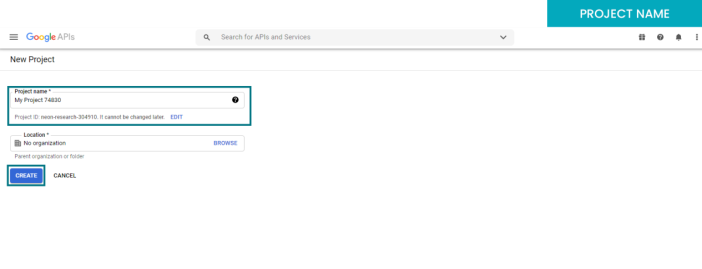
You can enter your project name here.
Note: Select parent organization if you have any.
After creating project you will be redirect to project listing page where you have to select the project you have created.
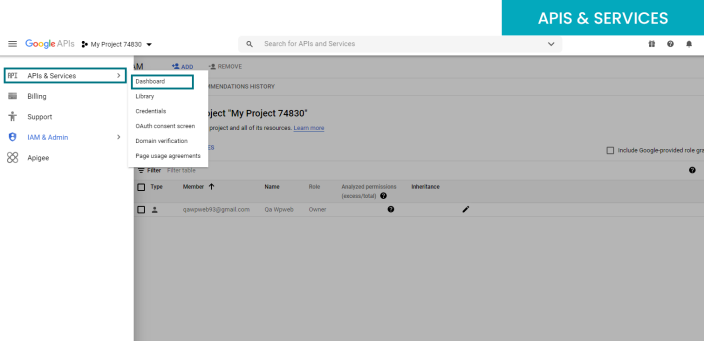
 STEP 3:
Now select APIs & Services dashboard.
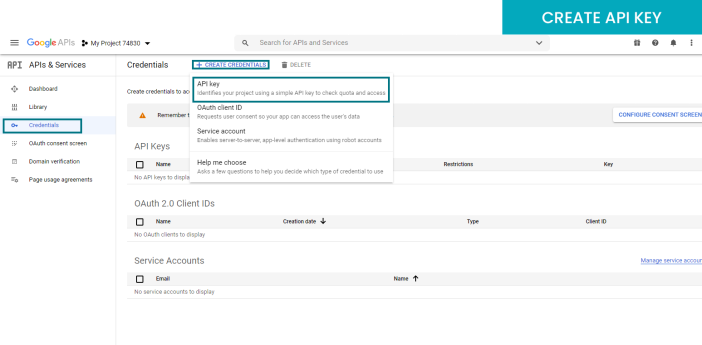
 STEP 4:
From credentials section you have to create New API Key. After successfully created it will show in API key listing with key.
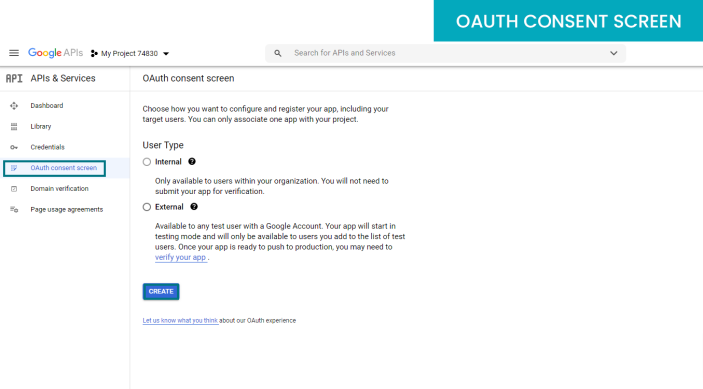
 STEP 5:
Now go to OAuth consent screen option and create OAuth consent.
Note: Select User Type which applicable to you.
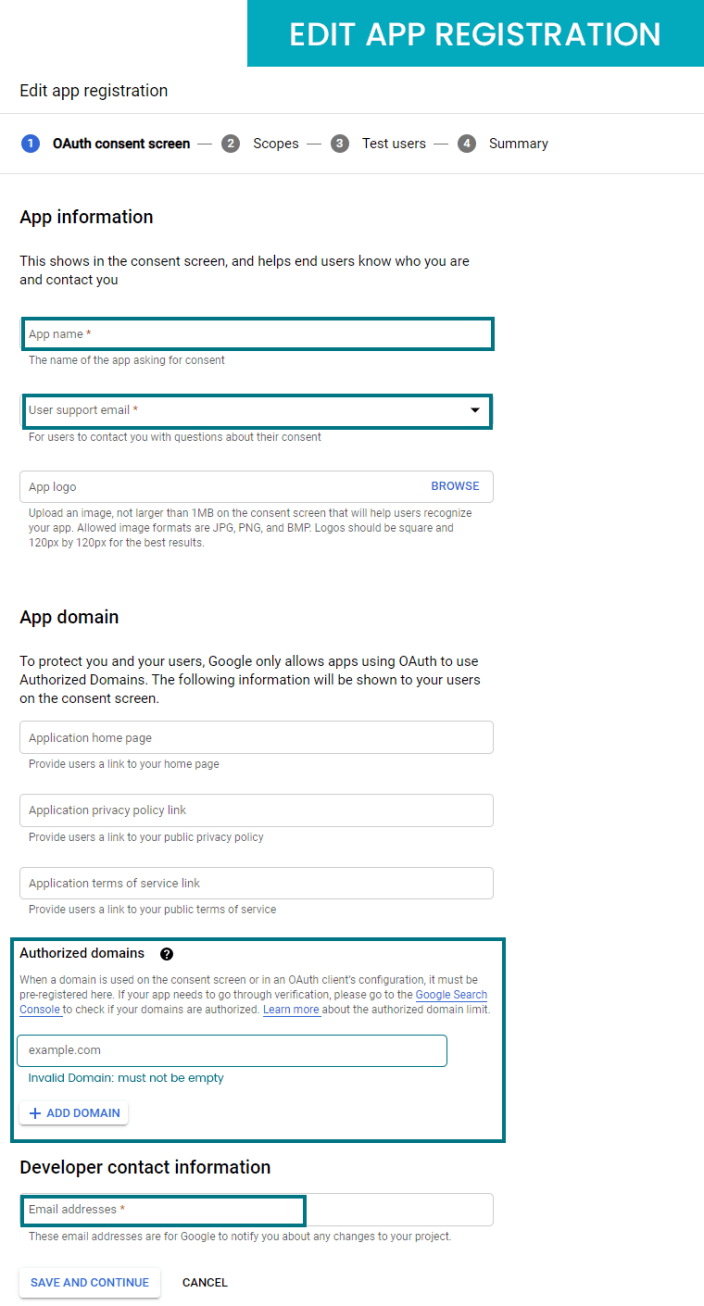
You have to fill-up all the details of your APP registration for OAuth consent screen.
Note 1: App name, Support email, Developer contact info are mandatory fields.
Note 2: Authorized domain must be match with your website URL without this Social Login Pro plugin will not work.
Now, from credentials section create New OAuth client ID.
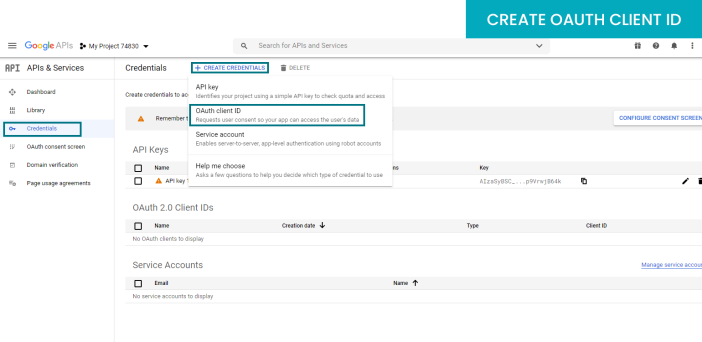
Fill-up the details for creating OAuth client ID, Application type must be Web application and add JavaScript origins URL.
Note: You will get JavaScript origins URL from Social Login Pro Google Plugin settings.
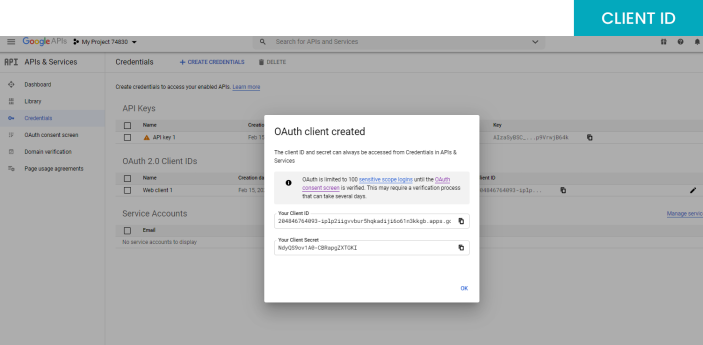
 STEP 6:
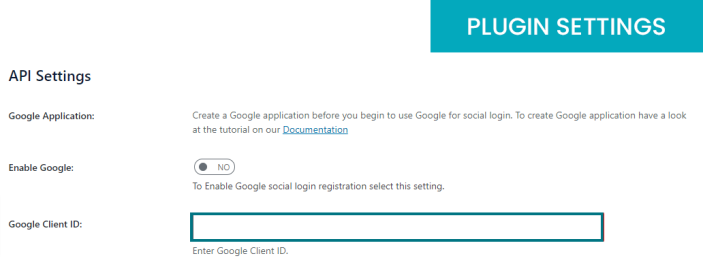
After successfully created you will get your Client ID which you need to copy and paste it in your plugin settings.
 Note
Note: When you copy and paste Keys make sure you don’t leave any empty spaces at the beginning or at the end of the text.
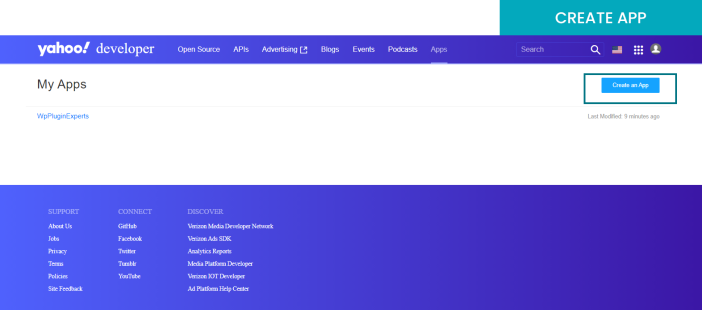
 STEP 1:
Login to your Yahoo account and then login to Yahoo developer domain. Once you logged-in from Apps section create new App.
 STEP 2:
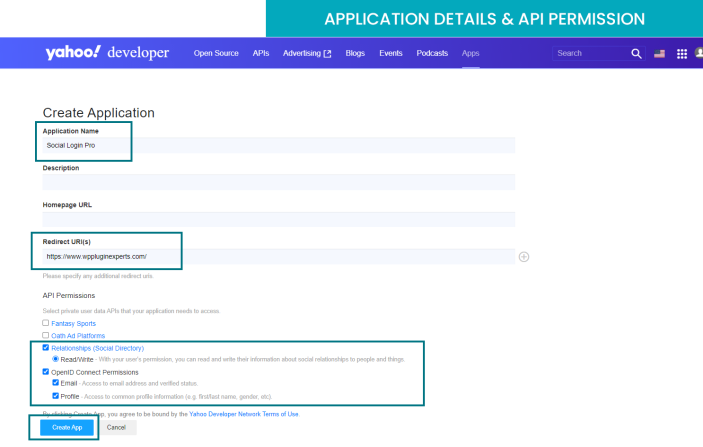
Enter all the details for creating an application.
Note 1: Enter the Redirect URIs & Home page URL same as your website URL, You will also find the URL in Social Login Pro Yahoo Settings.
Note 2: Select the Permissions choose Relationship (Social Directory), and in Relationship (Social Directory) choose option “Read/Write”. Also, enable OpenID Connect Permission and select Email & Profile both and then click on Create App.
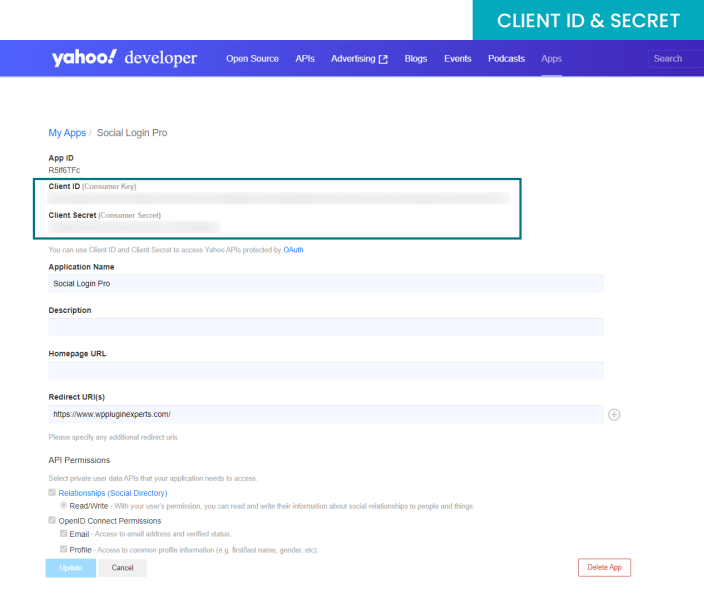
 STEP 3:
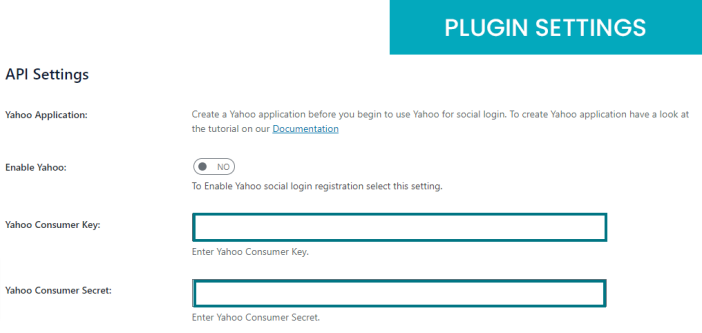
Once App successful created you will get Client ID and Client Secret. Copy the Consumer Key and Consumer Secret and paste it in your plugin settings.
 Note
Note: When you copy and paste Keys make sure you don’t leave any empty spaces at the beginning or at the end of the text.
 STEP 1:
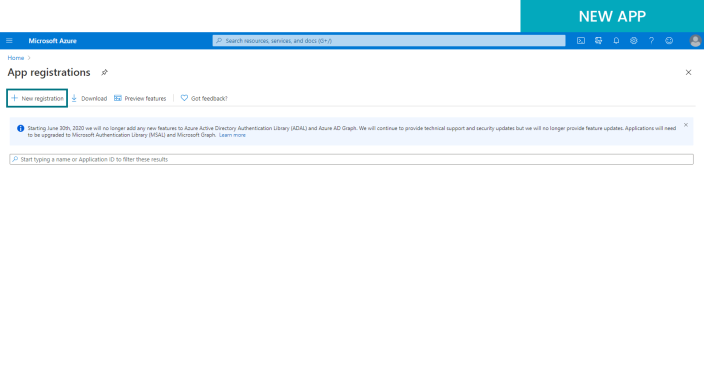
First login to your Microsoft Azure account and then you will able to create Windows Live App. From Microsoft azure create new APP.
 STEP 2:
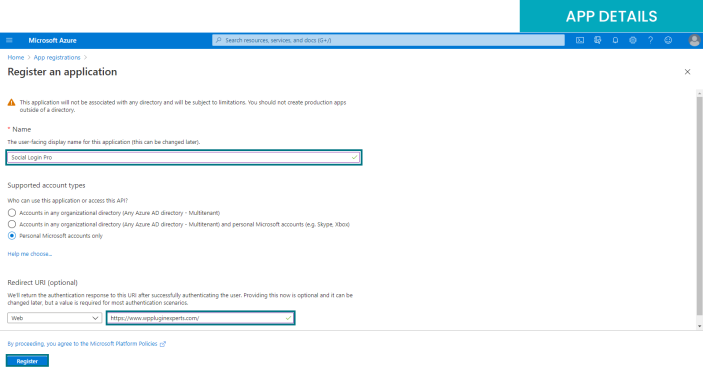
Fill-up all the details to register the application like Name, Account type and Redirect URI.
Note 1: Redirect URI must be match with your website URL.
Note 2: Important: Microsoft now requires that the redirect URI use SSL for all authentication redirects. If you have previously registered Live SDK applications, then you will also see an option to add another Live SDK application. Live SDK applications doesn’t require SSL.
 STEP 3:
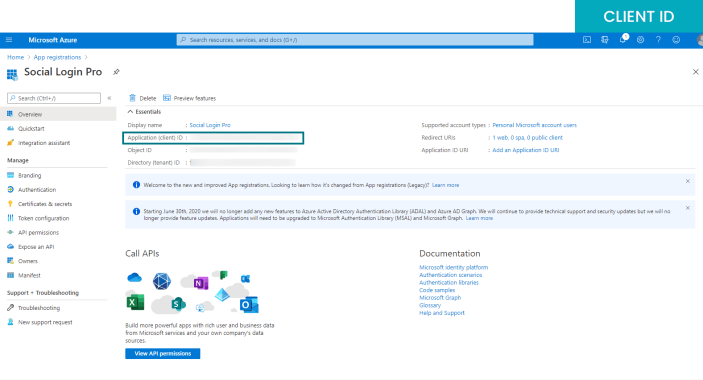
After creating the app you will be redirect to application overview page from where you can find the Client ID.
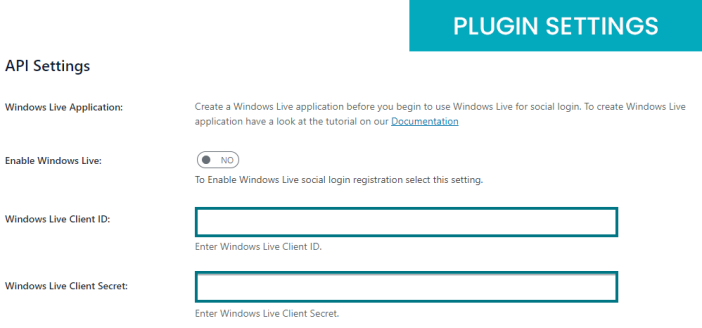
Note: This Client ID you need to copy and paste it in your plugin settings.
 STEP 4:
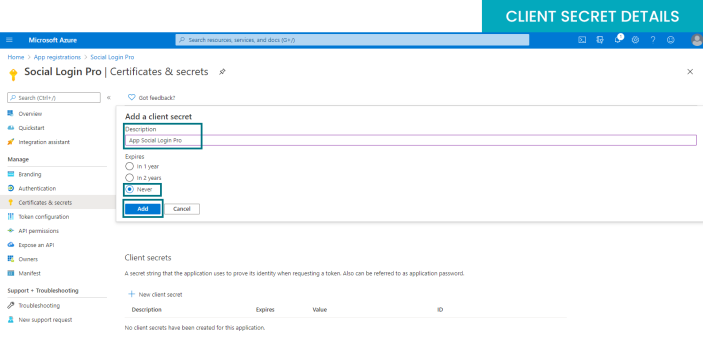
From Manage > Certificates & Secrets you have to create an New Client Secret.
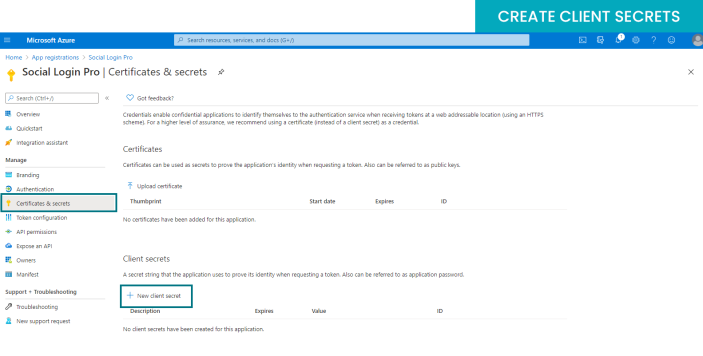
Fill-up the details for Client Secret like Description and Expires and click on Add.
 STEP 5:
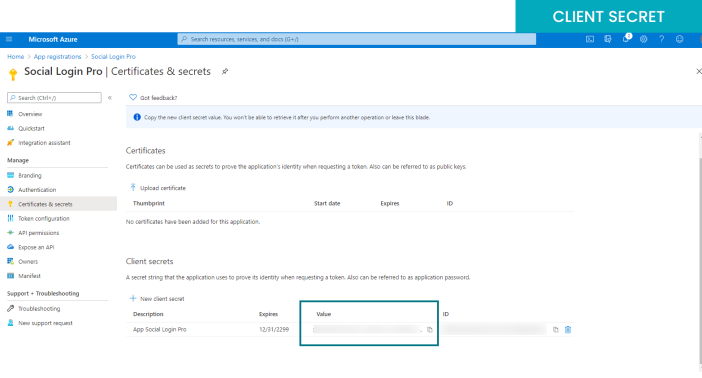
Now new client secret generated and you need to copy the Client Secret and paste it in your plugin settings.
 Note
Note: When you copy and paste Keys make sure you don’t leave any empty spaces at the beginning or at the end of the text.
 STEP 1:
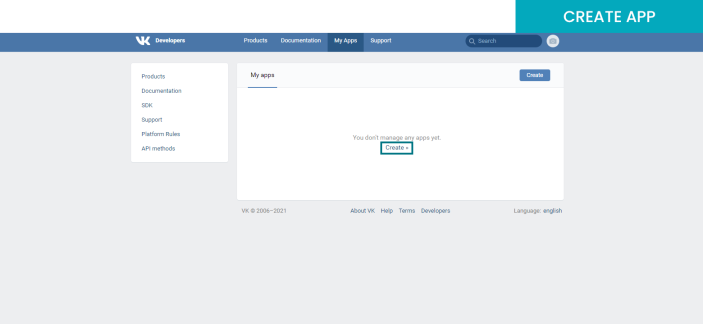
Log in to your VK developer account and create a new APP. Click
here to access developer platform.
 STEP2:
Fill-up all the details to create an app.
Note 1: Platform must be selected Website.
Note 2: Website address must be match with your site URL.
Note 3: Make sure base domain should not match your site URL 100% .
Eg: you can remove https:// or www.
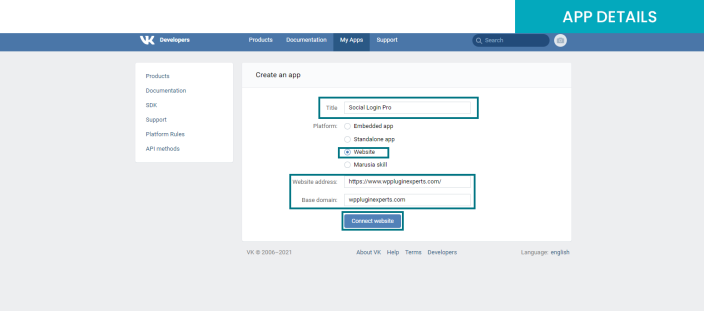
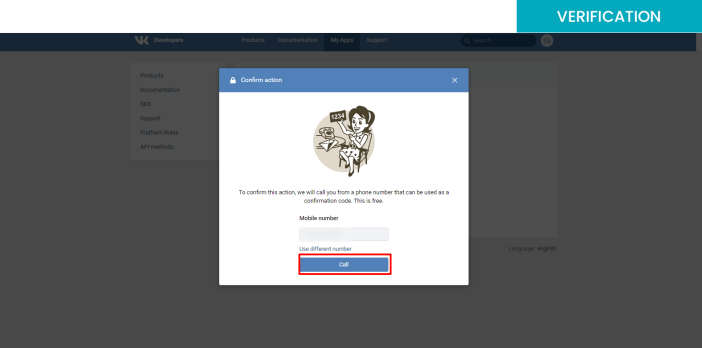
After connect website you will be asked for the verification, You need mobile number to verify your VK developer account and to create an application.
 STEP 3:
Now, after successfully creation of app and verification you will redirect to Edit application page, Where you need to enter Authorized Redirect URI and click on save.
Note: Authorized redirect URI should be your website URL.
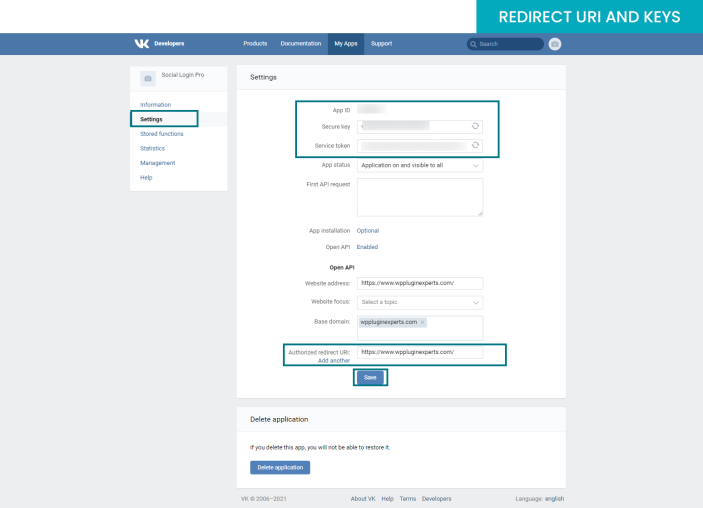
Copy the VK Application ID and Secret Key and past in your plugin settings.
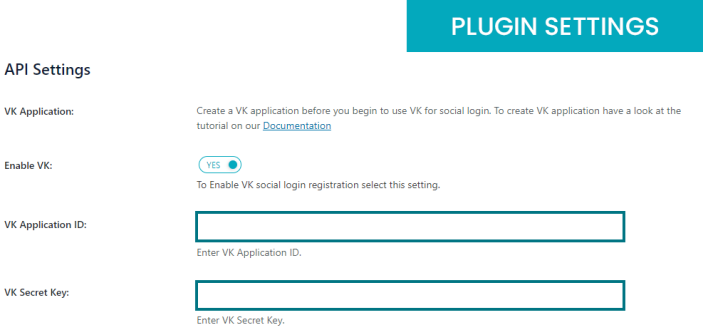 Note
Note: When you copy and paste Keys make sure you don’t leave any empty spaces at the beginning or at the end of the text.
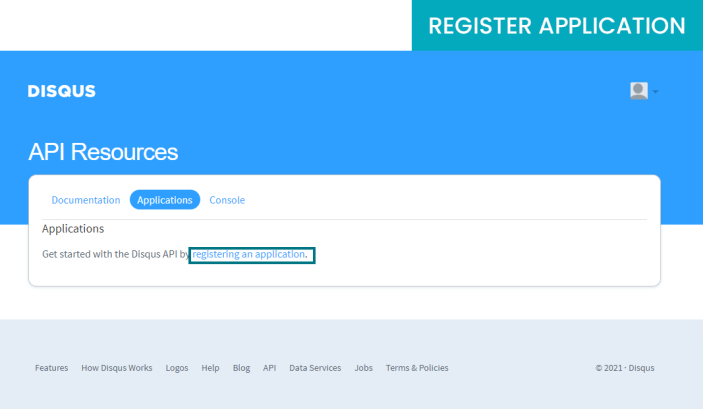
STEP 1:
Log in to your Disqus developer account and register a new application.
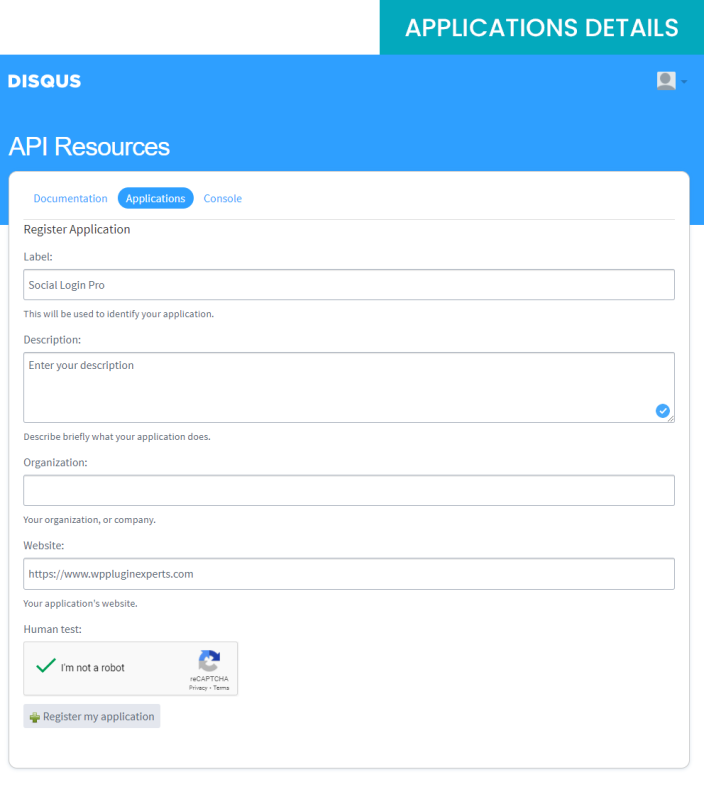
 STEP 2:
Fill-up all your application details like Label, Description and Website and click on Register my application.
Note: Website should match your site URL.
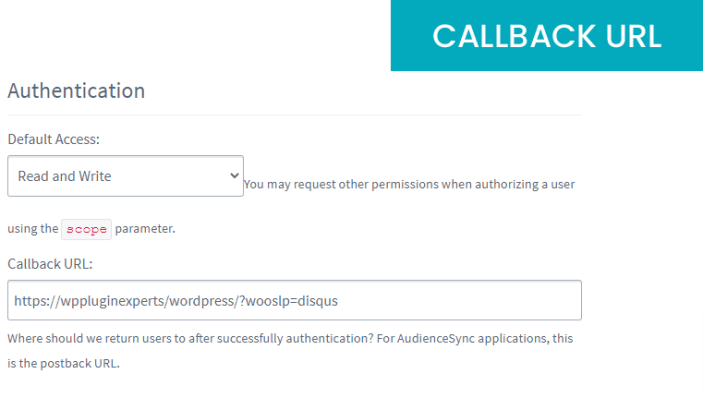
 STEP 3:
After application added you will redirect to the application overview page and from there you need to enter Callback URL.
Note: You will find the Callback URL from Social Login Pro Plugin Settings.
 STEP 4:
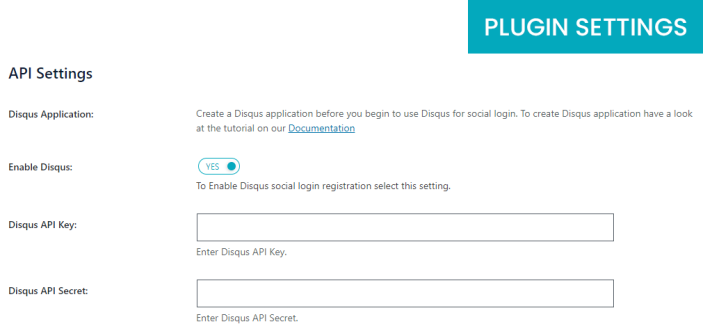
On Application details page you will get an API Key and API Secret, Copy the keys and paste it in your plugin settings.
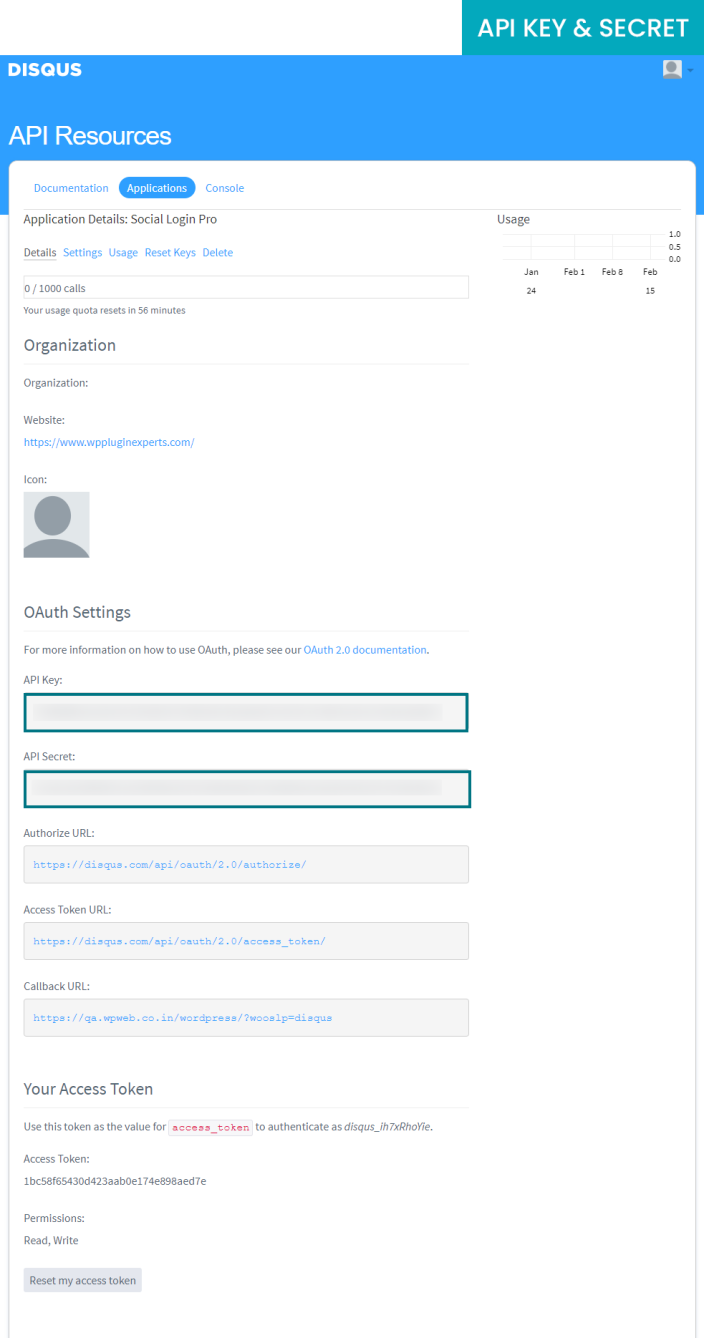 Note
Note: When you copy and paste Keys make sure you don’t leave any empty spaces at the beginning or at the end of the text.
 STEP 1:
First you need to log in to your PayPal account and then log in to PayPal developer account. From developer account create new App.
Note: To use the PayPal live app you must approved your app from PayPal.
 STEP 2:
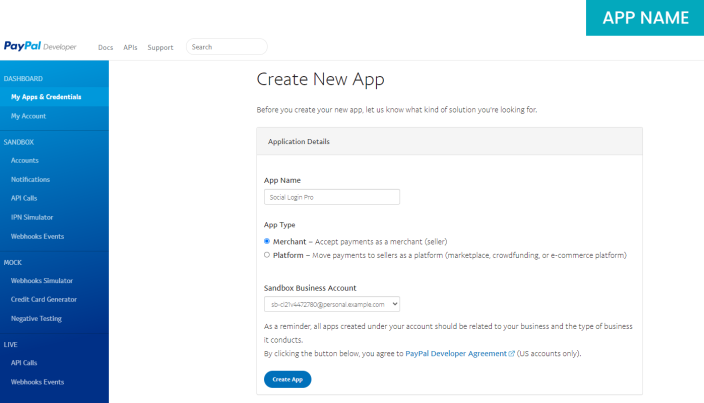
Fill-up app details like App name, Select App Type and Sandbox account.
 STEP 3:
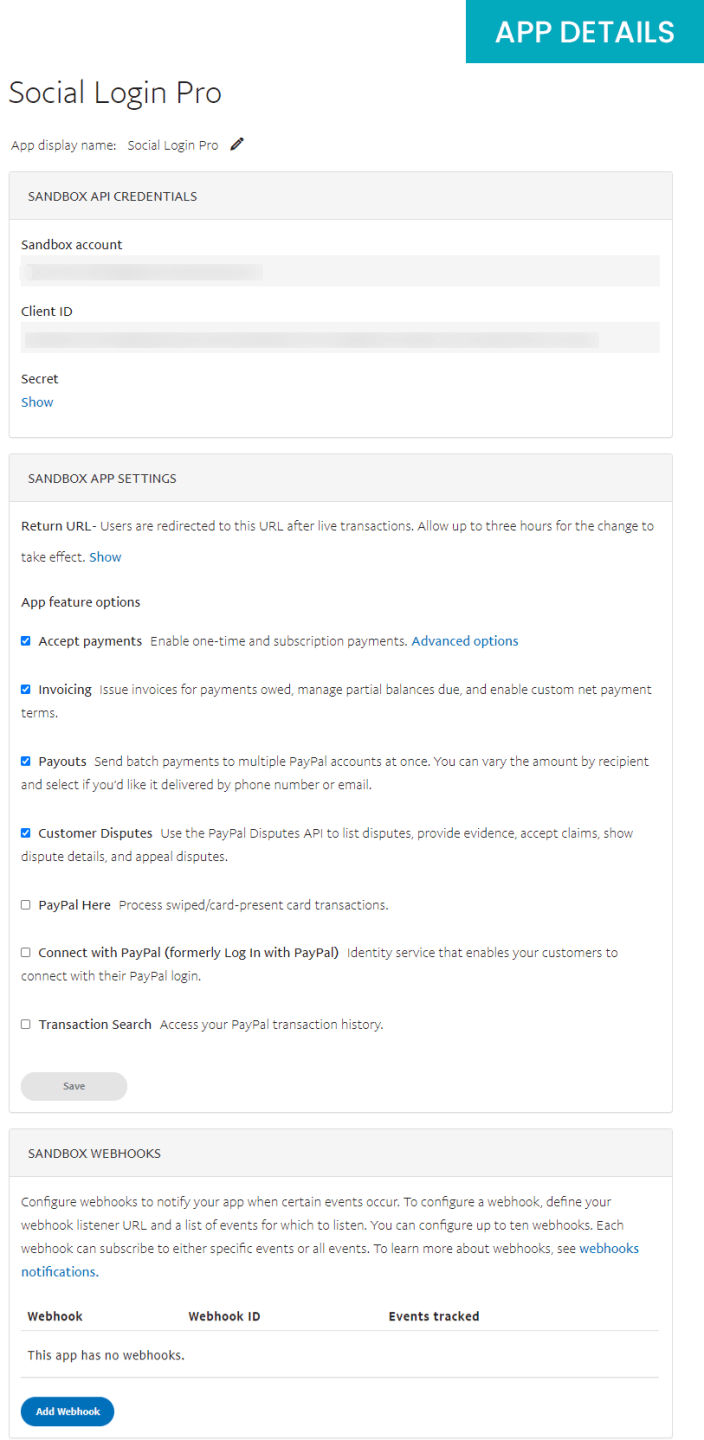
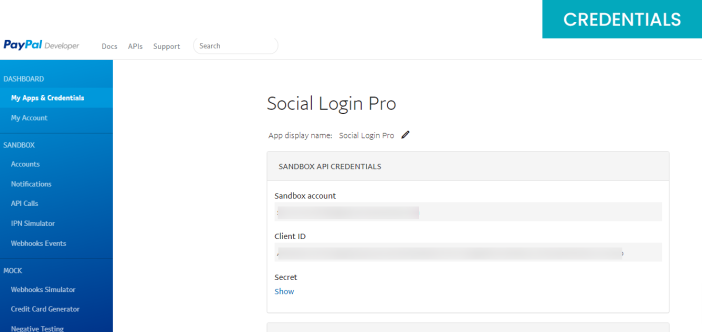
After creating the app you will redirect to app overview page.
 STEP 4:
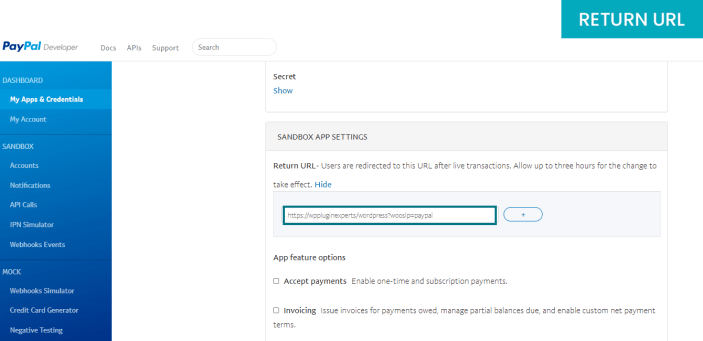
From App overview page enter you Return URL by clicking on show button.
Note: You will find Return URL from Plugin settings.
 STEP 5:
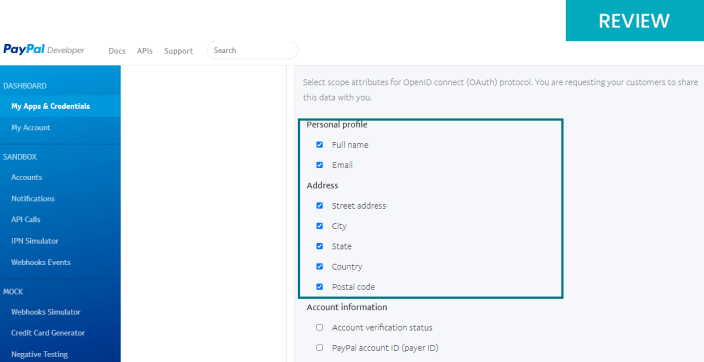
In Sandbox settings you need to make changes like disable Accept Payment, Invoicing, Payouts, Customer disputes, PayPal here and enable Connect with PayPal (log in with PayPal).
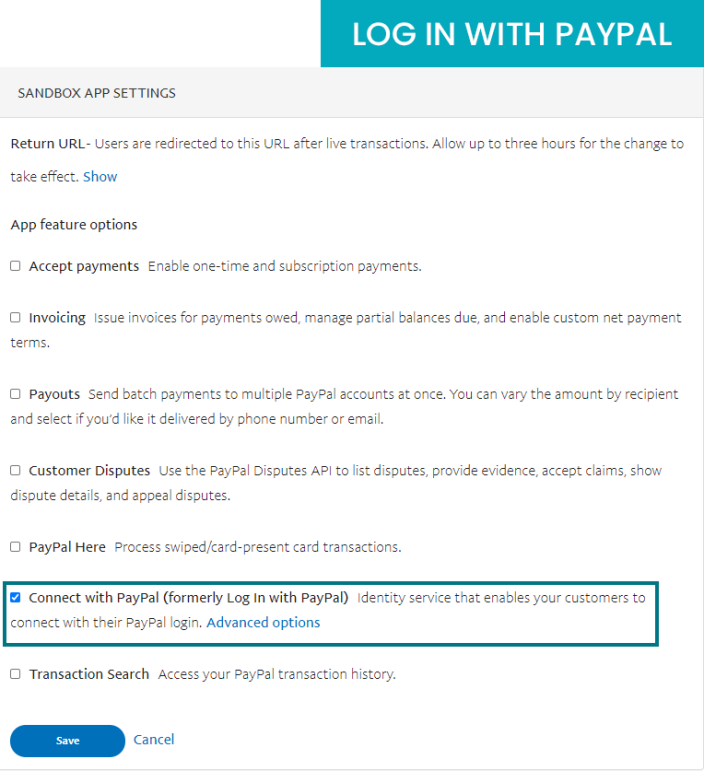
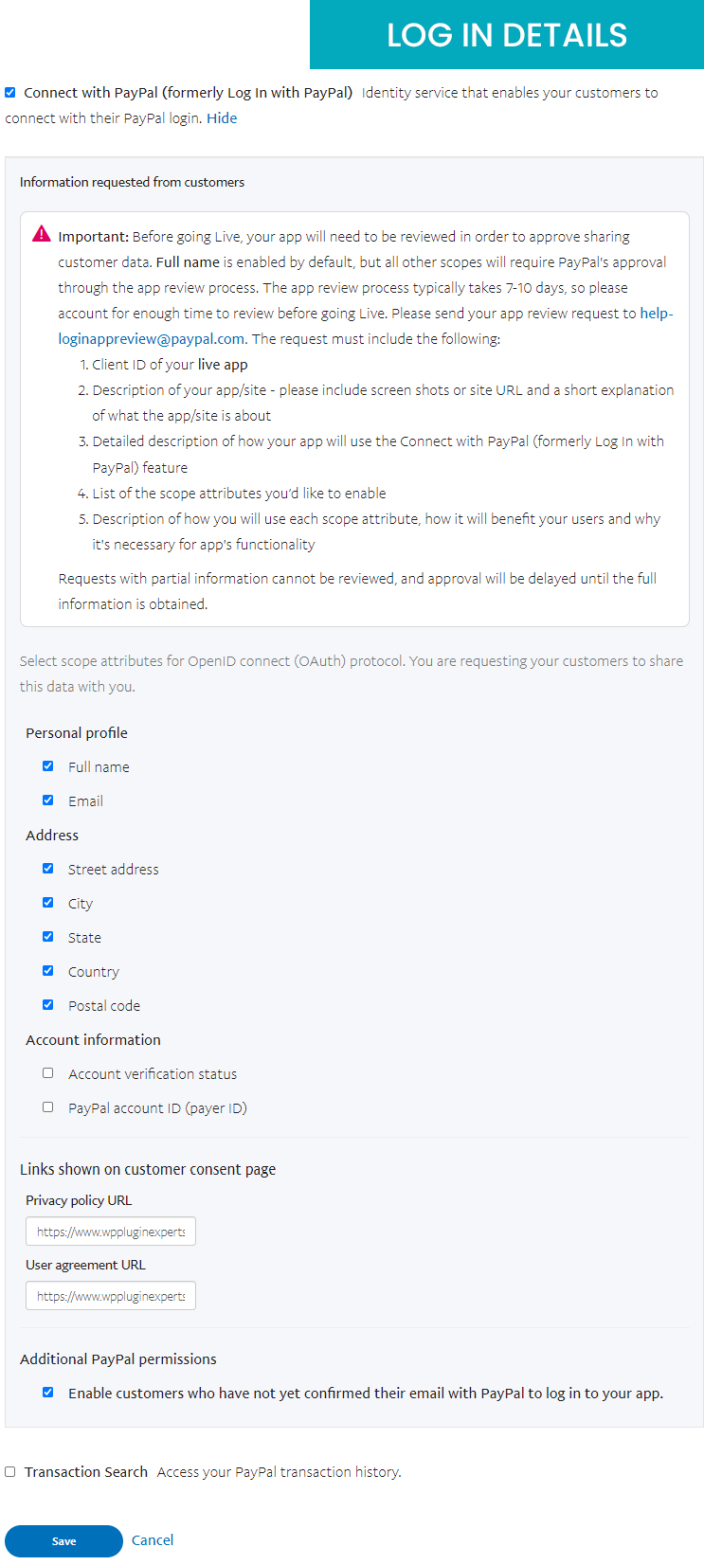
Now, click on Advanced options and enable Personal profile and Address, Fill-up the Privacy URL and Agreement URL and click on save.
Note: Additional PayPal permission is not mandatory.
 STEP 6:
Now, copy the Client ID and Client Secret and paste it in your Plugin settings.
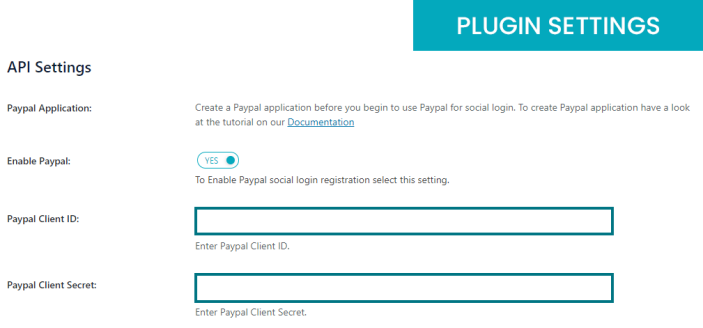 Note
Note: When you copy and paste Keys make sure you don’t leave any empty spaces at the beginning or at the end of the text.
Optional Step: Submission of PayPal App for Review
Permissions like Personal profile and Address requires app approval from PayPal. You can send email to PayPal for your app to review.
PayPal ID:
help-loginappreview@paypal.com
For your reference you can find below mail template:
Dear PayPal,
We have created an app on our PayPal developer account called “My Application Name”.
Description:
We are using a plugin on our website called “Social Login Pro” that provides a feature to login to the website via PayPal login button.We have configured this app with this plugin on our website. Using this the users will get logged into our website who are coming on our website.
From customer attributes we required Address Information as we need that email address to create users account else, it will not allow to login.
 STEP 1:
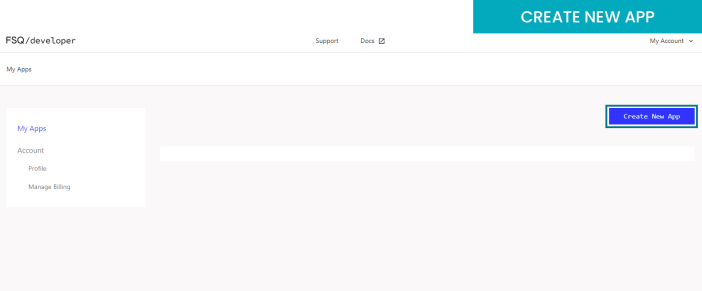
Log in to your Foursquare developer account and create new app.
 STEP 2:
Fill-up all the app details like App name and Company URL and then click on next.
Note: Company URL should be your site URL.
 STEP 3:
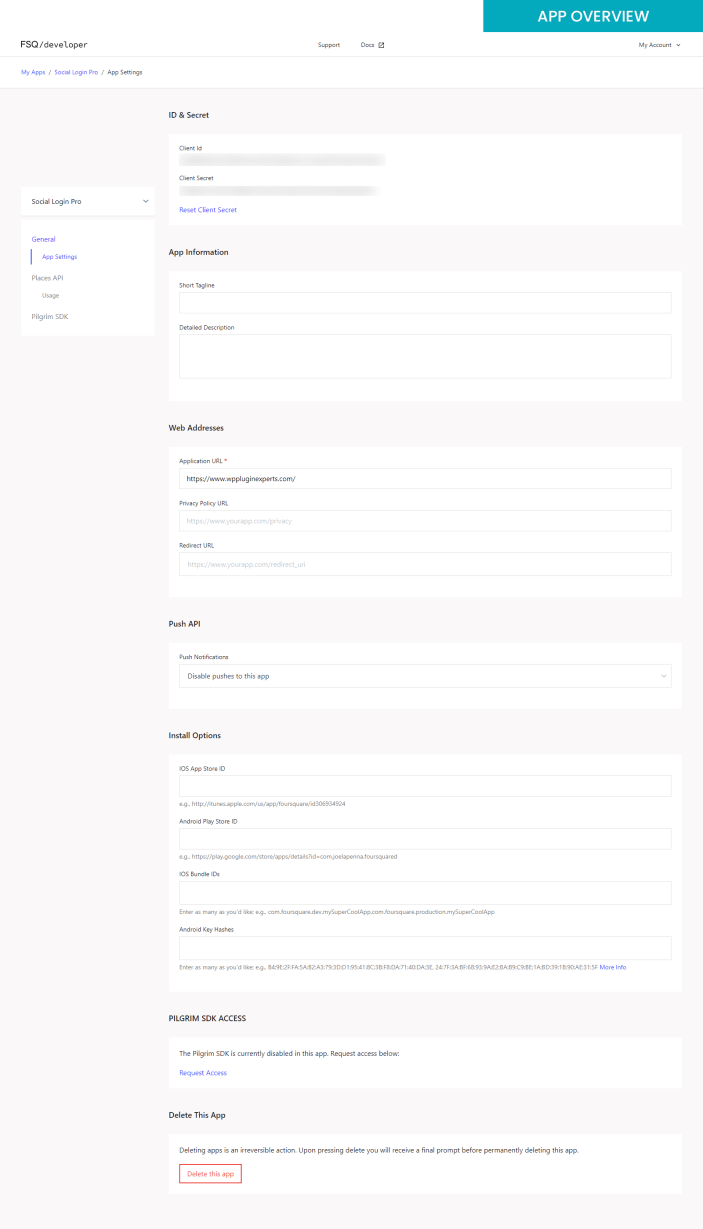
After successfully creation of the app you will redirect to app overview page.
 STEP 4:
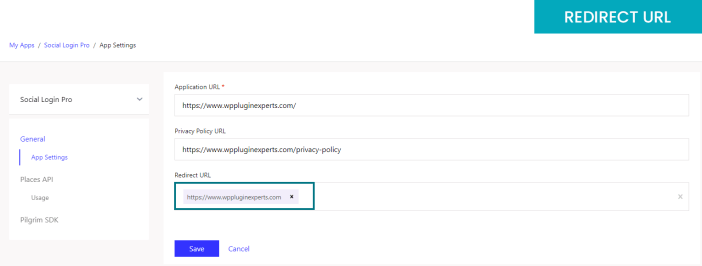
Now, you need to enter Redirect URL from App settings page.
Note: Redirect URL should match your Site URL.
 STEP 5:
After adding you will get your Client ID and Client Secret, Copy the ID and Secret and paste it in your plugin settings.
 Note
Note: When you copy and paste Keys make sure you don’t leave any empty spaces at the beginning or at the end of the text.
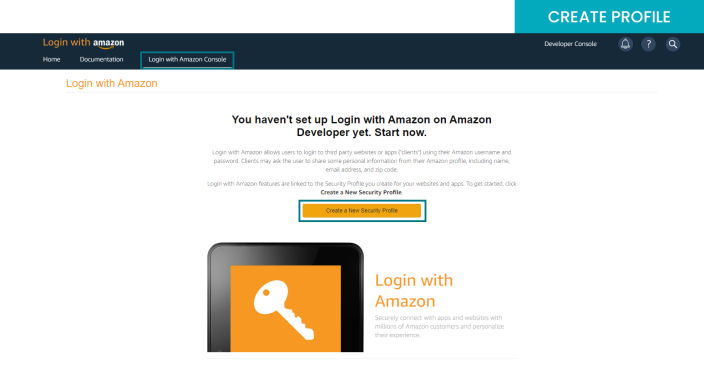
 STEP 1:
First login to your Amazon account and then log in to your Amazon developer account. Now from Login with Amazon console create new security profile.
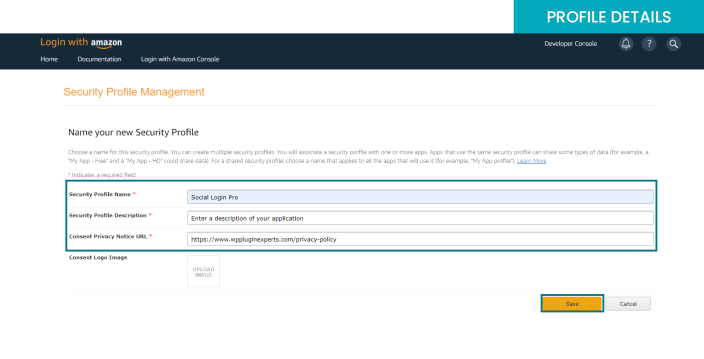
 STEP 2:
Fill-up all the security profile details like profile name, profile description and privacy notice URL and click on save button.
 STEP 3:
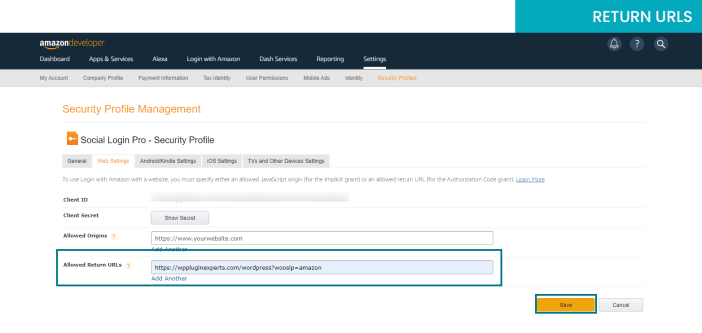
Once your app created Go to settings – Web settings.

From web settings page click on edit to enter the details.
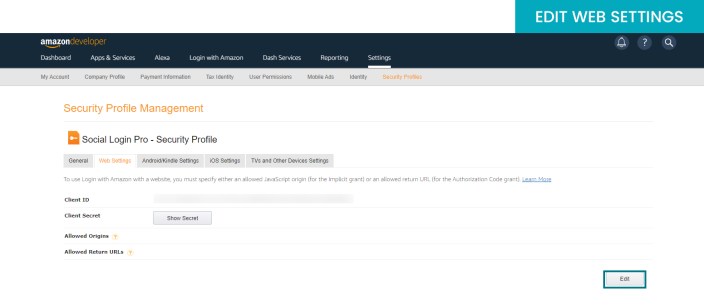
Now you need to enter Allowed Return URLs and click on save button.
Note: You will get Return URLs from Social Login Pro Plugin Settings.
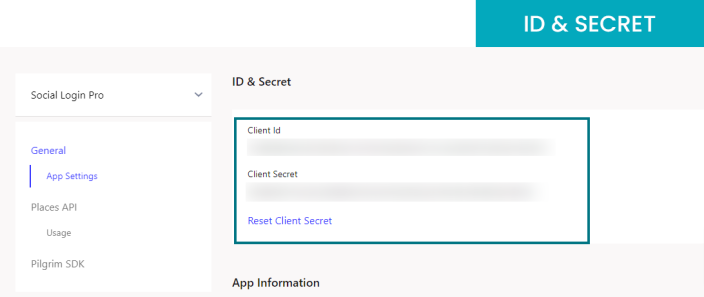
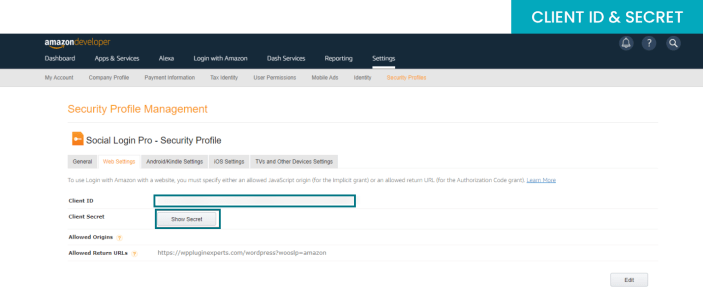
 STEP 4:
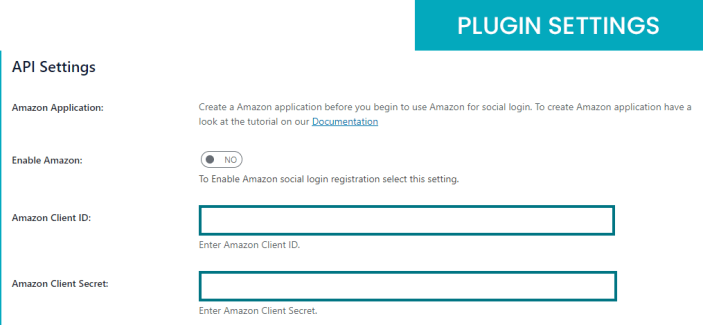
After adding you will get an Client ID and Client Secret from Web settings page, Copy the keys and paste it in your plugin settings.
 Note
Note: When you copy and paste Keys make sure you don’t leave any empty spaces at the beginning or at the end of the text.
 STEP 1:
Log in to your Line Business account and from Line developer page create new provider.
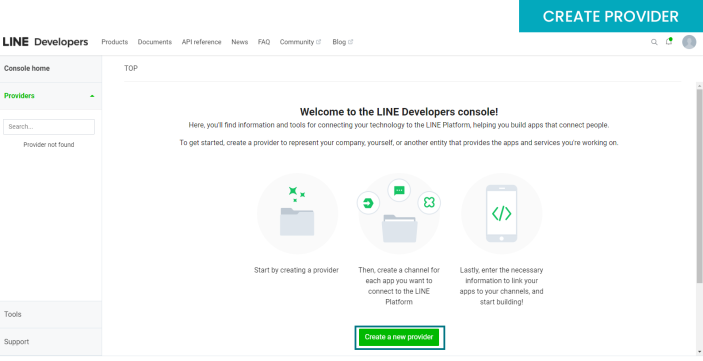 STEP 2:
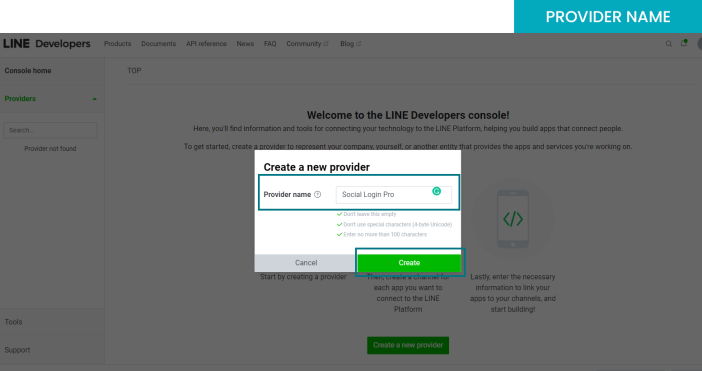
Fill-up the Provider name and click on create.
 STEP 3:
After creating provider click on Create Line Login Channel.
 STEP 4:
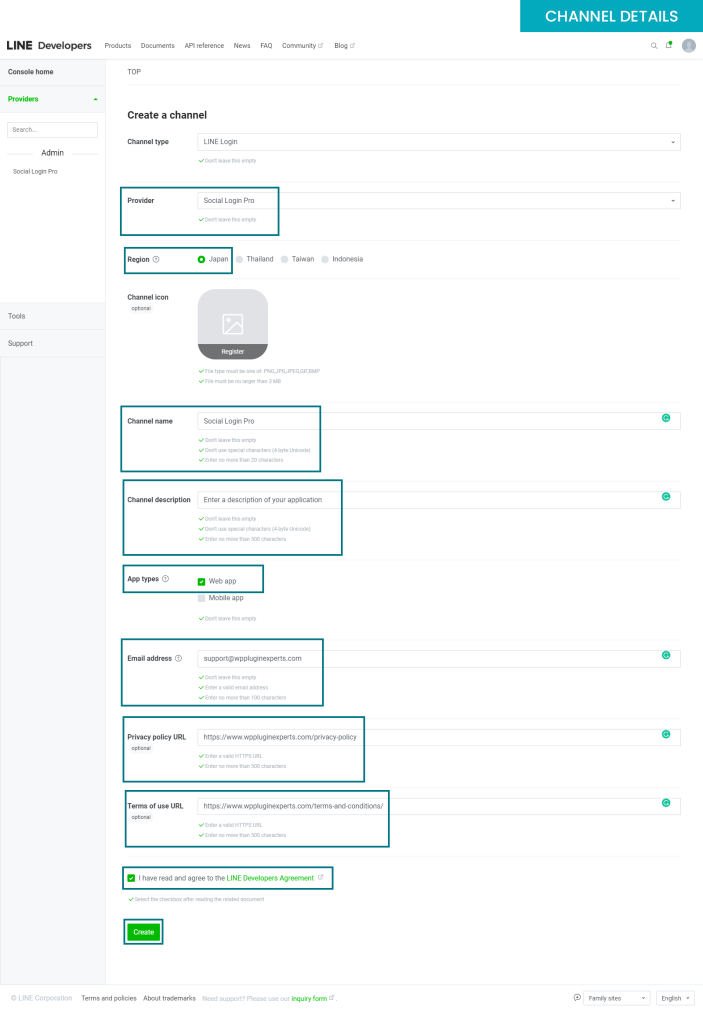
After that you will redirect to channel detail page and click on create to confirm.
Note 1: Select App type as a Web.
Note 2: Select the region as per your need.
 STEP 5:
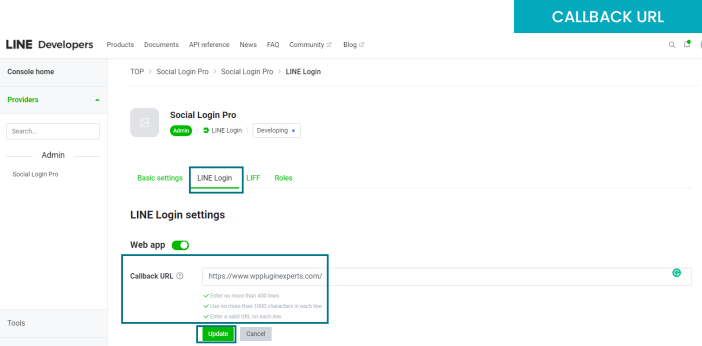
Now, from your app settings go to Line login to enter Callback URL.
Note: Callback URL should be your site URL.
 STEP 6:
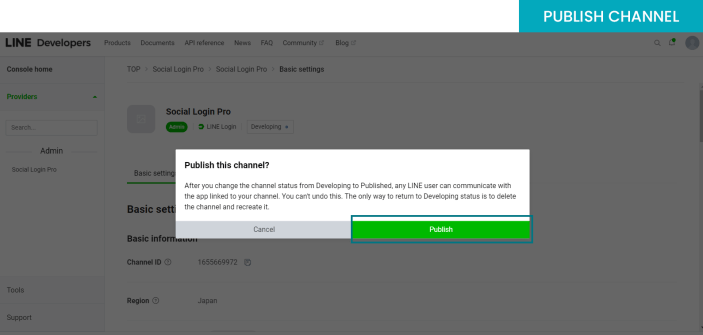
Now from basic settings the app is showing on developing mode.

Click on that to publish the channel.
 STEP 7:
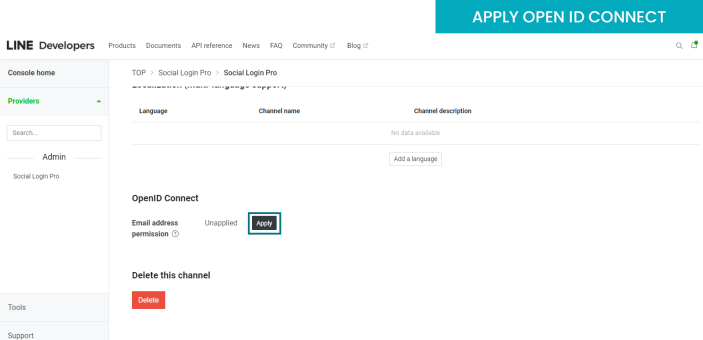
Lastly apply for Open ID Connect from Channel settings.
Note: This is mandatory step because from this you will be able to request for user’s email.
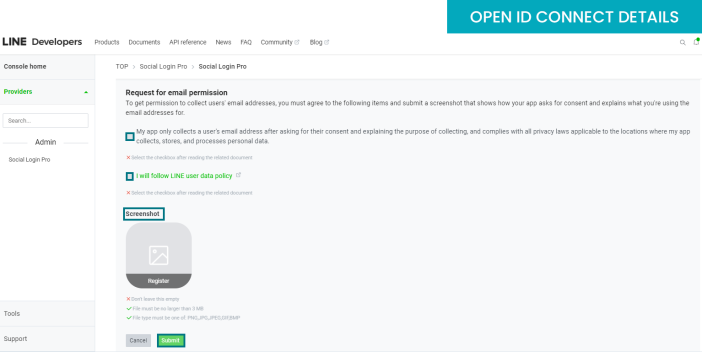
Fill-up all the details for Open ID Connect.
Note: You have to accept user data policy and add screenshot.
 STEP 8:
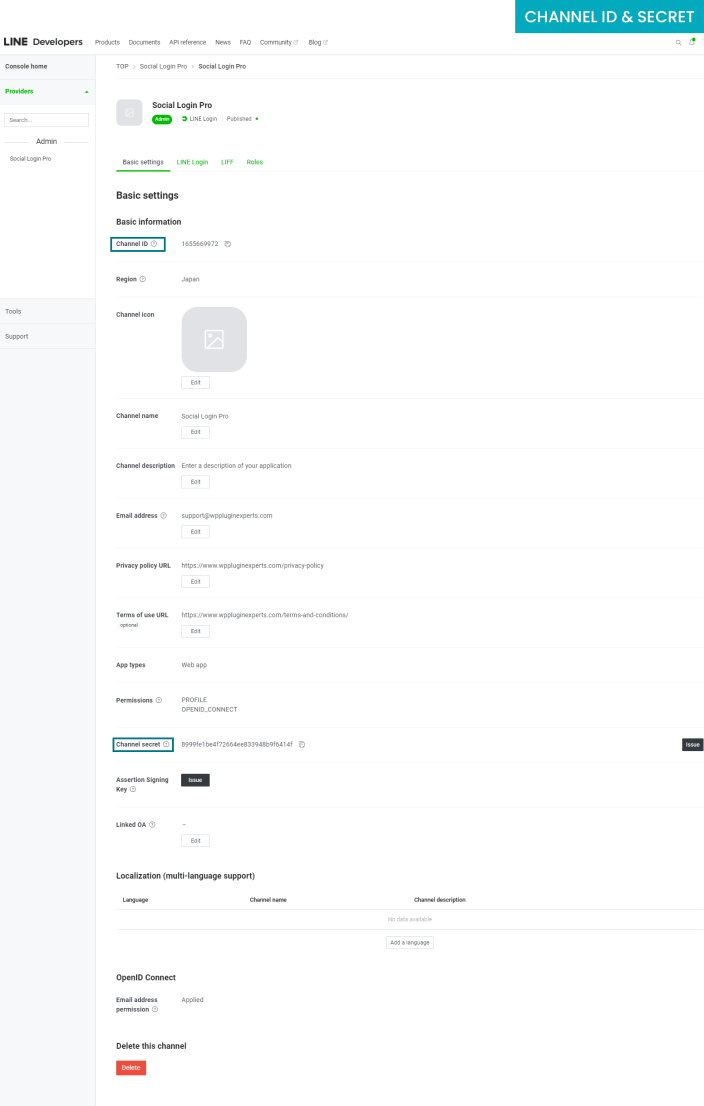
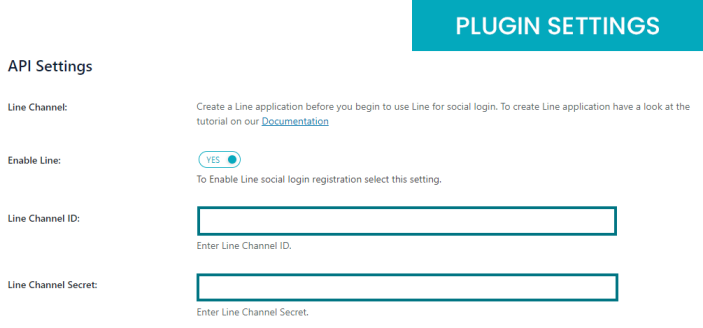
Now from channel basic settings copy the channel ID and channel secret and paste it in your plugin settings.
 Note
Note: When you copy and paste Keys make sure you don’t leave any empty spaces at the beginning or at the end of the text.
 STEP 1:
First log in to your Apple account and then go to Apple developer account from there create new identifiers first.
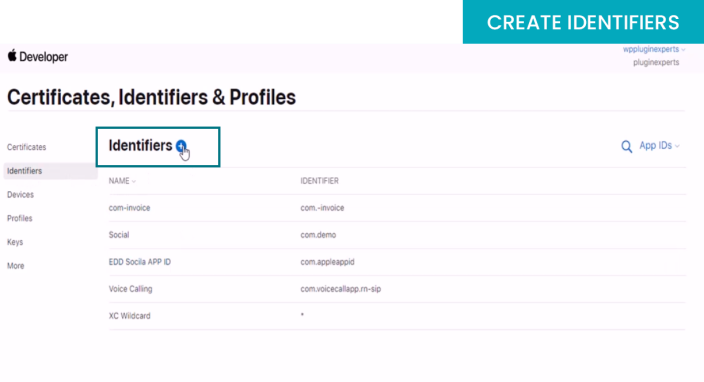
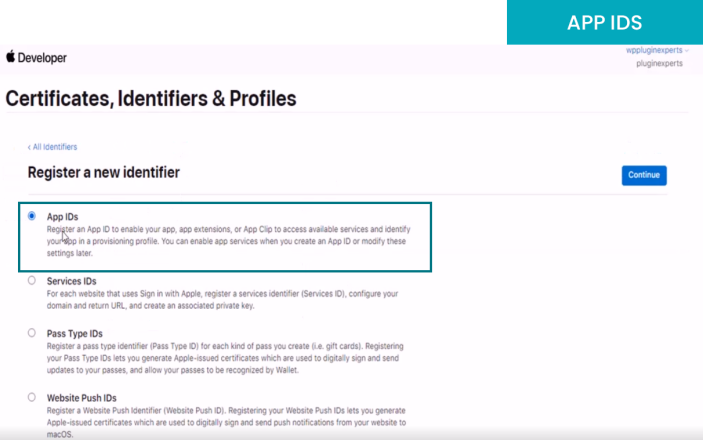
Select App IDs and click on continue.
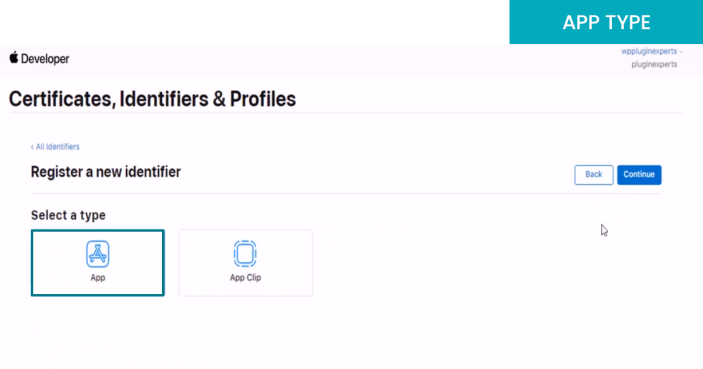
Select type as a App.
 STEP 2:
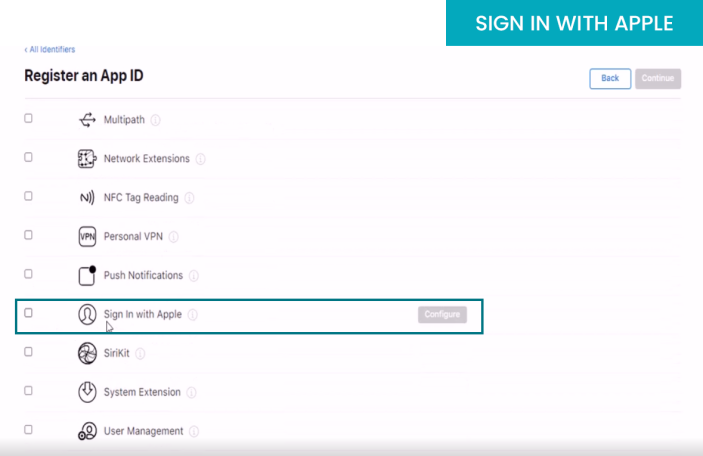
Fill-up App ID details like Description.
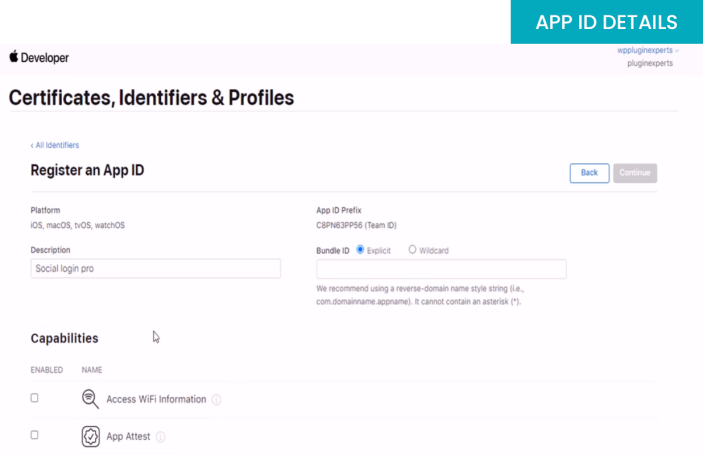
Now select the Sign-In with Apple permission and click on configure.
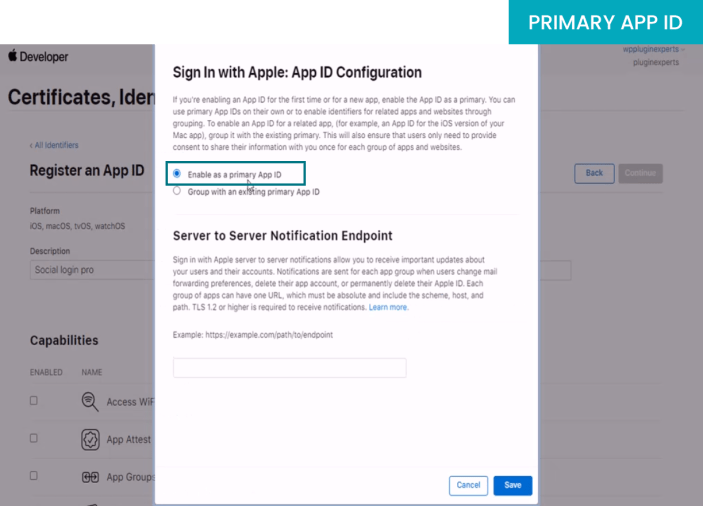
In sign-in with apple configuration page enable primary App ID and click on save button.
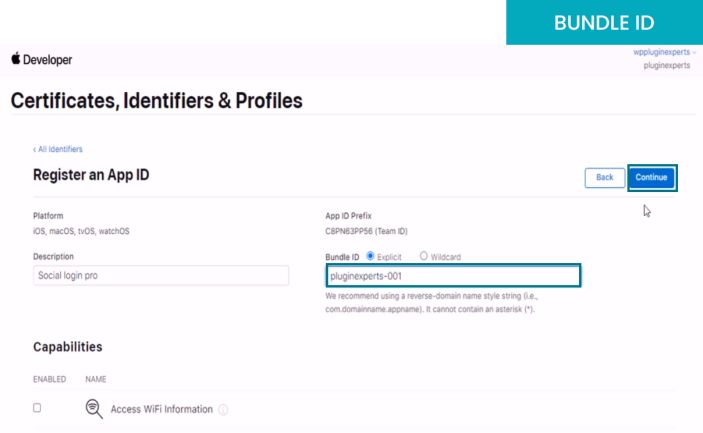
Now set Bundle ID and click on continue.
 STEP 3:
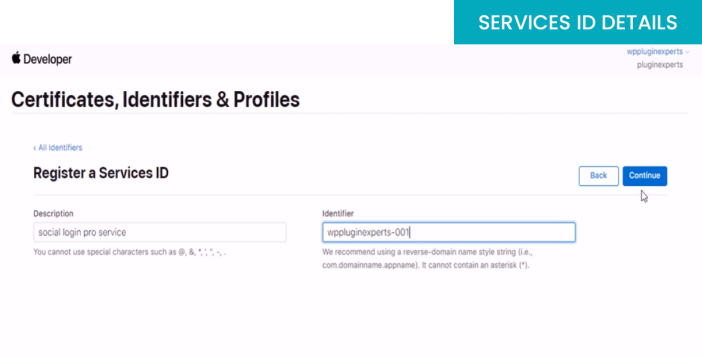
Now select services ID and click on continue.
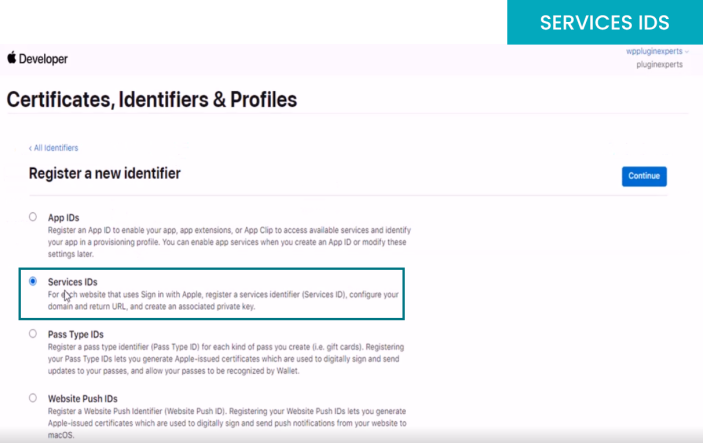
Fill-up the description and Identifier and click on continue button.
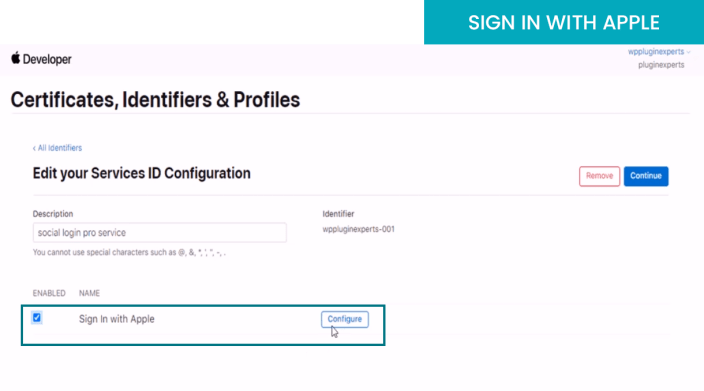
Now enable Sign-In with Apple and click on configure.
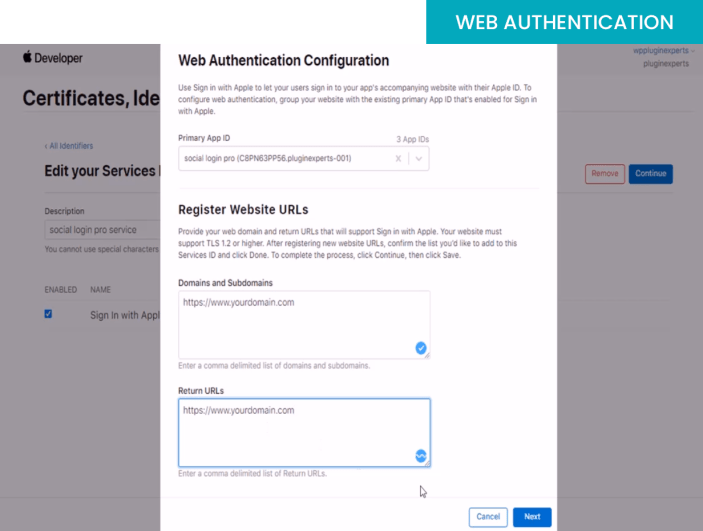
In web authentication page select the primary ID and enter domain and return URL and click next and save it.
Note 1: Select the primary ID which you have created at first step.
Note 2: Domain will be your Site URL.
Note 3: You will find the Return URL from Social Login Pro Plugin Settings.
 STEP 4:
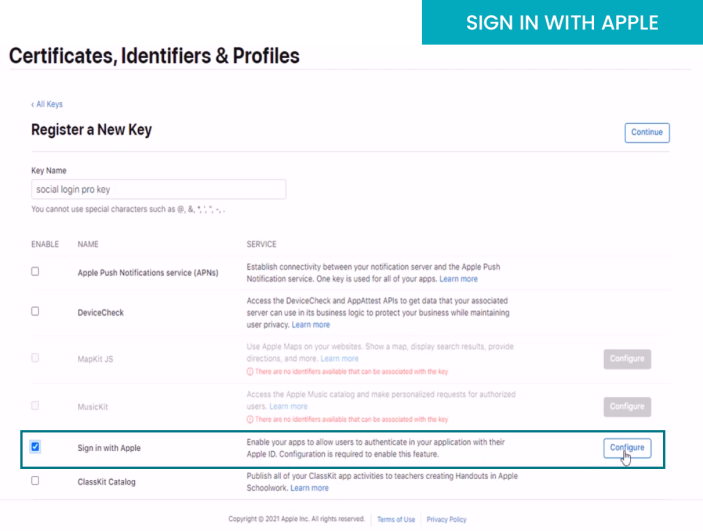
Lastly register a new key.
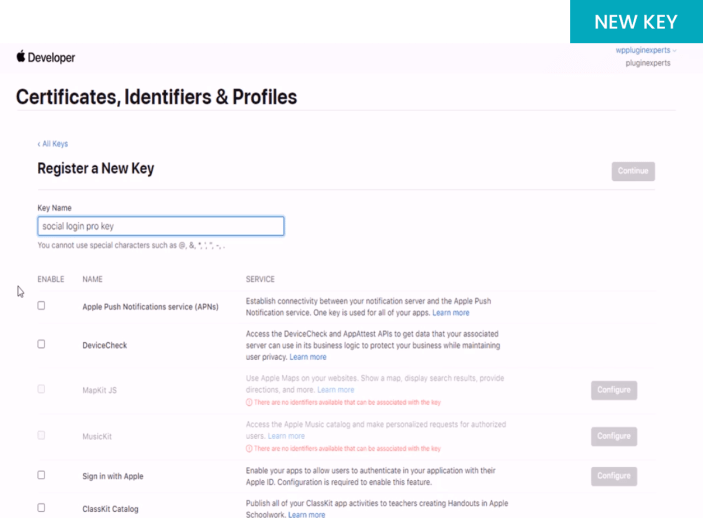
Select Sign-In with Apple and click on configure.
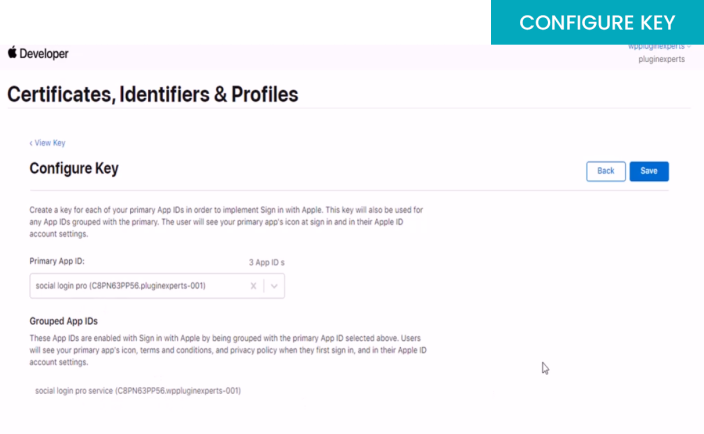
In configure key select the primary ID and click on save.
 STEP 5:
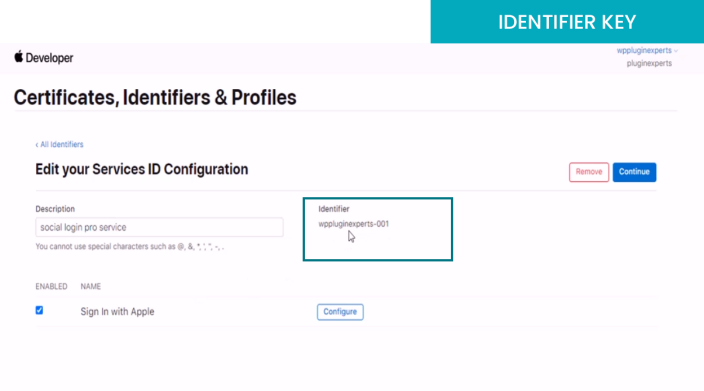
Now from App settings copy the identifier name and paste it in your plugin settings.
 Note
Note: When you copy and paste Keys make sure you don’t leave any empty spaces at the beginning or at the end of the text.
