Sparks for WooCommerce brings in extra e-commerce functionalities for your shop page, allowing you to build an engaging website using its modules.
Installation
↑ Back to top- Purchase the product from WooCommerce.com.
- Download the .zip file from your WooCommerce account.
- Go to: WordPress Admin > Plugins > Add New and Upload Plugin with the file you downloaded with Choose File.
- Install Now and Activate Plugin.
- Read on to learn how to set up and configure the product.
More information at Install and Activate Plugins/Extensions.
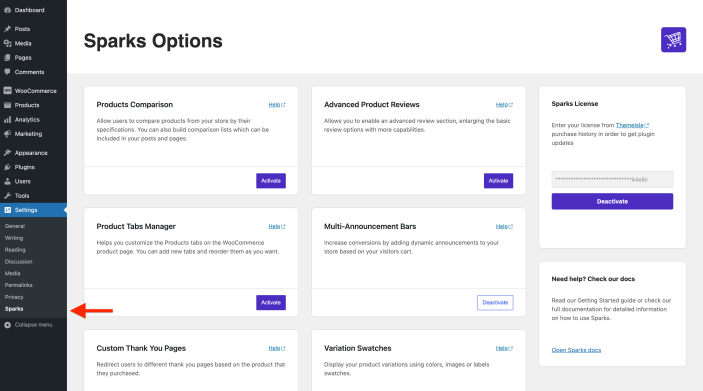
Plugin Modules
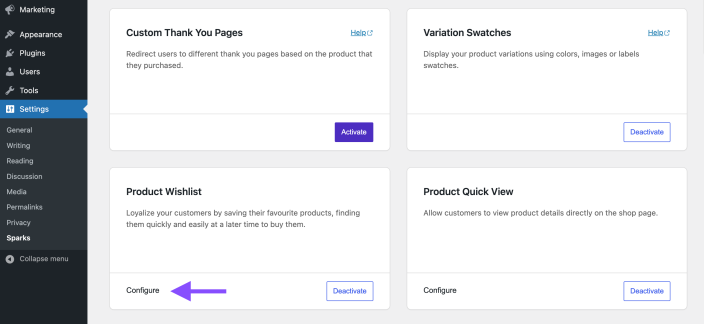
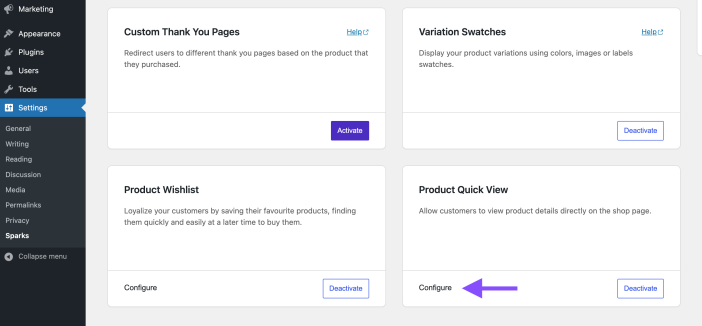
↑ Back to topThe Sparks for WooCommerce extension has eight modules. This section will provide general information about each module and a link to the dedicated documentation.
- Go to Settings > Sparks.
- Use the Activate button to enable the modules.
Multi-Announcement Bars
↑ Back to topThe multi-announcement bars are useful for the offers that appear from time to time, according to your configurations.
Multi-Announcements bars can be created within the Dashboard, and certain actions will automatically trigger them. Below is an example of offering a free product based on the ones added to the cart. In the following steps, we will explain how an announcement for free books can be created.
Creating the coupon
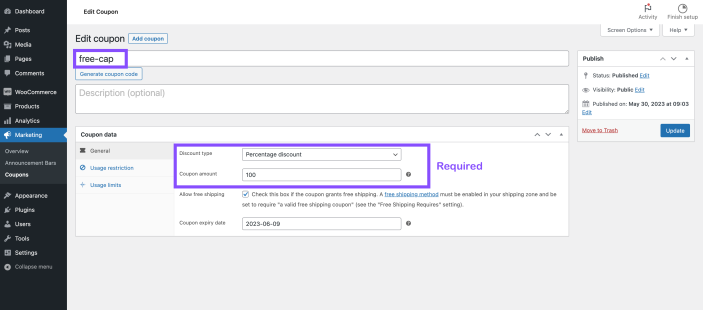
Before designing the multi-announcement bar, a coupon needs to be created.
- Navigate to Marketing > Coupons.
- Create a new coupon and insert a suggestive name.
- Under Coupon data > Discount Type, select Percentage discount.
- Next to the Coupon amount, insert 100 as a percentage of the offer. You can also allow free shipping and configure an expiry date.
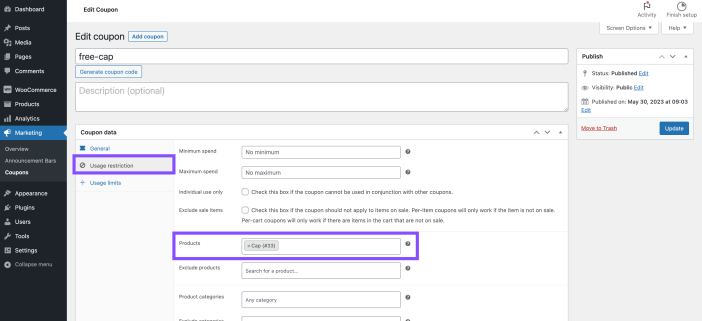
5. Switch to the Usage restriction tab.
6. Next to Products, insert the name of the product which will be available for the offer.
Creating the announcement bar
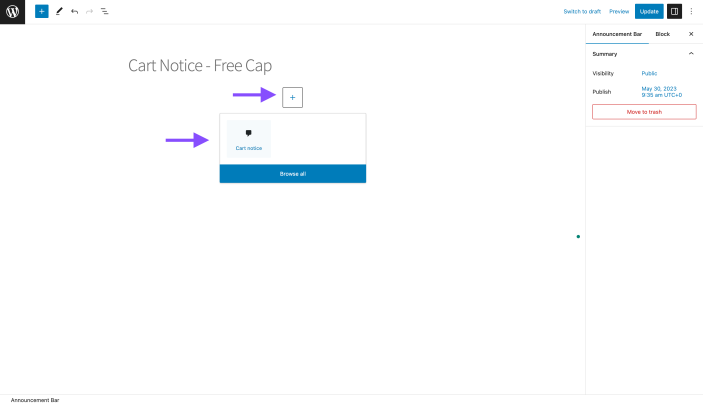
- Navigate to Dashboard > Marketing > Announcement Bars.
- Click on Add new to create a new one from scratch.
- Once the editor opens, click on the plus sign and add the Cart notice block.
4. Insert the desired text on the Cart Notice.
5. Click on the available button (here: Get Offer) to open its settings.
6. Expand the Advanced link settings and enable the options.
7. Insert a discount code for the offer, which must be the same as the coupon name.
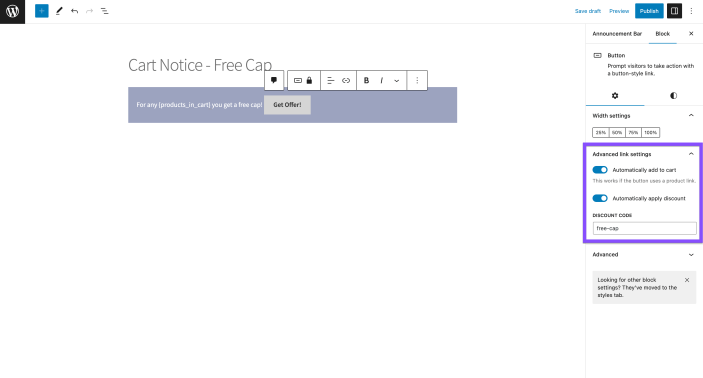
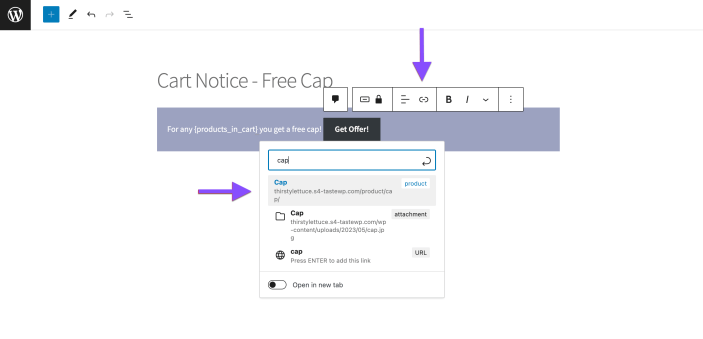
8. On the same button set a link to the product included in the offer.
Additional settings
There are other available settings, which you can find in the block settings: set triggers for the product or decide on which page it should appear.
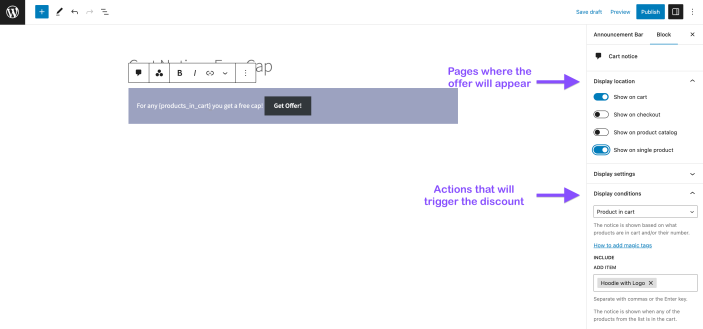
Also, magic tags can be used to show the name of the product that was added to the cart and triggered the announcement bar, but they can be configured only after you have set the Products in cart condition and included some of them.

Result

Video – How to use the Multi-Announcement Bars?
Variation Swatches
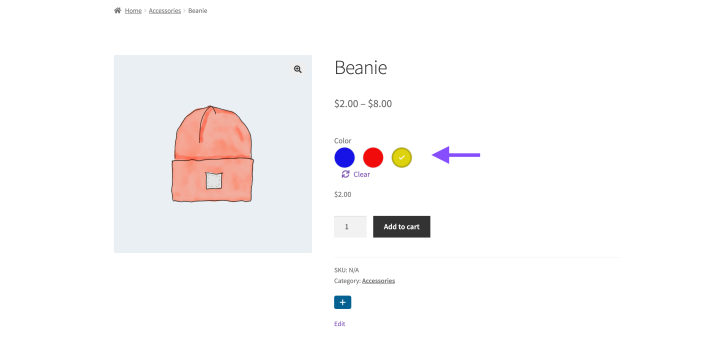
↑ Back to topThe Variation Swatches is a useful tool that belongs to an online shop. It displays the availability of the product in different shapes or colors, with different prices. The swatches are shown in colored dots corresponding to the color attributes. In the below example, we will present how to create color variations.
Creating the attributes
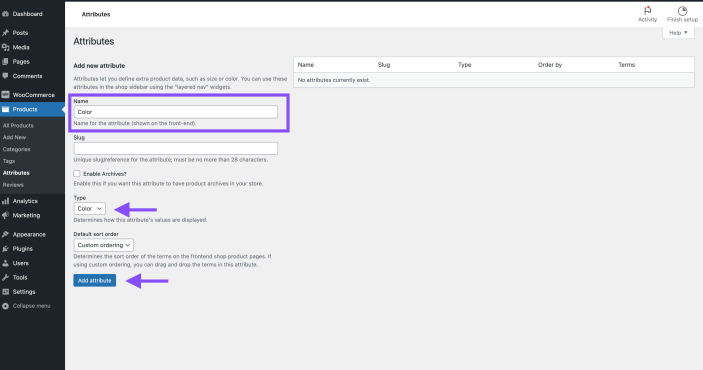
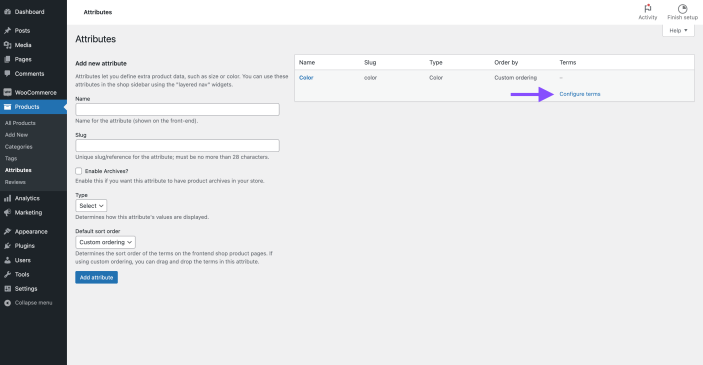
- Navigate to Dashboard > Products > Attributes.
- Set a suggestive name for the attribute that will appear on the website (e.g., “Color”), and choose an attribute type (here: color).
- Click on the Add attribute button.
4. On the right side, next to the attribute’s name, click on Configure terms.
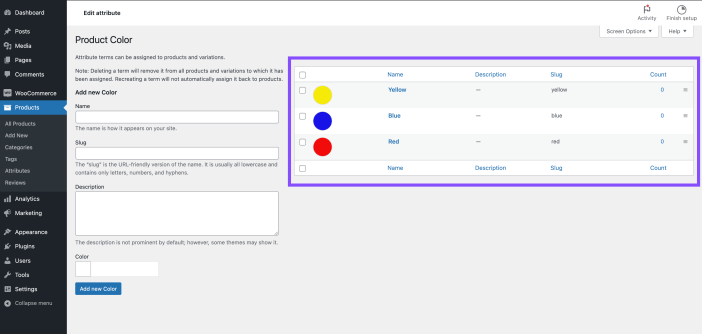
5. In the new panel, insert the name of the color (e.g., Red).
6. Pick the corresponding color from the Color palette.

Attaching attributes to products
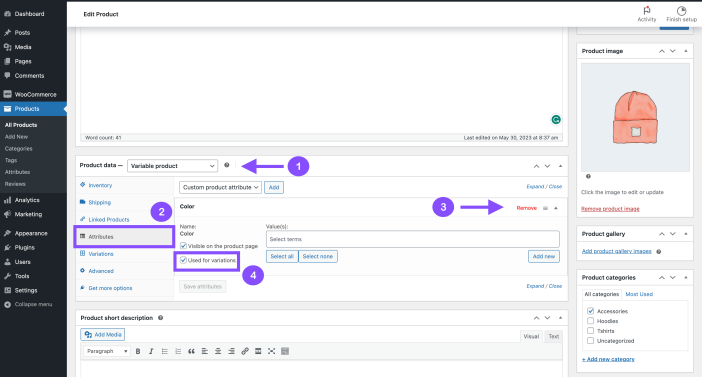
- Navigate to Products and open the desired one.
- Into the Product data space select the Variable product option from the dropdown.
- Select the Attributes panel.
- Select the Color attribute and expand it.
- Check the Used for variations option.
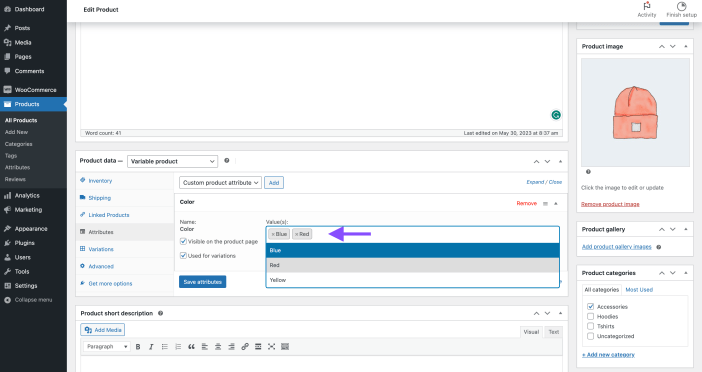
6. Inside the Values field, select the attributes that you have created.
7. Navigate to Variations and click on the Add Manually button.
8. For each value inserted, configure the price and the specifications.
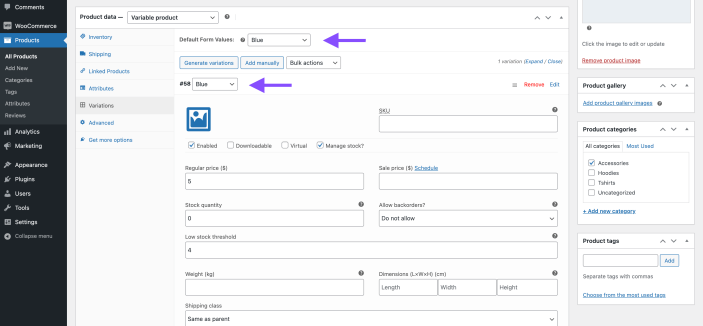
9. Use the Default Form Value to set the default color of the product.
10. Save the changes and check the product.
Result
Video – How to configure the Variation Swatches?
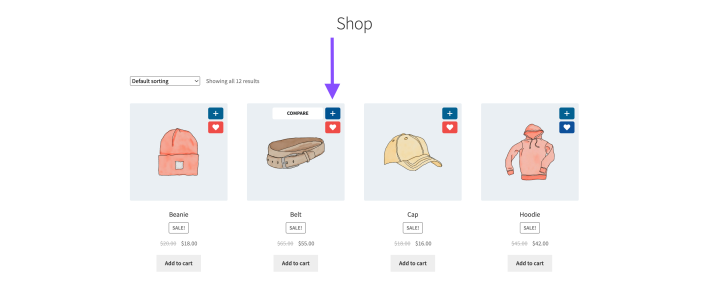
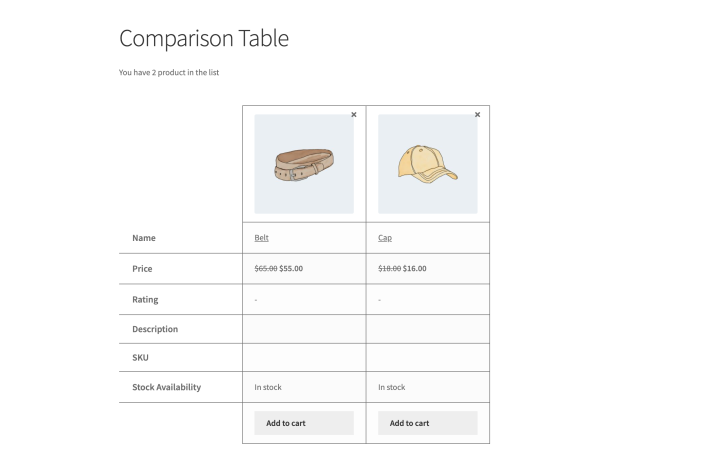
Product Comparison
↑ Back to topThe Product Comparison module creates a comparison table, which is an indispensable feature of an online shop that helps the user to have a better overview of the desired products by having them displayed along with their specifications one next to the other.
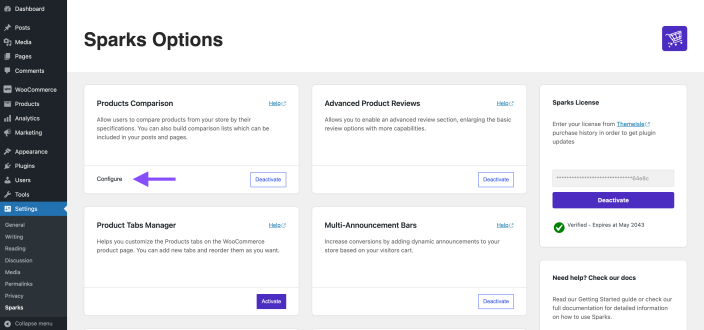
- Navigate to Settings > Sparks.
- Activate the Product Comparison module.
- Click on the Configure button.
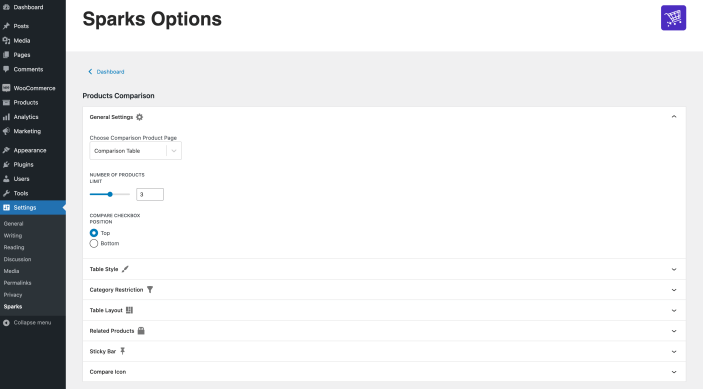
4. Use the settings accordions to create a pleasant appearance of the table.
Result
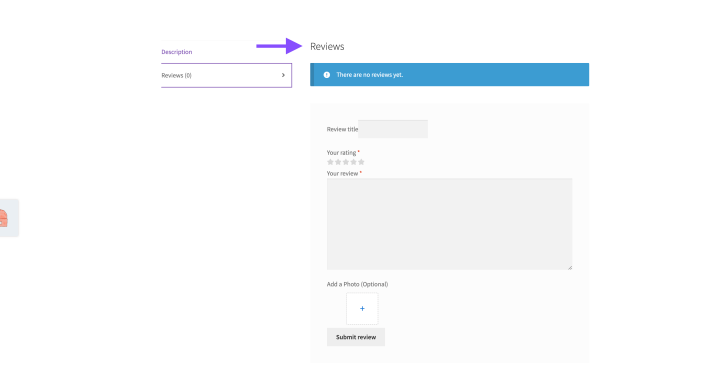
Advanced Product Review
↑ Back to topThis module enhances Sparks’ Product Review by allowing users to enable an advanced review section with multiple capabilities.
- Navigate to Dashboard > WooCommcerce > Settings > Products.
- Scroll down to the Reviews section.
- Enable the desired review features.
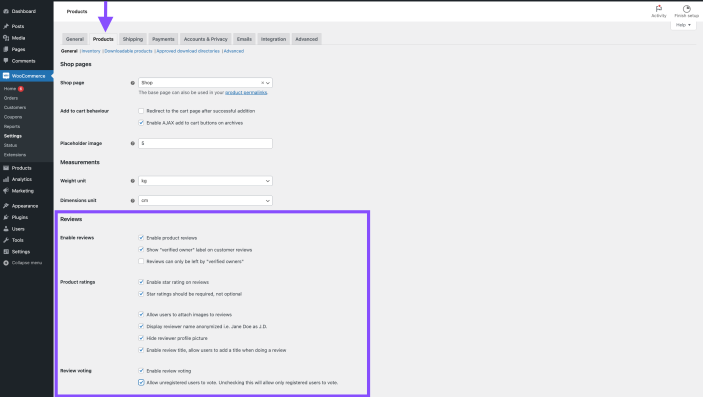
Result
Custom Thank You Pages
↑ Back to topThe Custom Thank You Page creates a more friendly appearance to the online shop by displaying a thank you message after finishing an order.
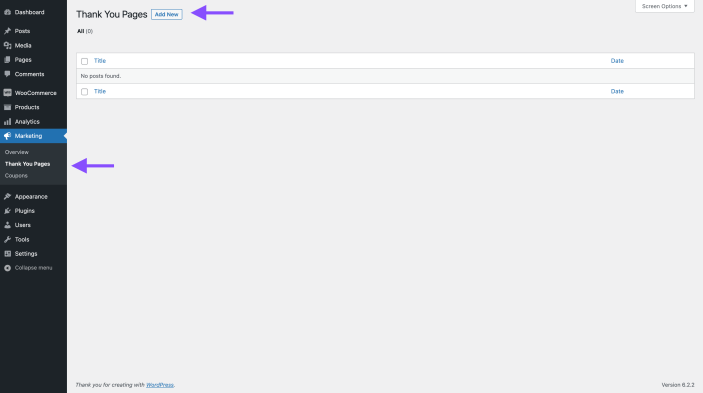
- Navigate to Dashboard > Marketing > Thank You Pages.
- Click on the Add New bottom to start from scratch.
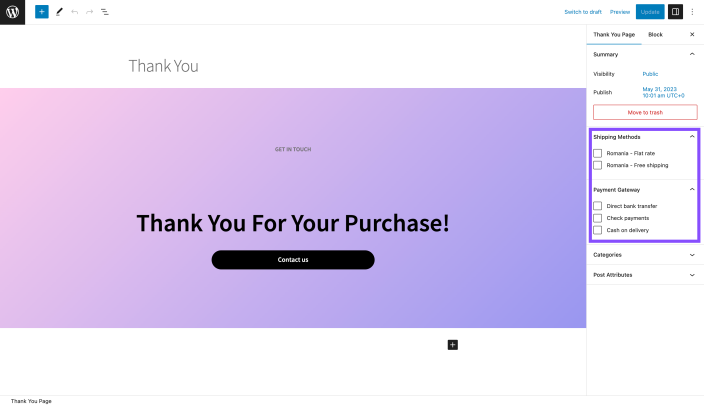
3. Once the editor opens, start designing the Thank You page.
4. From the right sidebar, configure the Shipping methods and Payment Gateways, which will trigger the Custom Thank You Page.
Additional settings
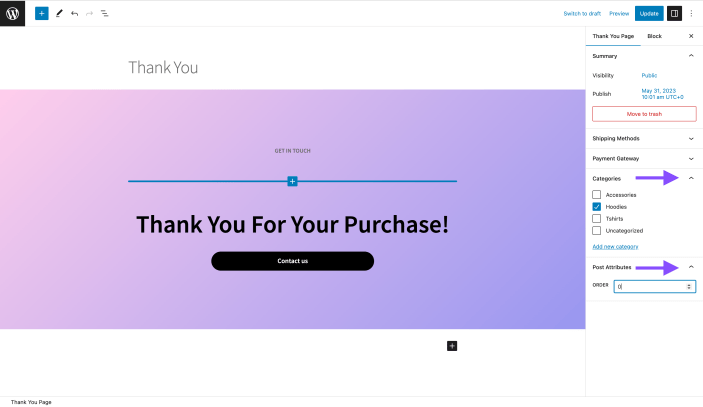
Apart from Shipping and Payment, the thank you page can be triggered by the categories of the products using the Categories accordion.
If multiple Custom Thank You Pages are created, the Post Attributes Order can be used to decide which one will be displayed (0 = most important).
Custom Thank You Pages for individual products
You can set a specific Thank You Page for each product by following these steps:
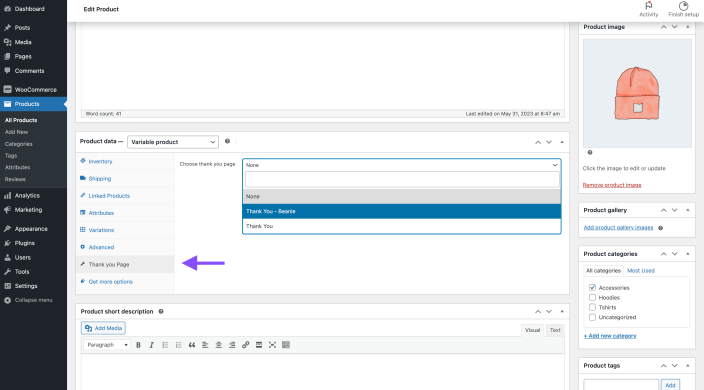
- Navigate to Products > All Products and pick the desired one.
- Click on the Edit button and scroll until the Product data.
- Go to the Thank you Page and select the suitable one from the dropdown list.
- Click on Update and visit the site to check the changes.
Video – How to create a custom Thank You Page?
Product Tab Manager
↑ Back to topThis option helps you customize the Products tabs on the shop product page. You can add new tabs and reorder them as you want.
Global tabs
Global tabs can be created to be used by multiple products. This can be controlled by selecting the categories of the products that should display the current tab.
- Navigate to WooCommerce > Product Tabs.
- Click on Add New to create a new global tab.
- Once the editor opens, select the categories where the product tab should appear.

Result
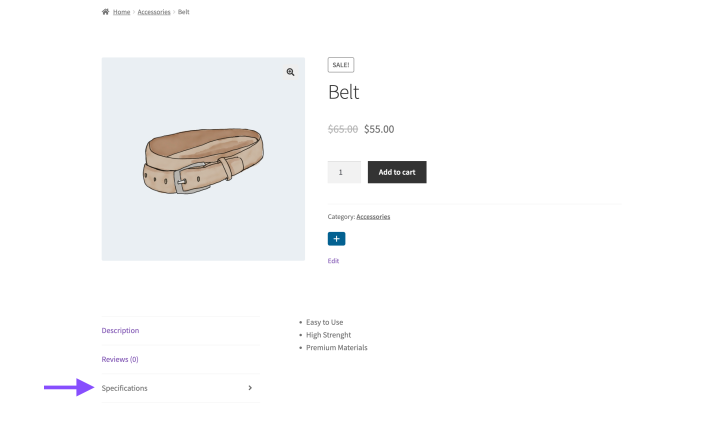
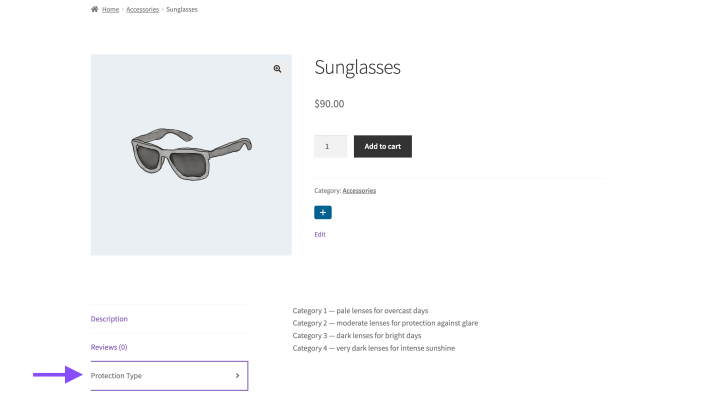
Individual product tab
The Custom sorting works only in the Sorting tab. The All / Published tabs do not provide this feature.
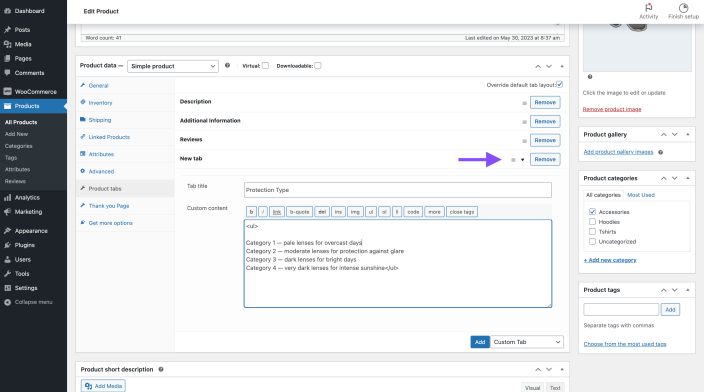
This feature is available for each particular product and offers the possibility of adding custom tabs for the current products only.
For adding a custom tab to the current product, first edit it, then navigate to Product data > Product tabs.
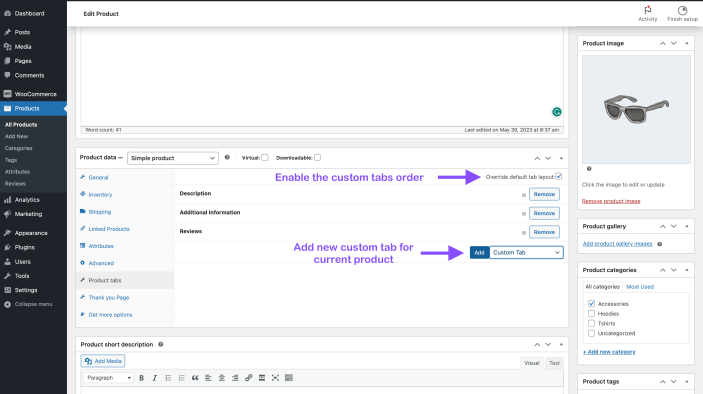
Please note that you’ll only see the default tabs of WooCommerce here and the custom ones you add. The global tabs mentioned in the above chapter don’t appear here.
The custom tabs added in this section can’t be edited with the WordPress blocks editor. The formatting options are available below the text area.
Result
Video – How to configure the Product Tabs?
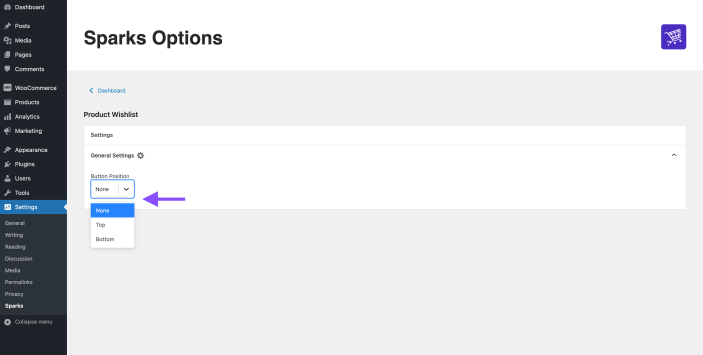
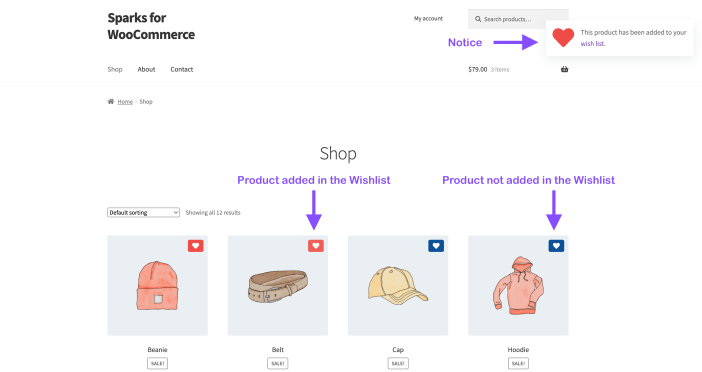
Product Wishlist
↑ Back to topThe Wish List Module ensures your customer’s visits through the possibility of storing their favorite products in a special wish list.
- Navigate to Settings > Sparks.
- Inside the Product Quick View panel, click on the Configure button.
3. Use the General Settings dropdown to set the button position.
Result
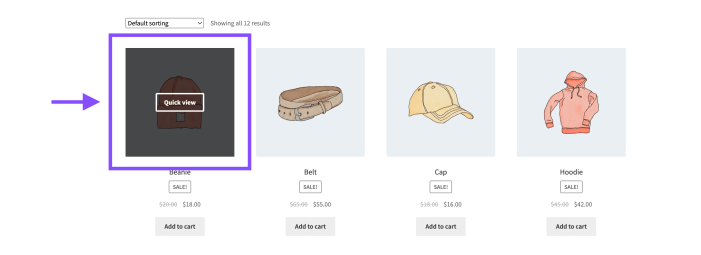
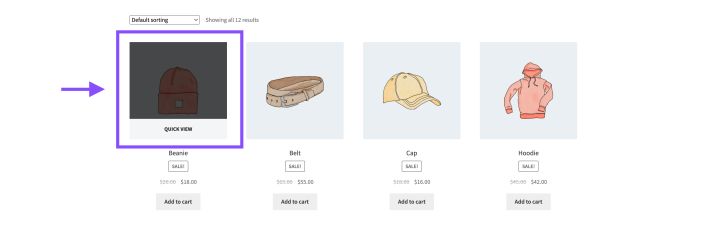
Product Quick View
↑ Back to topThe Quick View is an essential tool in e-commerce because it facilitates the customer’s experience, allowing them to quickly look at the product and explore its options without entering the product page.
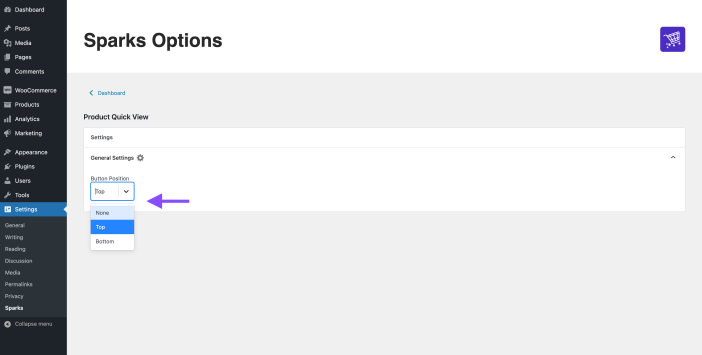
- Navigate to Settings > Sparks.
- Inside the Product Quick View panel, click on the Configure button.
3. Use the General Settings dropdown to set the button position.
Result
Questions and Support
↑ Back to topDo you still have questions and need assistance?
- Get in touch with a Happiness Engineer via our Help Desk. We provide support for extensions developed by and/or sold on WooCommerce.com, and Jetpack/WordPress.com customers.
- If you are not a customer, we recommend finding help on the WooCommerce Support Forum or hiring a recommended expert on our customizations page.