After activating WooCommerce Top Bar plugin, you can see the “Top Bar” in the WordPress Admin menu. Click to add a new notification bar.
Customize where and how your top bar appears on your website with these settings:
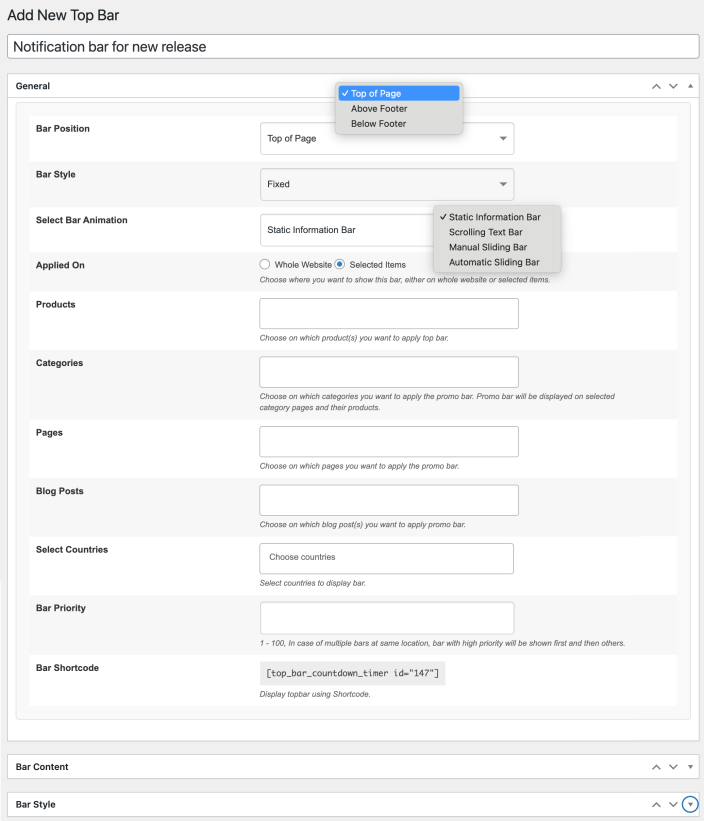
- Bar Position: Choose where the top bar should appear on your website:
- Top of Page: Displays the bar at the top of your site.
- Above Footer: Displays the bar just above the footer.
- Below Footer: Displays the bar just below the footer section.
- Bar Style: Control how the bar behaves when the user scrolls the page:
- Fixed: The bar stays in a fixed position as the user scrolls.
- Sticky: The bar moves along with the page while scrolling.
- Select Bar Animation: Choose how the content inside the bar is displayed:
- Static Information Bar: Regular, non-animated text.
- Scrolling Text Bar: Text scrolls horizontally across the bar.
- Manual Sliding Bar: Slides through content manually using navigation buttons.
- Automatic Sliding Bar: Slides through content automatically at set intervals.
- Applied On: Define where the bar should be shown:
- Whole Website: Displays on all pages.
- Selected Items: Display only on chosen products, categories, pages, or blog posts. Make sure to Target specific sections of your website:
- Whole Website:
- Select countries: Choose one or more countries
- Bar Priority: Set display priority (1 to 100) to control which bar is shown when multiple bars overlap.
- Bar Shortcodes: You can use a shortcode to manually place the bar anywhere on your site.
- Selected Items:
- Products: Select individual product(s) to display the bar on.
- Categories: Choose specific product categories like Clothing, Hoodies, Decor, etc.
- Pages: Show the bar on specific pages like Cart, Checkout, My Account, etc.
- Blog Posts: Display the bar on selected blog posts for targeted promotions or announcements.
- Select countries: Choose one or more countries
- Bar Priority: Set display priority (1 to 100) to control which bar is shown when multiple bars overlap.
Bar Shortcodes: You can use a shortcode to manually place the bar anywhere on your site.
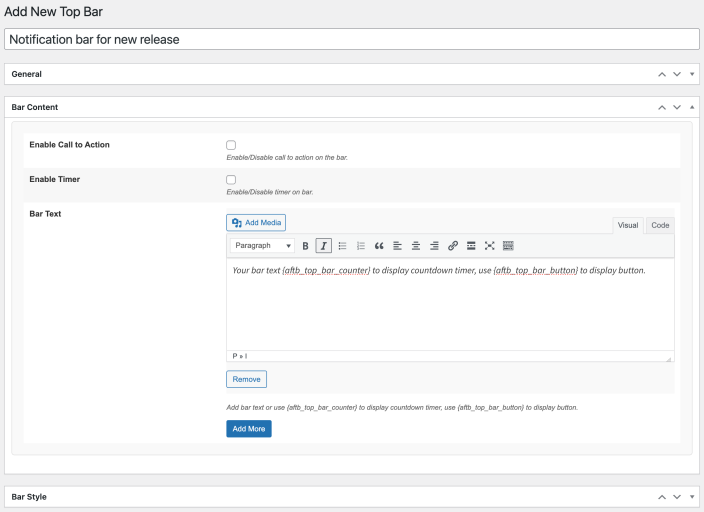
Customize your top bar’s interactivity, urgency, and content using the following options:
- Enable Call to Action: Turn the Call to Action (CTA) button on or off for the bar.
- Call to Action Button Text: Enter the text that will appear on the CTA button.
- Call to Action Button Link: Enter the URL where the user will be redirected after clicking the button.
- Enable Timer: Toggle this setting to enable or disable a countdown timer on the top bar.
- Timer Type:
- Date Range: The timer counts down between a specific start and end date/time. The bar is only visible during this range.
- Auto-Resetting Timer: A self-resetting timer that starts over after each interval.
- Note: If “Date Range” is selected, the bar only appears within the selected date/time range. If “Auto-Resetting Timer” is selected, the timer will restart once it finishes.
- Start/End Date: Set the starting and ending dates for the bar display. Required if the timer is enabled and using a Date Range.
- Start/End Time: Set the exact start and end times for the bar within the selected dates.
- Bar Text: Add the main message or content that will appear on the top bar.
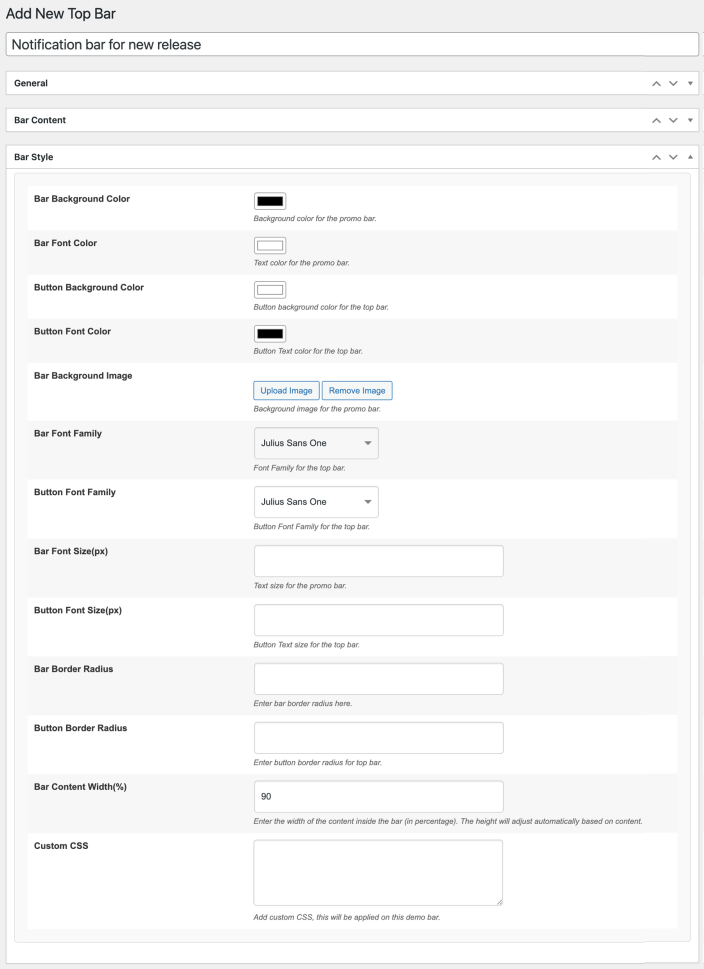
You can utilize the following options to style content of your notification bar.
- Bar Background Color: Set the background color of the top bar to match your brand or campaign theme.
- Bar Font Color: Choose the color for the text displayed on the bar for better visibility.
- Button Background Color: Define the background color of the Call-to-Action (CTA) button for attention-grabbing impact.
- Button Font Color: Select the font color for the button text to ensure readability.
- Bar Background Image: Upload a custom image to use as the background of the bar.
- This will replace the solid background color if applied.
- Bar Font Family: Choose the font style for the bar text.
- Button Font Family: Pick a font style for the CTA button text to align with your site’s design.
- Bar Font Size (px): Enter the font size for the bar content in pixels for optimal readability.
- Button Font Size (px): Set the font size of the button text in pixels for clear visibility.
- Bar Border Radius: Define how rounded the corners of the bar should be (e.g., 10px for slightly rounded corners).
- Button Border Radius: Set the roundness of the CTA button’s corners for a modern look.
- Bar Content Width (%): Specify the width of the content inside the bar as a percentage of the bar’s total width.
- Custom CSS: Add your own CSS styles to personalize the look and feel of this specific bar.
- Use this option to apply advanced design tweaks.
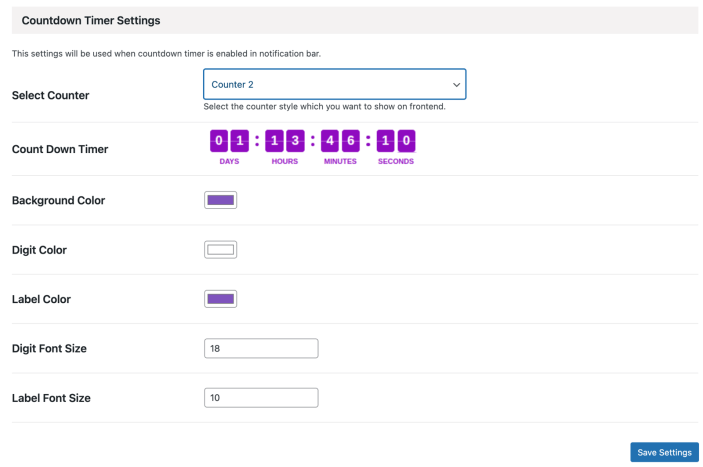
Click on settings under the top bar menu to access the configuration page. Here you can configure Countdown Timer settings.