Zendesk Ticket Manager Documentation will help you install and configure the plugin on your WooCommerce Store
How to install Zendesk Ticket Manager
↑ Back to top- Download the .zip file from your WooCommerce account.
- Go to: WordPress Admin > Plugins > Add New and Upload Plugin with the file you downloaded with Choose File.
- Install Now and Activate the extension.
Setup and Configuration
↑ Back to top
To set up your store with Zendesk Ticket Manager:
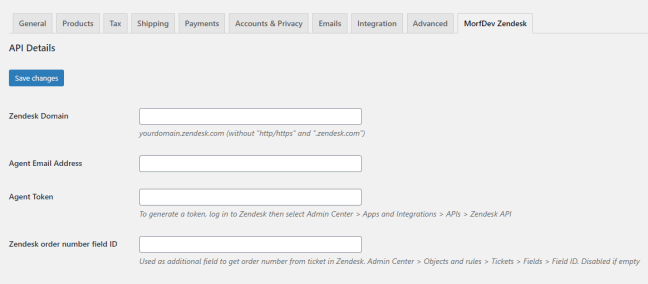
- Go to WooCommerce > Settings > MorfDev Zendesk.
- Place correct settings:
- Zendesk Domain – domain name of your Zendesk Support account.
- Agent Email Address – email uses for authorization to your Zendesk Support account. This agent should have access to create and view tickets.
- Agent Token – string can be generated on your Zendesk Support account. Go to Admin Center > Apps and Integration > APIs > Zendesk API. Then generate API Token for the plugin directly.
- Zendesk order number field ID – you can use custom field of Zendesk to connect a ticket with order number of WooCommerce store. So ticket can not be associated with order without this field or when this field is empty.
- Save settings.
Usage
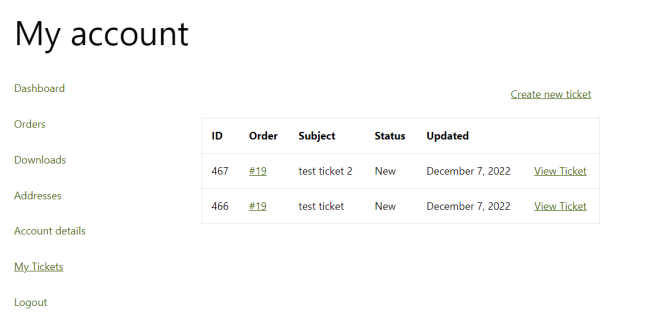
↑ Back to topFor customer: login to your customer account. Then you will see “My tickets” tab in the account page.

For admin: go to a order page. You will see “Order ticket list” block on the order page.

Zendesk Ticket Manager FAQ
↑ Back to topQ: I don’t see an “Order ticket list” block on the order page.
A: Check the “Zendesk order number field ID” setting. Any order can be associated with a ticket only when a ticket has a field with the order number value. Therefore, when the setting is empty, the block will not appear.
Q: I want to test the plugin and create a ticket on a customer account however I am unable to create a ticket.
A: Check your customer account role. The plugin works only with the “customer” role. As a result, other roles (like “Administrator”) cannot create tickets from the customer account page.
