Version 2.0 of Social Login updated how login is authenticated with provider networks like Facebook and Twitter. We migrated from using Opauth to HybridAuth, which is a different code library for communicating with social networks. We made this move because, while we routinely audit the plugin for security, HybridAuth has a more active development community, and thus will be more secure in the long run over the life of WooCommerce Social Login, and we want to be proactive in using newer codebases. The plugin will continue to work without issue after upgrading. This change is backwards-compatible, but you need to make an update to your site to support this newer library.
Upgrade Notice
↑ Back to top
- Click on “Credentials” on the left under “API Manager”.
- Under “OAuth 2.0 client IDs”, click on the correct application for your store’s social login.
- Add the new callback URL from the plugin settings under “Authorized redirect URIs”. The format will look something like:
https://mystore.com/?wc-api=auth&done=google
but may be different. Please refer to the plugin settings for the correct URL.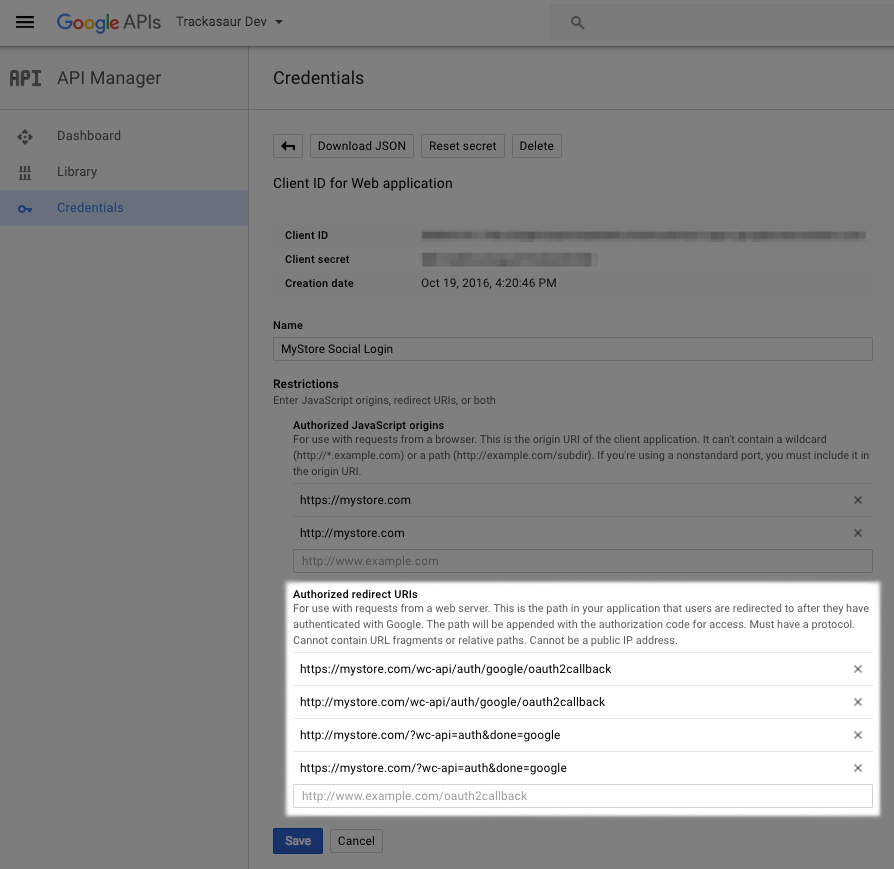
Google: New URL added - Save your application settings. You’re done!
Amazon
↑ Back to top- For the application that handles your site login, hover of the gear icon under “Manage”.
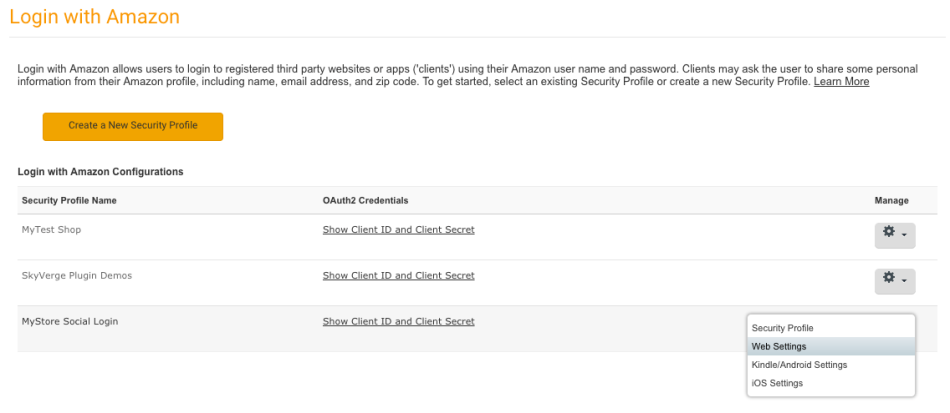
Amazon Apps - Click on “Web Settings”.
- Click “Edit” in the bottom right to modify your site’s URLs.
- Click “Add Another” under “Allowed Return URLs” to enter a new callback.
- Add the new callback URL from the plugin settings. The format will look something like:
https://mystore.com/?wc-api=auth&done=amazon
but may be different. Please refer to the plugin settings for the correct URL.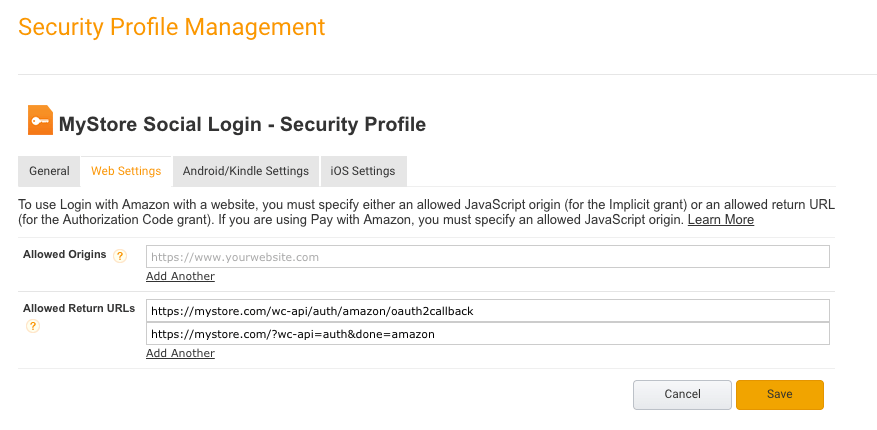
New Callback added - Save your application settings. You’re done!
- Scroll down to “OAuth 2.0” on this page.
- Add the new callback URL from the plugin settings under “Authorized Redirect URLs:”. The format will look something like:
https://mystore.com/?wc-api=auth&done=linkedin
but may be different. Please refer to the plugin settings for the correct URL.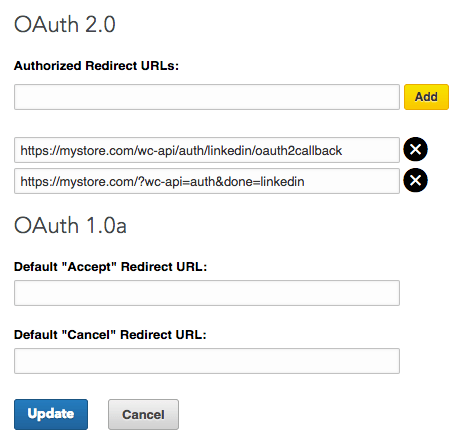
LinkedIn: New URL added - Click “update” to save your application settings. You’re done!
PayPal
↑ Back to top- Scroll down to “REST API apps”, and click on the name of your social login application.
- Scroll down to “LIVE APP SETTINGS” (or sandbox if you’re updating a sandbox app). Click “Show” for the return URL setting.
- Click the “+” sign to add the new callback URL from the plugin settings. The format will look something like:
https://mystore.com/?wc-api=auth&done=paypal
but may be different. Please refer to the plugin settings for the correct URL.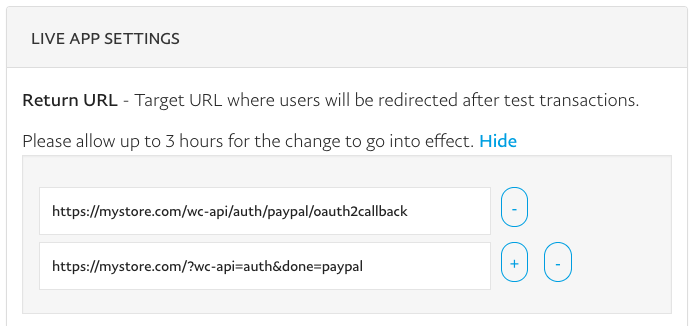
PayPal: New URL added - Save your application settings. You’re done!
- Click “Manage Clients” at the top.
- Click “Manage” for the application for your store’s social login.
- Click on the “Security” tab.
- Add the new callback URL from the plugin settings under “Valid redirect URIs”. The format will look something like:
https://mystore.com/?wc-api=auth&done=instagram
but may be different. Please refer to the plugin settings for the correct URL.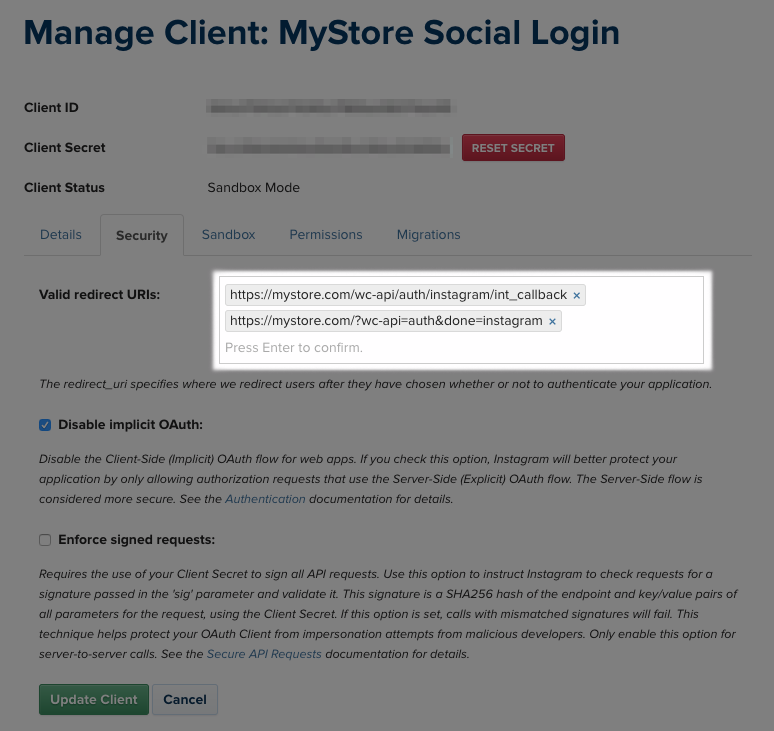
Instagram: New URL added - Save your application settings. You’re done!
Update Plugin Settings
↑ Back to top
All done here? You can read up on creating new social login apps, or go back to the main documentation.
