Step by step guide to set up membership plans on your stores using WooCommerce Membership plugin.
Installation
↑ Back to top- Download the .zip file from your WooCommerce account.
- Go to: WordPress Admin > Plugins > Add New and Upload Plugin the file you have downloaded.
- Install Now and Activate.
Setup and Configuration
↑ Back to topAfter activation of the WooCommerce Membership extension, “Ultimate Membership” will be displayed within the WordPress admin panel. Click to view settings and get started.
Dashboard of WooCommerce Membership plugin:
↑ Back to top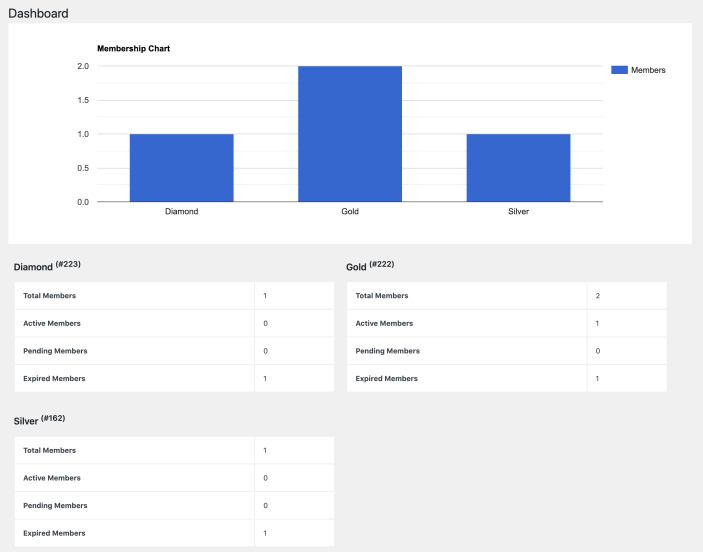
Creating new membership plan:
↑ Back to top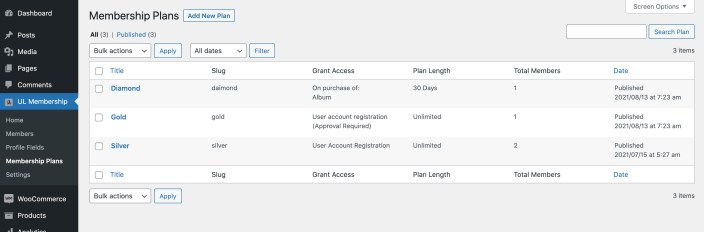 Click on “Add New” to new membership plans. While creating new membership plans, you can customize the plans with the following options:
- Plan name and access requirement
- Content restrictions (Posts, pages, tags, post types)
- Products & category restrictions (Hide entire product, prices or add to cart)
- Discounts (fixed or percentage)
- Members Area (What members would see in my account page)
- Emails (Membership status email alerts)
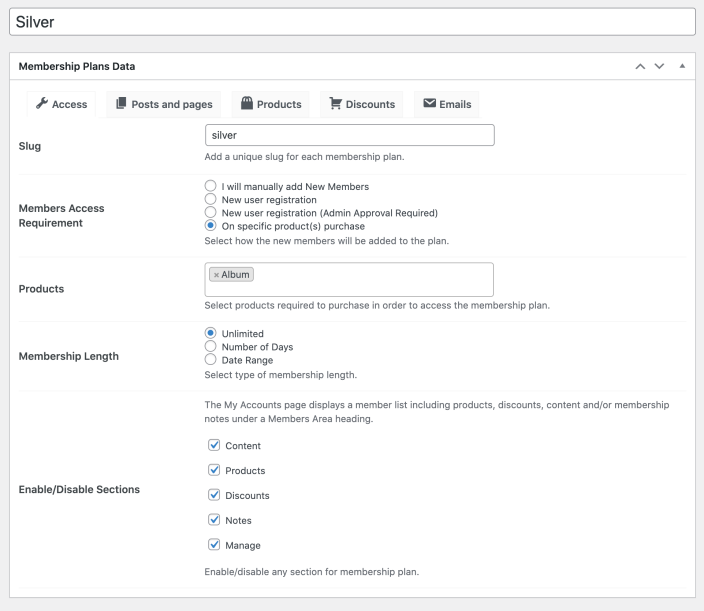
Step 1: Plan access requirements:
↑ Back to top- Plan name
- Slug
- Grant access on
- Manually Assignment
- User Account Registration
- User Account Registration (Manual Validation)
- Product Purchase
- Membership length
- Unlimited
- Date range
- Number of days
- Members Area
- Content – displays all posts, pages and additional content.
- Products – displays purchasable and viewable products.
- Discounts – lists all products associated with membership-only discounts.
- Notes – displays all notes sent to the customer and notified via email (excluding internal membership notes).
- Manage – displays membership details (i.e. action links and status).
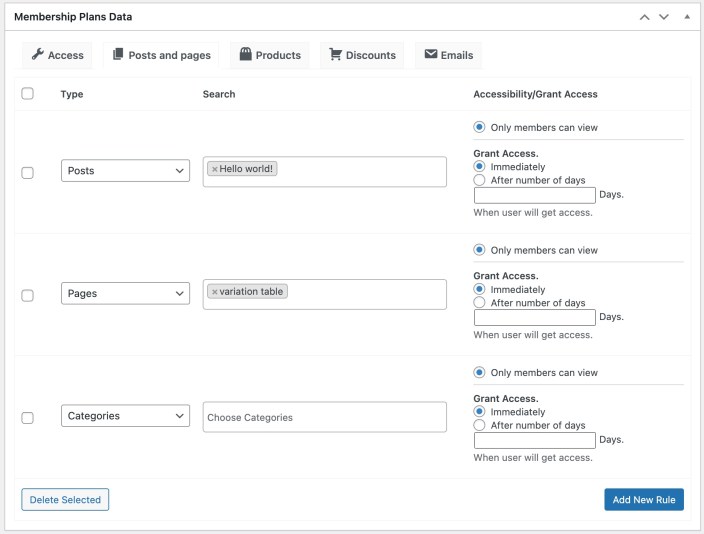
Content restrictions:
↑ Back to top- Only members can view (The selected content will be made available to members of this plan)
- Grant access
- Immediately (Immediately grant access to content
- After number of days (Grant access to content after X days)
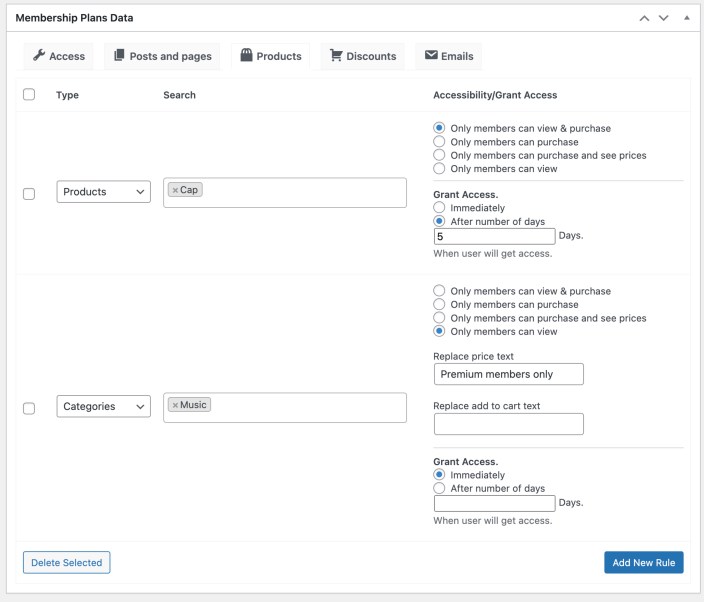
Product & category restrictions:
↑ Back to top- Only members can view & purchase: Non-members wont be able to see the product or purchase it.
- Only members can purchase: Non-members are able to see products and its prices but the add to cart button will not be available. Members will be able to see and purchase the product.
- Only members can purchase and see prices: Non-members are able to see the product but not the price and add to cart button. Only members will be able to see prices and purchase the product.
- Only members can view: Non-members cannot see product. Whereas, members will be able to view the product but cannot see prices and add to cart button.
-
- Immediately (Immediately grant access to content
- After number of days (Grant access to content after X days)
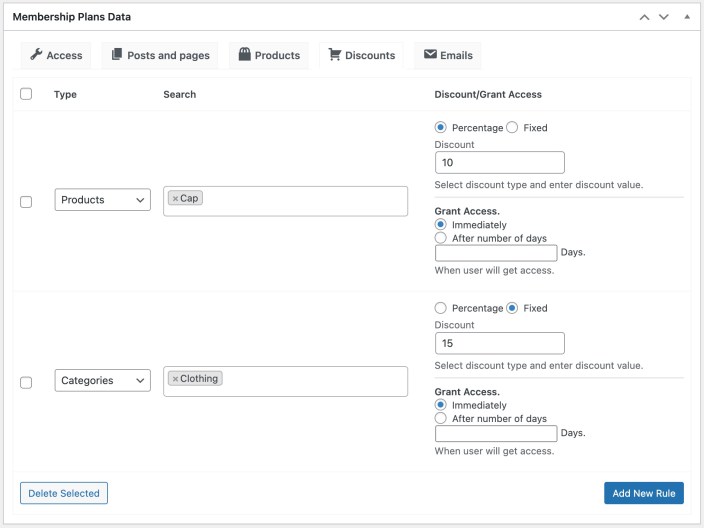
Discounts:
↑ Back to top- Immediately (Immediately offer discount)
- After number of days (Offer discount after X days)
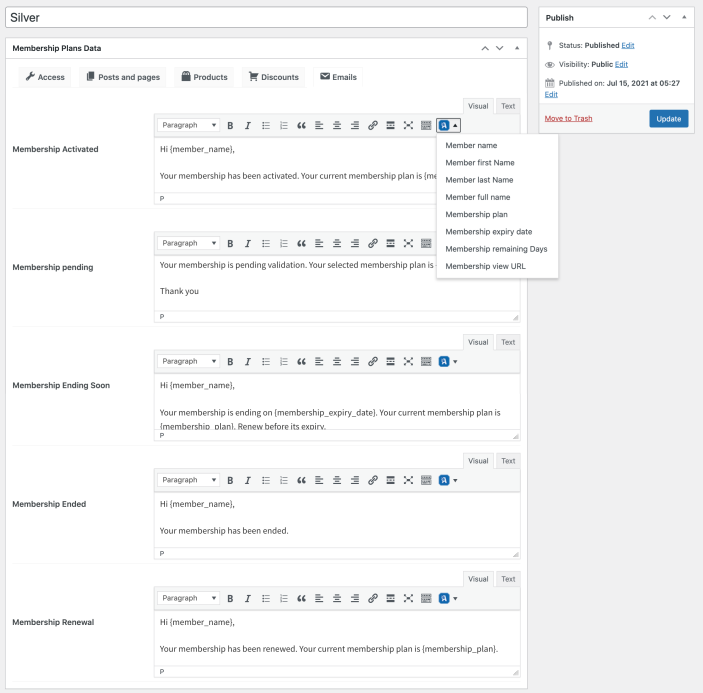
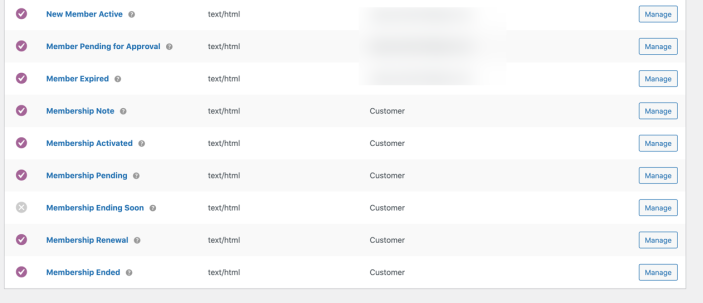
Emails:
↑ Back to top- Activated
- Pending
- Ending Soon
- Ended
- Renewal
- Member first name
- Member last name
- Member full name
- Membership plan
- Membership expiry date
- Membership remaining days
- Membership view URL
 In order to customize the email subject and other details, please go to WooCommerce > Settings > Emails.
Managing members:
↑ Back to top- Add or editing members
- Basic membership detail
- Member profile fields
- Member notes
Adding or editing member:
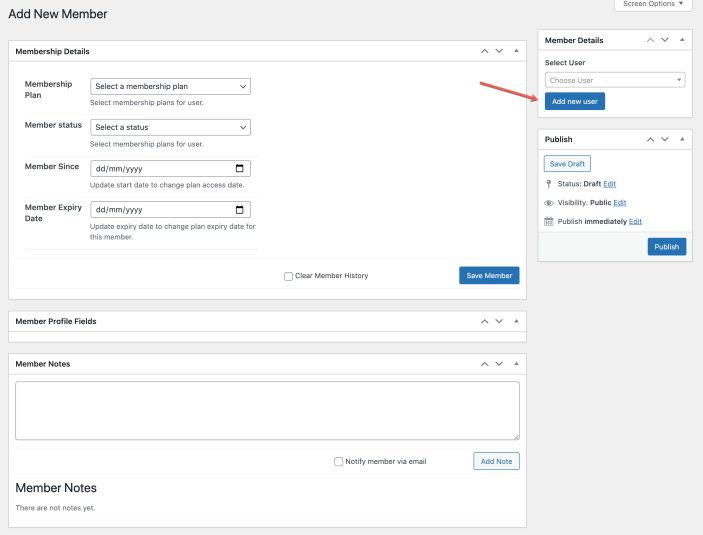
↑ Back to top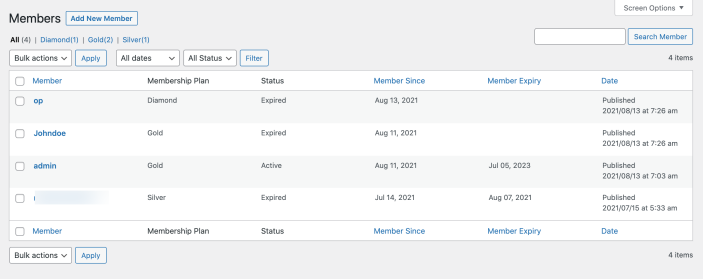 Adding new members:
In order to add new member, click on “Add new.” You can search user by name or email. The member must be an existing registered user. If not registered, you will need to add new member as a registered user first. You can do so by clicking the “Add new user” button.
Adding new members:
In order to add new member, click on “Add new.” You can search user by name or email. The member must be an existing registered user. If not registered, you will need to add new member as a registered user first. You can do so by clicking the “Add new user” button.
Basic membership detail
↑ Back to top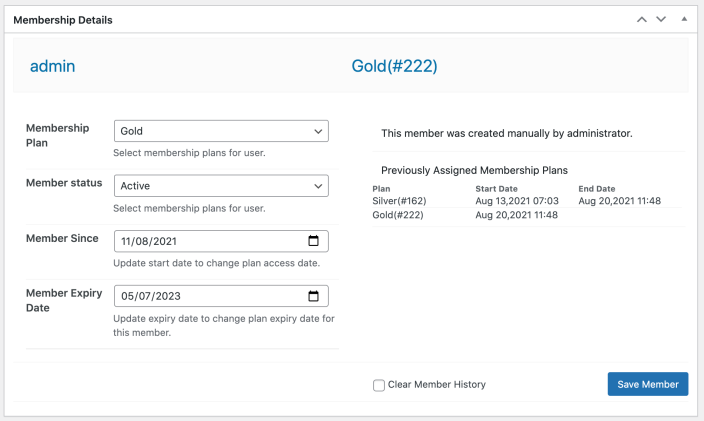
Member profile fields
↑ Back to top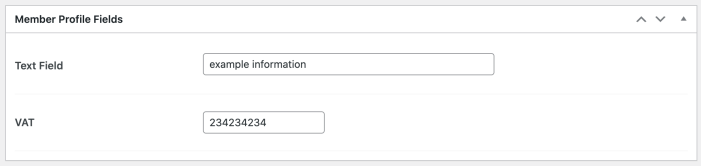
Member notes
↑ Back to top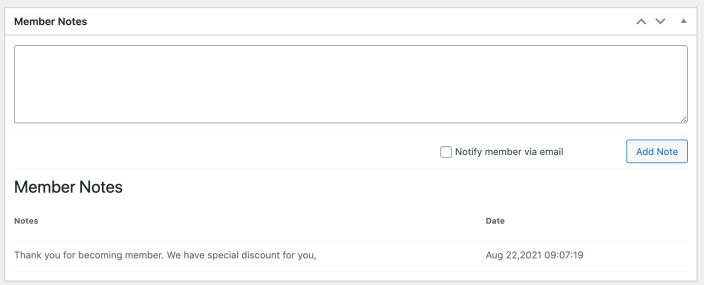
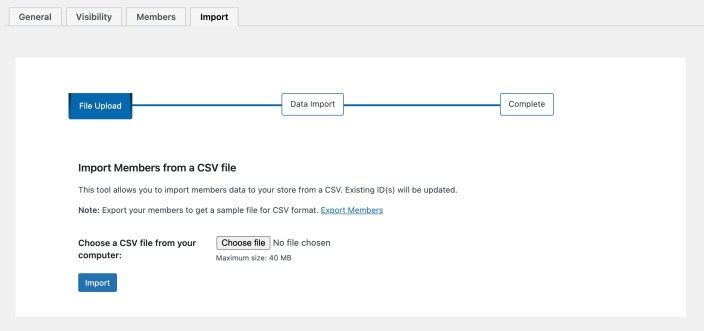
Import / Export Members
↑ Back to top- member id
- user name
- member email
- member plan
- member status
- member since
- member expiry date
- membership granted date
- member notes
Custom Profile Fields
↑ Back to top- Adding custom fields
- Field types (9 included)
- Fields dependable to membership plan
- Field display control (Admin/User)
- Field placement (Checkout, Registration, My Account & Admin only)

Adding custom field:
↑ Back to top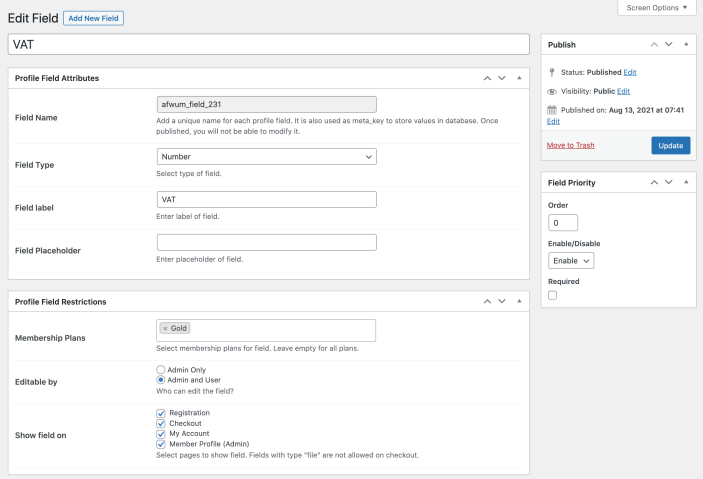
Field types (9 included)
↑ Back to top- Text, Text area
- Email, Number
- File upload
- Dropdown, multi-select
- Radio and checkbox

Fields dependable to membership plan
↑ Back to top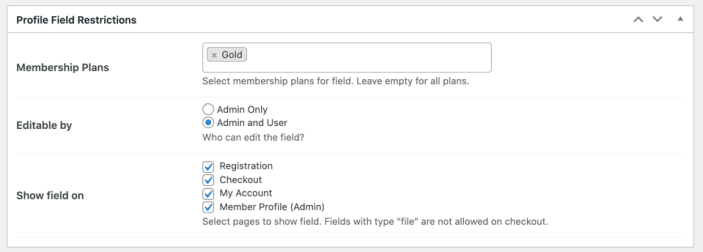 Only plans that are linked to user account registration will be able to see those fields on the registration form. If there are multiple registration plans on account creation and account creation with manual approval, then both plans will appear as a dropdown on the registration form and the fields will be displayed based on the selected plan.
If you want to show fields to all types of users during registration, the dependable fields section can be left blank. Please note the that fields will only appear on the registration form if you have created a plan on account creation. On checkout, the field will appear if the user is a member of any plan.
Only plans that are linked to user account registration will be able to see those fields on the registration form. If there are multiple registration plans on account creation and account creation with manual approval, then both plans will appear as a dropdown on the registration form and the fields will be displayed based on the selected plan.
If you want to show fields to all types of users during registration, the dependable fields section can be left blank. Please note the that fields will only appear on the registration form if you have created a plan on account creation. On checkout, the field will appear if the user is a member of any plan.
Field display control (Admin/User)
↑ Back to topField Placement (Checkout, Registration, My Account & Admin only)
↑ Back to top- Checkout (displayed only under the new membership fields section on checkout page)
- Registration (displayed on registration form)
- My Account (displayed under account details tab in My Account page)
- Admin Only (this field is for admin use only and will not appear anywhere on frontend for customer)
Configuration Settings:
↑ Back to top- General settings (exclude on sale items and redirects after login/signup)
- Visibility settings (exclude on sale items from discount, restriction modes)
- Messages settings (blog post, pages, products and discounts)
- Members settings (GDPR, force membership)
General settings
↑ Back to top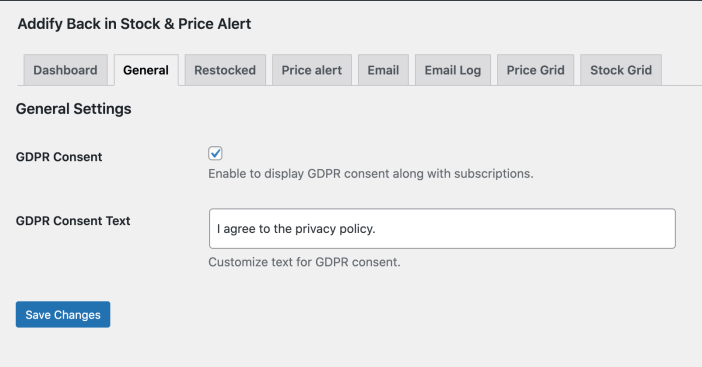
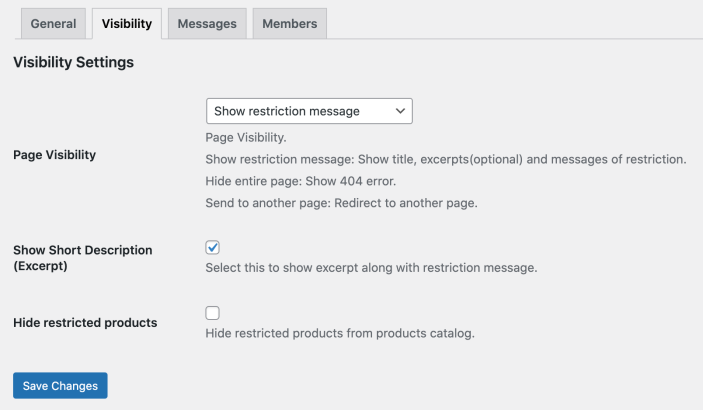
Visibility settings
↑ Back to top- Hide entire page (shows 404 when non-member try to access the restricted page)
- Show restriction message (shows page title, excerpts (optional) and restriction messages)
- Send to another (redirect to another page or URL)
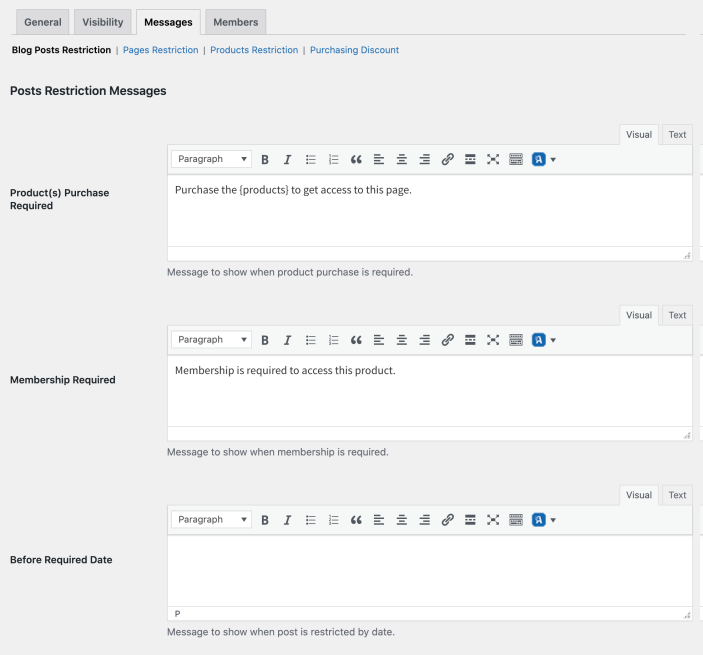
Messages settings
↑ Back to top- Product(s) Purchase Required to access the post, page, product or get discount
- Membership Required to access the post, page, product or get discount
- Before Required Date the post, page, product or discount will be available after X days
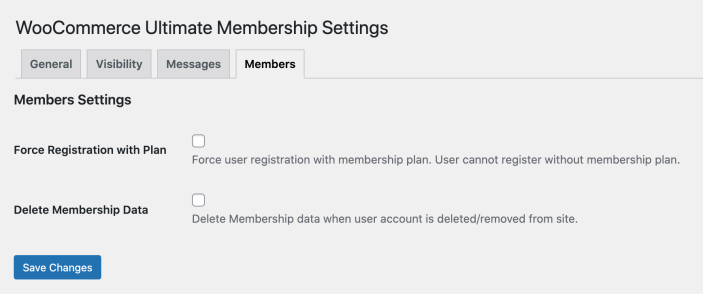
Members settings
↑ Back to top- Force Registration with Plan (if selected, the plans dropdown on the registration form will display “no plan” and the user will be forced to select a plan)
- Delete Membership Data (GDPR – delete membership data when user account is deleted/removed from site)