Installation
↑ Back to top- Download the .zip file from your WooCommerce account.
- Go to: WordPress Admin > Plugins > Add New and Upload Plugin for the file you have downloaded.
- Click Install Now and Activate.
Setup and Configuration
↑ Back to topAfter activation of the Custom Fields for WooCommerce extension, you can find the “Custom Fields” menu under WooCommerce menu in WP Admin. Click to view settings.
Creating New Field:
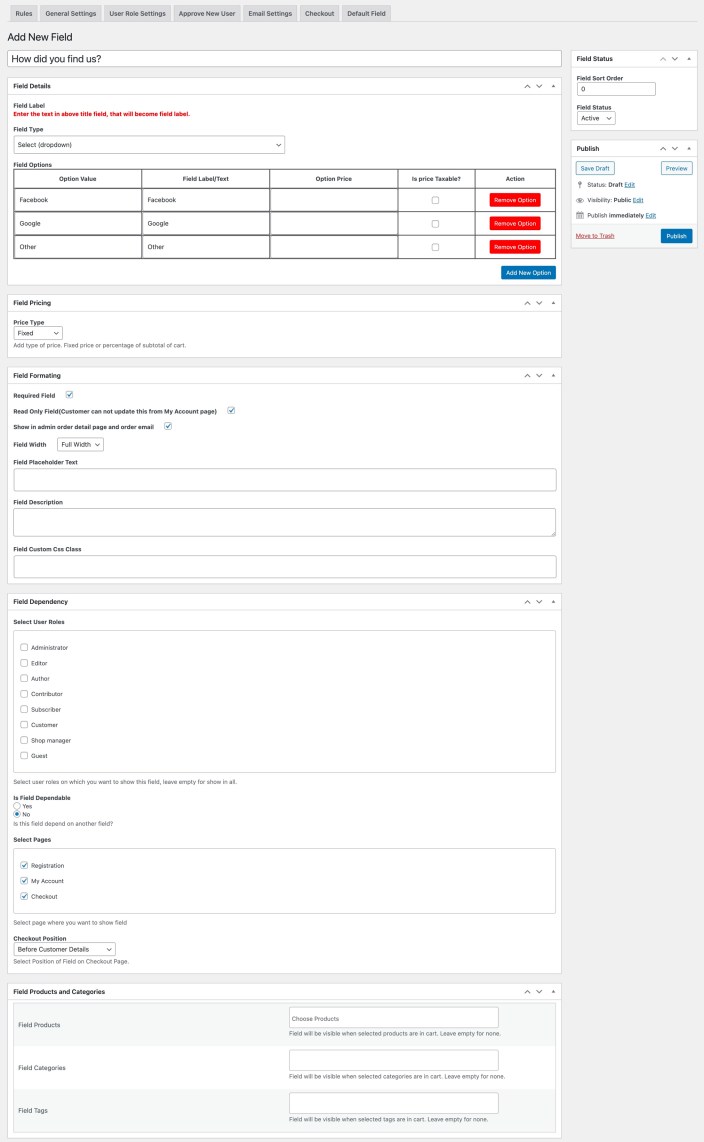
↑ Back to top- Add field title (this will be used on frontend as field title).
- Select field type and add options.
- Add checkout field price and choose to set price as fixed or percentage order amount
- Make field required or keep it optional
- Make field non-editable from My Account (once submitted during registration or checkout, it won’t be editable from the My Account page later on).
- Show field in order detail page and order email.
- Choose field width (full or half).
- Add field placeholder and description.
- Option to add custom CSS for field.
- Option to make fields dependent to any user role (leave empty for all users).
- Choose field dependency (select respective field name and select option to make it dependable).
- Choose where Checkout, Registration Form and My Account fields are displayed (these option will appear if the field is not dependable. If dependable, the field will display where the main field appears).
- Assign field to specific products, categories and product tags to trigger field on checkout page only when the selected product is in cart.
- Before or After Customer Details
- Before or After Billing Form
- Before or After Shipping Form
- Before Order Review Heading
- Before or After Order Review
- Before or After Order Notes
- Before or After Terms and Conditions
- Before or After Order Submit Button
View All Fields:
↑ Back to top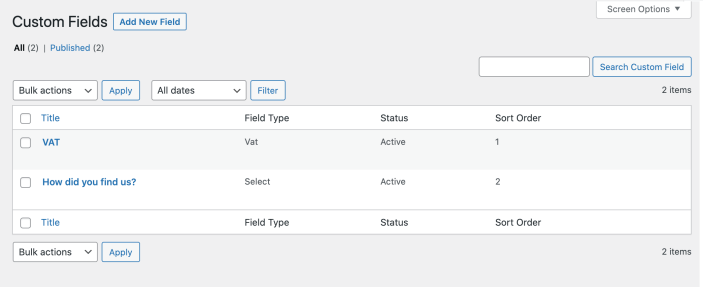
Manage Default Checkout Fields:
↑ Back to topEditing billing and shipping fields labels
↑ Back to top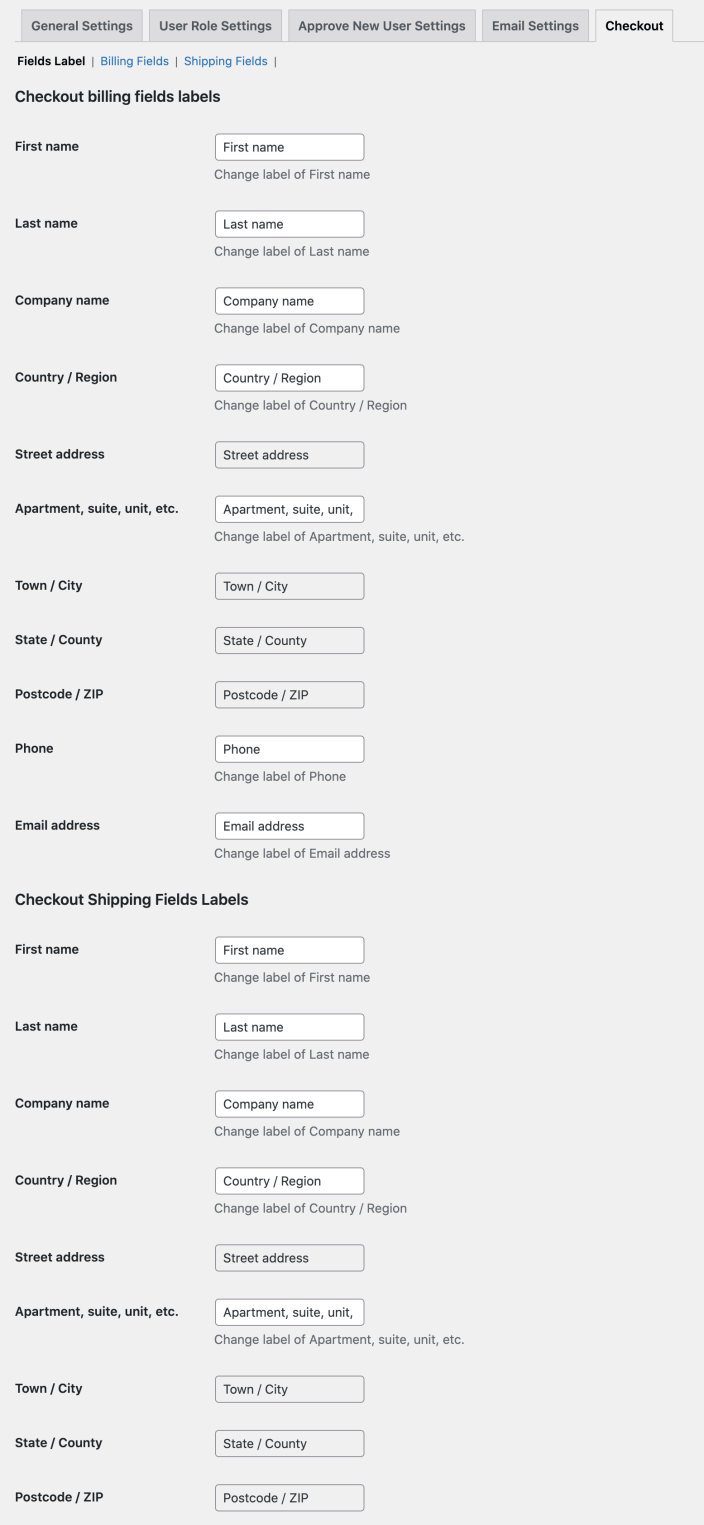
Show/Hide billing and shipping fields by user roles:
↑ Back to top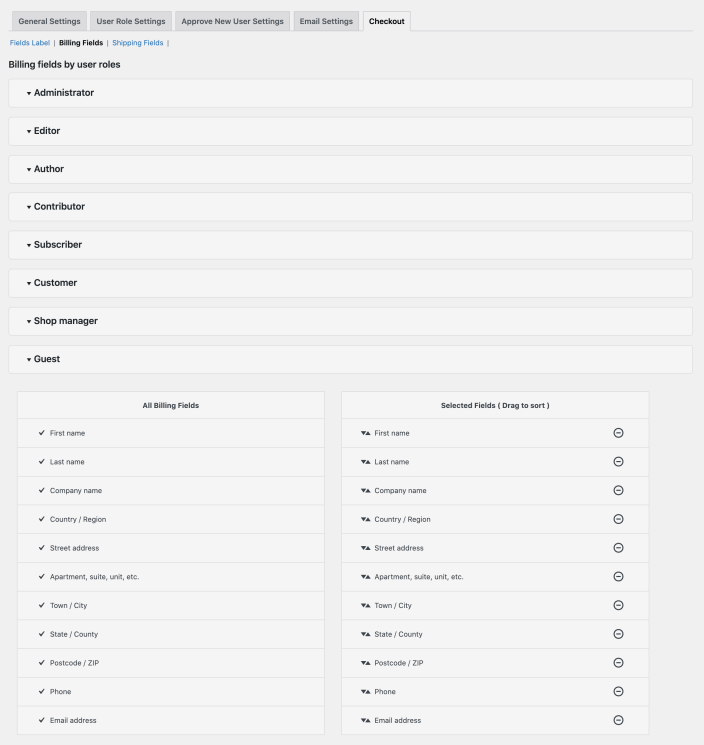
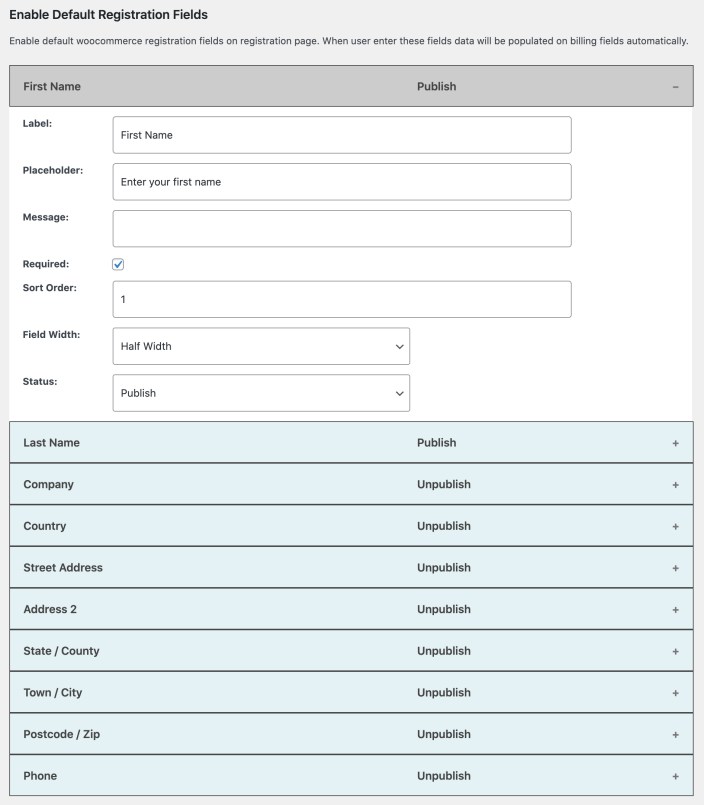
Adding Default Billing Fields to Registration Form:
↑ Back to top- Field label
- Place holder
- Message/Description
- Required/Optional
- Sort Order (will always be displayed above custom fields – see “Fields Sortings” section below for more details)
- Field Width
- Field Status
Show User Roles dropdown on Registration:
↑ Back to top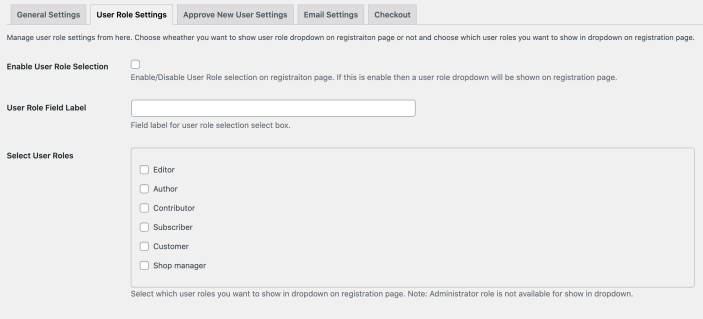
New user approval and notifications:
↑ Back to top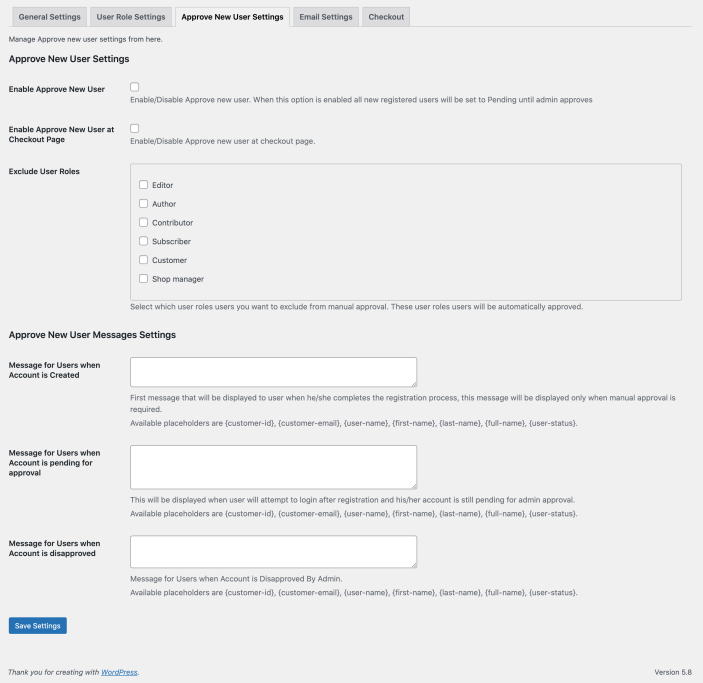 Email Configurations:
Within Custom Fields > Settings, you can customize the body text for the following emails:
Email Configurations:
Within Custom Fields > Settings, you can customize the body text for the following emails:
- Admin email when new user registers and awaiting approval
- Welcome/Pending email when user registers and account is awaiting validation
- User account approved
- User account declined
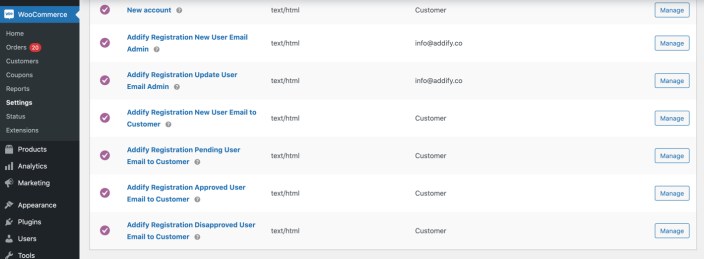
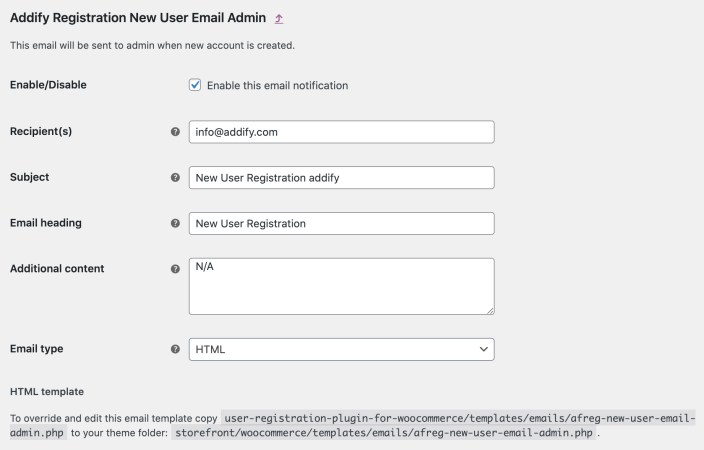 If you are not using the user validation/approval system, you can disable the above emails.
Note: the default “new account” email will automatically include the custom fields data filled during registration.
If you are not using the user validation/approval system, you can disable the above emails.
Note: the default “new account” email will automatically include the custom fields data filled during registration.
Known incompatibilities & technical limitations:
↑ Back to topFields Sorting on Registration Form:
↑ Back to top- The default registration fields are always displayed first – due to technical limitations, you cannot sort the new custom fields within the default fields on registration form
- The User roles dropdown is always displayed at the end of default fields.
- The new custom fields are displayed under User roles dropdown – you can easily sort these custom fields.