Exit Intent Coupons for WooCommerce allows you to offer coupons to your logged-in users(members) when they try to exit the site with products in their cart.
Installation
↑ Back to top- Download the .zip file from your WooCommerce account.
- Go to: WordPress Admin > Plugins > Add New and Upload Plugin with the file you downloaded with Choose File.
- Install Now and Activate the extension.
More information at: Install and Activate Plugins/Extensions.
Setup and Configuration
↑ Back to topTo access the plugin settings navigate to Dashboard > Exit Intent Coupons > Settings.
General
↑ Back to top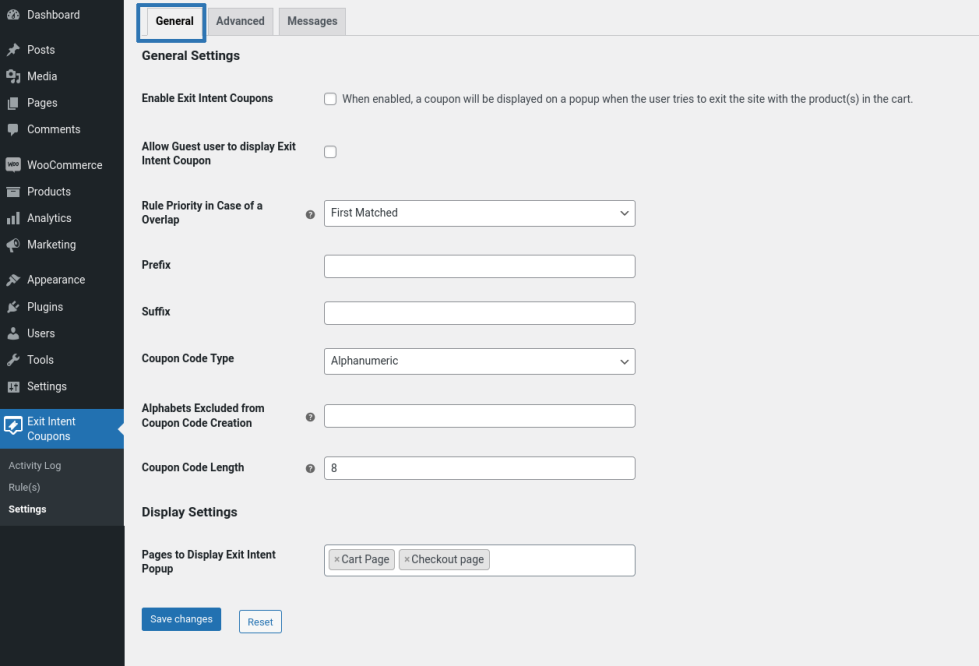
General Settings
- If you want to offer coupons to your logged-in users(members) when they try to exit the site with products in the cart, enable the “Enable Exit Intent Coupons” checkbox.
- If you want to offer coupons to Guest users when they try to exit the site with products in the cart, enable the “Allow Guest user to display Exit Intent Coupon” checkbox.
- When the user is eligible for two or more rules, then based on the value set in the “Rule Priority in Case of a Overlap” option, the rule to be applied for the user will be decided.
- You can input the Prefix and Suffix for the coupons generated in the “Prefix” and “Suffix” option.
- You can choose the type of coupon to be generated in the “Coupon Code Type” option.
- If you want certain alphabets to be excluded during coupon creation, then you can input those alphabets separated by a comma in the “Alphabets Excluded from Coupon Code Creation” option.
- You can customize the length of the coupon code in the “Coupon Code Length” option. We recommend you set the coupon code length to more than 8 to avoid coupon duplication.
Display Settings
By Default, the Exit Intent popup will be displayed to the user on the cart page and checkout page, if you want to display the popup on the product page, you can customize it in the “Pages to Display the Exit Intent Popup” option.
Advanced
↑ Back to top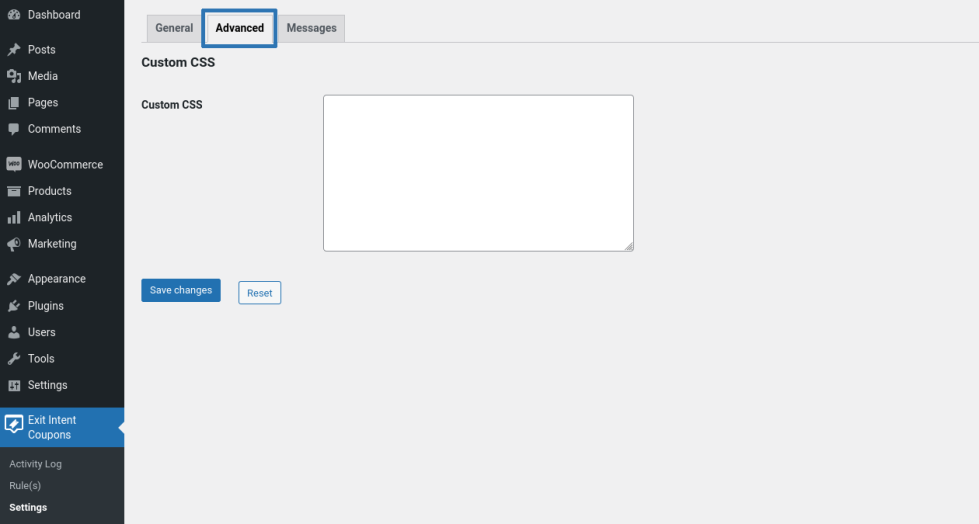
If you want to customize the popup using CSS, you can do so by using the custom CSS option.
Messages
↑ Back to top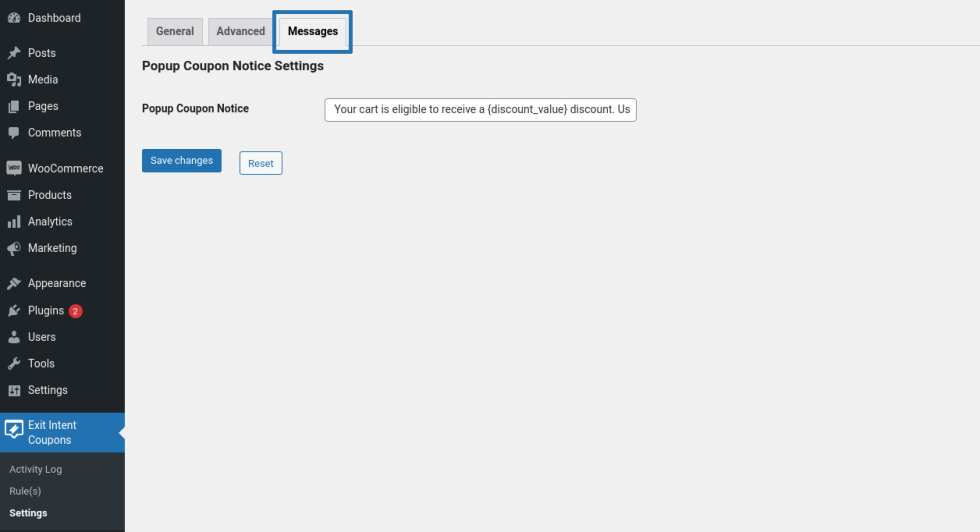
You can customize the notice displayed to the user on the cart and checkout page once the popup has been closed.
Rule Configuration
↑ Back to top
Copy and Paste Text Coupon – Rule Configuration
↑ Back to topGeneral
- To create a new rule, click the “Add New Rule” button.
- Fill in the title for the rule.
- In the “Rule Valid From” option, select the date from which the rule should be valid.
- In the “Rule Valid To” option, select the date till which the rule should be valid.
- In the “Coupon Display Type” option, select the value as “Text Coupon”.
- In the “Coupon Apply Type” option, select the value as “Copy and Paste”.
- If you want the coupon code to be a random code, select “Random” in the “Coupon Name Type” option. If you want the coupon code name to be as per your wish, select “Static” in the “Coupon Name Type” option.
- In the “Coupon Name” field, set the coupon name you want to be created.
- In the “Discount Type” option, select the discount type and in the “Discount Value” option, set the discount value.
- In the “Order Usage Count”, input the number of orders for which the rule should be valid.
- In the “Per User Usage Count”, input the number of orders for which the rule should be valid for each user.
Criteria
- To create a Criteria, click the “Add Rule” button.
- Configure the Criteria based on your preferences and needs.
- You can create a Criteria with a single condition or you can create a Criteria with multiple conditions.
- To create a Criteria with multiple conditions, click the Add button. When multiple conditions are configured, your customers match all the conditions within the Criteria to be eligible for a Rule.
Example
Customer’s cart must contain Product A and the Cart Sub Total should be more than $100.
- You can also create 2 or more unique sets of Criteria for a Rule.
- When 2 or more unique sets of criteria are configured, the customer only needs to satisfy one Criteria. To create a new set of Criteria within the Rule, click the Add Rule button.
Example
Customer’s cart must contain Product A and the cart subtotal should be more than $100.
Or
Customer’s cart must contain Product A and the previous purchase history should be more than $500.
Templates
- You can choose the Template for each Rule separately.
- By default, Template 1 will be chosen as the default template. If you want to change the template of a Rule, click on the template which you want to be selected as the template. You will be presented with a Confirmation dialog to save the design and content changes that were made to the current template.
- Once you click Ok, the Rule will be switched to the new Template.
- Each Template has its own set of content fields and design fields. So, if you make any changes in the Design Tab and Content Tab, the changes will only affect only the currently selected template.
- You can also switch between templates in a Rule.
Design
You can customize the color of the elements presented in the Rule.
Content
You can customize the content presented in the Rule.
Apply By Click Text Coupon – Rule Configuration
↑ Back to topGeneral
- To create a new rule, click the “Add New Rule” button.
- Fill in the title for the rule.
- In the “Rule Valid From” option, select the date from which the rule should be valid.
- In the “Rule Valid To” option, select the date till which the rule should be valid.
- In the “Coupon Display Type” option, select the value as “Text Coupon”.
- In the “Coupon Apply Type” option, select the value as “Apply by Click”.
- If you want the coupon code to be a random code, select “Random” in the “Coupon Name Type” option. If you want the coupon code name to be as per your wish, select “Static” in the “Coupon Name Type” option.
- In the “Coupon Name” field, set the coupon name you want to be created.
- In the “Discount Type” option, select the discount type and in the “Discount Value” option, set the discount value.
- In the “Order Usage Count”, input the number of orders for which the rule should be valid.
- In the “Per User Usage Count”, input the number of orders for which the rule should be valid for each user.
Criteria
- To create a Criteria, click the “Add Rule” button.
- Configure the Criteria based on your preferences and needs.
- You can create a Criteria with a single condition or you can create a Criteria with multiple conditions.
- To create a Criteria with multiple conditions, click the Add button. When multiple conditions are configured, your customers match all the conditions within the Criteria to be eligible for a Rule.
Example:
Customer’s cart must contain Product A and the Cart Sub Total should be more than $100.
- You can also create 2 or more unique sets of Criteria for a Rule.
- When 2 or more unique sets of criteria are configured, the customer only needs to satisfy one Criteria. To create a new set of Criteria within the Rule, click the Add Rule button.
Example
Customer’s cart must contain Product A and the cart subtotal should be more than $100.
Or
Customer’s cart must contain Product A and the previous purchase history should be more than $500.
Templates
- You can choose the Template for each Rule separately.
- By default, Template 1 will be chosen as the default template. If you want to change the template of a Rule, click on the template which you want to be selected as the template. You will be presented with a Confirmation dialog to save the design and content changes that were made to the current template.
- Once you click Ok, the Rule will be switched to the new Template.
- Each Template has its own set of content fields and design fields. So, if you make any changes in the Design Tab and Content Tab, the changes will only affect only the currently selected template.
- You can also switch between templates in a Rule.
Design
You can customize the color of the elements presented in the Rule.
Content
You can customize the content presented in the Rule.
Image Coupon – Rule Configuration
↑ Back to topGeneral
- To create a new rule, click the “Add New Rule” button.
- Fill in the title for the rule.
- In the “Rule Valid From” option, select the date from which the rule should be valid.
- In the “Rule Valid To” option, select the date till which the rule should be valid.
- In the “Coupon Display Type” option, select the value as “Image Coupon”.
- In the “Upload File” option, you can upload the image which has to be displayed as the popup. Please make sure to include the coupon name in the image.
- In the “Coupon Name” field, set the coupon name you want to be created. Please make sure that the coupon name entered here matches the name in the image.
- In the “Discount Type” option, select the discount type and in the “Discount Value” option, set the discount value.
- In the “Order Usage Count”, input the number of orders for which the rule should be valid.
- In the “Per User Usage Count”, input the number of orders for which the rule should be valid for each user.
Criteria
- To create a Criteria, click the “Add Rule” button.
- Configure the Criteria based on your preferences and needs.
- You can create a Criteria with a single condition or you can create a Criteria with multiple conditions.
- To create a Criteria with multiple conditions, click the Add button. When multiple conditions are configured, your customers match all the conditions within the Criteria to be eligible for a Rule.
Example
Customer’s cart must contain Product A and the Cart Sub Total should be more than $100.
- You can also create 2 or more unique sets of Criteria for a Rule.
- When 2 or more unique sets of criteria are configured, the customer only needs to satisfy one Criteria. To create a new set of Criteria within the Rule, click the Add Rule button.
Example
Customer’s cart must contain Product A and the cart subtotal should be more than $100.
Or
Customer’s cart must contain Product A and the previous purchase history should be more than $500.
Usage
↑ Back to topCopy and Paste Text Coupon – Usage
↑ Back to top- User adds few products to the cart and they proceed to the cart page.
- On the cart page, they try to exit the site by hovering over the address bar.
- A popup will be displayed to them. This popup will have the following info,
- Coupon Value
- Coupon
- Copy to Clipboard button
- Your logged-in users(members) can copy the coupon to the clipboard by clicking the “Copy to Clipboard” button. Once the button is clicked, the popup will be hidden and a notice with the coupon code will be displayed on the cart and checkout page. The coupon will be available for usage till the user completes the purchase/clears the cart.
- Every time a user is presented with an Exit Intent Coupon, that will be recorded in the Activity log. Similarly, when the user uses the coupon to complete the order, that will also be recorded. The activity log can be accessed from Exit Intent Coupons > Activity Log. The activity log will have the following information,
- Visit Count
- Usage Count
- Conversion Ratio
- Revenue Earned by Presenting Coupons
Apply By Click Text Coupon – Usage
↑ Back to top- User adds few products to the cart and they proceed to the cart page.
- On the cart page, they try to exit the site by hovering over the address bar.
- A popup will be displayed to them. This popup will have the following info,
- Coupon Value
- Coupon
- Apply Coupon button
- Your logged-in users(members) can apply the coupon to the cart by clicking the “Apply Coupon” button. Once the button is clicked, the coupon will be added to the cart. If your logged-in users(members) choose not to accept the offer and close the popup. The popup will be hidden and a notice with the coupon code will be displayed on the cart and checkout page. The coupon will be available for usage till the user completes the purchase/clears the cart.
- Every time a user is presented with an Exit Intent Coupon, that will be recorded in the Activity log. Similarly, when the user uses the coupon to complete the order, that will also be recorded. The activity log can be accessed from Exit Intent Coupons > Activity Log. The activity log will have the following information,
- Visit Count
- Usage Count
- Conversion Ratio
- Revenue Earned by Presenting Coupons
Image Coupon – Usage
↑ Back to top- User adds few products to the cart and they proceed to the cart page.
- On the cart page, they try to exit the site by hovering over the address bar.
- A popup with the image will be displayed to them.
- Your logged-in users(members) can make use of the coupon name displayed in the image to receive a discount. Once the user closes the popup, the popup will be hidden and a notice with the coupon code will be displayed on the cart and checkout page. The coupon will be available for usage till the user completes the purchase/clears the cart.
- Every time a user is presented with an Exit Intent Coupon, that will be recorded in the Activity log. Similarly, when the user uses the coupon to complete the order, that will also be recorded. The activity log can be accessed from Exit Intent Coupons > Activity Log. The activity log will have the following information,
- Visit Count
- Usage Count
- Conversion Ratio
- Revenue Earned by Presenting Coupons
Translation
↑ Back to topExit Intent Coupons for WooCommerce Plugin is translation ready meaning you can edit the po files by which you can translate the text to any language.
The steps to do the translation are as follows. For eg let us consider translation to French.
- Download and install Poedit
- Open the file exit-intent-coupons-for-woocommerce > languages > exit-intent-coupons-for-woocommerce.pot using Poedit.
- Create a new translation file by clicking Create new translation button.
- Choose the Source text and set its corresponding French text in Translation Text Area.
- Save the changes.
- Save the file name as exit-intent-coupons-for-woocommerce-fr_FR.po.
- If you are using WordPress Version 3.9.13 or below, then in wp-config.php define the WPLANG as French. Syntax is define(‘WPLANG’, ‘fr_FR’);
- If you are using WordPress Version 4.0 or above, then go to WordPress dashboard > Settings > General and select the Site Language as French.