Overview
↑ Back to top- Summarized Mode (recommended): Invoices are created daily to record accumulated sales, organized by tax amount, currency, and sales type. This is the recommended mode, especially for larger stores.
- Detailed Mode: Invoices are generated automatically when a WooCommerce order is placed, creating a corresponding invoice along with a contact for that user. You can also synchronize payments between FreeAgent invoices and WooCommerce orders.
Installation
↑ Back to top- Download the extension from your dashboard
- Go to Plugins > Add New > Upload and select the ZIP file you just downloaded
- Click Install Now and Activate
- Setup the extension how you prefer by visiting WooCommerce > Settings > Integration (see next section on configuration)
Setup and Configuration
↑ Back to top- Click on the My Apps link on the top of the page.
- Click the Create New App button on the top right.
- Enter a meaningful name for your app along with a description if necessary (these can be anything but will enable you to identify them if, for example, you are using multiple apps for different connections).
- The OAuth redirect URIs field will need the address to your websites connection page. This can be found on the settings page in the WordPress admin area (WooCommerce > Settings > Integrations > FreeAgent), labelled OAuth redirect URI. The existing URIs within this field can be left in place (these are used for testing purposes) and you can add your own URI on a new line. It will not cause issues if you delete the existing URIs.
- Finish the process by clicking Create App.
- On the next screen you will be presented with your application credentials. Copy both the OAuth Identifier and OAuth Secret over to your FreeAgent settings page in the WordPress admin and click Save Changes. This will store these values in your database.
- Once the page has reloaded, click Connect to FreeAgent and proceed to sign in and approve your new application.
Settings Screen
↑ Back to topConnection Options
↑ Back to top- Connect FreeAgent: Asks you to log in to your FreeAgent account and allow WooCommerce access.
- Disconnect FreeAgent: Disconnects the current FreeAgent account, stopping any future contacts/invoices from being created and disabling synchronization until reconnected.
Invoice Options
↑ Back to top- Create Invoices (detailed mode only): Automatically create invoices when orders are created. If unchecked, invoices can only be manually created on the order screen.
- Send Invoices (detailed mode only): Sends created invoices to the contact via FreeAgent.
- Mark Invoices as sent: Mark invoices as “sent” (open) rather than “Draft” when created.
- FreeAgent User Email Address: The “from” email address for sending emails from FreeAgent (required if “Send Invoices” is checked).
- Custom Invoice Reference: Designate a custom reference for FreeAgent invoices, which must include the order ID somewhere in the reference.
- Set Accounting Category for Invoices: Select the income category to be used for invoices (defaults to “Sales”). Use the “Reload categories” button if you update your categories in FreeAgent and they are not yet reflected here.
- Set Payment Terms in Days: Sets the number of days before an invoice becomes overdue.
- Set Default X Item Type (detailed mode only): Set the item type to appear on the invoice for products, shipping and fees.
- Automatically Apply Payments to Invoices (detailed mode only): Apply manual payments to FreeAgent invoices when order payment is taken in WooCommerce.
- Select Bank Account: Choose which bank account will be used when adding payments to FreeAgent (a bank account and contact named “WooCommerce” will be generated in summarized mode). Use the “Reload bank accounts” button if you update your accounts in FreeAgent and they are not yet reflected here.
- Select Payment Option: If you have payment options setup for your FreeAgent invoices you can set which to use here. If this is not set here or setup properly in your FreeAgent account this will be ignored.
- VAT MOSS (summarized mode only): Mark all products as digital services eligible for VAT MOSS.
Synchronization Options (detailed mode only)
↑ Back to top- Synchronize Automatically: Periodically check FreeAgent invoice statuses and references to ensure they match WooCommerce order data.
- Synchronization Frequency: Determine how often FreeAgent invoices will be synchronized with WooCommerce orders.
- Synchronize Now: Manually run the synchronization process.
Usage
↑ Back to topSummarized Mode
↑ Back to top- Separate invoices for each currency if operating with multi-currency.
- Invoices for all goods and services sold outside the EU, organized by tax rate.
- Invoices for services sold to the EU, VAT marked as “Reverse Charge”.
- Invoices for products marked as “EC VAT MOSS,” organized by billing country and tax rate (Important: invoices will only be created if the tax rate matches a valid option for the billing country in FreeAgent).
Detailed mode
↑ Back to topAutomatically creating invoices
If Create Invoices is set then a new invoice will be created in FreeAgent every time a new order is created. A contact will also be generated using the customer’s details. If Mark Invoices as sent is selected then the invoice status will be updated to “Open” (as per FreeAgent). The invoice status will be shown alongside the order on the Woocommerce > Orders screen: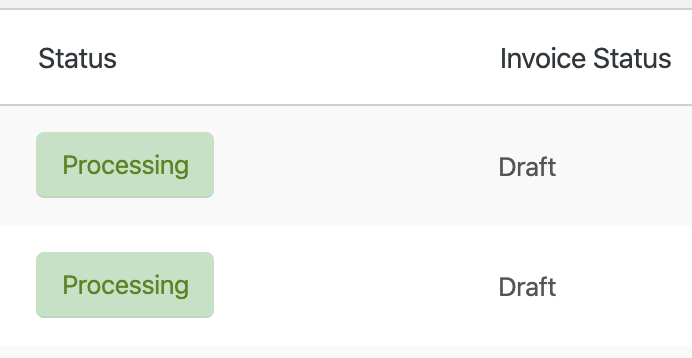 When an order is updated the changes made to any items on the order (along with any additional items/charges) will be reflected in the FreeAgent invoice, provided that it is editable at the time.
Manually creating invoices
If you are not automatically generating invoices, a button for these actions will become available to you on the WooCommerce > Orders screen: Also under Order Actions on the individual order edit screen:

Synchronizing Payments
If Synchronize Automatically is enabled, a manual payment is added to the corresponding FreeAgent invoice, marking it as “Paid” when a WooCommerce order status is updated to processing/completed. A periodic check will ensure WooCommerce order statuses match FreeAgent invoice statuses, updating order status if necessary. Invoice Items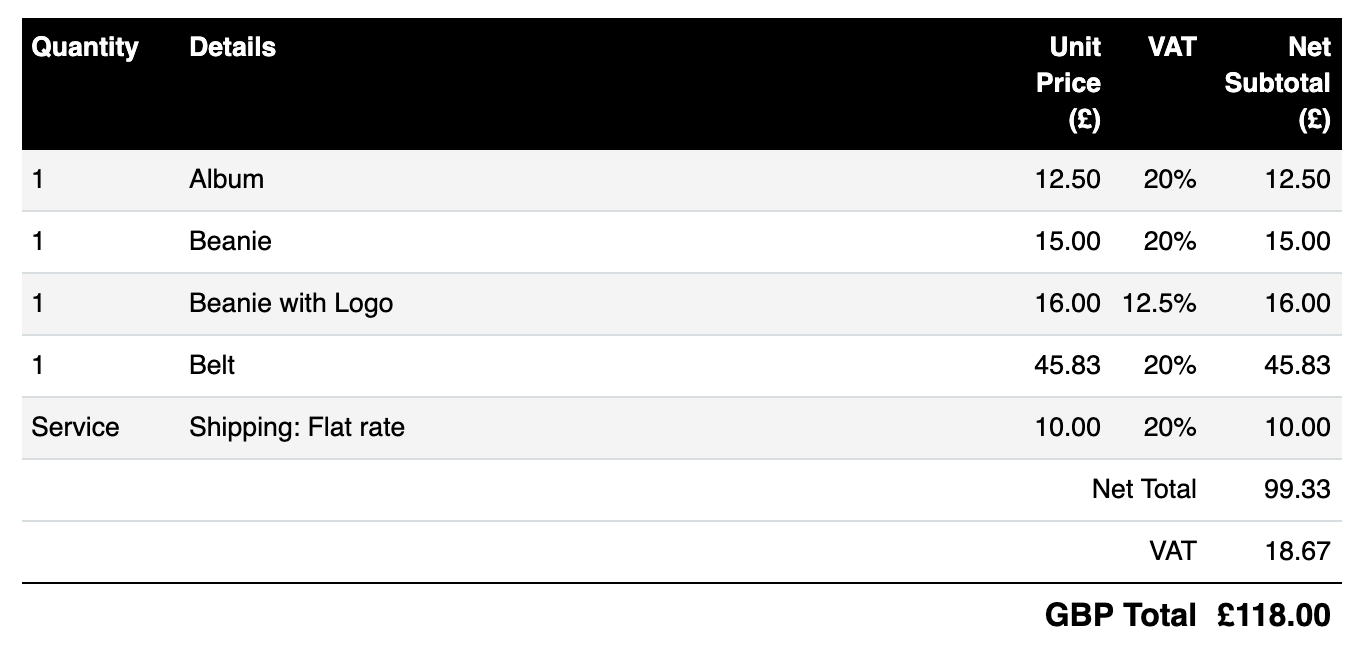 Each order item is added to the invoice as a separate line item with its corresponding tax rate.
FreeAgent Metabox
A metabox is added to the edit order screen for viewing the corresponding FreeAgent invoice and its status (in summarized mode, this links to the daily invoice).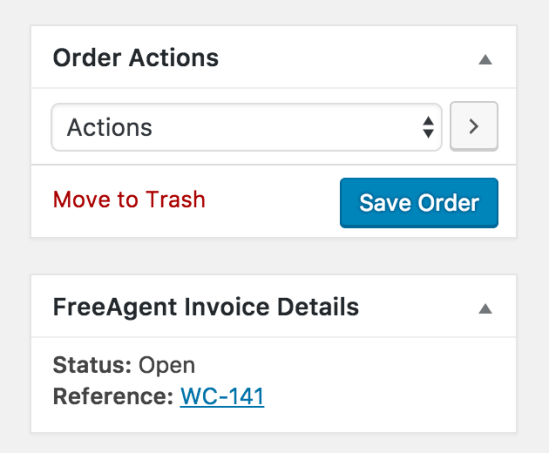
Customization
↑ Back to topNote: This is a Developer level section. If you are unfamiliar with hooks and filters and resolving potential conflicts, select a WooExpert or Developer for assistance. We are unable to provide support for customizations under our Support Policy.
Action Hooks
↑ Back to top- woocommerce_freeagent_invoice_created
- woocommerce_freeagent_invoice_sent
- woocommerce_freeagent_invoice_updated
- woocommerce_freeagent_daily_invoice_created
- woocommerce_freeagent_daily_credit_note_created
Filter Hooks
↑ Back to top- wcfa_allowed_order_status_for_paid_invoice_update
- wcfa_update_order_status_for_paid_invoice
- wcfa_option_when_to_create_invoice
- wcfa_force_add_admin_order_to_invoice
- wcfa_maybe_create_invoice
- woocommerce_freeagent_is_sandbox
- wcfa_invoice_details
- wcfa_customer_billing_country
- wcfa_invoice_reference
- wcfa_invoice_items
- wcfa_invoice_contact_url
- wcfa_invoice_dated_on
- wcfa_invoice_payment_terms_in_days
- wcfa_invoice_currency
- wcfa_invoice_bank_account
- wcfa_invoice_payment_method
- wcfa_invoice_comments
- wcfa_invoice_item_description
- wcfa_invoice_item_quantity
- wcfa_invoice_item_type
- wcfa_invoice_item_price
- wcfa_invoice_category_url_item
- wcfa_invoice_item_tax_rate
- woocommerce_freeagent_order_line_description_tax_rate
- wcfa_summarised_invoice_comments
FAQ
↑ Back to topMy application has disconnected from my FreeAgent account, what can I do?
↑ Back to top- Consider switching to Summarized Mode, since this reduces the number of requests to FreeAgent, helping avoid API rate limit issues (recommended).
- Consider disabling Synchronize Automatically, since this option repeatedly checks open invoices, comparing them to orders until the invoice is marked as paid.
How can I match up my Stripe payments with my invoices/sales entries when they’re a different amount?
↑ Back to top* £106.29 into bank account

* Explain as £108
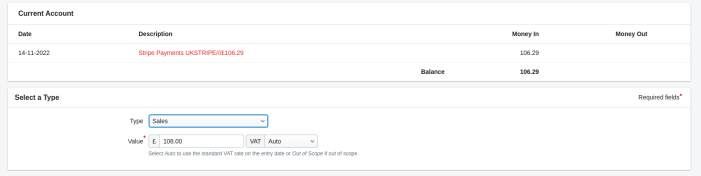
* Explain resulting debit as charges

Please consult a professional before using this method to ensure it’s suitable for your company.
Why are my invoice totals showing 1p different to my order totals?
↑ Back to top- Consider disabling “Rounding”in WooCommerce > Settings > Tax (Round tax at subtotal level, instead of rounding per line).
- Consider manually adding a 1p discount line item to erroneous invoices created in FreeAgent.
- Consider creating a new spending category in FreeAgent called “Rounding Errors”, and set it as N/A for VAT. Then, explain the incoming transactions as the full invoice amount including the rounding error, and explain the leftover penny as “Rounding Errors”
What happens when I migrate to version 1.6?
↑ Back to topWill invoices still get created if I change settings within my FreeAgent account?
↑ Back to topIs there a way to test the integration with a FreeAgent sandbox account?
↑ Back to topadd_filter( 'woocommerce_freeagent_is_sandbox', '__return_true' );You will also need a FreeAgent sandbox account which you can sign up for here. Setting up an application works in the same way as with a live account (the same application credentials can be used).
Can I set a default contact to use for all of my invoices with Detailed mode enabled?
↑ Back to top/**
* Add default contact for invoices
* Here my contact ID that I want to use for all invoices is 123
*
* @param mixed $contact current contact.
* @param int $order_id order ID.
* @return int
*/
function add_default_contact_for_invoices( $contact, $order_id ) {
// Check that the API class is available, return the current contact if not
if ( !class_exists( 'WooCommerce_FreeAgent_Api') ) {
return $contact;
}
// Load the class
$api = new WooCommerce_FreeAgent_Api();
// Return the single contact with given ID (123)
$contact = $api->return_single_contact( 123 );
// You may wish to do some additional error checking here but there is a check in the plugin to ensure the returned object is a valid contact
// Return the API response
return $contact;
}
add_filter( 'wcfa_invoice_contact', 'add_default_contact_for_invoices', 10, 2 );