WooCommerce Gift Registry extension enables your customers to create online registry of the items they want to buy and share with their friends and family to they can buy gifts for them.
Installation
↑ Back to top- Download the .zip file from your WooCommerce account.
- Go to: WordPress Admin > Plugins > Add New and Upload Plugin the file you have downloaded.
- Install Now and Activate.
Setup and Configuration
↑ Back to topAfter activation Gift Registry extension, you can see a new tab in WordPress Admin > WooCommerce > Settings > Gift Registry tab. Click to view settings and get started.
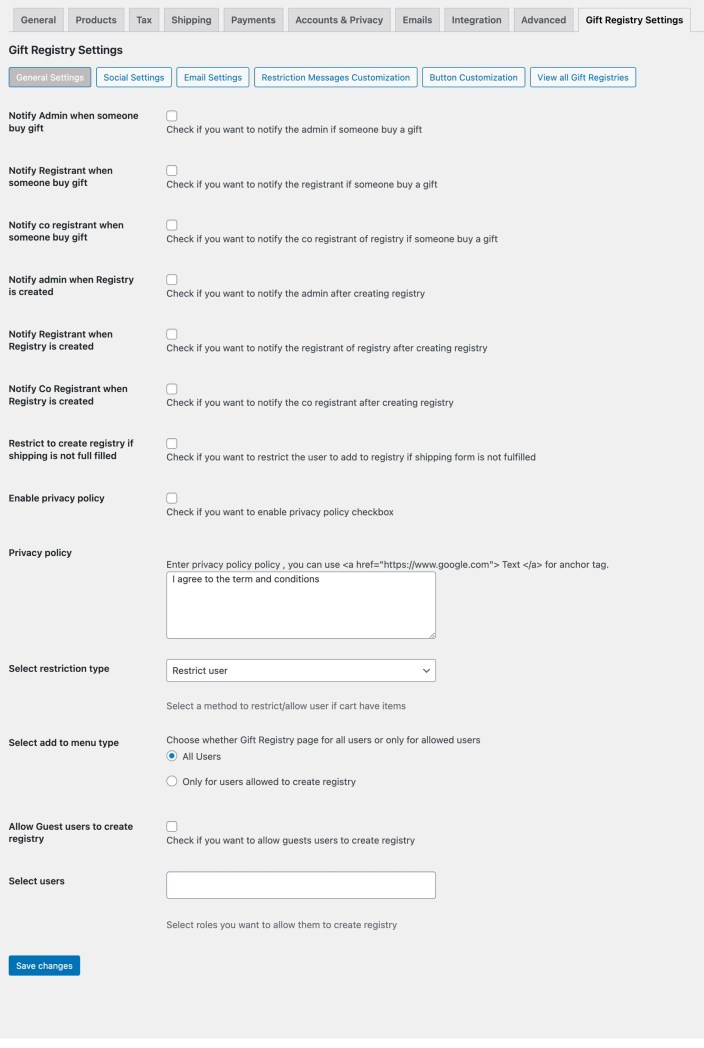
General Settings:
↑ Back to topEnable email notifications:
↑ Back to top- Notify admin when a new registry is created
- Notify Registrant when a new registry is created
- Notify co-registrant when a new registry is created.
- Restrict users from creating a registry if shipping is not fulfilled on the stated address.
- Notify admin, registrant, and co-registrant when someone buys a gift.
Enable privacy policy
↑ Back to top- Enable/Disable privacy policy check box in the gift registry form
- Edit Privacy Policy text box
Enable registry for guests and specific user roles
↑ Back to top- Select if only specific users can create registries.
- Use the pull-down menu to select roles that can create registries
- Allow/disallow guest users to create registries
Other Restrictions:
↑ Back to top- Restrict user from creating a registry if the shipping information is not fulfilled
- Using the “Select Restriction Type” dropdown, you can choose to
- Restrict User from adding other items in the cart once the gift registry item(s) is added in cart.
- Force delivery with registry items (In this option, your customer would be able to add other items along with gift registry item and the entire order will be shipping to the registrant address)
Social Settings:
↑ Back to top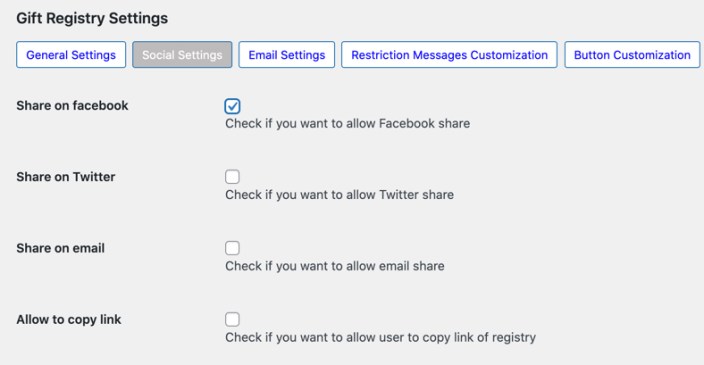
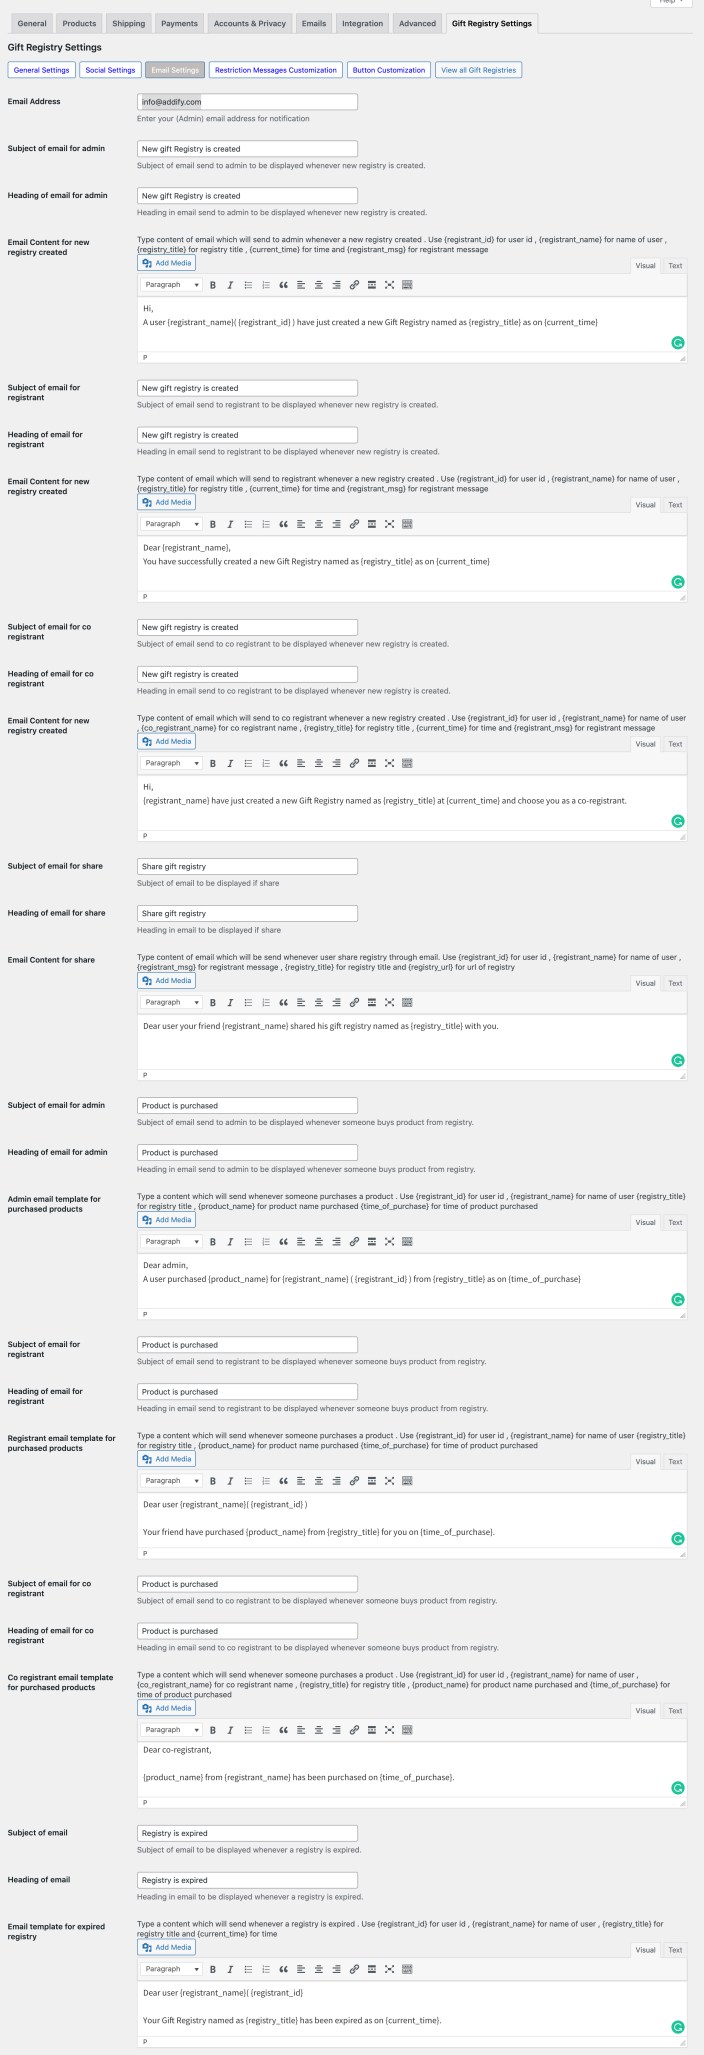
Email Settings:
↑ Back to top- Email notification when the new registry is successfully created
- Email notification to co-registrant
- A separate notification for customer and co-registrant when a product is purchased from the registry
- Customize email content when customer share registry VIA email
- Email notification when registry expires
- Email notification when a new registry is created by any customer
- Email notification when a product is purchased from a gift registry
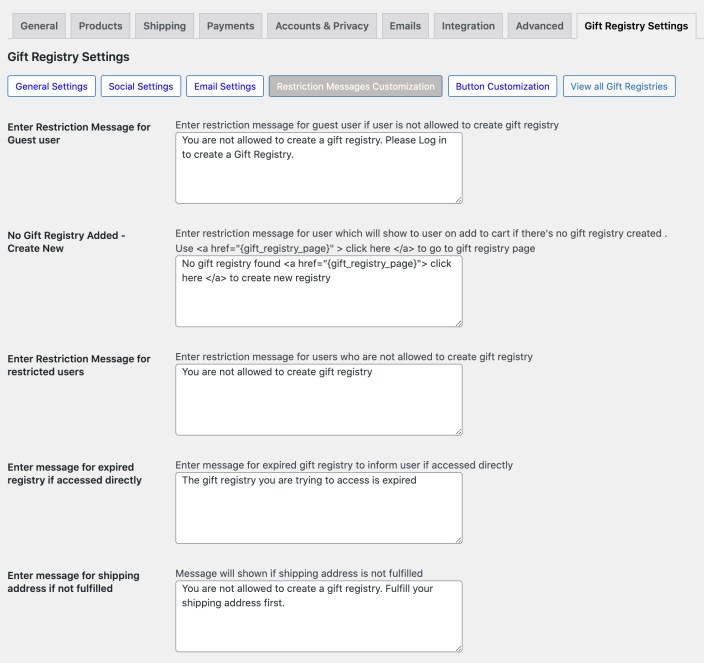
Multiple customizable error messages:
↑ Back to top- Customize message shown if only registered users are allowed create registry
- Customize message shown if the user attempts to add products to the registry when no registry is created
- Customize message shown if a specific user role is not allowed to create registry
- Customize message shown if a user is trying to directly access the expired registry.
- Customize message shown if no shipping address has been added to the registry.
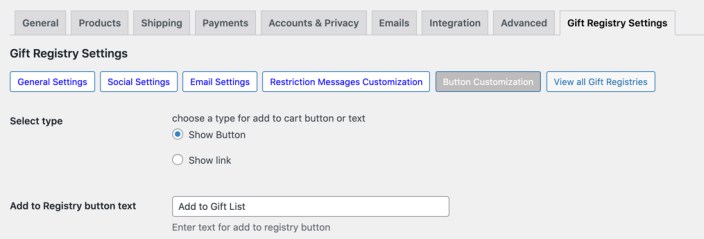
Customize add to gift registry button:
↑ Back to top- Select whether you want a button or link to direct customers to add products to the registry.
- You can also add a custom button/link label
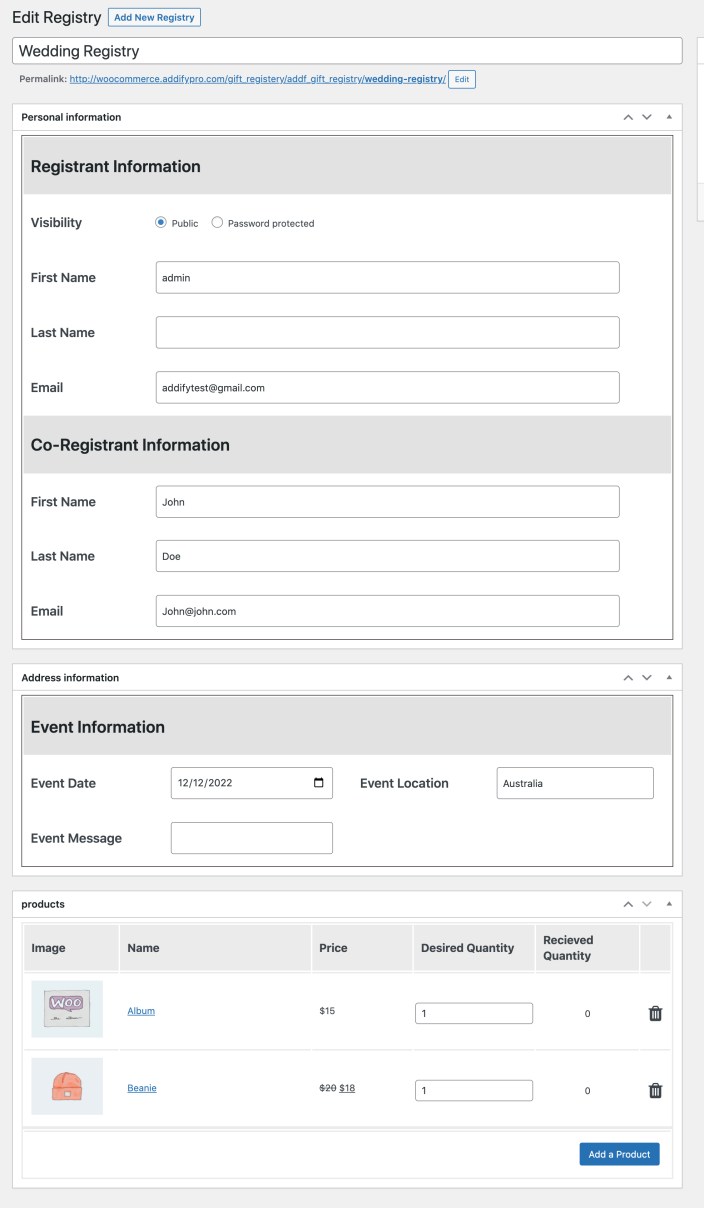
Backend grid for admin to view all created registries:
↑ Back to top- Registry title
- Registrant name and email
- Visibility status
- Current status
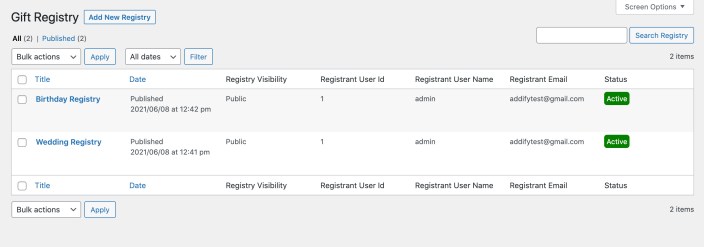 You can view each registry and make adjustments on customers’ behalf if needed.