Image Zoom Pro for WooCommerce offers tools which can help your users to view the product image and product gallery images more clearly.
Installation
↑ Back to top1. Download the image-zoom-pro-for-woocommerce.zip file from your WooCommerce account.
2. Go to: WordPress Admin > Plugins > Add New and Upload Plugin with the file you downloaded with Choose File.
3. Install Now and Activate the extension.
More information at: Install and Activate Plugins/Extensions.
Plugin Settings
↑ Back to topGeneral
↑ Back to top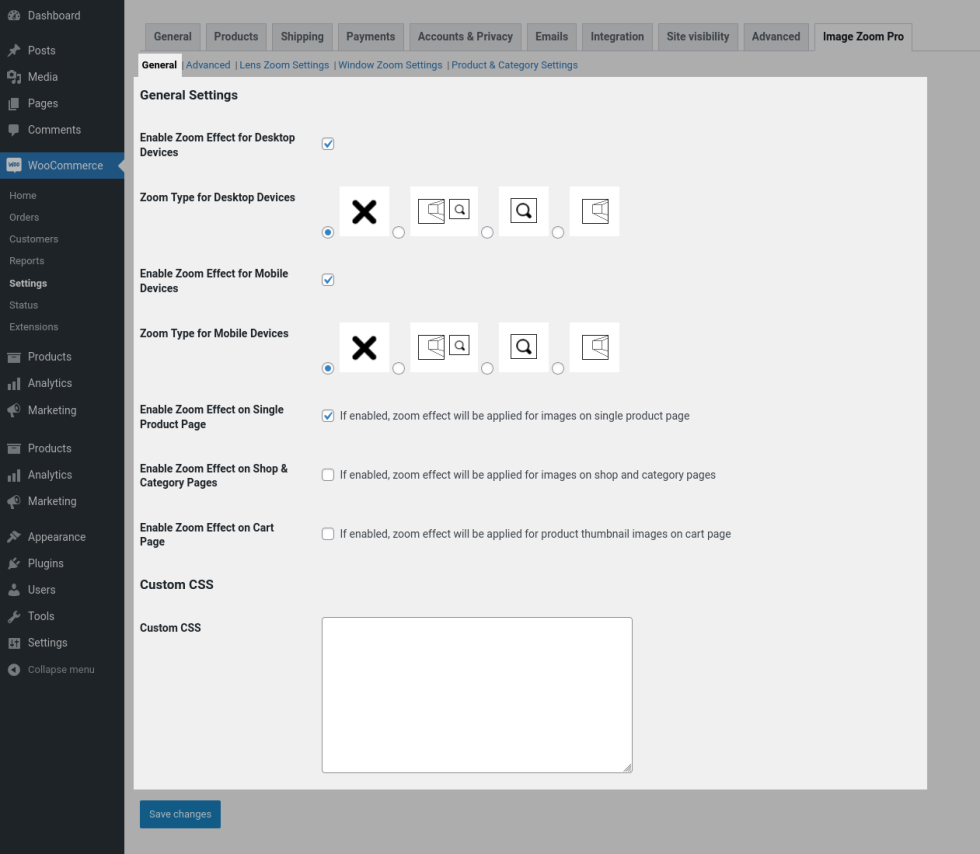
General Settings
Enable Zoom Effect for Desktop Devices: Enable this option to apply zoom effect on desktop devices.
Zoom Type for Desktop Devices: From the list of available zoom types, choose the zoom type to be applied for desktop devices.
Enable Zoom Effect for Mobile Devices: Enable this option to apply zoom effect on mobile devices.
Zoom Type for Desktop Devices: From the list of available zoom types, choose the zoom type to be applied for mobile devices.
Enable Zoom Effect on Single Product Pages: Enable this option to apply the zoom effect for product images on single product page.
Enable Zoom Effect on Shop and Category Pages: Enable this option to apply the zoom effect for product images on shop and category pages.
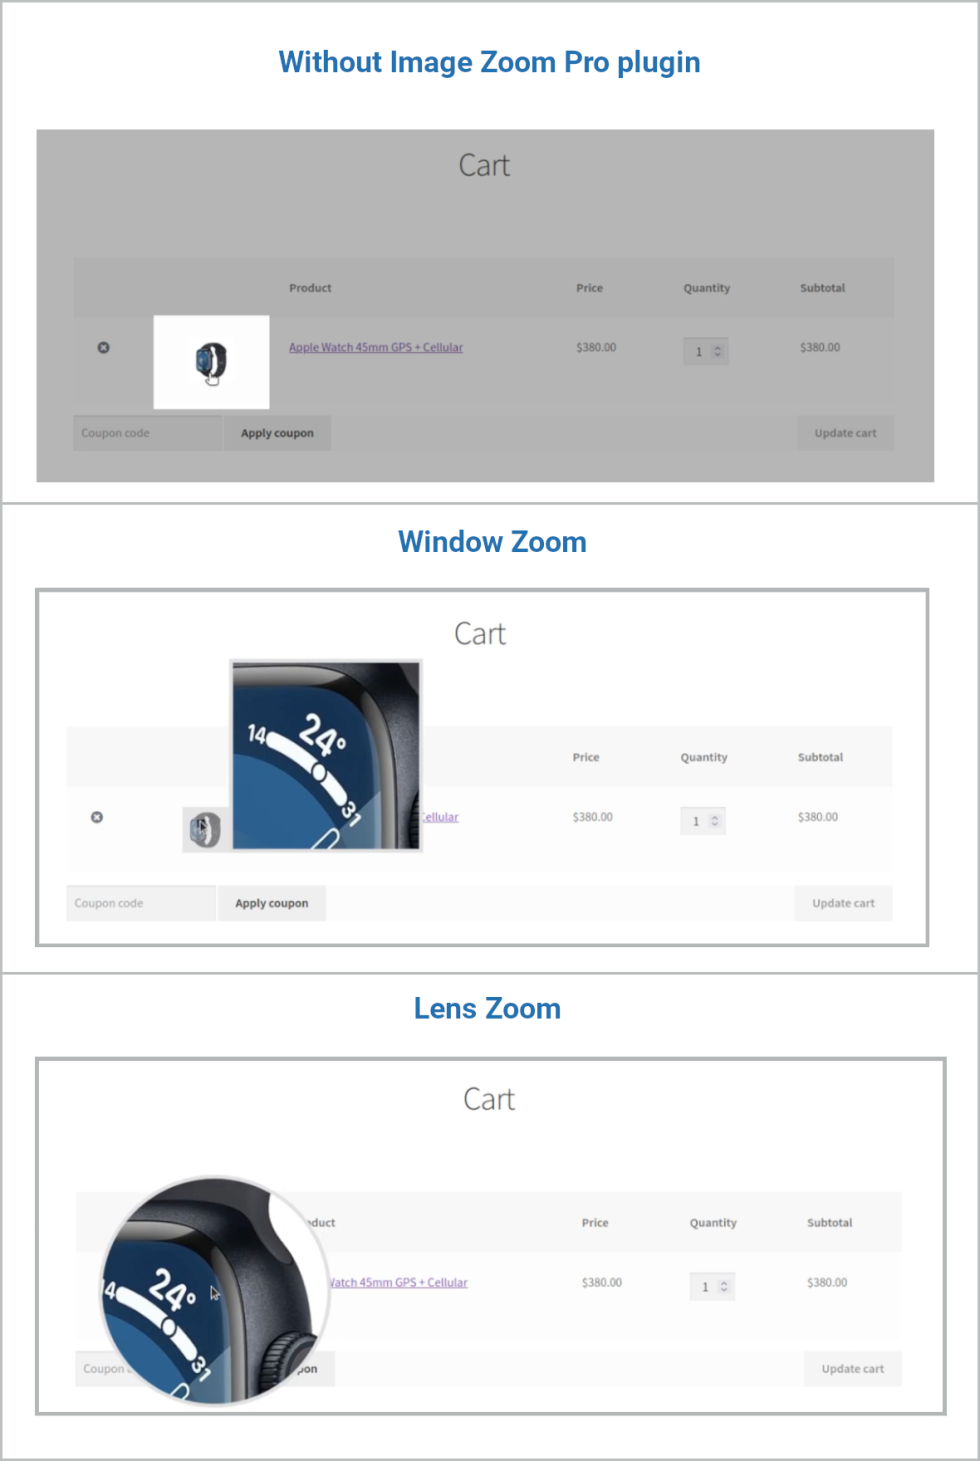
Enable Zoom Effect on Cart Page: Enable this option to apply the zoom effect for product thumbnail images on cart page.
Custom CSS
To apply any additional customization on frontend, you can add Custom CSS here.
Advanced
↑ Back to top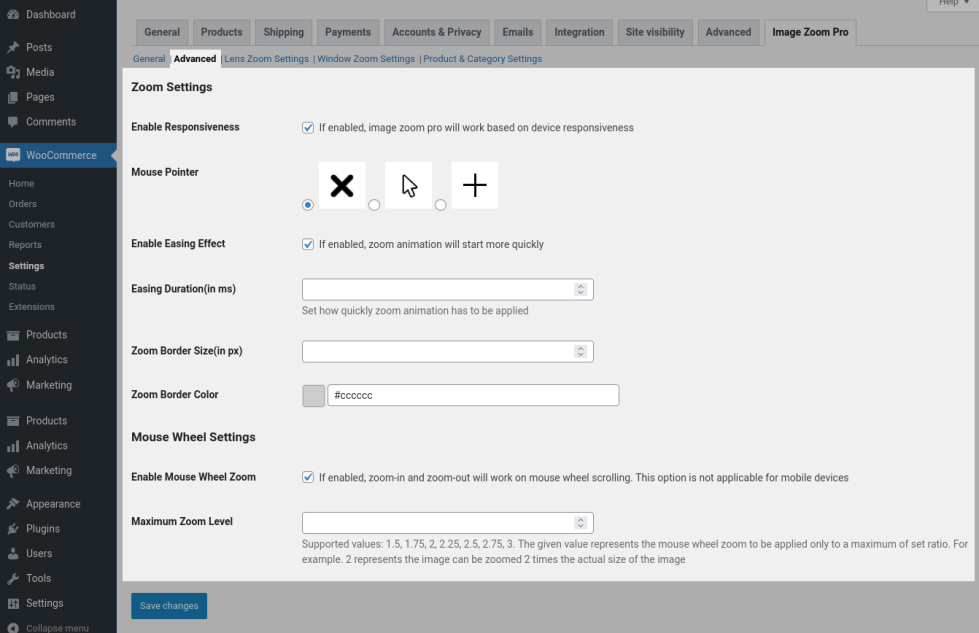
Zoom Settings
Enable Responsiveness – To make the plugin to work based on device size, enable this option.
Mouse Pointer – Select the mouse pointer from the list of available options.
Enable Easing Effect – To start the zoom animation more quickly, enable this option.
Easing Duration(in ms) – Set how quickly zoom animation has to start in this option. The duration has to be set in milliseconds.
Zoom Border Size(in px) – Set the zoom border size in this option. The value has to be set in pixels.
Mouse Wheel Settings
Enable Mouse Wheel Zoom – To apply zoom-in/zoom-out images when using mouse wheel, enable this option.
Maximum Zoom Level – On using mouse wheel, set the maximum level the zoom can be applied in this option. You can set the value range from 1.5 to 3 with intervals of 0.25. If 2 is set in this option, mouse wheel zoom can be applied to a maximum of 2 times the actual image size.
Lens Zoom Settings
↑ Back to top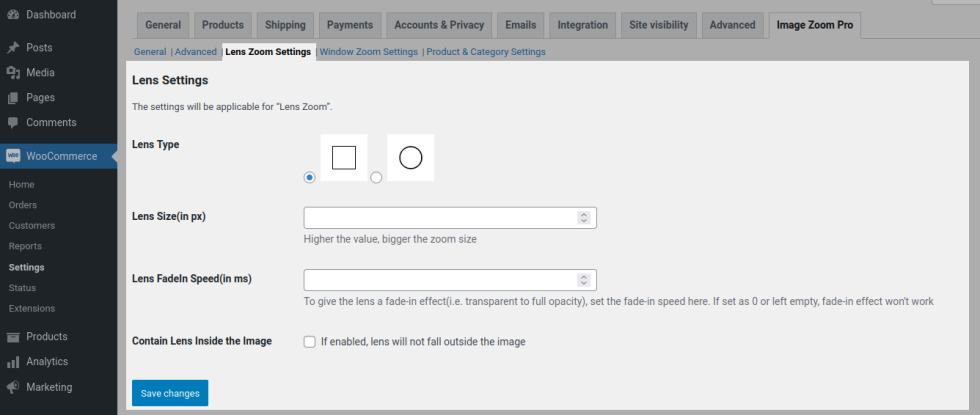
If you have chosen “Lens Zoom” as zoom type, the settings will be applied.
Lens Settings
Lens Type – Choose the lens type from the list of available options.
Lens Size(in px) – Set the size of the lens in pixels. To apply maximum zoom size, enter a higher value here.
Lens FadeIn Speed(in ms) – To give lens a fade-in effect, set a fade-in speed which has to be given in milliseconds. Set 0 if you don’t want to apply fade-in effect.
Contain Lens Inside the Image – Enable this option if you want the lens not to fall outside the image area.
Window Zoom Settings
↑ Back to top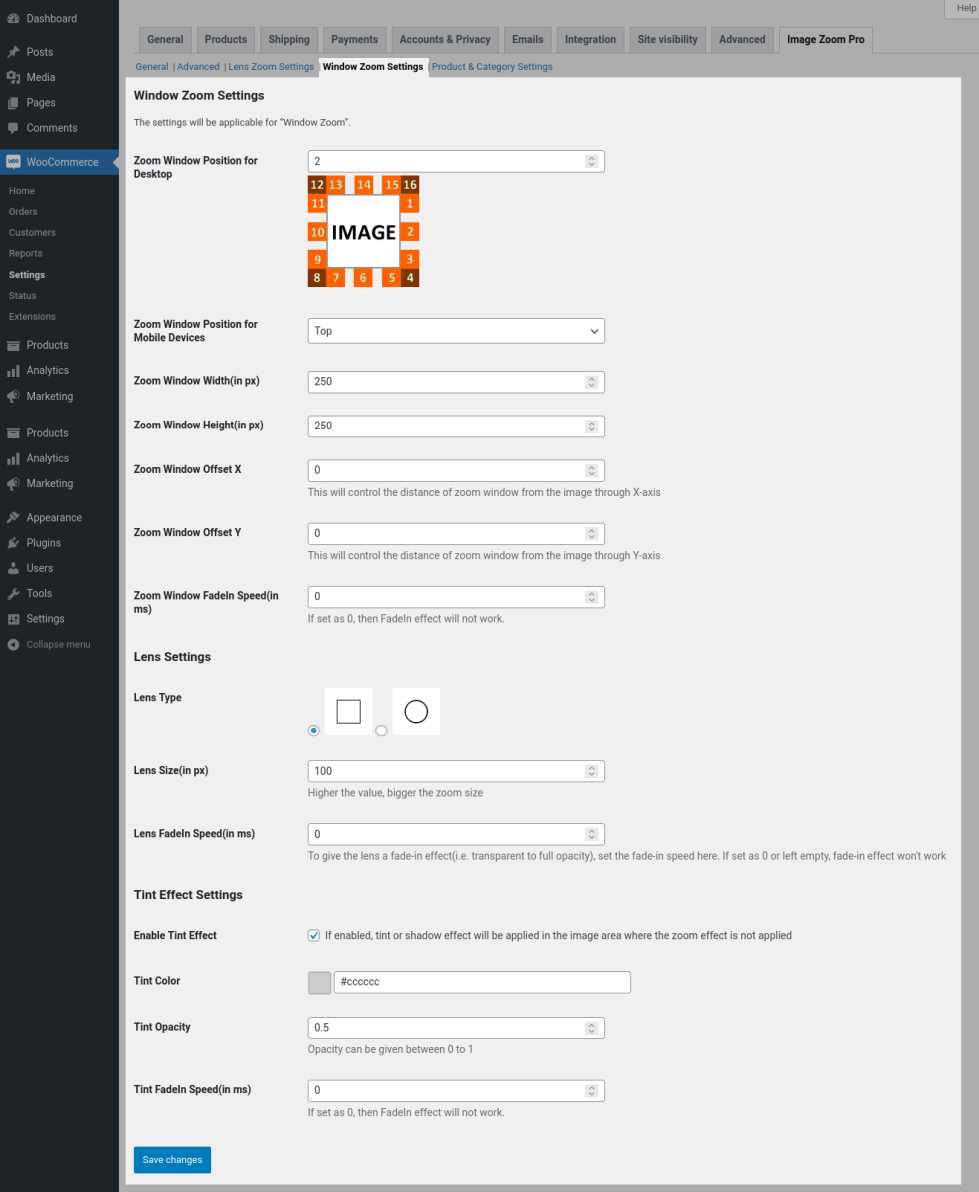
If you have chosen “Window Zoom” as zoom type, the settings will be applied.
Window Zoom Settings
Zoom Window Position for Desktop – From the list of available position options(1-12), set the value for which window has to be displayed.
Zoom Window Position for Mobile Devices – You can either show the window above or below the product image for mobile devices. Select “Top”/”Bottom” to show the window above/below respectively.
Zoom Window Width(in px) – Set the window width in this option. The value has to be given in pixels.
Zoom Window Height(in px) – Set the window height in this option. The value has to be given in pixels.
Zoom Window Offset X – From the end of the image, you can set the distance of zoom window to begin along the X-axis in this option.
Zoom Window Offset Y – From the end of the image, you can set the distance of zoom window to begin along the Y-axis in this option.
Zoom FadeIn Speed(in ms) – To give window a fade-in effect, set a fade-in speed which has to be given in milliseconds. Set 0 if you don’t want to apply fade-in effect.
Lens Settings
Lens Type – Choose the lens type from the list of available options.
Lens Size(in px) – Set the size of the lens in pixels. To apply maximum zoom size, enter a higher value here.
Lens FadeIn Speed(in ms) – To give lens a fade-in effect, set a fade-in speed which has to be given in milliseconds. Set 0 if you don’t want to apply fade-in effect.
Tint Effect Settings
Enable Tint Effect – To apply a shadow area outside the lens area, enable this option.
Tint Color – Choose the tint color in this option.
Tint Opacity – Set the tint opactity in this option. Value can be given in between 0 to 1.
Tint FadeIn Speed(in ms) – To give tint effect through a fade-in, set a fade-in speed which has to be given in milliseconds. Set 0 if you don’t want to apply fade-in for tint effect.
Product & Category Settings
↑ Back to top
Select Products from Applying Zoom Effect – If you want the zoom effect to be not applied for specific products, then search and select the products here.
Select Categories from Applying Zoom Effect – If you want the zoom effect to be not applied for products under specific categories, then search and select the categories here.
Frontend Output
↑ Back to top

Translation
↑ Back to topImage Zoom Pro for WooCommerce is translation ready, meaning you can edit the po files by which you can translate the text to any language. Steps to perform the translation are as follows. For example, a translation to French.
- Download and install Poedit
- Open the file image-zoom-pro-for-woocommerce > languages > image-zoom-pro-for-woocommerce.pot using Poedit.
- Create a new translation file by clicking Create new translation button.
- Choose the Source text and set its corresponding French text in Translation Text Area.
- Save the changes.
- Save the file name as image-zoom-pro-for-woocommerce-fr_FR.po.
- Then go to WordPress dashboard > Settings > General and select the Site Language as French.