Add a WooCommerce Mini Cart to your shop pages or WooCommerce cart anywhere with the help of a shortcode to provide quick and easy access to cart details for customers.
Installation
↑ Back to top- Download the Mini Cart.zip file from your WooCommerce account.
- Go to WordPress Admin > Plugins > Add New and Upload Plugin.
- Click on Choose File to upload the file you downloaded.
- Install Now and Activate the extension.
Setup and Configuration
↑ Back to topTo access plugin settings, navigate to WooCommerce > Mini Cart > General Settings.
Side Cart Settings
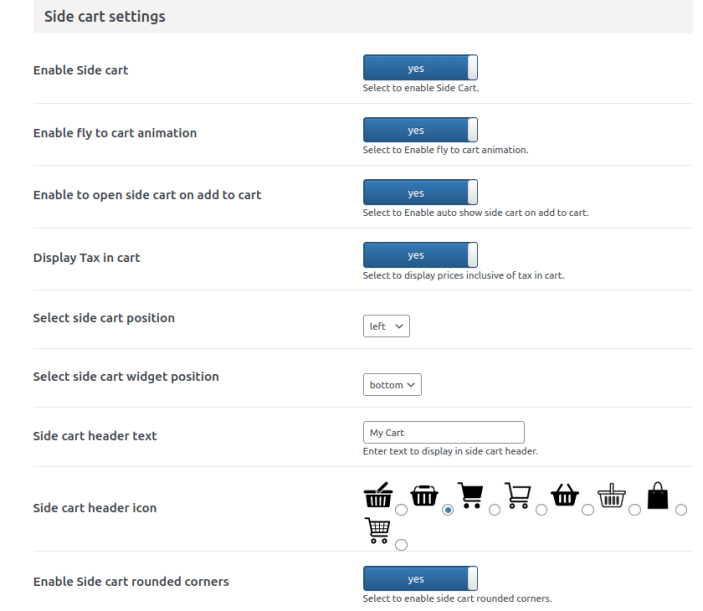
↑ Back to topIn this section, you will find the following side cart settings:
- Enable Side Cart: Click to enable the side cart
- Enable Fly-to Cart Animation: Select to enable fly-to-cart animation.
- Enable to Open Side Cart on Add to Cart: Select to enable the auto show slider on Add to Cart.
- Disable Tax in Cart: Select to display prices inclusive of tax in cart.
- Select Side Cart Position: Choose the position of the side cart.
- Select Side Cart Widget Position: Choose the widget position of the side cart.
- Side Cart Header Text: Enter the text that you want to display in the side cart header.
- Side Cart Header Icon: Select the icon for the cart in the side cart header.
- Enable Side Cart Rounded Corners: Select if you want to enable rounded corners on the side cart.
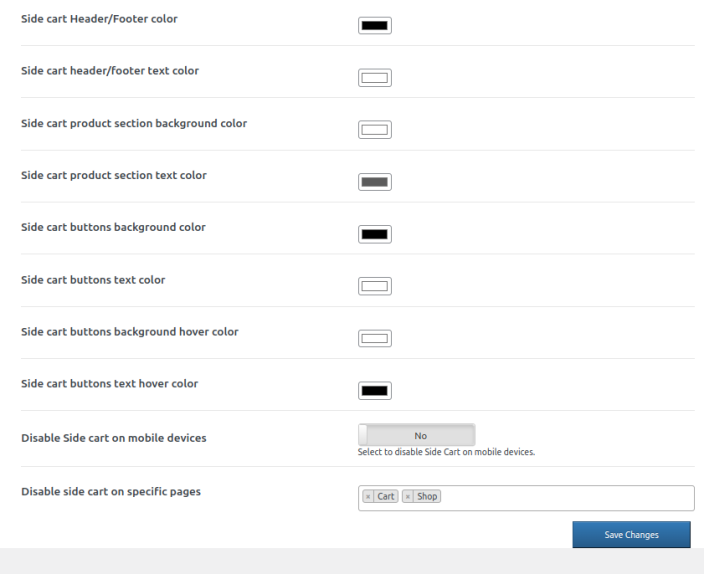
Additionally, further, customize the side cart with the following color configurations:
- Side Cart Header/Footer Color
- Side Cart Header/Footer Text Color
- Side Cart Product Section Background Color
- Side Cart Product Section Text Color
- Side Cart Buttons Background Color
- Side Cart Buttons Text Color
- Side Cart Buttons Background Hover Color
- Side Cart Buttons Text Hover Color
- Disable Side Cart on Mobile Devices: Click to disable side cart of mobile devices
- Disable Side Cart on Specific Pages: Select pages on which you want to disable side cart.
Sticky Cart Settings
↑ Back to topIn this section, you will find the following sticky cart settings:
- Enable Sticky Cart: Click to enable the sticky cart.
- Enable Cart Button: Select to enable the cart button on the sticky cart.
- Enable Checkout Button: Select to display the checkout button.
- Disable Tax in Cart: Select to display prices inclusive of tax in cart.
- Select Sticky Cart Position: Choose the position of the sticky cart
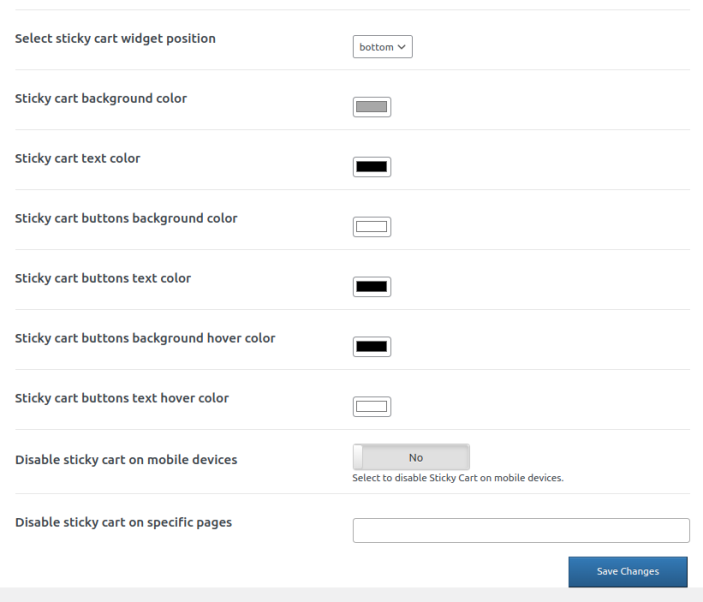
- Select Sticky Cart Widget Position: Choose the Widget position of the sticky cart

However, you can also customize a sticky cart with the following color settings:
- Sticky cart background color
- Sticky cart text color
- Sticky cart buttons background color
- Sticky cart buttons text color
- Sticky cart buttons background hover color
- Sticky cart buttons text hover color
- Disable sticky cart on mobile devices: Click to disable sticky cart on mobile devices
- Disable sticky Cart on Specific Pages: Select pages on which you want to disable side cart.
Shortcode Settings
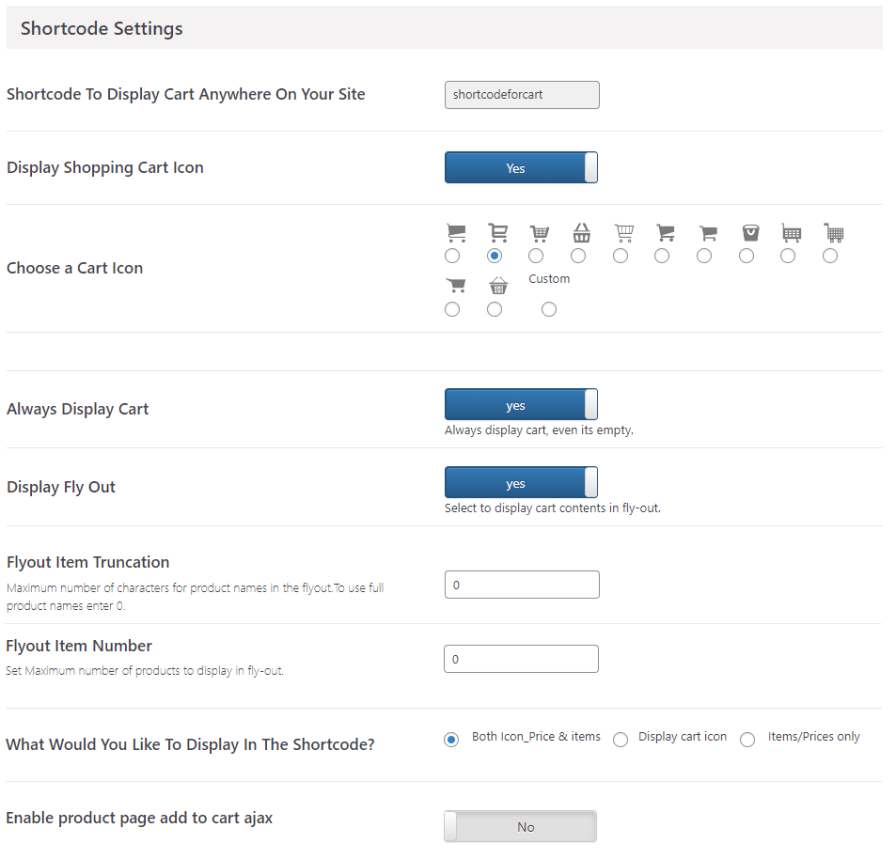
↑ Back to topWithin Shortcode Settings, you can configure the following options:
- Shortcode To Display Cart Anywhere On Your Site: Copy and paste the shortcode to display the mini cart anywhere on your website.
- Display Shopping Cart Icon: Option to display a shopping cart icon.
- Choose a Cart Icon: Option to customize the cart icon by selecting an icon or uploading a custom icon.
- Choose Custom Icon: Upload a custom icon for the mini cart.
- Always Display Cart: Select this option to always display the cart even when the cart is empty.
- Display Fly-Out: Select to display cart contents in the fly-out cart
- Fly-out Item Truncation: Choose the maximum number of characters to display in the fly-out menu. Enter “0” to use full product names.
- Fly-out Item Number: Set the maximum number of products in the fly-out menu.
- What Would You Like To Display In The Shortcode?: Choose what you would like to display in the cart menu – You can choose the cart icon, price, or both.
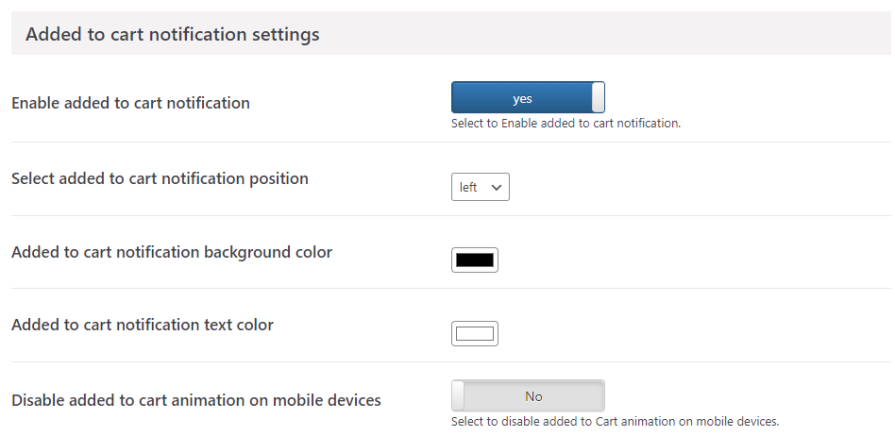
Add to Cart Notification Settings
↑ Back to topIn this section, you can set the following settings.
- Enable Add to Cart Notification: Select to enable notification when a customer adds products to the cart.
- Select Added to Cart Notification Position: Choose the position of the added to cart notification
- Add to Cart Notification Background Color: Set the background color for the add to cart notification.
- Add to Cart Notification Text Color: Choose the color of the text for the mini cart to add to cart notification.
- Disable Added to Cart Animation on Mobile Devices: Select to disable added to Cart animation on mobile devices.
Text & Links
↑ Back to topFrom within WooCommerce > Mini Cart > Text & Links, you can customize the cart with text and links for various conditions. For example, the “Add Empty Cart” and “View Cart” labels. Additionally, you can also specify Cart and Checkout URLs:
- Empty Cart: Enter the text for the empty cart for the main item hover.
- View Cart: Enter the text you want to display for the main item hover & flyout.
- Cart URL: Enter the URL for the cart.
- Checkout URL: Enter the URL for the checkout.
