Order Restrictions for WooCommerce allows you to place restrictions on order total, product quantity and payment gateways during purchase.
Installation
↑ Back to top1. Download the order-restrictions-for-woocommerce.zip file from your WooCommerce account.
2. Go to: WordPress Admin > Plugins > Add New and Upload Plugin with the file you downloaded with Choose File.
3. Install Now and Activate the extension.
More information at: Install and Activate Plugins/Extensions.
Setup and Configuration
↑ Back to topThe settings for the Order Restriction Plugin is available at WordPress Dashboard > Order Restrictions.
Order Total Restriction – Configuration
↑ Back to top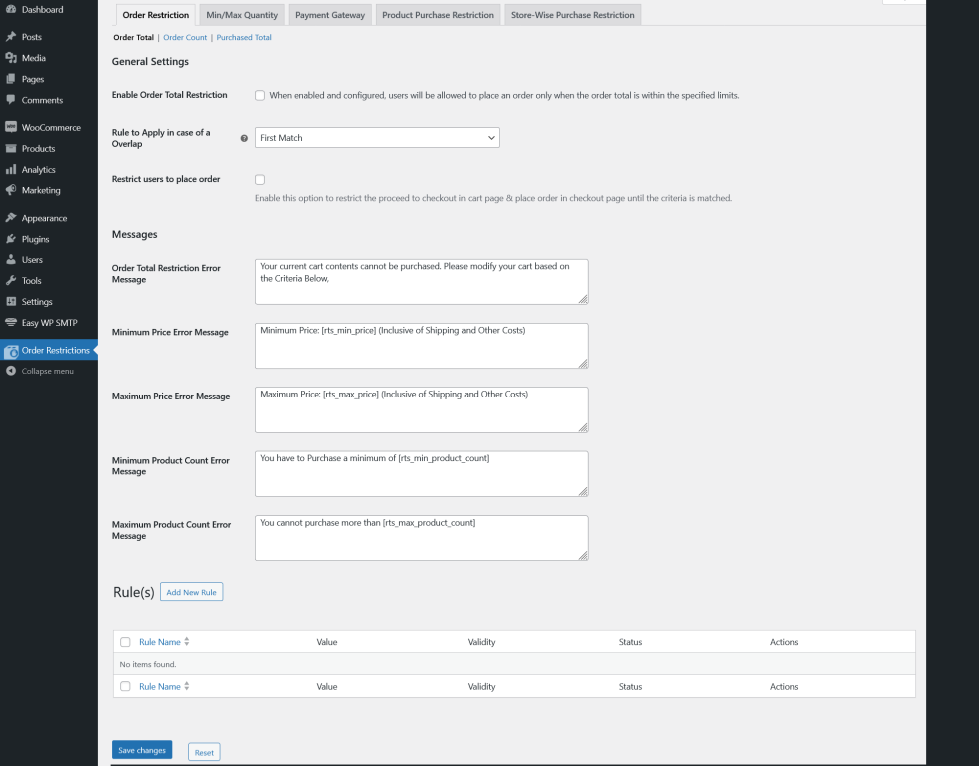
- To enable Order Total restriction go to Order Restriction > Order Total and enable Enable Order Total Restriction.
- When two or more Order Total rules match for a user in a single transaction, the first matched rule will be applied by default. If you want to change this behavior, then you can do so by modifying the priority in “Rule to Apply in case of a Overlap” option.
- If you wish to prevent users from accessing the checkout page and placing the order until the criteria is met, you can do so by enabling the “Restrict users to place order” option.
- You can customize the error messages in the messages section.
- To create a new rule click the “Add New Rule” button and fill in the title of the rule.
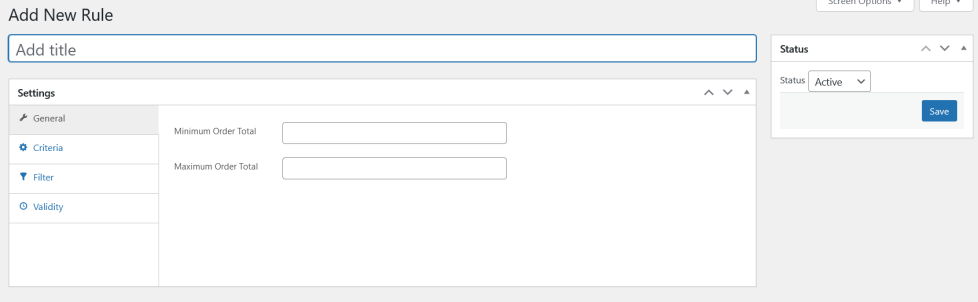
- In the “Minimum Order Total” option, you can input the minimum order amount which the user has to spend on your site.
- In the “Maximum Order Total” option, you can input the maximum order amount which the user can spend on your site.
Note
Either the Minimum Order Amount or the Maximum Order Amount has to be configured in order for the Order Total Restriction to be functional.
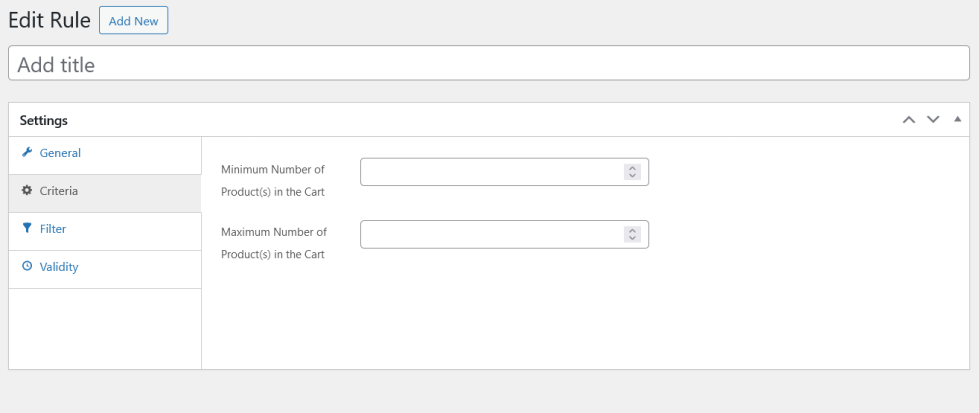
- In the “Minimum Number of Product(s) in the Cart” option, you can set the minimum number of products which has to be purchased by your users in order to place an order on your site.
- In the “Maximum Number of Product(s) in the Cart” option, you can set the maximum number of products that can be purchased by your users on your site.
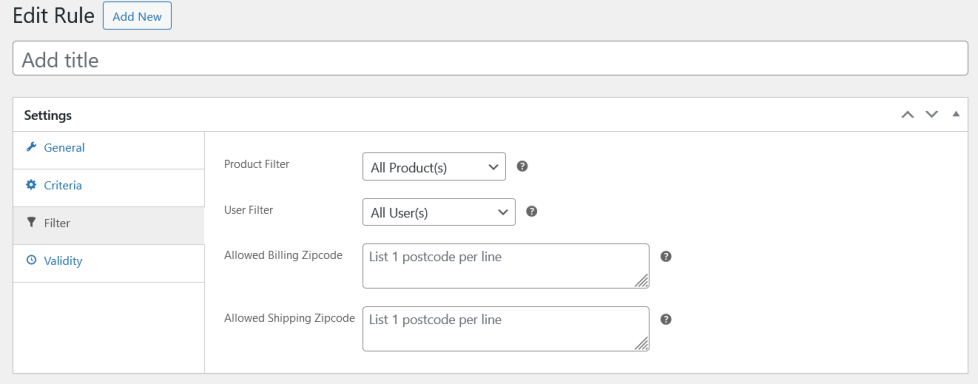
- By default, the Order Total restriction applies to all the products on the site. If you want to restrict it to specific products/categories, you can do so by customizing the “Product Filter” option in the Criteria section.
- By default, the Order Total restriction applies to all the users on the site. If you want to restrict it to specific Users/User roles, you can do so by customizing the “User Filter” option in the Filter section.
- By default, the order total restriction applies to all the billing and shipping zip codes on the site. If you want to restrict it to specific Billing/Shipping Zip codes, you can do so by entering it in the “Allowed Billing Zipcode and Allowed Shipping Zipcode” fields.
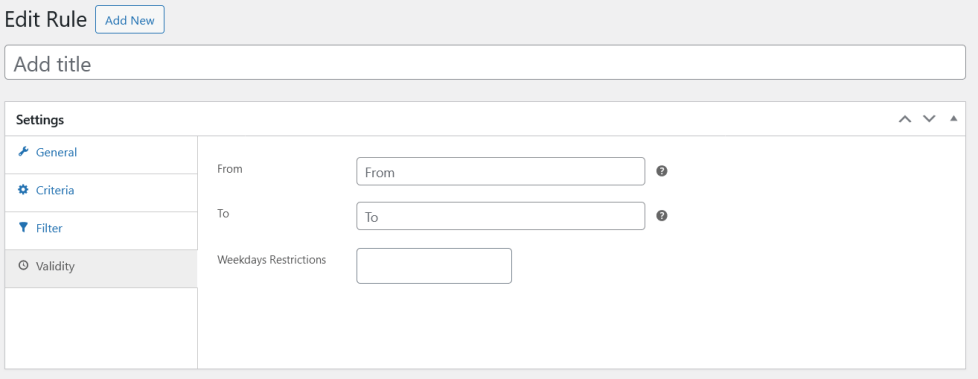
- By default, the Order Total restrictions will apply indefinitely. If you want to apply the order restriction to a specific time period, you can do so by setting a date in the From and To options in the Filter settings.
- The Order Total Restriction can also be restricted to specific days of the week.

Order Count Restriction – Configuration
↑ Back to top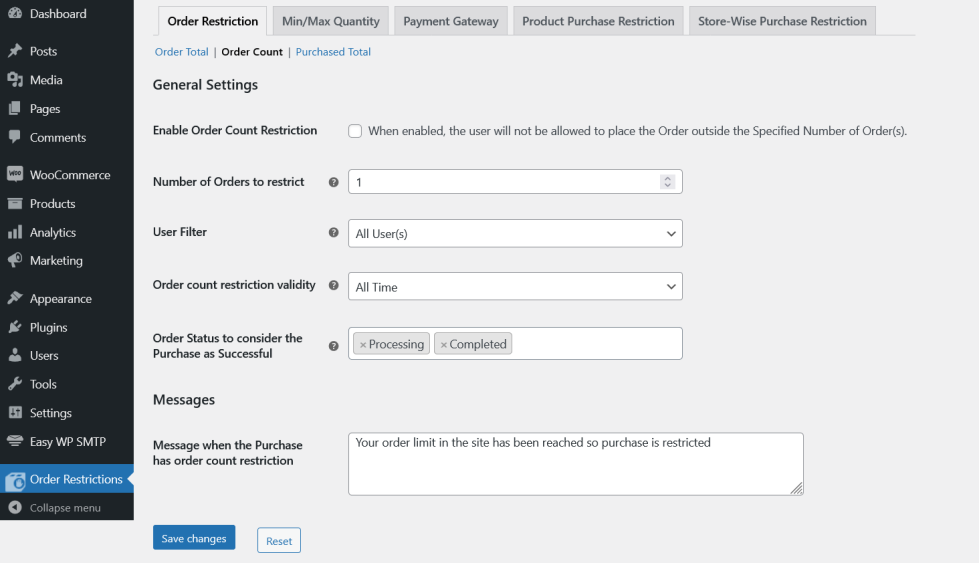
- To enable Order Count restriction go to Order Restriction > Order Count and enable Enable Order Count Restriction.
- In the “Number of Orders to restrict” option, input the number of orders after which the user will be restricted from purchasing products.
- By default, the restriction is applicable for all users. If you wish to restrict the Order Count Restriction to specific users/user roles, you can do so by customizing the “User Filter” option.
- By default, the order count restriction is applicable for an indefinite period. If you wish to apply the restriction for a limited period, you can do so by customizing the Order count restriction validity option.
- All Time: The user(s) will not be able to place the order after the Number of Order count(s) is reached.
- Specific Time Span: The user(s) will not able to place the order in the specified time span duration after the Number of Order count is reached.
- By default, orders with Processing and Completed status will be considered for order count restriction. If you customize the order status, you can do so by customizing the Order Status to consider the Purchase as Successful option.
- You can customize the messages displayed to the user during the restriction in the “Message when the Purchase has order count restriction” option.
Purchased Total – Configuration
↑ Back to top
- To enable Purchased Total restriction go to Order Restriction > Purchased Total and enable Order Restriction based on purchased total option.
- In the “Enter the Value to restrict” option, input the previously purchased order count after which the user will be restricted from purchasing products.
- By default, the restriction is applicable for all users. If you wish to restrict the Order Count Restriction to specific users/user roles, you can do so by customizing the “User Filter” option.
- By default, the purchased total restriction is applicable for an indefinite period. If you wish to apply the restriction for a limited period, you can do so by customizing the Restriction Validity option.
- By default, orders with Processing and Completed status will be considered for order count restriction. If you customize the order status, you can do so by customizing the Order Status to consider the Purchase as Successful option.
- You can customize the messages displayed to the user during the restriction in the “Message” option.
Min/Max Quantity Restriction – Configuration
↑ Back to topProduct Quantity Restriction
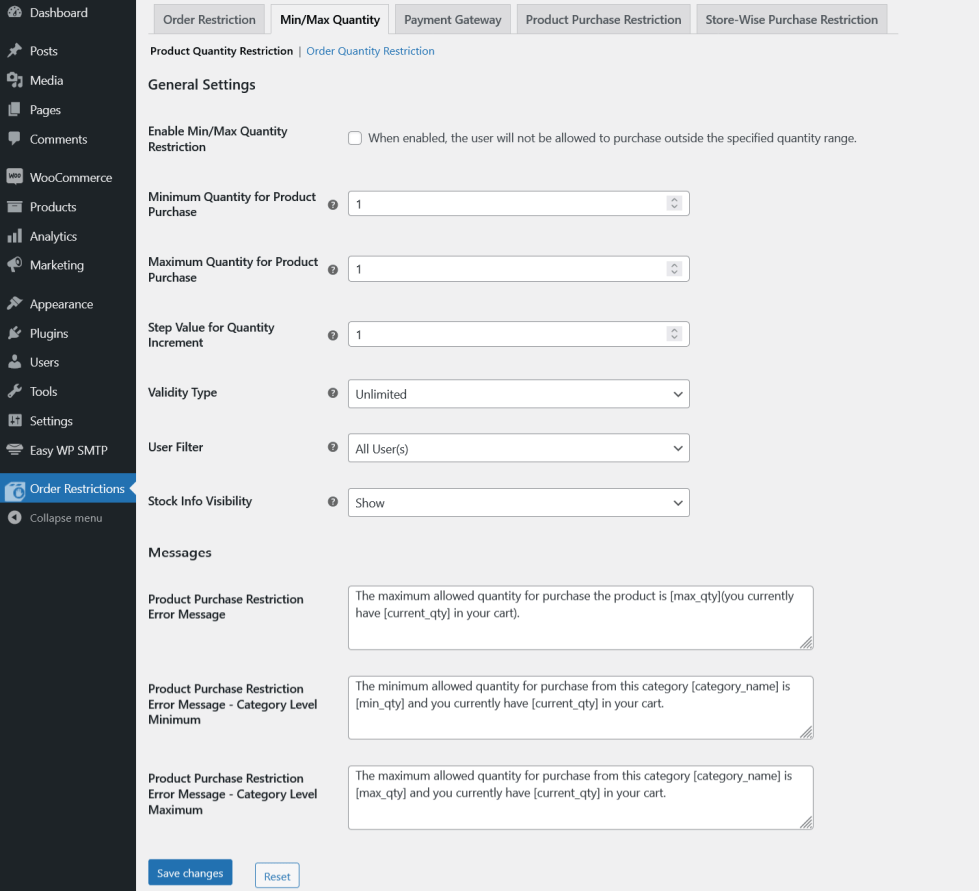
- To enable Min/Max Quantity restriction go to Order Restrictions > Min/Max Quantity > Product Quantity Restriction and enable Enable Min/Max Quantity Restriction option.
- In the “Minimum Quantity for Product Purchase”, input the minimum quantity which your user has to purchase for each product.
- In the “Maximum Quantity for Product Purchase”, input the maximum quantity which your user can purchase for each product.
Note
Either the minimum quantity or the maximum quantity has to be configured in order for the Min/Max Quantity Restriction to be functional.
- In the “Step Value for Quantity Increment” option, you can configure the minimum quantity which your users can increment on your site.
For Example: If the value is set 2, then the user can increase the quantity in increments of 2.
- By default, the min/max quantity restrictions will apply indefinitely. If you want to apply the order restriction to a specific time period, you can do so by changing the Validity Type option to “Date Range” and setting the Date in the “Limited Validity Duration Option”.
- By default, the min/max quantity restriction applies to all the users in the site. If you want to restrict it to specific Users/User roles, you can do so by customizing the “User Filter” option in the Filter section.
- If you want to hide the product stock info on the single product pages and other archive pages, set the Stock Info Visibility option to Hide.
- You can customize the messages displayed to the user during the restriction in the “Message” option.
Product Level Settings
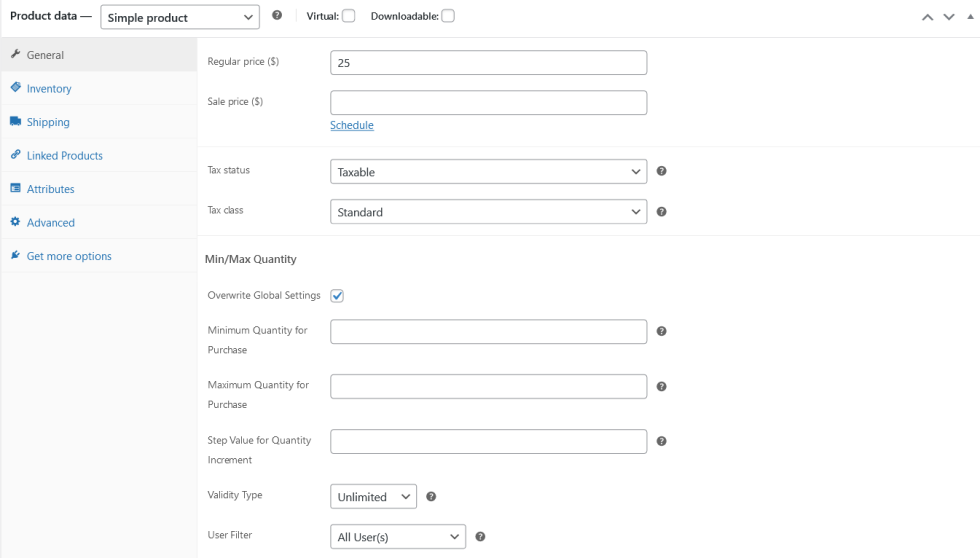
- If you want to override the Min/Max Quantity Restriction for a particular product, edit that product and enable the “Override Global Settings”.
- In the “Minimum Quantity for Product Purchase”, input the minimum quantity which your user has to purchase for each product.
- In the “Maximum Quantity for Product Purchase”, input the maximum quantity which your user can purchase for each product.
Note
Either the minimum quantity or the maximum quantity has to be configured in order for the Min/Max Quantity Restriction to be functional.
- In the “Step Value for Quantity Increment” option, you can configure the minimum quantity which your users can increment on your site.
For Example: If the value is set 2, then the user can increase the quantity in increments of 2.
- By default, the min/max quantity restrictions will apply indefinitely. If you want to apply the order restriction to a specific time period, you can do so by changing the Validity Type option to “Date Range” and setting the Date in the “Limited Validity Duration Option”.
- By default, the min/max quantity restriction applies to all the users on the site. If you want to restrict it to specific Users/Userroles, you can do so by customizing the “User Filter” option in the Filter section.
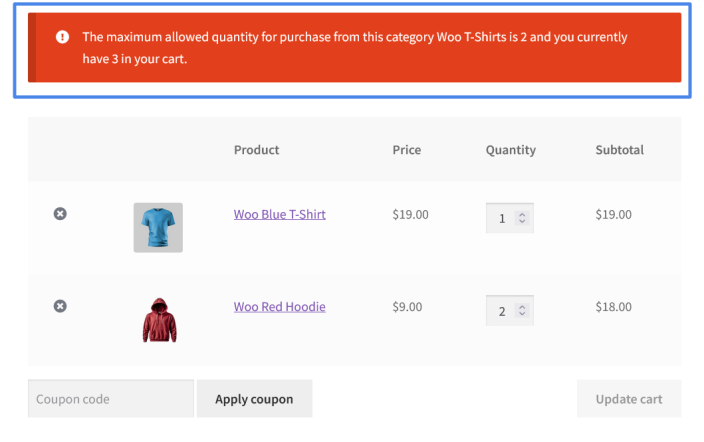
Category Level Settings

- If you want to override the Min/Max Quantity restriction for a particular product category, edit that product category and enable the “Enable Min/Max Quantity Restriction” option.
- By default, the restriction will be applied to individual products in the category. If you wish the restriction should apply across the products in the category, then select Quantity of all products in this Category in the “Quantity Restriction is applicable on” option.
- In the “Minimum Quantity for Product Purchase”, input the minimum quantity which your user has to purchase for each product.
- In the “Maximum Quantity for Product Purchase”, input the maximum quantity which your user can purchase for each product.
Note
Either the minimum quantity or the maximum quantity has to be configured in order for the Min/Max Quantity Restriction to be functional.
- In the “Step Value for Quantity Increment” option, you can configure the minimum quantity which your users can increment on your site.
For Example: If the value is set 2, then the user can increase the quantity in increments of 2.
- By default, the category level restriction is applicable for an indefinite period. If you wish to apply the restriction for a limited period, you can do so by customizing the category level restriction validity option.
- By default, the restriction is applicable for all users. If you wish to restrict the Order Count Restriction to specific users/user roles, you can do so by customizing the “User Filter” option.
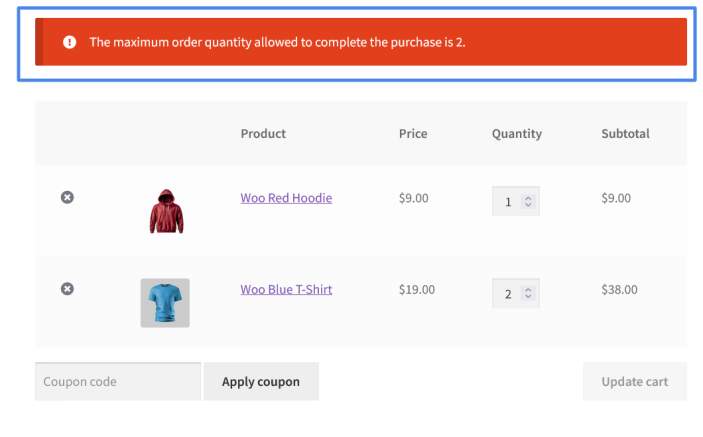
Order Quantity Restriction

- To enable Order Quantity restriction go to Order Restrictions > Min/Max Quantity -> Order Quantity Restriction and enable Enable Min/Max Order Quantity Restriction option.
- In the “Minimum Order Quantity ”, input the minimum quantity which your user has to purchase in their current order.
- In the “Maximum Order Quantity ”, input the maximum quantity which your user can purchase in their current order.
Note: Either the minimum order quantity or the maximum order quantity has to be configured in order for the Min/Max Order Quantity Restriction to be functional.
- By default, the min/max order order quantity restrictions will apply indefinitely. If you want to apply the order restriction to a specific time period, you can do so by changing the Validity Type option to “Date Range” and setting the Date in the “Limited Validity Duration Option”.
- By default, the min/max order quantity restriction applies to all the users in the site. If you want to restrict it to specific Users/User roles, you can do so by customizing the “User Filter” option in the Filter section.
- You can customize the messages displayed to the user during the restriction in the “Message” option.
Payment Gateway Restriction – Configuration
↑ Back to top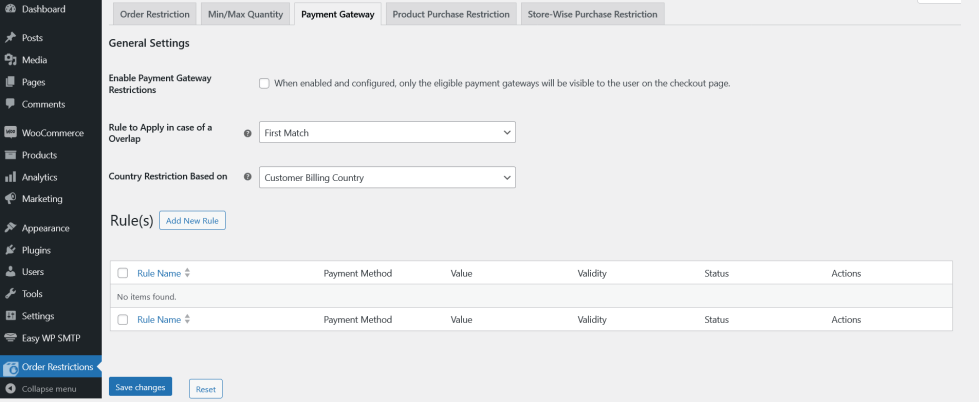
- To enable Payment Gateway restriction go to Order Restrictions > Payment Gateway and enable Enable Payment Gateway Restrictions.
- When two or more Order Total rules match for a user in a single transaction, the first matched rule will be applied by default. If you want to change this behavior, then you can do so by modifying the priority in “Rule to Apply in case of a Overlap” option.
- If you wish to restrict the Payment Gateway for a specific countries using country filter under the rule configuration, then please select the country identification method using the Country Restriction Based on option.
- To create a new rule click the “Add New Rule” button and fill in the title of the rule.
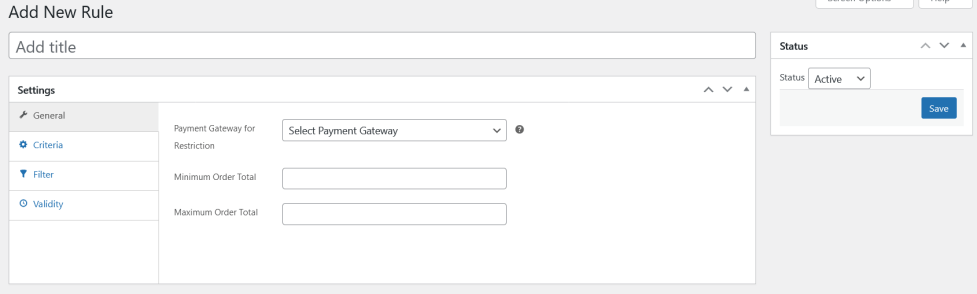
- In the “Payment Gateway for Restriction” option, select the payment gateway for which you want to configure the restriction.
- In the “Minimum Order Total” option, you can input the minimum order amount for using the payment gateway.
- In the “Maximum Order Total” option, you can input the maximum order amount for using the payment gateway.
Note
Either the Minimum Order Amount or the Maximum Order Amount has to be configured in order for the Payment Gateway Restriction to be functional.
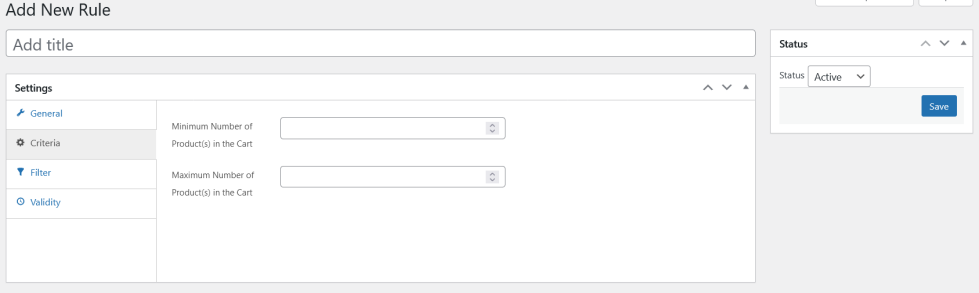
- In the “Minimum Number of Product(s) in the Cart” option, you can set the minimum number of products which has to be purchased by your users in order to use the payment gateway.
- In the “Maximum Number of Product(s) in the Cart” option, you can set the maximum number of products which has to be purchased by your users in order to use the payment gateway.
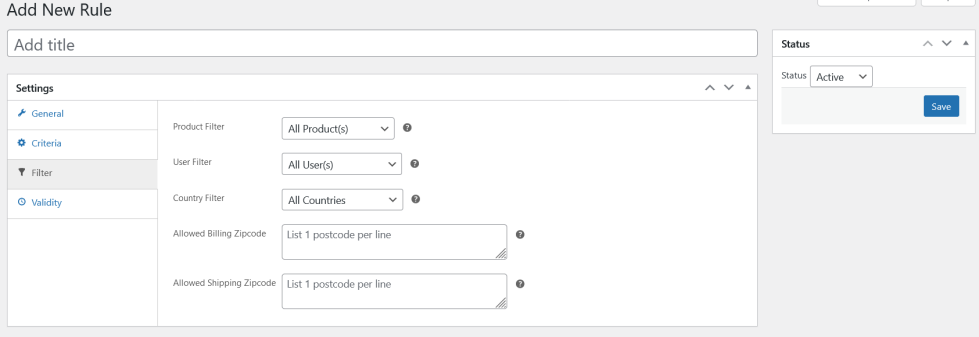
- By default, the payment gateway restriction applies to all the products on the site. If you want to restrict it to specific products/categories, you can do so by customizing the “Product Filter” option in the Filter section.
- By default, the payment gateway restriction applies to all the users on the site. If you want to restrict it to specific Users/User roles, you can do so by customizing the “User Filter” option in the Filter section.
- By default, the payment gateway restriction applies to users of any country. If you want to restrict it to Users/User roles of specific countries, you can do so by customizing the “Country Filter” option in the Filter section.
- By default, the payment gateway restriction applies to all the billing and shipping zip codes on the site. If you want to restrict it to specific Billing/Shipping Zip codes, you can do so by entering it in the “Allowed Billing Zipcode and Allowed Shipping Zipcode” fields.

- By default, the payment gateway restrictions will apply indefinitely. If you want to apply the order restriction to a specific time period, you can do so by setting a date in the From and To options in the Validity settings.
- The payment gateway restriction can also be restricted to specific days of the week in the Weekdays Restrictions option.

Product Purchase Restriction – Configuration
↑ Back to top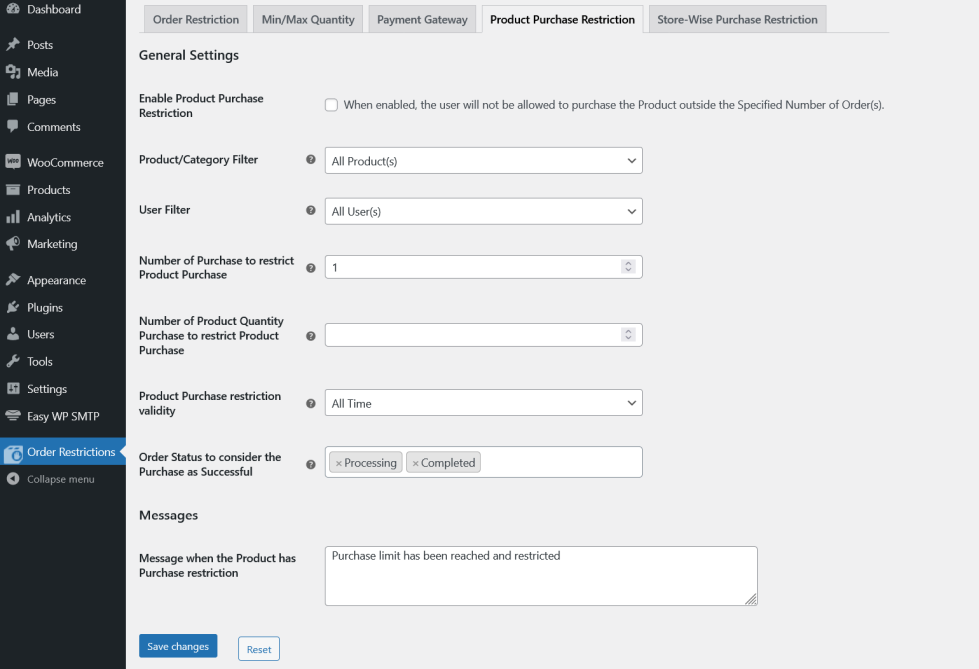
- To enable Product Purchase Restriction go to Order Restrictions > Product Purchase Restriction and enable Enable Product Purchase Restriction option.
- By default, the product purchase restriction applies to all the products on the site. If you want to restrict it to specific products/categories, you can do so by customizing the “Product/Category Filter” option.
- By default, the product purchase restriction applies to all the users on the site. If you want to restrict it to specific users/user roles, you can do so by customizing the “User Filter” option.
- In the “Number of Purchase to restrict Product Purchase” option, input the number of times, a user is allowed to purchase a product.
- In the “Number of Product Quantity Purchase to restrict Product Purchase” option, input the total number of quantities, a user is allowed to purchase from a product.
- By default, the restriction will apply for an indefinite period. If you wish to set the restriction to a specific time period, you can do so by customizing the “Product Purchase restriction validity” option.
- By default, orders with Processing and Completed status will be considered for product purchase restriction. If you customize the order status, you can do so by customizing the Order Status to consider the Purchase as Successful option.
- You can customize the messages displayed to the user in the messages section.
Product Level Settings
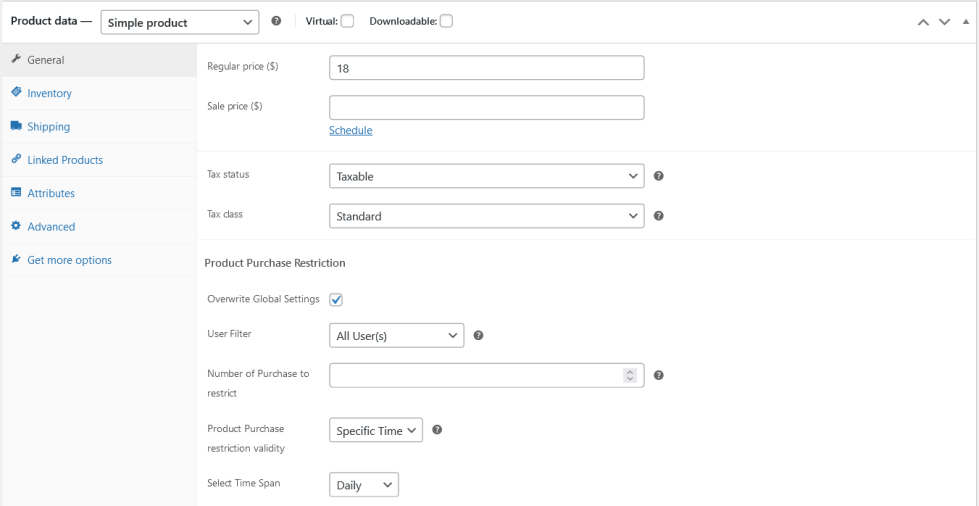
- If you want to override the Product Purchase Restriction for a particular product, edit that product and enable the “Override Global Settings”.
- By default, the product purchase restriction applies to all the users on the site. If you want to restrict it to specific users/user roles, you can do so by customizing the “User Filter” option.
- In the “Number of Product Purchase to Restrict” option, input the number of times, a user is allowed to purchase a product.
- By default, the restriction will apply for an indefinite period. If you wish to set the restriction to a specific time period, you can do so by customizing the “Product Purchase restriction validity” option.
Store-wise Purchase Restriction – Configuration
↑ Back to top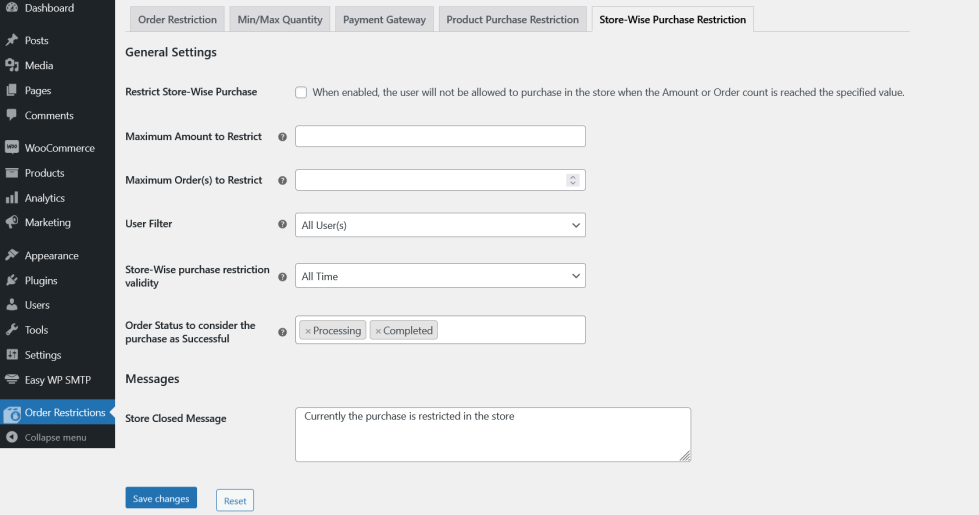
- To enable Store-wise Purchase restriction go to Order Restrictions > Store-wise Purchase Restriction and enable Restrict Store-wise Purchase Restriction option.
- In the “Maximum Amount to Restrict” option, input the amount above which the users will not be allowed to purchase from the shop.
- In the “Maximum Order(s) to Restrict” option, input the no. of orders above which the users will not be allowed to place an order on the shop.
- By default, the Store-wise purchase restriction applies to all the users on the site. If you want to restrict it to specific users/user roles, you can do so by customizing the “User Filter” option.
- By default, the restriction will apply for an indefinite period. If you wish to set the restriction to a specific time period, you can do so by customizing the “Store-wise purchase restriction validity” option.
- By default, orders with Processing and Completed status will be considered for product purchase restriction. If you customize the order status, you can do so by customizing the Order Status to consider the Purchase as Successful option.
- You can customize the messages displayed to the user in the Messages section.
Usage
↑ Back to topOrder Total Restriction – Usage
↑ Back to top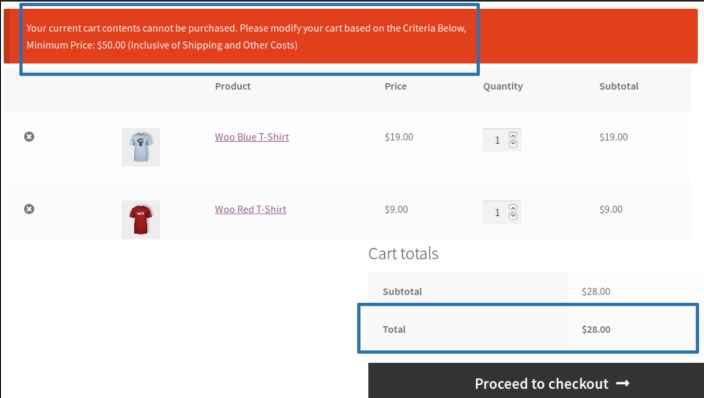
- User adds few products to the cart and proceeds to the cart page.
- On the cart page, an error message will be displayed to the user, if their order total is not within the configured threshold.
- The user will be allowed to place an order only when they meet the minimum requirements for Order Total.
Order Count Restriction – Usage
↑ Back to top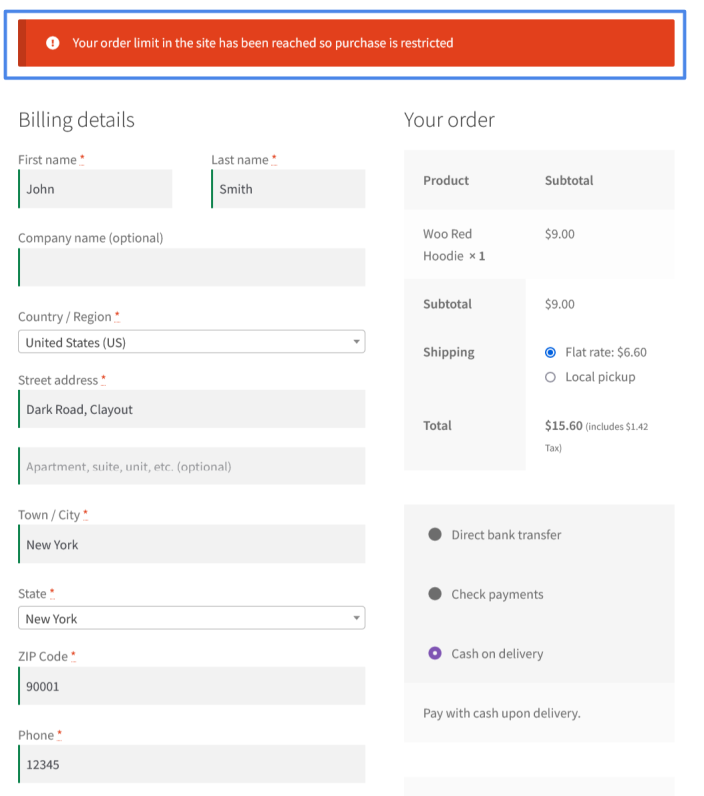
- User adds few products to the cart and proceeds to the cart page.
- On the cart page, an error message will be displayed to the user, if their order count is not within the configured threshold.
- The user will be allowed to place an order only when the order count is below the specified threshold.
Order Purchased Total Restriction – Usage
↑ Back to top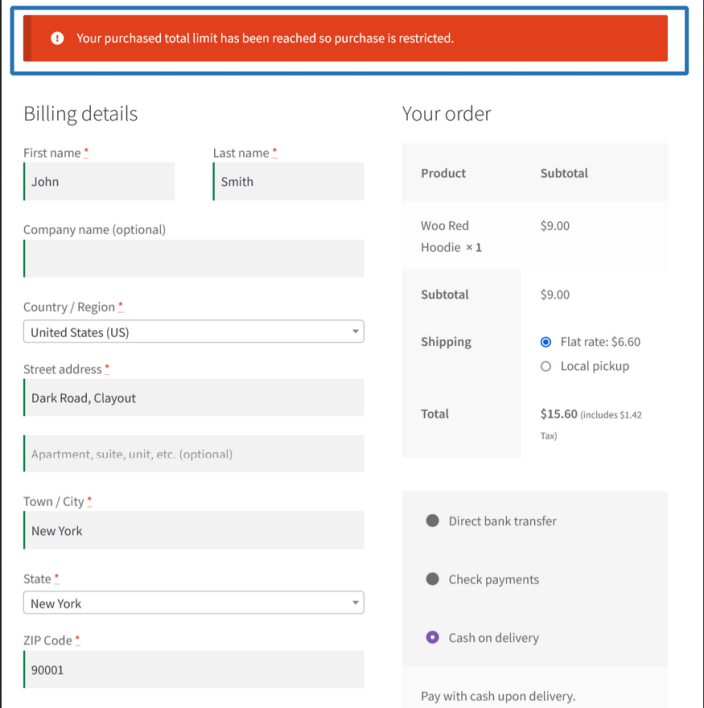
- User adds few products to the cart and proceeds to the cart page.
- On the cart page, an error message will be displayed to the user, if their order total is not within the configured threshold.
- The user will be allowed to place an order only when the purchased order total is below the specified threshold.
Min/Max Quantity Restriction – Usage
↑ Back to top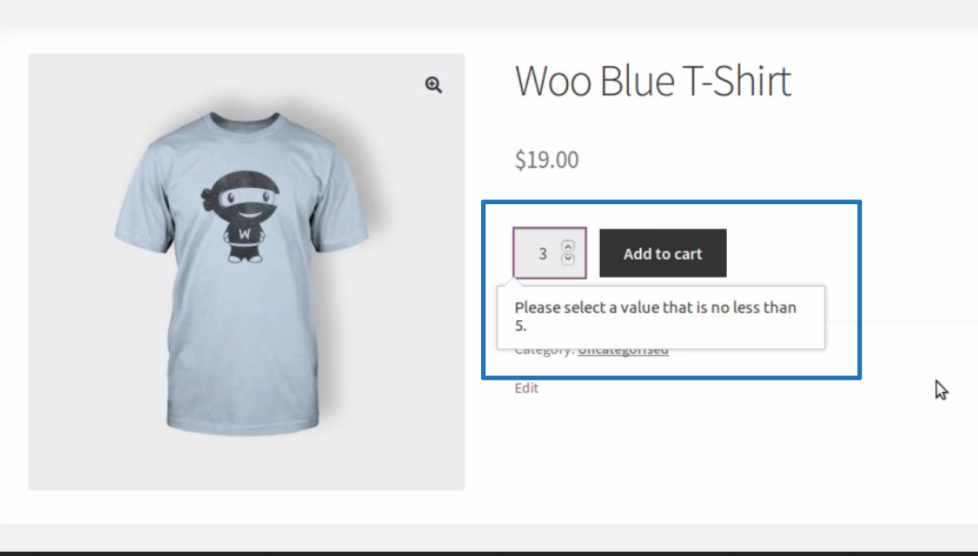
- When the user adds the product to the cart, the minimum product quantity configured in the plugin will be added to the cart.
- Users will not be able to purchase below/above the specified quantity.
Payment Gateway Restriction – Usage
↑ Back to top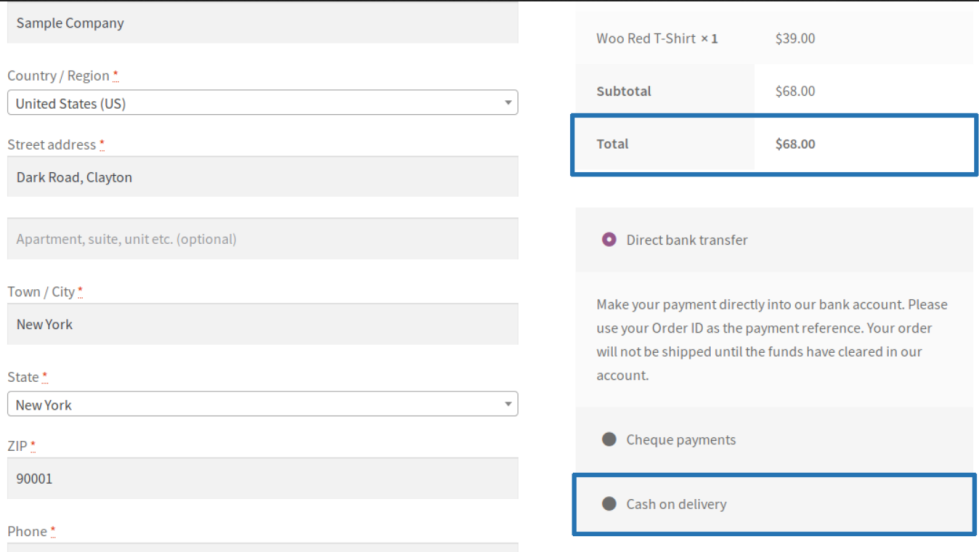
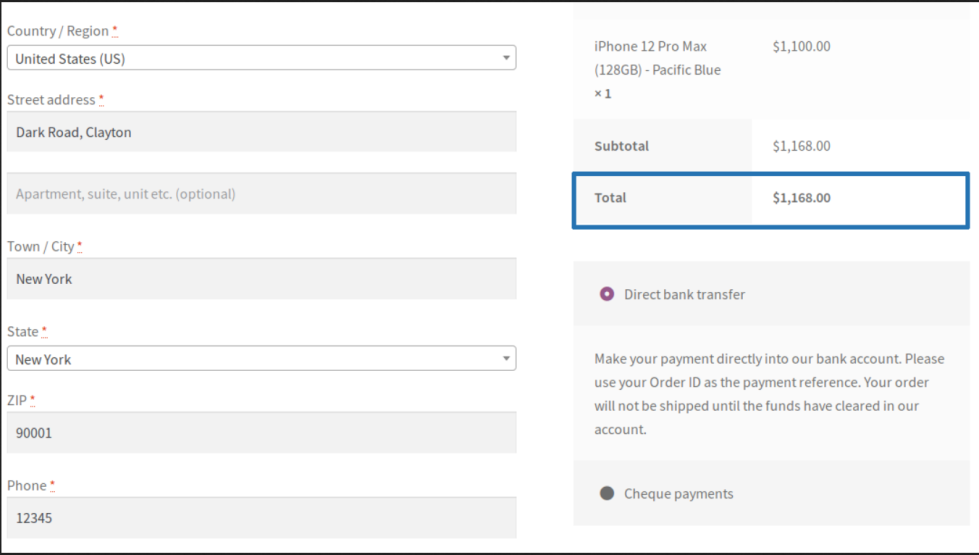
- User adds few products to the cart and proceeds to the checkout page to complete the payment.
- The restricted payment method will be visible only when the order amount is within the specified threshold.
Product Purchase Restriction – Usage
↑ Back to top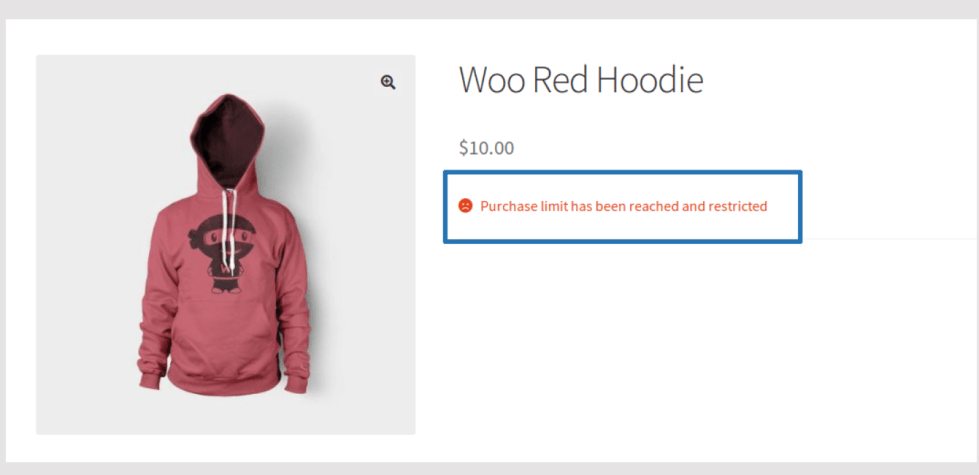
When the restriction is configured, the user will not be allowed to add the product to the cart if the user has already purchased more than the specified number of times.
Store-wise Purchase Restriction – Usage
↑ Back to top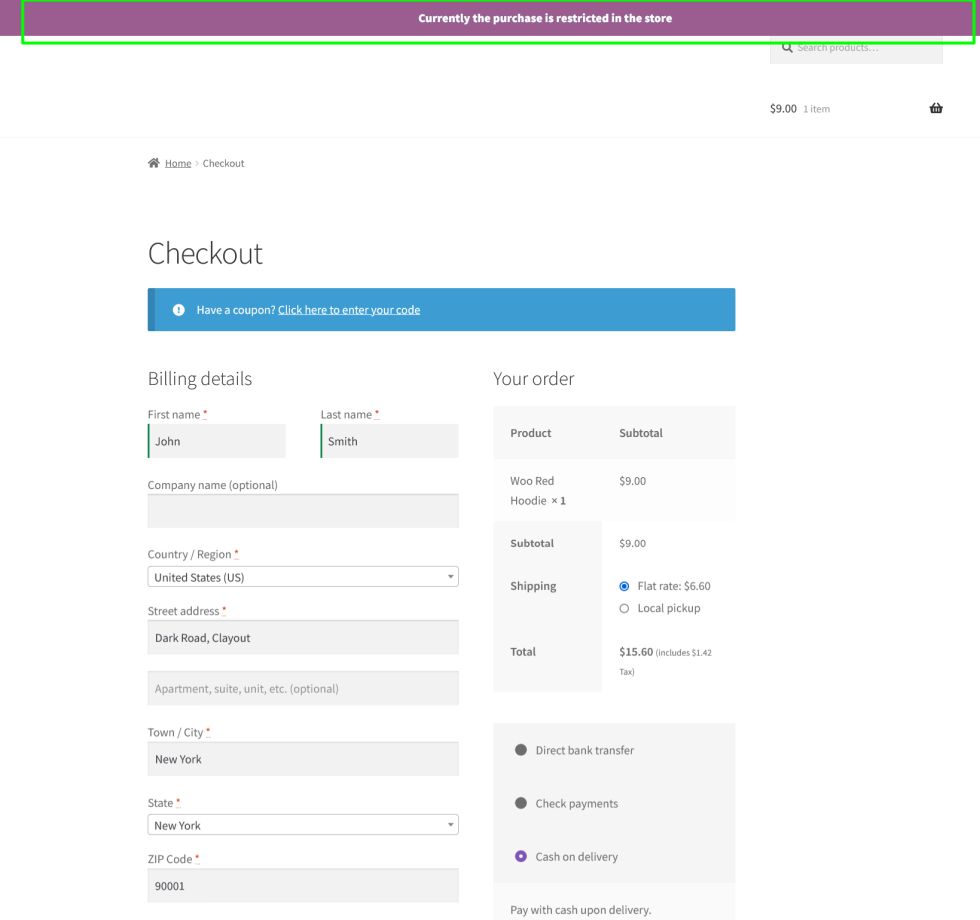
Users can be prevented from completing their purchase in the following scenarios,
- When they have exceeded the maximum amount which has to be spent on the site.
- When they have exceeded the maximum number of orders which can be placed on the site.
Translation
↑ Back to topOrder Restrictions for WooCommerce is translation ready, meaning you can edit the po files by which you can translate the text to any language. Steps to perform the translation are as follows. For example, a translation to French.
- Download and install Poedit
- Open the file order-restrictions-for-woocommerce > languages > order-restrictions-for-woocommerce.pot using Poedit.
- Create a new translation file by clicking Create new translation button.
- Choose the Source text and set its corresponding French text in Translation Text Area.
- Save the changes.
- Save the file name as order-restrictions-for-woocommerce-fr_FR.po.
- Then go to WordPress dashboard > Settings > General and select the Site Language as French.