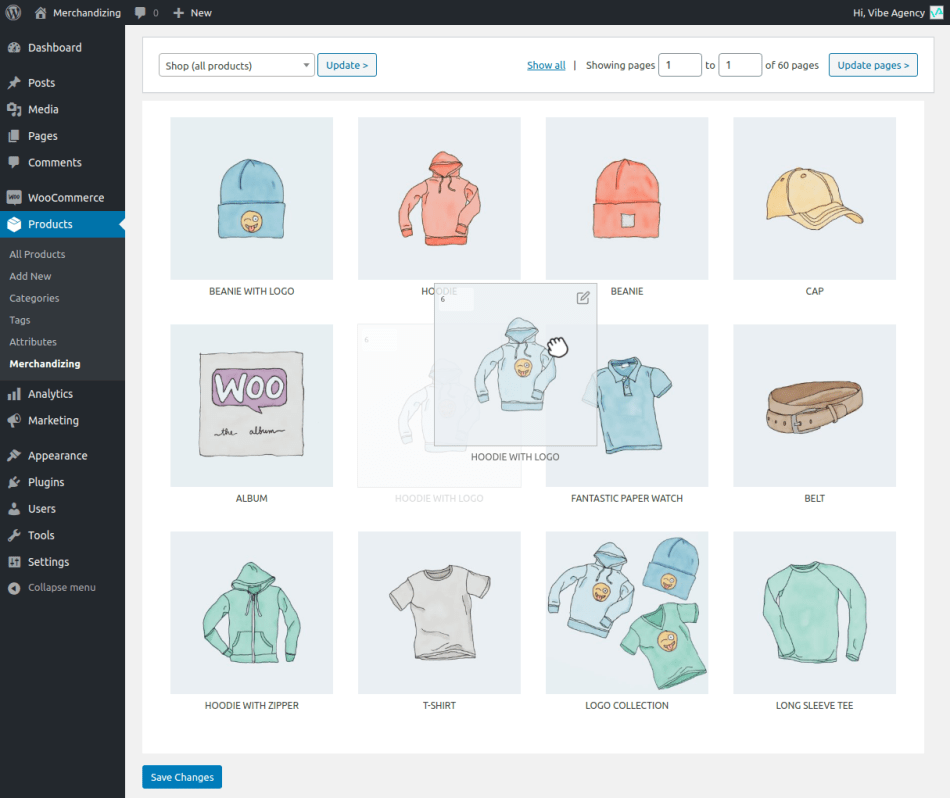
Product Merchandizing allows you to control the order of products in your shop using a drag-and-drop interface. A different product order can be applied to categories or other taxonomy terms.
- Download the .zip file from your WooCommerce account.
- Go to: WordPress Admin > Plugins > Add New and Upload Plugin with the file you downloaded with Choose File.
- Install Now and Activate the extension.
More information at:
Install and Activate Plugins/Extensions.
After activating the extension, merchandizing will automatically be enabled for products and all registered taxonomies for the product post type, such as product categories and product tags.
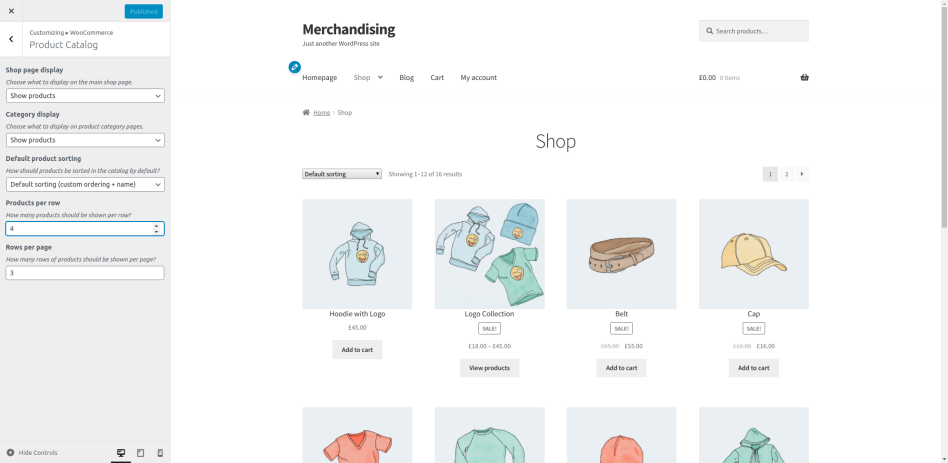
To configure the number of columns displayed within the merchandizing interface, update the products per row setting in
Appearance > Customize > WooCommerce > Product Catalog. On most themes this will also control the number of columns displayed on the front-end.

To start merchandizing your products:
- Go to Products > Merchandizing
- Use the select box at the top of the merchandizing page to choose the category or other archive to provide a sorting order for
- Drag-and-drop your products to sort them as you require
- Click the Save Changes button to save and publish the changes

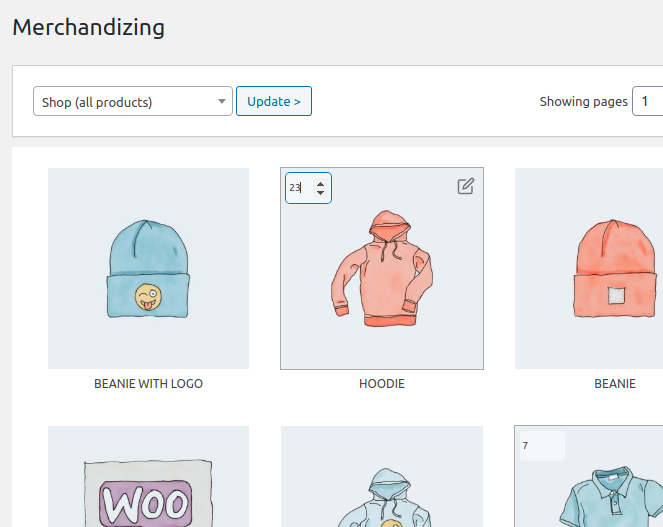
To add more granular control over the order of products, there is a numerical entry box that can be filled on each product. This is only visible on hover or focus of the product thumbnails.
Change the numbers to set the desired order, then click the
Save Changes button. The products will be rearranged based on the numerical index from low to high.
When using the drag-and-drop functionality these numerical indexes are reset to reflect the new order. So if the indexes are modified directly you should save the changes before continuing to use drag-and-drop.

This extension will override the default sorting of products in categories. If the ordering is not taking effect this is usually due to the theme or another plugin changing the shop archive to use something other than the default sorting. To identify which plugin/theme is the problem you could try disabling plugins or switching to a different theme.
Be aware that if you are using caching plugins (or a server level page cache) then the sort order may not change until the cache expires or is manually cleared.
The number of columns to display is taken from the products per page setting in the Customizer. If the theme you are using does not respect this setting then the number of columns may differ. You may still be able to change this setting to match the number of columns in your theme to make them consistent. The merchandizing extension will support up to 8 columns. On small screens fewer columns may be shown than the value set in order to keep the interface usable.
Note that the products per page setting was only added to WooCommerce in version 3.3.0, so in earlier versions you would need to use a code snippet (listed below).
The page size is determined from the products per page settings in the Customizer, or if that is not set then the default WordPress posts per page setting (
Settings > Reading). If the theme or another plugin overrides these values then it might be necessary to set the page size with the code snippet shown in the section below.
Yes. You are able to order products within any registered taxonomy. All product taxonomies and their terms will automatically be added to the list of archives you can sort.
Yes. Although this will require using a code snippet – details listed below.
The extension has been tested with up to 1000 products in a category, but should perform well with more than this. Our roadmap includes adding further optimisations for larger stores.
These snippets are intended for use by developers. To use them you will need to add the code to your child theme’s functions.php file or via a plugin that allows custom functions to be added, such as the Code snippets plugin.
The best way to change the number of columns is using the WooCommerce customizer setting. However in versions of WooCommerce prior to 3.3.0 or themes without column support you can use the following. Just change the returned value to match the number of columns your theme uses.
function merchandizing_columns( $columns ) {
    return 4;
}
add_filter( 'vibe_merch_columns', 'merchandizing_columns' );
The extension will try to match the page size used on the shop front-end, but if the theme uses non-standard settings for the page size this may not work correctly. You can correct this with the following code snippet. Just change the returned value to match your theme’s page size.
function merchandizing_page_size( $columns ) {
    return 12;
}
add_filter( 'vibe_merch_page_size', 'merchandizing_page_size' );
function merchandizing_post_types( $post_types ) {
    $post_types[] = 'post';

    return $post_types;
}
add_filter( 'vibe_merch_post_types', 'merchandizing_post_types' );


