
Express checkout methods allow customers to quickly pay for a product or service using pre-filled information from an existing account. The result is a completed purchase with very little “friction,” which can help lead to increased conversion rates.
With the Stripe extension, there are four express checkout methods available:
This guide will cover the requirements for offering express payment methods and how to enable them on your site.
Site requirements
↑ Back to topTo properly display express payment methods via the Stripe extension:
- Your domain must have a valid SSL certificate.
- Your entire site must be served over HTTPS.
Additional Apple Pay requirements
↑ Back to topIn addition to the site requirements above, Apple Pay also requires that:
- Your server has port
443open. - Your server supports the TLS 1.2 protocol or later.
- Your domain is enabled on your Stripe account’s payment method domains page.
NOTE: Apple Pay requires a domain association file to be hosted on your site. The Stripe extension automatically creates this file for you.
Additional Google Pay requirements
↑ Back to topIn addition to the site requirements above, Google Pay also requires that:
- Your domain is enabled on your Stripe account’s payment method domains page.
Additional Link by Stripe requirements
↑ Back to topIn addition to the site requirements above, Link by Stripe also requires that:
- Your Stripe account is based in one of the following countries: the United States, Canada, Mexico, Japan, Australia, New Zealand, Hong Kong, Singapore, Malaysia, United Arab Emirates, or any European country.
Additional Amazon Pay requirements
↑ Back to topIn addition to the site requirements above, Amazon Pay also requires that:
- The currency your customer is paying in is one of these: USD, AUD, GBP, DKK, EUR, HKD, JPY, NZD, NOK, ZAR, SEK, or CHF.
- Your Stripe account is based in one of the following countries: Austria, Belgium, Cyprus, Denmark, France, Germany, Hungary, Ireland, Italy, Luxembourg, Netherlands, Portugal, Spain, Sweden, Switzerland, United Kingdom, or the U.S.
Enabling express checkouts
↑ Back to topTo enable express payment methods in the Stripe extension:
- Navigate to WooCommerce > Settings > Payments > Stripe > Payment Methods.
- Scroll down to the Express checkouts section.
- Select which of the express payment methods you’d like to enable.
- Select the Save changes button when you are finished.
NOTE: Apple Pay and Google Pay cannot be enabled separately.
Customizing express checkouts
↑ Back to topAfter saving your payment method settings, you can customize how each set of express checkout method buttons appear on your site by selecting the Customize links.
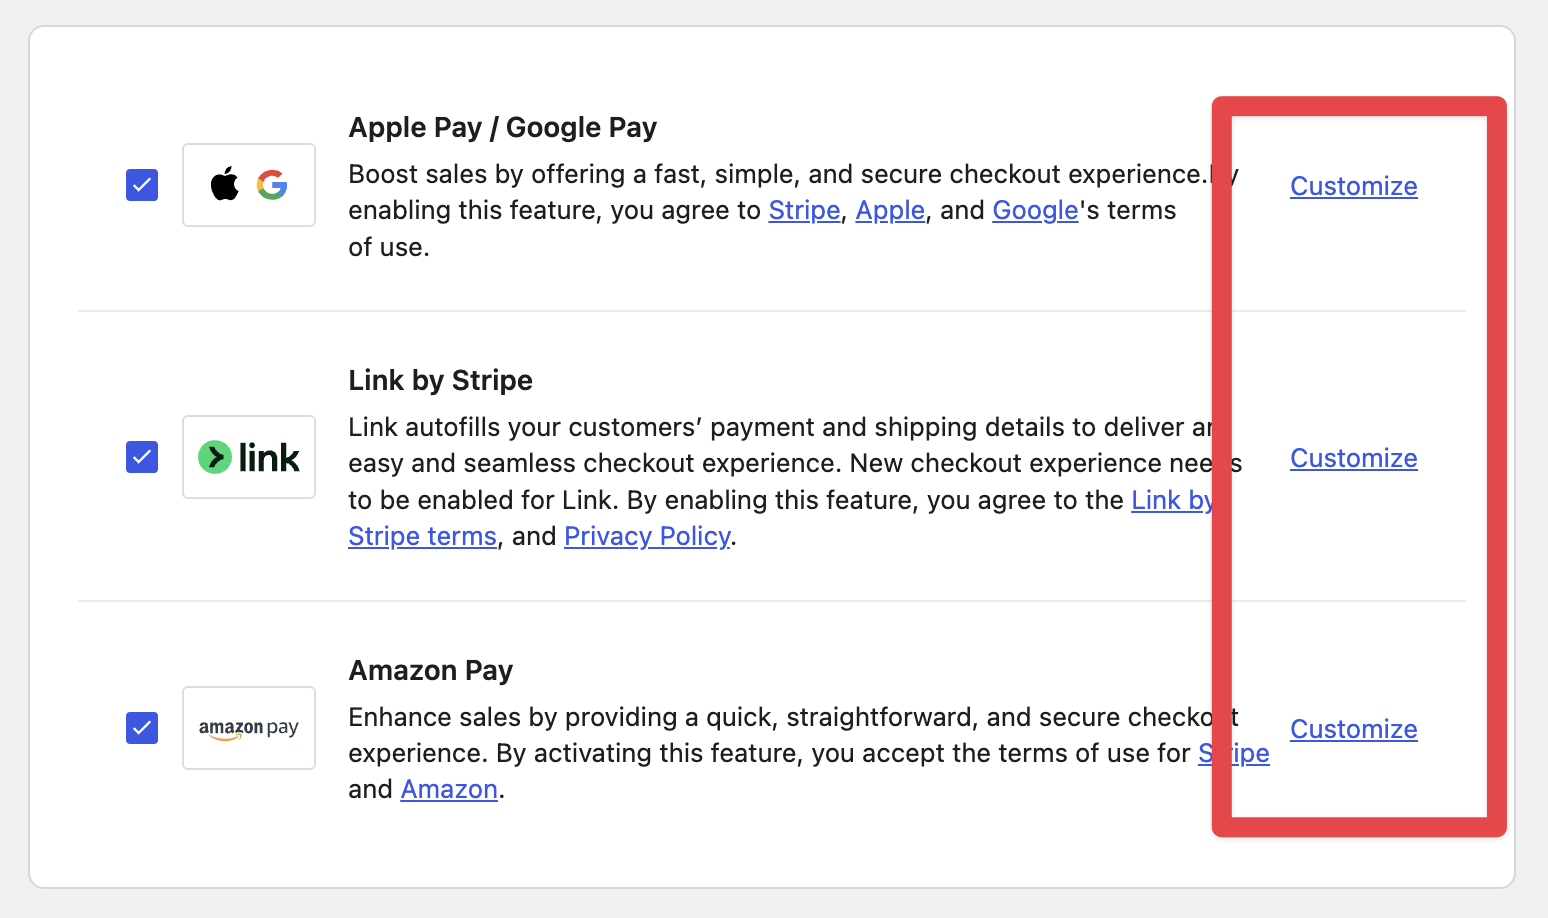
When customizing Apple Pay and Google Pay, you can change:
- Which of the following pages these buttons will appear on:
- The checkout page.
- Individual product pages.
- The cart page.
- The change payment method page (if the Subscriptions plugin is active)
- The call to action used in the buttons.
- The size of the buttons.
- The color theme of the buttons.
Amazon Pay and Link only allow you to customize the button locations and button size. (Note that the change payment method location is not available for Amazon Pay.)
Preview and eligibility
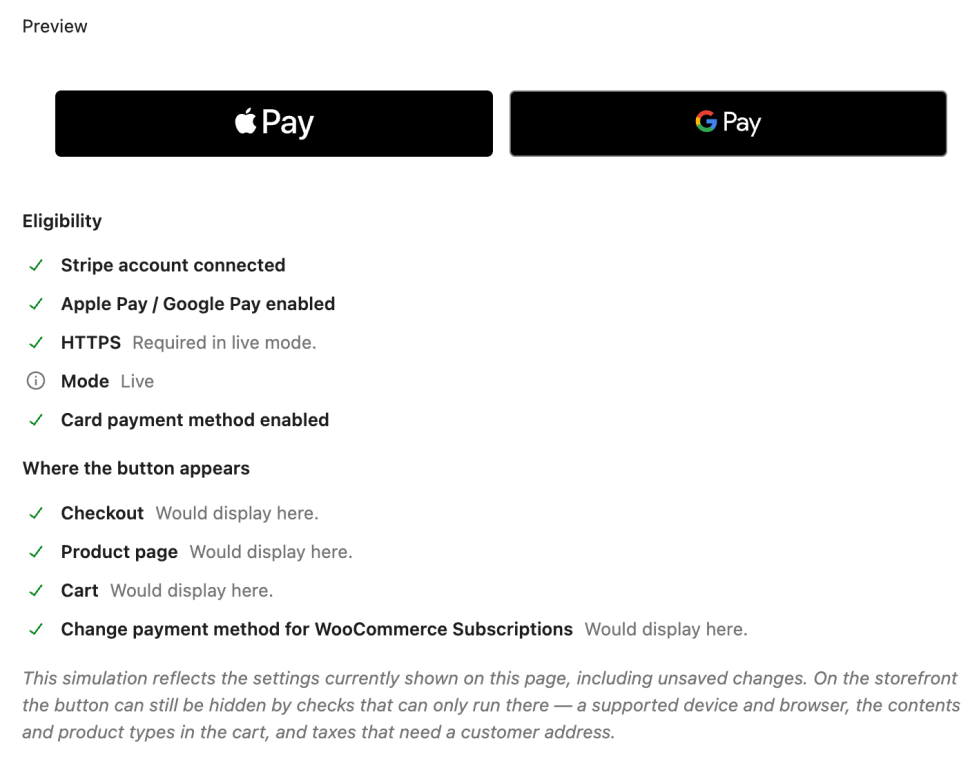
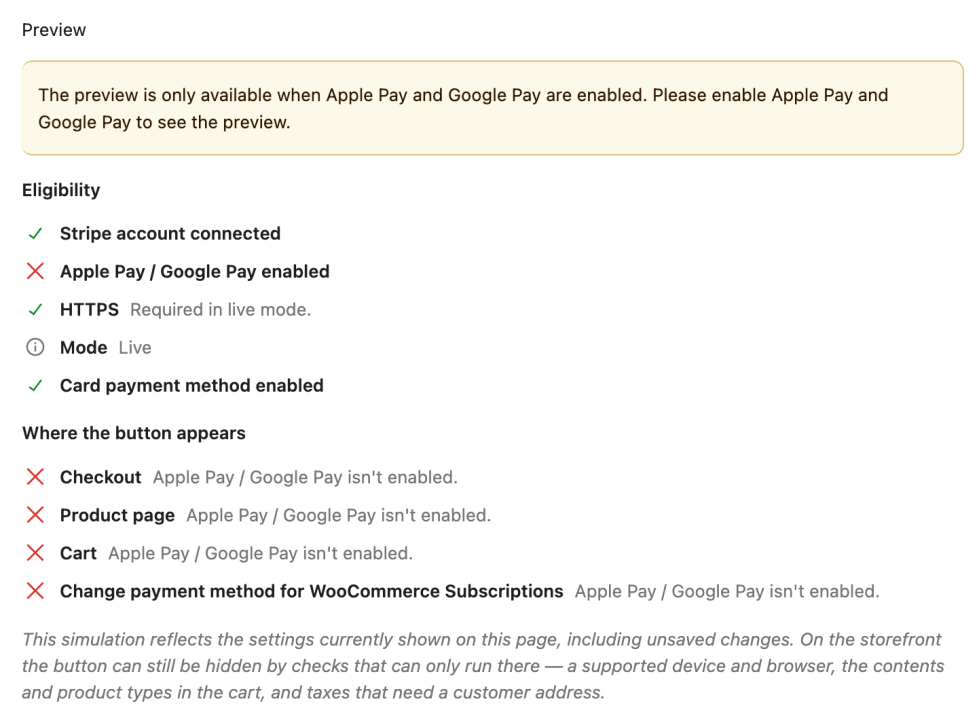
↑ Back to topA preview of the buttons is shown below the customization options so that you can see how the customizations will appear before saving your changes.
Below the previews, we list the eligibility requirements for the buttons, which ones are missing (if any), and where the buttons will appear.
Compatibility
↑ Back to topExpress checkout methods are very similar to card payments. As a result, they work well with most features, such as test mode and separate authorize/capture.
But there are some cases in which express checkout methods won’t be shown:
- Any non-default product type
- Pre-orders that charge upon release
- Composite products
- File upload fields
- Free products
- Variable subscriptions where any variation is out of stock
- Products that don’t require shipping, but only if the “Calculate tax based on” setting is set to the customer billing address.
Custom fields
↑ Back to topSome extensions add custom fields to the checkout page(s). How express checkouts handle them depends on how the extension registered the custom field.
With the woocommerce_register_additional_checkout_field function:
- These fields appear on the blocks checkout page. When a shopper pays with an express method from that page, express checkout collects the values they entered and saves them to the order.
- These fields are not shown on product or cart pages, so express checkout sends them empty from there. If one of them is required, WooCommerce refuses the payment and reports that the field is required.
With the woocommerce_checkout_fields filter, what happens depends on whether your store’s checkout page uses the shortcode checkout or the checkout block.
If your checkout page uses the shortcode checkout:
- These fields are shown on the checkout page. Express checkout enforces any that are marked as required, and saves the values a shopper enters to the order as custom fields keyed by the field ID.
- Express checkout runs this check after the shopper approves the wallet sheet, not before it opens, so shoppers get no advance warning. The payment is refused, and an error is shown that indicates the missing field.
- These fields aren’t shown on product or cart pages. If one is required, the payment is refused, and the error tells the shopper to go to checkout, fill in the required fields, and complete the order from there. The error links to your checkout page.
If your checkout page uses the checkout block:
- The checkout block can’t show these fields, so express checkout doesn’t enforce them, even when they’re marked as required. This applies whether the shopper pays from the checkout page, the cart page, or a product page.
- The order goes through, and no value is saved for these fields.
- If your site also has a separate page that uses the shortcode checkout, any express payments made from that page still follow the shortcode checkout rules above.
- Fields only appear on the checkout block if the extension registers them with the
woocommerce_register_additional_checkout_fieldfunction.
If an express checkout refuses an order because a required field is missing, an error is written to the logs, even if logging is turned off. The log entry will say “Missing required custom fields in express checkout” and lists the IDs of the missing fields and the error the shopper saw.
On stores that use the checkout block, the log also notes each express order that went through with a required field left empty, along with the field IDs. These entries are only written when loggin is turned on.
To see all these logs, go to WooCommerce > Status > Logs and open the most recent woocommerce-gateway-stripe log.
To stop logging refused payments, use this code snippet. (Express checkout still refuses the payments, it just won’t log them.)
add_filter( 'wc_stripe_express_checkout_log_missing_required_fields', '__return_false' );To turn off this handling entirely, use this code snippet:
add_filter( 'wc_stripe_express_checkout_enable_classic_checkout_custom_fields', '__return_false' );Using that snippet, required fields added with the woocommerce_checkout_fields filter no longer block express checkouts, and values aren’t saved to express checkout orders. Fields added via woocommerce_register_additional_checkout_field are not affected because WooCommerce validates those itself.
Can I use only the express checkout methods and not take card payments?
↑ Back to topGenerally not. The credit card/ debit card payment method must be enabled in order to use express checkout methods.
There is one exception: if you are using the Optimized Checkout Suite and have Link by Stripe enabled, Link will show on the checkout page even if you disable card payments.
Show Express Checkout Buttons for Virtual Products
↑ Back to topNOTE: Enabling Express Checkout for digital products may result in inaccurate tax calculation if the store’s tax settings depend on the customer’s billing address—which is not made available to the Express method before they are selected.
By default, Stripe for WooCommerce hides Express Checkout buttons (Apple Pay, Google Pay, Link, etc.) when:
- A product is not shippable (e.g., virtual or downloadable), and
- Taxes are configured to be calculated based on the customer’s billing address
This behavior was introduced to prevent tax mismatches, since WooCommerce doesn’t have the customer’s address until after the payment confirmation button is clicked—making it challenging to calculate tax accurately in advance.
As of Stripe for WooCommerce 9.5.0, developers can override the default behavior.
add_filter( 'wc_stripe_should_hide_express_checkout_button_based_on_tax_setup', '__return_false' );NOTE: We are unable to provide support for customizations under our Support Policy. If you need to customize a snippet beyond what is shown on this page, we suggest Codeable or a Certified WooExpert.

