Installation
↑ Back to top- Download the ultimate-payment-plans.zip file from your WooCommerce account.
- Go to: WordPress Admin > Plugins > Add New and Upload Plugin with the file you downloaded with Choose File.
- Install Now and Activate the extension.
Requirements: WooCommerce 5.0.0+
Setup and Configuration
↑ Back to topHow to use
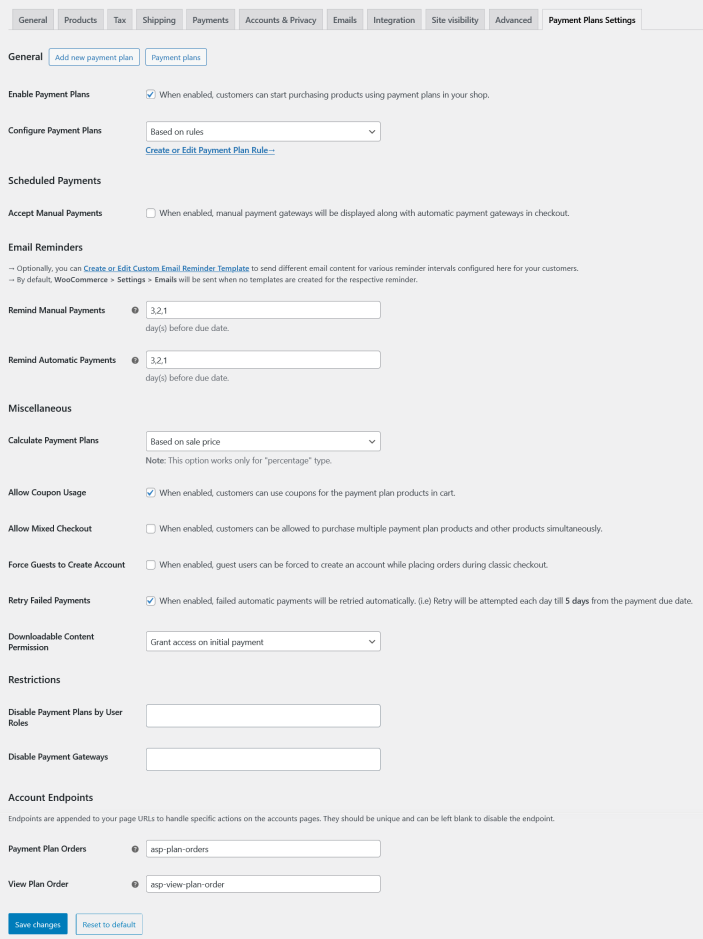
↑ Back to topAfter activation of Ultimate Payment Plans, navigate to: WooCommerce > Settings > Payment Plans Settings to setup the plugin settings.

- Enable the option Enable Payment Plans so that your customers can start purchasing products using payment plans in your shop.
- After enabling it, the site admin can have 2 options below to configure payment plans for their existing products on the Shop under the option Configure Payment Plans.
- Based on rules
- Based on storewide & productwide
3. To configure the payment plan for the product based on Rules:
- Click the link Create or Edit Payment Plan Rule which will navigate you to create flexible payment plan rules for your customers.
- Before creating the payment plan rule, it will be asked to create payment plans first, create it and assign it to the rule which you are creating.
- To create a payment plan, click the Create your first payment plan button.
4. To configure the payment plan for the product based on Storewide & Productwide:
- By default all products in your shop will follow these settings. You can also override these settings for each product separately to make exceptions.
- To apply the payment plans option on a global or storewide basis select the payment plans here.
- Payment Plans give customers the option to pay a down payment and the remaining payments at a later date, dividing payments into multiple parts over time. This would be similar to a loan, layaway, installment payments, flexible payments or credit plan.
- If you do not want payment plans for all products, skip these settings and go to Productwide settings under Edit product > Configure Payment Plans and choose the payment plans here.
