Product Condition for WooCommerce allows you to set a condition (new, used, like new, etc.) for all of the products on your site. The settings for Product Condition for WooCommerce lets you set a single “default” product condition for all of your products. It also lets you set a unique condition for each individual product, which overrides the default product condition.
For example, if your site sells products that are mostly in “new” condition, you would set the default product condition to “new”. However, it is possible that from time to time you might have a few products that are in “used” or some other condition. In that case you can set the “used” condition on the specific products that are used.
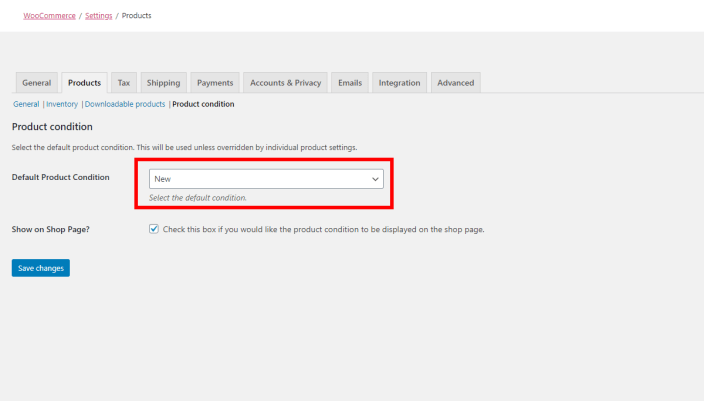
To set a default product condition, navigate to WooCommerce > Settings > Products tab > Product condition sub tab.
On this settings page there are two settings that can be set, the first is the default product condition. For this setting, select the option that makes the most sense for your store. The option you select should be the product condition that the majority of your store’s products will be in.
Please note that you can change this setting at any time and any product that does not have an overriding product condition set will be updated to reflect this default product condition.
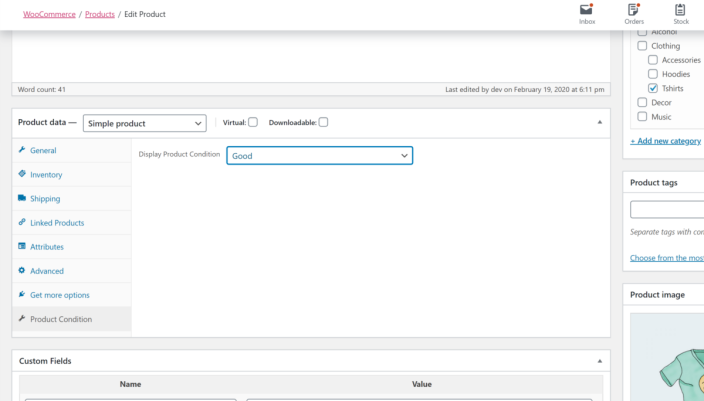
To set a product condition for an individual product, navigate to the product edit page by navigating to Products > All Products > Click the Edit product link.
In the Product data section, click the Product Condition tab.
Select the appropriate product condition for the product.
Publish or update the product to save your changes.
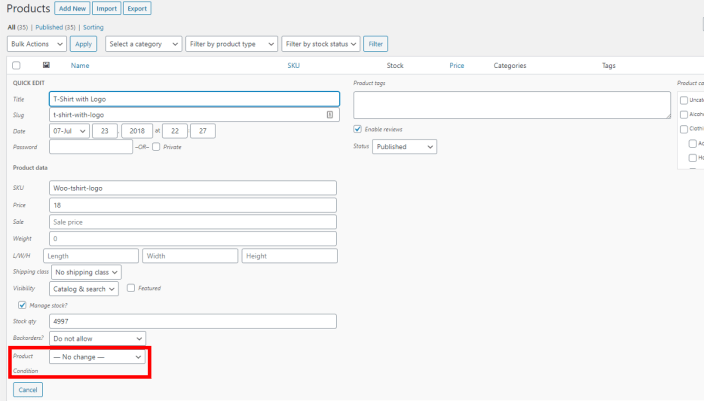
To quickly set a product condition for an individual product, you can utilize the Quick Edit link under the product name on the Products > All Products page. This means you don’t have to open every product individually following the steps above just to edit the product’s condition.
After clicking on the Quick Edit link, you will see a screen that looks similar to the screenshot above. Near the bottom you will see a drop down menu next to the Product Condition label.
Select the product condition you wish to set for that product, then click the Update button.
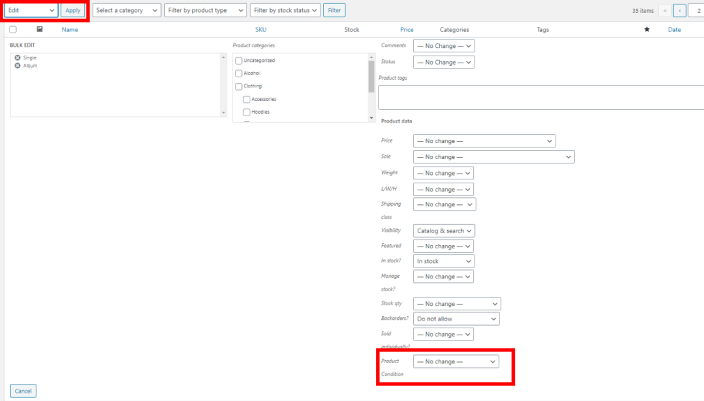
To quickly set a product condition for multiple products at once, you can use the bulk edit feature. This way if you have many products that all have the same product condition, you can edit them all at once.
- Navigate to the Products > All Products page.
- Check the box next to all of the products you want to change the product condition for.
- Note: All of the products you select will get the same product condition. If you need to set several product conditions for different products, you should repeat this process for each condition.
- Select “Edit” from the Bulk Actions drop down menu at the top or bottom of the page. Then click the Apply button.
- Select the product condition you wish to set for that product, then click the Update button.
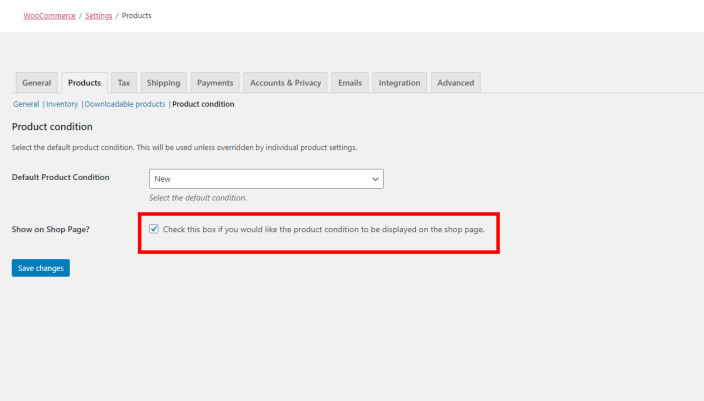
You can optionally set the product condition to be displayed on the shop page. To do this, navigate to WooCommerce > Settings > Products tab > Product condition sub tab.
From there, check the box next to
Show on Shop Page. Checking this box will enable the product condition to be displayed on the shop page as well as any category pages on your site.
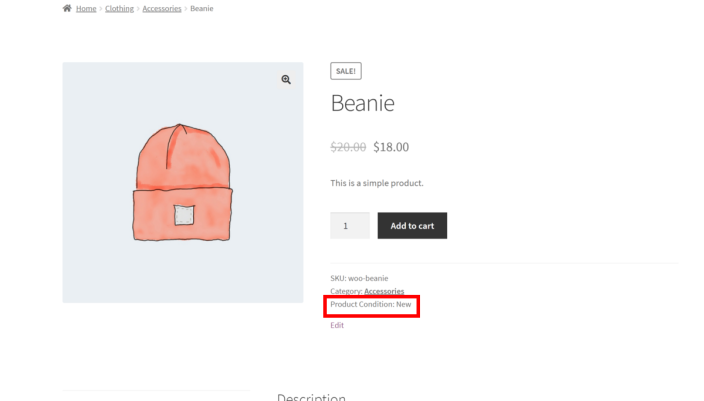
The product condition is shown on the single product page in two places, as well as on the shop page if you have checked the box in the plugin’s settings.
On the product page, one display is readily visible to your customers, while the other is designed for search engines to read in a structured format so they can understand the general condition of your products. On the shop page, the product condition is displayed after the product’s information (name, price, etc.) and before the add to cart button.
The output may look different depending on the theme you are using. Product Condition for WooCommerce hooks into the end of the product meta section to add the product condition, which will look like the section in the red box below. Please note that the red box is just for illustration purposes. The red box is not a part of the plugin and will not be displayed on your site.
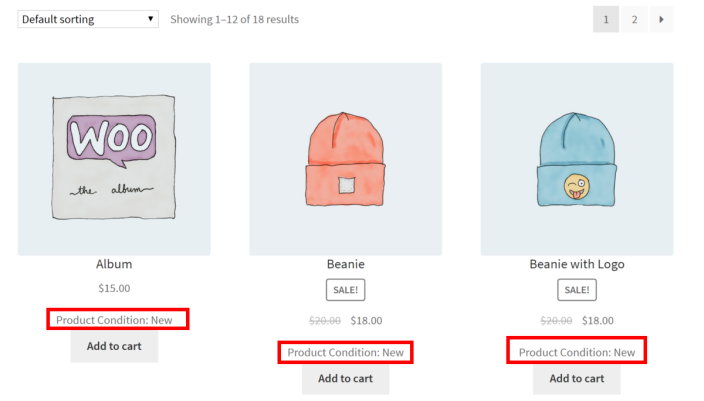
On the shop page, the product condition is displayed the product’s information (image, name, price, etc.) and above the add to cart button.
Note: In order to display the product condition on the shop page, you must check the box in the plugin’s settings. See above for more information.
Search engines look for what is known as Schema markup, or structured data. Part of this markup for products includes the product’s condition.
There are four product conditions that are expected to be included in this markup, which include:
- NewCondition
- UsedCondition
- RefurbishedCondition
- DamagedCondition
Product Condition for WooCommerce provides over 20 different product conditions. In order to display a result that search engines are expecting, we group each of the product conditions included in the plugin with one of the above product conditions.
The product condition’s Schema markup is only displayed on the product page, and not on the shop or category pages. Those groupings include:
- NewCondition
- Brand new
- New
- New other
- New with box
- New with defects
- New with tags
- New without box
- New without tags
- UsedCondition
- Acceptable
- Certified pre-owned
- Good
- Like-new
- Pre-owned
- Used
- Very good
- RefurbishedCondition
- Manufacturer refurbished
- Remanufactured
- Retread
- Seller refurbished
- DamagedCondition
Examples:
- If your product’s condition is set to “Brand New”, the markup will show NewCondition.
- If your product’s condition is set to “Good”, the markup will show UsedCondition.
- If your product’s condition is set to “Remanufactured”, the markup will show RefurbishedCondition.
- If your product’s condition is set to “For parts”, the markup will show DamagedCondition.
Developers looking to extend this plugin can take advantage of the filters included in the plugin. For more information on those filters, please visit the
developer support documentation.