Installation
↑ Back to top- Download the .zip file from your WooCommerce account.
- Go to: WordPress Admin > Plugins > Add New and Upload Plugin with the file you downloaded with Choose File.
- Install Now and Activate Plugin.
More information at Install and Activate Plugins/Extensions.
Supported Countries
↑ Back to topCurrently supported origin countries:
Germany, France, Ireland, Austria, Belgium, Croatia, Czechia, Hungary, Romania, Slovenia, Slovakia, Serbia
Delivery is supported to all the countries where GLS operates.
Settings
↑ Back to topOnce GLS Shipping MethodGLS for for WooCommerce is activated, you’ll need to configure the basic settings, which can be found under WooCommerce > Settings > GLS Labels.
| Client ID | Company ID provided by GLS. Example: 492111111 |
| Login E-mail | The email address that you use to log in to your MyGLS account. |
| Login Password | The password that you use to log in to your MyGLS account. |
| Sender Name | Name of the company that is sending packages. |
| Contact Name | Name and last name of the contact person. |
| Contact Email | Company email for GLS or clients to contact. |
| Contact Phone | Company phone for GLS or clients to contact. |
| Pickup Street | Pickup street without number where GLS picks up the packages. |
| Pickup House Number | Pickup house number. |
| Pickup Zip Code | Pickup zipcode. |
| Pickup City | Name of the town or village. |
| Country | The local country of the company with GLS contract. Options are: Germany, Slovenia, Croatia, Czechia, Slovakia, Hungary, Romania, Serbia |
| Require customer phone | GLS absolutely needs the customer’s phone number to create labels for some services. If there are no phone numbers, some services won’t work. |
Services Settings
↑ Back to topIn the extension settings, you will have the option to choose between various GLS services. You can easily enable or disable the services that are available, and decide which ones you want to be selected by default. We suggest choosing the ones that you use the most.
Some services are not compatible with each other. In this case, our program will notify you of an error in red. For example. You cannot use T10 and T12 together because it makes no sense. Either delivery by 10:00 or delivery by 12:00 can be used. But they don’t work together.
When a parcel shop service is selected for a package, it is not possible to select any other service.
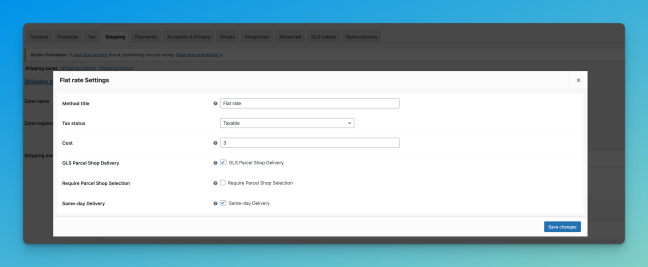
Parcel Shop Settings
↑ Back to topIf you want to use the parcel shop selection at checkout, you will need to turn on this functionality. The next important setting is to enter the Google API key. This key is free for up to $200 per month, which is more than enough for most online merchants.
You can get the Google Maps API key at this web address. You can see some details of the settings here. If you encounter problems, you can contact us so that we can help you.
In the settings, you can also define the text that will be displayed:

Make sure you enabled the feature in the shipping methods:
Additional Settings
↑ Back to topPrinting formats
- A4 Format – 2×2 – 4 stickers are printed in A4 format. Each is A6 in size.
- A6 Format – GLS Connect
- Thermo – For thermal printers that print on a roll
Automatic deletion of bulk printing labels
Every time you choose bulk printing, a file with all the stickers will be created on your hosting. After some time, it can happen that quite a few of these files accumulate, so it is recommended to delete them periodically.
Default message for the SMS service (SM1)
In the textarea field, you can set what kind of SMS the customer will receive if the SM1 service is selected. You can use variables in the message that will be automatically replaced:
- #ParcelNr# – Parcel number
- #COD# – COD value
- #PickupDate# – Pickup date
- #From_Name# – Sender Name
- #ClientRef# – Order Number
Email content
When the order changes to the “completed” status, the customer receives an email. You can easily add text with a tracking number to this email. Simply enter the text and enter #ParcelNr# instead of the tracking number. If you don’t want this feature, just leave the field empty.

Label comment
You can decide if you want to add an order not or a list of ordered SKUs to the GLS label.
Bulk Label Generation
↑ Back to topTo create bulk labels for multiple orders at once, simply visit the order list view and filter them if you need to filter. You will probably only want to print those orders that are in the “in progress” status. This depends on your workflow.
If you want to show more than 20 orders on this screen, you can find settings in the “Screen Options” tab in the upper right corner.