Overview
↑ Back to topSmart Social Proof and FOMO is a WooCommerce extension that allows shop owners to implement Social Proof and Fear Of Missing Out (FOMO) strategies in their shops. The features that Smart Social Proof and FOMO will bring to an online shop are:
- Sale notifications. Shop owners will be able to display sale notifications for products they want to promote;
- Review notifications. On product pages, there will be review notifications displayed for the product the customer is viewing;
- Measure the impact of notifications by tracking the impressions and clicks using Google Analytics 4 events.
- Sale countdown timer for products that have scheduled sales in WooCommerce;
- Display stock on product pages. Shop owners can display different messages depending on the stock level
- Live Viewers – Customers can see how many people are viewing the same product
Installation
↑ Back to topAs with any WordPress plugin, Smart Social Proof and FOMO can be installed on the website in 2 ways:
- Installing Smart Social Proof and FOMO directly from your website:
- Go to: WordPress Admin > Plugins > Add New and Upload Plugin with the file you downloaded with Choose File.
- Click Install Now and Activate the extension.
- Installing Smart Social Proof and FOMO using FTP
- Extract the WordPress plugin ZIP file to a folder on your computer.
- Upload the plugin folder to your FTP server. The folder should be copied to the following WordPress folder wp-content –> plugins. If you are upgrading an existing plugin, please make sure to overwrite the existing plugin folder.
- Activate the plugin by logging into your WordPress backend. Go to Plugins –> Installed Plugins, find the plugin from the list, and click ‘Activate’.
More information at Install and Activate Plugins/Extensions.
Setup and Configuration
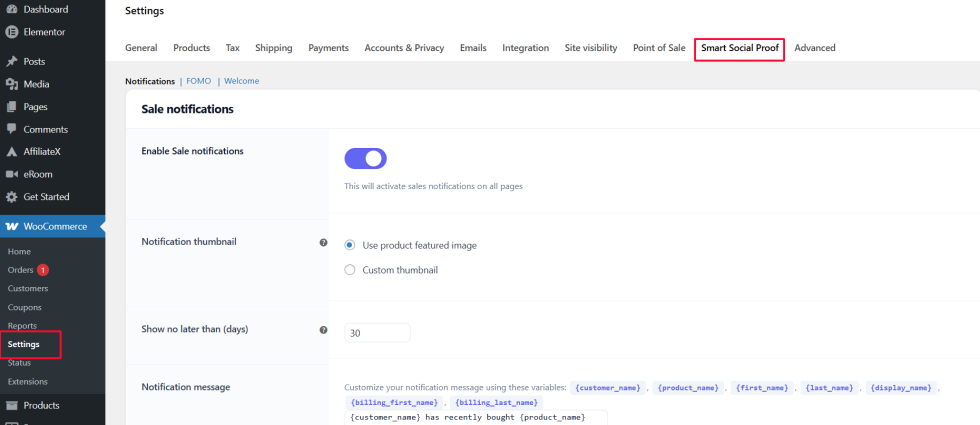
↑ Back to topPlugin functionalities can be enabled or disabled from the back-end by the administrator. To do this, go to WooCommerce – Settings – Smart Social Proof tab. From this tab, you will be able to enable/disable and set all the features of our plugin.
Sale notifications
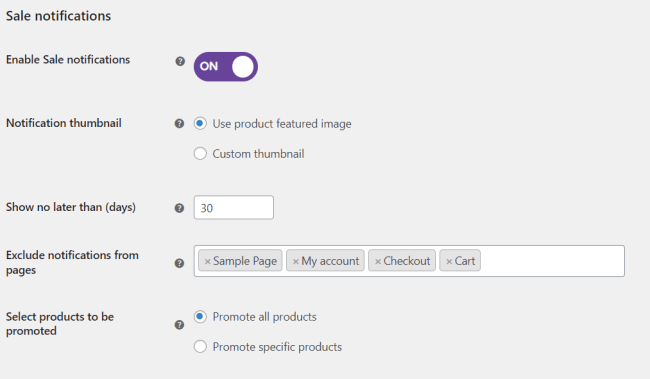
↑ Back to topSale notifications can be enabled from the Notifications tab by activating the Enable Sale notifications toggle. Once enabled, the sale notifications settings will be displayed and the admin can change the following settings related to the sale notifications:
- Notification thumbnail. Here the admin can choose the image that will be used for the sale notifications displayed on the front-end. The 2 options are:
- The product image;
- A custom image that can be uploaded through the media library.
- Show no later than (days). With this setting the admin can choose the period from which the product sales will be selected. This is measured in days, starting with the current date.
- Exclude notifications from pages. With this setting the admin can choose on which pages the sale notifications will not be displayed.
- Select products to be promoted. With this setting the admin can choose which products will be included in the sale notifications. The 2 options are:
- Promote all products. If this option is selected then the sale notifications will include the latest products sold in the shop.
- Promote specific products. If this option is selected then the admin will be prompted to select the products that will be featured in the sale notifications.
Note: The products in the sale notifications are selected depending on the page the customer is on:
- If the user is on a product page then the sale notifications will include only sales for the product that the customer is currently viewing. This is to increase the probability of the product being addedto the cart. On the product page, sale notifications will alternate with review notifications if these are enabled and the product has reviews.
- If the user is on a category page then the sale notifications will include only products from the same category, even if products from other categories are promoted.
- If the user is on another page that is not a product page or category page then the sale notifications will include all product sales (or promoted product sales), arranged in chronological order, starting with the latest.
All sale notifications will be linked to the product page related to the product from the notification.
Note: The plugin automatically detects if the Google Analytics 4 (GA4) script is present on the page. If the script is present, each notification will have 2 events attached, one for displaying the notification and one for clicking on it. the event names are ‘ssp_display’ and ‘ssp_click’.
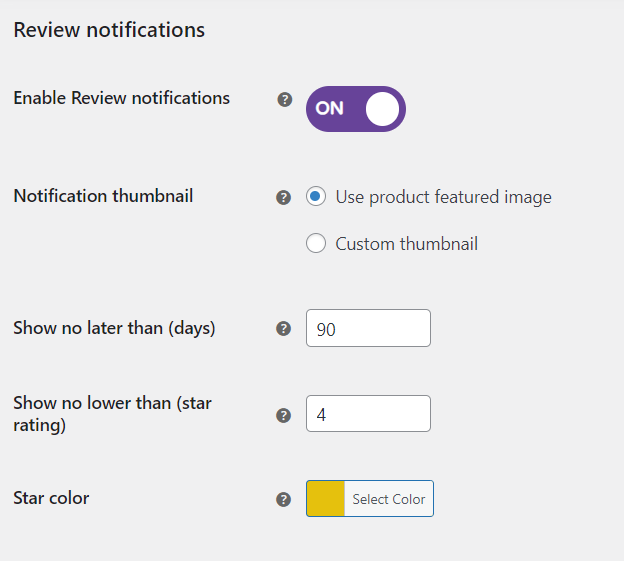
Review notifications
↑ Back to topThe review notifications will only be displayed on product pages if the product has reviews left by the customers. Review notifications can be enabled from the Notifications tab by activating the Enable Review notifications toggle. Once enabled, the review notifications settings will be displayed and the admin can change the following settings related to the review notifications:
- Notification thumbnail. Here the admin can choose the image that will be used for the review notifications displayed on the product pages. The 2 options are:
- The product image;
- A custom image that can be uploaded through the media library.
- Show no later than (days). With this setting the admin can choose the period from which the product reviews will be selected. This is measured in days, starting with the current date.
- Show no lower than (star rating). With this setting the admin will be able to select the minimum star rating for the displayed reviews.
- Star color. With this setting the admin will be able to select the color for the stars displayed on the notification.
Note: The plugin automatically detects if the Google Analytics 4 (GA4) script is present on the page. If the script is present, each notification will have 2 events attached, one for displaying the notification and one for clicking on it. the event names are ‘ssp_display’ and ‘ssp_click’.
Other notifications settings
↑ Back to topBesides the settings mentioned above, specific to each type of notification, there are other notification settings that will be applied to all notification types.
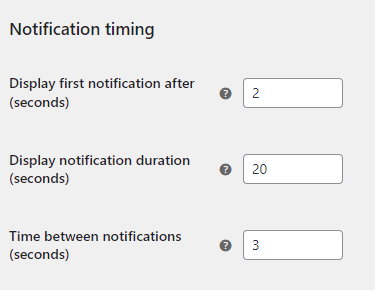
Notification timing settings
These settings control how the notifications are displayed on the front end. The settings are:
- Display first notification after (seconds). This setting allows the admin to control when the first notification is displayed on the page. The time is measured in seconds from the moment the page is loaded.
- Display notification duration (seconds). This setting allows the admin to control how long a notification is displayed. The time is measured in seconds from the moment the notification appears on the page. This time will be paused if the customer hovers over the notification.
- Time between notifications (seconds). This setting allows the admin to control the time between 2 notifications. The time is measured in seconds from the moment the previous notification is taken off the page and the time the next notification is displayed.
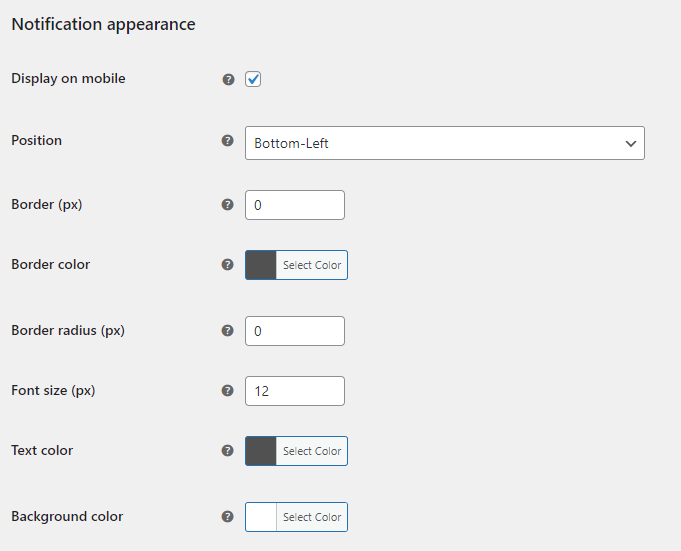
Notification appearance settings
These settings will give the admin control over how the notifications look on the front end. The settings are:
- Display on mobile. This setting allows the user to choose whether or not notifications will be displayed on mobile devices.
- Position. This setting allows the admin to choose the position of the notification on the page. The options are Bottom-left and Bottom-right.
- Border (px). This setting controls the border of the notification
- Border color. This setting controls the border color for the notifications
- Border radius (px). This setting controls the border radius for the notifications.
- Font size (px). This setting controls the font size for the text within a notification.
- Text color. This setting controls the color of the text within a notification.
- Background color. This setting controls the background color for notifications.
Notification content
These settings will give the admin control over how the content of the notification. The settings are:
- Display time since action. When checked, the notification will show how long ago the action occurred (sale or review).
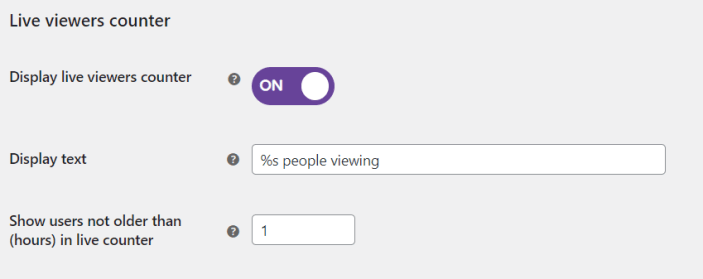
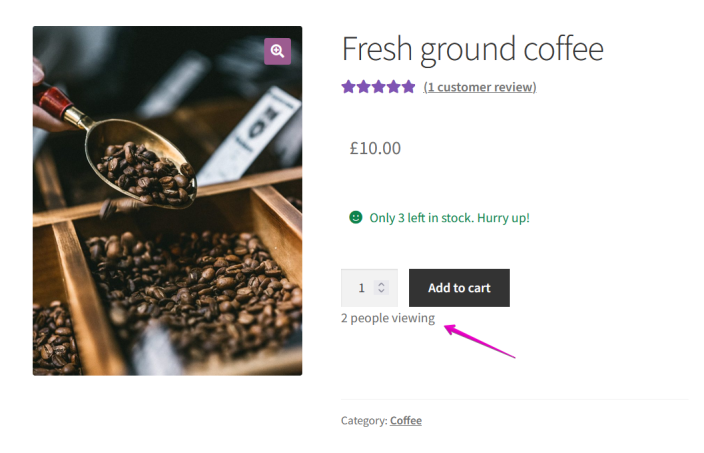
Live viewers counter
↑ Back to topThe live viewers counter will be displayed on the product page, beneath the [Add to cart] button. The counter will record how many users are viewing a product page in a given period, which can be set in the back-end settings. The live viewers counter can be enabled from the FOMO tab by activating the Display live viewers counter toggle. Once enabled, the counter settings will be displayed and the admin can change the following settings:
- Display text. This field allows the admin to edit the text that will be displayed for the counter on the front-end product page. The string can accept the ‘%s’ variable, which represents the actual count for the number of users. Ex. ‘%s people are viewing this product’
- Show users not older than (hours) in live counter. This field allows the admin to set the period when a user is considered active on the product page. This period is measured in hours.
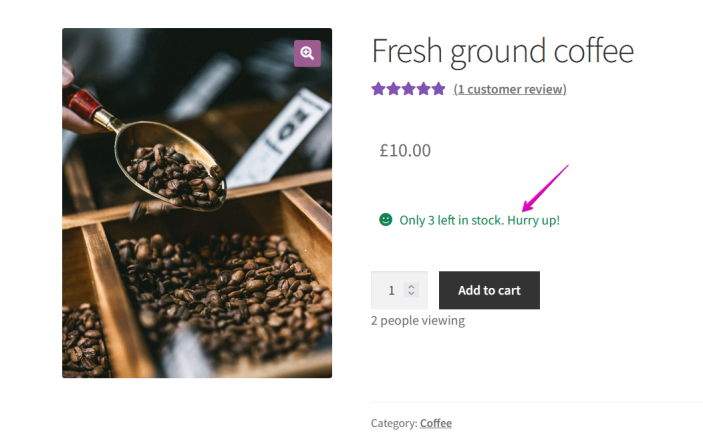
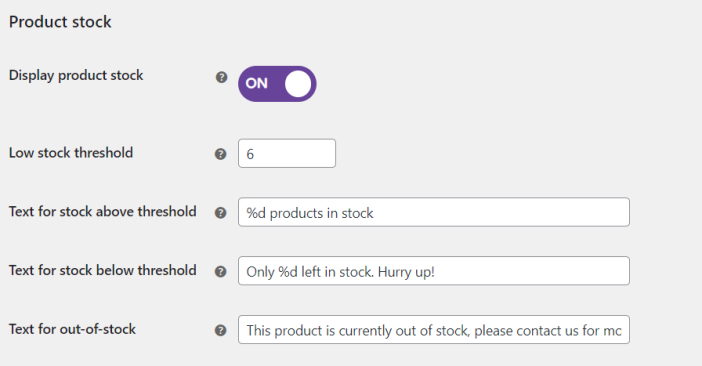
Product stock
↑ Back to topThe product stock will be displayed on the product page. The product stock will be displayed only for products that have the ‘Track stock quantity for this product’ option checked on the back-end product page. The product stock can be enabled from the FOMO tab by activating the Display product stock toggle. Once enabled, the product stock settings will be displayed and the admin can change the following settings:
- Low stock threshold. This field allows the admin to set a threshold beneath which the stock of a product is considered low. Depending on this threshold, the text displayed on the front-end product page will differ.
- Text for stock above threshold. This field allows the admin to edit the text that will be displayed if the product is equal to or above the low stock threshold. The string can accept the ‘%d’ variable, which represents the actual stock number for the product. Ex. ‘%d products in stock’.
- Text for stock below threshold. This field allows the admin to edit the text that will be displayed if the product is below the low stock threshold. The string can accept the ‘%d’ variable, which represents the actual stock number for the product. Ex. ‘Onl %d products left. Hurry up!’.
- Text for out-of-stock. This field allows the admin to edit the text that will be displayed when a product is out of stock.
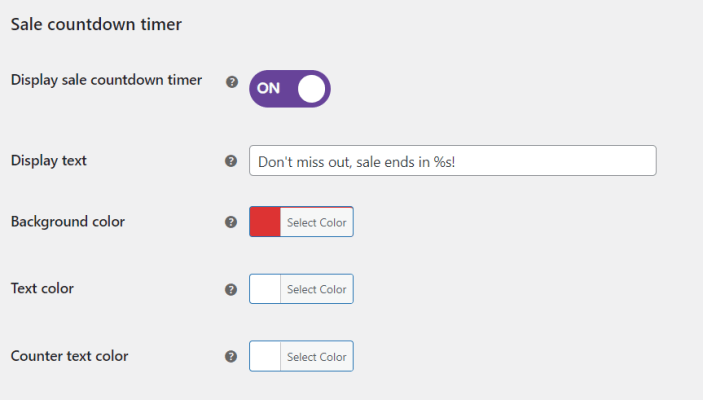
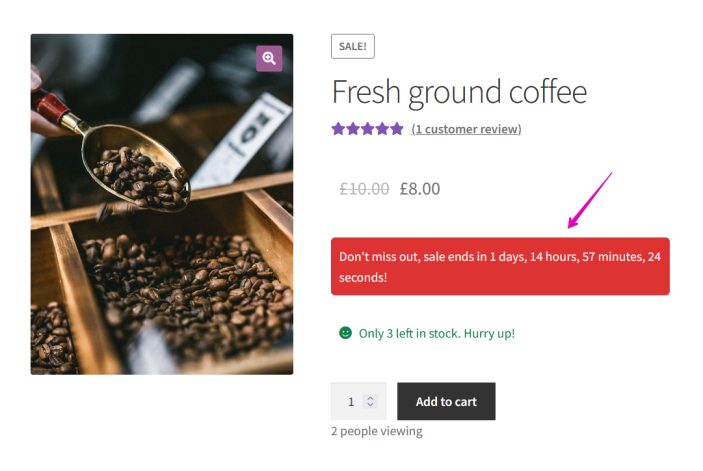
Sale countdown timer
↑ Back to topThe sale countdown timer will be displayed on the product page, below the price. The countdown timer will be displayed only for products that have a sale price set and a sale end date scheduled on the back-end product page. The timer calculates the time remaining from the present time until the scheduled end date of the sale.
The sale countdown timer can be enabled from the FOMO tab by activating the Display sale countdown timer toggle. Once enabled, the countdown timer settings will be displayed and the admin can change the following settings:
- Display text. This field allows the admin to edit the text for the sale countdown timer. The string can accept the ‘%s’ variable, which represents the actual timer. Ex. ‘This sale will end in %s’.
- Background color. This setting allows the admin to select the background color for the text and timer.
- Text color. This setting allows the admin to select the text color (excluding the timer).
- Counter text color. This setting allows the admin to select the color for the timer only.